instrument panel Alfa Romeo 8C 2010 Owner handbook (in English)
[x] Cancel search | Manufacturer: ALFA ROMEO, Model Year: 2010, Model line: 8C, Model: Alfa Romeo 8C 2010Pages: 223, PDF Size: 14.35 MB
Page 103 of 223

101
4
BEFORE YOU DRIVE
CAUTION
Before cleaning the front
windscreen (for example in service
stations) make sure the rain sensor is
deactivated or that the key is turned
to STOP. The rain sensor must be
deactivated also when washing the
vehicle by hand or in automatic car
washes.WARNING: If there is ice or snow on the front
windscreen, do not activate the rain sensor to
avoid damaging the wiper motor.
SENSOR FAILURE
When the rain sensor is activated, in the event
that it is malfunctioning, the windscreen wiper
will be turned on in intermittent mode and the
sensing range will be set by the user, regardless
of whether or not there is rain on the windscreen.
A failure message will be displayed on the
instrument panel.
In this case, we recommend that you deactivate
the rain sensor and turn on the windscreen wiper,
if necessary, in continuous mode. As soon as
possible, contact an Authorised Service Centre
of the Manufacturer’s Network.
Page 124 of 223

122
5
OTHER SYSTEM
FUNCTIONS
“Low-grip” WET mode
This mode can be used on particularly slippery
road surfaces (e.g., snow, ice) and it is
activated/deactivated by pressing button
E.
This will light up the letter “W” on the instrument
panel display.
While driving, the system ignores any
gearshifting which would cause RPM adjustment
above 2800 RPM.
“Low-grip” mode has priority over the other
functions (“automatic gearshift” and “SPORT”)
and it assists the VDC system.It is always a good rule to deactivate the other
operating modes (“automatic gearshift” and
“SPORT”) before you select “low-grip” mode.
“Automatic gearshift” mode AUTO
It is activated/deactivated by pressing the
button
D; the gear displayed is replaced with the
letter “D” and the system will automatically shift
the gears UP and DOWN according to the vehicle
speed, the engine RPM and the torque/power
requested by the driver.
WARNING: The “automatic gearshift” mode has
priority over “SPORT” mode. Therefore, if you
press the AUTO button, D the system will operate
in “automatic gearshift” mode.You can go back to NORMAL mode (or SPORT
mode, if this was active) by holding the button
D
pressed down until the word AUTO goes off.When the vehicle is stationary, requesting N 1
st
or R will not cause the system to switch from
“Automatic gearshift” to “Normal” mode.
It is always a good rule to deactivate the other
operating modes before you select “Automatic
gearshift” mode.
“No auto exit” strategy
In AUTO mode you can always request
a gearshift using the paddles, which will
temporarily set the system to “manual” mode.
This is shown on the display by the word “AUTO”
that flashes for 5 seconds and then illuminates
permanently, thus confirming that the system
has returned to AUTO mode. A further gearshift
request will restart the 5-second timer.
E
D
Page 127 of 223

125
5
USING THE VEHICLE
USING THE
ENGINEBREAKING-IN
The latest methods of production provide high
precision in the construction and coupling of
components. However, the moving parts do
undergo a settling process, basically in the first
hours of vehicle operation.
ENGINE AND
TRANSMISSION
Avoid exceeding 5000 RPM for the first 1000
km.
After starting the vehicle, do not exceed 4000
RPM until the engine has warmed up sufficiently
(water temperature: 65, 70 °C).
Do not let the engine run at a constantly high
RPM for a prolonged time.WHILE DRIVING
Never travel with the Rev. Counter indicator
approaching the peak RPM - not even downhill.
When the revolution counter indicator is
approaching the peak RPM, drive carefully to
avoid exceeding this limit.
WARNING: In normal conditions all the red
warning lights on the instrument panel and on
the display must be off. When they illuminate,
they indicate a problem in the relative system.Ensure proper operation of the various devices by
checking the relative control gauges.
WARNING: Continuing to drive when a red
warning light is on could cause serious damage
to the vehicle and affect performance.
CAUTION
Never turn the engine off
while driving downhill as the vacuum
decrease prevents the servo brake
from functioning correctly. After a few
braking attempts, the system will
become almost completely inefficient.
The power steering will also loose its
efficiency in these condition.
Page 128 of 223

126
5
Engine control system (EOBD)
The EOBD (European On Board Diagnosis)
system fitted on the vehicle is compliant with the
2003/76B/EC Directive (EURO 4).
This system continuously monitors the
components of the vehicle related to emissions;
it also indicates, when the warning light
illuminates on the instrument panel, that the
components in question are in poor condition.
The objective is the following:
- monitor the system effi ciency
- indicate when a problem causes an
increase in emissions exceeding the limits
established by European regulations
- indicate the need for replacement of worn
components.In addition, the system includes a diagnostics
connector that can be interfaced with suitable
instruments. This makes it possible to read the
error codes stored in the control unit, together
with a set of specific parameters for engine
operation diagnostics.
WARNING: If when turning the ignition key
to MARthe warning light
does not
illuminate or if it illuminates while driving,
contact an Authorised Service Centre of the
Manufacturer’s Network as soon as possible.
WARNING: After correcting the malfunction, the
entire system must be tested by the personnel
of an Authorised Service Centre of the
Manufacturer’s Network that must perform
tests on the bench and, if necessary, the road
test the vehicle: this might require travelling long
distances.
CONSTANT SPEED
REGULATOR (CRUISE CONTROL)GENERAL
The Cruise Control function allows the driver
to maintain the desired vehicle speed constant
without pressing the accelerator pedal. This
reduces driver fatigue on highways, especially
long trips, as the set speed is automatically
maintained.WARNING: The device can only be activated at
speeds exceeding 30 km/h and it deactivates
automatically when the brake pedal is
depressed.
Page 129 of 223

127
5
A
B
C
USING THE VEHICLE
CAUTION
Cruise Control must only
be activated when traffic and the
route permit a constant speed to be
maintained safely, for a sufficiently
long distance.
CONTROLS
The Cruise Control function is controlled by
means of the switch
A, the dial
B and the button
C (RCL).
Switch
A can be set to two positions:
- OFF the device is deactivated;
- ON the device is active. When the device
is activated, the symbol
illuminates on
the instrument panel display.The dial
B is used to store and maintain the
vehicle speed, or to increase or decrease the
speed stored.
Rotate the dial
B to position (+) to save the
speed reached or to increase the speed stored.
Rotate the dial B to position (–) to decrease the
stored speed.
Each turn of the dial
B increases or decreases the
speed by about 1 km/h. Rotate and hold the
dial to vary the speed continuously. When a new
speed is reached, it will automatically remain
constant.
Button
C (RCL) allows you to reset the stored
speed.
WARNING: When the ignition key is turned to
position STOP or the switch A to position OFF,
the stored speed is deleted and the system
deactivated.STORING A SPEED
Set the switch
A to ON and bring the vehicle up
to the desired speed. Rotate the dial
B to (+)
for at least three seconds, then release it. The
vehicle speed is saved and the accelerator pedal
can then be released.
The vehicle will proceed at the constant speed
stored in the memory until the brake pedal is
pressed.
If necessary, (for example, to pass another
vehicle), you can accelerate by simply pressing
the accelerator pedal. Afterwards, when you
release the accelerator pedal, the vehicle will
return to the speed saved previously.
Page 139 of 223

137
5
A
USING THE VEHICLE
ELECTRIC PARKING
BRAKE
The vehicle is equipped with an automatic
parking brake EPB (Electric Parking Brake).
It is automatically engaged when the engine
is turned off and it is disengaged when, with
the engine running, the accelerator pedal is
depressed.
When the electric parking brake is engaged and
the key is turned to STOP, the warning light
illuminates on the instrument panel.During engagement and disengagement, the
warning light
flashes until the maximum
engagement force and full release have been
reached.
In the above conditions, the automatic activation
function can be deactivated/activated by
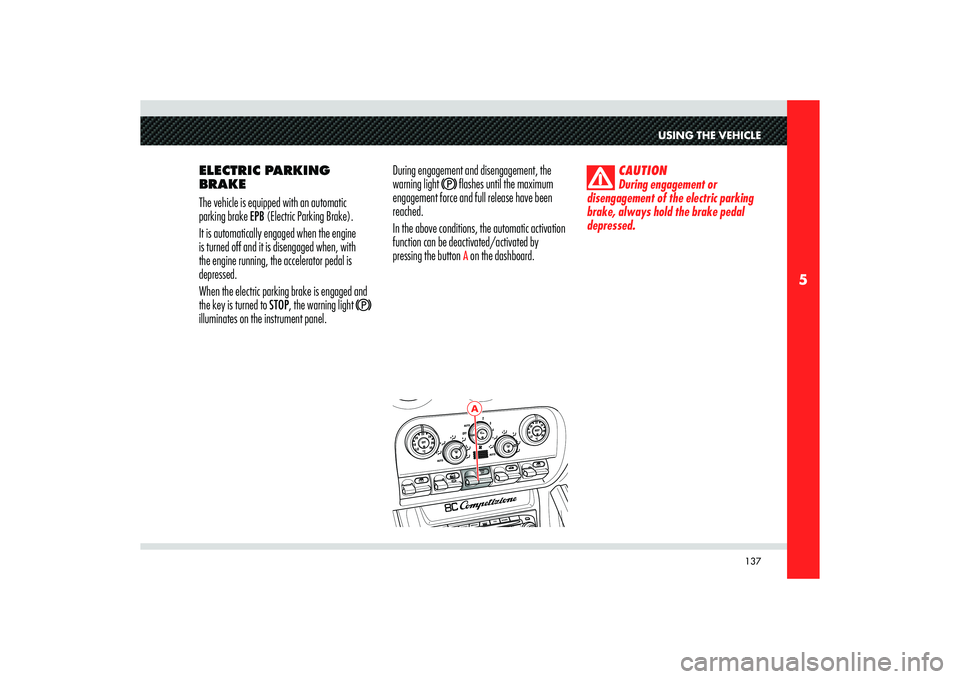
pressing the button A on the dashboard.
CAUTION
During engagement or
disengagement of the electric parking
brake, always hold the brake pedal
depressed.
Page 172 of 223

170
6
IF YOU HAVE TO
TOW THE VEHICLE If you need to tow the vehicle, observe the
following recommendations:
- if possible, have the vehicle transported on
a vehicle equipped with loading platform
and specifi c for roadside assistance and
recovery.
If this is not possible:
- Tow the vehicle for a stretch of less than
100 km at a speed below 60 km/h, using
the towing hook provided in the toolkit.To be able to tow the vehicle, you must:
- Turn the ignition key to MAR without
starting the engine (see page 87)
- Engage neutral (position N) by
simultaneously pulling the gearshift paddles
UP and DOWN while holding the brake
pedal depressed (see page 118)
- turn the key back to position STOP.
CAUTION
Do not extract the key, as the
steering wheel will lock automatically
and you will be unable to steer the
wheels.
CAUTION
When towing the vehicle, make
sure that you observe the road traffic
regulations concerning both the towing
device and driving conduct.CAUTION
When towing the vehicle with
the engine off, remember that, without
the assistance of the brake servo, a
stronger effort is required on the brake
pedal for braking and on the steering
wheel for steering.
CAUTION
Screw down the towing hook
into its seat (approx. 11 turns).
Accurately clean the threaded seat
before tightening the hook.
WARNING: If you have to tow the vehicle with 2
wheels raised, ensure that the ignition key is in
the STOP position. Otherwise, when the VDC is
active, the relative ECU will store a malfunction,
which will cause the illumination of the warning
light
on the instrument panel display. This
requires the intervention of an Authorised
Service Centre of the Manufacturer’s Network
to correct the system malfunction.
Page 193 of 223

191
8
MAINTENANCE
The Scheduled Maintenance operations are
indicated on the display up to the ninth service
when the due date is approaching; this value is
shown in kilometres.
The message is displayed only once, upon
activating the instrument panel, at decreasing
intervals expressed in Km (1800, 1600, ......
100, 50).
Once the set limit in kilometres is reached, every
time the instrument panel is turned on thereafter,
the message “Service Stop expired” will be
displayed.Selecting the “Service” function from the Setup
menu, you can view when the next service is due
(see page 48).
Page 198 of 223

196
8
MAX
MA
X MAX
MIN MIN
POWER STEERING FLUIDWARNING: Make sure that the power steering
fluid does not come in touch with the engine hot
parts as it is flammable.Check that the fluid level, with the vehicle on a
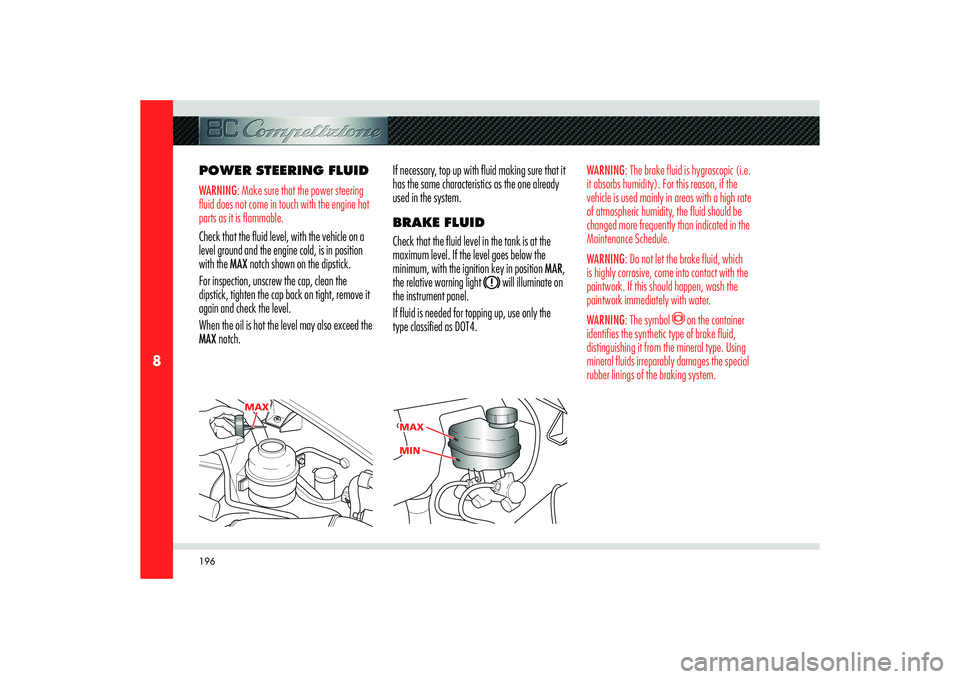
level ground and the engine cold, is in position
with the MAX notch shown on the dipstick.
For inspection, unscrew the cap, clean the
dipstick, tighten the cap back on tight, remove it
again and check the level.
When the oil is hot the level may also exceed the
MAX notch.If necessary, top up with fluid making sure that it
has the same characteristics as the one already
used in the system.
BRAKE FLUID
Check that the fluid level in the tank is at the
maximum level. If the level goes below the
minimum, with the ignition key in position MAR,
the relative warning light
will illuminate on
the instrument panel.
If fluid is needed for topping up, use only the
type classified as DOT4.
WARNING: The brake fluid is hygroscopic (i.e.
it absorbs humidity). For this reason, if the
vehicle is used mainly in areas with a high rate
of atmospheric humidity, the fluid should be
changed more frequently than indicated in the
Maintenance Schedule.
WARNING: Do not let the brake fluid, which
is highly corrosive, come into contact with the
paintwork. If this should happen, wash the
paintwork immediately with water.
WARNING: The symbol
on the container
identifies the synthetic type of brake fluid,
distinguishing it from the mineral type. Using
mineral fluids irreparably damages the special
rubber linings of the braking system.
Page 213 of 223

211
8
MAINTENANCE
RE-CONNECTING THE
BATTERY
- open the right-hand door
- remove the luggage shelf behind the seats
- remove the battery case cover
- connect the battery
- unlock and lock the doors using the remote
control or the key in the door lock
- turn on the instrument panel and adjust the
date and time setting in the Setup menu.WARNING: Each time the battery is reconnected,
wait at least 30 seconds with the ignition key
in position MAR before starting the engine.
This enables the electronic system that controls
the motor-driven valves to run a self-learning
procedure. At the same time, you can also set
the date and time on the instrument panel.
- Reconnect the battery after having checked
its charge condition and perform the
initialisation procedures where required.
In this regard, consult the chapter
“Reconnecting the battery” in this section.
- With the gearshift in neutral (N), let the
engine idle for several minutes
CAUTION
This operation must be
performed outdoors. Exhaust gases
contain carbon monoxide which is
strongly toxic and potentially lethal.
RADIO-
FREQUENCY
REMOTE
CONTROL:
MINISTERIAL
HOMOLOGATION Some countries do not require a specific domestic
homologation in the event that the vehicle has
already obtained other European homologations.