open Alfa Romeo 8C 2010 Owner handbook (in English)
[x] Cancel search | Manufacturer: ALFA ROMEO, Model Year: 2010, Model line: 8C, Model: Alfa Romeo 8C 2010Pages: 223, PDF Size: 14.35 MB
Page 86 of 223
84
4
B
OPERATION
Each time the ignition key is removed from
position STOP the protection system activates
the engine immobilizer.
Upon starting the engine, when the key is turned
to MAR:
1) If the code is recognised, the CODE
warning light on the instrument panel turns
off in one second, while the EOBD
warning light turns off after about four
seconds, after the ECU has completed its
diagnostic cycle. The protection system has
recognised the key code and deactivates the
engine immobilizer. With the brake pedal
depressed, pushing the START button, the
engine starts.
2) If the CODE warning light remains on
and the EOBD warning light goes off
after four seconds (ECU diagnostics) and
illuminates again immediately afterwards,
the code has not been recognised and the
message “Electronic key not recognised”
is displayed. In this case, it is advisable to
turn the key back to position STOP and
then back to MAR; If the immobilizer stays
on, try with the other keys. If you are still FUEL TANK DOOR
EMERGENCY OPENING
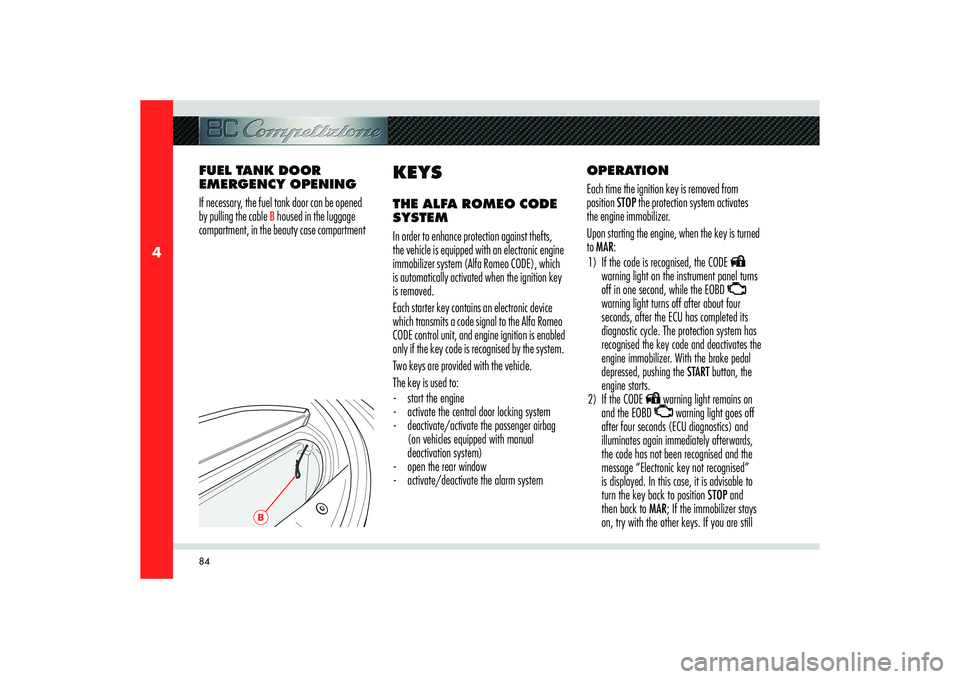
If necessary, the fuel tank door can be opened
by pulling the cable
B housed in the luggage
compartment, in the beauty case compartment
KEYSTHE ALFA ROMEO CODE
SYSTEM
In order to enhance protection against thefts,
the vehicle is equipped with an electronic engine
immobilizer system (Alfa Romeo CODE), which
is automatically activated when the ignition key
is removed.
Each starter key contains an electronic device
which transmits a code signal to the Alfa Romeo
CODE control unit, and engine ignition is enabled
only if the key code is recognised by the system.
Two keys are provided with the vehicle.
The key is used to:
- start the engine
- activate the central door locking system
- deactivate/activate the passenger airbag
(on vehicles equipped with manual
deactivation system)
- open the rear window
- activate/deactivate the alarm system
Page 89 of 223
87
4
STOPACC
MAR
A
BEFORE YOU DRIVE
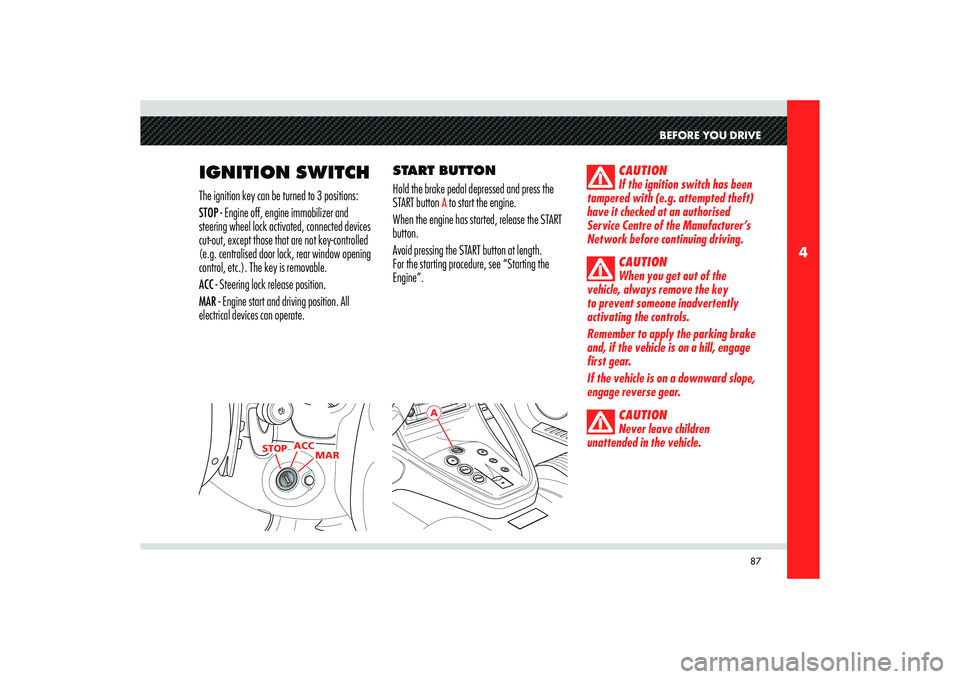
IGNITION SWITCHThe ignition key can be turned to 3 positions:
STOP - Engine off, engine immobilizer and
steering wheel lock activated, connected devices
cut-out, except those that are not key-controlled
(e.g. centralised door lock, rear window opening
control, etc.). The key is removable.
ACC - Steering lock release position.
MAR - Engine start and driving position. All
electrical devices can operate.START BUTTON
Hold the brake pedal depressed and press the
START button
A to start the engine.
When the engine has started, release the START
button.
Avoid pressing the START button at length.
For the starting procedure, see “Starting the
Engine”.
CAUTION
If the ignition switch has been
tampered with (e.g. attempted theft)
have it checked at an authorised
Service Centre of the Manufacturer’s
Network before continuing driving.
CAUTION
When you get out of the
vehicle, always remove the key
to prevent someone inadvertently
activating the controls.
Remember to apply the parking brake
and, if the vehicle is on a hill, engage
first gear.
If the vehicle is on a downward slope,
engage reverse gear.
CAUTION
Never leave children
unattended in the vehicle.
Page 90 of 223

88
4
A
ELECTRONIC
ALARM SYSTEMThe electronic alarm system has the following
functions:
- remote control of the centralised door
locking/unlocking system
- perimeter surveillance, detecting the
opening of doors, engine/luggage
compartment lids
- motion surveillance, detecting intrusion in
the passenger compartment
- vehicle movement surveillance.WARNING: The engine immobilizer function is
ensured by the Alfa Romeo CODE system, which
is automatically activated when the ignition key
is removed from the starter switch.
ACTIVATION
Press button
A on the key to activate the alarm
system:
- the direction indicators fl ash once
- the system beeps;
- the centralised door locking of the vehicle is
activated and doors are locked.
The alarm system is active after approximately
25 seconds and the alarm is activated when:
- a door is opened
- the luggage compartment lid is opened
- the engine compartment lid is opened
- someone attempts to enter the vehicle from
a window
- the power supply is disconnected
- the siren is disconnected
- the vehicle is moved.When the alarm is active, the user may request
the luggage compartment opening; in this
case, the motion and inclination sensors are
temporarily deactivated.
If the luggage compartment is then closed, the
sensors will be reactivated.
Should the direction indicators flash 9 times
when you activate the alarm system, this means
that one of the doors or lids is not properly closed
and therefore is not protected by the perimeter
surveillance. Check for correct closing of doors,
luggage/engine compartment lid and close the
open one without deactivating the alarm system:
direction indicators flashing once indicate that
now the door, luggage/engine compartment
lid are closed properly and are protected by the
perimeter surveillance.
Page 116 of 223
114
5
MAR
STARTING THE
ENGINE
CAUTION
Hold the brake pedal depressed
when starting the engine.
CAUTION
It is dangerous to operate the
engine in an enclosed space. The engine
consumes oxygen and discharges
carbon dioxide, carbon monoxide and
other toxic gases.
WARNING: Before start-up, switch off the
electrical devices with a high power consumption
(air-conditioning and heating system, heated
rear window, headlights, etc.).
WARNING: Do not start the engine if the fuel
level in the tank is low.
1) Make sure that the parking brake is applied
and that the doors are closed.
2) Hold the brake pedal depressed when
starting the engine.
3) Do not depress the accelerator pedal.
4) Set the gear to neutral by pulling both
paddles UP and DOWN towards the
steering wheel and check that the gear
display indicates N not fl ashing.
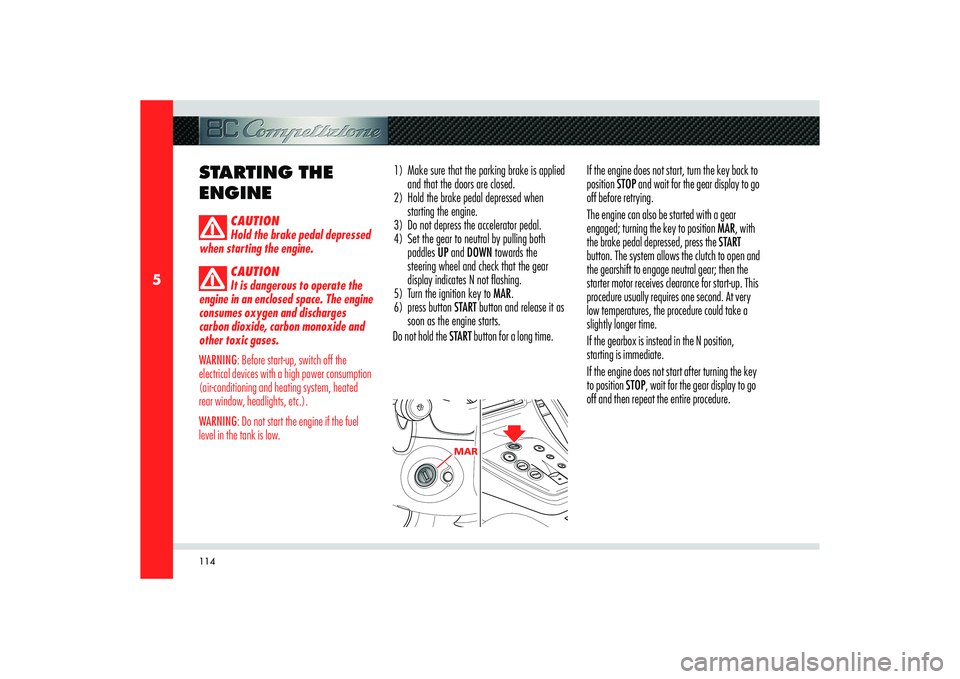
5) Turn the ignition key to MAR.
6) press button START button and release it as
soon as the engine starts.
Do not hold the START button for a long time.If the engine does not start, turn the key back to
position STOP and wait for the gear display to go
off before retrying.
The engine can also be started with a gear
engaged; turning the key to position MAR, with
the brake pedal depressed, press the START
button. The system allows the clutch to open and
the gearshift to engage neutral gear; then the
starter motor receives clearance for start-up. This
procedure usually requires one second. At very
low temperatures, the procedure could take a
slightly longer time.
If the gearbox is instead in the N position,
starting is immediate.
If the engine does not start after turning the key
to position STOP, wait for the gear display to go
off and then repeat the entire procedure.
Page 117 of 223

115
5
USING THE VEHICLE
STARTING-OFF WHEN
THE ENGINE IS COLD
Start-off slowly, avoiding sudden accelerations
and run the engine at low-medium speeds. High-
performance driving should be avoided until the
water temperature reaches
65–70 °C.EMERGENCY STARTING
WITH AUXILIARY
BATTERY
If the battery is flat, the engine can be started
using another battery having the same or slightly
higher capacity than the flat one.
Proceed as follows:
1) Connect the positive terminals (+) of the
two batteries with a cable specifi cally
designed for this purpose.
2) Connect the negative terminals (-) of the
two batteries with a cable specifi cally
designed for this purpose.
WARNING: The battery is housed in a metal box,
therefore, be extremely careful not to let the
battery charger clips come into contact with it.3) Start the engine.
4) When the engine starts, remove the cables
in reverse order.
If the engine does not start after a number
of attempts, do not continue indefinitely but
consult an Authorised Service Centre of the
Manufacturer’s Network.
CAUTION
Do not carry out this procedure
if you have no experience of it:
incorrect manoeuvres may cause high
levels of electrical discharge and may
even lead to the battery explosion.
CAUTION
You are also advised not to
approach the battery with open flames
or lit cigarettes and not to cause
sparks: risk of explosion and fire!
Page 119 of 223
117
5
E
CD
F
H
G
USING THE VEHICLE
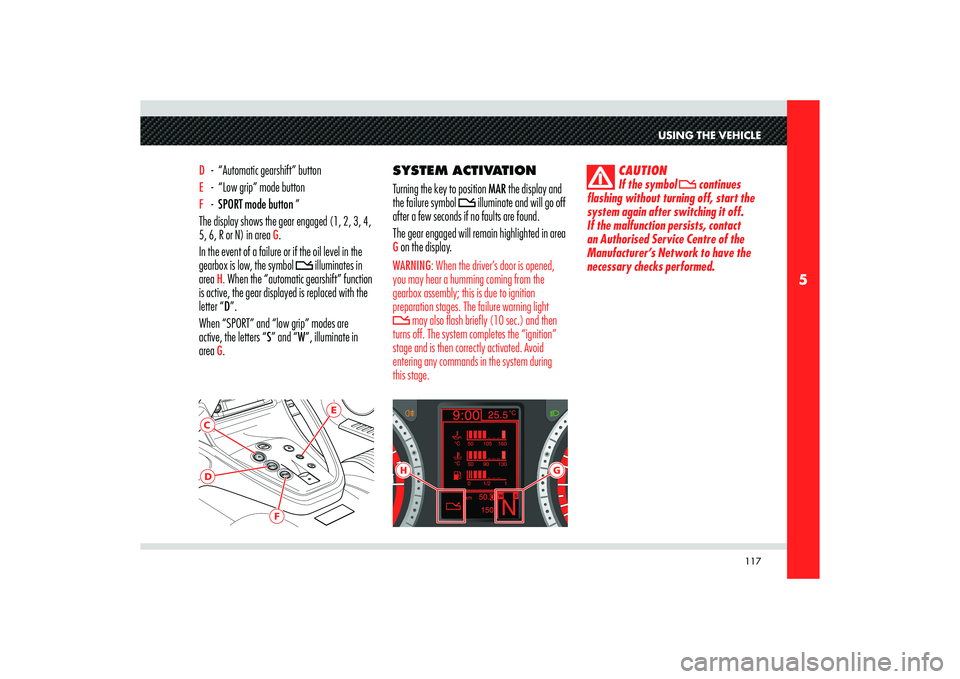
D - “Automatic gearshift” button E - “Low grip” mode button F - SPORT mode button ”
The display shows the gear engaged (1, 2, 3, 4,
5, 6, R or N) in area
G.
In the event of a failure or if the oil level in the
gearbox is low, the symbol
illuminates in
area
H. When the “automatic gearshift” function
is active, the gear displayed is replaced with the
letter “D”.
When “SPORT” and “low grip” modes are
active, the letters “S” and “W”, illuminate in
area G.SYSTEM ACTIVATION
Turning the key to position MAR the display and
the failure symbol
illuminate and will go off
after a few seconds if no faults are found.
The gear engaged will remain highlighted in area
G on the display.WARNING: When the driver’s door is opened,
you may hear a humming coming from the
gearbox assembly; this is due to ignition
preparation stages. The failure warning light
may also flash briefly (10 sec.) and then
turns off. The system completes the “ignition”
stage and is then correctly activated. Avoid
entering any commands in the system during
this stage.
CAUTION
If the symbol continues
flashing without turning off, start the
system again after switching it off.
If the malfunction persists, contact
an Authorised Service Centre of the
Manufacturer’s Network to have the
necessary checks performed.
Page 121 of 223
119
5
USING THE VEHICLE
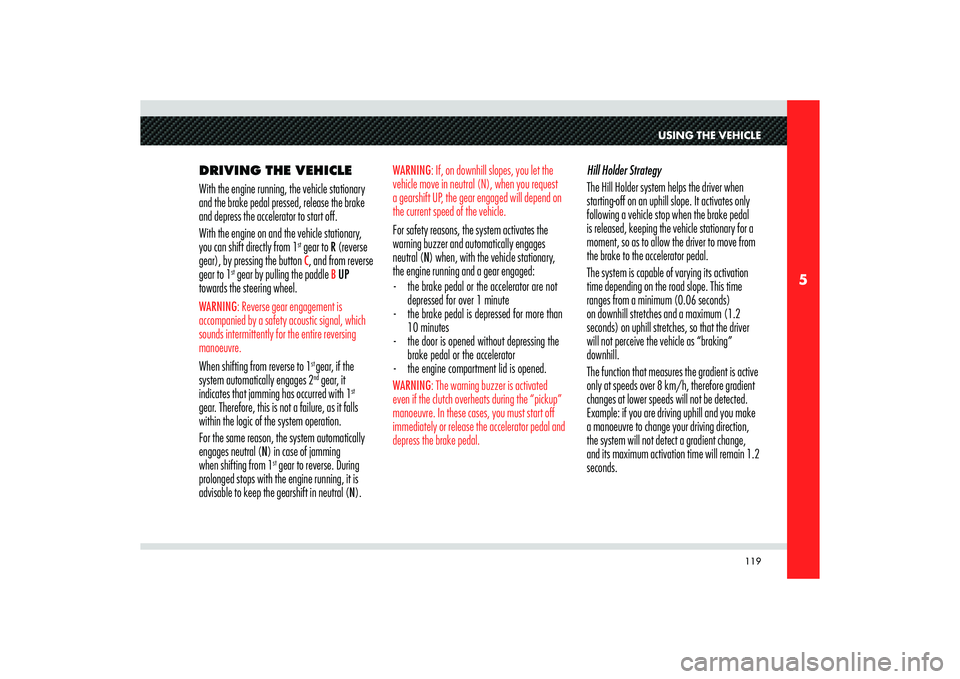
DRIVING THE VEHICLE
With the engine running, the vehicle stationary
and the brake pedal pressed, release the brake
and depress the accelerator to start off.
With the engine on and the vehicle stationary,
you can shift directly from 1
st gear to R (reverse
gear), by pressing the button C, and from reverse
gear to 1
st gear by pulling the paddle
B UP
towards the steering wheel.
WARNING: Reverse gear engagement is
accompanied by a safety acoustic signal, which
sounds intermittently for the entire reversing
manoeuvre. When shifting from reverse to 1
st gear, if the
system automatically engages 2nd gear, it
indicates that jamming has occurred with 1
st
gear. Therefore, this is not a failure, as it falls
within the logic of the system operation.
For the same reason, the system automatically
engages neutral (N) in case of jamming
when shifting from 1
st gear to reverse. During
prolonged stops with the engine running, it is
advisable to keep the gearshift in neutral (N).Hill Holder Strategy
The Hill Holder system helps the driver when
starting-off on an uphill slope. It activates only
following a vehicle stop when the brake pedal
is released, keeping the vehicle stationary for a
moment, so as to allow the driver to move from
the brake to the accelerator pedal.
The system is capable of varying its activation
time depending on the road slope. This time
ranges from a minimum (0.06 seconds)
on downhill stretches and a maximum (1.2
seconds) on uphill stretches, so that the driver
will not perceive the vehicle as “braking”
downhill.
The function that measures the gradient is active
only at speeds over 8 km/h, therefore gradient
changes at lower speeds will not be detected.
Example: if you are driving uphill and you make
a manoeuvre to change your driving direction,
the system will not detect a gradient change,
and its maximum activation time will remain 1.2
seconds.
WARNING: If, on downhill slopes, you let the
vehicle move in neutral (N), when you request
a gearshift UP, the gear engaged will depend on
the current speed of the vehicle. For safety reasons, the system activates the
warning buzzer and automatically engages
neutral (N) when, with the vehicle stationary,
the engine running and a gear engaged:
- the brake pedal or the accelerator are not
depressed for over 1 minute
- the brake pedal is depressed for more than
10 minutes
- the door is opened without depressing the
brake pedal or the accelerator
- the engine compartment lid is opened.WARNING: The warning buzzer is activated
even if the clutch overheats during the “pickup”
manoeuvre. In these cases, you must start off
immediately or release the accelerator pedal and
depress the brake pedal.
Page 149 of 223
147
6
ABIN AN EMERGENCY
TOOLKIT
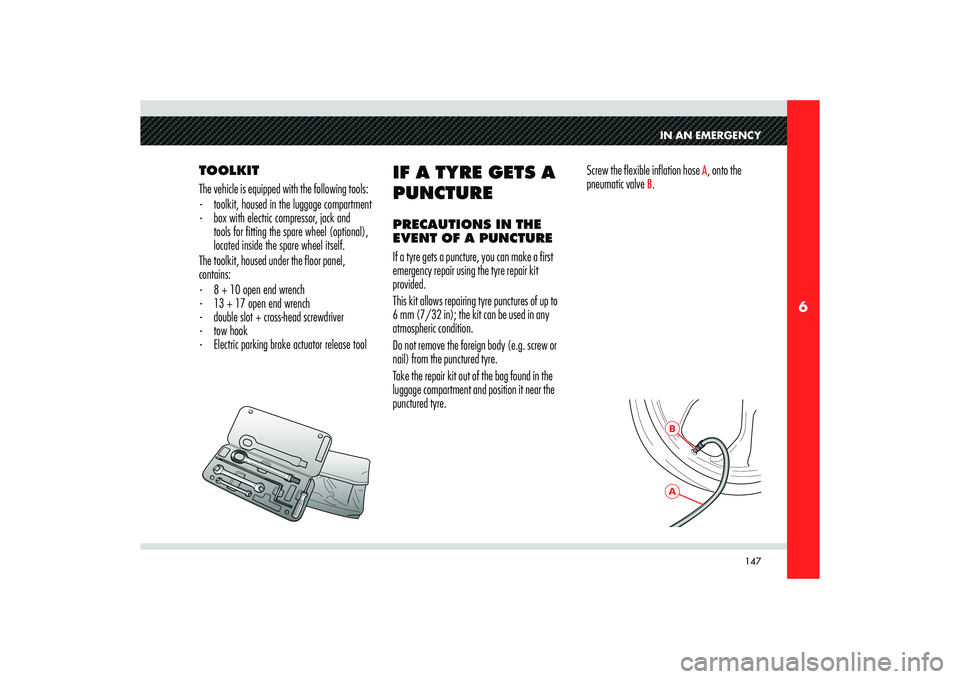
The vehicle is equipped with the following tools:
- toolkit, housed in the luggage compartment
- box with electric compressor, jack and
tools for fi tting the spare wheel (optional),
located inside the spare wheel itself.
The toolkit, housed under the floor panel,
contains:
- 8 + 10 open end wrench
- 13 + 17 open end wrench
- double slot + cross-head screwdriver
- tow hook
- Electric parking brake actuator release tool
IF A TYRE GETS A
PUNCTURE PRECAUTIONS IN THE
EVENT OF A PUNCTURE
If a tyre gets a puncture, you can make a first
emergency repair using the tyre repair kit
provided.
This kit allows repairing tyre punctures of up to
6 mm (7/32 in); the kit can be used in any
atmospheric condition.
Do not remove the foreign body (e.g. screw or
nail) from the punctured tyre.
Take the repair kit out of the bag found in the
luggage compartment and position it near the
punctured tyre.Screw the flexible inflation hose
A, onto the
pneumatic valve
B.
Page 171 of 223

169
6
IN AN EMERGENCY
CAUTION
The fluid contained in the
battery is poisonous and corrosive.
Avoid contact with the skin and eyes.
The battery recharging procedure
must be carried out in a ventilated
environment away from open flames
or possible sources of sparks: risk of
explosion and fire!
IF YOU HAVE
TO JACK UP THE
VEHICLE
If you need to jack up the vehicle, position the
rubber bushings in correspondence to the arrows.
Page 197 of 223
195
8
MAXMIN
B
MAINTENANCE
GEARBOX OIL
Have the oil level checked at an Authorised
Service Centre of the Manufacturer’s
Network.WARNING: Do not top up with oil having
characteristics other than those of the oil already
used in the engine.
WARNING: Waste transmission oil contains
substances that are dangerous for the
environment. To have the oil changed, we advise
you to contact an Authorised Service Centre
of the Manufacturer’s Network, where all the
necessary equipment is available to dispose
of the used oil and filters in compliance with
applicable legislation and in an environment-
friendly manner.
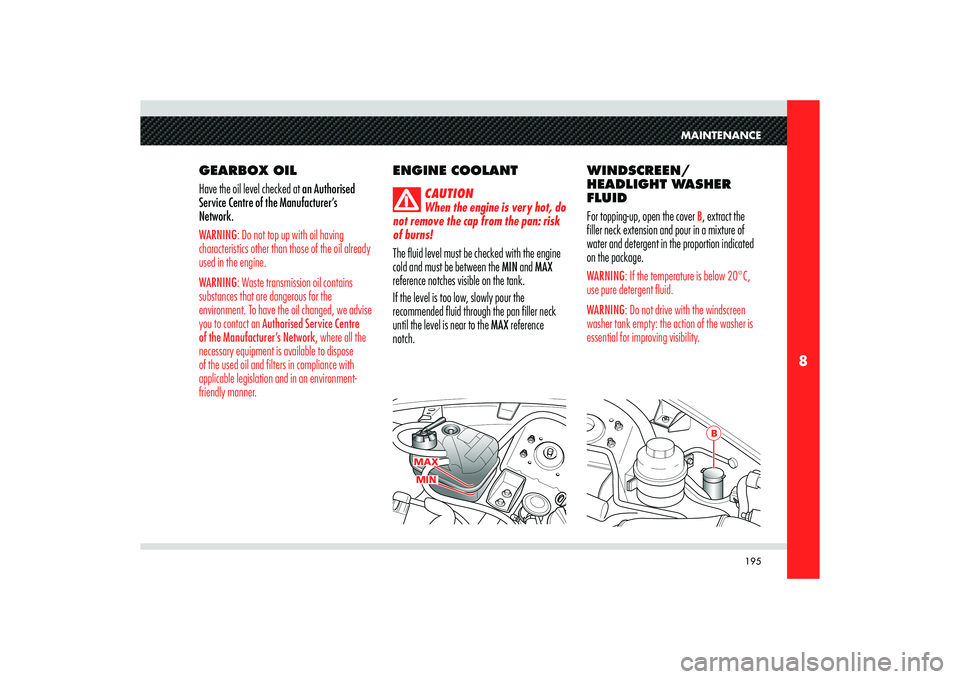
ENGINE COOLANT
CAUTION
When the engine is very hot, do
not remove the cap from the pan: risk
of burns!
The fluid level must be checked with the engine
cold and must be between the MIN and MAX
reference notches visible on the tank.
If the level is too low, slowly pour the
recommended fluid through the pan filler neck
until the level is near to the MAX reference
notch.WINDSCREEN/
HEADLIGHT WASHER
FLUID
For topping-up, open the cover
B, extract the
filler neck extension and pour in a mixture of
water and detergent in the proportion indicated
on the package.
WARNING: If the temperature is below 20°C,
use pure detergent fluid.
WARNING: Do not drive with the windscreen
washer tank empty: the action of the washer is
essential for improving visibility.