clock Alfa Romeo 8C 2010 Owner handbook (in English)
[x] Cancel search | Manufacturer: ALFA ROMEO, Model Year: 2010, Model line: 8C, Model: Alfa Romeo 8C 2010Pages: 223, PDF Size: 14.35 MB
Page 28 of 223
26
2
CAUTION
If the passenger airbag
system is active, do not sit a child in a
rearward-facing child seat on the front
vehicle seat. The airbag activation in
the event of a collision may cause fatal
injury to the child, regardless of the
collision severity.
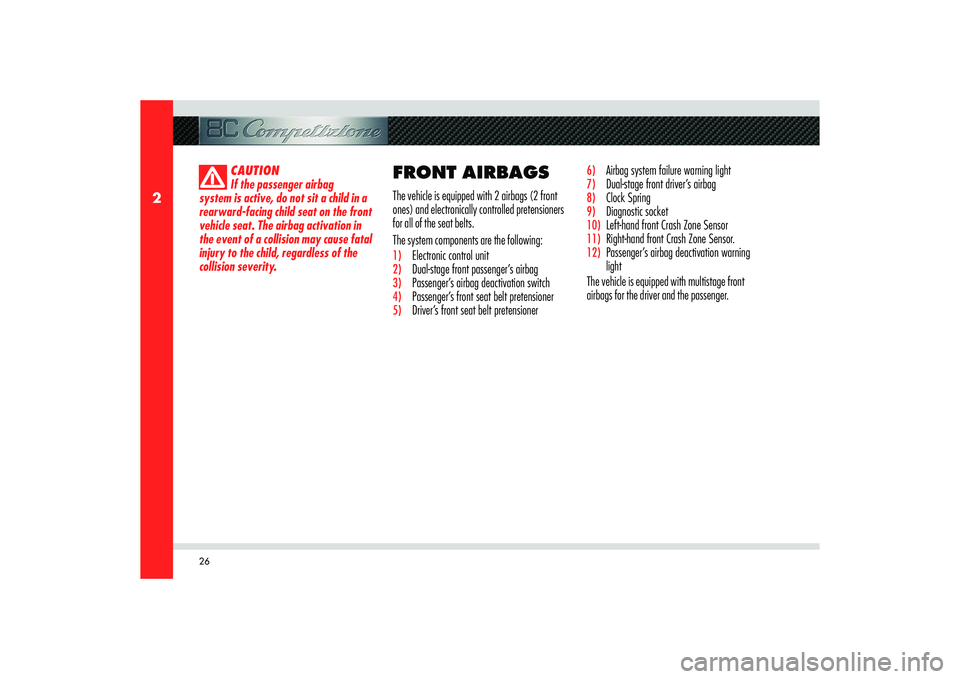
FRONT AIRBAGSThe vehicle is equipped with 2 airbags (2 front
ones) and electronically controlled pretensioners
for all of the seat belts.
The system components are the following:1) Electronic control unit2) Dual-stage front passenger’s airbag 3) Passenger’s airbag deactivation switch4) Passenger’s front seat belt pretensioner5) Driver’s front seat belt pretensioner
6) Airbag system failure warning light7) Dual-stage front driver’s airbag8) Clock Spring9) Diagnostic socket10)
Left-hand front Crash Zone Sensor
11)
Right-hand front Crash Zone Sensor.
12)
Passenger’s airbag deactivation warning
light
The vehicle is equipped with multistage front
airbags for the driver and the passenger.
Page 48 of 223
46
3
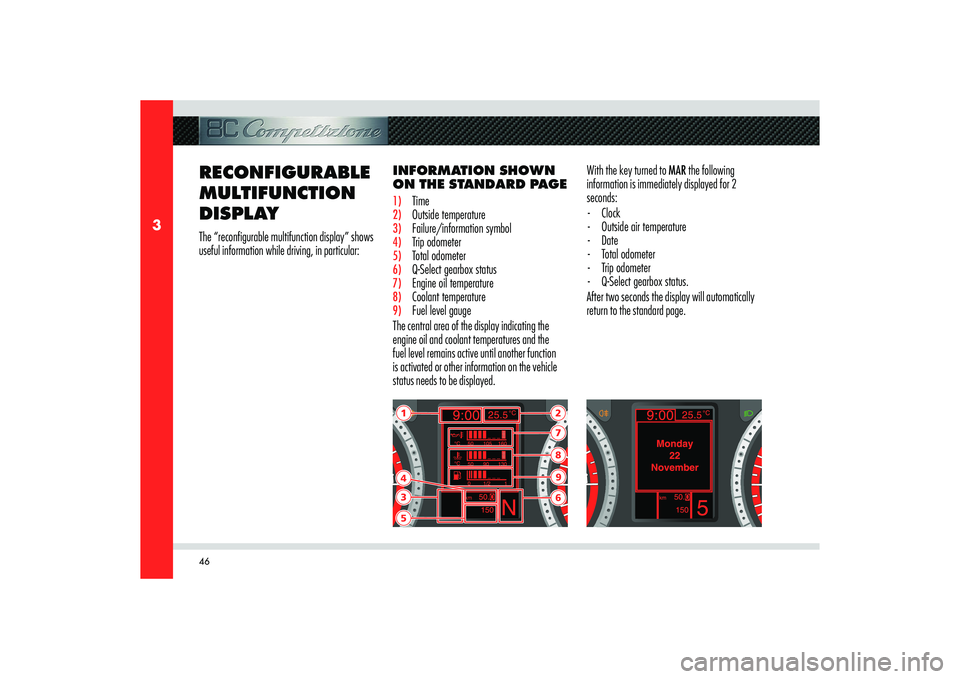
1354
27896
INFORMATION SHOWN
ON THE STANDARD PAGE 1) Time2) Outside temperature3) Failure/information symbol4) Trip odometer5) Total odometer6) Q-Select gearbox status 7) Engine oil temperature8) Coolant temperature 9) Fuel level gauge
The central area of the display indicating the
engine oil and coolant temperatures and the
fuel level remains active until another function
is activated or other information on the vehicle
status needs to be displayed.
RECONFIGURABLE
MULTIFUNCTION
DISPLAY The “reconfigurable multifunction display” shows
useful information while driving, in particular:With the key turned to MAR the following
information is immediately displayed for 2
seconds:
- Clock
- Outside air temperature
- Date
- Total odometer
- Trip odometer
- Q-Select gearbox status.
After two seconds the display will automatically
return to the standard page.
Page 51 of 223
49
3
INSTRUMENTS AND CONTROLS
+
+–
–
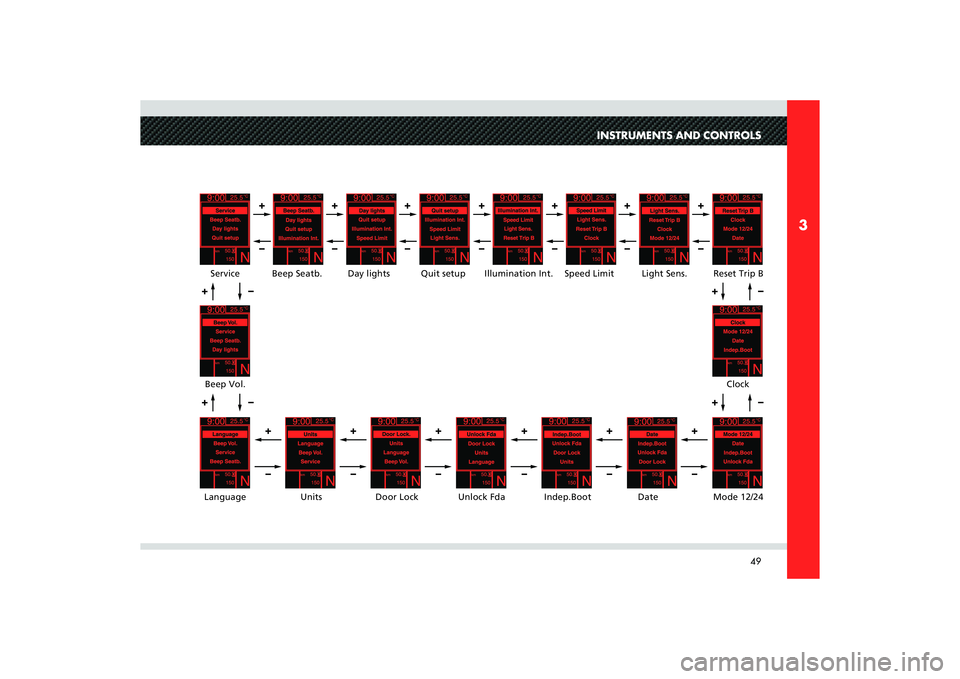
Illumination Int.Speed Limit Light Sens. Reset Trip B
Clock
Mode 12/24 Date Indep.Boot Unlock Fda Door Lock Units LanguageBeep Vol.Service Beep Seatb.Quit setup
Day lights
+–
+–+–
+
–
+
–
+
–
+
–
+
–
+
–
+
–
+
–
+
–
+
–
+
–
+
–
Page 53 of 223
51
3
INSTRUMENTS AND CONTROLS
Adjusting the sensing range of the twilight
sensor (Automatic low-beam)
This function allows you to adjust the sensing
range of the twilight sensor to 3 levels.
To adjust, proceed as follows:
- briefl y press the MENU button: the display
highlights the sensing range level previously
set
- press button + o – to adjust;
- press the MENU button briefl y to return to
the menu page or hold it down to return to
the standard screen page.Trip B reset mode (Reset TRIP B)
This function allows you to select Trip B reset
mode (automatic or manual).
For further information see the chapter “TRIP
button”.Clock adjustment (Clock)
This function allows you to adjust the clock.
To adjust the time proceed as follows:
- briefl y press the MENU button: the display
highlights the “hours”
- press button + o – to adjust;
- briefl y press the MENU button: the display
highlights the “minutes”
- press button + o – to adjust;
WARNING: When the button is pressed once
+/– the value increases/decreases by 1
unit. Holding the +/– button down, the value
automatically increases/decreases continuously
until you release the button. When you are close
to the desired value, release the button and then
press it briefly a few times until you reach the
desired value.- press the MENU button briefl y to return to
the main page or hold it down to return to
the standard page.
Page 54 of 223
52
3
Clock mode (12/24 mode)
This function allows you to set the time display
mode in 12h or 24h format.
To set the clock proceed as follows:
- briefl y press the MENU button: the display
highlights 12h or 24h (depending on the
format previously set);
- press button + o – to select;
- press the MENU button briefl y to return to
the main page or hold it down to return to
the standard page.Date adjustment (Date)
This function allows you to adjust the date (year
- month - day).
To adjust the date proceed as follows:
- briefl y press the MENU button: the “year”
fl ashes on the display
- press button + o – to adjust;
- briefl y press the MENU button: the
“month” fl ashes on the display
- press button + o – to adjust;
- briefl y press the MENU button: the “day”
fl ashes on the display
- press button + o – to adjust;
WARNING: When the button is pressed once
+/– the value increases/decreases by 1 unit.
Holding the +/– button down +/–the value
automatically increases/decreases continuously
until you release the button. When you are close
to the desired value, release the button and then
press it briefly a few times until you reach the
desired value. - press the MENU button briefl y to return to
the main page or hold it down to return to
the standard page.
Page 91 of 223
89
4
B
BEFORE YOU DRIVE
WARNING: If the direction indicators flash 9
times when the alarm system is activated with
doors, front and rear lids properly closed, this
means that the self-diagnostic function has
detected a malfunction in the system and that
you should contact an Authorised Service
Centre of the Manufacturer’s Network to have
the system checked.
DEACTIVATION
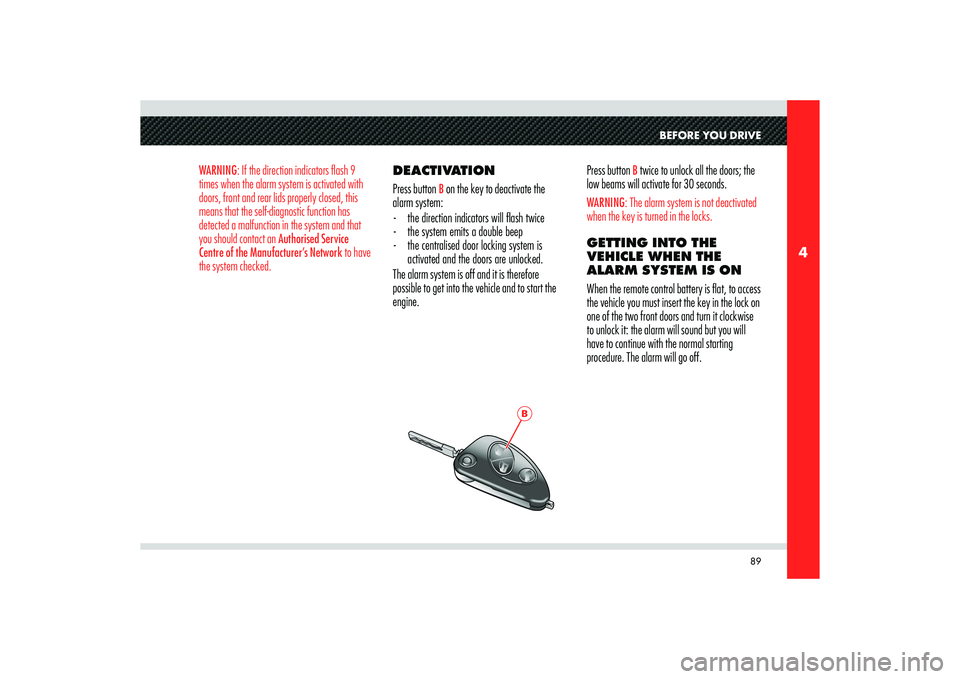
Press button
B on the key to deactivate the
alarm system:
- the direction indicators will fl ash twice
- the system emits a double beep
- the centralised door locking system is
activated and the doors are unlocked.
The alarm system is off and it is therefore
possible to get into the vehicle and to start the
engine.Press button
B twice to unlock all the doors; the
low beams will activate for 30 seconds.
WARNING: The alarm system is not deactivated
when the key is turned in the locks.GETTING INTO THE
VEHICLE WHEN THE
ALARM SYSTEM IS ON
When the remote control battery is flat, to access
the vehicle you must insert the key in the lock on
one of the two front doors and turn it clockwise
to unlock it: the alarm will sound but you will
have to continue with the normal starting
procedure. The alarm will go off.
Page 102 of 223
100
4
F
HEADLIGHT WASHERS
The headlight washers are activated
automatically when the windscreen washer is
started and the low beams are on.
The headlight washer and windscreen washer
share the same fluid tank, and a low fluid level
is indicated by the same warning light on the
instrument panel.
The headlight washers are deactivated if the
vehicle speed exceeds 130 Km/h.RAIN SENSOR
The function of the rain sensor is to adapt the
frequency of the windscreen wiper strokes (in
the intermittent operation mode) to the intensity
of the rain.
All the other functions controlled by the right-
hand lever (windscreen wipers off, headlight and
windscreen washer in continuous slow and fast
operation mode and in temporary fast operation
mode) remain the same.
The rain sensor is automatically activated when
shifting the right-hand lever to position
B and has
an adjustment range that varies progressively
from “windscreen wiper off” when the
windscreen is dry, to” second continuous speed”
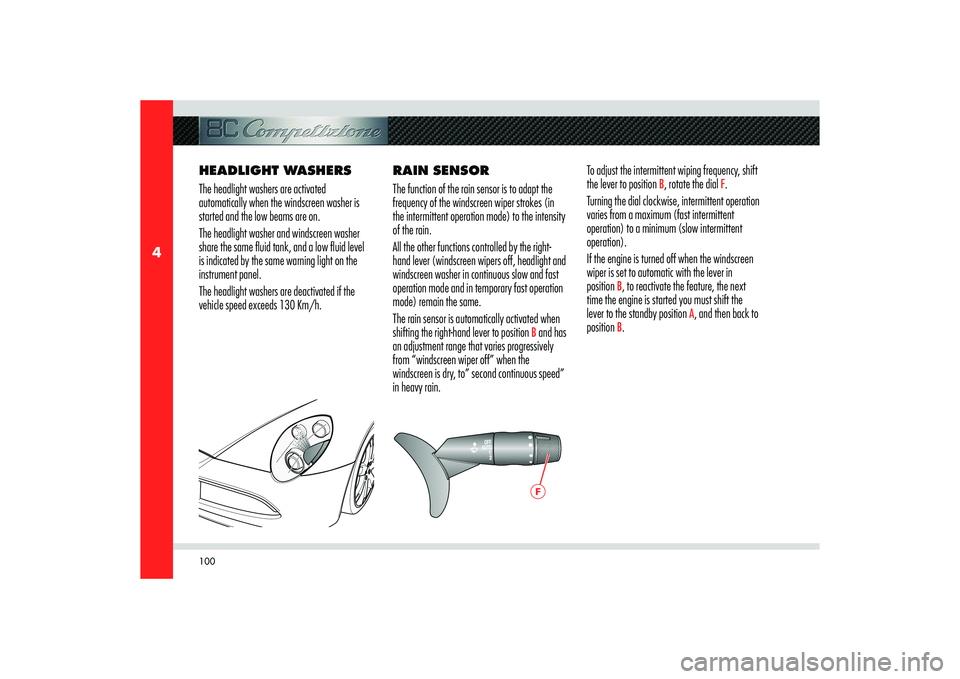
in heavy rain.To adjust the intermittent wiping frequency, shift
the lever to position
B, rotate the dial
F.
Turning the dial clockwise, intermittent operation
varies from a maximum (fast intermittent
operation) to a minimum (slow intermittent
operation).
If the engine is turned off when the windscreen
wiper is set to automatic with the lever in
position
B, to reactivate the feature, the next
time the engine is started you must shift the
lever to the standby position
A, and then back to
position
B.
Page 142 of 223

140
5
D
- Parking brake system overhaul
The EPB system requires maintenance,
therefore contact an Authorised Service
Centre of the Manufacturer’s Network to
have the system corrected.
CAUTION
In the event of an electric
parking brake failure, contact an
Authorised Service Centre of the
Manufacturer’s Network as soon as
possible.
Emergency disengagement
In the event that the electric parking brake locks
with a total system failure, you need to manually
release the parking brake using the special tool
provided in the toolkit.
Proceed as follows:
- Move the left-hand seat fully forward and
fully tilt the backrest.
- Using a screwdriver remove the cover
D by
prising on its left-hand side.- Insert the special tool in the just uncovered
pipe.
- Turn the handle clockwise until it is
released.
- Remove the tool from the pipe and refi t the
cover.
CAUTION
After each manual emergency
release, the electric parking brake
system will be inefficient until its
operation is corrected by an Authorised
Service Centre of the Manufacturer’s
Network.
Page 153 of 223

151
6
2
1
K
J
L
M
IN AN EMERGENCY
DIRECTION INDICATOR
LIGHTS
To replace the direction indicator light bulb (5W):
1) Push the direction indicator forward to
compress the spring clip
J. 4) Remove the bulb
M and replace it.
5) Refi t the bulb holder turning it clockwise.
6) Refi t the direction indicator inserting fi rst
the retaining tab on the rear part and then
pressing the front part until hearing the
spring clip click into position.
WARNING: Proceed with care when removing
the side direction indicator light to avoid
damages to the vehicle body or to the indicator
itself.
2) Remove the rear part of the indicator by
releasing the catch
K and remove the unit.
3) Remove the bulb holder L by turning it
anticlockwise.