exhaust Alfa Romeo Giulia 2017 Owner's Manual
[x] Cancel search | Manufacturer: ALFA ROMEO, Model Year: 2017, Model line: Giulia, Model: Alfa Romeo Giulia 2017Pages: 268, PDF Size: 18.64 MB
Page 31 of 268
certain period of time has elapsed. This
varies on a case-by-case basis, in
accordance with the specific operating
conditions.
Note:To preserve the battery charge,
this function cannot be activated when
the engine is off.
Warning!
Persons who are unable to feel pain to
the skin because of advanced age, chronic
illness, diabetes, spinal cord injury,
medication, alcohol use, exhaustion or
other physical condition must exercise care
when using the seat heater. It may cause
burns even at low temperatures, especially
if used for long periods of time
Do not place anything on the seat or
seatback that insulates against heat, such
as a blanket or cushion. This may cause
the seat heater to overheat. Sitting in a seat
that has been overheated could cause
serious burns due to the increased surface
temperature of the seat.
Rear Seats
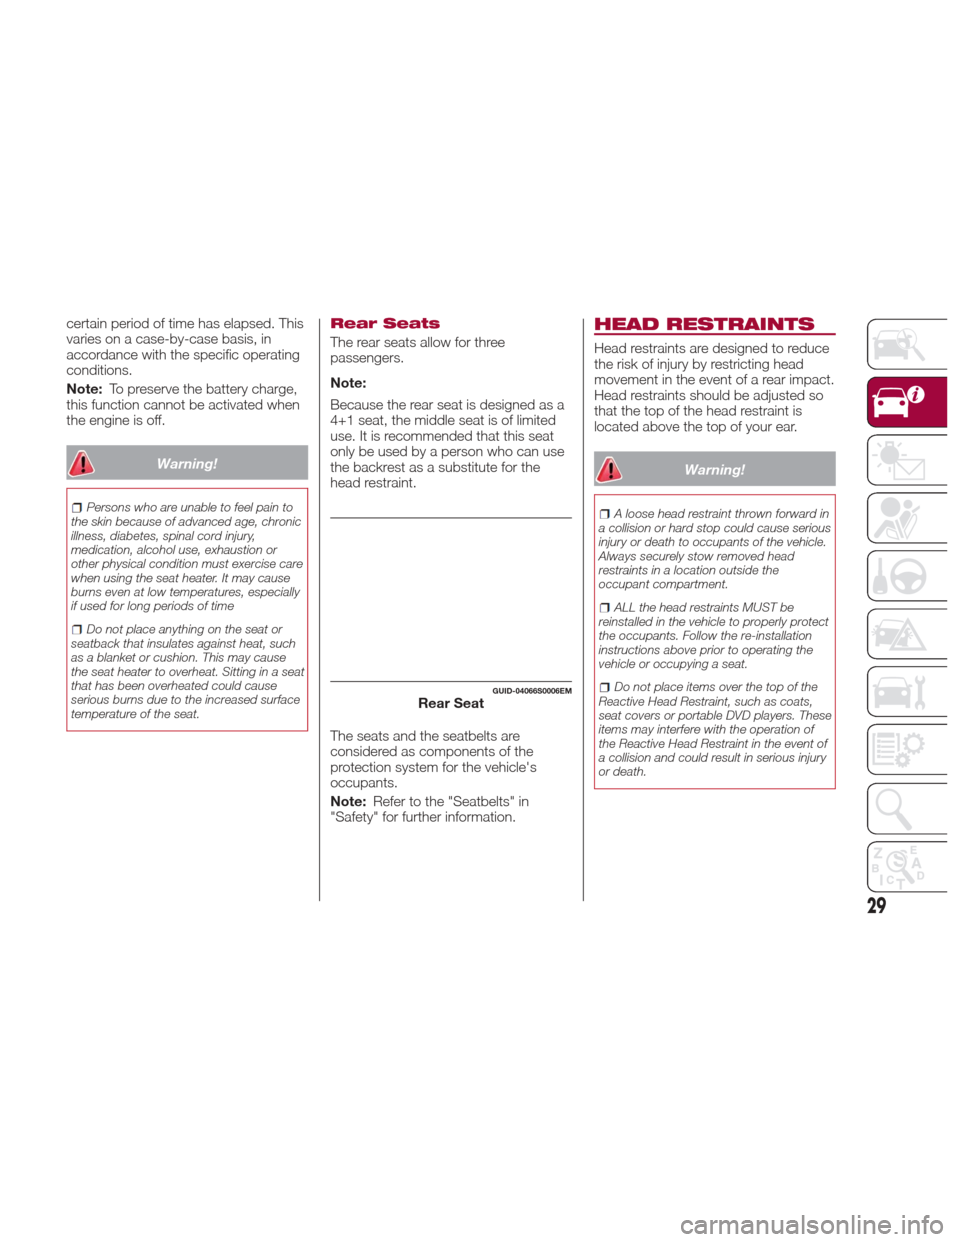
The rear seats allow for three
passengers.
Note:
Because the rear seat is designed as a
4+1 seat, the middle seat is of limited
use. It is recommended that this seat
only be used by a person who can use
the backrest as a substitute for the
head restraint.
The seats and the seatbelts are
considered as components of the
protection system for the vehicle's
occupants.
Note: Refer to the "Seatbelts" in
"Safety" for further information.
HEAD RESTRAINTS
Head restraints are designed to reduce
the risk of injury by restricting head
movement in the event of a rear impact.
Head restraints should be adjusted so
that the top of the head restraint is
located above the top of your ear.
Warning!
A loose head restraint thrown forward in
a collision or hard stop could cause serious
injury or death to occupants of the vehicle.
Always securely stow removed head
restraints in a location outside the
occupant compartment.
ALL the head restraints MUST be
reinstalled in the vehicle to properly protect
the occupants. Follow the re-installation
instructions above prior to operating the
vehicle or occupying a seat.
Do not place items over the top of the
Reactive Head Restraint, such as coats,
seat covers or portable DVD players. These
items may interfere with the operation of
the Reactive Head Restraint in the event of
a collision and could result in serious injury
or death.GUID-04066S0006EMRear Seat
29
Page 34 of 268
Warning!
Do not adjust the steering column while
driving. Adjusting the steering column while
driving or driving with the steering column
unlocked, could cause the driver to lose
control of the vehicle. Failure to follow this
warning may result in serious injury or
death.
To Adjust The Position:
1. Pull the Tilt/Telescoping Control
Handle down to the open position.
2. Adjust the steering wheel to the
desired position.
3. Lock the desired position by
pushing the Tilt/Telescoping Control
Handle to the closed position.
Warning!
It is absolutely forbidden to carry out any
after-market operation involving steering
system or steering column modifications
(e.g. installation of anti-theft device) that
could adversely affect performance,
invalidate the New Vehicle Limited
Warranty, cause SERIOUS SAFETY
PROBLEMS and also result in the vehicle
not meeting type-approval requirements.
Heated Steering Wheel
— If Equipped
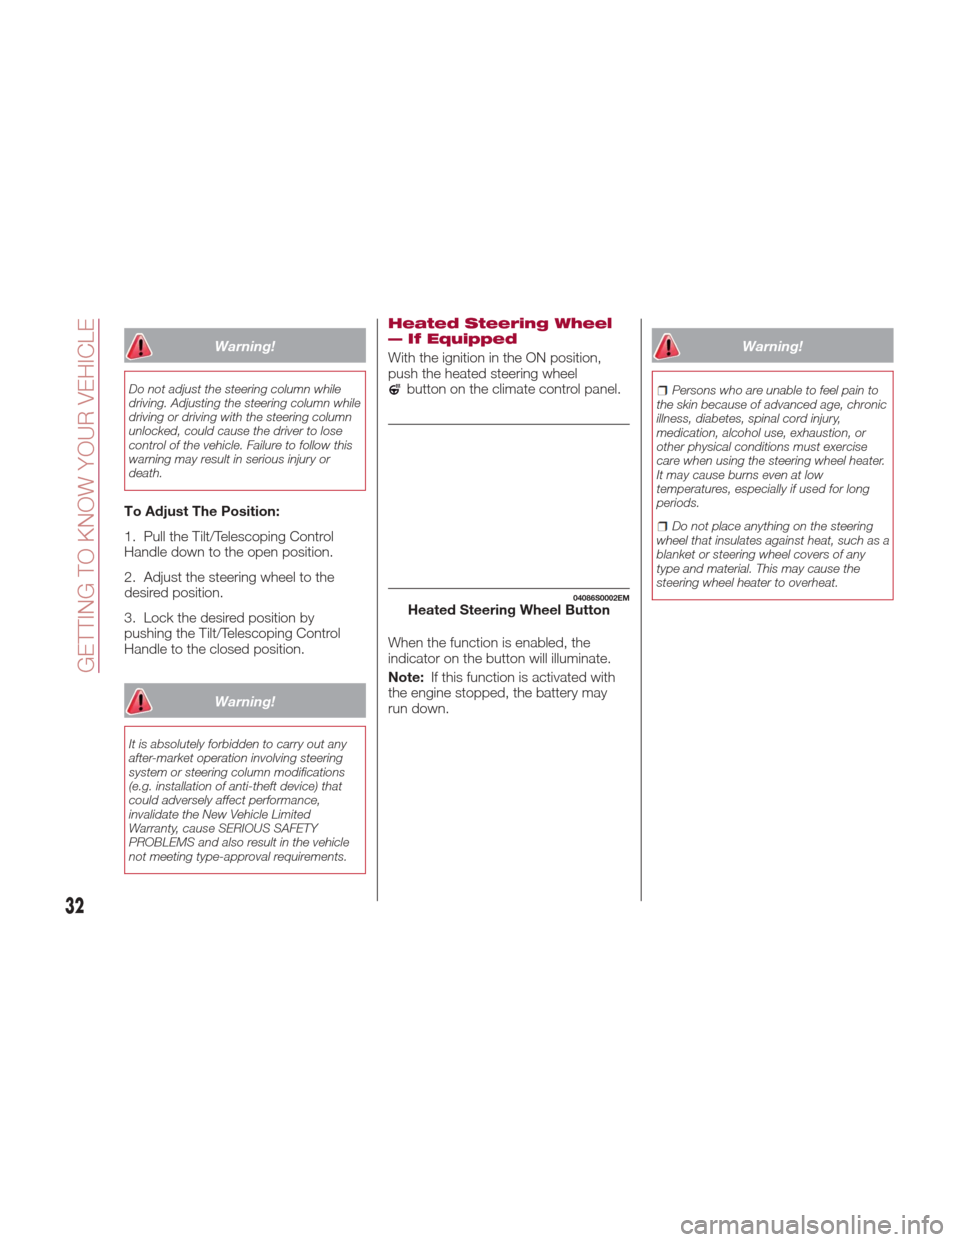
With the ignition in the ON position,
push the heated steering wheel
button on the climate control panel.
When the function is enabled, the
indicator on the button will illuminate.
Note: If this function is activated with
the engine stopped, the battery may
run down.
Warning!
Persons who are unable to feel pain to
the skin because of advanced age, chronic
illness, diabetes, spinal cord injury,
medication, alcohol use, exhaustion, or
other physical conditions must exercise
care when using the steering wheel heater.
It may cause burns even at low
temperatures, especially if used for long
periods.
Do not place anything on the steering
wheel that insulates against heat, such as a
blanket or steering wheel covers of any
type and material. This may cause the
steering wheel heater to overheat.
04086S0002EMHeated Steering Wheel Button
32
GETTING TO KNOW YOUR VEHICLE
Page 57 of 268
INTERNAL
EQUIPMENT
Glove Compartment
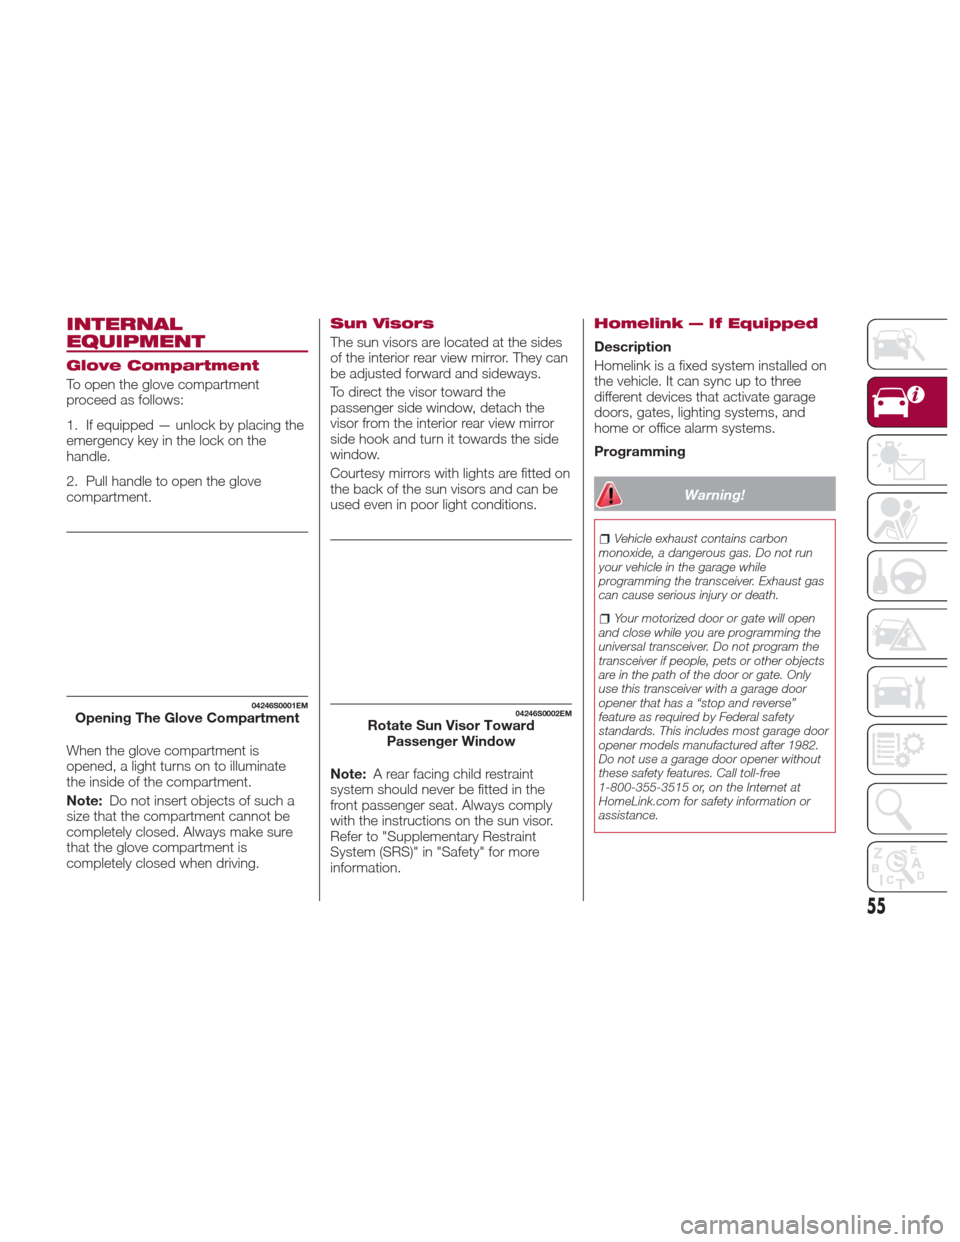
To open the glove compartment
proceed as follows:
1. If equipped — unlock by placing the
emergency key in the lock on the
handle.
2. Pull handle to open the glove
compartment.
When the glove compartment is
opened, a light turns on to illuminate
the inside of the compartment.
Note:Do not insert objects of such a
size that the compartment cannot be
completely closed. Always make sure
that the glove compartment is
completely closed when driving.
Sun Visors
The sun visors are located at the sides
of the interior rear view mirror. They can
be adjusted forward and sideways.
To direct the visor toward the
passenger side window, detach the
visor from the interior rear view mirror
sidehookandturnittowardstheside
window.
Courtesy mirrors with lights are fitted on
the back of the sun visors and can be
used even in poor light conditions.
Note: A rear facing child restraint
system should never be fitted in the
front passenger seat. Always comply
with the instructions on the sun visor.
Refer to "Supplementary Restraint
System (SRS)" in "Safety" for more
information.
Homelink — If Equipped
Description
Homelink is a fixed system installed on
the vehicle. It can sync up to three
different devices that activate garage
doors, gates, lighting systems, and
home or office alarm systems.
Programming
Warning!
Vehicle exhaust contains carbon
monoxide, a dangerous gas. Do not run
your vehicle in the garage while
programming the transceiver. Exhaust gas
can cause serious injury or death.
Your motorized door or gate will open
and close while you are programming the
universal transceiver. Do not program the
transceiver if people, pets or other objects
are in the path of the door or gate. Only
use this transceiver with a garage door
opener that has a “stop and reverse”
feature as required by Federal safety
standards. This includes most garage door
opener models manufactured after 1982.
Do not use a garage door opener without
these safety features. Call toll-free
1-800-355-3515 or, on the Internet at
HomeLink.com for safety information or
assistance.
04246S0001EMOpening The Glove Compartment04246S0002EMRotate Sun Visor Toward Passenger Window
55
Page 59 of 268
Warning!
Vehicle exhaust contains carbon
monoxide, a dangerous gas. Do not run
your vehicle in the garage while
programming the transceiver. Exhaust gas
can cause serious injury or death.
Your motorized door or gate will open
and close while you are programming the
universal transceiver. Do not program the
transceiver if people, pets or other objects
are in the path of the door or gate. Only
use this transceiver with a garage door
opener that has a “stop and reverse”
feature as required by Federal safety
standards. This includes most garage door
opener models manufactured after 1982.
Do not use a garage door opener without
these safety features. Call toll-free
1-800-355-3515 or, on the Internet at
HomeLink.com for safety information or
assistance.
Note: To program Homelink using an
Alternative Code, the car must be
within range of the garage door.
Activate the handbrake and turn the
ignition to ON, without starting the
engine. Proceed as follows:
1. Locate the “Learn” or “Train” button
on the garage door or gate motor. The
color and position may vary depending
on the manufacturer (consult the
garage door or gate manual). Push the
“Learn” or “Train” button (this normally
activates the setting warning light).
2. Push the desired HomeLink button
(1, 2 or 3). When the HomeLink
indicator begins to flash slowly, move
the portable remote control one to three
inches from the HomeLink system
(keeping the programmable button
pushed down).
3. Within 30 seconds, push the
programmed key (1, 2 or 3) and release
it. Push the programmed button a
second time and release it to conclude
the operation. For some motors, the
operation will probably have to be
repeated a third time to end the setting.
The motor should now be capable of
recognizing the signal transmitted by
HomeLink and then open/close the
door or gate.
Programming A Single Key
It is possible to program another
original remote control on an already
programmed HomeLink key by
canceling the previously stored
frequency.
Warning!
Vehicle exhaust contains carbon
monoxide, a dangerous gas. Do not run
your vehicle in the garage while
programming the transceiver. Exhaust gas
can cause serious injury or death.
Your motorized door or gate will open
and close while you are programming the
universal transceiver. Do not program the
transceiver if people, pets or other objects
are in the path of the door or gate. Only
use this transceiver with a garage door
opener that has a “stop and reverse”
feature as required by Federal safety
standards. This includes most garage door
opener models manufactured after 1982.
Do not use a garage door opener without
these safety features. Call toll-free
1-800-355-3515 or, on the Internet at
HomeLink.com for safety information or
assistance.
57
Page 72 of 268

WARNING LIGHTS
AND MESSAGES ON
THE INSTRUMENT
PANEL
The following pages consist of warning
lights and messages.
Note:
The warning light switches on
together with a dedicated message
and/or chime when applicable. These
indications are precautionary and as
such must not be considered as
exhaustive and/or alternative to the
information contained in the Owner’s
Manual, which you are advised to read
carefully in all cases. Always refer to
the information in this section in the
event of a failure indication.
The failure indicators appearing on
the display are divided into two
categories: very serious and less
serious faults. Serious faults are
indicated by a repeated and prolonged
warning "cycle.” Less serious faults are
indicated by a warning "cycle" with a
shorter duration. You can stop the
warning cycle in both cases by
pressing the button located on the
windshield wiper lever. The instrument
panel warning light will stay on until the
cause of the failure is eliminated.
70
GETTING TO KNOW YOUR INSTRUMENT PANEL
Page 81 of 268
Warning LightWhat It Means What To Do
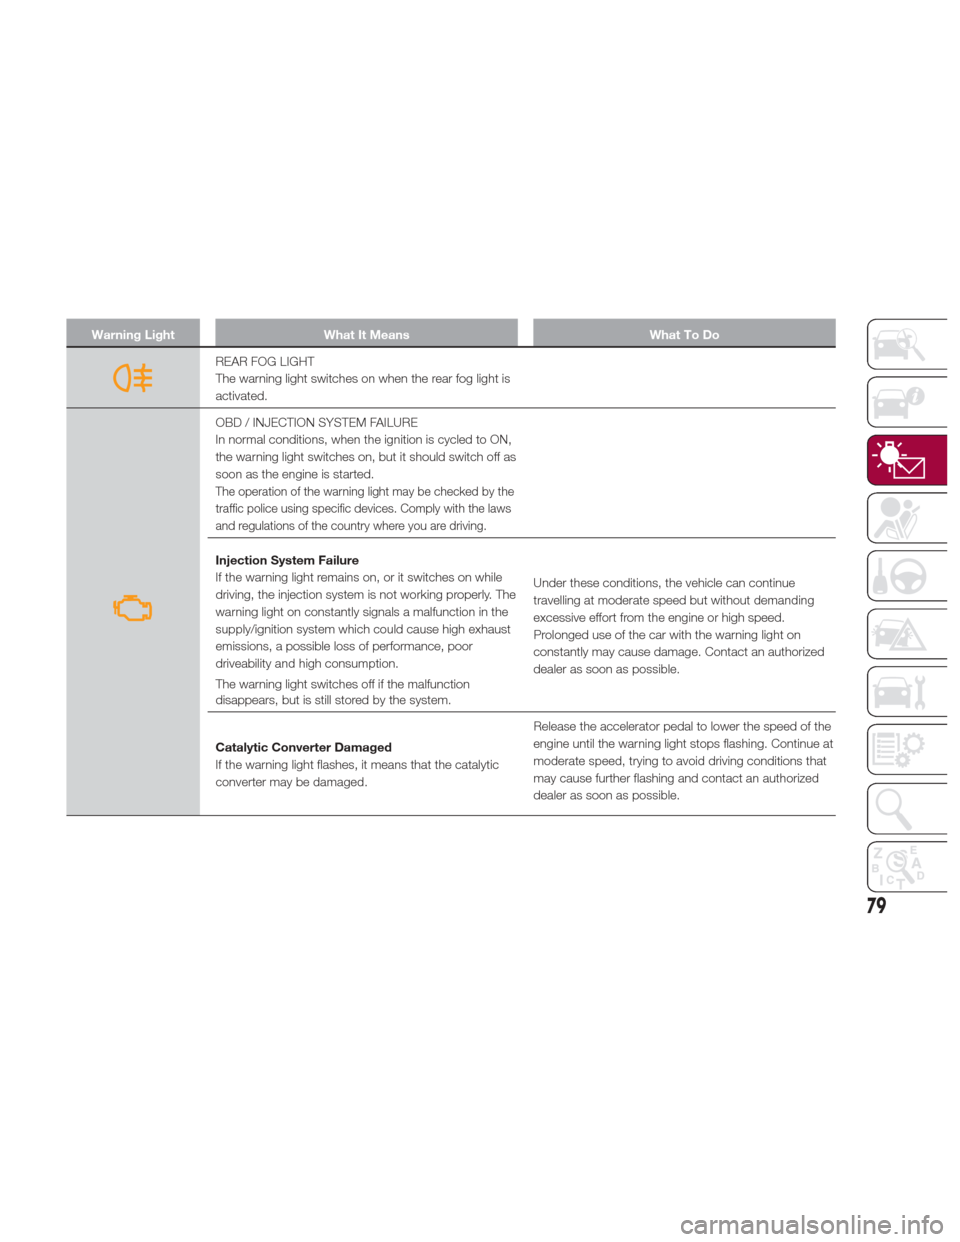
REAR FOG LIGHT
The warning light switches on when the rear fog light is
activated.
OBD / INJECTION SYSTEM FAILURE
In normal conditions, when the ignition is cycled to ON,
the warning light switches on, but it should switch off as
soon as the engine is started.
The operation of the warning light may be checked by the
traffic police using specific devices. Comply with the laws
and regulations of the country where you are driving.
Injection System Failure
If the warning light remains on, or it switches on while
driving, the injection system is not working properly. The
warning light on constantly signals a malfunction in the
supply/ignition system which could cause high exhaust
emissions, a possible loss of performance, poor
driveability and high consumption.
The warning light switches off if the malfunction
disappears, but is still stored by the system.Under these conditions, the vehicle can continue
travelling at moderate speed but without demanding
excessive effort from the engine or high speed.
Prolonged use of the car with the warning light on
constantly may cause damage. Contact an authorized
dealer as soon as possible.
Catalytic Converter Damaged
If the warning light flashes, it means that the catalytic
converter may be damaged. Release the accelerator pedal to lower the speed of the
engine until the warning light stops flashing. Continue at
moderate speed, trying to avoid driving conditions that
may cause further flashing and contact an authorized
dealer as soon as possible.
79
Page 86 of 268
SymbolWhat It Means What To Do
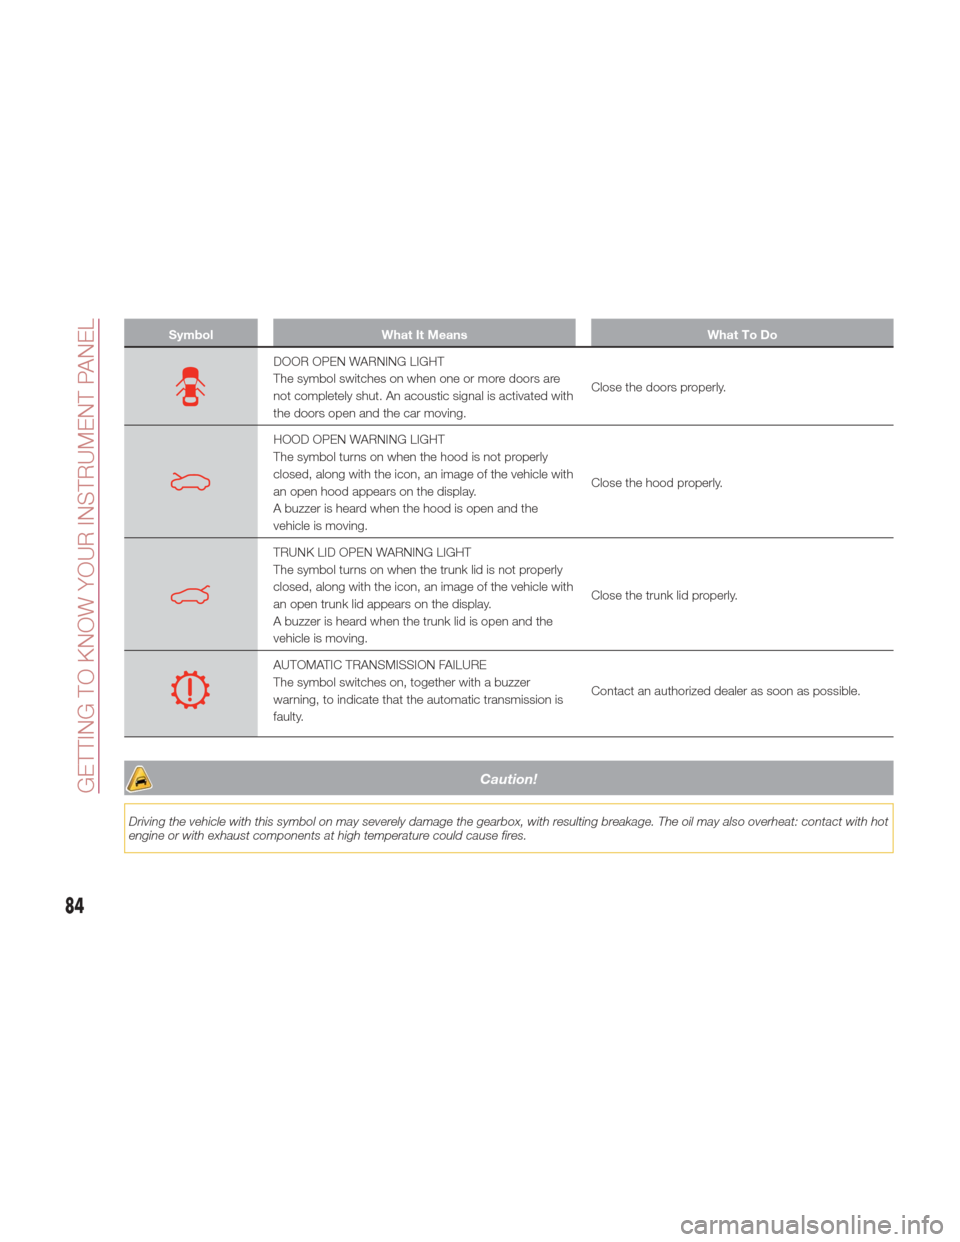
DOOR OPEN WARNING LIGHT
The symbol switches on when one or more doors are
not completely shut. An acoustic signal is activated with
the doors open and the car moving.Close the doors properly.
HOOD OPEN WARNING LIGHT
The symbol turns on when the hood is not properly
closed, along with the icon, an image of the vehicle with
an open hood appears on the display.
A buzzer is heard when the hood is open and the
vehicle is moving.Close the hood properly.
TRUNK LID OPEN WARNING LIGHT
The symbol turns on when the trunk lid is not properly
closed, along with the icon, an image of the vehicle with
an open trunk lid appears on the display.
A buzzer is heard when the trunk lid is open and the
vehicle is moving.Close the trunk lid properly.
AUTOMATIC TRANSMISSION FAILURE
The symbol switches on, together with a buzzer
warning, to indicate that the automatic transmission is
faulty.
Contact an authorized dealer as soon as possible.
Caution!
Driving the vehicle with this symbol on may severely damage the gearbox, with resulting breakage. The oil may also overheat: contact with hot
engine or with exhaust components at high temperature could cause fires.
84
GETTING TO KNOW YOUR INSTRUMENT PANEL
Page 174 of 268
Messages On The Display
If the trunk lid is lifted, the camera will
not detect any obstacle behind the
vehicle. The display will show a
dedicated warning message.
Make sure the trunk lid is closed by
pushing next to the lock until it clicks.
Important Notes
Ice, snow or mud on the surface of
the camera may reduce its sensitivity. It
is important to keep the camera surface
clean, and free from debris.
When parking, take care over
obstacles that may be above or under
the camera range.
REFUELING THE
VEHICLE
Refueling The Vehicle
Before refueling, make sure that the fuel
type is correct.
Also, stop the engine before refueling.
Note: An inefficient catalytic converter
leads to harmful exhaust emissions,
thus contributing to air pollution.
Caution!
Never introduce leaded fuel to the tank,
even in small amounts in an emergency, as
this would damage the catalytic converter
beyond repair.
Refueling Capacity
To ensure that you fill the tank
completely, top off twice after the first
click of the fuel nozzle.
Further top-off could cause faults in the
fuel feeding system.
Refueling Procedure
The fuel filler door is unlocked when the
central door locking system is
unlocked. It is automatically locked
when the central locking system is
applied. Opening The Fuel Filler Door
To refuel proceed as follows:
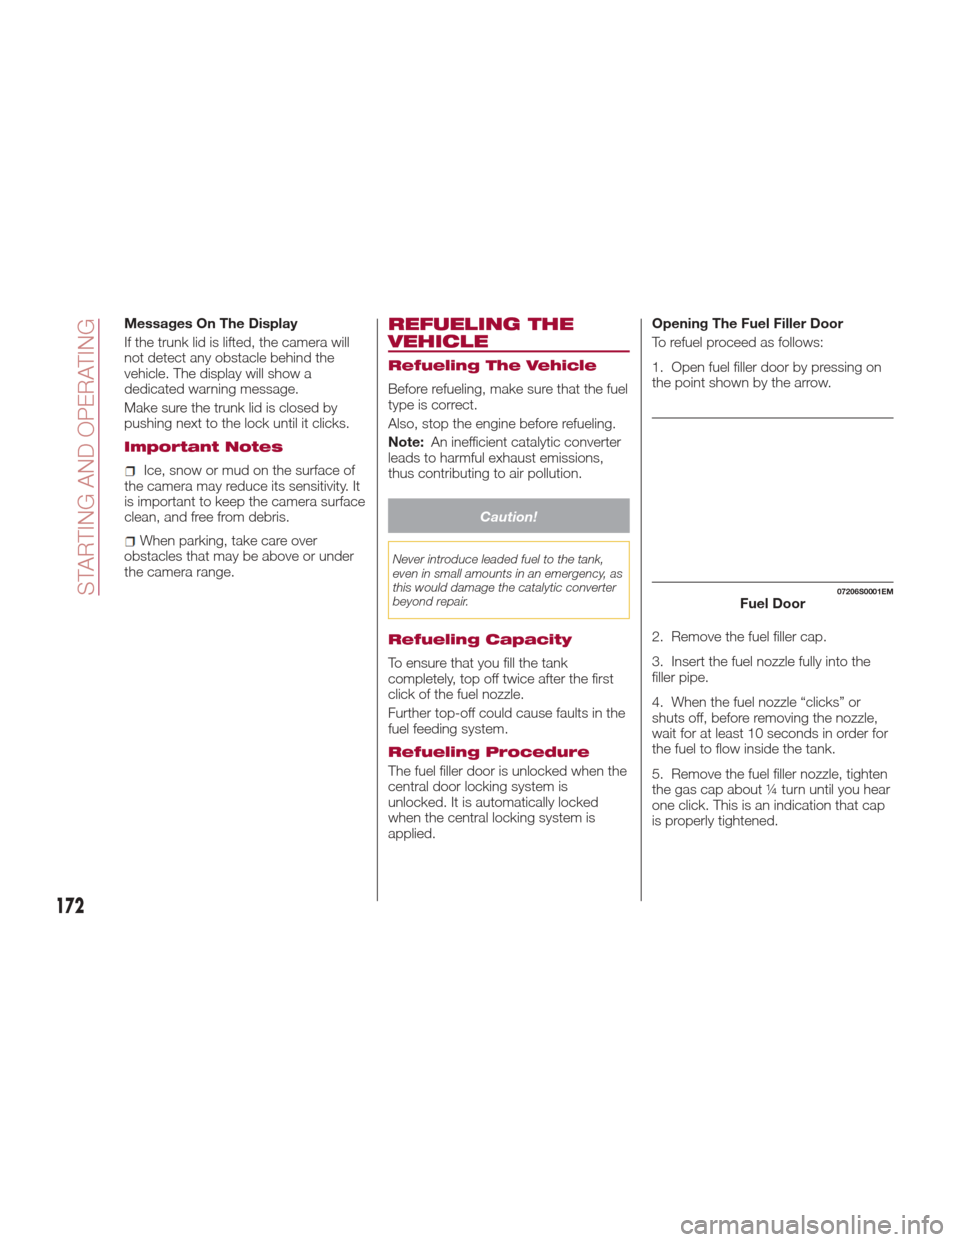
1. Open fuel filler door by pressing on
the point shown by the arrow.
2. Remove the fuel filler cap.
3. Insert the fuel nozzle fully into the
filler pipe.
4. When the fuel nozzle “clicks” or
shuts off, before removing the nozzle,
wait for at least 10 seconds in order for
the fuel to flow inside the tank.
5. Remove the fuel filler nozzle, tighten
the gas cap about ¼ turn until you hear
one click. This is an indication that cap
is properly tightened.
07206S0001EMFuel Door
172
STARTING AND OPERATING
Page 178 of 268
Max. Speed
Fuel consumption considerably
increases as speed increases. Maintain
a constant speed, avoiding
unnecessary braking and acceleration,
which cost in terms of both fuel
consumption and emissions.
Acceleration
Accelerating violently severely affects
consumption and emissions:
acceleration should be gradual and
should not exceed the maximum
torque.
Conditions Of Use
Cold Starting
Short trips and frequent cold starts will
not allow the engine to reach optimum
operating temperature. This results in a
significant increase in consumption
levels (from +15 to +30% in city driving)
and emissions.
Traffic And Road Conditions
High fuel consumption is caused by
heavy traffic, for instance when
travelling in traffic with frequent use of
low gears or in cities with many traffic
lights. Winding mountain roads and
rough road surfaces also adversely
affect consumption.
Stops In Traffic
During prolonged stops (e.g. railway
crossings) switch off the engine.
Transporting
Passengers
Warning!
It is extremely dangerous to leave
children in a parked vehicle when the
temperature outside is very high. The heat
inside the passenger compartment may
have serious, or even fatal, consequences.
Never travel in the trunk of the vehicle. In
the event of an accident, anyone inside the
trunk would be at greater risk of serious or
even fatal injury.
Ensure that all the occupants of the
vehicle wear their seat belts correctly and
that any children are positioned correctly
on the dedicated child restraint systems.
Transporting Animals
The intervention of the airbags may be
dangerous for an animal on the front
seat. It is therefore advised to arrange
animals on the rear seat inside
dedicated cages restrained by the
vehicle’s seat belts.
Keep in mind that, in the event of a
sudden braking or an accident, an
inadequately restrained animal may be
projected within the passenger
compartment, risking injury to the
animal itself and the other occupants of
the vehicle.
Exhaust Gas
Exhaust emissions are very dangerous,
and may be lethal. They contain carbon
monoxide, a colorless, odorless gas
which can cause fainting and poisoning
if inhaled.
To avoid inhaling carbon monoxide,
take the following measures:
Do not keep the engine running in
closed spaces.
If, for some reason (e.g. transporting
bulky loads), it is necessary to drive
with the trunk open, close all the
windows and run the climate control fan
at maximum speed. DO NOT activate
air recirculation mode.
Should it be necessary to stay in the
stationary vehicle with engine running,
adjust the ventilation/heating system
and operate the fan in such a way that
outside air will enter the passenger
compartment. Activate the maximum
fan speed.
Maintenance of the exhaust system
provides the best protection against
leaks of carbon monoxide into the
passenger compartment.
Should an unusual noise from the
exhaust system or the presence of
exhaust gas in the passenger
compartment be identified, or if the
underbody or rear section of the vehicle
is damaged, have the entire exhaust
system and bodywork areas checked
to identify any components which are
176
STARTING AND OPERATING
Page 179 of 268
broken, damaged, worn or have moved
from their correct fitting position. If any
of these things occur, contact your
authorized dealer.
Open welding or loose connections
may permit exhaust gas to enter the
passenger compartment.
Check the exhaust system each time
the vehicle is raised for lubrication or oil
change operations. Replace the
components if necessary, contact your
authorized dealer.
Performance
This vehicle is equipped with an engine
capable of delivering exceptionally fast
acceleration and speed:
Peak power: 505 HP at 6500 rpm.
Peak torque: 443 ft-lbs at
2500–5000 rpm.
Top speed: 190 mph (307 km/h).
Acceleration from 0 to 60 mph (0 to
100 km/h): 3.9 seconds.
For safe driving, it is essential,
particularly during the first days of use,
to get to know the car by driving
carefully and gradually discovering its
performance.
Brakes
The car braking system may be
available with four carbon-ceramic
material brake discs, one on each
wheel. In order to guarantee the maximum
braking capacity for the first use, Alfa
Romeo performs a "run-in" procedure
for discs and pads directly at the
factory.
The use of carbon-ceramic material
brake discs guarantees braking features
(better deceleration/pedal load ratio,
braking distances, fading resistance)
proportional to the dynamic features of
the car in addition to considerably
decreasing the unsprung component
weight.
The materials used and the structural
features of the system could generate
unusual noises which have absolutely
no adverse effect on correct operation
and reliability of the braking system.
Greater pressure may need to be
applied to the brake pedal the first time
to keep the same braking capacities in
presence of condensation or salt on the
braking surfaces, for example after
washing or if the car is not used for a
long time.
Note:
Given the high technological
level of this system, any servicing on it
must be performed by your authorized
dealer which exclusively has the skills
needed for the repair operations. In case of intensive, high-performance
use of the car, have the efficiency of the
carbon-ceramic material braking
system inspected as shown on the
Maintenance Plan at your authorized
dealer.
Driving On Race Tracks
Before driving on a track using a racing
style, it is necessary to:
Attend a race track driving course.
Check the liquid levels in the engine
compartment. For more information,
see the “Checking Levels” section in
the “Servicing And Maintenance”
chapter.
Have the car inspected at your
authorized dealer.
Remember that the car was not
designed to be driven exclusive on the
race track and that this use increases
stress and component wear.
177