brake light ALFA ROMEO GIULIA 2021 Owners Manual
[x] Cancel search | Manufacturer: ALFA ROMEO, Model Year: 2021, Model line: GIULIA, Model: ALFA ROMEO GIULIA 2021Pages: 284, PDF Size: 8.87 MB
Page 11 of 284

9
Adaptive Frontlight System
(AFS Function) — If Equipped ................ 44 Turn Signals ........................................... 44
Lane Change Assist ............................... 44
Static Bending Light Function (SBL) —
If Equipped ............................................. 44
INTERIOR LIGHTS .....................................44
Front Map Reading Lights ..................... 45
Interior Ambient Lighting ....................... 45
Rear Overhead Light .............................. 46
Instrument Panel Dimmer Control ....... 46
WINDSHIELD WIPERS AND WASHERS....46
Windshield Wiper Operation ................ 47
Rain Sensing Wipers.............................. 47
CLIMATE CONTROL .................................48
Automatic Dual-Zone Climate
Control System ...................................... 49
INTERIOR STORAGE AND EQUIPMENT....55
Glove Compartment .............................. 55
Center Console ...................................... 56
Power Outlet........................................... 56
Cigar Lighter And Ash Tray —
If Equipped ............................................. 57
Wireless Charging Pad — If Equipped ... 57
POWER WINDOWS ...................................58
Power Window Controls......................... 58
POWER SUNROOF — IF EQUIPPED ..........60
Power Sunroof........................................ 60
Opening And Closing The Sunroof ........ 60
Venting Sunroof ..................................... 61
Sun Shade Operation ............................ 61
Pinch Protect Feature ............................ 61
Re-Initialization Procedure .................... 61
Sunroof Maintenance ............................ 61
HOOD ........................................................ 62
Opening .................................................. 62
Closing.................................................... 62
TRUNK ...................................................... 63
Opening .................................................. 63
Closing.................................................... 64
Trunk Initialization ................................. 64
Trunk Specifications ............................. 64
ENVIRONMENTAL PROTECTION
SYSTEMS .................................................. 65
ACTIVE AERODYNAMIC SPOILER
(QUADRIFOGLIO VEHICLES) .................... 65
Carbon Fiber Active Aero Front
Spoiler .................................................... 65
GETTING TO KNOW YOUR INSTRUMENT
PANEL
INSTRUMENT PANEL FEATURES............. 66
Instrument Cluster ................................ 66
Tachometer............................................ 67
Engine Oil Temperature Gauge ............ 67
Fuel Level Gauge ................................... 68
Speedometer ......................................... 68
INSTRUMENT CLUSTER DISPLAY............ 68
Instrument Cluster Display
Description ............................................. 68 Reconfigurable Instrument Cluster
Display.................................................... 68 Reconfigurable Display Items ............... 68
Customer Programmable Settings ....... 72
WARNING LIGHTS AND MESSAGES
ON THE INSTRUMENT PANEL ................. 73
Red Warning Lights ............................... 73
Amber Warning Lights ........................... 75 Green Indicator Lights ...........................77
Blue Indicator Lights ..............................77
Red Symbols...........................................78
Amber Symbols ......................................79
Green Symbols .......................................83
Blue Symbols .......................................... 83
ONBOARD DIAGNOSTIC SYSTEM ...........84
Onboard Diagnostic System (OBD II)
Cybersecurity .......................................... 84
EMISSIONS INSPECTION AND
MAINTENANCE PROGRAMS ....................85
STARTING AND OPERATING
STARTING THE ENGINE ............................86
Starting Procedure .................................86
Remote Starting System ........................86
Cold Weather Operation ........................87
Extended Park Starting ..........................87
If Engine Fails To Start ...........................88
After Starting — Warming Up The
Engine .....................................................88 Stopping The Engine ..............................88
Turbocharger Cool Down .......................88
ENGINE BLOCK HEATER —
IF EQUIPPED ............................................89
ENGINE BREAK-IN
RECOMMENDATIONS ...............................89
Engine Break-In ......................................89
ELECTRIC PARK BRAKE (EPB) .................90
Electric Park Brake (EPB) Operating
Modes .....................................................92 Safe Hold ................................................92
21_GA_OM_EN_USC_t.book Page 9
Page 13 of 284

11
SAFETY
ACTIVE SAFETY SYSTEMS ..................... 141
Anti-Lock Brake System (ABS) ........... 141
Active Torque Vectoring (ATV) —
If Equipped ...........................................142 Dynamic Steering Torque (DST) .........142
Drive Train Control (DTC) System —
If Equipped ...........................................142 Electronic Stability Control (ESC) ........142
Hill Start Assist (HSA)...........................143
Panic Brake Assist (PBA) .....................143
Traction Control System (TCS) ............144
AUXILIARY DRIVING SYSTEMS .............. 144
Blind Spot Monitoring (BSM) System —
If Equipped ..........................................145 Active Blind Spot Assist (ABSA) System —
If Equipped ..........................................147 Driver Attention Assist (DAA) System —
If Equipped ...........................................150 Forward Collision Warning (FCW)
System ..................................................151 Tire Pressure Monitoring
System (TPMS) ..................................... 156
OCCUPANT RESTRAINT SYSTEMS ....... 159
Occupant Restraint Systems
Features ..............................................159 Important Safety Precautions .............159
Seat Belt Systems ............................... 159
Supplemental Restraint
Systems (SRS)...................................... 165 Child Restraints....................................174
SAFETY TIPS .......................................... 187
Transporting Passengers .................... 187
Transporting Pets ............................... 187
Safety Checks You Should Make
Inside The Vehicle .............................. 187 Periodic Safety Checks You Should
Make Outside The Vehicle .................. 188 Exhaust Gas ......................................... 189
Carbon Monoxide Warnings................ 189
IN CASE OF EMERGENCY
HAZARD WARNING FLASHERS ............. 190SOS - EMERGENCY CALL ...................... 190
TIRE SERVICE KIT .................................. 194
Description ........................................... 194
Inflation Procedure .............................. 195
Checking And Restoring Tire
Pressure ............................................... 197 Sealant Cartridge Replacement ......... 197
JUMP STARTING .................................... 198
Remote Battery Connection Posts ..... 198
Jump Starting....................................... 199
Bump Starting...................................... 200
IF YOUR ENGINE OVERHEATS ............... 200
MANUAL PARK RELEASE ....................... 201
TOWING A DISABLED VEHICLE ............. 201
Rear Wheel Drive (RWD) Models........ 202
All Wheel Drive (AWD) Models ............ 202
TOW EYES............................................... 202ENHANCED ACCIDENT
RESPONSE SYSTEM (EARS) .................. 203EVENT DATA RECORDER (EDR) ............ 203 SERVICING AND MAINTENANCE
SCHEDULED SERVICING ....................... 204
Periodic Checks................................... 204
Heavy Usage Of The Vehicle............... 204
Maintenance Plan — 2.0L Engine ...... 205
Maintenance Plan — 2.9L Engine ...... 208
ENGINE COMPARTMENT....................... 211
Checking Levels — 2.0L Engine ......... 211
Checking Levels — 2.9L Engine ........ 212
Engine Oil............................................. 213
Engine Coolant .................................... 214
Washer Fluid For Windshield/
Headlights............................................ 214 Brake Fluid .......................................... 214
Automatic Transmission Activation
System Oil ............................................ 214 Useful Advice For Extending
The Life Of Your Battery ...................... 214 Battery ................................................. 215
Pressure Washing ............................... 215
BATTERY RECHARGING......................... 215
Important Notes .................................. 215
VEHICLE MAINTENANCE ....................... 217
Engine Oil............................................. 217
Engine Oil Filter ................................... 217
Engine Air Cleaner............................... 217
Air Conditioning System
Maintenance ....................................... 217 Lubricating Moving Parts Of
The Bodywork ...................................... 218 Windshield Wiper ................................ 218
21_GA_OM_EN_USC_t.book Page 11
Page 15 of 284
13
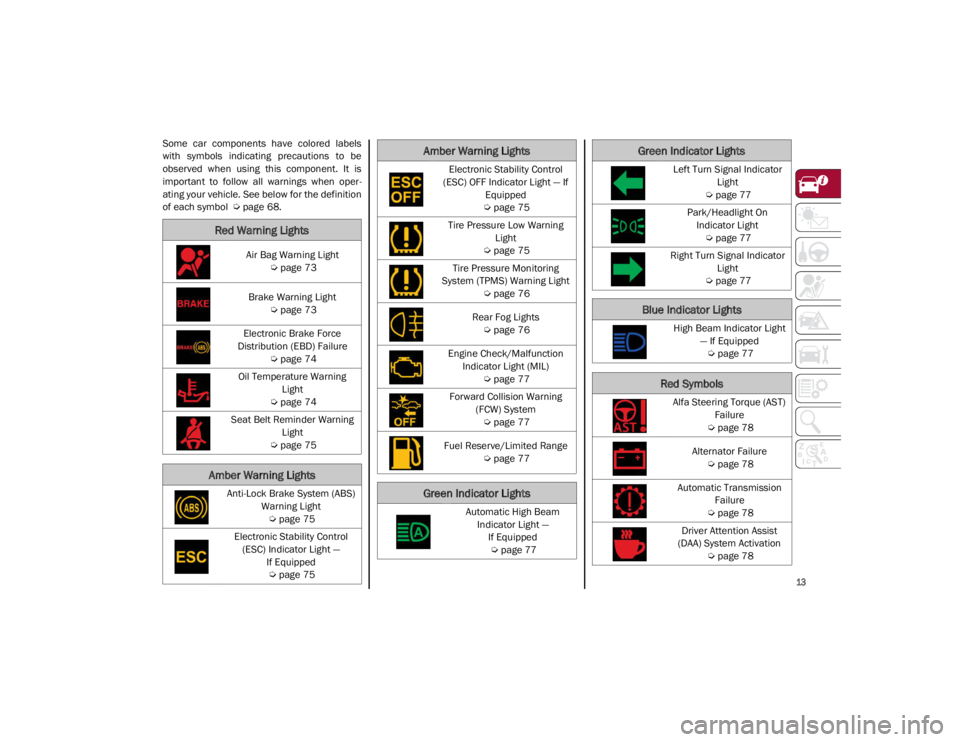
Some car components have colored labels
with symbols indicating precautions to be
observed when using this component. It is
important to follow all warnings when oper-
ating your vehicle. See below for the definition
of each symbol
Ú
page 68.
Red Warning Lights
Air Bag Warning Light
Ú
page 73
Brake Warning Light
Ú
page 73
Electronic Brake Force
Distribution (EBD) Failure
Ú
page 74
Oil Temperature Warning Light
Ú
page 74
Seat Belt Reminder Warning Light
Ú
page 75
Amber Warning Lights
Anti-Lock Brake System (ABS)
Warning Light
Ú
page 75
Electronic Stability Control (ESC) Indicator Light — If Equipped
Ú
page 75
Electronic Stability Control
(ESC) OFF Indicator Light — If Equipped
Ú
page 75
Tire Pressure Low Warning Light
Ú
page 75
Tire Pressure Monitoring
System (TPMS) Warning Light
Ú
page 76
Rear Fog Lights
Ú
page 76
Engine Check/Malfunction Indicator Light (MIL)
Ú
page 77
Forward Collision Warning (FCW) System
Ú
page 77
Fuel Reserve/Limited Range
Ú
page 77
Green Indicator Lights
Automatic High Beam
Indicator Light — If Equipped
Ú
page 77
Amber Warning Lights
Left Turn Signal Indicator
Light
Ú
page 77
Park/Headlight On Indicator Light
Ú
page 77
Right Turn Signal Indicator Light
Ú
page 77
Blue Indicator Lights
High Beam Indicator Light
— If Equipped
Ú
page 77
Red Symbols
Alfa Steering Torque (AST)
Failure
Ú
page 78
Alternator Failure
Ú
page 78
Automatic Transmission Failure
Ú
page 78
Driver Attention Assist
(DAA) System Activation
Ú
page 78
Green Indicator Lights
21_GA_OM_EN_USC_t.book Page 13
Page 17 of 284
15
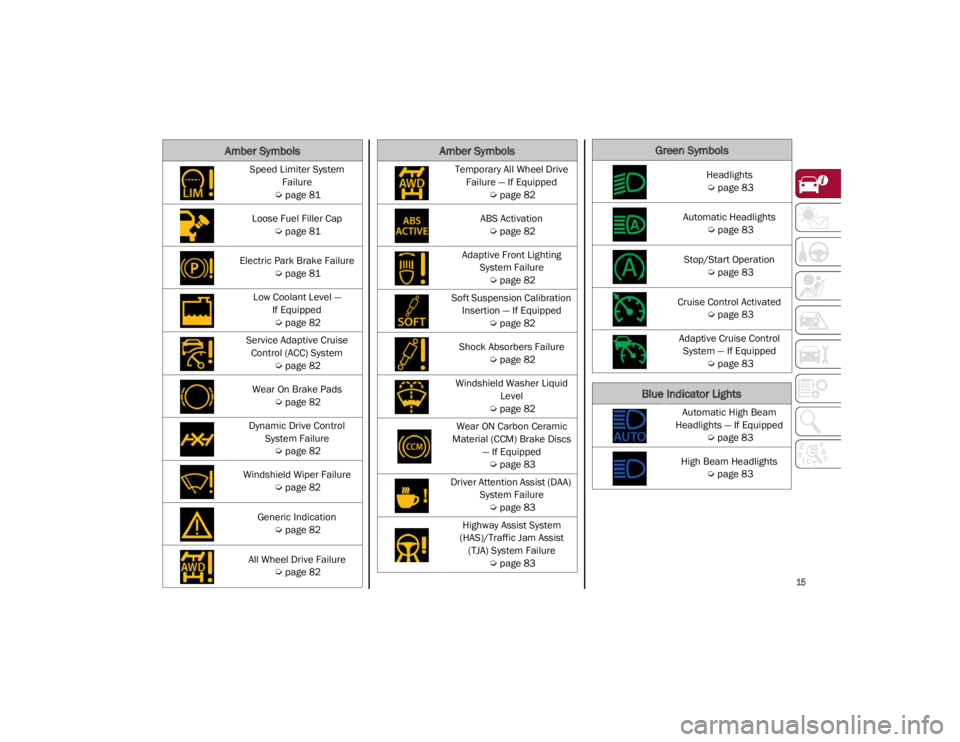
Speed Limiter System Failure
Ú
page 81
Loose Fuel Filler Cap
Ú
page 81
Electric Park Brake Failure
Ú
page 81
Low Coolant Level — If Equipped
Ú
page 82
Service Adaptive Cruise Control (ACC) System
Ú
page 82
Wear On Brake Pads
Ú
page 82
Dynamic Drive Control System Failure
Ú
page 82
Windshield Wiper Failure
Ú
page 82
Generic Indication
Ú
page 82
All Wheel Drive Failure
Ú
page 82
Amber Symbols
Temporary All Wheel Drive
Failure — If Equipped
Ú
page 82
ABS Activation
Ú
page 82
Adaptive Front Lighting System Failure
Ú
page 82
Soft Suspension Calibration Insertion — If Equipped
Ú
page 82
Shock Absorbers Failure
Ú
page 82
Windshield Washer Liquid Level
Ú
page 82
Wear ON Carbon Ceramic
Material (CCM) Brake Discs — If Equipped
Ú
page 83
Driver Attention Assist (DAA) System Failure
Ú
page 83
Highway Assist System
(HAS)/Traffic Jam Assist (TJA) System Failure
Ú
page 83
Amber SymbolsGreen Symbols
Headlights
Ú
page 83
Automatic Headlights
Ú
page 83
Stop/Start Operation
Ú
page 83
Cruise Control Activated
Ú
page 83
Adaptive Cruise Control System — If Equipped
Ú
page 83
Blue Indicator Lights
Automatic High Beam
Headlights — If Equipped
Ú
page 83
High Beam Headlights
Ú
page 83
21_GA_OM_EN_USC_t.book Page 15
Page 22 of 284
GETTING TO KNOW YOUR VEHICLE
20
REMOTE START — IF EQUIPPED
This system uses the key fob to start
the engine conveniently from
outside the vehicle while still main-
taining security.
NOTE:
Obstructions between the vehicle and key fob
may reduce this range
Ú
page 273.
How To Use Remote Start
Push the Remote Start button on the key fob
twice within five seconds. The vehicle doors
will lock, the turn signals will flash twice, and
the horn will chirp twice. Pushing the Remote
Start button a third time shuts the engine off.
NOTE:
With Remote Start, the engine will only run
for 15 minutes.
Remote Start can only be used twice.
If an engine fault is present or fuel level is
low, the vehicle will start and then shut
down in 10 seconds.
The park lamps will turn on and remain on
during Remote Start mode.
For security, power window operation is
disabled when the vehicle is in the Remote
Start mode.
The ignition must be placed in the ACC posi -
tion before the Remote Start sequence can
be repeated for a third cycle.
All of the following conditions must be met
before the engine will Remote Start:
Gear selector in PARK
Doors closed
Hood closed
Trunk closed
Hazard switch off
Brake switch inactive (brake pedal not
pushed)
Battery at an acceptable charge level
PANIC button not pushed
System not disabled from previous remote
start event
Vehicle Security system indicator flashing
Ignition in OFF position
Fuel level meets minimum requirement
Vehicle Security system is not signaling an
intrusion
Malfunction Indicator Light is not illuminated
Do not leave the key fob in or near the
vehicle, or in a location accessible to chil -
dren, and do not leave the ignition of a
vehicle equipped with Keyless Enter-N-Go
in the ON/RUN mode. A child could
operate power windows, other controls, or
move the vehicle.
Do not leave children or animals inside
parked vehicles in hot weather. Interior
heat build-up may cause serious injury or
death.
CAUTION!
An unlocked vehicle is an invitation for
thieves. Always remove key fob from the
vehicle and lock all doors when leaving the
vehicle unattended.
WARNING! (Continued) WARNING!
Do not start or run an engine in a closed
garage or confined area. Exhaust gas
contains Carbon Monoxide (CO) which is
odorless and colorless. Carbon Monoxide
is poisonous and can cause serious injury
or death when inhaled.
Keep key fobs away from children. Opera -
tion of the Remote Start system, windows,
door locks or other controls could cause
serious injury or death.
21_GA_OM_EN_USC_t.book Page 20
Page 23 of 284
21
To Exit Remote Start Mode
To drive the vehicle after starting the Remote
Start system, either push and release the
unlock button on the key fob to unlock the
doors, or unlock the vehicle using Passive
Entry via the door handles, and disarm the
Vehicle Security system (if equipped). Then,
prior to the end of the 15 minute cycle, push
and release the START/STOP ignition button
while pressing the brake pedal.
The Remote Start system will turn the engine
off with another push and release of the
Remote Start button on the key fob, or if the
engine is allowed to run for the entire
15 minute cycle.
Remote Start Comfort Systems — If
Equipped
When Remote Start is activated, the heated
steering wheel and front heated seat features
will automatically activate when ambient
temperature is less than 39°F (4°C). These
features will stay on through the duration of
Remote Start.
NOTE:
This feature can be activated through the
radio system. Refer to the Information and
Entertainment System Owner’s Manual
Supplement for further information
VEHICLE SECURITY SYSTEM — IF
EQUIPPED
The Vehicle Security system monitors the
vehicle doors, hood, trunk, and the keyless
push button ignition for unauthorized opera-
tion. It also monitors movement inside the
passenger compartment (volumetric protec -
tion — if equipped), cutting of battery cables,
and unexpected lifting/tilting of the vehicle
(anti-lift protection — if equipped).
While the Vehicle Security system is armed,
interior switches for door locks and trunk
release are disabled.
If something triggers the alarm, the Vehicle
Security system will provide the following
audible and visible signals:
The horn will pulse
The turn signals will flash
The vehicle security light in the instrument
cluster will flash
NOTE:
The Vehicle Security system is activated by the
Engine Immobilizer system, which is automati -
cally activated when you get out of the vehicle
with the key fob and lock the doors.
To Arm The System
Follow these steps to arm the Vehicle Security
system:
1. Make sure the vehicle’s ignition is placed in the OFF position.
2. Perform one of the following methods to lock the vehicle:
• Push the lock button on the interior
power door lock switch with the driver
and/or passenger door open.
• Push the lock button on the exterior
Passive Entry Door Handle with a valid
key fob available in the same exterior
zone
Ú
page 24.
• Push the lock button on the key fob.
3. If any doors (or trunk lid) are open, close them.
To Disarm The System
The Vehicle Security system can be disarmed
using any of the following methods:
Push the unlock button on the key fob.
Grab the Passive Entry door handle to
unlock the door
Ú
page 24.
Cycle the ignition out of the OFF position to
disarm the system.
21_GA_OM_EN_USC_t.book Page 21
Page 64 of 284
GETTING TO KNOW YOUR VEHICLE
62
HOOD
Opening
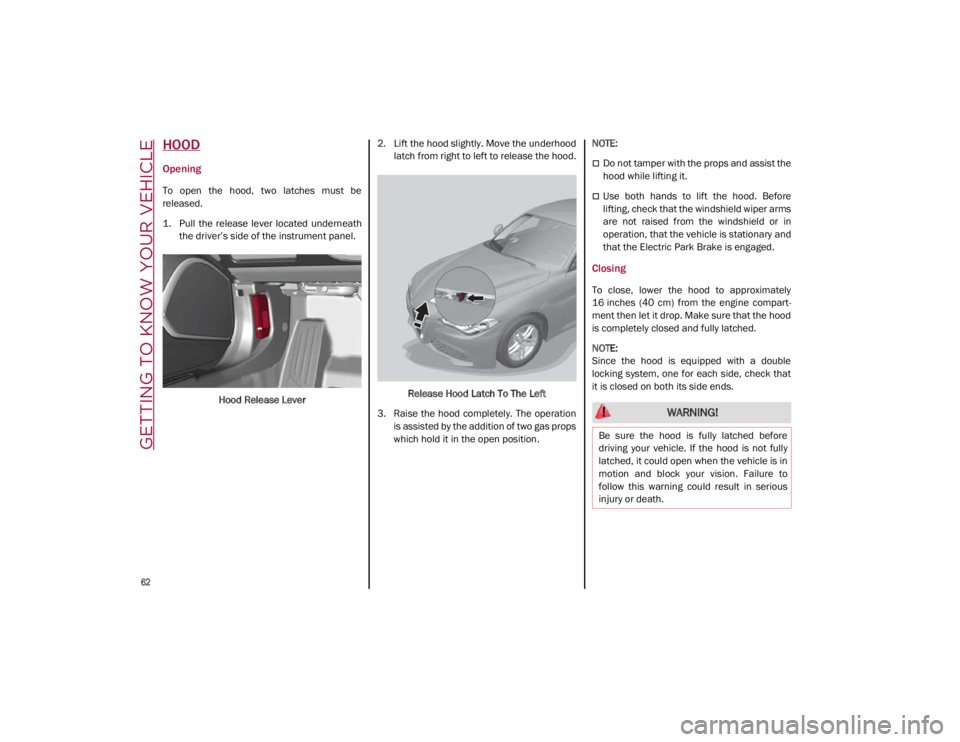
To open the hood, two latches must be
released.
1. Pull the release lever located underneaththe driver’s side of the instrument panel.
Hood Release Lever 2. Lift the hood slightly. Move the underhood
latch from right to left to release the hood.
Release Hood Latch To The Left
3. Raise the hood completely. The operation is assisted by the addition of two gas props
which hold it in the open position.
NOTE:
Do not tamper with the props and assist the
hood while lifting it.
Use both hands to lift the hood. Before
lifting, check that the windshield wiper arms
are not raised from the windshield or in
operation, that the vehicle is stationary and
that the Electric Park Brake is engaged.
Closing
To close, lower the hood to approximately
16 inches (40 cm) from the engine compart
-
ment then let it drop. Make sure that the hood
is completely closed and fully latched.
NOTE:
Since the hood is equipped with a double
locking system, one for each side, check that
it is closed on both its side ends.
WARNING!
Be sure the hood is fully latched before
driving your vehicle. If the hood is not fully
latched, it could open when the vehicle is in
motion and block your vision. Failure to
follow this warning could result in serious
injury or death.
21_GA_OM_EN_USC_t.book Page 62
Page 75 of 284
73
Show Audio Info: allows you to activate/
deactivate repetition of the audio function
screens (Radio and Media) also on the
instrument panel display.
Show Nav Info: allows you to activate/deac-
tivate repetition of the navigator function
screens also on the instrument panel
display.
Digital speed on all screens: this allows you
to activate/deactivating of digital speed on
the instrument panel display screens other
than the main screen.
Consumption Bar: allows you to activate/
deactivate the consumption baron the
display screens of the instrument panel
where it is available.
Performance pages: allows you to choose,
for each driving mode, one of the two alter -
native contents displayed in the screen.
Custom areas: allows you to select which
content to display in each of the three
customizable areas on the display of the
instrument panel: time, date, outside
temperature, radio information, compass.
Restore Cluster Settings: deletes the
current settings and restores the factory
settings.
To access and change the setting, turn and
push the Rotary Pad or press the desired
setting on the touchscreen.
WARNING LIGHTS AND
MESSAGES ON THE
INSTRUMENT PANEL
The following pages consist of warning lights
and messages.
NOTE:
The warning light turns on together with a
dedicated message and/or chime when
applicable. These indications are precau -
tionary and as such must not be considered
as exhaustive and/or alternative to the
information contained in the Owner’s
Manual, which you are advised to read care -
fully in all cases. Always refer to the informa -
tion in this section in the event of a failure
indication.
The failure indicators appearing on the
display are divided into two categories: very
serious and less serious faults. Serious
faults are indicated by a repeated and
prolonged warning "cycle.” Less serious
faults are indicated by a warning "cycle" with
a shorter duration. You can stop the
warning cycle in both cases by pushing the
button located on the windshield wiper
stalk. The instrument panel warning light
will stay on until the cause of the failure is
eliminated.
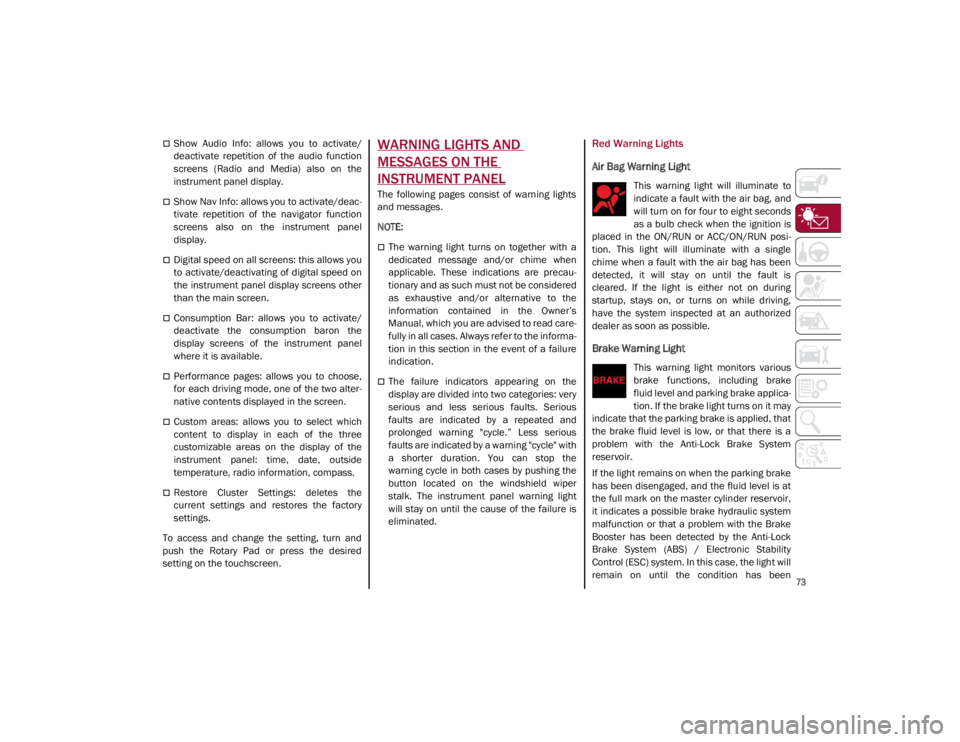
Red Warning Lights
Air Bag Warning Light
This warning light will illuminate to
indicate a fault with the air bag, and
will turn on for four to eight seconds
as a bulb check when the ignition is
placed in the ON/RUN or ACC/ON/RUN posi -
tion. This light will illuminate with a single
chime when a fault with the air bag has been
detected, it will stay on until the fault is
cleared. If the light is either not on during
startup, stays on, or turns on while driving,
have the system inspected at an authorized
dealer as soon as possible.
Brake Warning Light
This warning light monitors various
brake functions, including brake
fluid level and parking brake applica -
tion. If the brake light turns on it may
indicate that the parking brake is applied, that
the brake fluid level is low, or that there is a
problem with the Anti-Lock Brake System
reservoir.
If the light remains on when the parking brake
has been disengaged, and the fluid level is at
the full mark on the master cylinder reservoir,
it indicates a possible brake hydraulic system
malfunction or that a problem with the Brake
Booster has been detected by the Anti-Lock
Brake System (ABS) / Electronic Stability
Control (ESC) system. In this case, the light will
remain on until the condition has been
21_GA_OM_EN_USC_t.book Page 73
Page 76 of 284
GETTING TO KNOW YOUR INSTRUMENT PANEL
74
(Continued)
corrected. If the problem is related to the
brake booster, the ABS pump will run when
applying the brake, and a brake pedal pulsa-
tion may be felt during each stop.
The dual brake system provides a reserve
braking capacity in the event of a failure to a
portion of the hydraulic system. A leak in either
half of the dual brake system is indicated by
the Brake Warning Light, which will turn on
when the brake fluid level in the master
cylinder has dropped below a specified level.
The light will remain on until the cause is
corrected.
NOTE:
The light may flash momentarily during sharp
cornering maneuvers, which change fluid level
conditions. The vehicle should have service
performed, and the brake fluid level checked.
If brake failure is indicated, immediate repair
is necessary. Vehicles equipped with the Anti-Lock Brake
System (ABS) are also equipped with Elec
-
tronic Brake Force Distribution (EBD). In the
event of an EBD failure, the Brake Warning
Light will turn on along with the ABS Light.
Immediate repair to the ABS system is
required.
Operation of the Brake Warning Light can be
checked by turning the ignition switch from the
OFF position to the ON/RUN position. The light
should illuminate for approximately two
seconds. The light should then turn off unless
the parking brake is applied or a brake fault is
detected. If the light does not illuminate, have
the light inspected by an authorized dealer. The light also will turn on when the parking
brake is applied with the ignition switch in the
ON/RUN position.
NOTE:
This light shows only that the parking brake is
applied. It does not show the degree of brake
application.
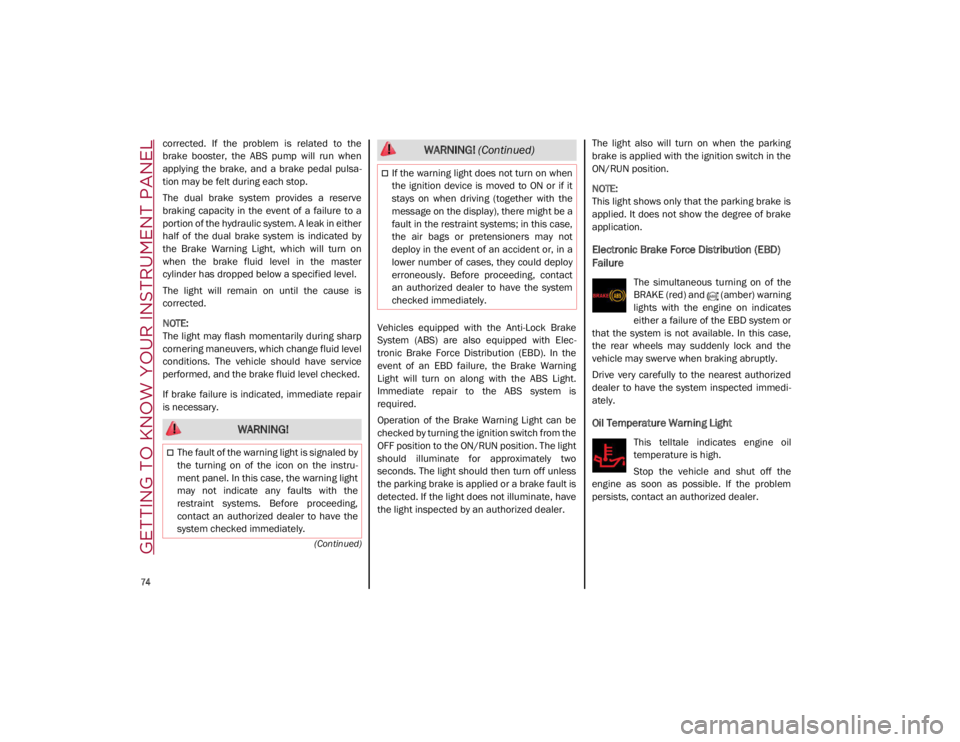
Electronic Brake Force Distribution (EBD)
Failure
The simultaneous turning on of the
BRAKE (red) and (amber) warning
lights with the engine on indicates
either a failure of the EBD system or
that the system is not available. In this case,
the rear wheels may suddenly lock and the
vehicle may swerve when braking abruptly.
Drive very carefully to the nearest authorized
dealer to have the system inspected immedi -
ately.
Oil Temperature Warning Light
This telltale indicates engine oil
temperature is high.
Stop the vehicle and shut off the
engine as soon as possible. If the problem
persists, contact an authorized dealer.
WARNING!
The fault of the warning light is signaled by
the turning on of the icon on the instru -
ment panel. In this case, the warning light
may not indicate any faults with the
restraint systems. Before proceeding,
contact an authorized dealer to have the
system checked immediately.
If the warning light does not turn on when
the ignition device is moved to ON or if it
stays on when driving (together with the
message on the display), there might be a
fault in the restraint systems; in this case,
the air bags or pretensioners may not
deploy in the event of an accident or, in a
lower number of cases, they could deploy
erroneously. Before proceeding, contact
an authorized dealer to have the system
checked immediately.
WARNING! (Continued)
21_GA_OM_EN_USC_t.book Page 74
Page 77 of 284
75
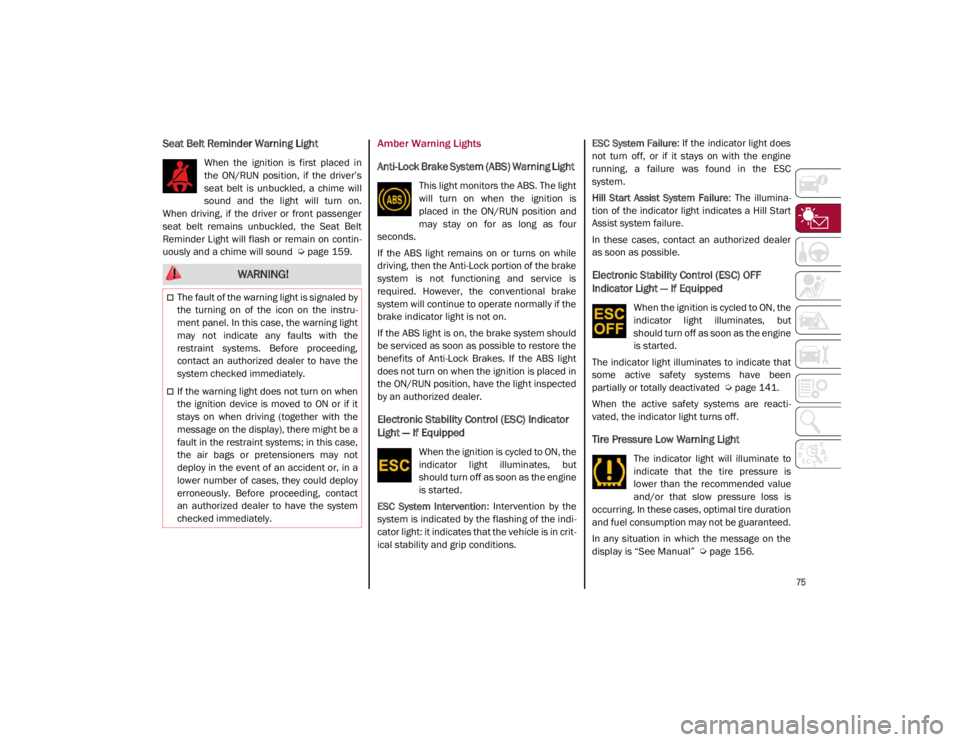
Seat Belt Reminder Warning Light
When the ignition is first placed in
the ON/RUN position, if the driver’s
seat belt is unbuckled, a chime will
sound and the light will turn on.
When driving, if the driver or front passenger
seat belt remains unbuckled, the Seat Belt
Reminder Light will flash or remain on contin -
uously and a chime will sound
Ú
page 159.
Amber Warning Lights
Anti-Lock Brake System (ABS) Warning Light
This light monitors the ABS. The light
will turn on when the ignition is
placed in the ON/RUN position and
may stay on for as long as four
seconds.
If the ABS light remains on or turns on while
driving, then the Anti-Lock portion of the brake
system is not functioning and service is
required. However, the conventional brake
system will continue to operate normally if the
brake indicator light is not on.
If the ABS light is on, the brake system should
be serviced as soon as possible to restore the
benefits of Anti-Lock Brakes. If the ABS light
does not turn on when the ignition is placed in
the ON/RUN position, have the light inspected
by an authorized dealer.
Electronic Stability Control (ESC) Indicator
Light — If Equipped
When the ignition is cycled to ON, the
indicator light illuminates, but
should turn off as soon as the engine
is started.
ESC System Intervention : Intervention by the
system is indicated by the flashing of the indi -
cator light: it indicates that the vehicle is in crit -
ical stability and grip conditions. ESC System Failure
: If the indicator light does
not turn off, or if it stays on with the engine
running, a failure was found in the ESC
system.
Hill Start Assist System Failure : The illumina-
tion of the indicator light indicates a Hill Start
Assist system failure.
In these cases, contact an authorized dealer
as soon as possible.
Electronic Stability Control (ESC) OFF
Indicator Light — If Equipped
When the ignition is cycled to ON, the
indicator light illuminates, but
should turn off as soon as the engine
is started.
The indicator light illuminates to indicate that
some active safety systems have been
partially or totally deactivated
Ú
page 141.
When the active safety systems are reacti -
vated, the indicator light turns off.
Tire Pressure Low Warning Light
The indicator light will illuminate to
indicate that the tire pressure is
lower than the recommended value
and/or that slow pressure loss is
occurring. In these cases, optimal tire duration
and fuel consumption may not be guaranteed.
In any situation in which the message on the
display is “See Manual”
Ú
page 156.
WARNING!
The fault of the warning light is signaled by
the turning on of the icon on the instru -
ment panel. In this case, the warning light
may not indicate any faults with the
restraint systems. Before proceeding,
contact an authorized dealer to have the
system checked immediately.
If the warning light does not turn on when
the ignition device is moved to ON or if it
stays on when driving (together with the
message on the display), there might be a
fault in the restraint systems; in this case,
the air bags or pretensioners may not
deploy in the event of an accident or, in a
lower number of cases, they could deploy
erroneously. Before proceeding, contact
an authorized dealer to have the system
checked immediately.
21_GA_OM_EN_USC_t.book Page 75