start stop button ALFA ROMEO GIULIA 2022 User Guide
[x] Cancel search | Manufacturer: ALFA ROMEO, Model Year: 2022, Model line: GIULIA, Model: ALFA ROMEO GIULIA 2022Pages: 248, PDF Size: 9.71 MB
Page 72 of 248

GETTING TO KNOW YOUR INSTRUMENT PANEL
70
To access and change the setting, turn and push
the Rotary Pad or press the desired setting on the
touchscreen.
Clock & Date
The following settings can be modified under the
“Clock & Date” menu:
Sync With GPS Time (if equipped): activates or
deactivates the clock synchronization through
the GPS. If the function is deactivated, the
options Set Time and Set Date are enabled
Set Time: set the time manually
Time Format: set the time format to either a
12-hour or a 24-hour clock
Set Date: set the date manually
Restore Clock & Date Settings: restores the
factory settings
To access and change the setting, turn and push
the Rotary Pad or press the desired setting on the
touchscreen.
Cluster
The following settings can be modified when this
mode is selected:
Warning Buzzer Volume: set the volume of the
warning buzzer on seven levels
Trip B: activate or deactivate the Trip function
Show Phone Info: activate/deactivate
repetition of the phone function screens also
on the instrument panel display
Show Audio Info: activate/deactivate
repetition of the audio function screens (Radio
and Media) also on the instrument panel
display
Show Nav Info (if equipped): activate/
deactivate repetition of the navigator function
screens also on the instrument panel display
Digital speed on all screens: activate/deacti -
vating of digital speed on the instrument panel
display screens other than the main screen
Consumption Bar: activate/deactivate the
consumption baron the display screens of the
instrument panel where it is available
Performance pages: choose, for each driving
mode, one of the two alternative contents
displayed in the screen
Custom areas: select which content to display
in each of the three customizable areas on the
display of the instrument panel: time, date,
outside temperature, radio information,
compass
Restore Cluster Settings: deletes the current
settings and restores the factory settings
To access and change the setting, turn and push
the Rotary Pad or press the desired setting on the
touchscreen.
WARNING LIGHTS AND
MESSAGES ON THE
INSTRUMENT PANEL
The following pages consist of warning lights and
messages.
NOTE:
The warning light turns on together with a
dedicated message and/or chime when
applicable. These indications are precau -
tionary and as such must not be considered as
exhaustive and/or alternative to the information contained in the Owner’s Manual,
which you are advised to read carefully in all
cases. Always refer to the information in this
section in the event of a failure indication.
The failure indicators appearing on the display
are divided into two categories: very serious
and less serious faults. Serious faults are
indicated by a repeated and prolonged
warning "cycle.” Less serious faults are
indicated by a warning "cycle" with a shorter
duration. You can stop the warning cycle in
both cases by pushing the button located on
the windshield wiper stalk. The instrument
panel warning light will stay on until the cause
of the failure is eliminated.
RED WARNING LIGHTS
Air Bag Warning Light
This warning light will illuminate to
indicate a fault with the air bag, and will
turn on for four to eight seconds as a
bulb check when the ignition is placed
in the ON/RUN or ACC/ON/RUN position. This
light will illuminate with a single chime when a
fault with the air bag has been detected, it will
stay on until the fault is cleared. If the light is
either not on during startup, stays on, or turns on
while driving, have the system inspected at an
authorized dealer as soon as possible.
Brake Warning Light
This warning light monitors various
brake functions, including brake fluid
level and parking brake application. If
the brake light turns on it may indicate
that the parking brake is applied, that the brake
fluid level is low, or that there is a problem with
the Anti-Lock Brake System reservoir.
22_GA_OM_EN_USC_t.book Page 70
Page 85 of 248
83
AFTER STARTING — WARMING UP THE
E
NGINE
Proceed as follows:
Travel slowly, letting the engine run at a
reduced RPM, without accelerating suddenly.
It is recommended to wait until the digital
engine coolant temperature indicator starts to
rise for maximum performance.
STOPPING THE ENGINE
To stop the engine, proceed as follows:
1. Park the vehicle in a position that is not
dangerous for oncoming traffic.
2. Engage the PARK (P) mode.
3. With engine idling, push the ENGINE START/ STOP button on the steering wheel to STOP
the engine.
NOTE:
Do not leave the ignition in ACC position when the
engine is off.
To shut off the engine with vehicle speed greater
than 5 mph (8 km/h), you must push and hold
the ignition or push the ENGINE START/STOP
button three times consecutively within a few
seconds. The engine will shut down, and the
ignition will be placed in the ACC position.
With the keyless ignition system, it is possible to
leave the vehicle taking the key fob with you
without the engine switching off. The vehicle will
inform the absence of the key on board, only if the
doors are closed. After stopping the engine (cycling from the ACC to
the OFF position), the accessories are still
powered for about three minutes, or until a door
is opened.
When the ignition is in the OFF position, the
window switches remain active for three minutes.
Opening a front door will cancel this function.
After severe driving, idle the engine to allow the
temperature inside the engine compartment to
cool before shutting off the engine.
TURBOCHARGER COOL DOWN
It is recommended before switching the vehicle
off, to keep the engine idling for a few minutes so
that the turbocharger can be suitably lubricated.
This procedure is particularly recommended after
severe driving.
After a full load operation, keep the engine idling
for three to five minutes before switching it off.
This time allows the lubricating oil and the engine
coolant to eliminate the excessive heat from
combustion chamber, bearings, inner
components and turbocharger.
ENGINE BLOCK HEATER —
IF EQUIPPED
The engine block heater warms the engine and
permits quicker starts in cold weather.
Connect the cord to a 110-115 Volt AC electrical
outlet with a grounded, three-wire extension cord.
For ambient temperatures below 0°F (-18°C),
the engine block heater is recommended. For
ambient temperatures below -20°F (-29°C), the
engine block heater is required.Follow the steps below to properly use the engine
block heater:
1. Locate the engine block heater cord (access
door on the passenger side wiper cowl).
2. Pull the cord to the front of the vehicle and plug it into a grounded, three-wire extension
cord.
3. After the vehicle is running, properly stow away behind access door on the passenger
side wiper cowl.
NOTE:
The engine block heater cord is a factory
installed option. If your vehicle is not equipped,
heater cords are available from an authorized
dealer.
The engine block heater will require 110 Volts
AC and 6.5 Amps to activate the heater
element.
The engine block heater must be plugged in at
least one hour to have a warming effect on the
engine and at least four hours to have a
warming effect when ambient temperatures
are below -20°F (-29°C).
WARNING!
Remember to disconnect the engine block
heater cord before driving. Damage to the
110-115 Volt electrical cord could cause
electrocution.
22_GA_OM_EN_USC_t.book Page 83
Page 90 of 248
STARTING AND OPERATING
88
(Continued)
(Continued)
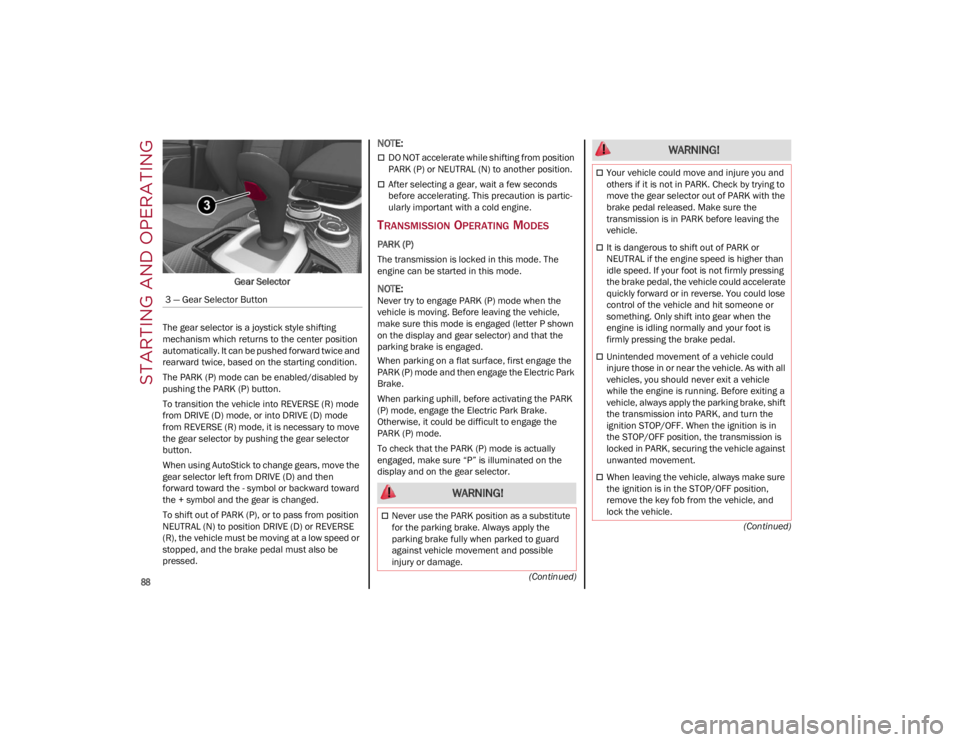
Gear Selector
The gear selector is a joystick style shifting
mechanism which returns to the center position
automatically. It can be pushed forward twice and
rearward twice, based on the starting condition.
The PARK (P) mode can be enabled/disabled by
pushing the PARK (P) button.
To transition the vehicle into REVERSE (R) mode
from DRIVE (D) mode, or into DRIVE (D) mode
from REVERSE (R) mode, it is necessary to move
the gear selector by pushing the gear selector
button.
When using AutoStick to change gears, move the
gear selector left from DRIVE (D) and then
forward toward the - symbol or backward toward
the + symbol and the gear is changed.
To shift out of PARK (P), or to pass from position
NEUTRAL (N) to position DRIVE (D) or REVERSE
(R), the vehicle must be moving at a low speed or
stopped, and the brake pedal must also be
pressed.
NOTE:
DO NOT accelerate while shifting from position
PARK (P) or NEUTRAL (N) to another position.
After selecting a gear, wait a few seconds
before accelerating. This precaution is partic -
ularly important with a cold engine.
TRANSMISSION OPERATING MODES
PARK (P)
The transmission is locked in this mode. The
engine can be started in this mode.
NOTE:
Never try to engage PARK (P) mode when the
vehicle is moving. Before leaving the vehicle,
make sure this mode is engaged (letter P shown
on the display and gear selector) and that the
parking brake is engaged.
When parking on a flat surface, first engage the
PARK (P) mode and then engage the Electric Park
Brake.
When parking uphill, before activating the PARK
(P) mode, engage the Electric Park Brake.
Otherwise, it could be difficult to engage the
PARK (P) mode.
To check that the PARK (P) mode is actually
engaged, make sure “P” is illuminated on the
display and on the gear selector.
3 — Gear Selector Button
WARNING!
Never use the PARK position as a substitute
for the parking brake. Always apply the
parking brake fully when parked to guard
against vehicle movement and possible
injury or damage.
Your vehicle could move and injure you and
others if it is not in PARK. Check by trying to
move the gear selector out of PARK with the
brake pedal released. Make sure the
transmission is in PARK before leaving the
vehicle.
It is dangerous to shift out of PARK or
NEUTRAL if the engine speed is higher than
idle speed. If your foot is not firmly pressing
the brake pedal, the vehicle could accelerate
quickly forward or in reverse. You could lose
control of the vehicle and hit someone or
something. Only shift into gear when the
engine is idling normally and your foot is
firmly pressing the brake pedal.
Unintended movement of a vehicle could
injure those in or near the vehicle. As with all
vehicles, you should never exit a vehicle
while the engine is running. Before exiting a
vehicle, always apply the parking brake, shift
the transmission into PARK, and turn the
ignition STOP/OFF. When the ignition is in
the STOP/OFF position, the transmission is
locked in PARK, securing the vehicle against
unwanted movement.
When leaving the vehicle, always make sure
the ignition is in the STOP/OFF position,
remove the key fob from the vehicle, and
lock the vehicle.
WARNING!
22_GA_OM_EN_USC_t.book Page 88
Page 91 of 248
89
REVERSE (R)
Select this mode only with the vehicle at a
standstill.
NEUTRAL (N)
Use this range when the vehicle is standing for
prolonged periods with the engine running. The
engine may be started in this range. Apply the Electric Park Brake and shift the transmission
into PARK (P) if you must leave the vehicle.
DRIVE (D)
Use this mode in normal driving conditions.
Shifting from DRIVE (D) to PARK (P) or REVERSE
(R) modes must take place only after releasing
the accelerator pedal, with vehicle at a standstill
and brake pedal pressed.
This mode ensures automatic engagement of the
most suitable gears for driving needs and
maximum fuel economy in terms of consumption.
In this position, the transmission shifts the gears
automatically, selecting the most suitable for
forward driving among those available as you go.
This ensures the vehicle's optimal driving charac
-
teristics are provided for all conditions.
AutoStick
In the case of frequent shifting (e.g. for sport
driving, when the vehicle is driven with a heavy
load or on slopes), it is recommended to use the
AutoStick (sequential shifting) mode to select and
keep a lower fixed ratio.
In these conditions, the use of a lower gear
improves vehicle performance, preventing
overheating. It is possible to shift from DRIVE (D) mode to
sequential mode regardless of vehicle speed.
Activation
Starting from DRIVE (D), move the selector to the
left (– and + indication of the trim) to activate the
sequential drive mode. The gear engaged will be
shown on the display.
Shifting is made by moving the gear selector
forwards, towards symbol – or backwards,
towards symbol +.
Steering Wheel Shift Paddles — If Equipped
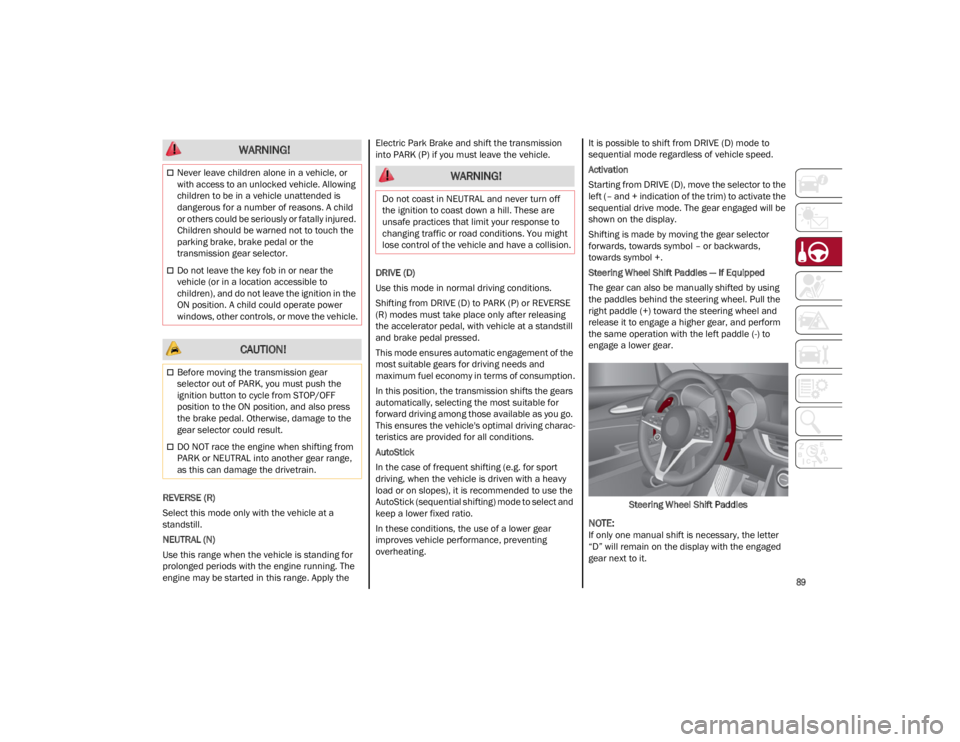
The gear can also be manually shifted by using
the paddles behind the steering wheel. Pull the
right paddle (+) toward the steering wheel and
release it to engage a higher gear, and perform
the same operation with the left paddle (-) to
engage a lower gear.
Steering Wheel Shift Paddles
NOTE:
If only one manual shift is necessary, the letter
“D” will remain on the display with the engaged
gear next to it.
Never leave children alone in a vehicle, or
with access to an unlocked vehicle. Allowing
children to be in a vehicle unattended is
dangerous for a number of reasons. A child
or others could be seriously or fatally injured.
Children should be warned not to touch the
parking brake, brake pedal or the
transmission gear selector.
Do not leave the key fob in or near the
vehicle (or in a location accessible to
children), and do not leave the ignition in the
ON position. A child could operate power
windows, other controls, or move the vehicle.
CAUTION!
Before moving the transmission gear
selector out of PARK, you must push the
ignition button to cycle from STOP/OFF
position to the ON position, and also press
the brake pedal. Otherwise, damage to the
gear selector could result.
DO NOT race the engine when shifting from
PARK or NEUTRAL into another gear range,
as this can damage the drivetrain.
WARNING!
WARNING!
Do not coast in NEUTRAL and never turn off
the ignition to coast down a hill. These are
unsafe practices that limit your response to
changing traffic or road conditions. You might
lose control of the vehicle and have a collision.
22_GA_OM_EN_USC_t.book Page 89
Page 92 of 248
STARTING AND OPERATING
90
Deactivation
To deactivate the sequential driving mode, bring
the gear selector back in position DRIVE (D)
(“automatic” driving mode).
NOTE:
To select the correct gear for maximum
deceleration (engine brake), just keep the gear
paddle pulled (–): the transmission goes to an
operating mode in which the vehicle can slow
down easily.
The vehicle will keep the gear selected by the
driver until the safety conditions allow it.
This means, for example, that the system will
try to prevent the engine from switching off,
automatically downshifting if the engine speed
is too low.
AUTOMATIC TRANSMISSION LIMP HOME
M
ODE
Transmission function is monitored electronically
for abnormal conditions. If a condition is detected
that could result in transmission damage,
Transmission Limp Home Mode is activated.
In this condition, the transmission stays in
FOURTH gear, regardless of the selected gear. Positions PARK (P), REVERSE (R) and NEUTRAL
(N) still work.
The symbol might light up in the instrument
cluster.
Temporary failure
In the event of a momentary problem, the
transmission can be reset to regain all forward
gears by performing the following steps:
1. Stop the vehicle.
2. Shift the transmission into PARK (P), if
possible. If not, shift the transmission to
NEUTRAL (N).
3. Push and hold the ignition until the engine turns off.
4. Wait for about 10 seconds, then restart the engine.
5. Shift into the desired gear range. If the problem is no longer detected, the transmis -
sion will return to normal operation.
NOTE:
Even if the transmission can be reset, we recom -
mend that you visit an authorized dealer at your
earliest possible convenience. An authorized
dealer has diagnostic equipment to determine if
the problem could reoccur. If the transmission
cannot be reset, service is required at an autho -
rized dealer.
BRAKE/TRANSMISSION SHIFT INTERLOCK
(BTSI) S
YSTEM
This vehicle is equipped with a BTSI system that
holds the gear selector in PARK (P) unless the
brakes are applied. This system prevents you from moving the gear
selector from position PARK (P) unless the brakes
are applied.
To shift the transmission out of PARK (P), the
ignition must be placed in the ON/RUN position
(engine running or not) and the brake pedal must
be pressed.
Brake/Transmission Shift Interlock Disabling
Only if strictly necessary (e.g. pushing the vehicle,
conveyor vehicle washing systems) inhibit the
automatic activation of PARK (P) mode when
stopping the engine, or proceed as follows:
1. Vehicle at a standstill.
2. NEUTRAL (N) mode activated.
3. Push the ignition button for at least three
seconds.
The automatic parking brake engagement
function when the engine is stopped can also be
deactivated on the Information and
Entertainment system by selecting the following
functions on the main menu: “Settings”, “Driver
Assistance” and “Automatic Parking Brake”.
IMPORTANT NOTES
Failure to comply with the following may damage
the transmission:
Shift into PARK (P) mode only with the vehicle
at a standstill.
Select REVERSE (R) mode, or pass from
REVERSE to another mode only with the
vehicle at a standstill and engine idling.
WARNING!
Do not downshift for additional engine braking
on a slippery surface. The drive wheels could
lose their grip and the vehicle could skid,
causing a collision or personal injury.
22_GA_OM_EN_USC_t.book Page 90
Page 96 of 248
STARTING AND OPERATING
94
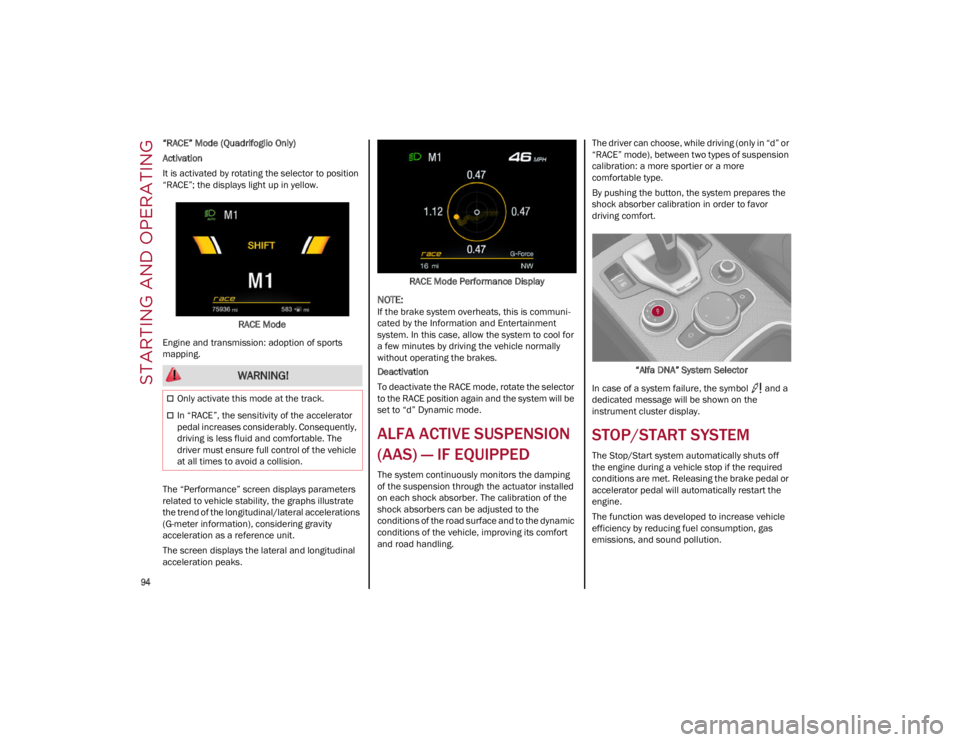
“RACE” Mode (Quadrifoglio Only)
Activation
It is activated by rotating the selector to position
“RACE”; the displays light up in yellow.RACE Mode
Engine and transmission: adoption of sports
mapping.
The “Performance” screen displays parameters
related to vehicle stability, the graphs illustrate
the trend of the longitudinal/lateral accelerations
(G-meter information), considering gravity
acceleration as a reference unit.
The screen displays the lateral and longitudinal
acceleration peaks. RACE Mode Performance Display
NOTE:
If the brake system overheats, this is communi
-
cated by the Information and Entertainment
system. In this case, allow the system to cool for
a few minutes by driving the vehicle normally
without operating the brakes.
Deactivation
To deactivate the RACE mode, rotate the selector
to the RACE position again and the system will be
set to “d” Dynamic mode.
ALFA ACTIVE SUSPENSION
(AAS) — IF EQUIPPED
The system continuously monitors the damping
of the suspension through the actuator installed
on each shock absorber. The calibration of the
shock absorbers can be adjusted to the
conditions of the road surface and to the dynamic
conditions of the vehicle, improving its comfort
and road handling. The driver can choose, while driving (only in “d” or
“RACE” mode), between two types of suspension
calibration: a more sportier or a more
comfortable type.
By pushing the button, the system prepares the
shock absorber calibration in order to favor
driving comfort.
“Alfa DNA” System Selector
In case of a system failure, the symbol and a
dedicated message will be shown on the
instrument cluster display.
STOP/START SYSTEM
The Stop/Start system automatically shuts off
the engine during a vehicle stop if the required
conditions are met. Releasing the brake pedal or
accelerator pedal will automatically restart the
engine.
The function was developed to increase vehicle
efficiency by reducing fuel consumption, gas
emissions, and sound pollution.
WARNING!
Only activate this mode at the track.
In “RACE”, the sensitivity of the accelerator
pedal increases considerably. Consequently,
driving is less fluid and comfortable. The
driver must ensure full control of the vehicle
at all times to avoid a collision.
22_GA_OM_EN_USC_t.book Page 94
Page 97 of 248
95
OPERATING MODE
Stopping the Engine
With vehicle at a standstill and brake pedal
pressed, the engine switches off if the gear
selector is in a position other than REVERSE (R).
The system does not operate when the gear
selector is in REVERSE (R), in order to make
parking maneuvers easier.
In the event of stops uphill, engine switching off is
disabled to make the “Hill Start Assist” function
available (works only with running engine).
NOTE:
The engine can only be automatically stopped
after having run at about 6 mph (10 km/h). After
an automatic restart, the vehicle only needs to
exceed a speed of 0.3 mph (0.5 km/h) to stop the
engine.
Engine stopping is signaled by the symbol
lighting up on the instrument cluster display.
Restarting the Engine
To restart the engine, release the brake pedal or
turn the steering wheel slightly (if equipped).
With the brake pressed and the transmission in
automatic mode DRIVE (D), the engine will restart
by shifting to REVERSE (R), to PARK (P) or to
“AutoStick”.
With the brake pressed while the gear selector is
in “AutoStick” mode, the engine will restart by
shifting to PARK (P) or by moving the selector
to + or -.
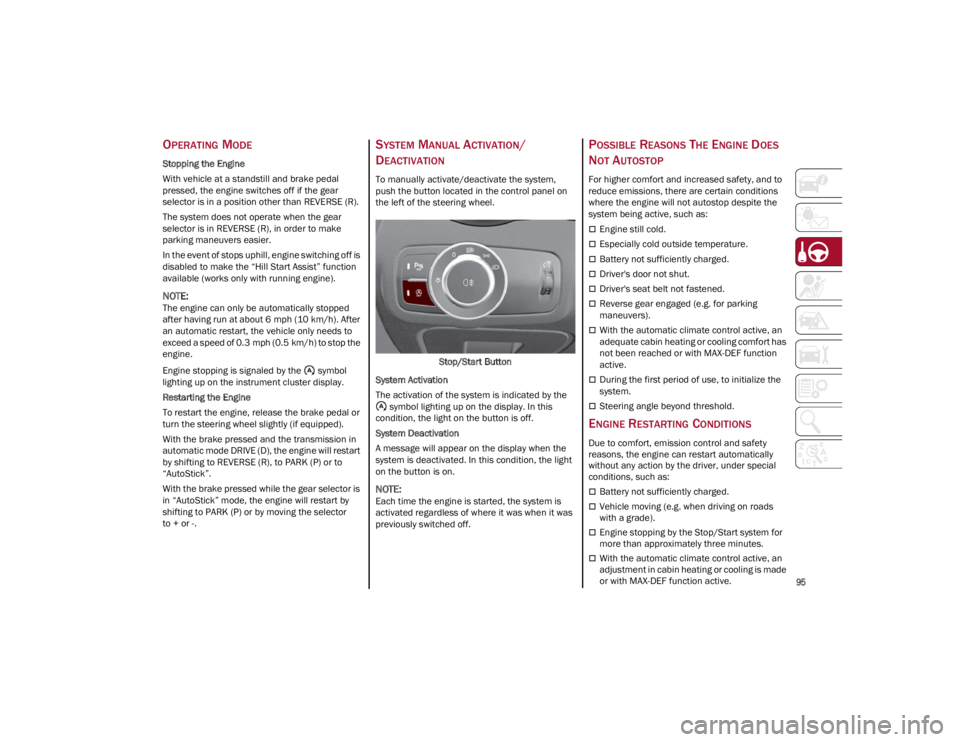
SYSTEM MANUAL ACTIVATION/
D
EACTIVATION
To manually activate/deactivate the system,
push the button located in the control panel on
the left of the steering wheel.
Stop/Start Button
System Activation
The activation of the system is indicated by the symbol lighting up on the display. In this
condition, the light on the button is off.
System Deactivation
A message will appear on the display when the
system is deactivated. In this condition, the light
on the button is on.
NOTE:
Each time the engine is started, the system is
activated regardless of where it was when it was
previously switched off.
POSSIBLE REASONS THE ENGINE DOES
N
OT AUTOSTOP
For higher comfort and increased safety, and to
reduce emissions, there are certain conditions
where the engine will not autostop despite the
system being active, such as:
Engine still cold.
Especially cold outside temperature.
Battery not sufficiently charged.
Driver's door not shut.
Driver's seat belt not fastened.
Reverse gear engaged (e.g. for parking
maneuvers).
With the automatic climate control active, an
adequate cabin heating or cooling comfort has
not been reached or with MAX-DEF function
active.
During the first period of use, to initialize the
system.
Steering angle beyond threshold.
ENGINE RESTARTING CONDITIONS
Due to comfort, emission control and safety
reasons, the engine can restart automatically
without any action by the driver, under special
conditions, such as:
Battery not sufficiently charged.
Vehicle moving (e.g. when driving on roads
with a grade).
Engine stopping by the Stop/Start system for
more than approximately three minutes.
With the automatic climate control active, an
adjustment in cabin heating or cooling is made
or with MAX-DEF function active.
22_GA_OM_EN_USC_t.book Page 95
Page 103 of 248
101
Activating Adaptive Cruise Control (ACC)
The minimum set speed for the ACC system is
19 mph (30 km/h) and the maximum is 110 mph
(180 km/h).
The system cannot be activated:
When pressing the brake pedal.
When the brakes are overheated.
When the Electric Park Brake has been
operated.
When either PARK, REVERSE or NEUTRAL is
engaged.
When the engine RPM is above a maximum
threshold.
When the vehicle speed is not within the
operational speed range.
When the Electronic Stability Control (ESC) (or
Anti-Lock Brake System (ABS) or other stability
control systems) are operating or have just
operated.
When the ESC system is off.
When the Forward Collision Warning system (if
equipped) is braking automatically.
In the event of a system failure.
When the engine is off.
In case of obstruction of the radar sensor (in
this case the bumper area where it is located
must be cleaned).
If the system is set, the conditions described
above also cause a cancellation or deactivation
of the system. These situations may vary
according to the conditions.
NOTE:
The system will not be deactivated when speeds
higher than those set are reached by pressing the
accelerator pedal above 110 mph (180 km/h). In
these situations, the system may not work
correctly and it is recommended to deactivate it.
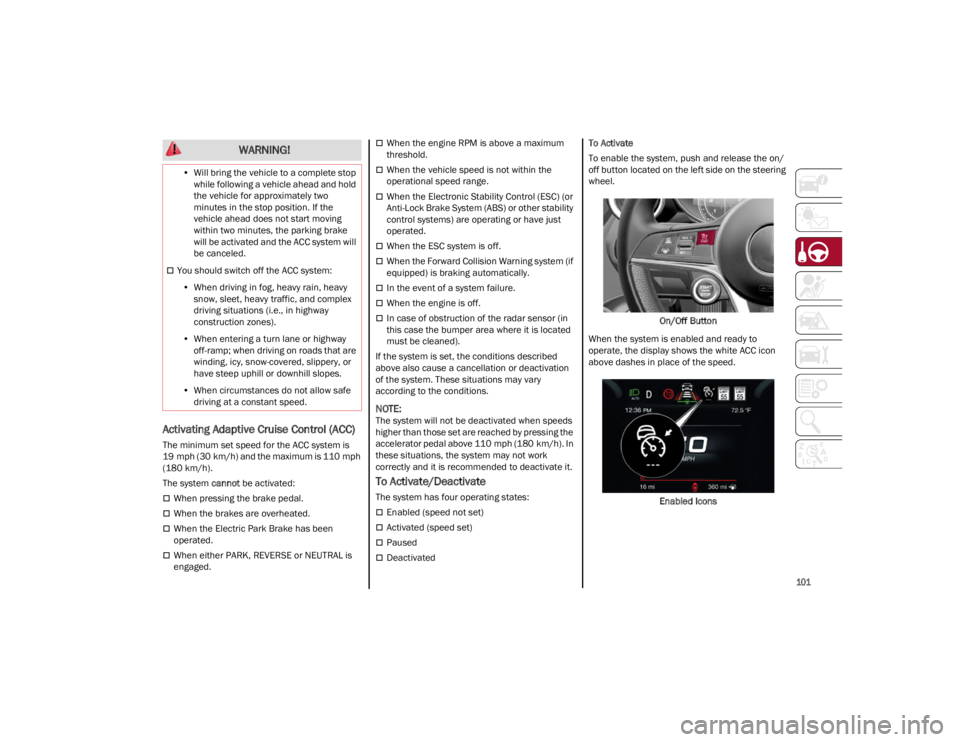
To Activate/Deactivate
The system has four operating states:
Enabled (speed not set)
Activated (speed set)
Paused
Deactivated To Activate
To enable the system, push and release the on/
off button located on the left side on the steering
wheel.
On/Off Button
When the system is enabled and ready to
operate, the display shows the white ACC icon
above dashes in place of the speed.
Enabled Icons
•
Will bring the vehicle to a complete stop
while following a vehicle ahead and holdthe vehicle for approximately twominutes in the stop position. If thevehicle ahead does not start movingwithin two minutes, the parking brakewill be activated and the ACC system will be canceled.
You should switch off the ACC system:
• When driving in fog, heavy rain, heavy
sn
ow, sleet, heavy traffic, and complex
driving situations (i.e., in highway construction zones).
• When entering a turn lane or highway
off-ramp; when driving on roads that are winding, icy, snow-covered, slippery, or have steep uphill or downhill slopes.
• When circumstances do not allow safe
driving at a constant speed.
WARNING!
22_GA_OM_EN_USC_t.book Page 101
Page 106 of 248
STARTING AND OPERATING
104
Overtake Aid
When driving with ACC engaged and following a
vehicle at a speed greater than 45 mph
(70 km/h), the system will provide an additional
acceleration up to the ACC set speed to assist in
passing the vehicle. This additional acceleration
is triggered when the driver utilizes the left turn
signal and will only be active when passing on the
left hand side.
The system detects the direction of traffic
automatically when the vehicle passes from left
hand traffic to right hand traffic. In this case, the
overtaking assist function is only active when the
reference vehicle is overtaken on the right. The
additional acceleration is deactivated when the
driver uses the right direction indicator and
returns to the original lane.
“Stop And Go” Function
The “Stop and Go” operating strategy allows you
to maintain a safe distance from the vehicle
ahead until the vehicle has completely stopped.
In the event that the ACC system brings your
vehicle to a standstill while following the vehicle
in front, if the vehicle in front starts moving within
two seconds of your vehicle coming to a
standstill, your vehicle will resume motion
without the need for any driver action.
If the vehicle in front does not start moving within
two seconds of your vehicle coming to a standstill, the driver will have to push the RES/
SET switch upward to restart.
Deactivation
The system is deactivated and the set speed is
canceled if:
The on/off button is pushed (when the system
is on or paused)
The ignition is placed in the OFF position
RACE mode is activated (Quadrifoglio models)
The system is canceled (the set speed and
distance are stored):
When the system is paused
Ú
page 101
When the conditions shown in the “Activating
Adaptive Cruise Control (ACC)” section occur
Ú
page 101
Limited Operation Warning
If the dedicated message is shown on the display,
a condition limiting the Adaptive Cruise Control
operation may have occurred.
This could be due to an obstruction of the
vehicle’s sensor or camera. It could also be due
to a fault in the system. If an obstruction is
detected, clean the area of the windshield
opposite the interior rearview mirror, where the
camera is located, as well as the area of the front bumper where the sensor is located. Then check
that the message has disappeared.
When the conditions limiting the system
functions end, normal operation will resume.
Should the fault persist, contact an authorized
dealer.
Precautions While Driving With ACC
In certain driving situations, ACC may have
detection issues. In these cases, ACC may brake
late or unexpectedly. The driver needs to stay
alert and may need to intervene. The following
are examples of these types of situations:
Offset Driving
ACC may not detect a vehicle in the same lane
that is offset from your direct line of travel, or a
vehicle merging in from a side lane. There may
not be sufficient distance to the vehicle ahead.
The offset vehicle may move in and out of the line
of travel, which can cause your vehicle to brake or
accelerate unexpectedly.
Turns And Bends
When driving on a curve with ACC engaged, the
system may increase or decrease the vehicle
speed for stability, with no vehicle ahead
detected. Once the vehicle is out of the curve the
system will resume your original set speed. This is
a part of normal ACC system functionality.
NOTE:
On tight turns ACC performance may be
limited. In this case, it is advisable to
deactivate the system.
The system only limits the speed DURING a
bend and not BEFORE it.
The driver is fully responsible for holding a
safe distance from the vehicle ahead
respecting the highway code in force in the
respective country.
WARNING!
WARNING!
When the ACC system is resumed, the driver
must ensure that there are no pedestrians,
vehicles or objects in the path of the vehicle.
Failure to follow these warnings can result in a
collision and death or serious personal injury.
22_GA_OM_EN_USC_t.book Page 104
Page 118 of 248
STARTING AND OPERATING
116
PARKSENSE DISPLAY
The driver can select the type of warning they
would like to be displayed through the radio
system. To access the function on the main
menu, select in the following order:
1. Driver Assistance
2. ParkSense
3. Mode
4. Sound and Display
Visual Indications
The system indicates the presence of an obstacle
by displaying a single red arc in the detected
area, in relation to the distance of the object and
the position of the vehicle.
If the obstacle is detected in the front or rear
central area, a single red arc will be displayed as
the obstacle approaches, first constant, then
flashing, in addition to an acoustic signal.
If the obstacle is detected in the front or rear left
and/or right area, a single red flashing arc will be
shown in the corresponding area on the display
and the system will emit an acoustic signal, either
at frequent intervals or constantly.
In general, the vehicle is closer to the obstacle
when a single red flashing arc is shown on the
display and the acoustic signal becomes
continuous.
If several obstacles are detected simultaneously
in the front and rear area, the display will show all
of them, regardless of the area in which they were
detected.It is not possible to exit from the display screen
while the vehicle is in REVERSE.
Acoustic Signal
In the presence of an obstacle at the front or the
rear of the vehicle, an acoustic signal with
variable frequency will sound:
The acoustic signal increases in frequency as
the distance between the vehicle and the
obstacle decreases.
The acoustic signal becomes continuous when
the distance between the vehicle and the
obstacle is less than 11 inches (30 cm), and
stops if the distance increases.
The acoustic signal is constant if the distance
between the vehicle and the obstacle is
unchanged.
NOTE:
If the sensors detect several front and rear obsta
-
cles, the closest obstacle is considered. An inter -
mittent signal will sound if the obstacles are at
the same distance (front and rear).
When the system emits an acoustic signal, the
volume of the radio system, if activated, is
automatically lowered.
An acoustic signal will not sound if the vehicle is
in PARK.
ENABLING AND DISABLING PARKSENSE
For vehicles only equipped with rear sensors, to
turn the system off, push the ParkSense button
located to the left of the headlight switch. The
indicator light within the button will illuminate
when the system is turned off. Pushing the button
a second time will turn the system back on, and
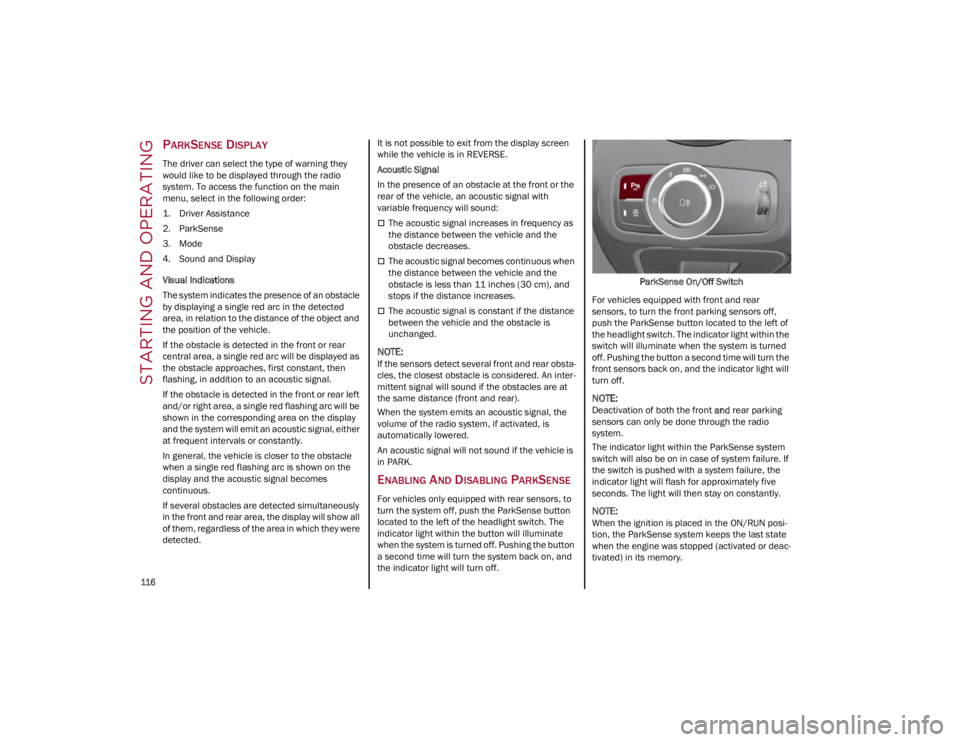
the indicator light will turn off. ParkSense On/Off Switch
For vehicles equipped with front and rear
sensors, to turn the front parking sensors off,
push the ParkSense button located to the left of
the headlight switch. The indicator light within the
switch will illuminate when the system is turned
off. Pushing the button a second time will turn the
front sensors back on, and the indicator light will
turn off.
NOTE:
Deactivation of both the front and rear parking
sensors can only be done through the radio
system.
The indicator light within the ParkSense system
switch will also be on in case of system failure. If
the switch is pushed with a system failure, the
indicator light will flash for approximately five
seconds. The light will then stay on constantly.
NOTE:
When the ignition is placed in the ON/RUN posi -
tion, the ParkSense system keeps the last state
when the engine was stopped (activated or deac -
tivated) in its memory.
22_GA_OM_EN_USC_t.book Page 116