heating ALFA ROMEO GIULIA 2022 Owners Manual
[x] Cancel search | Manufacturer: ALFA ROMEO, Model Year: 2022, Model line: GIULIA, Model: ALFA ROMEO GIULIA 2022Pages: 248, PDF Size: 9.71 MB
Page 18 of 248
SYMBOL GLOSSARY
16
Amber Symbols
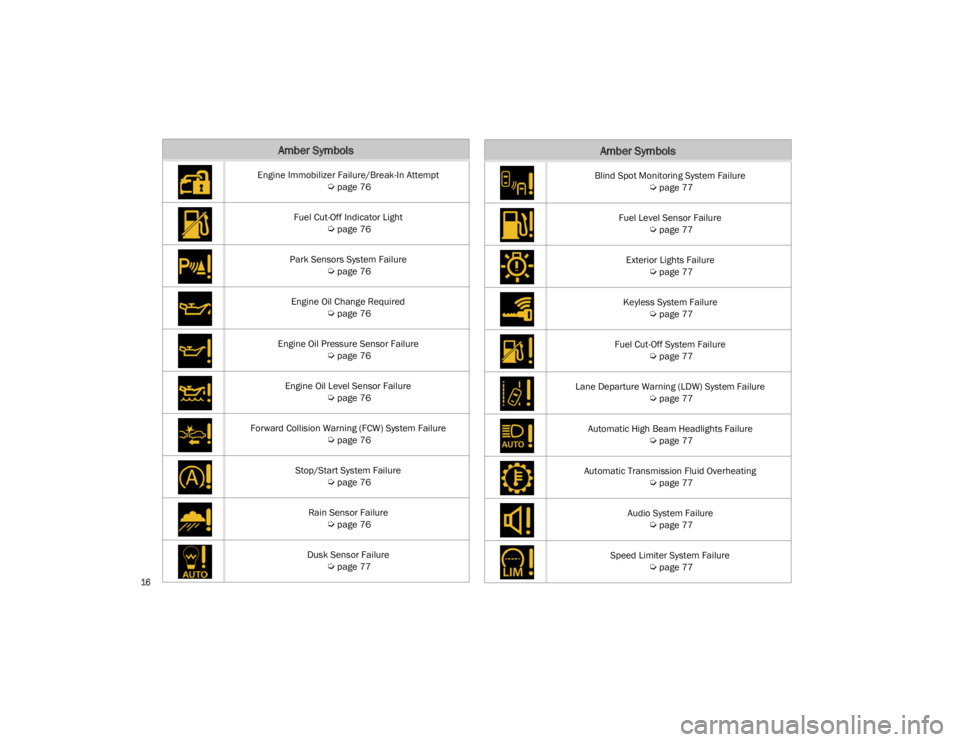
Engine Immobilizer Failure/Break-In Attempt
Ú
page 76
Fuel Cut-Off Indicator Light
Ú
page 76
Park Sensors System Failure
Ú
page 76
Engine Oil Change Required
Ú
page 76
Engine Oil Pressure Sensor Failure
Ú
page 76
Engine Oil Level Sensor Failure
Ú
page 76
Forward Collision Warning (FCW) System Failure
Ú
page 76
Stop/Start System Failure
Ú
page 76
Rain Sensor Failure
Ú
page 76
Dusk Sensor Failure
Ú
page 77
Blind Spot Monitoring System Failure
Ú
page 77
Fuel Level Sensor Failure
Ú
page 77
Exterior Lights Failure
Ú
page 77
Keyless System Failure
Ú
page 77
Fuel Cut-Off System Failure
Ú
page 77
Lane Departure Warning (LDW) System Failure
Ú
page 77
Automatic High Beam Headlights Failure
Ú
page 77
Automatic Transmission Fluid Overheating
Ú
page 77
Audio System Failure
Ú
page 77
Speed Limiter System Failure
Ú
page 77
Amber Symbols
22_GA_OM_EN_USC_t.book Page 16
Page 31 of 248
29
To unlock the steering column, push the tilt/
telescoping control handle down to the open
position. To tilt the steering column, move the
steering wheel upward or downward as desired.
To lengthen or shorten the steering column, pull
the steering wheel outward or push it inward as
desired. To lock the steering column in position,
push the tilt/telescoping control handle to the
closed position.
HEATED STEERING WHEEL — IF EQUIPPED
The steering wheel contains a heating
element that helps warm your hands in
cold weather. The heated steering
wheel has only one temperature setting.
The heated steering wheel may not turn on when
it is already warm.
NOTE:
Quadrifoglio vehicles equipped with Sparco
Racing Seats will not be equipped with the heated
steering wheel feature.
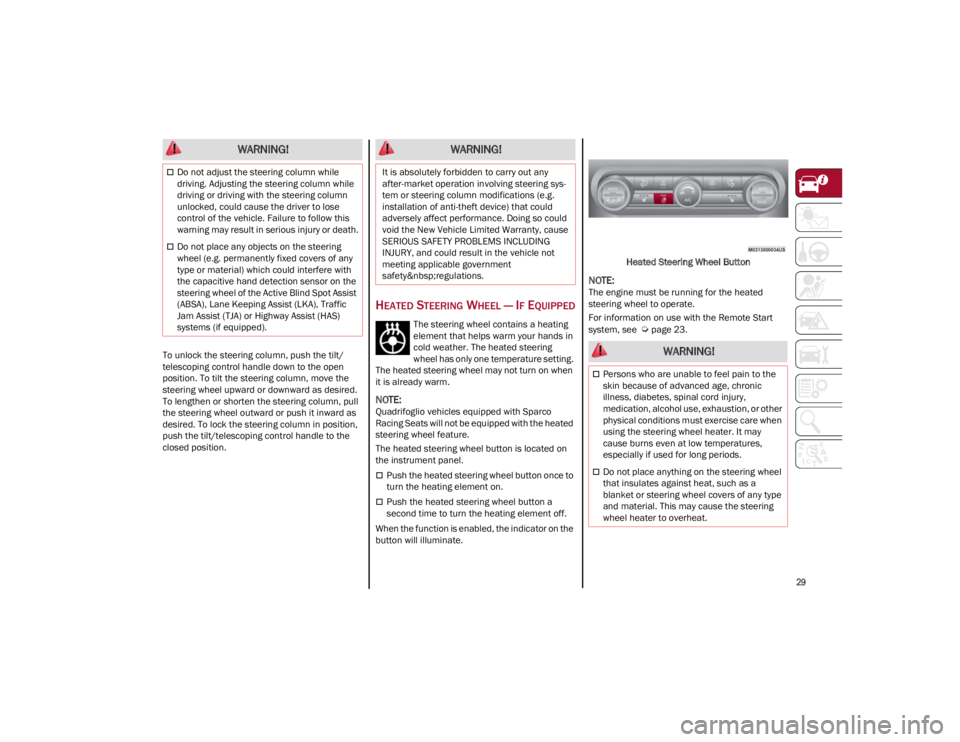
The heated steering wheel button is located on
the instrument panel.
Push the heated steering wheel button once to
turn the heating element on.
Push the heated steering wheel button a
second time to turn the heating element off.
When the function is enabled, the indicator on the
button will illuminate. Heated Steering Wheel Button
NOTE:
The engine must be running for the heated
steering wheel to operate.
For information on use with the Remote Start
system, see
Ú
page 23.
WARNING!
Do not adjust the steering column while
driving. Adjusting the steering column while
driving or driving with the steering column
unlocked, could cause the driver to lose
control of the vehicle. Failure to follow this
warning may result in serious injury or death.
Do not place any objects on the steering
wheel (e.g. permanently fixed covers of any
type or material) which could interfere with
the capacitive hand detection sensor on the
steering wheel of the Active Blind Spot Assist
(ABSA), Lane Keeping Assist (LKA), Traffic
Jam Assist (TJA) or Highway Assist (HAS)
systems (if equipped).
WARNING!
It is absolutely forbidden to carry out any
after-market operation involving steering sys -
tem or steering column modifications (e.g.
installation of anti-theft device) that could
adversely affect performance. Doing so could
void the New Vehicle Limited Warranty, cause
SERIOUS SAFETY PROBLEMS INCLUDING
INJURY, and could result in the vehicle not
meeting applicable government
safety regulations.
WARNING!
Persons who are unable to feel pain to the
skin because of advanced age, chronic
illness, diabetes, spinal cord injury,
medication, alcohol use, exhaustion, or other
physical conditions must exercise care when
using the steering wheel heater. It may
cause burns even at low temperatures,
especially if used for long periods.
Do not place anything on the steering wheel
that insulates against heat, such as a
blanket or steering wheel covers of any type
and material. This may cause the steering
wheel heater to overheat.
22_GA_OM_EN_USC_t.book Page 29
Page 37 of 248
35
(Continued)
HEATED SEATS — IF EQUIPPED
For information on use with the Remote Start
system, see
Ú
page 23.
Front Heated Seats — If Equipped
NOTE:
Quadrifoglio vehicles equipped with Sparco
Racing Seats will not be equipped with the heated
seat feature.A push of the heated seat buttons
located on the instrument panel, near
the climate controls, will select the heat
levels in order of highest to lowest. A
fourth push of the button will turn the heated seat
off.
NOTE:
The heated seat function can also be activated
through the radio system. Refer to the Informa -
tion and Entertainment System Owner’s Manual
Supplement for further information.
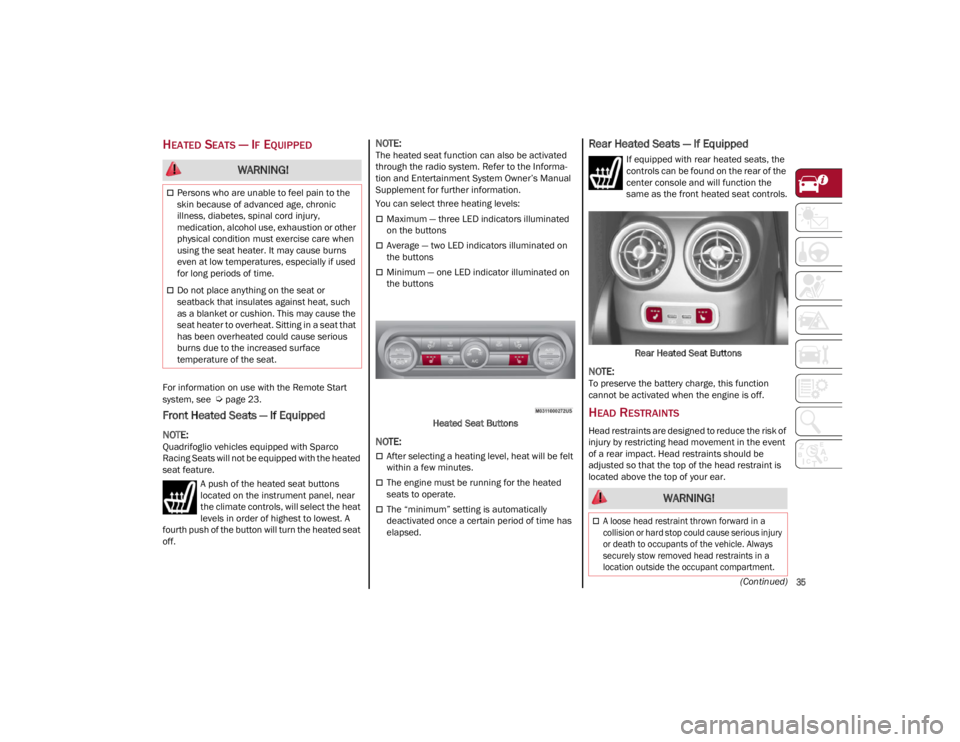
You can select three heating levels:
Maximum — three LED indicators illuminated
on the buttons
Average — two LED indicators illuminated on
the buttons
Minimum — one LED indicator illuminated on
the buttons
Heated Seat Buttons
NOTE:
After selecting a heating level, heat will be felt
within a few minutes.
The engine must be running for the heated
seats to operate.
The “minimum” setting is automatically
deactivated once a certain period of time has
elapsed.
Rear Heated Seats — If Equipped
If equipped with rear heated seats, the
controls can be found on the rear of the
center console and will function the
same as the front heated seat controls.
Rear Heated Seat Buttons
NOTE:
To preserve the battery charge, this function
cannot be activated when the engine is off.
HEAD RESTRAINTS
Head restraints are designed to reduce the risk of
injury by restricting head movement in the event
of a rear impact. Head restraints should be
adjusted so that the top of the head restraint is
located above the top of your ear.
WARNING!
Persons who are unable to feel pain to the
skin because of advanced age, chronic
illness, diabetes, spinal cord injury,
medication, alcohol use, exhaustion or other
physical condition must exercise care when
using the seat heater. It may cause burns
even at low temperatures, especially if used
for long periods of time.
Do not place anything on the seat or
seatback that insulates against heat, such
as a blanket or cushion. This may cause the
seat heater to overheat. Sitting in a seat that
has been overheated could cause serious
burns due to the increased surface
temperature of the seat.
WARNING!
A loose head restraint thrown forward in a
collision or hard stop could cause serious injury
or death to occupants of the vehicle. Always
securely stow removed head restraints in a
location outside the occupant compartment.
22_GA_OM_EN_USC_t.book Page 35
Page 43 of 248
41
REPROGRAMMING A SINGLE
H
OMELINK® BUTTON
To reprogram a single HomeLink® button that
has been previously trained, without erasing all
the channels, proceed as follows. Be sure to
determine whether the new device you want to
program the HomeLink® button to has a rolling
code, or non-rolling code.
1. Place the ignition in the ON/RUN position,
without starting the engine.
2. Push and hold the desired HomeLink® button until the HomeLink® indicator light
begins to flash after 20 seconds. Do not
release the button.
3. Without releasing the button , proceed with
Step 2 in “Programming HomeLink® To A
Garage Door Opener” and follow all
remaining steps.
CANADIAN/GATE OPERATOR
P
ROGRAMMING
The programming of transmitters in Canada/
United States require the transmitter signals to
“time-out” after several seconds of transmission:
Canadian Radio Frequency (RF) laws require
transmitter signals to time-out (or quit) after
several seconds of transmission, which may not
be long enough for HomeLink® to pick up the
signal during programming. Similar to this
Canadian law, some U.S. gate operators are
designed to time-out in the same manner.
It may be helpful to unplug the device during the
cycling process to prevent possible overheating
of the garage door or gate motor. 1. Place the ignition in the ON/RUN position.
2. Place the hand-held transmitter 1 to 3 inches
(3 to 8 cm) away from the HomeLink® button
you wish to program while keeping the
HomeLink® indicator light in view.
3. Continue to press and hold the HomeLink® button, while you press and release (cycle)
your hand-held transmitter every two seconds
until HomeLink® has successfully accepted
the frequency signal. The indicator light will
flash slowly and then rapidly when fully
trained.
4. Watch for the HomeLink® indicator to change flash rates. When it changes, it is
programmed. It may take up to 30 seconds or
longer in rare cases. The garage door may
open and close while you are programming.
5. Press and hold the programmed HomeLink® button and observe the indicator light.
NOTE:
•If the indicator light stays on constantly,
programming is complete and the garagedoor/device should activate when the HomeLink® button is pushed.
• To program the two remaining HomeLink® buttons, repeat each step for each remaining button. DO NOT erase the chan-nels.
If you unplugged the garage door opener/device
for programming, plug it back in at this time. Reprogramming A Single HomeLink® Button
(Canadian/Gate Operator)
To reprogram a channel that has been previously
trained, follow these steps:
1. Place the ignition to the ON/RUN position.
2. Press and hold the desired HomeLink®
button until the indicator light begins to flash
after 20 seconds. Do not release the button.
3. Without releasing the button, proceed with “Canadian/Gate Operator Programming”
step 2 and follow all remaining steps.
SECURITY
It is advised to erase all channels before you sell
or turn in your vehicle.
To do this, push and hold the two outside buttons
for 20 seconds until the indicator flashes. Note
that all channels will be erased. Individual
channels cannot be erased.
The HomeLink® Universal Transceiver is disabled
when the Vehicle Security system is active.
TROUBLESHOOTING TIPS
If you are having trouble programming
HomeLink®, here are some of the most common
solutions:
Replace the battery in the garage door opener
hand-held transmitter.
Push the LEARN button on the garage door
opener to complete the training for a rolling
code.
Did you unplug the device for programming
and remember to plug it back in?
22_GA_OM_EN_USC_t.book Page 41
Page 54 of 248
GETTING TO KNOW YOUR VEHICLE
52
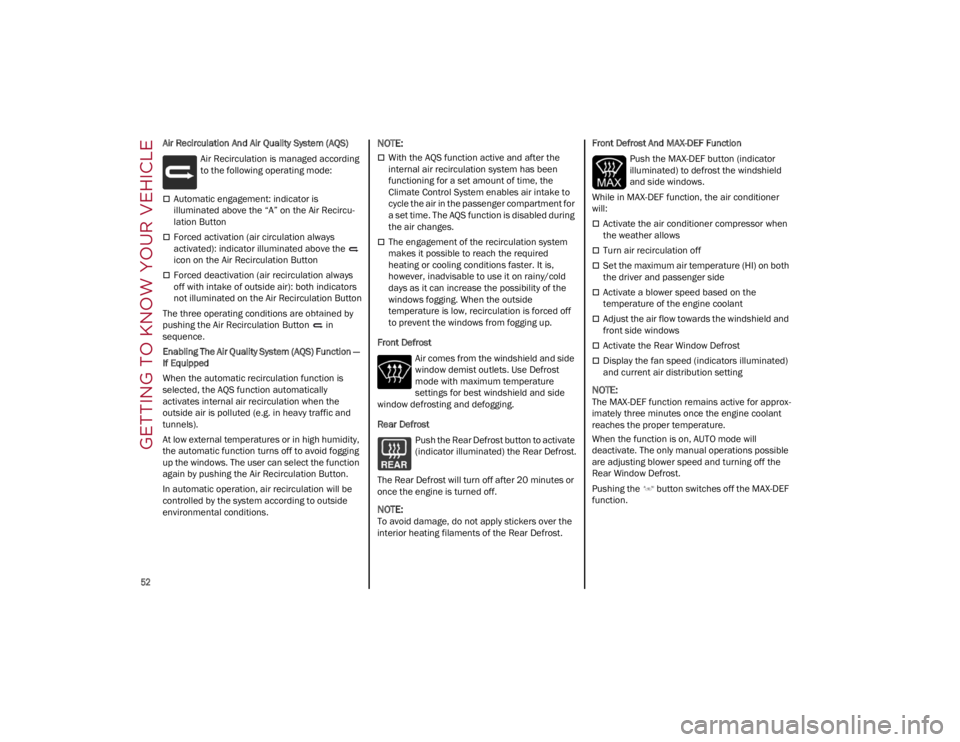
Air Recirculation And Air Quality System (AQS)Air Recirculation is managed according
to the following operating mode:
Automatic engagement: indicator is
illuminated above the “A” on the Air Recircu -
lation Button
Forced activation (air circulation always
activated): indicator illuminated above the
icon on the Air Recirculation Button
Forced deactivation (air recirculation always
off with intake of outside air): both indicators
not illuminated on the Air Recirculation Button
The three operating conditions are obtained by
pushing the Air Recirculation Button in
sequence.
Enabling The Air Quality System (AQS) Function —
If Equipped
When the automatic recirculation function is
selected, the AQS function automatically
activates internal air recirculation when the
outside air is polluted (e.g. in heavy traffic and
tunnels).
At low external temperatures or in high humidity,
the automatic function turns off to avoid fogging
up the windows. The user can select the function
again by pushing the Air Recirculation Button.
In automatic operation, air recirculation will be
controlled by the system according to outside
environmental conditions.
NOTE:
With the AQS function active and after the
internal air recirculation system has been
functioning for a set amount of time, the
Climate Control System enables air intake to
cycle the air in the passenger compartment for
a set time. The AQS function is disabled during
the air changes.
The engagement of the recirculation system
makes it possible to reach the required
heating or cooling conditions faster. It is,
however, inadvisable to use it on rainy/cold
days as it can increase the possibility of the
windows fogging. When the outside
temperature is low, recirculation is forced off
to prevent the windows from fogging up.
Front Defrost Air comes from the windshield and side
window demist outlets. Use Defrost
mode with maximum temperature
settings for best windshield and side
window defrosting and defogging.
Rear Defrost
Push the Rear Defrost button to activate
(indicator illuminated) the Rear Defrost.
The Rear Defrost will turn off after 20 minutes or
once the engine is turned off.
NOTE:
To avoid damage, do not apply stickers over the
interior heating filaments of the Rear Defrost. Front Defrost And MAX-DEF Function
Push the MAX-DEF button (indicator
illuminated) to defrost the windshield
and side windows.
While in MAX-DEF function, the air conditioner
will:
Activate the air conditioner compressor when
the weather allows
Turn air recirculation off
Set the maximum air temperature (HI) on both
the driver and passenger side
Activate a blower speed based on the
temperature of the engine coolant
Adjust the air flow towards the windshield and
front side windows
Activate the Rear Window Defrost
Display the fan speed (indicators illuminated)
and current air distribution setting
NOTE:
The MAX-DEF function remains active for approx -
imately three minutes once the engine coolant
reaches the proper temperature.
When the function is on, AUTO mode will
deactivate. The only manual operations possible
are adjusting blower speed and turning off the
Rear Window Defrost.
Pushing the button switches off the MAX-DEF
function.
22_GA_OM_EN_USC_t.book Page 52
Page 55 of 248
53
Air Temperature Adjustment
Rotate the driver or passenger Temperature
Adjustment Knob clockwise for warmer
temperatures or counterclockwise for cooler
temperatures. The set temperatures are shown
on the radio system.
Push the SYNC button to sync the driver and
passenger air temperatures.
Rotate the passenger Temperature Adjustment
Knob to cancel the SYNC function. This will set a
new passenger side temperature.
Rotate the Temperature Adjustment Knob fully
clockwise to engage the HI (maximum heating)
setting or fully counterclockwise to engage the LO
(maximum cooling) setting. To deactivate these
functions, rotate the Temperature Adjustment
Knob to the desired temperature.
Rear passengers’ temperature is linked to driver
side selection.
AUTO Button
When the AUTO button is pushed (indicator
illuminated), the Climate Control system automat-
ically adjusts the following settings:
Quantity and distribution of air flow in the
passenger compartment
The air conditioner
Air recirculation
Cancels any manual settings
Selecting the AUTO function illuminates the
indicator on the A/C button.
If air distribution or the fan speed is manually
adjusted, the AUTO button indicator turns off to
indicate that the Climate Control system is no
longer in AUTO mode. After a manual adjustment, push the AUTO button
to resume the automatic system.
SYNC Button
Push the SYNC button (indicator illuminated) to
sync the passenger side air temperature with the
driver side air temperature.
This function makes temperature regulation
easier when the driver is traveling alone.
Turn the passenger Temperature Adjustment
Knob or push the passenger side Air Distribution
Selection Button to change the passenger side air
temperature and return to separate air
temperature management.
Blower Speed
Turn the Blower Speed Knob to increase or
decrease the blower speed. The speed is
displayed with lighted indicators in the radio
system display.
Maximum fan speed = all indicators
illuminated on the radio system display
Minimum fan speed = one indicator
illuminated on the radio system display
The fan can be turned off by rotating the Blower
Speed Knob counterclockwise to the off position
(all segments on the radio system display are
turned off).
NOTE:
To restore automatic control of the fan speed,
push the AUTO button.
Air Distribution Selection
Push the Air Distribution Selection button on the
faceplate to change the mode of air distribution.
NOTE:
In AUTO mode, the Climate Controls automatically
manage the air distribution. When set manually,
the respective symbols on the radio system indi -
cate the air distribution setting.
Panel Mode
Air comes from the outlets in the
instrument panel to ventilate the chest
and face. Each of these outlets can be
individually adjusted to direct the flow of
air. The air vanes of the center outlets and
outboard outlets can be moved up and down or
side to side to regulate airflow direction. There is
a shut-off wheel located below the air vanes to
shut off or adjust the amount of airflow from
these outlets.
Bi-Level Mode
Air comes from the instrument panel
outlets and floor outlets. A slight amount
of air is directed through the defrost and
side window demister outlets.
NOTE:
Bi-Level mode is designed under comfort condi -
tions to provide cooler air out of the panel outlets
and warmer air from the floor outlets.
Floor Mode
Air comes from the floor outlets. A slight
amount of air is directed through the
defrost and side window demister
outlets. This setting heats the
passenger compartment the quickest.
22_GA_OM_EN_USC_t.book Page 53
Page 56 of 248

GETTING TO KNOW YOUR VEHICLE
54
Mix ModeAir is directed through the floor, defrost,
and side window demister outlets. This
setting works best in cold or snowy
conditions that require extra heat to the
windshield. This setting is good for maintaining
comfort while reducing moisture on the
windshield.
Front Defrost And Panel Mode
Air flow is distributed between the
windshield demisting/defrosting vents
and side/central dashboard vents. This
setting allows air to flow to the
windshield on sunny days.
Front Defrost And Bi-Level Mode
Air flow is distributed to all vents.
Switching The Climate Control System On/Off
To Turn Off The Climate Control System
Rotate the Air Speed Adjustment Knob
completely counterclockwise to turn off the
Climate Control system.
With the air conditioner is off:
Air recirculation is on
The A/C compressor is off
The fan is off
The heated rear window can be activated/
deactivated
NOTE:
The climate control system stores the previously
set temperatures and resumes operation when
any button on the system is pushed.
To Turn On The Climate Control System
To switch the climate control system on in
automatic mode, push the AUTO button.
Operating Mode
The Climate Control system can be activated in
different ways. It is recommended to use the
automatic function. Push the AUTO button and
set the desired temperatures.
The automatic system adjusts the temperature,
quantity, and distribution of air introduced into
the passenger compartment. It also controls air
recirculation and the activation of the air
conditioner.
At any time during automatic operation, you can
change the temperature, activate or deactivate
the Rear Defrost, activate SYNC, activate or
deactivate the air conditioner, and activate or
deactivate air recirculation. The system will
automatically adjust to the new settings.
Climate Control Display Settings
The Climate Control settings are visible on the
radio screen.
The display on the radio system is a pop up
window, which is activated by pushing the
buttons or turning the knobs on the Climate
Control system. The indicator lights located on
the number of buttons and knobs indicate that
the selected feature is on/off. If no operation is
performed for a predetermined time, the pop-up
will close on the display.
Humidity Sensor
The Humidity Sensor helps prevent the windows
from fogging up. The AUTO function (indicator
illuminated) must be on for the Humidity Sensor
to function.
When outside temperature is low, the system
may turn the compressor on and turn air recircu -
lation off for safer driving.
Stop/Start
The Stop/Start system shuts off the engine when
the vehicle speed is 0 mph (0 km/h), as a fuel
conservation measure.
In order to maintain comfort in the cabin, the
Stop/Start feature will not activate if any of the
following conditions exist:
The climate control system is in AUTO mode
(indicator illuminated), and the vehicle has yet
to reach the set temperature
The climate control system is in LO maximum
cooling
The climate control system is in HI maximum
heating
The climate control system is in the MAX-DEF
status
When the Stop/Start system is active, the engine
will restart if the inside temperature changes
significantly, or if the LO setting, or MAX-DEF
setting, is activated.
With the Stop/Start system on (engine is off), air
flow is reduced to keep the compartment comfort
conditions for longer.
22_GA_OM_EN_USC_t.book Page 54
Page 67 of 248
65
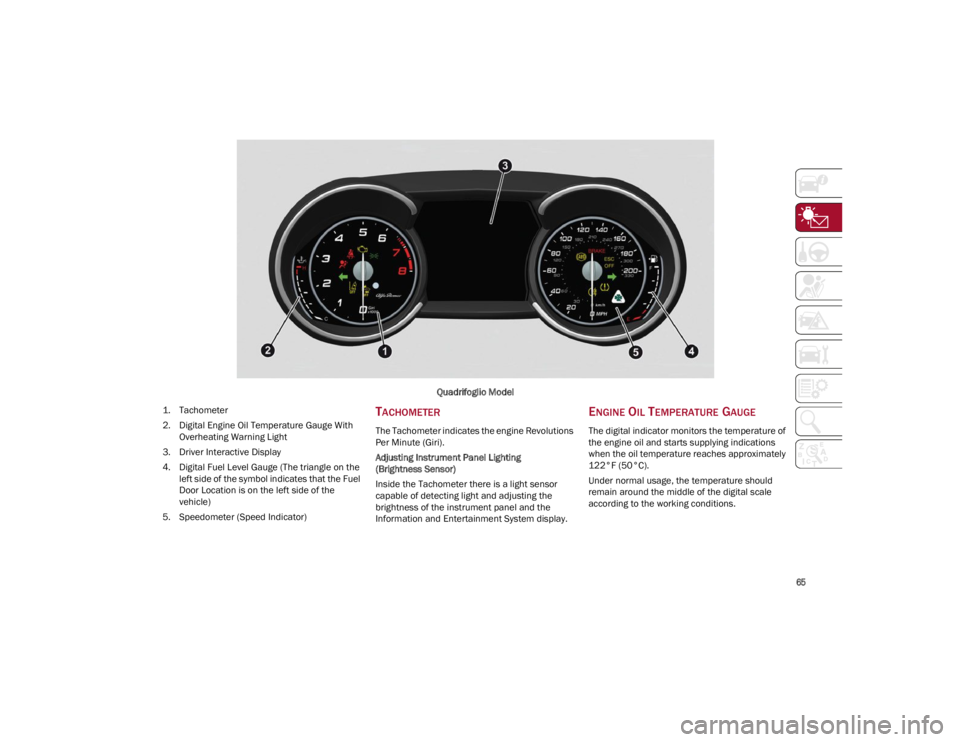
Quadrifoglio Model
1. T
achometer
2. Digital Engine Oil Temperature Gauge With Overheating Warning Light
3. Driver Interactive Display
4. Digital Fuel Level Gauge (The triangle on the left side of the symbol indicates that the Fuel
Door Location is on the left side of the
vehicle)
5. Speedometer (Speed Indicator)
TACHOMETER
The Tachometer indicates the engine Revolutions
Per Minute (Giri).
Adjusting Instrument Panel Lighting
(Brightness Sensor)
Inside the Tachometer there is a light sensor
capable of detecting light and adjusting the
brightness of the instrument panel and the
Information and Entertainment System display.
ENGINE OIL TEMPERATURE GAUGE
The digital indicator monitors the temperature of
the engine oil and starts supplying indications
when the oil temperature reaches approximately
122°F (50°C).
Under normal usage, the temperature should
remain around the middle of the digital scale
according to the working conditions.
22_GA_OM_EN_USC_t.book Page 65
Page 79 of 248
77
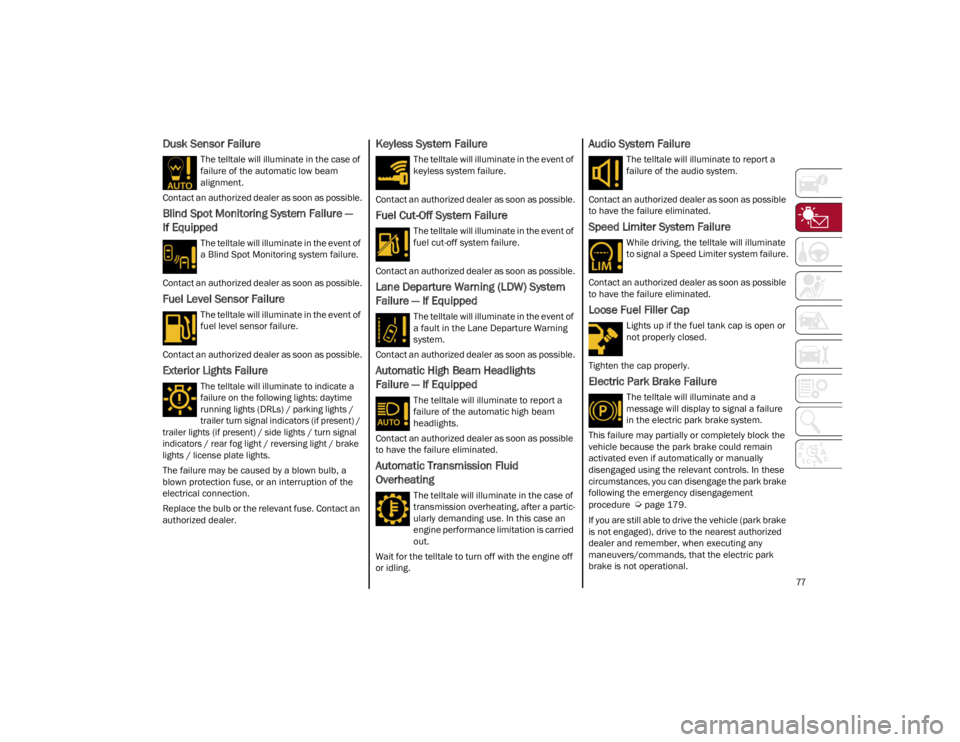
Dusk Sensor Failure
The telltale will illuminate in the case of
failure of the automatic low beam
alignment.
Contact an authorized dealer as soon as possible.
Blind Spot Monitoring System Failure —
If Equipped
The telltale will illuminate in the event of
a Blind Spot Monitoring system failure.
Contact an authorized dealer as soon as possible.
Fuel Level Sensor Failure
The telltale will illuminate in the event of
fuel level sensor failure.
Contact an authorized dealer as soon as possible.
Exterior Lights Failure
The telltale will illuminate to indicate a
failure on the following lights: daytime
running lights (DRLs) / parking lights /
trailer turn signal indicators (if present) /
trailer lights (if present) / side lights / turn signal
indicators / rear fog light / reversing light / brake
lights / license plate lights.
The failure may be caused by a blown bulb, a
blown protection fuse, or an interruption of the
electrical connection.
Replace the bulb or the relevant fuse. Contact an
authorized dealer.
Keyless System Failure
The telltale will illuminate in the event of
keyless system failure.
Contact an authorized dealer as soon as possible.
Fuel Cut-Off System Failure
The telltale will illuminate in the event of
fuel cut-off system failure.
Contact an authorized dealer as soon as possible.
Lane Departure Warning (LDW) System
Failure — If Equipped
The telltale will illuminate in the event of
a fault in the Lane Departure Warning
system.
Contact an authorized dealer as soon as possible.
Automatic High Beam Headlights
Failure — If Equipped
The telltale will illuminate to report a
failure of the automatic high beam
headlights.
Contact an authorized dealer as soon as possible
to have the failure eliminated.
Automatic Transmission Fluid
Overheating
The telltale will illuminate in the case of
transmission overheating, after a partic -
ularly demanding use. In this case an
engine performance limitation is carried
out.
Wait for the telltale to turn off with the engine off
or idling.
Audio System Failure
The telltale will illuminate to report a
failure of the audio system.
Contact an authorized dealer as soon as possible
to have the failure eliminated.
Speed Limiter System Failure
While driving, the telltale will illuminate
to signal a Speed Limiter system failure.
Contact an authorized dealer as soon as possible
to have the failure eliminated.
Loose Fuel Filler Cap
Lights up if the fuel tank cap is open or
not properly closed.
Tighten the cap properly.
Electric Park Brake Failure
The telltale will illuminate and a
message will display to signal a failure
in the electric park brake system.
This failure may partially or completely block the
vehicle because the park brake could remain
activated even if automatically or manually
disengaged using the relevant controls. In these
circumstances, you can disengage the park brake
following the emergency disengagement
procedure
Ú
page 179.
If you are still able to drive the vehicle (park brake
is not engaged), drive to the nearest authorized
dealer and remember, when executing any
maneuvers/commands, that the electric park
brake is not operational.
22_GA_OM_EN_USC_t.book Page 77
Page 91 of 248
89
REVERSE (R)
Select this mode only with the vehicle at a
standstill.
NEUTRAL (N)
Use this range when the vehicle is standing for
prolonged periods with the engine running. The
engine may be started in this range. Apply the Electric Park Brake and shift the transmission
into PARK (P) if you must leave the vehicle.
DRIVE (D)
Use this mode in normal driving conditions.
Shifting from DRIVE (D) to PARK (P) or REVERSE
(R) modes must take place only after releasing
the accelerator pedal, with vehicle at a standstill
and brake pedal pressed.
This mode ensures automatic engagement of the
most suitable gears for driving needs and
maximum fuel economy in terms of consumption.
In this position, the transmission shifts the gears
automatically, selecting the most suitable for
forward driving among those available as you go.
This ensures the vehicle's optimal driving charac
-
teristics are provided for all conditions.
AutoStick
In the case of frequent shifting (e.g. for sport
driving, when the vehicle is driven with a heavy
load or on slopes), it is recommended to use the
AutoStick (sequential shifting) mode to select and
keep a lower fixed ratio.
In these conditions, the use of a lower gear
improves vehicle performance, preventing
overheating. It is possible to shift from DRIVE (D) mode to
sequential mode regardless of vehicle speed.
Activation
Starting from DRIVE (D), move the selector to the
left (– and + indication of the trim) to activate the
sequential drive mode. The gear engaged will be
shown on the display.
Shifting is made by moving the gear selector
forwards, towards symbol – or backwards,
towards symbol +.
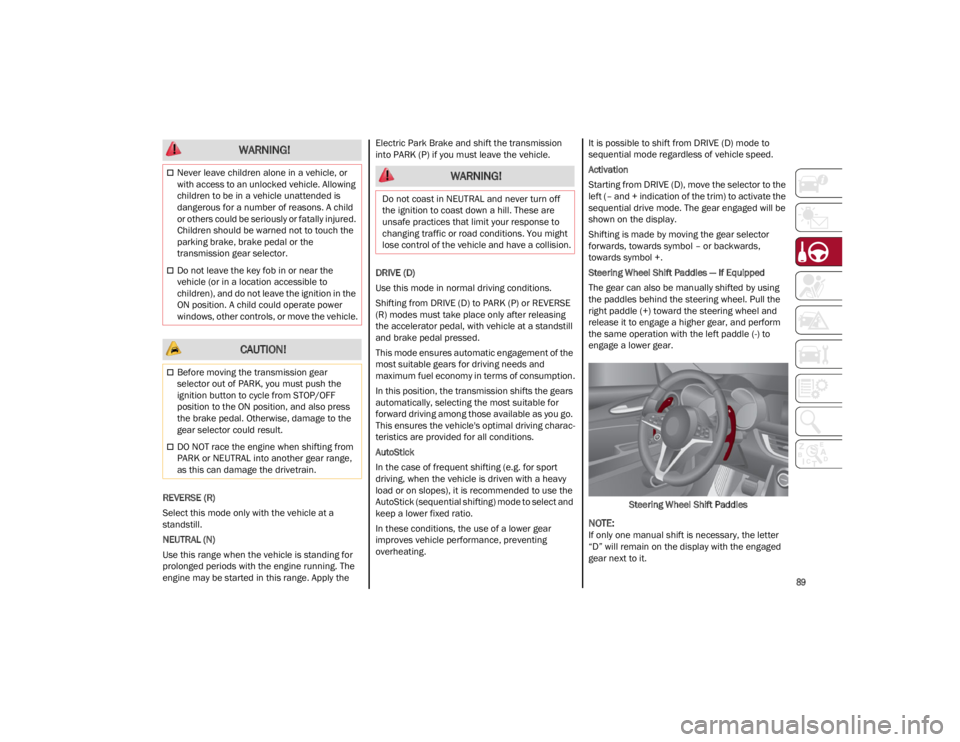
Steering Wheel Shift Paddles — If Equipped
The gear can also be manually shifted by using
the paddles behind the steering wheel. Pull the
right paddle (+) toward the steering wheel and
release it to engage a higher gear, and perform
the same operation with the left paddle (-) to
engage a lower gear.
Steering Wheel Shift Paddles
NOTE:
If only one manual shift is necessary, the letter
“D” will remain on the display with the engaged
gear next to it.
Never leave children alone in a vehicle, or
with access to an unlocked vehicle. Allowing
children to be in a vehicle unattended is
dangerous for a number of reasons. A child
or others could be seriously or fatally injured.
Children should be warned not to touch the
parking brake, brake pedal or the
transmission gear selector.
Do not leave the key fob in or near the
vehicle (or in a location accessible to
children), and do not leave the ignition in the
ON position. A child could operate power
windows, other controls, or move the vehicle.
CAUTION!
Before moving the transmission gear
selector out of PARK, you must push the
ignition button to cycle from STOP/OFF
position to the ON position, and also press
the brake pedal. Otherwise, damage to the
gear selector could result.
DO NOT race the engine when shifting from
PARK or NEUTRAL into another gear range,
as this can damage the drivetrain.
WARNING!
WARNING!
Do not coast in NEUTRAL and never turn off
the ignition to coast down a hill. These are
unsafe practices that limit your response to
changing traffic or road conditions. You might
lose control of the vehicle and have a collision.
22_GA_OM_EN_USC_t.book Page 89