changed Alfa Romeo Giulietta 2014 Owner's Manual
[x] Cancel search | Manufacturer: ALFA ROMEO, Model Year: 2014, Model line: Giulietta, Model: Alfa Romeo Giulietta 2014Pages: 280, PDF Size: 6.65 MB
Page 2 of 280
We really know your car because we invented, designed and built it: we really know every single detail.
At Alfa Romeo Service authorised workshopsyou can find technicians directly trained by us,
offering quality and professionalism for all service operations.
Alfa Romeo workshops are always close to you for the regular servicing operations, season checks
and practical recommendations by our experts.
With Alfa Romeo Genuine Parts you keep the reliability, comfort and performance features
of your new car unchanged in time: that's why you bought it for.
Always ask for Genuine Parts for the components used on our cars; we recommend them because
they come from our steady commitment in research and development of highly innovative technologies.
For all these reasons: rely on Genuine Parts, because they are the only ones
designed by Alfa Romeo for your car.
SAFETY:
BRAKING SYSTEM
ENVIRONMENT: PARTICULATE FILTERS,
CLIMATE CONTROL MAINTENANCE
COMFORT: SUSPENSION
AND WINDSCREEN WIPERS
PERFORMANCE: SPARK PLUGS,
INJECTORS AND BATTERIES
LINEACCESSORI
ROOF RACK BARS, WHEEL RIMS
WHY CHOOSING
GENUINE PARTS
Page 33 of 280
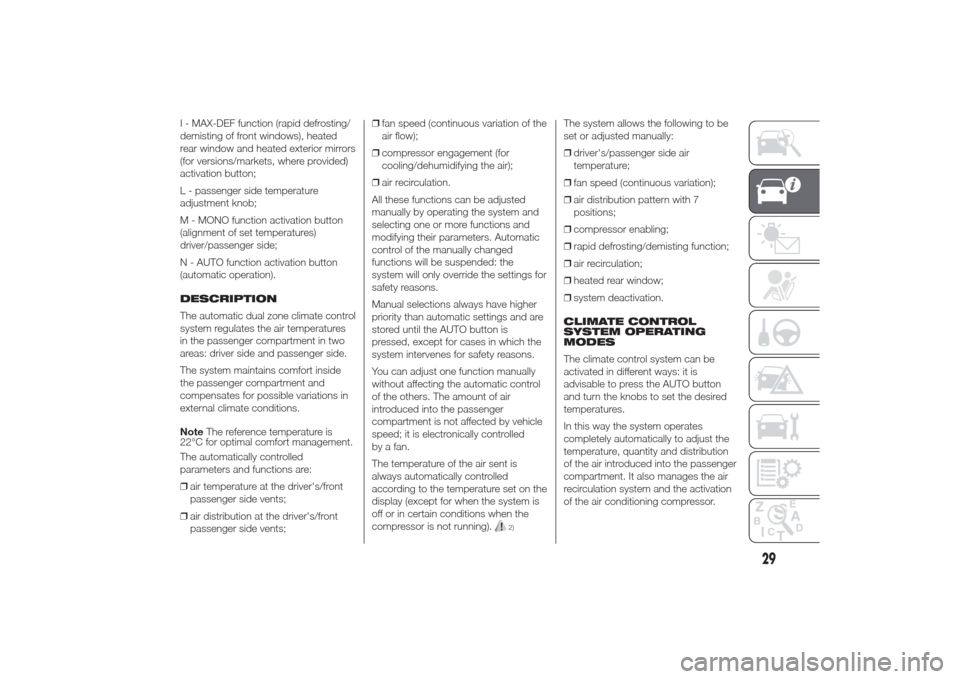
I - MAX-DEF function (rapid defrosting/
demisting of front windows), heated
rear window and heated exterior mirrors
(for versions/markets, where provided)
activation button;
L - passenger side temperature
adjustment knob;
M - MONO function activation button
(alignment of set temperatures)
driver/passenger side;
N - AUTO function activation button
(automatic operation).
DESCRIPTION
The automatic dual zone climate control
system regulates the air temperatures
in the passenger compartment in two
areas: driver side and passenger side.
The system maintains comfort inside
the passenger compartment and
compensates for possible variations in
external climate conditions.
NoteThe reference temperature is
22°C for optimal comfort management.
The automatically controlled
parameters and functions are:
❒air temperature at the driver's/front
passenger side vents;
❒air distribution at the driver's/front
passenger side vents;❒fan speed (continuous variation of the
air flow);
❒compressor engagement (for
cooling/dehumidifying the air);
❒air recirculation.
All these functions can be adjusted
manually by operating the system and
selecting one or more functions and
modifying their parameters. Automatic
control of the manually changed
functions will be suspended: the
system will only override the settings for
safety reasons.
Manual selections always have higher
priority than automatic settings and are
stored until the AUTO button is
pressed, except for cases in which the
system intervenes for safety reasons.
You can adjust one function manually
without affecting the automatic control
of the others. The amount of air
introduced into the passenger
compartment is not affected by vehicle
speed; it is electronically controlled
by a fan.
The temperature of the air sent is
always automatically controlled
according to the temperature set on the
display (except for when the system is
off or in certain conditions when the
compressor is not running).
2)
The system allows the following to be
set or adjusted manually:
❒driver's/passenger side air
temperature;
❒fan speed (continuous variation);
❒air distribution pattern with 7
positions;
❒compressor enabling;
❒rapid defrosting/demisting function;
❒air recirculation;
❒heated rear window;
❒system deactivation.
CLIMATE CONTROL
SYSTEM OPERATING
MODES
The climate control system can be
activated in different ways: it is
advisable to press the AUTO button
and turn the knobs to set the desired
temperatures.
In this way the system operates
completely automatically to adjust the
temperature, quantity and distribution
of the air introduced into the passenger
compartment. It also manages the air
recirculation system and the activation
of the air conditioning compressor.
29
Page 34 of 280
During automatic operation, you can
change the set temperatures, air
distribution and fan speed at any time
by using the relevant buttons or knobs:
the system will automatically change
the settings to adjust to the new
requirements.
During fully automatic operation
(AUTO), the word AUTO will disappear
if the air distribution and/or flow rate
and/or engagement of the compressor
and/or recirculation settings are
changed.
During fully automatic operation (FULL
AUTO), the word FULL will disappear
if the air distribution and/or flow rate
and/or activation of the compressor
and/or recirculation settings are
changed.
In this way the climate control system
will continue to automatically manage
all functions except for those that have
been manually adjusted. The fan speed
is the same in all the zones of the
passenger compartment.ADJUSTING THE AIR
TEMPERATURE
Turn knob A or L to the right or left to
adjust the air temperature: knob A
for the front left area, knob L for the
front right area of the passenger
compartment. The set temperatures are
shown on the displays.
Press the MONO button to align the air
temperature between the two areas.
Turn knob L to return to the separate
management of air temperatures in the
two areas.
Turn the knobs fully right or left to
engage HI (maximum heating) or LO
(maximum cooling) respectively. To
deactivate these functions, turn the
temperature knob to the desired
temperature.
SETTING THE AIR
DISTRIBUTION
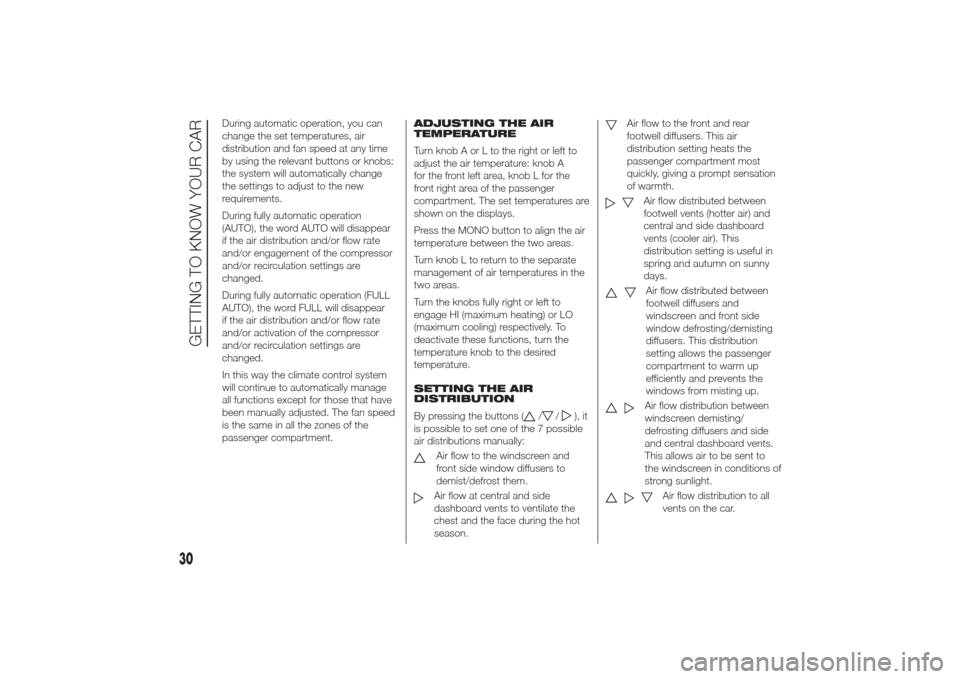
By pressing the buttons (
/
/
), it
is possible to set one of the 7 possible
air distributions manually:
Air flow to the windscreen and
front side window diffusers to
demist/defrost them.Air flow at central and side
dashboard vents to ventilate the
chest and the face during the hot
season.
Air flow to the front and rear
footwell diffusers. This air
distribution setting heats the
passenger compartment most
quickly, giving a prompt sensation
of warmth.
Air flow distributed between
footwell vents (hotter air) and
central and side dashboard
vents (cooler air). This
distribution setting is useful in
spring and autumn on sunny
days.Air flow distributed between
footwell diffusers and
windscreen and front side
window defrosting/demisting
diffusers. This distribution
setting allows the passenger
compartment to warm up
efficiently and prevents the
windows from misting up.Air flow distribution between
windscreen demisting/
defrosting diffusers and side
and central dashboard vents.
This allows air to be sent to
the windscreen in conditions of
strong sunlight.
Air flow distribution to all
vents on the car.
30
GETTING TO KNOW YOUR CAR
Page 44 of 280
The sensitivity of the rain sensor can be
adjusted through the Setup menu
(see paragraph “Menu Items” in the
“Knowing the instrument panel”
section).
If the engine is stopped with the lever in
“automatic” position, when it is next
started no wiping cycle will take place
even if it is raining. This prevents
accidental activation of the rain sensor
when the engine is started (e.g. when
the windscreen is being washed by
hand or the wipers are stuck to the
windscreen when there is ice).
To restore automatic operation of the
rain sensor, turn the ring nut on the
right stalk A fig. 32 from automatic
position (AUTO) toOposition and then
turn A ring nut back to the AUTO
position.
When the rain sensor is reactivated
using any of the manoeuvres described
above, reactivation is indicated by a
single stroke of the windscreen wipers,
regardless of the condition of the
windscreen.
If the sensitivity is changed whilst the
rain sensor is operating, a windscreen
wiper stroke is carried out to confirm
the change.In the event of malfunction of the rain
sensor whilst it is active, the
windscreen wiper operates
intermittently at a speed consistent with
the sensitivity setting of the rain sensor,
regardless of whether there is rain on
the glass (sensor failure is indicated on
the display).
The sensor continues to operate and it
is possible to set the windscreen wiper
to continuous mode (1
stor 2
nd
speed).
The failure indication remains for as
long as the sensor is active.
REAR WINDOW
WASHER/WIPER
(for versions/markets, where provided)
Activation
This operates only with the ignition key
turned to MAR.
Turn ring nut B fig. 32 from positionO
to position
to operate the rear
window wiper as follows:
❒in intermittent mode when the
windscreen wiper is not operating;
❒in synchronous mode (at half the
speed of the windscreen wiper) when
the windscreen wiper is operating;
❒in continuous mode with reverse gear
engaged and the control active.With reverse gear engaged and
windscreen wiper on, the rear window
wiper is activated in continuous mode.
Pushing the stalk towards the
dashboard (unstable position) will
activate the rear window washer jet.
Keep the stalk pushed for more than
half a second to activate the rear
window wiper as well. Releasing the
stalk will activate the smart washing
function, as described for the
windscreen wiper.
WARNING
13) Do not use the screen wiper to
remove layers of snow or ice
from the windscreen. In such
conditions, the windscreen wiper
may be subjected to excessive
stress and the motor cut-out
switch, which prevents operation
for a few seconds, may intervene.
If operation is not restored (even
after restarting that car with the
key), contact an Alfa Romeo
Dealership.
14) Do not operate the windscreen
wiper with the blades lifted from
the windscreen.
40
GETTING TO KNOW YOUR CAR
Page 81 of 280
iTPMS (indirect Tyre
Pressure
Monitoring System)(for versions/markets, where provided)
DESCRIPTION
The car can be equipped with the
iTPMS (indirect Tyre Pressure
Monitoring System) which monitors the
tyre inflation status thanks to wheel
speed sensors.
The system warns the driver if one or
more tyres are flat by the dedicated
warning light
continuously on and a
warning message on the display.
If one tyre only is flat, the system can
indicate its position: it is anyway
recommended to check the pressure
on all four tyres.
This indication is displayed also when
turning the engine off and on again until
the RESET procedure is carried out.RESET PROCEDURE
The iTPMS system needs an initial
"self-learning" phase (with length
depending on the driving style and road
conditions) which starts when the
RESET procedure is carried out.
The Reset procedure must be carried
out:
❒whenever the tyre pressure is
modified;
❒when even only one tyre is changed;
❒when tyres are rotated/inverted;
❒when the space-saver wheel is fitted.
Before carrying out the RESET, inflate
the tyres to the rated pressure values
specified in the inflation pressure table
(see "Wheels" paragraph in the
"Technical specifications" section).
If the RESET is not carried out, in all
above cases, the warning light
may
give false indications on one or more
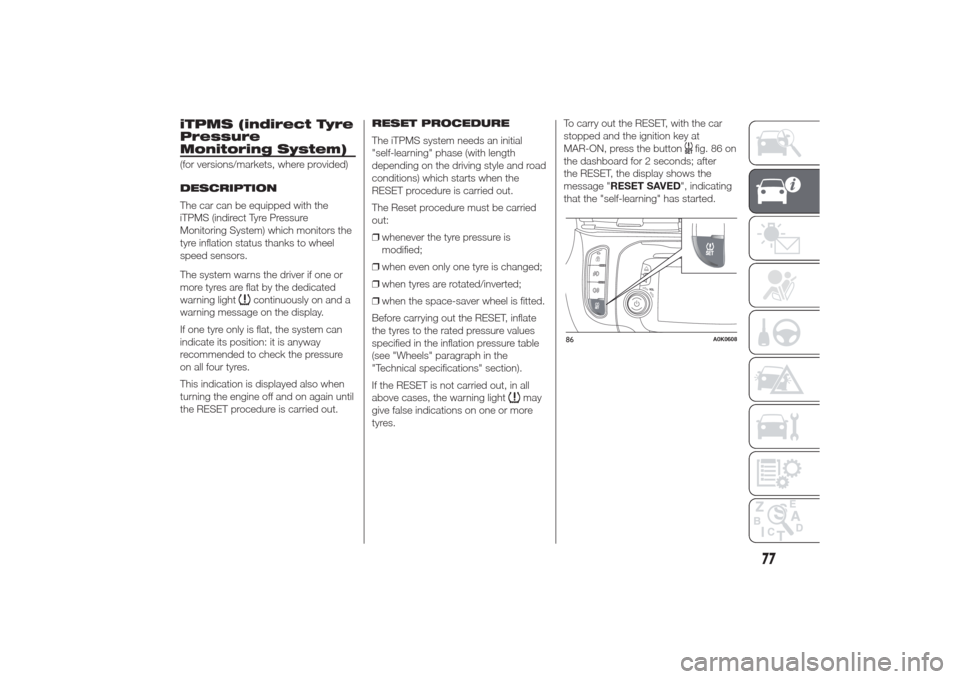
tyres.To carry out the RESET, with the car
stopped and the ignition key at
MAR-ON, press the button
fig. 86 on
the dashboard for 2 seconds; after
the RESET, the display shows the
message "RESET SAVED", indicating
that the "self-learning" has started.
86
A0K0608
77
Page 114 of 280
Warning lights on
panelWhat it means What to do
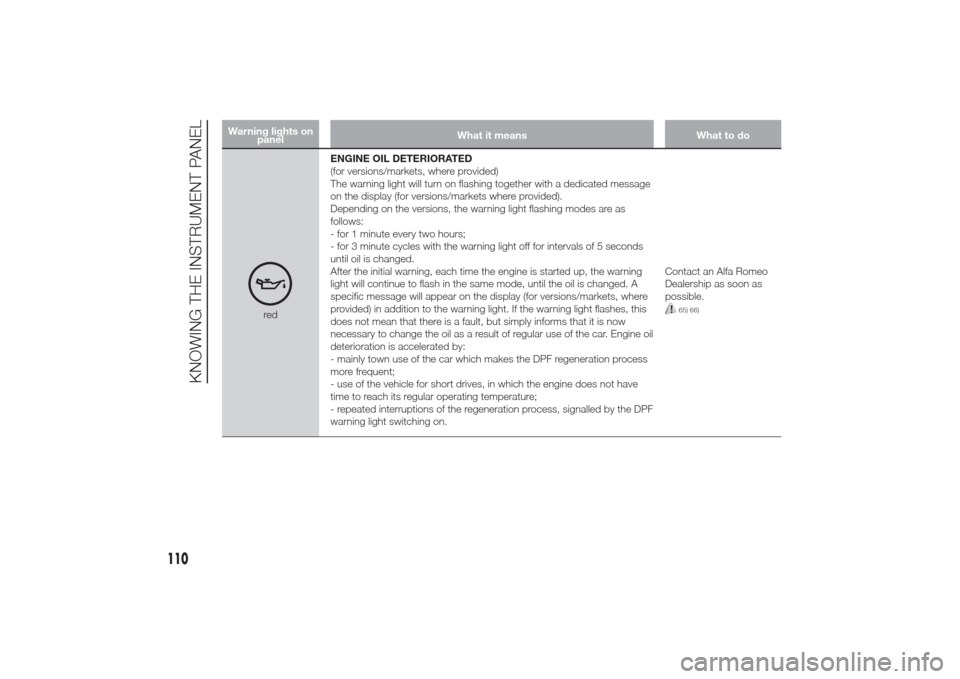
redENGINE OIL DETERIORATED
(for versions/markets, where provided)
The warning light will turn on flashing together with a dedicated message
on the display (for versions/markets where provided).
Depending on the versions, the warning light flashing modes are as
follows:
- for 1 minute every two hours;
- for 3 minute cycles with the warning light off for intervals of 5 seconds
until oil is changed.
After the initial warning, each time the engine is started up, the warning
light will continue to flash in the same mode, until the oil is changed. A
specific message will appear on the display (for versions/markets, where
provided) in addition to the warning light. If the warning light flashes, this
does not mean that there is a fault, but simply informs that it is now
necessary to change the oil as a result of regular use of the car. Engine oil
deterioration is accelerated by:
- mainly town use of the car which makes the DPF regeneration process
more frequent;
- use of the vehicle for short drives, in which the engine does not have
time to reach its regular operating temperature;
- repeated interruptions of the regeneration process, signalled by the DPF
warning light switching on.Contact an Alfa Romeo
Dealership as soon as
possible.
65) 66)
110
KNOWING THE INSTRUMENT PANEL
Page 143 of 280
76) If the belt has been subjected to
heavy strain, for example after an
accident, it must changed
completely together with the
anchors, anchor fastening screws
and the pretensioner. Even if the
belt has no visible defects, it could
have lost its resilience.
IMPORTANT
15) Operations which lead to
impacts, vibrations or localised
heating (over 100°C for a
maximum of six hours) in the area
around the pretensioner may
damage or deploy it. Contact an
Alfa Romeo Dealership should
intervention be necessary on
these components.
CARRYING
CHILDREN SAFELYFor optimal protection in the event of an
impact, all occupants must be seated
and wearing adequate restraint
systems, including newborn and other
children!
This prescription is compulsory in all EC
countries according to EC Directive
2003/20/EC.
Compared with an adult, a child's head
is larger and heavier in proportion to
his/her body and the child's muscular
and bone structures are not fully
developed. Therefore, correct restraint
systems other than adult seat belts
are necessary to reduce as much as
possible the risk of injuries in case
of accident, braking or sudden
manoeuvre.
Children must be seated safely and
comfortably. As far as the
characteristics of the child restraint
systems used allow, you are advised to
keep children in rear facing restraint
systems for as long as possible (at least
until 3–4 years old), since this is the
most protected position in the event of
an impact.
77) 78)
The choice of the most suitable child
restraint device depends on the weight
of the child; there are various types of
child restraint systems and you are
advised always to choose the one that
is most suitable for the child.
When over 1.50 m in height, from the
point of view of restraint systems,
children are considered as adults and
wear seat belts normally.
In Europe the characteristics of children
restraint systems are ruled by the
regulation ECE-R44, dividing them into
five weight groups:Group Weight groupsGroup0 upto10kg
Group 0+ up to 13 kg
Group 1 9-18 kg
Group 2 15-25 kg
Group 3 22-36 kg
139
Page 163 of 280
Shifting from N to D is free, while
shifting from N to R or P can only be
made by the button on the gear lever.
Drive (D) - Automatic
forward gear
It is the lever position in standard
running conditions.
Shifting from D to N is free, while
shifting from D to R or P can only be
made by the button on the gear lever.
Sequential mode (+ / –)
Shifting the lever from position D on
side in stable position, the transmission
is used in sequential mode.
Shifting the lever in unstable position (+
or −) gears are changed.
Important information
IMPORTANT All movements of the gear
lever must be performed with car
stationary and engine idling only.
The drive wheels are mechanically
locked in position P.
Shifting from P to R is possible with
brake pedal pressed and button on
gear lever pressed.
Shifting from R to N and from N to D is
free.Shifting from D to "Sequential mode" is
free.
Shifting from "Sequential mode" to D is
free.
Shifting from D to N is free.
Shifting from N to R is possible only
with button on gear lever pressed.
Shifting from R to P is possible only
with button on gear lever pressed.
STARTING THE ENGINE
Starting is only permitted with gear
lever in position P or N (with or without
brake pedal pressed).
On starting, the system is at N or P (the
latter means neutral, but with the car’s
wheels locked mechanically).
Start&Stop system
With car at a standstill and Start&Stop
system activated, the engine switches
off if the gear lever is in a position
other than R.
The Start&Stop system does not
operate when the gear lever is in R, for
making parking manoeuvres easier.
In the event of stops uphill, the engine
switching off is disabled to activate
the "Hill Holder" function (works only
with running engine).The engine restarts automatically if:
❒the brake pedal is released (and the
lever is not at N or P)
❒the lever is shifted to an unstable
position: +, − or R
❒the lever is shifted from D to the left
in "Sequential mode"
❒by the "+" or "–" paddles on the
steering wheel (for versions/markets,
where provided)
During the engine stop and start
sequence, the system passes through
the automatic engagement of neutral:
the display shows N.
IMPORTANT In some conditions (for
example with small gradients and brake
pedal not fully depressed), engine
switching off is not deactivated. In this
case, fully depress the brake pedal
to make the "Hill Holder" function
available and restart the engine, using
the gear lever or the paddles on the
steering wheel (for versions/markets,
where provided) as described
previously.
159
Page 175 of 280
REPLACING A
WHEELGENERAL
INSTRUCTIONS
The car is equipped with the “Fix&Go
Automatic Kit”: see the paragraph
“Fix&Go Automatic Kit” for how to use
this device.
As an alternative to the “Fix&Go
Automatic Kit” the car may be
requested with a space-saver wheel:
see the instructions on the following
pages for changing the wheel.
112) 113) 114) 115) 116)
JACK
Please note that:
❒the jack weight is 1.76 kg;
❒the jack requires no adjustment;
❒the jack cannot be repaired and in
the event of a fault it must be
replaced by another original one;
❒no tool other than its cranking device
may be fitted on the jack.
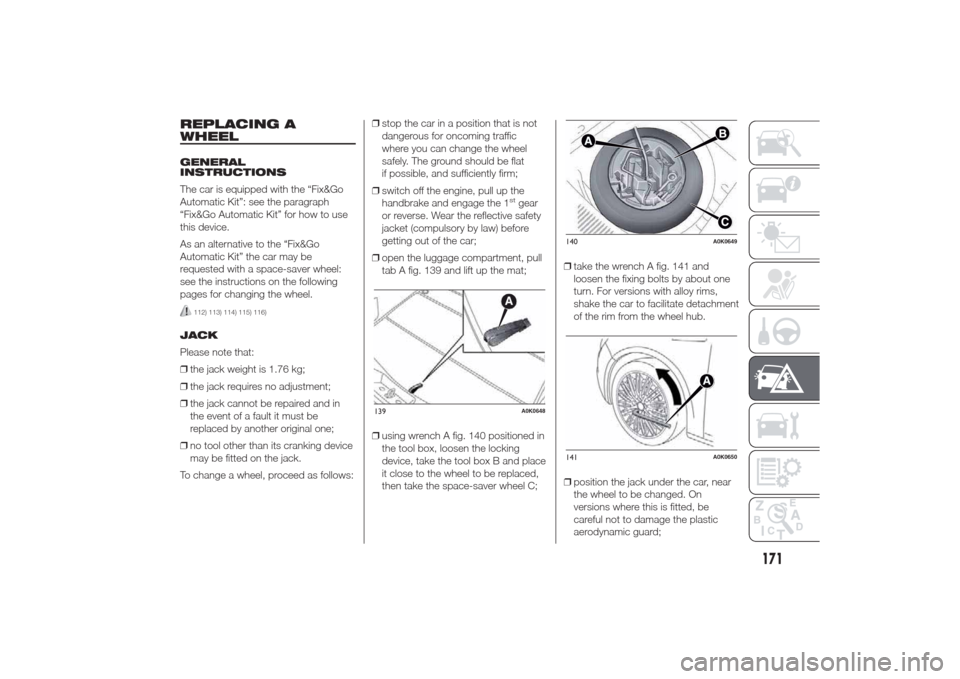
To change a wheel, proceed as follows:❒stop the car in a position that is not
dangerous for oncoming traffic
where you can change the wheel
safely. The ground should be flat
if possible, and sufficiently firm;
❒switch off the engine, pull up the
handbrake and engage the 1
stgear
or reverse. Wear the reflective safety
jacket (compulsory by law) before
getting out of the car;
❒open the luggage compartment, pull
tab A fig. 139 and lift up the mat;
❒using wrench A fig. 140 positioned in
the tool box, loosen the locking
device, take the tool box B and place
it close to the wheel to be replaced,
then take the space-saver wheel C;❒take the wrench A fig. 141 and
loosen the fixing bolts by about one
turn. For versions with alloy rims,
shake the car to facilitate detachment
of the rim from the wheel hub.
❒position the jack under the car, near
the wheel to be changed. On
versions where this is fitted, be
careful not to damage the plastic
aerodynamic guard;
139
A0K0648
140
A0K0649
141
A0K0650
171
Page 179 of 280
113) Use your hazard lights, warning
triangle, etc to show that your car
is stationary. Passengers should
get out of the car, particularly if it
is heavily loaded, and wait for
the wheel to be changed away
from the traffic. In the event of a
wheel change on a slope or on
unsurfaced roads, chock the
wheels.
114) Car handling is modified with
the space-saver wheel fitted.
Avoid violent acceleration and
braking, abrupt steering and fast
cornering. The overall duration
of the space-saver wheel is of
about 3000 km, after which the
relevant tyre must be replaced
with another one of the same
type. Never install a traditional
tyre on a rim designed to be used
as a space-saver wheel. Have
the wheel repaired and refitted as
soon as possible. Using two or
more space-saver wheels at the
same time is forbidden. Do not
grease the bolt threads before you
fit them, because they could
suddenly come loose.115) Use the jack only to replace
wheels on the car with which it
is supplied or on other cars of the
same model. Never use the jack
for other purposes, such as lifting
other car models. Never use it
for repair operations under the
car. Incorrect positioning of the
jack may cause the car to fall. Do
not use the jack for loads higher
than those shown on the label.
Never install snow chains on the
space-saver wheel; if a front tyre
(driving wheel) is punctured and
you need to use snow chains, use
a standard wheel from the rear
axle and install the space-saver
wheel on the rear axle. In this
way, with two normal front drive
wheels, it is possible to use snow
chains.
116) Incorrect hub cap assembly
may cause it to come off when the
car is moving. Never tamper with
the inflation valve. Never
introduce tools of any kind
between rim and tyre. Regularly
check the inflation pressure of the
tyres and space-saver wheel
(see chapter "Technical
specifications").
IMPORTANT
26) Contact an Alfa Romeo
Dealership as soon as possible to
have the correct tightening of
the wheel bolts checked.
175