instrument panel Alfa Romeo MiTo 2013 Owner handbook (in English)
[x] Cancel search | Manufacturer: ALFA ROMEO, Model Year: 2013, Model line: MiTo, Model: Alfa Romeo MiTo 2013Pages: 312, PDF Size: 11.5 MB
Page 7 of 312

GETTING TO KNOW YOUR CAR
DASHBOARDThe presence and position of the controls, instruments and indicators may vary according to the different versions.1. Diffuser for directing air to the side windows 2. Adjustable air vent 3. Exterior light control lever 4. Instrument panel 5. Windscreen wiper/rear
window wiper/trip computer control lever 6. Car radio (for versions/markets, where provided) 7. Adjustable air diffusers 8. Hazard warning lights,
door locking/unlocking button 9. Passenger front airbag 10. Glove compartment 11. Heating/ventilation/climate control system controls 12. Gear
lever 13. "Alfa DNA" system 14. Ignition device 15. Driver side front knee bag (for versions/markets, where provided) 16. Driver front airbag
17. Cruise Control lever (for versions/markets, where provided) 18. Fuse box access flap 19. Panel with various controls.
fig. 1
A0J0330
3GETTING TO
KNOW YOUR CARSAFETY
STARTING AND
DRIVING
IN AN EMERGENCY
SERVICING AND
MAINTENANCE
TECHNICAL
SPECIFICATIONS
INDEX
Page 8 of 312

CONTROL PANEL ANDINSTRUMENTSVERSIONS WITH MULTIFUNCTION DISPLAYA. Speedometer (speed indicator) B. Multifunction display C. Rev counter D. Fuel level gauge with reserve warning light E. Engine coolant
temperature gauge with overheating warning light
Warning lights supplied on diesel versions only. On diesel versions, the end of scale for the rev counter is 6000 rpm
IMPORTANT The illumination of the instrument panel graphics may vary according to version.
fig. 2
A0J0349
4
GETTING TO
KNOW YOUR CAR
SAFETY
STARTING AND
DRIVING
IN AN EMERGENCY
SERVICING AND
MAINTENANCE
TECHNICAL
SPECIFICATIONS
INDEX
Page 9 of 312

VERSIONS WITH RECONFIGURABLE MULTIFUNCTIONAL DISPLAYA. Speedometer (speed indicator) B. Reconfigurable multifunction display C. Rev counter D. Fuel level gauge with reserve warning light E. Engine
coolant temperature gauge with overheating warning light
Warning lights supplied on diesel versions only. On diesel versions, the end of scale for the rev counter is 6000 rpm
IMPORTANT The illumination of the instrument panel graphics may vary according to version.
fig. 3
A0J0263
5GETTING TO
KNOW YOUR CARSAFETY
STARTING AND
DRIVING
IN AN EMERGENCY
SERVICING AND
MAINTENANCE
TECHNICAL
SPECIFICATIONS
INDEX
Page 19 of 312
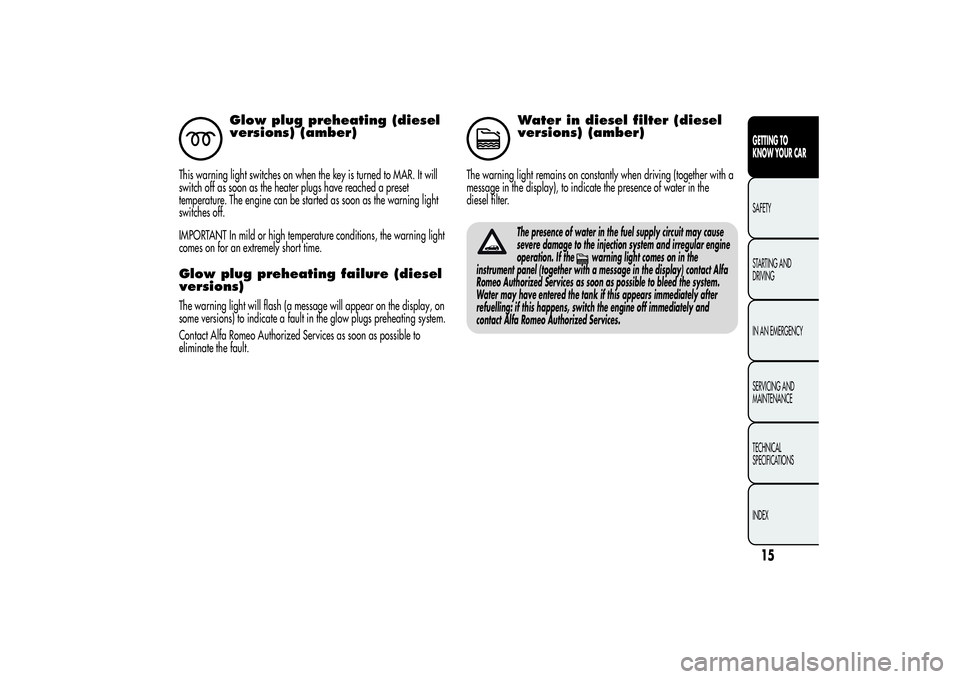
Glow plug preheating (diesel
versions) (amber)
This warning light switches on when the key is turned to MAR. It will
switch off as soon as the heater plugs have reached a preset
temperature. The engine can be started as soon as the warning light
switches off.
IMPORTANT In mild or high temperature conditions, the warning light
comes on for an extremely short time.Glow plug preheating failure (diesel
versions)The warning light will flash (a message will appear on the display, on
some versions) to indicate a fault in the glow plugs preheating system.
Contact Alfa Romeo Authorized Services as soon as possible to
eliminate the fault.
Water in diesel filter (diesel
versions) (amber)
The warning light remains on constantly when driving (together with a
message in the display), to indicate the presence of water in the
diesel filter.
The presence of water in the fuel supply circuit may cause
severe damage to the injection system and irregular engine
operation. If the
warning light comes on in the
instrument panel (together with a message in the display) contact Alfa
Romeo Authorized Services as soon as possible to bleed the system.
Water may have entered the tank if this appears immediately after
refuelling: if this happens, switch the engine off immediately and
contact Alfa Romeo Authorized Services.
15GETTING TO
KNOW YOUR CARSAFETY
STARTING AND
DRIVING
IN AN EMERGENCY
SERVICING AND
MAINTENANCE
TECHNICAL
SPECIFICATIONS
INDEX
Page 30 of 312
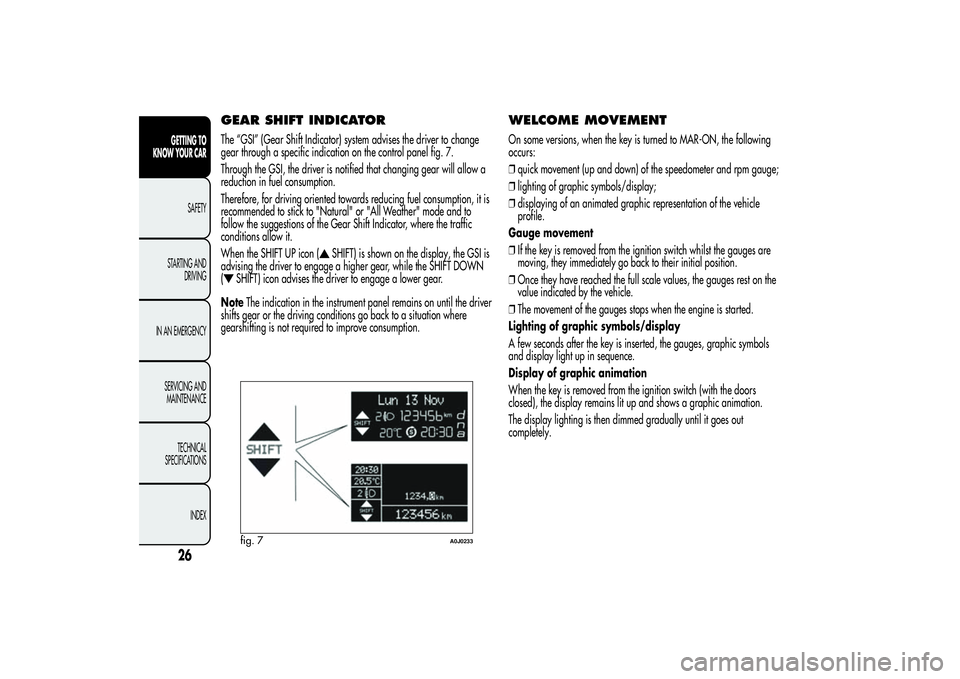
GEAR SHIFT INDICATORThe “GSI” (Gear Shift Indicator) system advises the driver to change
gear through a specific indication on the control panel fig. 7.
Through the GSI, the driver is notified that changing gear will allow a
reduction in fuel consumption.
Therefore, for driving oriented towards reducing fuel consumption, it is
recommended to stick to "Natural" or "All Weather" mode and to
follow the suggestions of the Gear Shift Indicator, where the traffic
conditions allow it.
When the SHIFT UP icon (
SHIFT) is shown on the display, the GSI is
advising the driver to engage a higher gear, while the SHIFT DOWN
(
SHIFT) icon advises the driver to engage a lower gear.
NoteThe indication in the instrument panel remains on until the driver
shifts gear or the driving conditions go back to a situation where
gearshifting is not required to improve consumption.
WELCOME MOVEMENTOn some versions, when the key is turned to MAR-ON, the following
occurs:
❒quick movement (up and down) of the speedometer and rpm gauge;
❒lighting of graphic symbols/display;
❒displaying of an animated graphic representation of the vehicle
profile.
Gauge movement
❒If the key is removed from the ignition switch whilst the gauges are
moving, they immediately go back to their initial position.
❒Once they have reached the full scale values, the gauges rest on the
value indicated by the vehicle.
❒The movement of the gauges stops when the engine is started.
Lighting of graphic symbols/display
A few seconds after the key is inserted, the gauges, graphic symbols
and display light up in sequence.
Display of graphic animation
When the key is removed from the ignition switch (with the doors
closed), the display remains lit up and shows a graphic animation.
The display lighting is then dimmed gradually until it goes out
completely.
fig. 7
A0J0233
26GETTING TO
KNOW YOUR CAR
SAFETY
STARTING AND
DRIVING
IN AN EMERGENCY
SERVICING AND
MAINTENANCE
TECHNICAL
SPECIFICATIONS
INDEX
Page 43 of 312
SYMBOLSSome car components have coloured labels whose symbols indicate
precautions to be observed when using this component. Under the
bonnet there is also a label that summarises all the symbols.
ALFA ROMEO CODE SYSTEMTo further protect your car from theft, it has been fitted with an engine
immobilising system. It is automatically activated when the ignition
key is removed.
Each key contains an electronic device which modulates the signal
emitted during ignition by an antenna built into the ignition device. The
modulated signal, which changes each time the engine is started, is
the “password”, by means of which the control unit recognises the key
and enables to start the engine.OPERATIONEach time the car is started by turning the ignition key to MAR, the
Alfa Romeo CODE system control unit sends an acknowledgement
code to the engine management control unit to deactivate the inhibitor.
The code is sent only if the Alfa Romeo CODE system control unit has
recognised the code transmitted from the key.
Each time the ignition key is turned to STOP, the Alfa Romeo CODE
system deactivates the functions of the engine management control
unit. If, during starting, the code is not correctly recognised, the
warning light switches on in the instrument panel.
In this case, turn the key to STOP and then to MAR; if it is still locked,
try again with the other keys that come with the vehicle. If you are
still unable to start the engine contact Alfa Romeo Authorized Services.
39GETTING TO
KNOW YOUR CARSAFETY
STARTING AND
DRIVING
IN AN EMERGENCY
SERVICING AND
MAINTENANCE
TECHNICAL
SPECIFICATIONS
INDEX
Page 51 of 312
SWITCHING OFF THE ALARMPress the
button. The following operations are performed (excluding
specific markets):
❒the direction indicators flash briefly twice;
❒there are two brief acoustic signals;
❒unlocking of the doors.
IMPORTANT The alarm does not switch off when the central opening is
activated using the metal insert in the key.
VOLUMETRIC/ANTI-LIFT PROTECTIONTo guarantee the correct operation of the protection, close the side
windows and any sun roof completely (for versions/markets, where
provided).
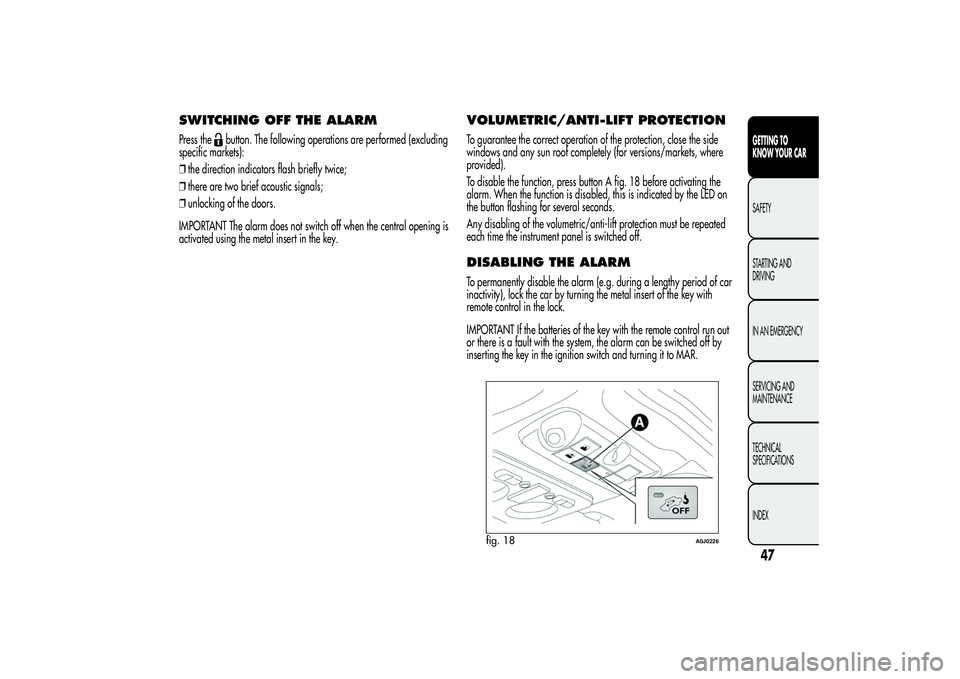
To disable the function, press button A fig. 18 before activating the
alarm. When the function is disabled, this is indicated by the LED on
the button flashing for several seconds.
Any disabling of the volumetric/anti-lift protection must be repeated
each time the instrument panel is switched off.DISABLING THE ALARMTo permanently disable the alarm (e.g. during a lengthy period of car
inactivity), lock the car by turning the metal insert of the key with
remote control in the lock.
IMPORTANT If the batteries of the key with the remote control run out
or there is a fault with the system, the alarm can be switched off by
inserting the key in the ignition switch and turning it to MAR.
fig. 18
A0J0226
47GETTING TO
KNOW YOUR CARSAFETY
STARTING AND
DRIVING
IN AN EMERGENCY
SERVICING AND
MAINTENANCE
TECHNICAL
SPECIFICATIONS
INDEX
Page 73 of 312
ADDITIONAL HEATER(only diesel versions)
(for versions/markets, where provided)
This allows the passenger compartment to be heated more quickly in
cold weather conditions. The additional heater turns off automatically
after the required comfort conditions are achieved.
Automatic dual zone climate control system
(for versions/markets, where provided)
The additional heater activates automatically when the ignition key is
turned to MAR-ON.
Manual heater and manual climate control
The additional heater activates automatically when knob N is turned to
the end of the red section and the fan is set to at least 1
stspeed.
IMPORTANT The heater only works if the outside temperature and
engine coolant temperature are low. The heater will not activate if the
battery voltage is too low.
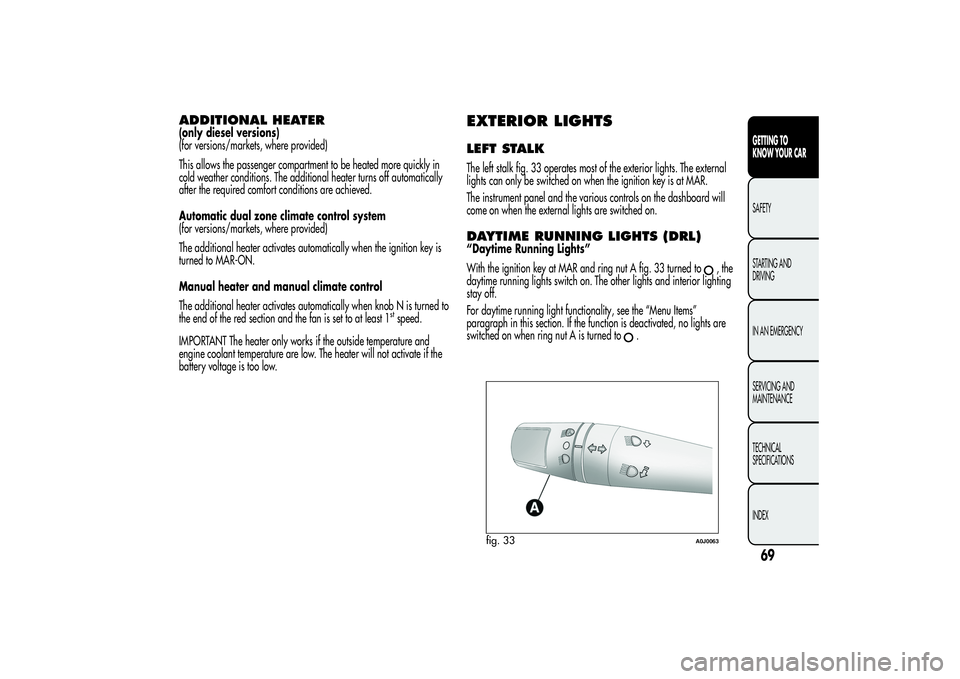
EXTERIOR LIGHTSLEFT STALKThe left stalk fig. 33 operates most of the exterior lights. The external
lights can only be switched on when the ignition key is at MAR.
The instrument panel and the various controls on the dashboard will
come on when the external lights are switched on.DAYTIME RUNNING LIGHTS (DRL)“Daytime Running Lights”
With the ignition key at MAR and ring nut A fig. 33 turned to
,the
daytime running lights switch on. The other lights and interior lighting
stay off.
For daytime running light functionality, see the “Menu Items”
paragraph in this section. If the function is deactivated, no lights are
switched on when ring nut A is turned to
.
fig. 33
A0J0063
69GETTING TO
KNOW YOUR CARSAFETY
STARTING AND
DRIVING
IN AN EMERGENCY
SERVICING AND
MAINTENANCE
TECHNICAL
SPECIFICATIONS
INDEX
Page 74 of 312

SIDE LIGHTS/DIPPED BEAM
HEADLIGHTSWith the ignition key turned to MAR, turn ring nut A fig. 33 to
.
The daytime running lights are switched off and the side lights and
dipped headlights are switched on. The warning light
switches
on on the instrument panel.
PARKING LIGHTSThese lights can only be switched on with ignition key at STOP or
removed, by moving ring nut A first to position
and then to position
.
When the parking lights are switched on, the number plate lights and
the front and rear side lights switch on as well (the daytime running
lights (DRLs) remain off however).
The warning light
switches on on the instrument panel.
When the direction indicator stalk is activated the side for the lights
(left or right) can be selected.
AUTOMATIC LIGHTING CONTROL
(AUTOLIGHT) (Dusk sensor)(for versions/markets, where provided)
This infrared LED sensor, combined with the rain sensor and located on
the windscreen, detects the variations in outside brightness depending
on the light sensitivity set with the Set-up Menu: the greater the
sensitivity, the less external light is required to activate the exterior
lights.Activation
The dusk sensor activates when ring nut A fig. 33 is turned to
.In
this way the side lights and dipped headlights are activated
automatically according to the external light level.
IMPORTANT The sensor is unable to detect the presence of fog.
Therefore under these circumstances, these lights must be turned on
manually.
When the lights are turned on by the sensor, the fog lights (for
versions/markets, where provided) and the rear fog lights may be
turned on.
When the lights are automatically switched off, the front and rear fog
lights (if activated) are also switched off. The next time the lights are
switched on automatically, the fog lights must be reactivated manually
(if required).
With the sensor active, it is possible to flash the headlights but the
main beam headlights cannot be switched on. If you need to turn these
lights on, turn ring nut A to position
and turn the dipped
headlights on.
When the lights have been activated automatically and are then
switched off by the sensor, the dipped beam headlights are switched
off first, followed by the side lights a few seconds later.
If the sensor is activated but is malfunctioning, the side lights and
dipped beam headlights are switched on irrespective of the outside
light level and the sensor failure is indicated on the instrument panel
display.
It is also possible to deactivate the sensor and switch on these lights if
necessary.
70GETTING TO
KNOW YOUR CAR
SAFETY
STARTING AND
DRIVING
IN AN EMERGENCY
SERVICING AND
MAINTENANCE
TECHNICAL
SPECIFICATIONS
INDEX
Page 75 of 312
MAIN BEAM HEADLIGHTSWith ring nut A at
pull the stalk towards the steering wheel (stable
position). The warning light
switches on on the instrument panel.
To turn the lights off, pull the stalk towards the steering wheel (dipped
headlights will stay on). It is not possible to switch on the main beam
headlights in fixed mode if the automatic lighting control system is
active.
FLASHINGPull the stalk towards the steering wheel (unstable position) regardless
of the position of ring nut A. The warning light
switches on on
the instrument panel.
DIRECTION INDICATORSBring the stalk into (stable) position:
❒upwards: activates right direction indicator;
❒downwards: activates left direction indicator.
Warning light
or
will flash in the instrument panel.
The indicators are switched off automatically when the steering wheel
is straightened.
"Lane change" function
If you want to signal that you are changing lane, hold the left stalk in
the unstable position for less than half a second. The direction indicator
on the selected side flashes 3 times and then switches off automatically.
"FOLLOW ME HOME" DEVICEThis device allows you to illuminate the area in front of the car for a
certain amount of time.
Activation
With the ignition key at STOP or removed, pull stalk A towards the
steering wheel and move it within 2 minutes of the engine switching
off.
At each single movement of the stalk, the lights will remain on for an
extra 30 seconds up to a maximum of 210 seconds; then the lights are
switched off automatically.
The
warning light on the instrument panel will light up (and the
corresponding message will appear on the display) as long as the
function is active.
The light comes on when the stalk is first moved and stays on until the
function is automatically deactivated. Each movement of the stalk
only increases the amount of time the lights stay on.
Deactivation
Keep stalk A pulled towards the steering wheel for more than 2
seconds.
71GETTING TO
KNOW YOUR CARSAFETY
STARTING AND
DRIVING
IN AN EMERGENCY
SERVICING AND
MAINTENANCE
TECHNICAL
SPECIFICATIONS
INDEX