parking brake ALFA ROMEO STELVIO 2022 Owners Manual
[x] Cancel search | Manufacturer: ALFA ROMEO, Model Year: 2022, Model line: STELVIO, Model: ALFA ROMEO STELVIO 2022Pages: 256, PDF Size: 10.17 MB
Page 4 of 256
2
READ THIS CAREFULLY
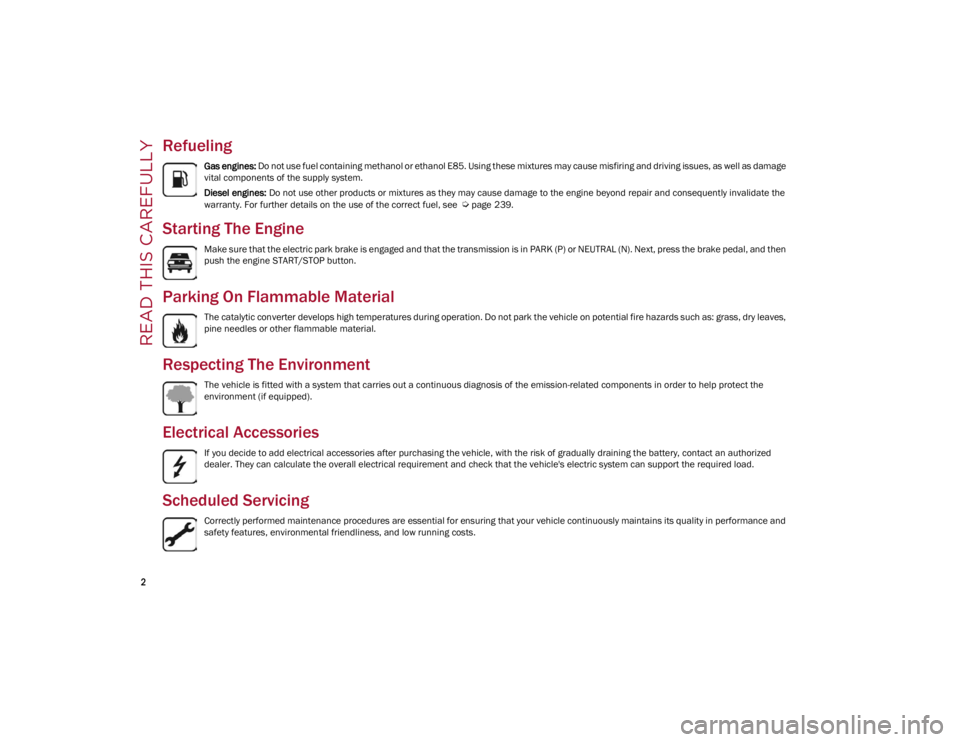
Refueling
Gas engines: Do not use fuel containing methanol or ethanol E85. Using these mixtures may cause misfiring and driving issues, as well as damage
vital components of the supply system.
Diesel engines: Do not use other products or mixtures as they may cause damage to the engine beyond repair and consequently invalidate the
warranty. For further details on the use of the correct fuel, see
Ú
page 239.
Starting The Engine
Make sure that the electric park brake is engaged and that the transmission is in PARK (P) or NEUTRAL (N). Next, press the brake pedal, and then
push the engine START/STOP button.
Parking On Flammable Material
The catalytic converter develops high temperatures during operation. Do not park the vehicle on potential fire hazards such as: grass, dry leaves,
pine needles or other flammable material.
Respecting The Environment
The vehicle is fitted with a system that carries out a continuous diagnosis of the emission-related components in order to help protect the
environment (if equipped).
Electrical Accessories
If you decide to add electrical accessories after purchasing the vehicle, with the risk of gradually draining the battery, contact an authorized
dealer. They can calculate the overall electrical requirement and check that the vehicle's electric system can support the required load.
Scheduled Servicing
Correctly performed maintenance procedures are essential for ensuring that your vehicle continuously maintains its quality in performance and
safety features, environmental friendliness, and low running costs.
22_GU_OM_EN_USC_t.book Page 2
Page 17 of 256
15
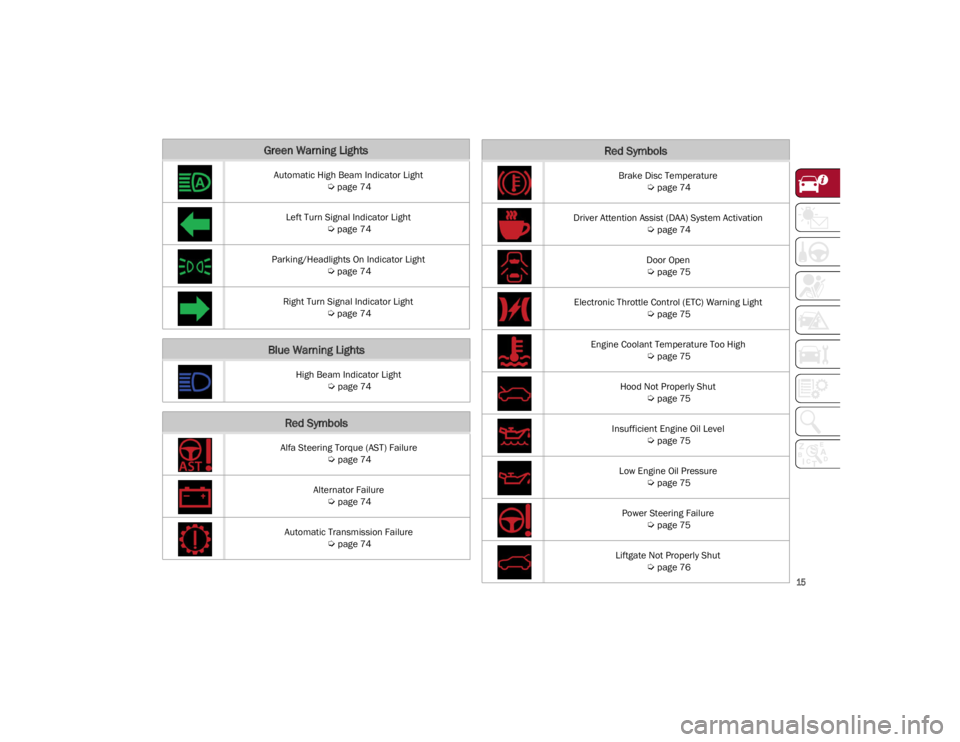
Green Warning Lights
Automatic High Beam Indicator Light
Ú
page 74
Left Turn Signal Indicator Light
Ú
page 74
Parking/Headlights On Indicator Light
Ú
page 74
Right Turn Signal Indicator Light
Ú
page 74
Blue Warning Lights
High Beam Indicator Light
Ú
page 74
Red Symbols
Alfa Steering Torque (AST) Failure
Ú
page 74
Alternator Failure
Ú
page 74
Automatic Transmission Failure
Ú
page 74
Brake Disc Temperature
Ú
page 74
Driver Attention Assist (DAA) System Activation
Ú
page 74
Door Open
Ú
page 75
Electronic Throttle Control (ETC) Warning Light
Ú
page 75
Engine Coolant Temperature Too High
Ú
page 75
Hood Not Properly Shut
Ú
page 75
Insufficient Engine Oil Level
Ú
page 75
Low Engine Oil Pressure
Ú
page 75
Power Steering Failure
Ú
page 75
Liftgate Not Properly Shut
Ú
page 76
Red Symbols
22_GU_OM_EN_USC_t.book Page 15
Page 24 of 256
GETTING TO KNOW YOUR VEHICLE
22
IGNITION SWITCH
KEYLESS PUSH BUTTON IGNITION
This feature allows the driver to operate the
ignition switch with the push of a button as long
as the key fob is in the passenger compartment.
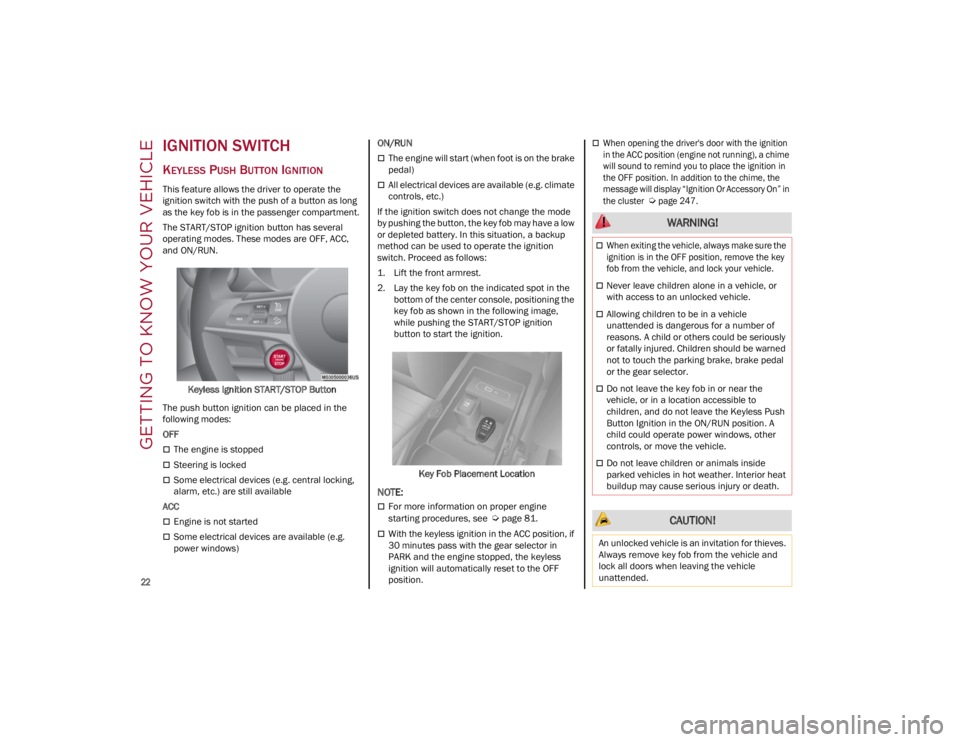
The START/STOP ignition button has several
operating modes. These modes are OFF, ACC,
and ON/RUN.Keyless Ignition START/STOP Button
The push button ignition can be placed in the
following modes:
OFF
The engine is stopped
Steering is locked
Some electrical devices (e.g. central locking,
alarm, etc.) are still available
ACC
Engine is not started
Some electrical devices are available (e.g.
power windows) ON/RUN
The engine will start (when foot is on the brake
pedal)
All electrical devices are available (e.g. climate
controls, etc.)
If the ignition switch does not change the mode
by pushing the button, the key fob may have a low
or depleted battery. In this situation, a backup
method can be used to operate the ignition
switch. Proceed as follows:
1. Lift the front armrest.
2. Lay the key fob on the indicated spot in the bottom of the center console, positioning the
key fob as shown in the following image,
while pushing the START/STOP ignition
button to start the ignition.
Key Fob Placement Location
NOTE:
For more information on proper engine
starting procedures, see
Ú
page 81.
With the keyless ignition in the ACC position, if
30 minutes pass with the gear selector in
PARK and the engine stopped, the keyless
ignition will automatically reset to the OFF
position.
When opening the driver's door with the ignition
in the ACC position (engine not running), a chime
will sound to remind you to place the ignition in
the OFF position. In addition to the chime, the
message will display “Ignition Or Accessory On” in
the cluster
Ú
page 247.
WARNING!
When exiting the vehicle, always make sure the
ignition is in the OFF position, remove the key
fob from the vehicle, and lock your vehicle.
Never leave children alone in a vehicle, or
with access to an unlocked vehicle.
Allowing children to be in a vehicle
unattended is dangerous for a number of
reasons. A child or others could be seriously
or fatally injured. Children should be warned
not to touch the parking brake, brake pedal
or the gear selector.
Do not leave the key fob in or near the
vehicle, or in a location accessible to
children, and do not leave the Keyless Push
Button Ignition in the ON/RUN position. A
child could operate power windows, other
controls, or move the vehicle.
Do not leave children or animals inside
parked vehicles in hot weather. Interior heat
buildup may cause serious injury or death.
CAUTION!
An unlocked vehicle is an invitation for thieves.
Always remove key fob from the vehicle and
lock all doors when leaving the vehicle
unattended.
22_GU_OM_EN_USC_t.book Page 22
Page 25 of 256
23
REMOTE START —
IF EQUIPPED
This system uses the key fob to start the
engine conveniently from outside the
vehicle while still maintaining security.
NOTE:
Obstructions between the vehicle and key fob
may reduce this range
Ú
page 247.
HOW TO USE REMOTE START
Push the Remote Start button on the key fob
twice within five seconds. The vehicle doors will
lock, the turn signals will flash twice, and the horn
will chirp twice. Pushing the Remote Start button
a third time shuts the engine off.
NOTE:
With Remote Start, the engine will only run for
15 minutes.
Remote Start can only be used twice.
If an engine fault is present or fuel level is low,
the vehicle will start and then shut down in 10
seconds.
The parking lights will turn on and remain on
during Remote Start mode.
For security, power window and power sunroof
(if equipped) operation is disabled when the
vehicle is in the Remote Start mode.
The ignition must be placed in the ACC position
before the Remote Start sequence can be
repeated for a third cycle.
All of the following conditions must be met before
the engine will remote start:
Gear selector in PARK
Doors closed
Hood closed
Liftgate closed
Hazard switch off
Brake switch inactive (brake pedal not
pressed)
Battery at an acceptable charge level
PANIC button not pushed
System not disabled from previous Remote
Start event
Vehicle Security system indicator flashing
Ignition in OFF position
Fuel level meets minimum requirement
Vehicle Security system is not signaling an
intrusion
Malfunction Indicator Light (MIL) is not
illuminated
TO EXIT REMOTE START MODE
To drive the vehicle after starting the Remote
Start system, either push and release the unlock
button on the key fob to unlock the doors, or
unlock the vehicle using Passive Entry via the
door handles, and disarm the Vehicle Security
system (if equipped). Then, prior to the end of the
15 minute cycle, push and release the START/
STOP ignition button while pressing the brake
pedal.
The Remote Start system will turn the engine off
if the Remote Start button is pushed again, or if
the engine is allowed to run for the entire
15 minute cycle.
REMOTE START COMFORT SYSTEMS —
I
F EQUIPPED
When Remote Start is activated, the heated
steering wheel and front heated seat features will
automatically activate when ambient
temperature is less than 39°F (4°C). These
features will stay on through the duration of
Remote Start.
NOTE:
This feature can be activated through the radio
system. Refer to the Information and Entertain -
ment System Owner’s Manual Supplement for
further information.
WARNING!
Do not start or run an engine in a closed
garage or confined area. Exhaust gas
contains Carbon Monoxide (CO) which is
odorless and colorless. Carbon Monoxide is
poisonous and can cause serious injury or
death when inhaled.
Keep key fobs away from children. Operation
of the Remote Start system, windows, door
locks or other controls could cause serious
injury or death.
22_GU_OM_EN_USC_t.book Page 23
Page 27 of 256
25
(Continued)
When the function is disabled, the light on the
Volumetric/Anti-Lift Protection button flashes for
several seconds.
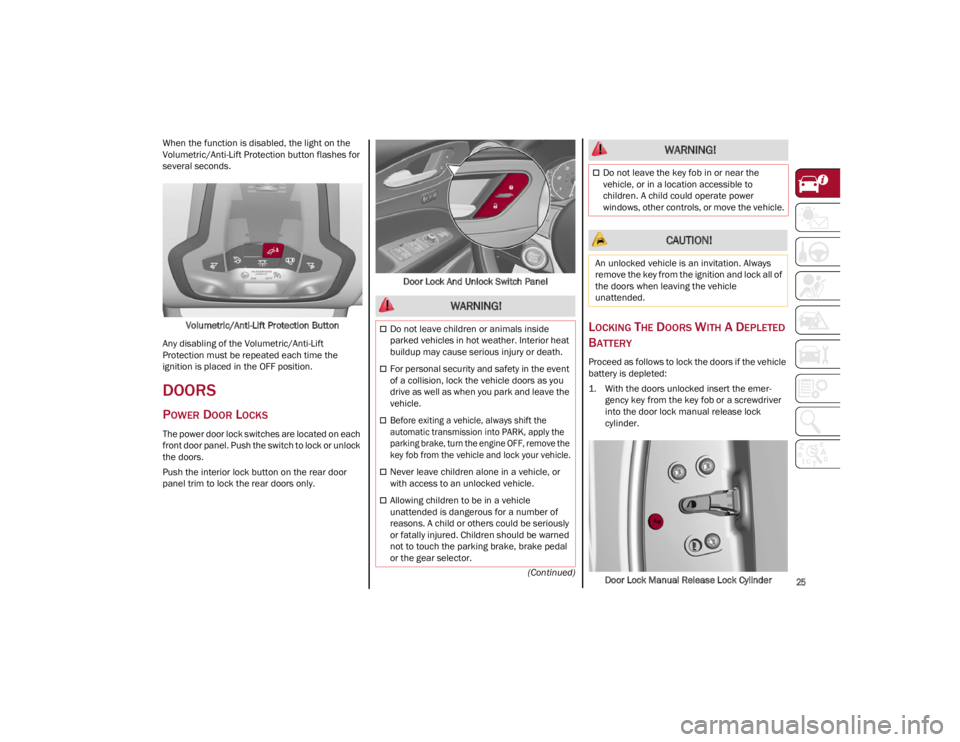
Volumetric/Anti-Lift Protection Button
Any disabling of the Volumetric/Anti-Lift
Protection must be repeated each time the
ignition is placed in the OFF position.
DOORS
POWER DOOR LOCKS
The power door lock switches are located on each
front door panel. Push the switch to lock or unlock
the doors.
Push the interior lock button on the rear door
panel trim to lock the rear doors only. Door Lock And Unlock Switch Panel
LOCKING THE DOORS WITH A DEPLETED
B
ATTERY
Proceed as follows to lock the doors if the vehicle
battery is depleted:
1. With the doors unlocked insert the emer -
gency key from the key fob or a screwdriver
into the door lock manual release lock
cylinder.
Door Lock Manual Release Lock Cylinder
WARNING!
Do not leave children or animals inside
parked vehicles in hot weather. Interior heat
buildup may cause serious injury or death.
For personal security and safety in the event
of a collision, lock the vehicle doors as you
drive as well as when you park and leave the
vehicle.
Before exiting a vehicle, always shift the
automatic transmission into PARK, apply the
parking brake, turn the engine OFF, remove the
key fob from the vehicle and lock your vehicle.
Never leave children alone in a vehicle, or
with access to an unlocked vehicle.
Allowing children to be in a vehicle
unattended is dangerous for a number of
reasons. A child or others could be seriously
or fatally injured. Children should be warned
not to touch the parking brake, brake pedal
or the gear selector.
Do not leave the key fob in or near the
vehicle, or in a location accessible to
children. A child could operate power
windows, other controls, or move the vehicle.
CAUTION!
An unlocked vehicle is an invitation. Always
remove the key from the ignition and lock all of
the doors when leaving the vehicle
unattended.
WARNING!
22_GU_OM_EN_USC_t.book Page 25
Page 72 of 256
GETTING TO KNOW YOUR INSTRUMENT PANEL
70
Clock & Date
The following settings can be modified under the
“Clock & Date” menu:
Sync With GPS Time: activates or deactivates
the clock synchronization through the GPS. If
the function is deactivated, the options Set
Time and Set Date are enabled.
Set Time: set the time manually.
Time Format: set the time format to either a
12-hour or a 24-hour clock.
Set Date: set the date manually.
Restore Clock & Date Settings: restores the
factory settings.
To access and change the setting, turn and push
the Rotary Pad or press the desired setting on the
touchscreen.
Cluster
The following settings can be modified under the
“Cluster” menu:
Warning Buzzer Volume: set the volume of the
warning buzzer on seven levels.
Trip B: activate or deactivate the Trip function.
Show Phone Info: activate/deactivate
repetition of the phone function screens also
on the instrument cluster display.
Show Audio Info: activate/deactivate
repetition of the audio function screens (Radio
and Media) also on the instrument cluster
display.
Show Nav Info: activate/deactivate repetition
of the navigator function screens also on the
instrument cluster display.
Digital Speed on all screens: activate/deacti -
vating of digital speed on the instrument
cluster display screens other than the main
screen.
Consumption Bar: activate/deactivate the
consumption baron the display screens of the
instrument panel where it is available.
Performance Pages: choose, for each driving
mode, one of the two alternative contents
displayed in the screen.
Custom Areas: select which content to display
in each of the three customizable areas on the
display of the instrument panel: time, date,
outside temperature, radio information,
compass.
Restore Cluster Settings: deletes the current
settings and restores the factory settings.
To access and the change the setting, turn and
push the Rotary Pad or press the desired setting
on the touchscreen.
WARNING LIGHTS AND
MESSAGES ON THE
INSTRUMENT PANEL
The following pages consist of warning lights and
messages.
NOTE:
The warning light turns on together with a
dedicated message and/or chime when
applicable. These indications are precau -
tionary and as such must not be considered as
exhaustive and/or alternative to the
information contained in the Owner’s Manual, which you are advised to read carefully in all
cases. Always refer to the information in this
section in the event of a failure indication.
The failure indicators appearing on the display
are divided into two categories: very serious
and less serious faults. Serious faults are
indicated by a repeated and prolonged
warning cycle. Less serious faults are
indicated by a warning cycle with a shorter
duration. You can stop the warning cycle in
both cases by pushing the button located on
the windshield wiper stalk. The instrument
panel warning light will stay on until the cause
of the failure is eliminated.
RED WARNING LIGHTS
Air Bag Warning Light
This warning light will illuminate to
indicate a fault with the air bag, and will
turn on for four to eight seconds as a
bulb check when the ignition is placed
in the ON/RUN or ACC/ON/RUN position. This
light will illuminate with a single chime when a
fault with the air bag has been detected, it will
stay on until the fault is cleared. If the light is
either not on during startup, stays on, or turns on
while driving, have the system inspected at an
authorized dealer as soon as possible.
Brake Warning Light
This warning light monitors various
brake functions, including brake fluid
level and parking brake application. If
the brake light turns on it may indicate
that the parking brake is applied, that the brake
fluid level is low, or that there is a problem with
the Anti-Lock Brake System reservoir.
22_GU_OM_EN_USC_t.book Page 70
Page 73 of 256
71
(Continued)
If the light remains on when the parking brake has
been disengaged, and the fluid level is at the full
mark on the master cylinder reservoir, it indicates
a possible brake hydraulic system malfunction or
that a problem with the Brake Booster has been
detected by the Anti-Lock Brake System (ABS) /
Electronic Stability Control (ESC) system. In this
case, the light will remain on until the condition
has been corrected. If the problem is related to the
brake booster, the ABS pump will run when
applying the brake, and a brake pedal pulsation
may be felt during each stop.
The dual brake system provides a reserve braking
capacity in the event of a failure to a portion of the
hydraulic system. A leak in either half of the dual
brake system is indicated by the Brake Warning
Light, which will turn on when the brake fluid level
in the master cylinder has dropped below a
specified level.
The light will remain on until the cause is corrected.
NOTE:
The light may flash momentarily during sharp
cornering maneuvers, which change fluid level
conditions. The vehicle should have service
performed, and the brake fluid level checked.
If brake failure is indicated, immediate repair is
necessary.
Vehicles equipped with the Anti-Lock Brake
System (ABS) are also equipped with Electronic
Brake Force Distribution (EBD). In the event of an
EBD failure, the Brake Warning Light will turn on
along with the ABS Light. Immediate repair to the
ABS system is required.
Operation of the Brake Warning Light can be
checked by turning the ignition switch from the
OFF position to the ON/RUN position. The light
should illuminate for approximately two seconds.
The light should then turn off unless the parking
brake is applied or a brake fault is detected. If the
light does not illuminate, have the light inspected
by an authorized dealer.
The light also will turn on when the parking brake
is applied with the ignition switch in the ON/RUN
position.
NOTE:
This light shows only that the parking brake is
applied. It does not show the degree of brake
application.
Electronic Brake Force Distribution (EBD)
Failure
The simultaneous turning on of the
BRAKE (red) and (amber) warning
lights with the engine on indicates either
a failure of the EBD system or that the
system is not available. In this case, the rear
wheels may suddenly lock and the vehicle may
swerve when braking abruptly.
Drive very carefully to the nearest authorized
dealer to have the system inspected immediately.
Oil Temperature Warning Light
This telltale indicates engine oil
temperature is high.
Stop the vehicle and shut off the engine as soon
as possible. If the problem persists, contact an
authorized dealer.
Seat Belt Reminder Warning Light
When the ignition is first placed in the
ON/RUN position, if the driver’s seat
belt is unbuckled, a chime will sound
and the light will turn on. When driving,
if the driver or front passenger seat belt remains
unbuckled, the Seat Belt Reminder Light will flash
or remain on continuously and a chime will sound
Ú
page 151. WARNING!
The fault of the warning light is signaled by the
turning on of the icon on the instrument panel.
In this case, the warning light may not indicate
any faults with the restraint systems. Before
proceeding, contact an authorized dealer to
have the system checked immediately.
If the warning light does not turn on when the
ignition device is moved to ON or if it stays on
when driving (together with the message on the
display), there might be a fault in the restraint
systems; in this case, the air bags or preten -
sioners may not deploy in the event of an
accident or, in a lower number of cases, they
could deploy erroneously. Before proceeding,
contact an authorized dealer to have the
system checked immediately.
WARNING!
22_GU_OM_EN_USC_t.book Page 71
Page 76 of 256
GETTING TO KNOW YOUR INSTRUMENT PANEL
74
GREEN INDICATOR LIGHTS
Automatic High Beam Indicator Light — If
Equipped
This indicator light will illuminate when
the automatic high beam headlights are
activated.
Left Turn Signal Indicator Light
The instrument cluster directional arrow
will flash independently for the left turn
signal as selected, as well as the
exterior turn signal lamp(s) (front and
rear) as selected when the multifunction lever is
moved down (left). This directional arrow will
flash in conjunction with the right directional
arrow when the hazard warning light button is
pushed.
Parking/Headlights On Indicator Light
This indicator will illuminate when the
parking lights or headlights are turned
on.
Right Turn Signal Indicator Light
The instrument cluster directional arrow
will flash independently for the right
turn signal as selected, as well as the
exterior turn signal lamp(s) (front and
rear) as selected when the multifunction lever is
moved up (right). This directional arrow will flash
in conjunction with the left directional arrow
when the hazard warning light button is pushed.
BLUE INDICATOR LIGHTS
High Beam Indicator Light — If Equipped
This indicator shows that the high beam
headlights are on. Push the
multifunction control lever away from
you to switch the headlights to high
beam. Push the lever a second time to switch the
headlights back to low beam. Pull the lever
toward you for a temporary high beam on, “flash
to pass” scenario.
RED SYMBOLS
Alfa Steering Torque (AST) Failure
The switching on of the telltale signals a
failure in the automatic steering
correction system.
Contact an authorized dealer to have the system
checked.
Alternator Failure
The switching on of the telltale with
engine on corresponds to an alternator
failure.
Contact an authorized dealer as soon as
possible.
Automatic Transmission Failure
The telltale turns on, together with a
buzzer warning, to indicate that the
automatic transmission is faulty.
Contact an authorized dealer as soon as
possible.
Brake Disc Temperature
When the symbol turns on, it indicates
an excessive temperature of the brake
discs. Let the breaking system cool
down by reducing the speed.
Driver Attention Assist (DAA) System
Activation
The symbol appears, together with a
message on the display, in case of
activation of the DAA system.
Stop to pause while driving, pulling the car over in
safe conditions.
WARNING!
The TPMS has been optimized for the original
equipment tires and wheels. TPMS pressures
and warning have been established for the tire
size equipped on your vehicle. Undesirable sys -
tem operation or sensor damage may result
when using replacement equipment that is not
of the same size, type, and/or style. Aftermarket
wheels can cause sensor damage. Using after -
market tire sealants may cause the Tire Pres -
sure Monitoring System (TPMS) sensor to
become inoperable. After using an aftermarket
tire sealant it is recommended that you take
your vehicle to an authorized dealership to have
your sensor function checked.
CAUTION!
Driving the vehicle with this symbol on may
severely damage the gearbox, with resulting
breakage. The oil may also overheat: contact
with hot engine or with exhaust components
at high temperature could cause fires.
22_GU_OM_EN_USC_t.book Page 74
Page 79 of 256
77
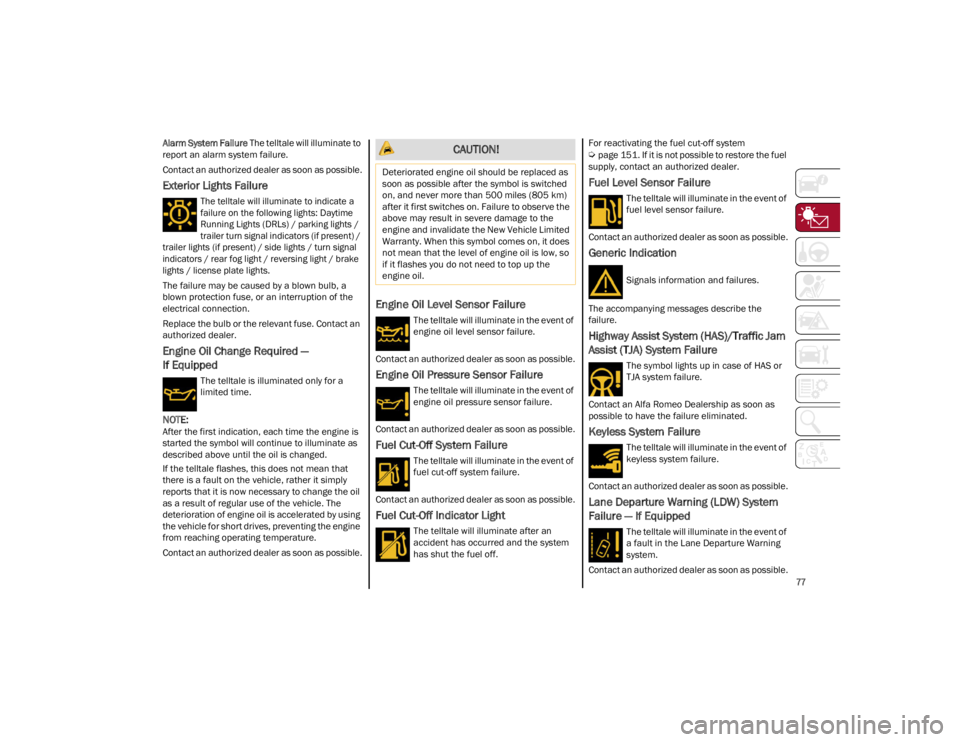
Alarm System Failure The telltale will illuminate to
report an alarm system failure.
Contact an authorized dealer as soon as possible.
Exterior Lights Failure
The telltale will illuminate to indicate a
failure on the following lights: Daytime
Running Lights (DRLs) / parking lights /
trailer turn signal indicators (if present) /
trailer lights (if present) / side lights / turn signal
indicators / rear fog light / reversing light / brake
lights / license plate lights.
The failure may be caused by a blown bulb, a
blown protection fuse, or an interruption of the
electrical connection.
Replace the bulb or the relevant fuse. Contact an
authorized dealer.
Engine Oil Change Required —
If Equipped
The telltale is illuminated only for a
limited time.
NOTE:
After the first indication, each time the engine is
started the symbol will continue to illuminate as
described above until the oil is changed.
If the telltale flashes, this does not mean that
there is a fault on the vehicle, rather it simply
reports that it is now necessary to change the oil
as a result of regular use of the vehicle. The
deterioration of engine oil is accelerated by using
the vehicle for short drives, preventing the engine
from reaching operating temperature.
Contact an authorized dealer as soon as possible.
Engine Oil Level Sensor Failure
The telltale will illuminate in the event of
engine oil level sensor failure.
Contact an authorized dealer as soon as possible.
Engine Oil Pressure Sensor Failure
The telltale will illuminate in the event of
engine oil pressure sensor failure.
Contact an authorized dealer as soon as possible.
Fuel Cut-Off System Failure
The telltale will illuminate in the event of
fuel cut-off system failure.
Contact an authorized dealer as soon as possible.
Fuel Cut-Off Indicator Light
The telltale will illuminate after an
accident has occurred and the system
has shut the fuel off. For reactivating the fuel cut-off system
Ú
page 151. If it is not possible to restore the fuel
supply, contact an authorized dealer.
Fuel Level Sensor Failure
The telltale will illuminate in the event of
fuel level sensor failure.
Contact an authorized dealer as soon as possible.
Generic Indication
Signals information and failures.
The accompanying messages describe the
failure.
Highway Assist System (HAS)/Traffic Jam
Assist (TJA) System Failure
The symbol lights up in case of HAS or
TJA system failure.
Contact an Alfa Romeo Dealership as soon as
possible to have the failure eliminated.
Keyless System Failure
The telltale will illuminate in the event of
keyless system failure.
Contact an authorized dealer as soon as possible.
Lane Departure Warning (LDW) System
Failure — If Equipped
The telltale will illuminate in the event of
a fault in the Lane Departure Warning
system.
Contact an authorized dealer as soon as possible.
CAUTION!
Deteriorated engine oil should be replaced as
soon as possible after the symbol is switched
on, and never more than 500 miles (805 km)
after it first switches on. Failure to observe the
above may result in severe damage to the
engine and invalidate the New Vehicle Limited
Warranty. When this symbol comes on, it does
not mean that the level of engine oil is low, so
if it flashes you do not need to top up the
engine oil.
22_GU_OM_EN_USC_t.book Page 77
Page 83 of 256
81
STARTING THE ENGINE
Before starting the engine, be sure to adjust the
seat, the interior rearview mirror, door mirrors,
and fasten the seat belt correctly.
Never press the accelerator pedal before starting
the engine.
If necessary, messages indicating the starting
procedure will be shown in the display.
STARTING PROCEDURE
Proceed as follows:
1. Apply the Electric Park Brake (EPB) and place the gear selector in PARK (P) or NEUTRAL (N).
2. Fully press the brake pedal without touching the accelerator.
3. Briefly push the ignition button.
4. If the engine doesn't start within a few seconds, you need to repeat the procedure.
If the problem persists, contact an authorized
dealer.
REMOTE STARTING SYSTEM
This system uses the key fob to start the engine
conveniently from outside the vehicle while still
maintaining security. The system has a range of
at least 300 feet (91 meters).
The remote starting system also activates the
climate control, the heated seats (if equipped),
and the heated steering wheel (if equipped),
depending on temperatures outside and inside of
the vehicle.
NOTE:
Obstructions between the vehicle and key fob
may reduce this range.
How To Use Remote Start
All of the following conditions must be met before
the engine will remote start:
Gear selector in PARK (P).
Doors closed.
Hood closed.
Liftgate closed.
Hazard switch off.
Brake switch inactive (brake pedal not
pressed).
Battery at an acceptable charge level.
PANIC button not pushed.
WARNING!
When leaving the vehicle, always remove the
key fob from the vehicle and lock your
vehicle.
Never leave children alone in a vehicle, or
with access to an unlocked vehicle.
Allowing children to be in a vehicle
unattended is dangerous for a number of
reasons. A child or others could be seriously
or fatally injured. Children should be warned
not to touch the parking brake, brake pedal
or the transmission gear selector.
Do not leave the key fob in or near the
vehicle, or in a location accessible to
children. A child could operate power
windows, other controls, or move the vehicle.
Do not leave children or animals inside
parked vehicles in hot weather. Interior heat
buildup may cause serious injury or death.
WARNING!
Never pour fuel or other flammable liquid
into the throttle body air inlet opening in an
attempt to start the vehicle. This could result
in flash fire causing serious personal injury.
Do not attempt to push or tow your vehicle to
get it started. Vehicles equipped with an
automatic transmission cannot be started
this way. Unburned fuel could enter the
catalytic converter and once the engine has
started, ignite and damage the converter
and vehicle.
If the vehicle has a discharged battery,
booster cables may be used to obtain a start
from a booster battery or the battery in
another vehicle. This type of start can be
dangerous if done improperly
Ú
page 184.
CAUTION!
To prevent damage to the starter, do not
continuously crank the engine for more than
25 seconds at a time. Wait 60 seconds before
trying again.
22_GU_OM_EN_USC_t.book Page 81