transmission ALFA ROMEO STELVIO 2022 Owners Manual
[x] Cancel search | Manufacturer: ALFA ROMEO, Model Year: 2022, Model line: STELVIO, Model: ALFA ROMEO STELVIO 2022Pages: 256, PDF Size: 10.17 MB
Page 3 of 256

1
Dear Customer,
We would like to congratulate and thank you for the purchase of your Alfa Romeo.
We have written this Owner’s Manual to help you get to know all of the features of your vehicle and use it in the best possible way. Please take the necessary
time to familiarize yourself with all the dynamic features of your vehicle.
Here you will find important information and warnings regarding the use of your vehicle, and how to achieve the best performance from the technical
features of your Alfa Romeo.
You are advised to read through the Owner’s Manual before taking it on the road for the first time. It is important to become familiar with the controls of
your vehicle, especially with sections concerning the brakes, handling, transmission, and vehicle behavior on different road surfaces.
This Owner’s Manual also provides a description of special features and tips, as well as essential information for the safe driving, care, and maintenance
of your Alfa Romeo over time.
It is supplemented by Warranty Information, and customer-oriented documents. Within this information, you will find a description of the services that Alfa
Romeo offers to its customers, the vehicle's warranty coverage, and the details of the terms and conditions for maintaining its validity.
We are sure that these will help you to get in touch with and appreciate both your new vehicle and the service provided by the people at Alfa Romeo.
For questions or comments pertaining to your vehicle, please contact:
Alfa Romeo Customer Care Center:
P.O. Box 21–8004 Auburn Hills, MI
48321–8004
Phone: 1-844-Alfa-USA
(1-844-253-2872)
Alfa Romeo Customer Care (Canada):
P.O. Box 1621
Windsor, Ontario N9A 4H6
Phone: 1-877-230-0563 (English)
Phone: 1-877-515-9112 (French)
22_GU_OM_EN_USC_t.book Page 1
Page 4 of 256
2
READ THIS CAREFULLY
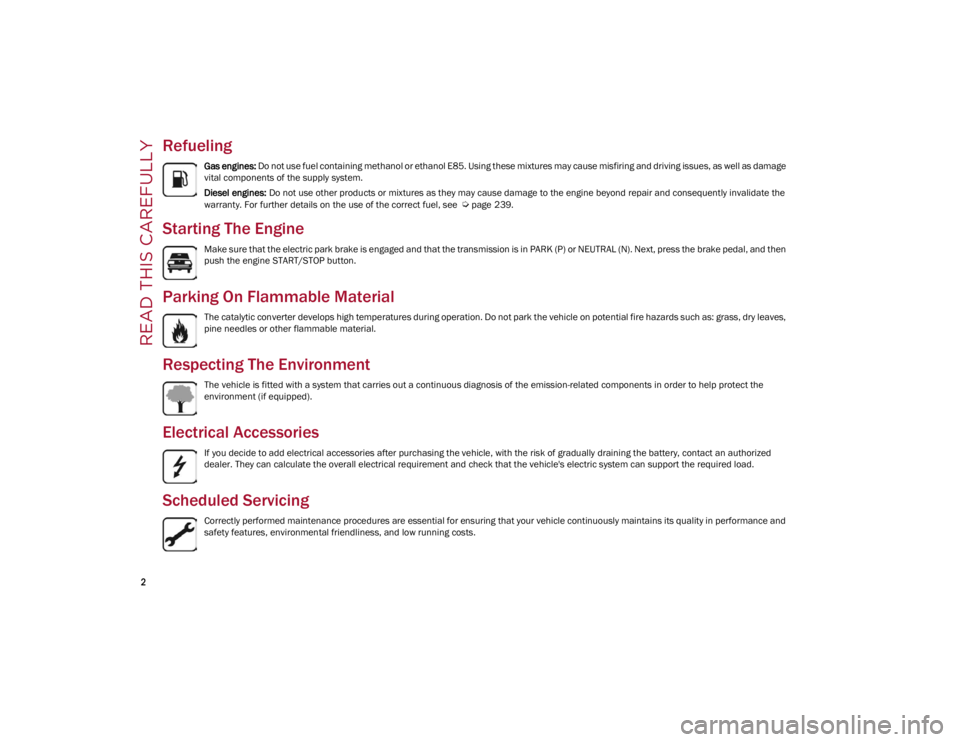
Refueling
Gas engines: Do not use fuel containing methanol or ethanol E85. Using these mixtures may cause misfiring and driving issues, as well as damage
vital components of the supply system.
Diesel engines: Do not use other products or mixtures as they may cause damage to the engine beyond repair and consequently invalidate the
warranty. For further details on the use of the correct fuel, see
Ú
page 239.
Starting The Engine
Make sure that the electric park brake is engaged and that the transmission is in PARK (P) or NEUTRAL (N). Next, press the brake pedal, and then
push the engine START/STOP button.
Parking On Flammable Material
The catalytic converter develops high temperatures during operation. Do not park the vehicle on potential fire hazards such as: grass, dry leaves,
pine needles or other flammable material.
Respecting The Environment
The vehicle is fitted with a system that carries out a continuous diagnosis of the emission-related components in order to help protect the
environment (if equipped).
Electrical Accessories
If you decide to add electrical accessories after purchasing the vehicle, with the risk of gradually draining the battery, contact an authorized
dealer. They can calculate the overall electrical requirement and check that the vehicle's electric system can support the required load.
Scheduled Servicing
Correctly performed maintenance procedures are essential for ensuring that your vehicle continuously maintains its quality in performance and
safety features, environmental friendliness, and low running costs.
22_GU_OM_EN_USC_t.book Page 2
Page 6 of 256
4
VEHICLE CHANGES / ALTERATIONS
Accessories Purchased By The Owner
If you decide to install electrical accessories that require a permanent electrical supply (e.g. radio, satellite anti-theft system, etc.) or accessories that in any
case drain the electrical supply after purchasing the vehicle, contact an authorized dealer. Dealer personnel will check whether the vehicles's electrical
system is able to withstand the load required or whether it needs to be integrated with a more powerful battery.
NOTE:
Use caution when adding additional spoilers, alloy wheel rims, or non-standard wheel hubs: they could reduce the ventilation of the brakes and affect effi-
ciency under sharp and repeated braking, or on long descents. Make sure that nothing obstructs the pedal (mats, etc.).
FCA US LLC shall not be liable for damage caused by the installation of accessories either not supplied or recommended by FCA US LLC and/or not installed
in compliance with the provided instructions.
Installing Electrical/Electronic Devices
FCA US LLC authorizes the installation of transceivers provided that installation is carried out at a specialized center, in compliance with manufacturer's specifications.
NOTE:
Local authorities may not allow the vehicle on the road if devices that modify the features of the vehicle have been installed. This also may void the warranty
in relation to faults caused by the change either directly or indirectly related to it.
FCA US LLC shall not be liable for damage caused by the installation of accessories either not supplied or recommended by FCA US LLC and/or not installed
in compliance with the provided instructions.
Radio Transmitters And Mobile Phones
Radio transmitter equipment (vehicle mobile phones, CB radios, amateur radio etc.) cannot be used inside the vehicle unless a separate antenna is
mounted externally.
Transmission and reception of these devices may be affected by the shielding effect of the vehicle body. As far as the use of approved mobile phones is
concerned, follow the usage instructions provided by the mobile phone manufacturer.
WARNING!
Any change or alteration of the vehicle might seriously affect its safety and road handling, thus causing accidents, in which the occupants could even be fatally injured.
CAUTION!
The use of these devices inside the passenger compartment (without an external antenna) may cause the electrical systems to malfunction. This could compromise the
safety of the vehicle in addition to constituting a potential hazard for passengers' health.
If mobile phones/laptops/smartphones/tablets are inside the vehicle and/or close to the electronic key, a reduced performance of the Passive Entry/Keyless Start system
may occur.
22_GU_OM_EN_USC_t.book Page 4
Page 12 of 256
10
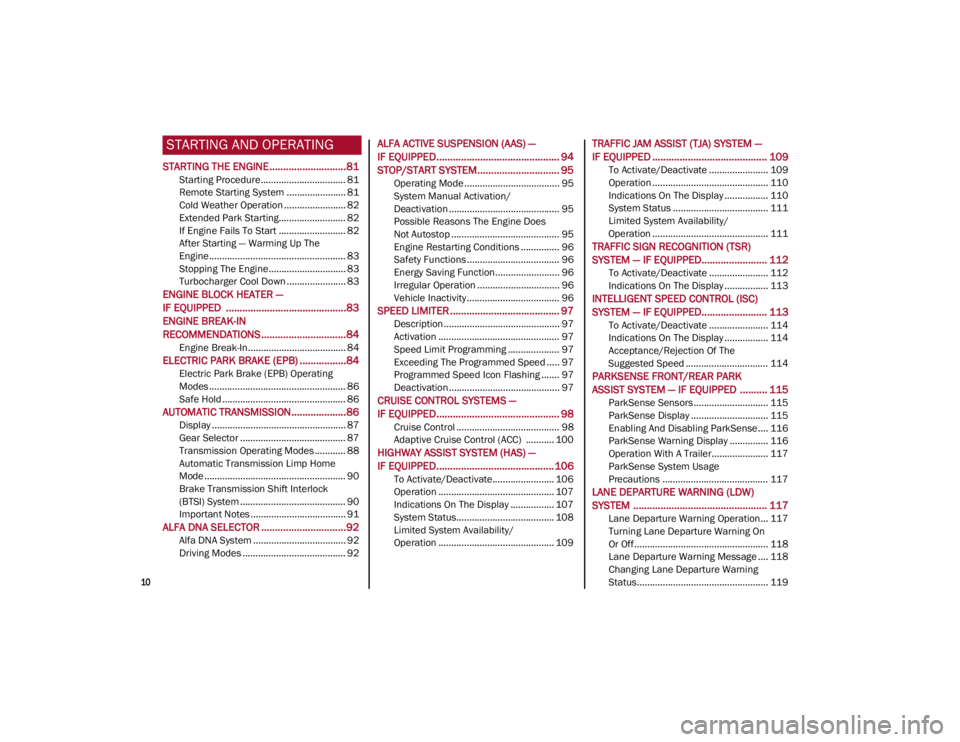
STARTING AND OPERATING
STARTING THE ENGINE ............................81
Starting Procedure................................. 81
Remote Starting System ....................... 81
Cold Weather Operation ........................ 82
Extended Park Starting.......................... 82
If Engine Fails To Start .......................... 82
After Starting — Warming Up The
Engine ..................................................... 83 Stopping The Engine.............................. 83
Turbocharger Cool Down ....................... 83
ENGINE BLOCK HEATER —
IF EQUIPPED ............................................83
ENGINE BREAK-IN
RECOMMENDATIONS ...............................84
Engine Break-In...................................... 84
ELECTRIC PARK BRAKE (EPB) .................84
Electric Park Brake (EPB) Operating
Modes ..................................................... 86 Safe Hold ................................................ 86
AUTOMATIC TRANSMISSION....................86
Display .................................................... 87
Gear Selector ......................................... 87
Transmission Operating Modes ............ 88
Automatic Transmission Limp Home
Mode....................................................... 90 Brake Transmission Shift Interlock
(BTSI) System ......................................... 90 Important Notes ..................................... 91
ALFA DNA SELECTOR ...............................92
Alfa DNA System .................................... 92
Driving Modes ........................................ 92
ALFA ACTIVE SUSPENSION (AAS) —
IF EQUIPPED............................................. 94
STOP/START SYSTEM.............................. 95
Operating Mode ..................................... 95
System Manual Activation/
Deactivation ........................................... 95 Possible Reasons The Engine Does
Not Autostop .......................................... 95 Engine Restarting Conditions ............... 96
Safety Functions .................................... 96
Energy Saving Function......................... 96
Irregular Operation ................................ 96
Vehicle Inactivity .................................... 96
SPEED LIMITER ........................................ 97
Description ............................................. 97
Activation ............................................... 97
Speed Limit Programming .................... 97
Exceeding The Programmed Speed ..... 97
Programmed Speed Icon Flashing ....... 97
Deactivation ........................................... 97
CRUISE CONTROL SYSTEMS —
IF EQUIPPED............................................. 98
Cruise Control ........................................ 98
Adaptive Cruise Control (ACC) ........... 100
HIGHWAY ASSIST SYSTEM (HAS) —
IF EQUIPPED........................................... 106
To Activate/Deactivate........................ 106
Operation ............................................. 107
Indications On The Display ................. 107
System Status...................................... 108
Limited System Availability/
Operation ............................................. 109
TRAFFIC JAM ASSIST (TJA) SYSTEM —
IF EQUIPPED .......................................... 109
To Activate/Deactivate ....................... 109
Operation ............................................. 110
Indications On The Display ................. 110
System Status ..................................... 111
Limited System Availability/
Operation ............................................. 111
TRAFFIC SIGN RECOGNITION (TSR)
SYSTEM — IF EQUIPPED........................ 112
To Activate/Deactivate ....................... 112
Indications On The Display ................. 113
INTELLIGENT SPEED CONTROL (ISC)
SYSTEM — IF EQUIPPED........................ 113
To Activate/Deactivate ....................... 114
Indications On The Display ................. 114
Acceptance/Rejection Of The
Suggested Speed ................................ 114
PARKSENSE FRONT/REAR PARK
ASSIST SYSTEM — IF EQUIPPED .......... 115
ParkSense Sensors............................. 115
ParkSense Display .............................. 115
Enabling And Disabling ParkSense .... 116
ParkSense Warning Display ............... 116
Operation With A Trailer...................... 117
ParkSense System Usage
Precautions ......................................... 117
LANE DEPARTURE WARNING (LDW)
SYSTEM ................................................. 117
Lane Departure Warning Operation... 117
Turning Lane Departure Warning On
Or Off .................................................... 118 Lane Departure Warning Message .... 118
Changing Lane Departure Warning
Status................................................... 119
22_GU_OM_EN_USC_t.book Page 10
Page 14 of 256
12
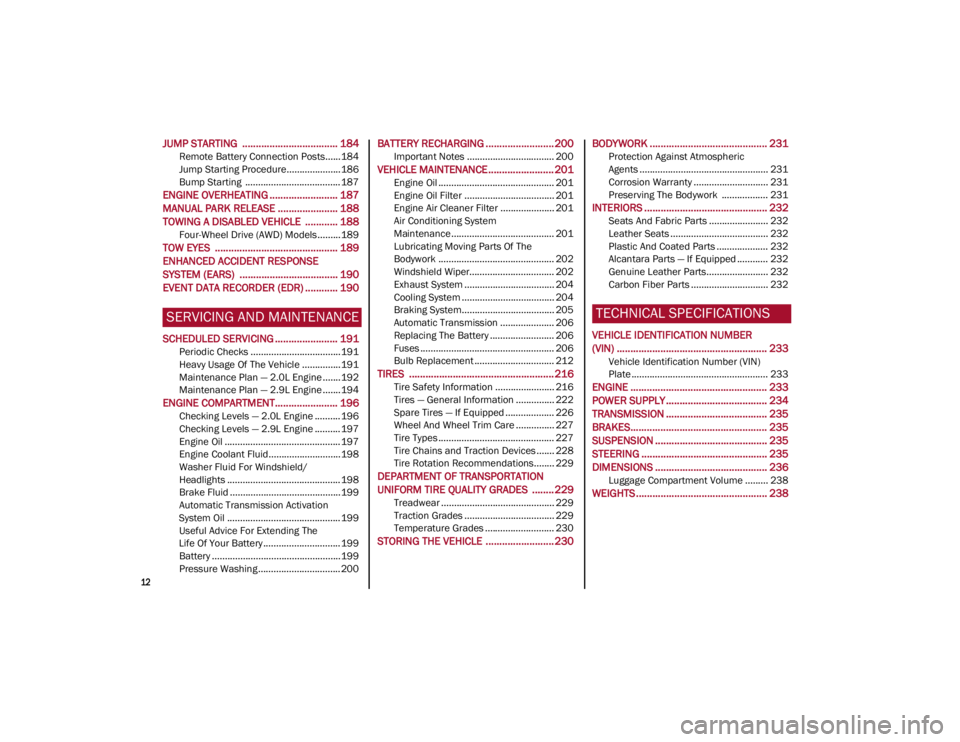
JUMP STARTING ................................... 184
Remote Battery Connection Posts......184
Jump Starting Procedure.....................186
Bump Starting ..................................... 187
ENGINE OVERHEATING ......................... 187 MANUAL PARK RELEASE ...................... 188TOWING A DISABLED VEHICLE ............ 188
Four-Wheel Drive (AWD) Models .........189
TOW EYES ............................................. 189ENHANCED ACCIDENT RESPONSE
SYSTEM (EARS) .................................... 190EVENT DATA RECORDER (EDR) ............ 190
SERVICING AND MAINTENANCE
SCHEDULED SERVICING ....................... 191
Periodic Checks ...................................191
Heavy Usage Of The Vehicle ...............191
Maintenance Plan — 2.0L Engine .......192
Maintenance Plan — 2.9L Engine .......194
ENGINE COMPARTMENT....................... 196
Checking Levels — 2.0L Engine .......... 196
Checking Levels — 2.9L Engine .......... 197
Engine Oil ............................................. 197
Engine Coolant Fluid............................198
Washer Fluid For Windshield/
Headlights ............................................ 198 Brake Fluid ...........................................199
Automatic Transmission Activation
System Oil ............................................ 199 Useful Advice For Extending The
Life Of Your Battery .............................. 199 Battery ..................................................199
Pressure Washing ................................ 200
BATTERY RECHARGING ......................... 200
Important Notes .................................. 200
VEHICLE MAINTENANCE ........................ 201
Engine Oil ............................................. 201
Engine Oil Filter ................................... 201
Engine Air Cleaner Filter ..................... 201
Air Conditioning System
Maintenance........................................ 201 Lubricating Moving Parts Of The
Bodywork ............................................. 202 Windshield Wiper................................. 202
Exhaust System ................................... 204
Cooling System .................................... 204
Braking System.................................... 205
Automatic Transmission ..................... 206
Replacing The Battery ......................... 206
Fuses .................................................... 206
Bulb Replacement ............................... 212
TIRES ..................................................... 216
Tire Safety Information ....................... 216
Tires — General Information ............... 222
Spare Tires — If Equipped ................... 226
Wheel And Wheel Trim Care ............... 227
Tire Types ............................................. 227
Tire Chains and Traction Devices ....... 228
Tire Rotation Recommendations........ 229
DEPARTMENT OF TRANSPORTATION
UNIFORM TIRE QUALITY GRADES ........ 229
Treadwear ............................................ 229
Traction Grades ................................... 229
Temperature Grades ........................... 230
STORING THE VEHICLE ......................... 230
BODYWORK ........................................... 231
Protection Against Atmospheric
Agents .................................................. 231 Corrosion Warranty ............................. 231
Preserving The Bodywork .................. 231
INTERIORS ............................................. 232
Seats And Fabric Parts ....................... 232
Leather Seats ...................................... 232
Plastic And Coated Parts .................... 232
Alcantara Parts — If Equipped ............ 232
Genuine Leather Parts........................ 232
Carbon Fiber Parts .............................. 232
TECHNICAL SPECIFICATIONS
VEHICLE IDENTIFICATION NUMBER
(VIN) ....................................................... 233
Vehicle Identification Number (VIN)
Plate ..................................................... 233
ENGINE .................................................. 233
POWER SUPPLY ..................................... 234 TRANSMISSION ..................................... 235BRAKES.................................................. 235
SUSPENSION ......................................... 235
STEERING .............................................. 235
DIMENSIONS ......................................... 236
Luggage Compartment Volume ......... 238
WEIGHTS ................................................ 238
22_GU_OM_EN_USC_t.book Page 12
Page 17 of 256
15
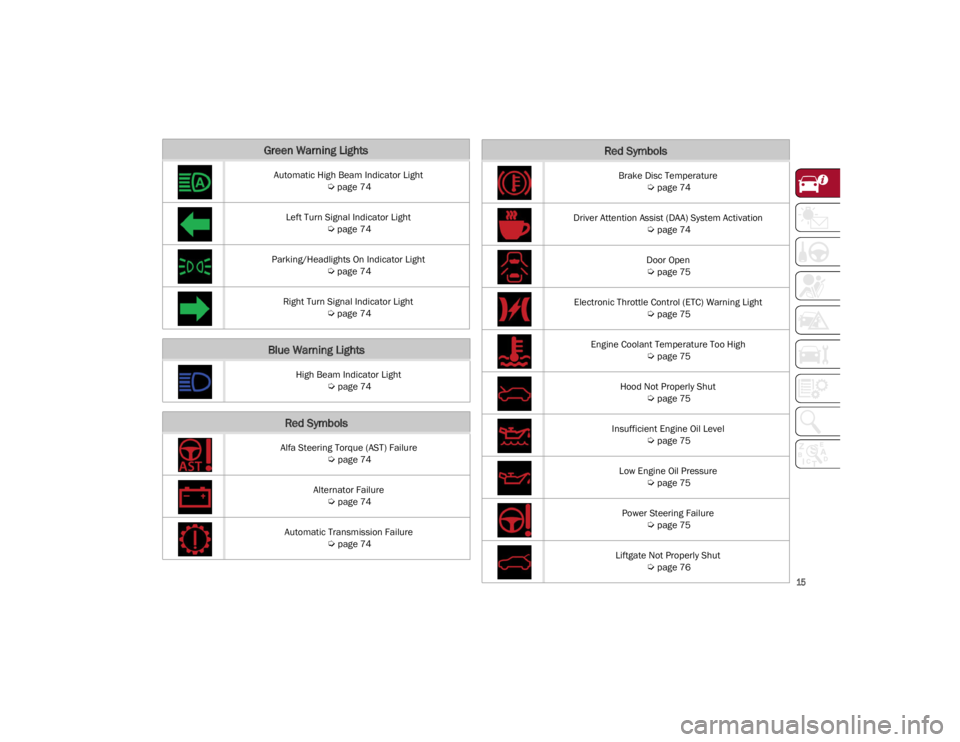
Green Warning Lights
Automatic High Beam Indicator Light
Ú
page 74
Left Turn Signal Indicator Light
Ú
page 74
Parking/Headlights On Indicator Light
Ú
page 74
Right Turn Signal Indicator Light
Ú
page 74
Blue Warning Lights
High Beam Indicator Light
Ú
page 74
Red Symbols
Alfa Steering Torque (AST) Failure
Ú
page 74
Alternator Failure
Ú
page 74
Automatic Transmission Failure
Ú
page 74
Brake Disc Temperature
Ú
page 74
Driver Attention Assist (DAA) System Activation
Ú
page 74
Door Open
Ú
page 75
Electronic Throttle Control (ETC) Warning Light
Ú
page 75
Engine Coolant Temperature Too High
Ú
page 75
Hood Not Properly Shut
Ú
page 75
Insufficient Engine Oil Level
Ú
page 75
Low Engine Oil Pressure
Ú
page 75
Power Steering Failure
Ú
page 75
Liftgate Not Properly Shut
Ú
page 76
Red Symbols
22_GU_OM_EN_USC_t.book Page 15
Page 18 of 256
SYMBOL GLOSSARY
16
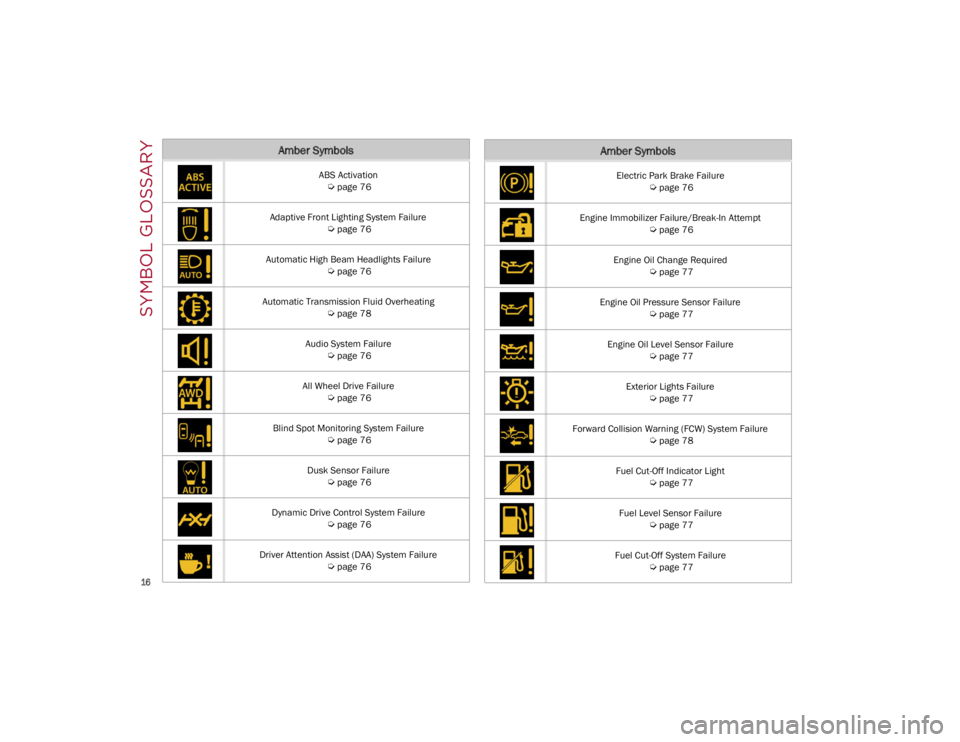
Amber Symbols
ABS Activation
Ú
page 76
Adaptive Front Lighting System Failure
Ú
page 76
Automatic High Beam Headlights Failure
Ú
page 76
Automatic Transmission Fluid Overheating
Ú
page 78
Audio System Failure
Ú
page 76
All Wheel Drive Failure
Ú
page 76
Blind Spot Monitoring System Failure
Ú
page 76
Dusk Sensor Failure
Ú
page 76
Dynamic Drive Control System Failure
Ú
page 76
Driver Attention Assist (DAA) System Failure
Ú
page 76
Electric Park Brake Failure
Ú
page 76
Engine Immobilizer Failure/Break-In Attempt
Ú
page 76
Engine Oil Change Required
Ú
page 77
Engine Oil Pressure Sensor Failure
Ú
page 77
Engine Oil Level Sensor Failure
Ú
page 77
Exterior Lights Failure
Ú
page 77
Forward Collision Warning (FCW) System Failure
Ú
page 78
Fuel Cut-Off Indicator Light
Ú
page 77
Fuel Level Sensor Failure
Ú
page 77
Fuel Cut-Off System Failure
Ú
page 77
Amber Symbols
22_GU_OM_EN_USC_t.book Page 16
Page 27 of 256
25
(Continued)
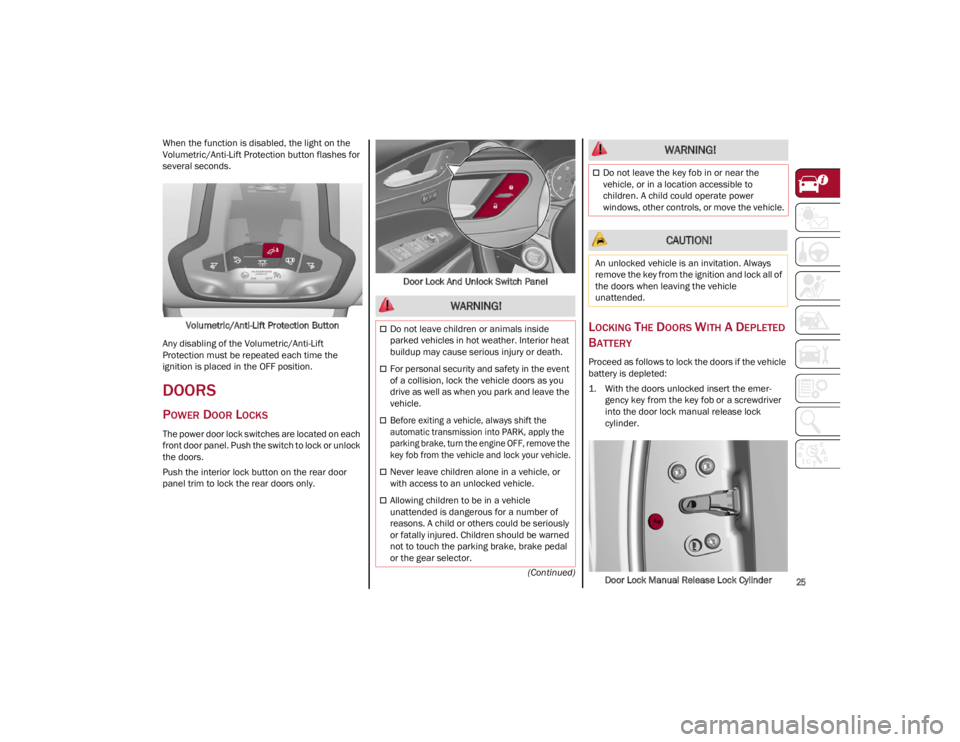
When the function is disabled, the light on the
Volumetric/Anti-Lift Protection button flashes for
several seconds.
Volumetric/Anti-Lift Protection Button
Any disabling of the Volumetric/Anti-Lift
Protection must be repeated each time the
ignition is placed in the OFF position.
DOORS
POWER DOOR LOCKS
The power door lock switches are located on each
front door panel. Push the switch to lock or unlock
the doors.
Push the interior lock button on the rear door
panel trim to lock the rear doors only. Door Lock And Unlock Switch Panel
LOCKING THE DOORS WITH A DEPLETED
B
ATTERY
Proceed as follows to lock the doors if the vehicle
battery is depleted:
1. With the doors unlocked insert the emer -
gency key from the key fob or a screwdriver
into the door lock manual release lock
cylinder.
Door Lock Manual Release Lock Cylinder
WARNING!
Do not leave children or animals inside
parked vehicles in hot weather. Interior heat
buildup may cause serious injury or death.
For personal security and safety in the event
of a collision, lock the vehicle doors as you
drive as well as when you park and leave the
vehicle.
Before exiting a vehicle, always shift the
automatic transmission into PARK, apply the
parking brake, turn the engine OFF, remove the
key fob from the vehicle and lock your vehicle.
Never leave children alone in a vehicle, or
with access to an unlocked vehicle.
Allowing children to be in a vehicle
unattended is dangerous for a number of
reasons. A child or others could be seriously
or fatally injured. Children should be warned
not to touch the parking brake, brake pedal
or the gear selector.
Do not leave the key fob in or near the
vehicle, or in a location accessible to
children. A child could operate power
windows, other controls, or move the vehicle.
CAUTION!
An unlocked vehicle is an invitation. Always
remove the key from the ignition and lock all of
the doors when leaving the vehicle
unattended.
WARNING!
22_GU_OM_EN_USC_t.book Page 25
Page 41 of 256
39
UNIVERSAL GARAGE DOOR
OPENER (HOMELINK®)
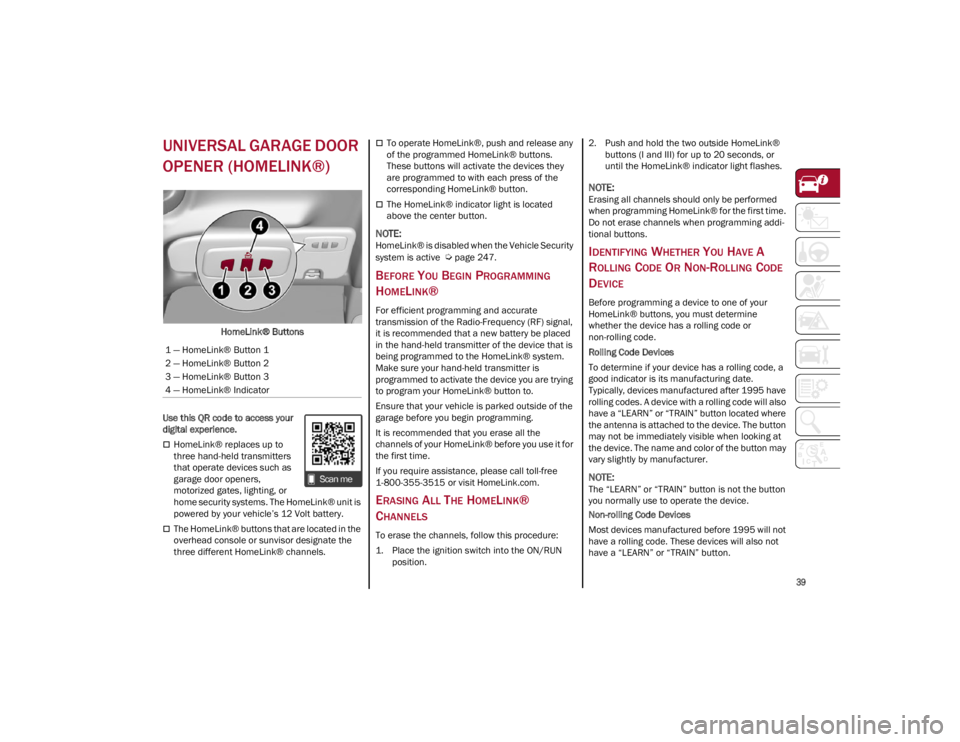
HomeLink® Buttons
Use this QR code to access your
digital experience.
HomeLink® replaces up to
three hand-held transmitters
that operate devices such as
garage door openers,
motorized gates, lighting, or
home security systems. The HomeLink® unit is
powered by your vehicle’s 12 Volt battery.
The HomeLink® buttons that are located in the
overhead console or sunvisor designate the
three different HomeLink® channels.
To operate HomeLink®, push and release any
of the programmed HomeLink® buttons.
These buttons will activate the devices they
are programmed to with each press of the
corresponding HomeLink® button.
The HomeLink® indicator light is located
above the center button.
NOTE:
HomeLink® is disabled when the Vehicle Security
system is active
Ú
page 247.
BEFORE YOU BEGIN PROGRAMMING
H
OMELINK®
For efficient programming and accurate
transmission of the Radio-Frequency (RF) signal,
it is recommended that a new battery be placed
in the hand-held transmitter of the device that is
being programmed to the HomeLink® system.
Make sure your hand-held transmitter is
programmed to activate the device you are trying
to program your HomeLink® button to.
Ensure that your vehicle is parked outside of the
garage before you begin programming.
It is recommended that you erase all the
channels of your HomeLink® before you use it for
the first time.
If you require assistance, please call toll-free
1-800-355-3515 or visit
HomeLink.com
.
ERASING ALL THE HOMELINK®
C
HANNELS
To erase the channels, follow this procedure:
1. Place the ignition switch into the ON/RUN
position. 2. Push and hold the two outside HomeLink®
buttons (I and III) for up to 20 seconds, or
until the HomeLink® indicator light flashes.
NOTE:
Erasing all channels should only be performed
when programming HomeLink® for the first time.
Do not erase channels when programming addi -
tional buttons.
IDENTIFYING WHETHER YOU HAVE A
R
OLLING CODE OR NON-ROLLING CODE
D
EVICE
Before programming a device to one of your
HomeLink® buttons, you must determine
whether the device has a rolling code or
non-rolling code.
Rolling Code Devices
To determine if your device has a rolling code, a
good indicator is its manufacturing date.
Typically, devices manufactured after 1995 have
rolling codes. A device with a rolling code will also
have a “LEARN” or “TRAIN” button located where
the antenna is attached to the device. The button
may not be immediately visible when looking at
the device. The name and color of the button may
vary slightly by manufacturer.
NOTE:
The “LEARN” or “TRAIN” button is not the button
you normally use to operate the device.
Non-rolling Code Devices
Most devices manufactured before 1995 will not
have a rolling code. These devices will also not
have a “LEARN” or “TRAIN” button.
1 — HomeLink® Button 1
2 — HomeLink® Button 2
3 — HomeLink® Button 3
4 — HomeLink® Indicator
22_GU_OM_EN_USC_t.book Page 39
Page 42 of 256
GETTING TO KNOW YOUR VEHICLE
40
PROGRAMMING HOMELINK® TO A
G
ARAGE DOOR OPENER
To program any of the HomeLink® buttons to
activate your garage door opener motor, proceed
as follows:
NOTE:
All HomeLink® buttons are programmed using
this procedure. You do not need to erase all chan -
nels when programming additional buttons.
1. Place the ignition switch into the ON/RUN position.
2. Place the garage door opener transmitter 1 to 3 inches (3 to 8 cm) away from the
HomeLink® button you wish to program,
while keeping the HomeLink® indicator light
in view.
3. Push and hold the HomeLink® button you want to program while you push and hold the
garage door opener transmitter button you
are trying to replicate.
4. Continue to hold both buttons and observe the HomeLink® indicator light. The
HomeLink® indicator light will flash slowly
and then rapidly. Once this happens, release
both buttons.
NOTE:
Make sure the garage door opener motor is
plugged in before moving on to the rolling code/
non-rolling code final steps. Rolling Code Garage Door Opener Final Steps
NOTE:
You have 30 seconds in which to initiate rolling
code final step 2, after completing rolling code
final step 1.
1. At the garage door opener motor (in the
garage), locate the “LEARN” or “TRAIN”
button. This can usually be found where the
hanging antenna wire is attached to the
garage door opener motor. Firmly push and
release the “LEARN” or “TRAIN” button.
2. Return to the vehicle and push the programmed HomeLink® button three times
(holding the button for two seconds each
time). If the garage door opener motor oper-
ates, programming is complete.
3. Push the programmed HomeLink® button to confirm that the garage door opener motor
operates. If the garage door opener motor
does not operate, repeat the final steps for
the rolling code procedure.
Non-Rolling Code Garage Door Opener Final
Steps
1. Push and hold the programmed HomeLink® button and observe the HomeLink® indicator
light. If the HomeLink® indicator light stays
on constantly, programming is complete.
2. Push the programmed HomeLink® button to confirm that the garage door opener motor
operates. If the garage door opener motor
does not operate, repeat the steps from the
beginning.
PROGRAMMING HOMELINK® TO A
M
ISCELLANEOUS DEVICE
The procedure on how to program HomeLink® to
a miscellaneous device follows the same
procedure as programming to a garage door
opener
Ú
page 40. Be sure to determine if the
device has a rolling code, or non-rolling code
before beginning the programming process.
NOTE:
Canadian Radio Frequency (RF) laws require
transmitter signals to time-out (or quit) after
several seconds of transmission, which may not
be long enough for HomeLink® to pick up the
signal during programming. Similar to this Cana -
dian law, some U.S. gate operators are designed
to time-out in the same manner. The procedure
may need to be performed multiple times to
successfully pair the device to your HomeLink®
buttons.
WARNING!
Your motorized door or gate will open and
close while you are programming the
universal transmitter. Do not program the
transmitter if people or pets are in the path
of the door or gate.
Do not run your vehicle in a closed garage or
confined area while programming the
transmitter. Exhaust gas from your vehicle
contains Carbon Monoxide (CO) which is
odorless and colorless. Carbon Monoxide is
poisonous when inhaled and can cause you
and others to be severely injured or killed.
22_GU_OM_EN_USC_t.book Page 40