mirror ASTON MARTIN DB AR1 Q 2003 Owners Guide
[x] Cancel search | Manufacturer: ASTON MARTIN, Model Year: 2003, Model line: DB AR1 Q, Model: ASTON MARTIN DB AR1 Q 2003Pages: 279, PDF Size: 3.77 MB
Page 6 of 279
vi
Warnings, Cautions and Notes
Within this Owner's Guide, advice is given at three levels, Warnings,
Cautions and Notes. Take particular care to read all relevant advice before
operating or servicing the vehicle.
Warnings
Procedures which must be followed precisely to help avoid the risk of
personal injury.
Example:
WARNING: Avoid touching the sides of the engine when working in the engine
compartment. The exhaust system will be hot if the engine has recently been run.
Cautions
Procedures which must be followed precisely to reduce the possibility of
damage to the vehicle.
Example:
Caution: Take care that hydraulic fluid does not contact the paint work during the
topping-up operation. Serious paint work damage can result. If a spillage does
occur, immediately flush the hydraulic fluid from the paint work with clean, fresh
water and then wipe with a clean damp cloth.
Notes
Procedures which will help to avoid difficulties in the operation of the
vehicle.
Example:
Note: The ignition must be switched on (position I or II) before the door mirrors
can be adjusted.
DB AR1 Owner's Guide
Page 21 of 279
A - Before Driving
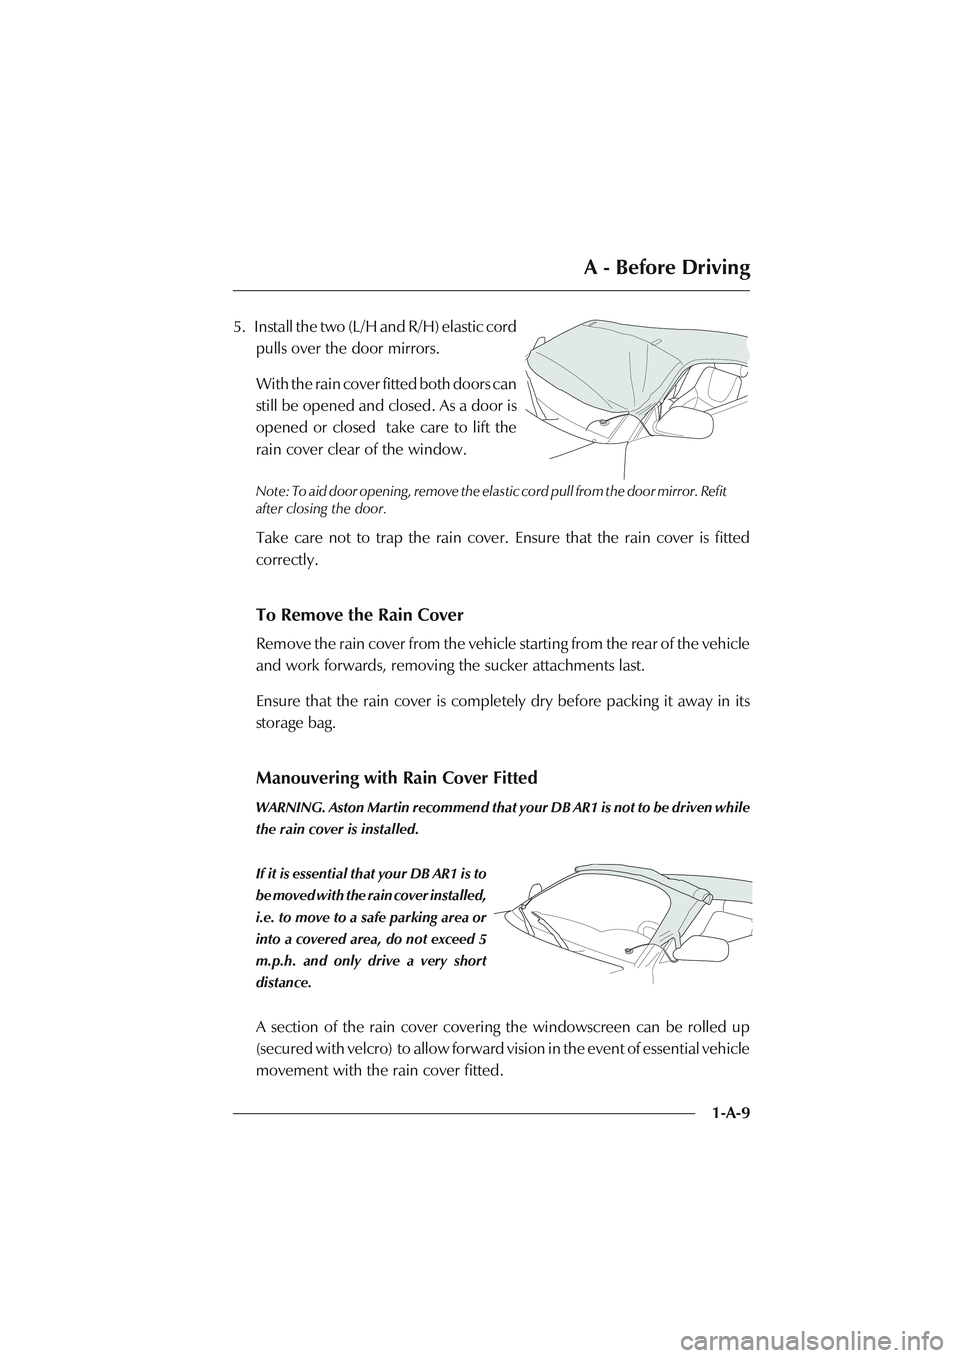
1-A-9 5. Install the two (L/H and R/H) elastic cord
pulls over the door mirrors.
With the rain cover fitted both doors can
still be opened and closed. As a door is
opened or closed take care to lift the
rain cover clear of the window.
Note: To aid door opening, remove the elastic cord pull from the door mirror. Refit
after closing the door.
Take care not to trap the rain cover. Ensure that the rain cover is fitted
correctly.
To Remove the Rain Cover
Remove the rain cover from the vehicle starting from the rear of the vehicle
and work forwards, removing the sucker attachments last.
Ensure that the rain cover is completely dry before packing it away in its
storage bag.
Manouvering with Rain Cover Fitted
WARNING. Aston Martin recommend that your DB AR1 is not to be driven while
the rain cover is installed.
If it is essential that your DB AR1 is to
be moved with the rain cover installed,
i.e. to move to a safe parking area or
into a covered area, do not exceed 5
m.p.h. and only drive a very short
distance.
A section of the rain cover covering the windowscreen can be rolled up
(secured with velcro) to allow forward vision in the event of essential vehicle
movement with the rain cover fitted.
Page 22 of 279
A - Before Driving
1-A-10
Adjustments Before Driving
When you get into the car you should check and, if necessary, adjust the
seat, steering wheel, interior and door mirrors, and secure your seat belt.
The controls for these functions are described on the following pages.
Steering Wheel
WARNING. Do not attempt to adjust the steering wheel whilst driving.
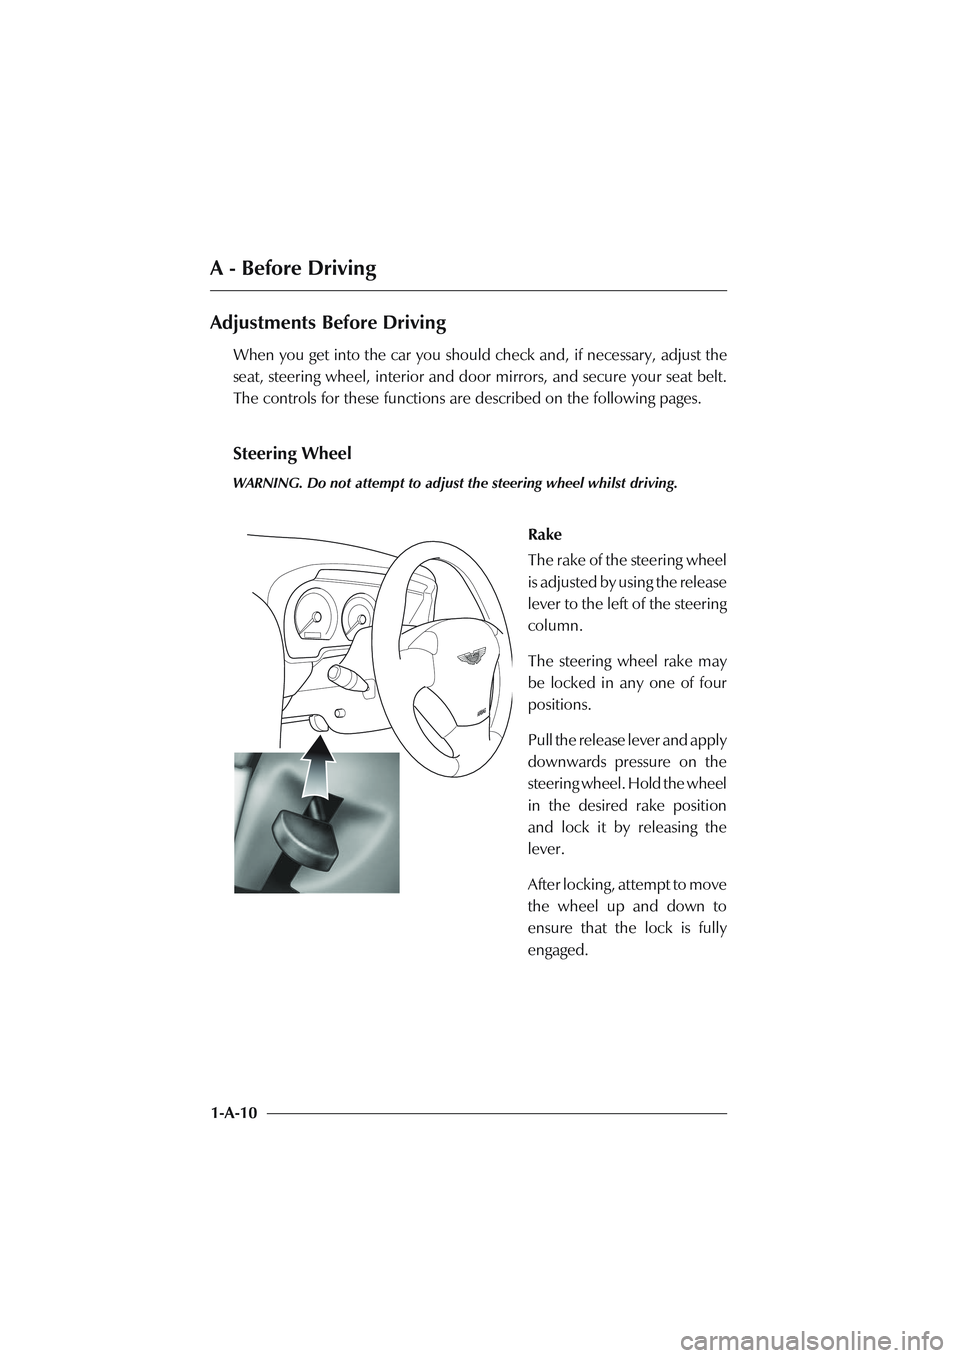
Rake
The rake of the steering wheel
is adjusted by using the release
lever to the left of the steering
column.
The steering wheel rake may
be locked in any one of four
positions.
Pull the release lever and apply
downwards pressure on the
steering wheel. Hold the wheel
in the desired rake position
and lock it by releasing the
lever.
After locking, attempt to move
the wheel up and down to
ensure that the lock is fully
engaged.
Page 25 of 279
A - Before Driving
1-A-13
Interior Mirror
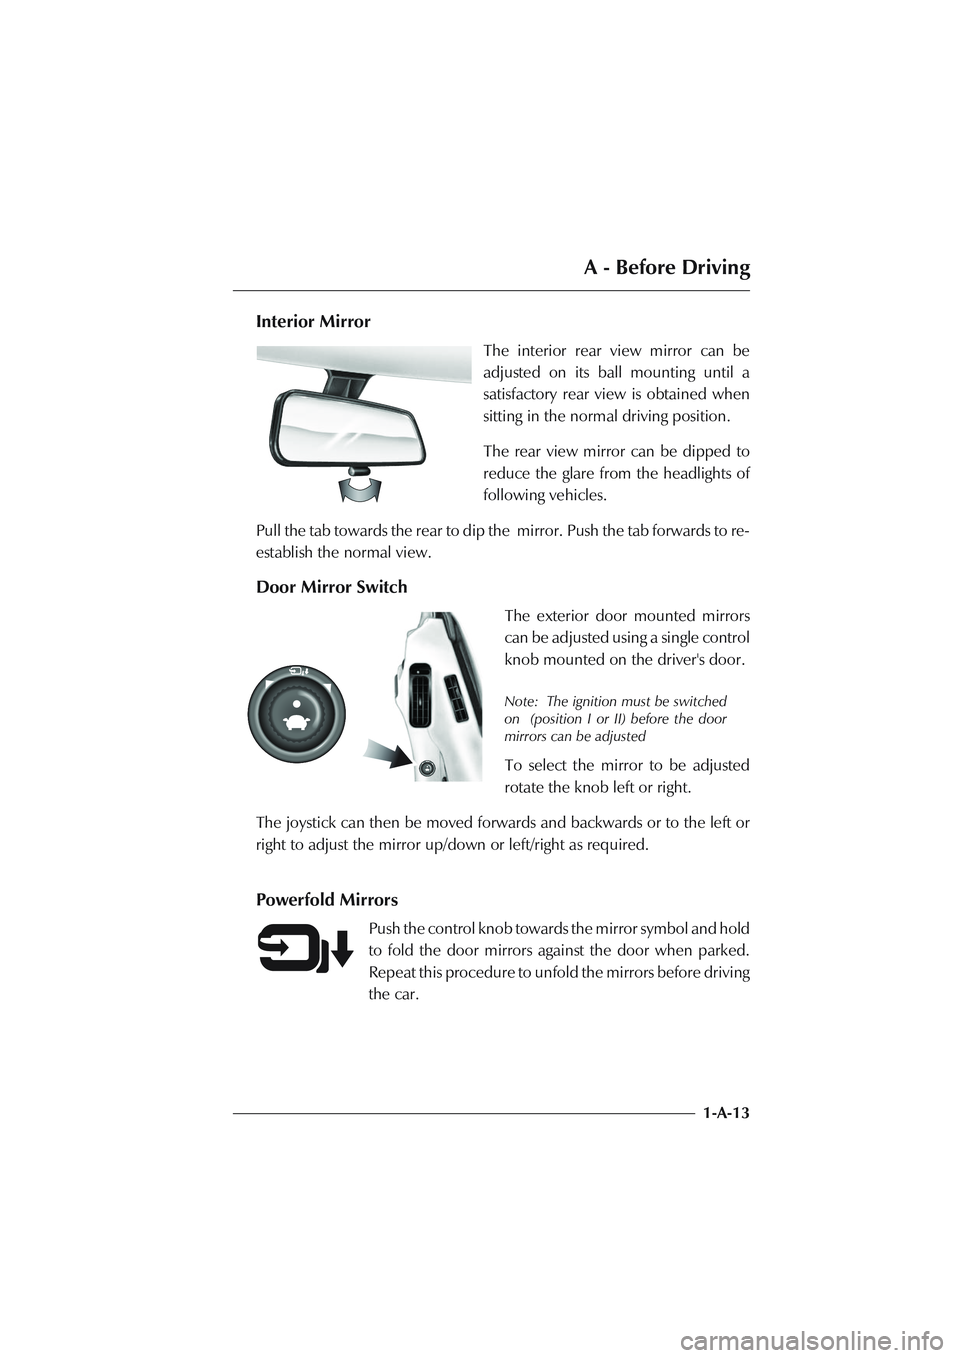
The interior rear view mirror can be
adjusted on its ball mounting until a
satisfactory rear view is obtained when
sitting in the normal driving position.
The rear view mirror can be dipped to
reduce the glare from the headlights of
following vehicles.
Pull the tab towards the rear to dip the mirror. Push the tab forwards to re-
establish the normal view.
Door Mirror Switch
The exterior door mounted mirrors
can be adjusted using a single control
knob mounted on the driver's door.
Note: The ignition must be switched
on (position I or II) before the door
mirrors can be adjusted
To select the mirror to be adjusted
rotate the knob left or right.
The joystick can then be moved forwards and backwards or to the left or
right to adjust the mirror up/down or left/right as required.
Powerfold Mirrors
Push the control knob towards the mirror symbol and hold
to fold the door mirrors against the door when parked.
Repeat this procedure to unfold the mirrors before driving
the car.
Page 67 of 279
C - Driving
1-C-2
Checks Before Driving
Inspect the car to make sure that everything is according to the information
and specifications in this Owner's Guide.
Check the wheels, wheel nuts and tyres.
Check that all windows, mirrors and lights are clear and unobstructed.
Check that the boot and bonnet are closed.
Once you are in the car, check that the doors are closed.
Check that the seat, mirrors and steering wheel adjustments are correct.
Check that all gauges and indicators are reading correctly.
Check that the seat backs are in an upright position.
Check that all occupants have fastened their seat belts.
Fuel
DB AR1 uses 95/98 RON Unleaded Fuel only (USA - Premium Unleaded).
For optimum performance and extended high speed driving, the use of 98
RON fuel is recommended.
Caution: Do not use unleaded petrol containing metal based additives, such as those
based on Manganese (often sold as MMT) and Iron (often sold as Ferrocene). The use
of fuel containing such additives could lead to catalyst failure which is not covered by
the vehicle warranties.
The DB AR1 total fuel capacity is 82 litres (18 Imp gallons / 21.5 US gallons).
Note: Approximately 7 litres of the total fuel capacity specified above is required
to prime the fuel system and is therefore not usable.
Page 148 of 279

F - Owner Maintenance
1-F-39
Fuse Lists
Passenger Footwell Fusebox - Right Hand
F1 5A Passive Anti-Theft Module
F2 20A Cigar Lighter
F3 10A Diagnostic Sockets, Radio, Air Conditioning, Driver's
Door Mirror and Window
F4 5A Seat Switches and Heaters
F5 10A Indicator Flasher
F6 10A Ignition Coils 1-6
F7 10A Interior Lamp Cluster
F8 10A Ignition Coils 7-12
F9 20A RHS Seat Heater Relay, RHS Seat Module
F10 10A Dimmer, Passive Anti-Theft Module, Radio
F11 10A Door Mirrors
F12 5A Diagnostic Sockets
F13 25A Not used
F14 10A Hazard Flasher Unit
F15 20A Wiper Logic Module and Wiper Stalk
F16 30A ABS Control Unit
F17 20A Wiper Motor, Logic Module and Wiper Stalk
F18 30A ABS Control Unit
F19 10A Air Conditioning LH Blower Motor
F20 5A Gearshift Interlock Module, Traction Control Switch,
Interior, Map & Courtesy Lamps
F21 10A Air Conditioning RH Blower Motor
F22 10A Powertrain and Transmission control Modules - Keep
Alive Memory
Page 178 of 279

G - Specifications
1-G-7
Exterior Features
Laminated front windscreen with heating element
Heated and electrically operated powerfold rear view door mirrors
Electrically operated door windows
Interior Features
Hand-crafted leather trim
Optional interior trim details: Oak, Elm, Walnut, Maple, Carbon Fibre and
body colour painted
Electrically operated front seats
Air-conditioning
Six speaker stereo radio cassette
CD autochanger
Megamos alarm system interacting with the central locking system
PATs security immobiliser system
Page 190 of 279
2-A-5
A - Service Schedules
Pre-delivery Inspection (PDI)
Before you receive your DB AR1, it will undergo a comprehensive pre-
delivery inspection at the Dealer's premises to ensure that it meets Aston
Martin's quality standards. The following checks will be made:
Levels and Leaks
Engine oil
Power steering oil
Brake Fluid
Clutch fluid (manual only)
Engine coolant level
Engine coolant specific gravity
Windscreen washer fluid
Fuel system
Gearbox oil/Auto transmission fluid
Rear axle oil - Differential
Battery
Mechanical Functions
Auto transmission
Selection and P & N functions
Manual gear selection
Clutch operation (manual only)
Throttle pedal operation
Parking brake operation
Steering column adjustment and lock
operation
Seat adjuster rails
Bonnet (Hood) release and catch
Door operation and locks
Storage compartments
Rear view mirror
Wheels and Tyres
Road wheel nuts
Tyre pressures
Front wheel tracking
Electrical Checks
Battery condition
Heated windscreen
Windscreen washers
Windscreen wipers
Air-conditioning controls
Gauges and warning lights
Radio/Cassette/CD player
Navigation (where fitted)
All speakers
Electric aerial
Inertia switch
Window mechanisms
Side and headlights (main and dip)
Front fog lights
Rear fog lights (where fitted)
Hazard warning lights
Instrument illumination and dimmer
Air conditioning panel illumination
Auto Trans. PRNDL illumination
Horns
Interior/map lights
Cigar lighter
Seat adjustment - all functions
Door mirror adjustments
Reset clock (if necessary)
Door / boot courtesy lights
Central locking system
Filler flap lock operation
Seat belt operation
Seat belt warning system
Security system / Remote control
Clutch pedal start inhibit
Interrogate DTC codes (not N.
America)
Record battery open-circuit voltage
Page 193 of 279

A - Service Schedules
2-A-8
Mechanical Function Checks
1000mls 7500mls 15000mls
1500km 12000km 24000km
3 months 6 months 12 months
- x x Lubricate all door locks and hinges
- x x Grease all points excluding hubs
x x x Check / adjust all drive belt tensions,
renew if necessary
x x x Lubricate handbrake links and cables
x x x Check handbrake security
- - 30,000 Check condition of handbrake shoes
- x x Inspect brake pad wear and condition of discs
- x x Check and renew wiper blade inserts
if necessary
- - 30000 Renew wiper blades
- - 30000 Clean out engine and A/C radiators
x x x Check condition and operation of all seat belts
x x x Check security of exhaust system mountings
x x x Check brake hoses, pipes and unions
x x x Check power steering pipes and unions for
corrosion and mechanical defects
- - x Check security and condition of fuel hoses
x x x Check cooling system hoses security
and condition
x - - Check air conditioning hoses security
and condition
x x x Check condition and security of steering unit
joints and gaiters
x x x Check security and condition of
suspension fixings
- - x Check tightness of propshaft and driveshaft bolts
x x x Check interior rear view mirror for security and
function
- - x Check the condition of underbody protection
Electrical Function Checks
1000mls 7500mls 15000mls
1500km 12000km 24000km
3 months 6 months 12 months
- - 45,000 ml Renew spark plugs
- - x Check / top-up battery electrolyte
x x x Clean and grease the battery connections
Page 194 of 279
2-A-9
A - Service Schedules
x - x Check and if necessary adjust headlight
alignment
x x x Check operation of all lights
x x x Check operation of ABS warning lamp
x x x Check operation of all warning indicators
x x x Check audible warnings including
security system
x x x Check operation of the horns
x x x Check operation of the windscreen wipers
x x x Check operation of the windscreen washers
x x x Clean the radio aerial mast
x x x Check exterior rear view mirrors for security and
function
x x x Interrogate DTC P codes (not N. America)
x x x Check man. transmission cooling pump (PDU)
Wheels and Tyres Checks
1000mls 7500mls 15000mls
1500km 12000km 24000km
3 months 6 months 12 months
x x x Check for correct tyre size, type and rotation
x x x Check and report tyre tread depth
x x x Check tyres for uneven / excessive
wear or damage
x x x Check / adjust the tyre pressures(including spare)
to comfort or high speed pressures as required
x x x Check torque of road wheel nuts
x x x Check road wheel rims for inner
and outer damage
Final Checks
1000mls 7500mls 15000mls
1500km 12000km 24000km
3 months 6 months 12 months
- x x Degrease windscreen
x x x Carry out road test
x x x Check ABS and Traction Control operation
x x x Check operation of all seat belts and buckles
x x x Check that fuel filler bowl rain drain is clear