AUDI A3 1995 8L / 1.G AEB ATW Engines Sealing Flanges And Flywheel Driveplate Workshop Manual
Manufacturer: AUDI, Model Year: 1995, Model line: A3, Model: AUDI A3 1995 8L / 1.GPages: 11, PDF Size: 0.25 MB
Page 1 of 11
13-36
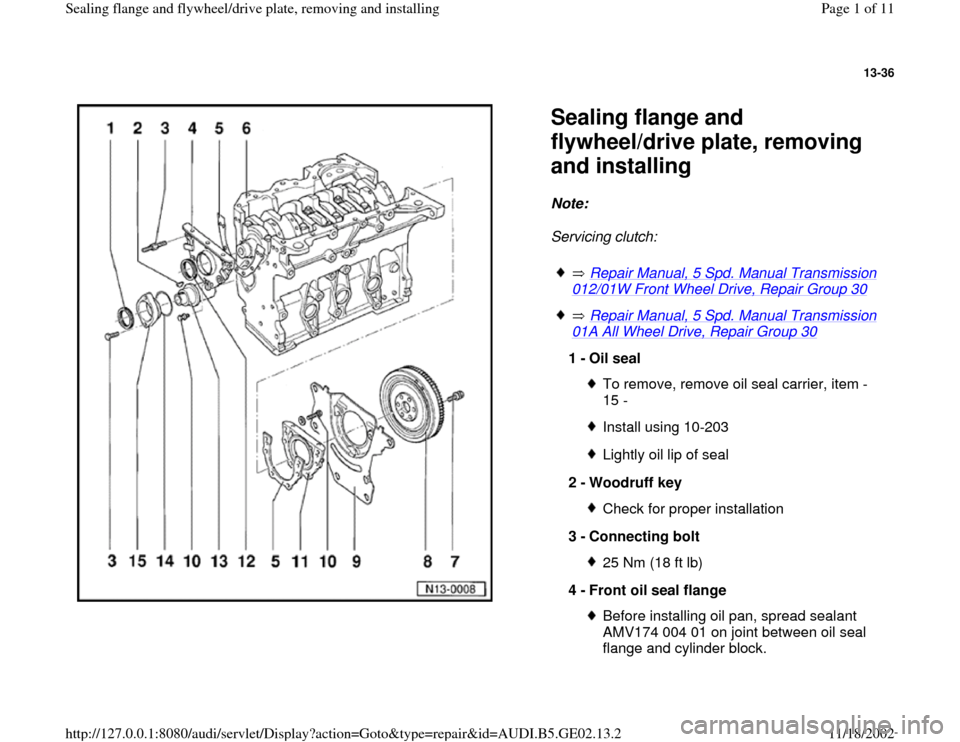
Sealing flange and
flywheel/drive plate, removing
and installing Note:
Servicing clutch:
Repair Manual, 5 Spd. Manual Transmission
012/01W Front Wheel Drive, Repair Group 30
Repair Manual, 5 Spd. Manual Transmission
01A All Wheel Drive, Repair Group 30
1 -
Oil seal
To remove, remove oil seal carrier, item -
15 - Install using 10-203Lightly oil lip of seal
2 -
Woodruff key Check for proper installation
3 -
Connecting bolt 25 Nm (18 ft lb)
4 -
Front oil seal flange Before installing oil pan, spread sealant
AMV174 004 01 on joint between oil seal
flange and cylinder block.
Pa
ge 1 of 11 Sealin
g flan
ge and fl
ywheel/drive
plate, removin
g and installin
g
11/18/2002 htt
p://127.0.0.1:8080/audi/servlet/Dis
play?action=Goto&t
yp
e=re
pair&id=AUDI.B5.GE02.13.2
Page 2 of 11
13-37
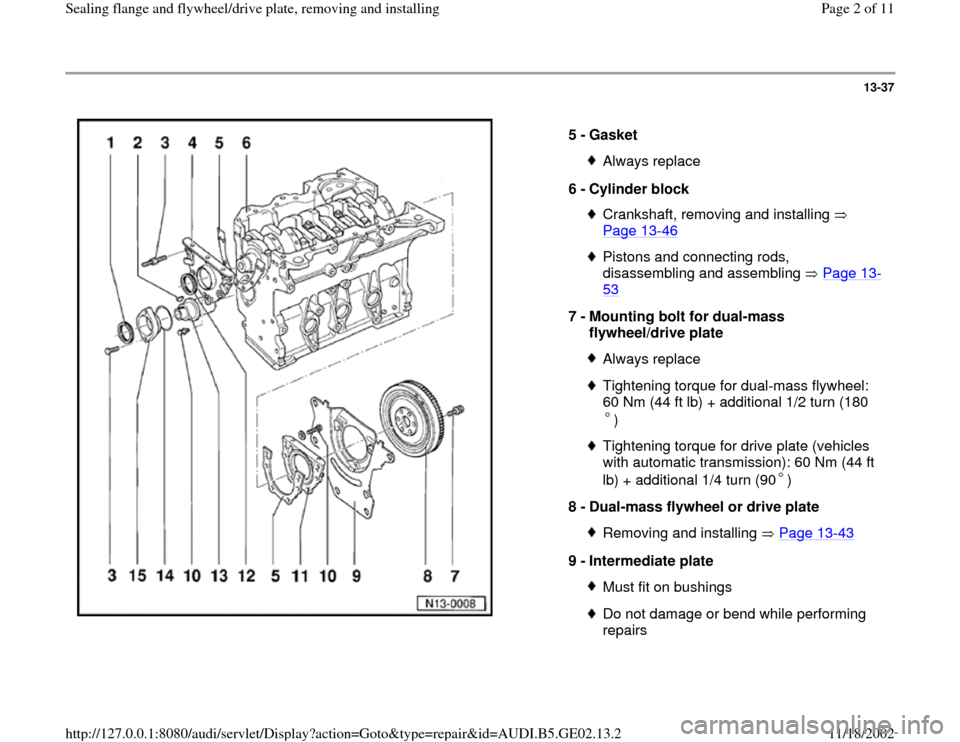
5 -
Gasket
Always replace
6 -
Cylinder block Crankshaft, removing and installing
Page 13
-46
Pistons and connecting rods,
disassembling and assembling Page 13
-
53
7 -
Mounting bolt for dual-mass
flywheel/drive plate
Always replaceTightening torque for dual-mass flywheel:
60 Nm (44 ft lb) + additional 1/2 turn (180
) Tightening torque for drive plate (vehicles
with automatic transmission): 60 Nm (44 ft
lb) + additional 1/4 turn (90 )
8 -
Dual-mass flywheel or drive plate
Removing and installing Page 13
-43
9 -
Intermediate plate
Must fit on bushingsDo not damage or bend while performing
repairs
Pa
ge 2 of 11 Sealin
g flan
ge and fl
ywheel/drive
plate, removin
g and installin
g
11/18/2002 htt
p://127.0.0.1:8080/audi/servlet/Dis
play?action=Goto&t
yp
e=re
pair&id=AUDI.B5.GE02.13.2
Page 3 of 11
13-38
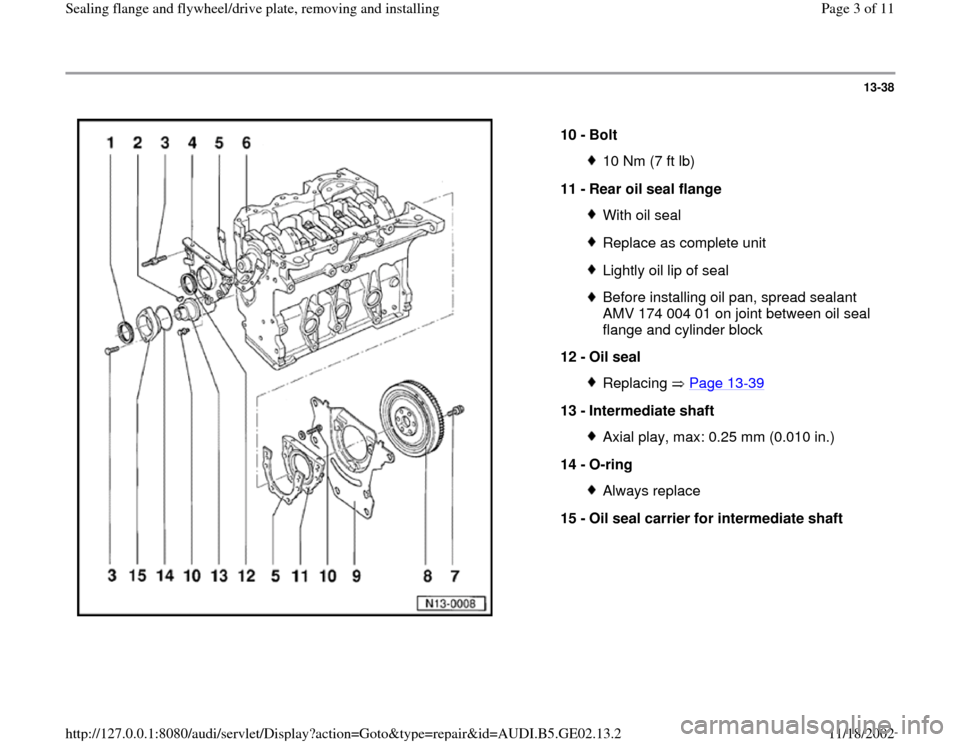
10 -
Bolt
10 Nm (7 ft lb)
11 -
Rear oil seal flange With oil sealReplace as complete unitLightly oil lip of sealBefore installing oil pan, spread sealant
AMV 174 004 01 on joint between oil seal
flange and cylinder block
12 -
Oil seal Replacing Page 13
-39
13 -
Intermediate shaft
Axial play, max: 0.25 mm (0.010 in.)
14 -
O-ring Always replace
15 -
Oil seal carrier for intermediate shaft
Pa
ge 3 of 11 Sealin
g flan
ge and fl
ywheel/drive
plate, removin
g and installin
g
11/18/2002 htt
p://127.0.0.1:8080/audi/servlet/Dis
play?action=Goto&t
yp
e=re
pair&id=AUDI.B5.GE02.13.2
Page 4 of 11
13-39
Crankshaft oil seal (toothed belt side),
replacing
Engine installed
Lock carrier in service position Page 13
-1
Special tools and equipment
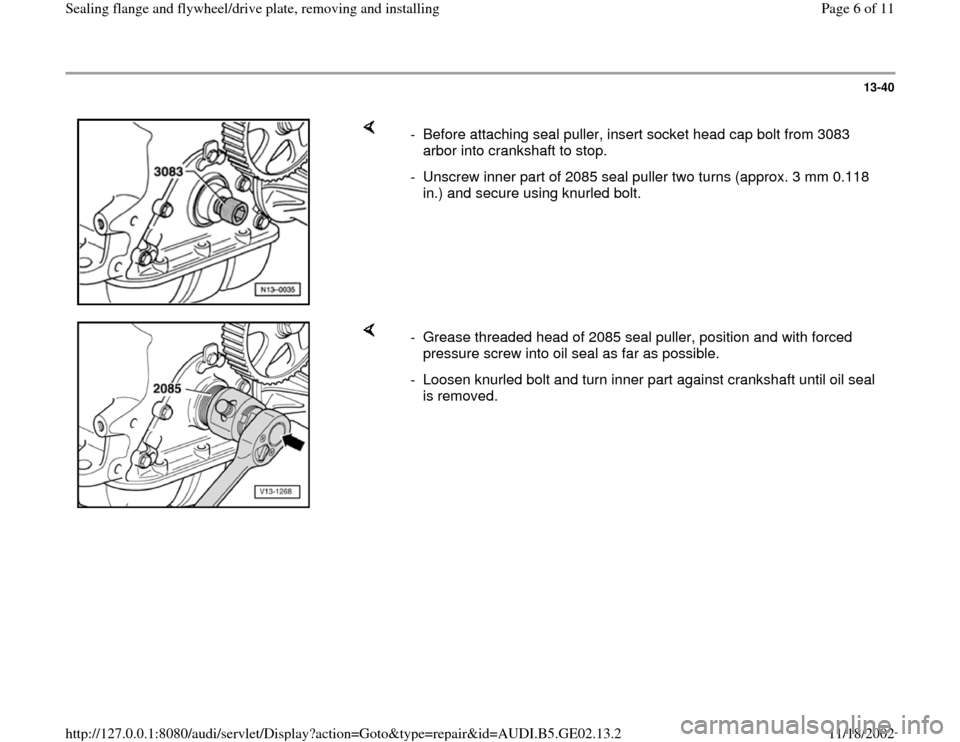
2085 seal puller
3083 arbor
3099 spur belt spreading
Removing
- Remove ribbed belt and ribbed belt tensioner
Page 13
-15
.
- Remove toothed belt Page 13
-29
.
- Remove mounting bracket for torque arm
Page 17
-2 , item - 5 -.
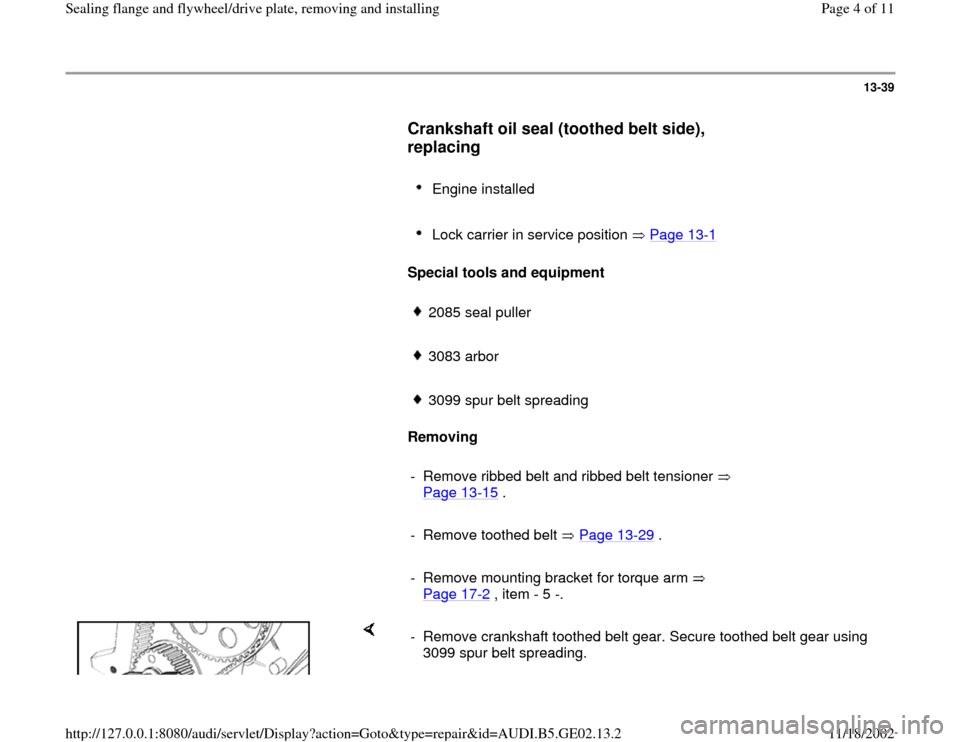
- Remove crankshaft toothed belt gear. Secure toothed belt gear using
3099 spur belt spreading.
Pa
ge 4 of 11 Sealin
g flan
ge and fl
ywheel/drive
plate, removin
g and installin
g
11/18/2002 htt
p://127.0.0.1:8080/audi/servlet/Dis
play?action=Goto&t
yp
e=re
pair&id=AUDI.B5.GE02.13.2
Page 5 of 11
Note:
3415 special tool can also be used.
Pa
ge 5 of 11 Sealin
g flan
ge and fl
ywheel/drive
plate, removin
g and installin
g
11/18/2002 htt
p://127.0.0.1:8080/audi/servlet/Dis
play?action=Goto&t
yp
e=re
pair&id=AUDI.B5.GE02.13.2
Page 6 of 11
13-40
- Before attaching seal puller, insert socket head cap bolt from 3083
arbor into crankshaft to stop.
- Unscrew inner part of 2085 seal puller two turns (approx. 3 mm 0.118
in.) and secure using knurled bolt.
- Grease threaded head of 2085 seal puller, position and with forced
pressure screw into oil seal as far as possible.
- Loosen knurled bolt and turn inner part against crankshaft until oil seal
is removed.
Pa
ge 6 of 11 Sealin
g flan
ge and fl
ywheel/drive
plate, removin
g and installin
g
11/18/2002 htt
p://127.0.0.1:8080/audi/servlet/Dis
play?action=Goto&t
yp
e=re
pair&id=AUDI.B5.GE02.13.2
Page 7 of 11
13-41
Installing
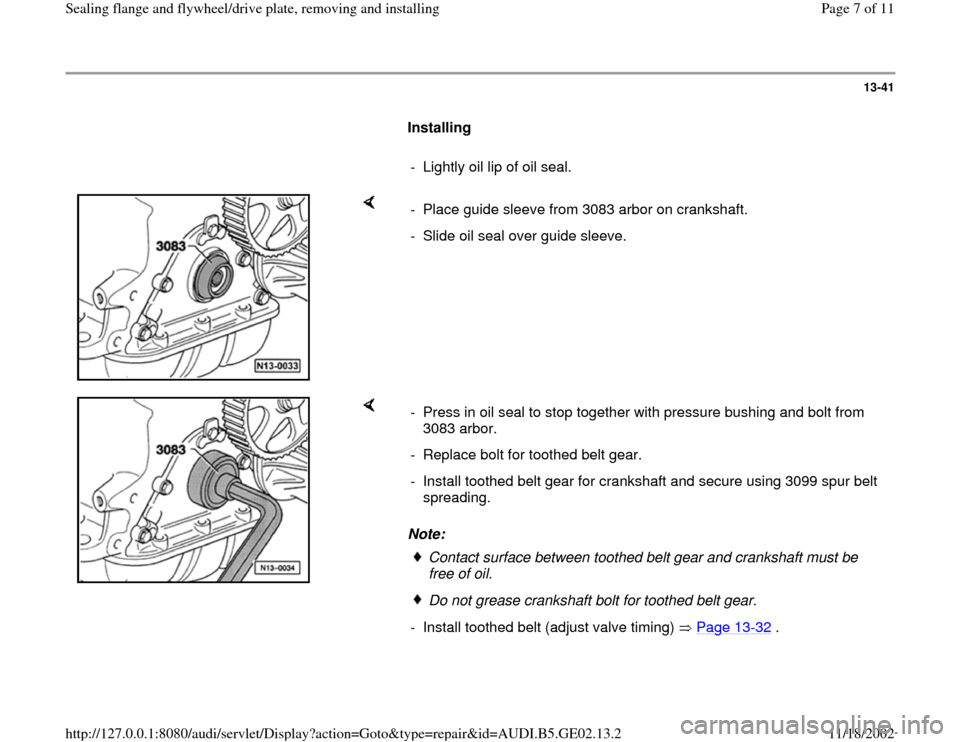
- Lightly oil lip of oil seal.
- Place guide sleeve from 3083 arbor on crankshaft.
- Slide oil seal over guide sleeve.
Note: - Press in oil seal to stop together with pressure bushing and bolt from
3083 arbor.
- Replace bolt for toothed belt gear.
- Install toothed belt gear for crankshaft and secure using 3099 spur belt
spreading.
Contact surface between toothed belt gear and crankshaft must be
free of oil. Do not grease crankshaft bolt for toothed belt gear.
- Install toothed belt (adjust valve timing) Page 13
-32
.
Pa
ge 7 of 11 Sealin
g flan
ge and fl
ywheel/drive
plate, removin
g and installin
g
11/18/2002 htt
p://127.0.0.1:8080/audi/servlet/Dis
play?action=Goto&t
yp
e=re
pair&id=AUDI.B5.GE02.13.2
Page 8 of 11
13-42
- Place torque arm on rubber buffer for torque arm
and tighten bolts to 25 Nm (18 ft lb).
- Install ribbed belt and ribbed belt tensioner
Page 13
-15
.
Note:
When installing the ribbed belt, make sure it is
seated correctly on the pulley.
Tightening torque
Component
Tightening torque
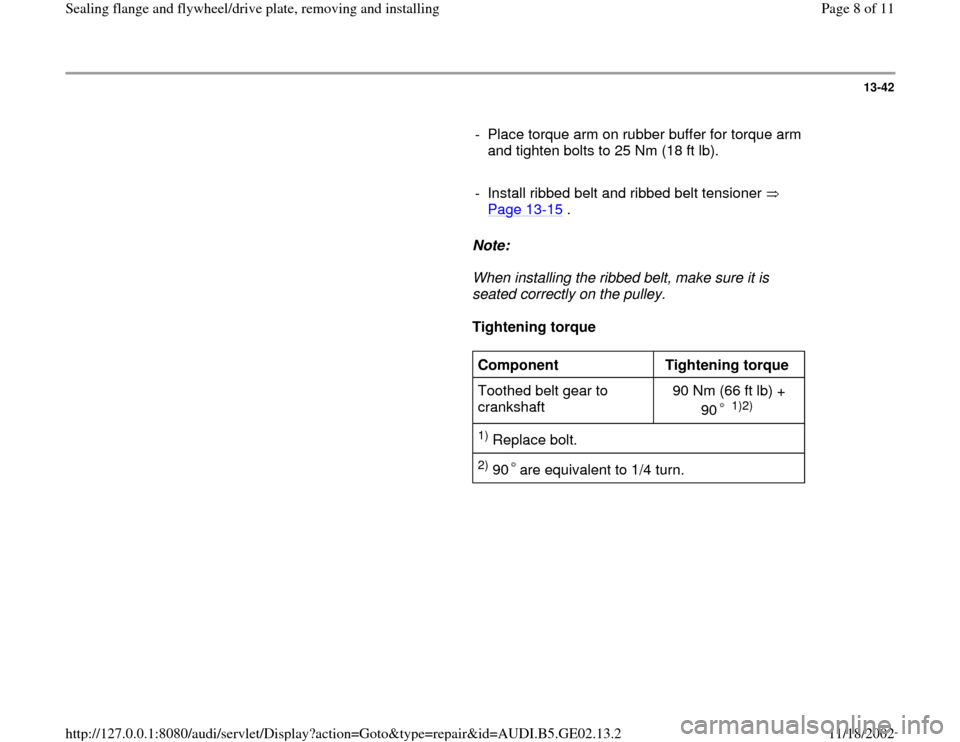
Toothed belt gear to
crankshaft 90 Nm (66 ft lb) +
90
1)2)
1) Replace bolt. 2) 90 are equivalent to 1/4 turn.
Pa
ge 8 of 11 Sealin
g flan
ge and fl
ywheel/drive
plate, removin
g and installin
g
11/18/2002 htt
p://127.0.0.1:8080/audi/servlet/Dis
play?action=Goto&t
yp
e=re
pair&id=AUDI.B5.GE02.13.2
Page 9 of 11
13-43
Dual-mass flywheel/drive plate,
removing and installing
Special tools and equipment
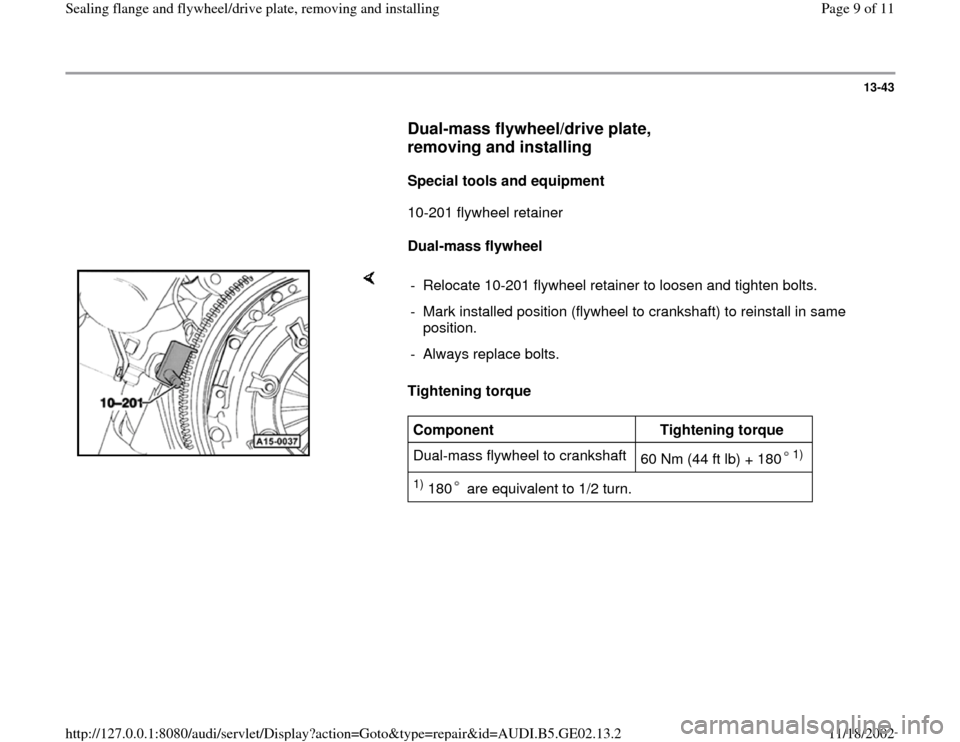
10-201 flywheel retainer
Dual-mass flywheel
Tightening torque - Relocate 10-201 flywheel retainer to loosen and tighten bolts.
- Mark installed position (flywheel to crankshaft) to reinstall in same
position.
- Always replace bolts. Component
Tightening torque
Dual-mass flywheel to crankshaft
60 Nm (44 ft lb) + 180
1)
1) 180 are equivalent to 1/2 turn.
Pa
ge 9 of 11 Sealin
g flan
ge and fl
ywheel/drive
plate, removin
g and installin
g
11/18/2002 htt
p://127.0.0.1:8080/audi/servlet/Dis
play?action=Goto&t
yp
e=re
pair&id=AUDI.B5.GE02.13.2
Page 10 of 11
13-44
Drive plate
Removing
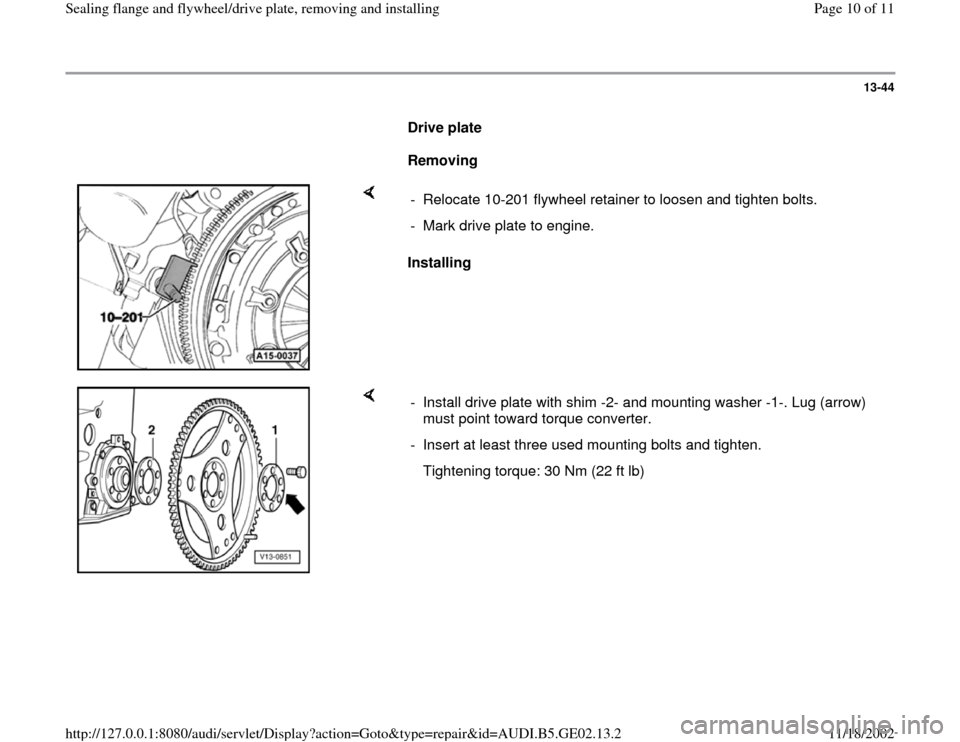
Installing - Relocate 10-201 flywheel retainer to loosen and tighten bolts.
- Mark drive plate to engine.
- Install drive plate with shim -2- and mounting washer -1-. Lug (arrow)
must point toward torque converter.
- Insert at least three used mounting bolts and tighten.
Tightening torque: 30 Nm (22 ft lb)
Pa
ge 10 of 11 Sealin
g flan
ge and fl
ywheel/drive
plate, removin
g and installin
g
11/18/2002 htt
p://127.0.0.1:8080/audi/servlet/Dis
play?action=Goto&t
yp
e=re
pair&id=AUDI.B5.GE02.13.2