warning light AUDI A3 2011 Owner´s Manual
[x] Cancel search | Manufacturer: AUDI, Model Year: 2011, Model line: A3, Model: AUDI A3 2011Pages: 320, PDF Size: 75.79 MB
Page 243 of 320
_____________________________________________ C_h _ e_ c_ k_in --= g'-- a_n _d_ f_i _ll _i_n -=g ::;__ ____.fflll
& WARNING (continued)
• Never charge a frozen or a thawed-out battery. It could
explode! If a battery has frozen, then it must be replaced. A
discharged battery can freeze over at 32 °F (0 °C).
• Make sure the vent hose is always attached to the opening on
the side of the battery.
• Never use batteries which are damaged. There is the danger of
an explosion! Always replace a damaged battery.
& WARNING
California Proposition 65 Warning:
• Battery posts, terminals and related accessories contain lead
and lead compounds, chemicals known to the State of California
to cause cancer and reproductive problems. Wash hands after
handling.
0 Note
• Do not disconnect the vehicle battery when the ignition is
switched on or when the engine is running, otherwise, you will
damage electronic components in the electrical system.
• When working on the engine, protect the battery housing from
ultraviolet (UV) rays by not parking the vehicle in direct sunlight .
• If your vehicle is going to stand for a long period of time without
being driven, protect the battery from "freezing", otherwise it will be
damaged and will then have to be replaced::::;,
page 241. •
Vehicle OP-eration
Charging of battery
All work on the battery requires technical knowledge!
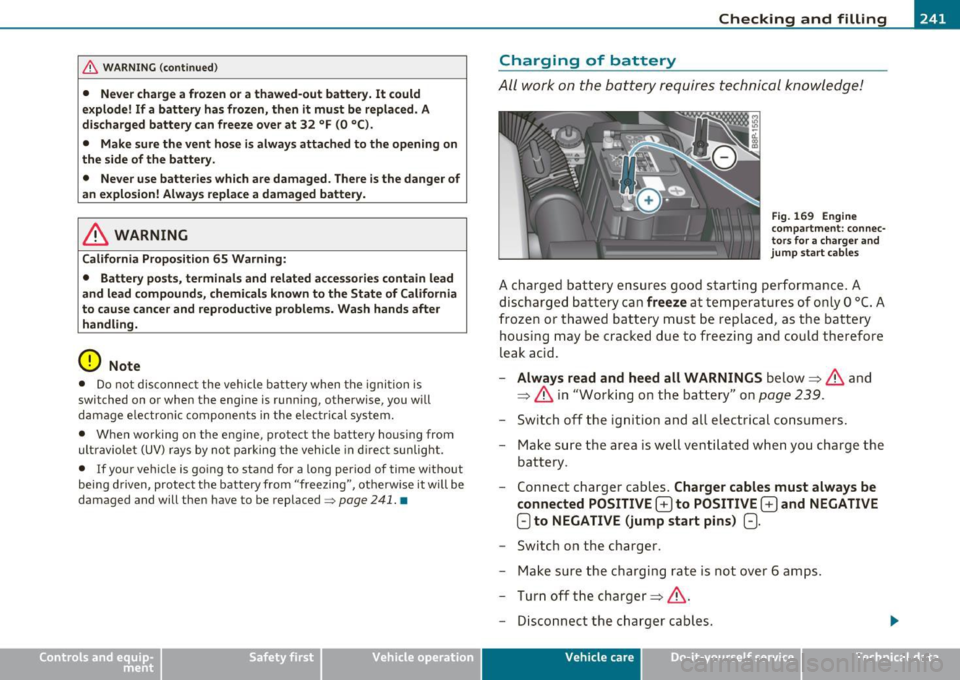
Fig. 169 Engine
compartment: connec
tors for a charger and
jump start cables
A charged battery ensures good starting performance. A
discharged battery can
freeze at temperatures of only O °C. A
frozen or thawed battery must be replaced, as the battery
housing may be cracked due to freezing and could therefore
leak acid.
- Always read and heed all WARNINGS below==> & and
==> & in "Working on the battery" on
page 239.
-Switch off the ignition and all electrical consumers.
- Make sure the area is well ventilated when you charge the
battery .
- Connect charger cables .
Charger cables must always be
connected POSITIVE
G to POSITIVE G and NEGATIVE
Oto NEGATIVE (jump start pins) (:).
-Switch on the charger.
- Make sure the charging rate is not over 6 amps.
- Turn off the charger==> &.
- Disconnect the charger cables.
Vehicle care Do-it-yourselt service iTechnical data
Page 275 of 320
What do I do now? -________________ Vflll
- Move selector lever to position Pon an automatic trans
mission; put manual transmission in
first gear=> &.
-If you are towing a trailer: unhitch the trailer from your
vehicle.
- Take the
tool and the spare tire=> page 270 out of the
luggage compartment.
& WARNING
You or your passengers could be injured while changing a wheel if
you do not follow these safety precautions:
• If you have a flat tire, move a safe distance off the road. Turn
off the engine, turn the emergency flasher on and use other
warning devices to alert other motorists.
• Make sure that passengers wait in a safe place away from the
vehicle and well away from the roadway and traffic.
• To help prevent the vehicle from moving suddenly and possibly
slipping off the jack, always fully set the parking brake and block
the wheel diagonally opposite the wheel being changed. When one front wheel is lifted off the ground, placing the automatic
transmission in "P" (Park), or engaging a gear in a manual trans
mission will
not prevent the vehicle from moving.
• Before you change a wheel, be sure the ground is level and
firm. If necessary, use a sturdy board under the jack .
• After installing the spare wheel, make sure that you remount
the flat tire/wheel in its storage area properly and tighten the
knurled retaining screw securely. •
Safety first
Changing a wheel
When you change a wheel, follow the sequence described
below step-by-step and exactly in that order.
1. Remove the decorative wheel cover*. For more details see
also =>
page 274, "Decorative wheel covers" or
=> page 275, "Wheels with cap-covered wheel bolts".
2. Loosen the
wheel bolts=> page 276.
3. Locate the proper mounting point for the jack and align the jack below that point=>
page 276.
4.
Lift the car with the jack=> page 2 76.
5. Take the
flat wheel off and then put the spare on
=> page 278.
6. Tighten all wheel bolts lightly.
7.
Lower the vehicle with the jack.
8. Use the wheel bolt wrench and
firmly tighten all wheel
bolts=>
page 276.
9. Put the decorative
wheel cover* back on.
& WARNING
Always read and head all WARNINGS and information~ & in
"Raising the vehicle" on
page 276 and~ page 279. •
After changing a wheel
A wheel change is not complete without the following
actions.
- Store and secure the replaced wheel in the spare wheel
well. .,._
Vehicle care Do-it-yourself service Technical data
Page 280 of 320
lffll.,___W_ h_ a_t _ d_ o_ I_d_ o_ n_o _w_ ? ___________________________________________ _
Taking the wheel off/putting the spare on
Follow these instructions step-by-step for changing the
wheel
M
"' ;;; u.
1li
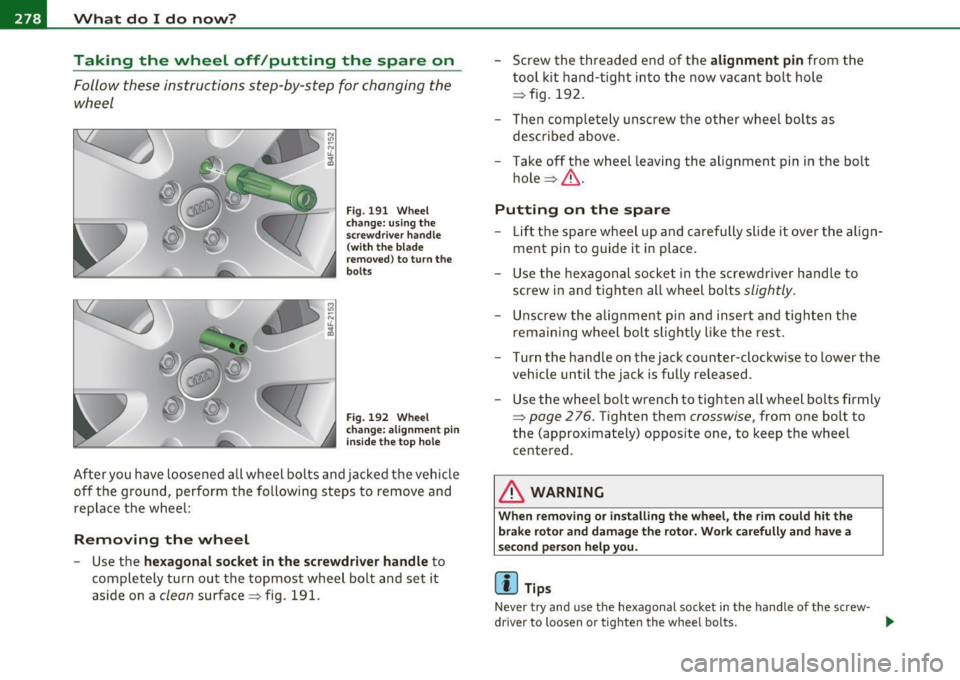
Fig . 191 Wheel
change: using the
screwdriver handle
(with the blade
removed) to turn the
bolts
Fig. 192 Wheel
change: alignment pin
inside the top hole
After you have loosened all wheel bolts and jacked the vehicle
off the ground, perform the following steps to remove and
replace the wheel:
Removing the wheel
- Use the hexagonal socket in the screwdriver handle to
completely turn out the topmost wheel bolt and set it
aside on a
clean surface=> fig. 191. -
Screw the threaded end of the
alignment pin from the
tool kit hand-tight into the now vacant bolt hole
=> fig. 192.
- Then completely unscrew the other wheel bolts as
described above.
- Take off the wheel leaving the alignment pin in the bolt
hole=> &.
Putting on the spare
- Lift the spare wheel up and carefully slide it over the align
ment pin to guide it in place.
- Use the hexagonal socket in the screwdriver handle to
screw in and tighten all wheel bolts
slightly.
Unscrew the alignment pin and insert and tighten the
remaining wheel bolt slightly like the rest.
- Turn the handle on the jack counter-clockwise to lower the vehicle until the jack is fully released.
- Use the wheel bolt wrench to tighten all wheel bolts firmly
=>
page 276. Tighten them crosswise, from one bolt to
the (approximately) opposite one, to keep the wheel
centered.
& WARNING
When removing or installing the wheel, the rim could hit the
brake rotor and damage the rotor. Work carefully and have a
second person help you.
(I) Tips
Never try and use the hexagonal socket in the handle of the screw-
driver to loosen or tighten the wheel bolts.
~
Page 285 of 320
_______________________________________________ F_u _s_ e_ s_ a_ n_ d_ b_u _ l_ b _ s __ _
Equipment No. II Equipment
Amps
Manual headlight beam adjustment, automatic Diagnostic connector, rain sensor, air condition-
headlight beam adjustment, AFS control mod-
16 ing (control module), tire pressure monitor dis-10
1 ule, engine components, light switch (switch 10 play (control module)
-lig hti ng/i llum i nation), diagnosis socket 1 7 Ant i-theft alarm warning system 5
Automatic transmission, control module for CAN 18 Diagnose Starter 5
data transfer (gateway), electro-mechanical
19 All Whee l Drive 10 steering, shift gate automatic transmission, 2 10 engine relay, fuel tank control unit, engine con-22 Blower fan 40
trol unit, brakes control (ABS), Electronic Stabili-23 Driver's side power window, front 30 zation Program (ESP), Anti-Slip Regulation (ASR)
3 Airbag 5 24 Power outlet front 20
Air-conditioning (pressure sensor, air quality sen-25 Rear window defogge r 30
sor), button for Electronic Stabilization Program 26 Power outlet in luggage compartment 20
(ESP), Anti-Slip Regulation (ASR), tire pressure 27 Fuel tank control module, fuel pump 15
monitor display, oil level sensor, back-up light
28 Power window, rear 30 4 switch, front seat heating, parking aid, seat-s
occupancy recognition (on USA vehicles), garage 33 Sliding/pop-up roof 20
door opener, automatic mirror dimming, head-
Lumbar support
10 light assistant, heated windshield washer noz-
zles, air conditioning (control module)
3 7 Hea ted seats, front 20
--
5 AFS headlights (left side) 5 38 Passenger side power window, front 30
AFS headlights (right side) 5 39 Specia l function interface 5
9
Navigat ion system, radio system 15 40 Starter 40
digital radio, cell phone, TV equipment 7,5 Rear window wiper 15
11
Automatic mirror dimming, headlight assistant 10 Body control module 20
12 Central locking (front doors) 10 47 Ce ll phone package (VDA interface) 5
13
Central locking (rear doors) 10
A uto m atic c ircu it bre ake rs :
14 Electronic Stabilization Program (ESP) (control 10 The electric power w indows and the electric seat adjusters are
module), shift gate automatic transmission protected with circuit b reakers which reset automatically after the
1 5 Inter ior lights, read ing lights 10 circuit overload has been corrected . ...
Safety first Vehicle care Do-it-yourself service Technical data
Page 287 of 320
_______________________________________________ F_u _s_ e_ s_ a_ n_ d_ b_u _ l_ b _ s __ _
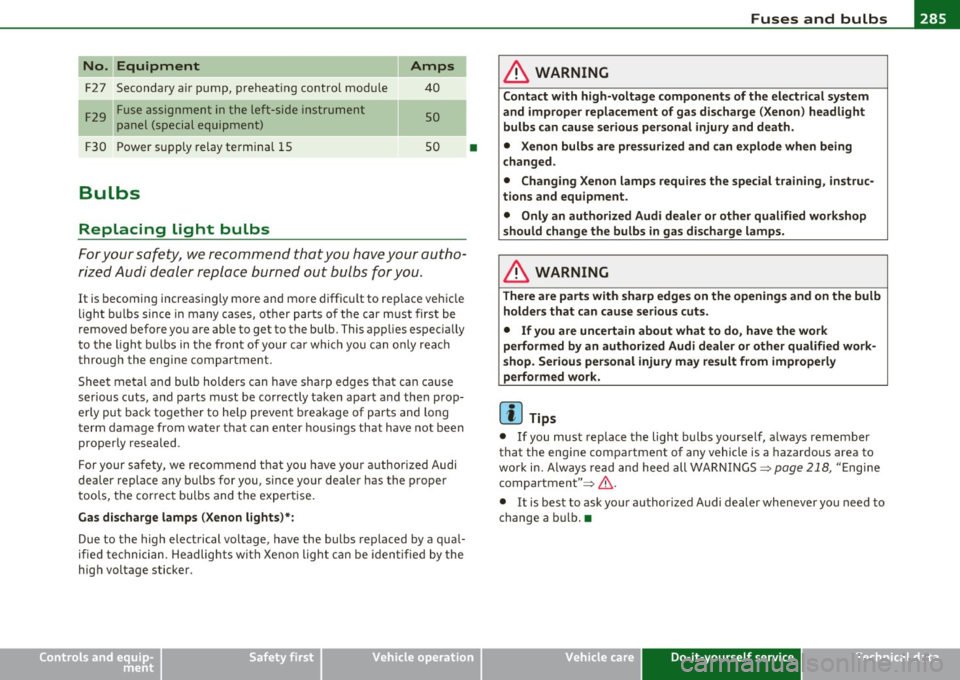
No. Equipment
F2 7 Secondary a ir pump, preheating contro l module
F 29 Fuse assignment in the left-side instrument
panel (special equipment)
F30 Power supply relay termina l 15
Bulbs
Replacing light bulbs
Amps
40
so
so
For you r safety, we recommend that you have your autho
ri zed Audi dealer replace burned out bulbs for you.
It is becoming increasingly more and more difficu lt to rep lace vehicle
light bulbs since in many cases, ot her parts of the car must first be
removed before you are able to get to the bu lb. This app lies espec ially
to the l igh t bu lbs in the front of your car whi ch you can o nly rea ch
through the engine compartment .
Sheet metal and bu lb holders can have sharp edges that can ca use
serious cuts, and parts must be correctly taken apart and the n prop
erly put back together to he lp prevent b reakage of parts and long
term damage from wate r that can enter housings that have not been
p roperly resealed.
For your safety, we recommend that you have you r authorized Audi
deale r replace any bu lbs fo r you, since your dealer has the proper
too ls, the cor rec t bu lbs and the expertise .
Gas dis charge lamp s (Xenon lights)* :
Due to the high electrical voltage, have the bulbs replaced by a qual
ified technician. Headlights with Xe non light can be iden tified by the
high voltage sticker.
Safety first
•
& WARNING
C ontact with high-voltag e components of the electrica l system
and improper replacement of g as discharge (Xenon ) headlight
bulb s can caus e serious personal injury and death .
• Xenon bulb s are pres surized and can explode when b eing
c hanged .
• Changing Xenon lamp s requir es the special training , instruc
tions and equipment.
• Only an authori zed Audi dealer or oth er qualified workshop
should change the bulbs in ga s di scharge lamp s.
& WARNING
There are parts with sharp edge s on the openi ngs and on the bulb
holde rs that can cau se se rious cuts.
• If you are uncertain about what to do, ha ve the work
performed b y an auth orized Audi de aler or oth er qualified work
s hop. Seriou s per sonal injur y m ay re sult from improperl y
p erformed w ork.
(I] Tips
• If you must replace the light bulbs yourself , a lways remember
that the engine compar tment of any vehicle is a hazardo us area to
work in. Always read and heed all WARNINGS=>
page 218, "E ngi ne
compa rtment" =>& .
• It is best to ask you r author ized Audi dealer whenever you need to
change a bu lb. •
Vehicle care Do-it-yourself service Technical data
Page 288 of 320
111.___E_ m_ e_r-= g=- e_ n_c-= y'-- s_ i_t _u _a_ t_ i_ o _ n_ s ____________________________________________ _
Emergency situations
General
This chapter is intended for trained emergency crew s and working
pe rsonnel who have the necessary tool s and equipment to perform
the se operation s. •
Starting by pushing or towing
0 Note
Veh icles with an automatic transmission cannot be started by
pushing or towing .•
Starting with jumper cables
J umper c able : Note the manufacturer 's information .
If the battery is discha rged, another ve hicle can p rovide sta rting
assistance. For this yo u require a jumper cab le. Bot h batter ies m ust
h ave the s ame vo lt a ge (V) and a sim ila r cap acity (Ah).
Jumper cables Use
only jumpe r cables o f sufficiently la rge cross section to safely
carry the starter current. Refer to the man ufact urer's spec ificat ions.
Use only j umpe r ca bles with
isola ted t ermin al cl am ps and pro p erl y
marked for distinct ion:
plu s(+) cable in most cases co lored red
minus( ·) cable i n most cases colo red black .
T he w ire cross sect ion must be at least 0.038 in
2 (25 mm2
) for gaso
line engines and a t least 0. 054 in
2 (3 5 mm2
) for diese l engines.
& WARNING
Batterie s contain el ectricity, acid, and gas . Any of the se can cause
very serious or fatal injury. Follow the inst ructions below for safe
handling of your vehicle 's battery.
• Always shield your eyes and avoid leaning over the battery
whenev er po ssible .
• A discharged battery can alre ady freeze at temperatures just
below 32 °F (0 °C) . Never attempt to provide starting assistance
on a frozen or thawed out battery- Danger of explosion and chem
ical burns! Replace a battery if it has been frozen.
• Do not allow battery acid to contact eyes or skin. Flush any
contacted area with water immediately .
• Improper u se of a booste r battery to start a vehicle m ay cause
an explosion .
• Vehicle batteries generate explosive gases . Keep sparks, flame
and lighted cigarettes away from batteries .
• Do not try to jump start any vehicle with a low acid level in the
battery .
• The voltage of the booster battery mu st also have a 12 -Volt
rating. The capacity (Ah) of the booster battery should not be
lower than that of the discharged battery . Use of batteries of
different voltage or substantially different "Ah" rating may cause
an explosion and personal injury.
• Never charge a frozen battery . Gas t rapped in the ice may cause
an explosion .
• Never charge or use a b attery that has been frozen. The battery
case may have be weakened.
• Use of batteries of different voltage or substantially different
capacity (Ah) rating may cause an explosion and injury. The
capacity (Ah) of the booster battery should not be lower than that
of the di scharged battery .
~
Page 306 of 320
__ _:._A..:. l:.! p:.. h ::....:..:: a:.:b:.. e=-= t.:..:ic :.:a:.. l:.....:..: in~ d:...:e :..: x.:...._ ___________________________________________ _
A
ABS
See Anti-lock brake system ........ 192
AC (air conditioner) .. ... ....... ...... 97
Accessories ................ .... .. .. 301
Adapter for anti -theft wheel bolts . .... 27S
Adding Engine coolant ... ............... 236
E ngine oil ....................... 232
Windshield washer flu id ........ ... 243
Additional accessories .. ............. 301
Add itional heater
Climate controls ................. 102
Additives Engine oil .. .. .. .. .. .. .... .... ... 232
Adjustable steering wheel column . .... 105
Adjusting Steering wheel column . .. .. .. ..... 105
Adjusting front seats .............. .. . 73
Advanced Airbag System Components ............. .... ... 152
Fr ont airbags . .. ................. 150
How the components work together . 153
Monitoring .. ................. .. 156
PASS ENGER AIR BAG OFF light .. ... 157
Air conditioner ....... ............... 97
See also Climate controls ....... ... . 95
Air conditioning Switching on and off ..... .......... 97
Air distribution Climate controls .. .... ... ...... .. 100 Air outlets
Adjusting the outlets for rapid
defrosting/defogging ........... 101
Climate controls ............... .. 101
Air quality sensor .................... 99
Air recirculat ion .......... ... ... ... . 100
Climate controls . . . . . . . . . . . . . . . . . . 99
When shou ld I use the air recirculat ion? ..
99
Air rec irculat ion mode Side curtain airbags .
........... .. 164
When must the system be inspected? 156
All Wheel Drive .. .... .. ........... .. 194
Alloy wheels ............ .... ..... .. 212
All-wheel drive Winter t ires .. .. .... ..... ..... . .. 261
Alternator
See Genera tor ........... .. .. .. .. . 15
Aluminum alloy whee ls ....... ... .. .. 212
Ambient lighting .............. ...... 62
Climate controls .................. 99
6
Anti-glare inside day-night mirror.
. . . 3, 64
Airbag
Anti-lock brake system
Warning/indicator l ights . .. .. .. .. .. 15 k
How the ABS system wor s .. .... .. 192
Ai rbag System
Warning/indicator lights ... ........ 16
Weight-sensing mat ... .... .. ..... 168 ( )
Anti-Slip Regulation System ASR
Airbag system ................ .. 145, 162 H th t k l90
ow e sys em wor s ........ ... .
Advanced Airbag System .......... 149
159 Anti-theft systems
Care .................... .. .. .. .
Child restraints ...... ... .. .. .... . 169 Anti-Theft Alarm System ........... 48
Children ....... .. .. .. ...... .... .
168 Anti-theft whee
l bolts . ......... ... .. 275
Components (front airbags) . .. .... . 152
Danger of fitting a child safety seat on the front passenger seat ............ 147
Disposal ........ .... ..... .. .... . 159
Front airbags .............. ... .. . 149
How do the front ai rbags work? .. ... 154
How many airbags does my vehicle have? .
152
Important things to know ... ... .. . 145
Indicator light ................... 156
Monitoring .............. .. ... .. 156
Repairs ......... .... ..... .. .. ... 159
Side airbags ..................... 161 Armrest
Center armrest . .................. 79
Rear armrest .. .. ... .. . .. .. .. .. .. . 80
ASR How the Anti-Slip Regulation System works . ........... ...... .... .. 190
Asterisk What does it mean when something is
marked with an asterisk? . . . . . . . . . . . 5
Audi magnetic ride . ........... .. . 12, 112
Description .. ...... ............. 112
Indicator light .... .. ............. . 12
Page 307 of 320

_____________________________________________ A_ L .... p_ h _ a_b_ e_ t_ ic_a_ l_ in_ d_e _ x __ _
Audi Service Repair Manuals and Literature
299
AUTO
Climate controls ..... .. .. ....... ..
98
Switching on ........... .. .. .. .. .. 98
When should I use AUTO? . .. .... .. .. 98
Auto Safety Hotline .... .. .. .. .. ..... 133
Automatic air recirculation ......... .... 99
Automatic belt retractor .......... .. . 139
Automatic car wash
See Washing ....... .. .. .. .. .... . 207
Automatic headlights
defective .............. ..........
36
Automatic Transmiss ion
Automatic Transmiss ion .. .. .. .... .
118
Automatic transmission ........... .. . 115
Driving Notes . ...... .. .. .. .. ..... 117
Emergency program .... ..........
121
Emergency release ............ ... . 121
Ignition key safety lock ....... ... .. 106
Kick-down ..... ......... ... .. .. . 120
Launch Control Program .. .. .. .. .. . 120
Selector lever lock ... .... .. .. .. .. . 116
Selector lever positions ..... .... .. . 115
Tiptronic .................... ... . 119
T iptronic controls on the steering wheel .
120
Average fuel mileage ........ ... .. .. .. 21
Average speed ......... ...... .. .. .. .. 21
Avoid damaging the vehicle .. .. .. .. .. . 199
Controls and equip
ment Safety first
B
Battery
... .. ... ... ................. 238
charging . .. .. .. .... .... .. .. ..... 241
Disconnecting and connecting ...... 238
Important warnings when work ing on the
battery ..... ........... ...... ..
239
Low . .. .. .. .. .... .... .. ......... 194
Replacing the battery .. .. .. .... ... 242
State of charge ..... .. ... ...... .. 194
Winter operation ..... ..... ....... 239
Working on the battery .... .... .... 239
Battery voltage .. ........... ...... .. . 35
Before driving .. ... .... .. .. .. .. .....
125
Bioethanol
Engine preheater .... ....... ......
103
Blended gasoline ................. .. 219
Body cavity seal ing . ...... .. .........
212
Booster seats . .. .. ...... ........... 17 5
Brake assistant . ................. ...
193
Brake booster ... .. .... .. .. .. ... ... . 192
Brake fluid
Changing the brake fluid ......... ..
238
Checking the brake fluid level ..... .. 237
Reservoir .. .. .. ... ..... ......... 237
What is the correct brake fluid level? . 23 7
What should I do if the brake fluid warning light comes on? . ... ... ..........
237
Brake pads .. .. .. .... ....... ...... .. 197
Brake system .. .. .. ........ ......... 237
Anti-lock brake system . .. .. ..... ... 16
Brake fluid . ................ ..... 23 7 Brake fluid specifications for
refill and
rep lacement .................. .
238
Brake light defective ....... .... .. .. 36
General information ............ .. 191
How does moisture or road salt affect the
brakes? ... .... .. ..............
191
Malfunction ........ ...... .... .. .. 32
Warning/indicator lights ... .... .. .. 15
Worn brake pads symbol ........... 35
Break-in period ... .. .. .... ... ..... ..
197
Brake pads .. .............. ...... 197
Tires ... ...................... .. 197
Bulbs ................ .. .. .. .... .. . 285
C
California Proposition 65 Warning .. .. . 227
Battery specific .. ................ 241
Capacities ............ ...... .... ... 296
Car care ... ..... ........... ........ 206
Interior ........... .. . .. .. .. .. .. . 213
Plastic and vinyl .. .. ............. . 210
Weatherstrips ........ .... .... .. . 211
Care of exterior . ...... .. . .. .. .. .. .. . 206
Cargo area
See Loading the luggage compartment ..
131
Cargo net ............. ...... .. .. .. .. 83
Catalytic converter .. .. .... .......... 198
Center armrest . .. ... ................ 79
Centigrade
Switching between Centigrade and Fahrenheit . .............. ...... .
99
Vehicle operation Vehicle care Do-it-yourself service Technical data
Page 309 of 320

------------------------------------------~A~ LE P '.!:h ~a~ b~e~ t~ic ~a~ l~ in~ d ~ e~x ~ _lffl'II
Coolant system ....... ... .. .. .. .. .. . 234
Cooling System
Expansion tank .................. 235
Cru ise control .............. ... ..... 110
Changing speed ................. . 111
Presetting your speed .......... .. . 111
Switching off ............. .. .... . 112
Switching on ........... ......... 110
Warning/indicator lights ... .... .... 14
Cup holder ............ ...... .. .. .. .. 89
Cup holders front ........ ...... .. .. .. .. .. .. .. 89
Current fuel mileage ................ .. 21
D
Damp ing
See Audi magnetic ride ......... ... 112
Data ....... .... ...... .. .... .. .. .. . 296
Data recorder ................. .. ... 188
Date display .. .. .. ............... .... . 9
Daytime running lights ............... . S6
Daytime running lights (Canada) ........ 56
Declaration of compliance Cell phone package ............ .. . 303
Electronic immobilizer ... .. .. .. .. . 303
Homel ink® un iversal remote control . 303
Remote control key ............... 303
Ti re pressure monitoring system ... . 303
def What does this mean when it appears in
the trip odometer display? ......... 10
Defective light bulb warn ing . .. .. .. .. .. 36
Controls and equip
ment Safety first
Defogg
ing the windows ....... .... ... . 98
Defrosting the windows ............... 98
Defrosting/defogging w indows ..... ... 101
Determining correct load limit . ...... .. 254
Diesel engine Add ing engine oil .. .... .. ......... 233
Changing engine oil .. .. ........... 233
Engine oil . ... .... .... ........... 233
Diesel fuel .. .................... ... 220
Diesel particulate filter. . . . . . . . . . . 34, 199
Digital clock . .. ............. .. .... .... 9
Setting the time ............ ....... 9
Digital compass . ................ ... . 71
Dimensions ..... .... ............... 295
Dipstick Reading the dipstick p roperly ..... .. 231
Direct Shift Gearbox Emergency release ............... 121
Distance .... .... .. .... .............. 22
Doors, power locks .... ... .. .. ........ 43
Driver information ................... 31
Driver Information System Menu display ............ ......... 22
Driver information system
Gearshift indicator ............. .. . 19
Menu button . ....... .... .. .. .. .. . 24
Open door or front lid wa rning .. .. .. . 18
Outside temperature display ........ 18
Red symbols ................... ... 30
Service interval display ............. 27
Setting . ................ .. .. .. ... 2s
Sound system display .. .. .......... 18 Trip computer
... ... ..... ... . ... .. 21
yellow symbols .. ................ . 30
Driver seat
See Seating position ...... ..... ... 126
Driving safely .. .. .. .. ............. . 124
Driving through water .... .... .. .. .. . 198
Duplicate key ...... . .. ............... 38
E
Efficiency program . ... .. .. ........... 25
Fuel economy messages ............ 26
Other equipment ... ............... 26
Elapsed time ... ...... ............. .. 21
Electrically heated front seats .. .... .. . 103
Electro-mechanical power assist ... 17, 193
Electronic differential lock (EDL) How the system works .. .... ...... 189
Warning/indicator lights ... .. ... ... 16
Electronic immobilizer . . . . . . . . . . . . 10, 40
Electronic power control
EPC warning/indicator light ......... 13
Electronic speed limiter ........ ...... . 20
Electronic Stability Program ... .... .. . 188
Electronic stabilization program (ESP)
Warning/indicator lights ..... .. .. .. 14
Emergency flasher Warning/indicator lights ... .. ... ... 14
Emergency flashers ... .. .. .... ....... 59
Emergency operation panoramic sliding sunroof ........ .. 53
Rear lid .......................... 46
Vehicle operation Vehicle care Do-it-yourself service Technical data
Page 310 of 320
-Alphabetical inde x _...,___ _ ______:_:__:_=.:..:...._ _________________ _
Emergency release for selector lever ... 121 Engine hood
Emergency starting ...... .. .. .. ... .. 286 Closing
............. ... .. ... .... 226
Emergency towing . .. .... .. ..... .... 289 Release lever
.............. .... .. 225
Energy management ........ .. .... .. 194 Releasing and open
ing .. .... .... .. 225
Battery power ................. .. 196 Engine malfunction (diesel engine)
Dr iver not ification .... ..... ....... 196 Warning light ............
.. .. .. .. 13
Engine E
ngine oil ........ ...... .... .. .. ... 228
4-cylinde r diesel (140 hp) ...... ... 228 Add
ing ... ... .. .. .. .. .... .. .. ... 232
4-cylinder gasoline (200 hp) . ..... . 227 Add
itives . ... ... ... .. .... .. .. ... 232
Coolant ................ ...... .. 234 Changing
....... ... .... .. .. .... . 232
Hood . ............. .... .. .... .. 225 Checking the engine oil leve
l ..... .. 231
Preheater .... .. .. .. .... ......... 103 Diesel engine .........
.... .. ..... 233
Starting . .. ... ... .... .. .. ... 106, 107
Starting w ith jumper cables . ....... 286
Stopping .. .. ... ... .. ........ ... 108
Engine compartment .. ....... ... . .. . 227
Safety instructions ............. .. 226
Work ing in the eng ine compartment 226
Engine coo lant system . ....... ... . ... 234
Add ing coolant ....... .. ... .... .. 236
Checking coo lant level ... .. .. .. ... 235
Checking the engine coolant level . .. 235 Indicat
ions and conditions requir ing extra
c heck ing .. .................... 231
O il cons ump tion . .... .. .. ... .. .. . 230
Oil grades .... .. .... ...... .. ... . 228
Recommended oil check intervals . .. 231
Specification and viscosity .. .... .. . 228
Specifications D iese l engine . .. ..... 233
Specifications gaso line engine . .... . 228
Engine oil leve l ... .. .... .. .. ...... .. . 3 4
E ngine oil p ressure (mailf u nctio n) ... .. . . 33
Radiator fan ............ ...... .. 237 Engine oil sensor defective
... .. .. ... .. 35
Engine coo lant tempe ra tur e E
ngine preheater ........ .... .. ..... 103
Ga uge ... .. .. .. .. .. .. ... . .. .. .. .. 9 Connecting ................
.... . 103
E ngine coo ling system Engine speed lim
itation . .... ... .... ... 34
Malf unct io n .. ... ......... .... .... 32 Environment
E ngine data ................ ...... .. 296 Brea
k-in period .. .... .. .. ... .... . 197
Engine fau lt
W arning light ........... ...... ... 13 Catalytic converter . . . . . . . .
. . . . . . . 198
Diesel particulate filter ............ 199
Disposing of your vehicle battery . .. . 242
Dr iv ing at hig h speeds .......... .. 200 Dr
iv in g to mi nimize pollution and noise ..
20 0
Fuel . ... .. .. .. ...... ... .. .. . ... 222
Fue l economy . ... .. .. .. ... .... .. 200
Leaks under yo ur vehicle ... .. .. .. . 226
Letting the vehicle stand and warm up ... 200
Proper disposa l of dra ined br ake fluid 238
Proper disposa l of dra ined engine coo lant
236
Prope r disposal of dra ined engine oil 232
Recycl ing used eng ine o il .......... 232
Unleaded fue l ............. .. .. .. 219
W hat sho uld I do w it h an old batte ry?
242
EPC
See Electronic power control . . . . . . . . 13
ES P
See Elect ronic Stability P rogram .. .. 188
Event Data Recorder ( EDR) .. ......... 188
Exhaust ta il pipes
Cleaning ... .... .... .. .. ...... .. 213
Expans ion tank .. ... ................ 235
F
Fahrenheit
Switching between Fahre nhe it and
Centigrade ..... .. .............. 99
Fan Adjusting the fan s peed .. ......... 1 00
Climate cont rols . ... .. .. ... .. ... . 10 0
Radiator ... .. ... ..... ... ...... .. 237