key AUDI A3 2011 Owner´s Manual
[x] Cancel search | Manufacturer: AUDI, Model Year: 2011, Model line: A3, Model: AUDI A3 2011Pages: 320, PDF Size: 75.79 MB
Page 48 of 320
Opening and closing
Closing the rear lid
-Pull it down and shut it firmly => & . T here is a recess in
the interior trim o f the lid to make it easier to pull down.
& WARNING
• After closing the rea r lid , always pull up on it to make sure that
it is properly closed. Otherwise it could open suddenly when the
vehicle is moving .
• To help p re v ent poisonous exhaust ga s from being drawn into
the vehicle, always keep the rear lid closed while d riv ing. Never
transport objects larger than those fitting completely into the
luggage area, becau se then the rear l id cannot be fully closed.
• Never lea ve your vehicle unattended e specially with the re ar lid
left open . A child could crawl into th e car throu gh the luggage
compa rtment and pull the lid shut , bec oming trapped and un able
to get out . To reduc e the r isk of per sonal injury, never let children
play in or around your vehicle. Always keep the rear lid , as well as
the vehicle doors , clo sed when not in us e.
(I) Tips
• If the rea r lid is op en or not p roper ly locked when the ign ition is
turned on, the door and rear lid warning appears in the instrument
cl uster dis play.
• If the rear lid on a locked vehicle is unlocked with the middle
button
cs on the remote key, the rear lid is automat ically locked
again immediately after clos ing . This is indicated by the turn signa ls
blinking. •
Emergency release for rear lid
If the rear lid can not be opened, an emergency release is
p rovided.
Fig . 3 5 Rear and trunk
se ction : Acce ss to
em ergency relea se
Fig . 3 6 Rea r lid i nte
ri or se ct ion: Em er
ge ncy rele ase
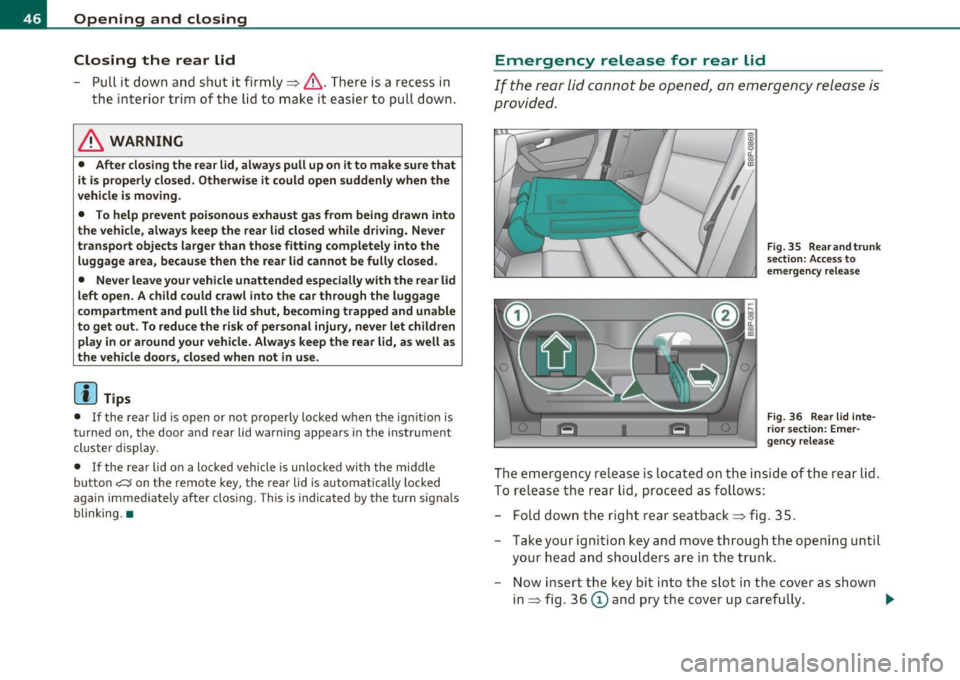
The em ergency re lease is located on the inside of the rear lid .
To re lease the rear lid, proceed as follows:
- Fold dow n the righ t rear se atba ck
=> fig . 35.
- Take you r igni tion key and move through the ope nin g u ntil
your head a nd shou lders are i n the tru nk.
- Now insert the key bit into the slot in the cover as shown
in => fig. 36
(D and pry the cover up caref ully . ..,.
Page 49 of 320
-Place the key in the round opening behind the cover@
and turn the key in the direct ion of the arrow . This unlocks
the lock and the rear lid opens a crack.
- Open the rear lid from the outside and put the ignition key
in a safe place. •
Manual door locking
If the power locking system fails (power failure), you will
need to lock the passenger door separately.
i a:.
"' "'
F ig. 3 7 Em ergency
lo cking devic e in the
doo rs
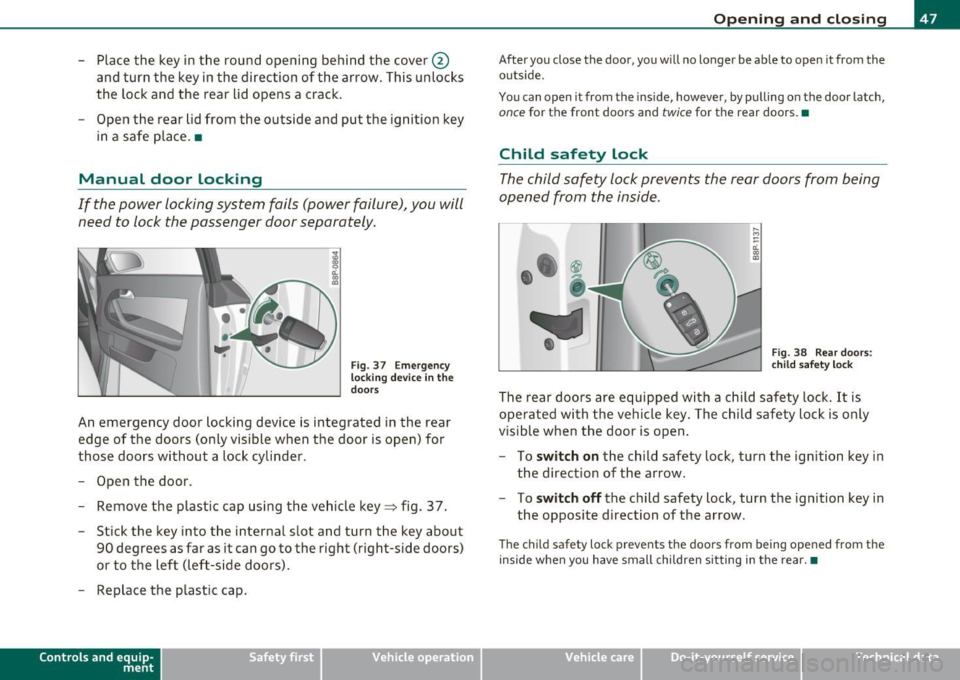
An emergency door locking device is integrated in the rear
edge of the doors (only visible when the door is open) for
those doors without a lock cylinder .
- Open the door.
- Remove the plastic cap using the veh icle key~ fig. 37 .
- Stick the key into the internal slot and turn the key about
90 degrees as far as it can go to the righ t (right-side doors)
or to the left (left-side doors).
- Replace the plastic cap.
Con tro ls a nd e quip
m en t Vehicle
OP-eration
Opening and closing
After you close the door, you will no longer be able to open it from the
outs ide.
You can open it from the inside, however, by pulling on the door latch,
once for the front doors and twice for the rear doors.•
Child safety lock
The child safety lock prevents the rear doors from being
opened from the inside.
,._ M
-
-a:. a, (0
Fig. 38 Rear doors:
c h ild safety loc k
The rear doors are equipped with a child safety lock. It is
operated with the vehicle key . The child safety lock is only
visible when the door is op en .
- To
switch on the child safety lock, turn the ignition key in
the direction of the arrow.
- To
switch off the child safety lock, turn the ignition key in
the opposite direction of the arrow.
The child safety lock prevents the doors from being opened from the
inside when you have small children sitting in the rear. •
Vehicle care Do-it-yourselt service iTechnical data
Page 50 of 320
Opening and closing
Anti-theft alarm system
The anti-theft alarm triggers an alarm if anyone
attempts to break in to the ve hicle .
Fig . 3 9 Dio de po sition
in the in strum ent
panel
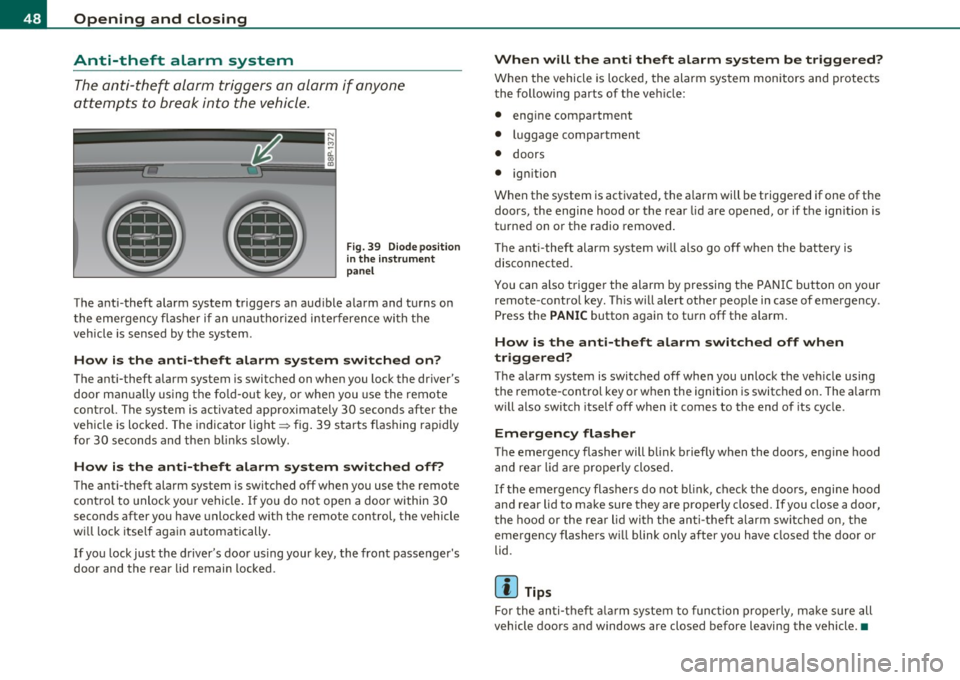
The anti -theft alarm system trigge rs an audible a larm and turns on
t he emergency flasher if an unauthori zed i nter feren ce wi th th e
veh icle is sensed by t he system .
How is the anti-theft alarm system switched on?
The anti-theft alarm system is switched on when you lock the dr iver's
door m anually using t he fo ld-ou t key, o r whe n you use the remote
control. The sys tem is activated approximately 30 seconds after the
vehicle is lo cked. The indicato r lig ht ~ fig . 39 sta rts flash ing rapi dly
for 30 seconds and then blinks s lowly.
How is the anti -theft alarm sy stem switched off?
The anti-theft alarm sys tem is switched off when you use the remote
c on trol to unlock yo ur vehi cle. If you do no t open a door within 30
seconds after you have unlocked with t he remote control, the vehicle
w ill l ock itse lf aga in automat ically .
If you lock just the d river's door us ing your key, the front passenger's
door and the rear lid remain locked .
When will the anti theft alarm system be triggered?
When the vehicle is locke d, the alarm sys tem monitors and protects
t he following parts of t he veh icle:
• eng ine compa rtment
• luggage compartment
• doors
• ignition
When the system is activated, the a larm will be t rigge red if one of the
doors, the engine hood or the rear lid are opened, or if t he ign it ion is
t u rned on or t he radio removed .
Th e a nti-t hef t alarm system w ill also go o ff w hen the bat tery i s
disconnected.
You can also t rigge r the alarm by pressing the PA NI C but ton on your
remote -co ntro l key. T his w ill alert other peop le in case of emergency .
Press the
PANIC button aga in to t urn off the a la rm .
How is the anti-theft alarm switched off when
triggered?
T he a larm system is switched off when you unlock the ve hicle using
the remote-cont ro l key or when the ignition is switched on. The a la rm
w ill also switch itself off when it comes to the end of its cycle .
Emergency flasher
The emergency flasher will b link briefly when the doors, eng ine hood
and re ar lid ar e pr oper ly closed .
If the emergency flashers do not blink, check the doo rs , engi ne hood
and rear lid to ma ke sure they are properly closed. If you close a door,
t he hood or the rea r lid wi th the an ti- theft a la rm sw itched on, the
eme rgency flashers w ill blink on ly after you have closed the door or
lid .
[ i ] Tips
For the an ti-t heft a larm system to func tion p roperly, m ake su re all
vehicle doors and windows are closed before leaving the vehicle. •
Page 51 of 320
Power windows
Controls
Fig. 40 Dri ver's door:
power wind ow
swit ches
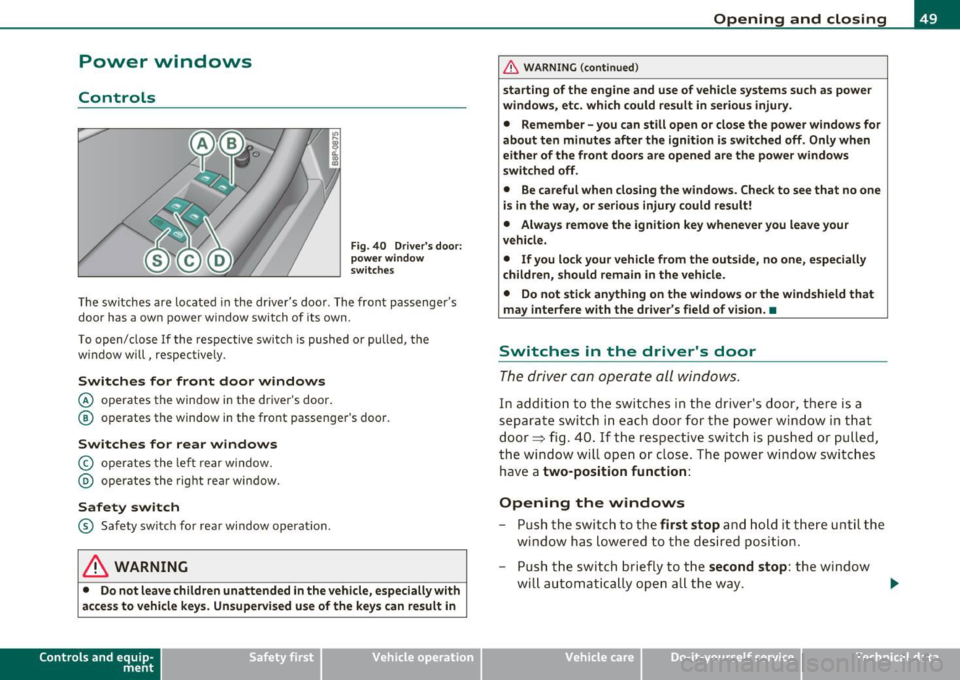
T he switches are located in the dr iver 's doo r. The front passenger's
door has a own power w indow switch of its own .
T o open/ close If the respective swi tch is pu shed or pulled, the
window will, respectively .
Switches for front door windows
© operates the window in the driver's door .
@ operates the window in the front passenger's door.
Switches for rear windows
© operates the lef t r ear w indow.
@ operates the rig ht rea r window.
Safety switch
® Safety switch for rea r window operat ion .
& WARNING
• Do not leave children unattended in the vehicle, esp ecially with
ac ce ss to vehicle key s. Unsupervi sed use of the keys can re sult in
Con tro ls a nd e quip
m en t Vehicle
OP-eration
Opening and closing
& WARNI NG (continued )
starting of the engine and use of vehicle systems such as power
windows, et c. whi ch could result in seriou s injury.
• Remember -you can still open or clo se the power windows for
about ten minutes after the ignition is swit ched off . Only when
eithe r of the front doors are opened are the powe r windows
s witched off .
• Be ca reful when closing the windows . Chec k to see that no one
is in the way, or serious injury could result!
• Alway s remo ve the ignition key whene ver you leave your
veh icle.
• If you lo ck your vehicle from the out side, no one, e specially
children, should remain in the vehicle .
• Do not stick anything on the windows or the windshield that
may interfere w ith the driver 's field of vision. •
Switches in the driver 's door
The d riv er can operate all windo ws.
In additi on to th e switches i n the driver's d oor, t here is a
separate switch in each door fo r th e po wer wi ndow in that
door~ fig. 40. If the respective switc h is pus hed or p ulled ,
the window will open or c lose. The power window switc hes
have a
two-position function:
Opening the windows
- Push th e switch to th e first stop an d h old it there until the
window has l owere d to the d esired position.
- Push t he swi tch briefly to t he
second stop : the window
wi ll automati ca lly op en all th e way .
Vehicle care Do-it-yourselt service iTechnical data
Page 52 of 320
Open ing and closing
- By briefly pressing/pulling the switch again, the down
ward travel of the window can be stopped in any position
:::::, & in "Controls" .
Closing the windows
Pull the switch up to the first stop and hold it there until
the window has risen to the desired position.
- Pull the switch quickly to the
sec ond po sit ion : the window
will automatically close all the way:::::,
& in "Controls".
- By briefly pressing/pulling the switch again, the upward travel of the window can be stopped in any position=:>
&
in "Controls".
Activating/deactivating re ar windows
- Push the switch to the depressed position to acti vate the
rear windows -the light in the switch will go out .
- Briefly press the switch to
deacti vate the rear windows -
the switch will return to the safety position and the light
~ will illuminate.
The safety switch ©::::> page 49, fig. 40 in the armrest on the driver's
door turns off the rear power windows. Only when the safety switch
is depressed can the rear windows be opened or closed . The symbol in
the safety switch illuminates when the power windows in the rear
doors are switched off (button NOT dep ressed) . This featu re has been
prov ided for the safety of small children rid ing in the rear of the
vehicle.
[ i ] Tips
T he windows can still be opened and closed for about ten min utes
after the ign ition has been turned off. The power windows are not
shut off unti l one of the front doors is opened .•
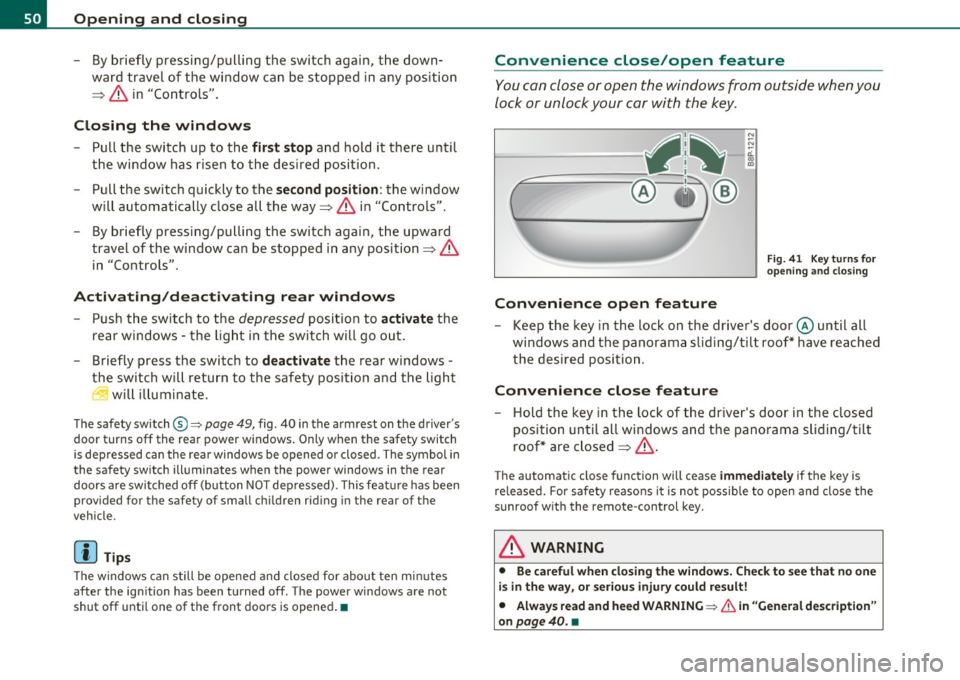
Convenience close/open feature
You can close or open the windows from outside when you
lock or unlock your car with the key.
Convenience open feature
Fi g. 41 K ey turn s fo r
openi ng and closi ng
Keep the key in the lock on the driver's door @until all
windows and the panorama sliding/tilt roof * have reached
the desired position.
Convenience close feature
- Hold the key in the lock of the driver's door in the closed
position until all windows and the panorama sliding/t ilt
roof* are closed :::::,
&.
The automatic close function will cease immed iatel y if the key is
re leased. For safety reasons it is not possib le to open and close the
sunroof with the remote-control key.
& WARNING
• Be c areful when cl osing t he window s. C heck to see that no one
i s in the w ay, or seriou s injur y could re sult !
• Alwa ys read and h eed WARNING =>
& in "Gener al d esc ription "
on
pag e 40. •
Page 54 of 320
Opening and closing
Opening manually (manual operation)
- Press the switch (D => page 51, fig. 42, starting from the
"lift position" until the roof has reached the desired posi
tion.
Closing completely
- Press the switch @=> page 51, fig. 42 until the roof is
completely closed=>& .
Closing partially
- Press the switch @=> page 51, fig. 42 until the roof has
reached the desired position =>& . If the roof is almost
closed and you interrupt the operation, the roof opens
automatically to a minimum setting; this is the smallest
possible opening that can be set.
If you pa rk your vehicle in the su n, we recommend that you close the
sun blind . You should especially make certain that the panoramic
sliding sunroof is closed when the sun blind is closed when parked or
if there is a sudden rain shower.
The sun blind has two positions: comp letely open or completely
closed. The sun blind is manually operated.
& WARNING
Never close the panoramic sliding sunroof carelessly or without
watching -the re is a risk of personal injury. For this reason, always
remove the ignition key when leaving the vehicle.
[ i ] Tips
• When you park your vehicle , we generally recommend closing the
panoramic sliding sunroof and the sun blind . •
When the vehicle is parked, a wet roof should be dried lightly with
a soft cloth
before it is opened so that water does not drip into the
interior .
• In an emergency, the panoramic sliding sunroof can be closed
manually=>
page 53, "Emergency mechan ical closing for the
panoramic slidi ng sunroof". •
Appli es to vehicles : wit h pa norami c sli ding s unroo f
Comfort closing
The open roof can also be closed from the outside.
-Hold the key in the driver's door lock in the lock position
until the roof is closed=> &.
& WARNING
Never close the panoramic sliding sunroof carelessly or without
watching -there is a risk of personal injury.•
Page 78 of 320
Seats and storage
Applies to veh icles : w ith power driver seat
Power seat adjustment
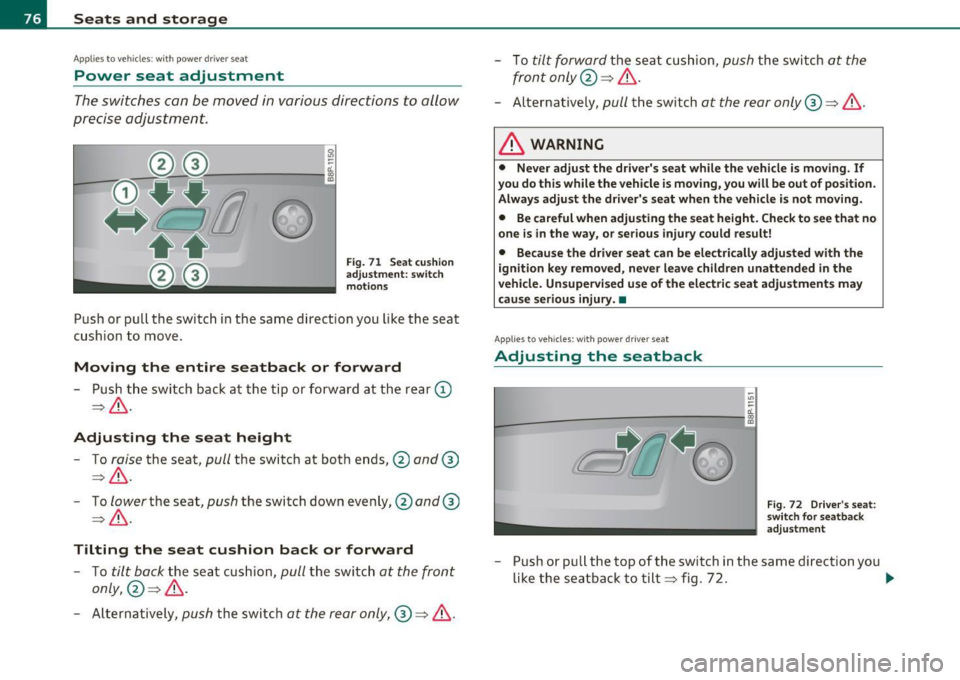
The switches can be moved in various directions to allow
precise adjustment.
Fig. 71 Seat cushion
adjustment: switch
motions
Push or pull the switch in the same direction you like the seat
cushion to move.
Moving the entire seatback or forward
- Push the switch back at the tip or forward at the rear (D
=>& .
Adjusting the seat height
- To raise the seat, pull the switch at both ends,@ and®
=>& .
- To
lower the seat, push the switch down evenly,@and @
=>& .
Tilting the seat cushion back or forward
- To tilt bock the seat cushion, pull the switch at the front
only, @=>& .
- Alternatively, push the switch at the rear only,®=>& .
-To tilt forward the seat cushion, push the switch at the
front only@=>& .
-Alternatively, pull the switch at the rear only®=>& .
& WARNING
• Never adjust the driver's seat while the vehicle is moving. If
you do this while the vehicle is moving, you will be out of position .
Always adjust the driver's seat when the vehicle is not moving.
• Be careful when adjusting the seat height. Check to see that no
one is in the way, or serious injury could result!
• Because the driver seat can be electrically adjusted with the
ignition key removed, never leave children unattended in the
vehicle. Unsupervised use of the electric seat adjustments may
cause serious injury. •
Applies to vehicles: with power driver sea t
Adjusting the seatback
Fig. 72 Driver 's seat:
switch for seatback
adjustment
- Push or pull the top of the switch in the same direction you
like the seatback to tilt=> fig. 72. _,,,
Page 93 of 320
- Plug in appliance to be used.
The outlet may be used for 12-volt app liances w ith maxim um
cons umption of up to 100 watts, such as a flash light, small vacuum
cl eaner, e tc.
Before you purchase any accessor ies, always read and fo llow the
info rm ation in::::,
page 301, "Add it io na l acc essories and p arts
re placemen t".
& WARNING
The outlet plus any appliances plugged into it remain functional
even if the ignition is switched off or the ignition key is removed. Never leave children inside the vehicle without supervision .
0 Note
To avoid damaging the socket, only use plugs that fit properly.
(I) Tips
When the engine is off and accessor ies are st ill plugged in and are on,
the ve hicle battery can sti ll be drained .•
Storage
General overview
There are numerous pl aces to st ore items in your vehi cle .
Storage in t he center armrest
Storage in the rear armrest
::::, page 79
Glove com partment (Ai r ven tila tion in t he ::::, page 92
glove compartment*, CD changer*)
Controls and equip ·
ment Safety first
Seats and storage
Center console ::::,
page 92
Compartments in the door tr ims ::::, page 93
Storage in the footwell ::::, page 93
Compartments in luggage compartment ::::, page 94
Coat hooks
Some of the storage locations are only fo und o n specific vehicle
mode ls o r are op tio nal equ ipme nt.
& WARNING
• Always remove objects from the instrument panel. Any items
not put away could slide around inside the vehicle while dri ving or
when accelerating or when applying the brakes or when dri ving
around a corner.
• When you are driv ing make sure that anything you may have
placed in the center console or other stor age locations cannot fall
out into the footwells. In c ase of sudden braking you would not be
able to b rake, depres s the clutch or accelerate .
• Any pieces of clothing that you have hung up must not inter
fere with the driver's view. The co at hooks are designed onl y for
lightweight clothing . Never hang any clothing with hard, pointed
or hea vy objects in the pockets on the coat hooks. During sudden
braking or in an accident· especially if the airbag is deployed ·
the se objects could injure any passengers inside the vehicle. •
Vehicle care Technical data
Page 104 of 320
ffl..__w __ a _r _m __ a_n _ d_ c_ o_ ld ________________________________________________ _
Key coded settings
When the ignition is switched on, the air conditioner
settings are automatically assigned to the key being used .
The air conditioner settings selected are automatically stored and
assigned to the key being used . When the vehicle is started, the air
conditioner automatically selects the settings assigned to that key.
Th is way every driver will maintain his/her own personal settings and
does not have to reset them manually.
[ i J Tips
If a different driver uses your key and changes the a ir conditioner
sett ings, the latest adjustments wi ll erase and replace the settings
you have stored. •
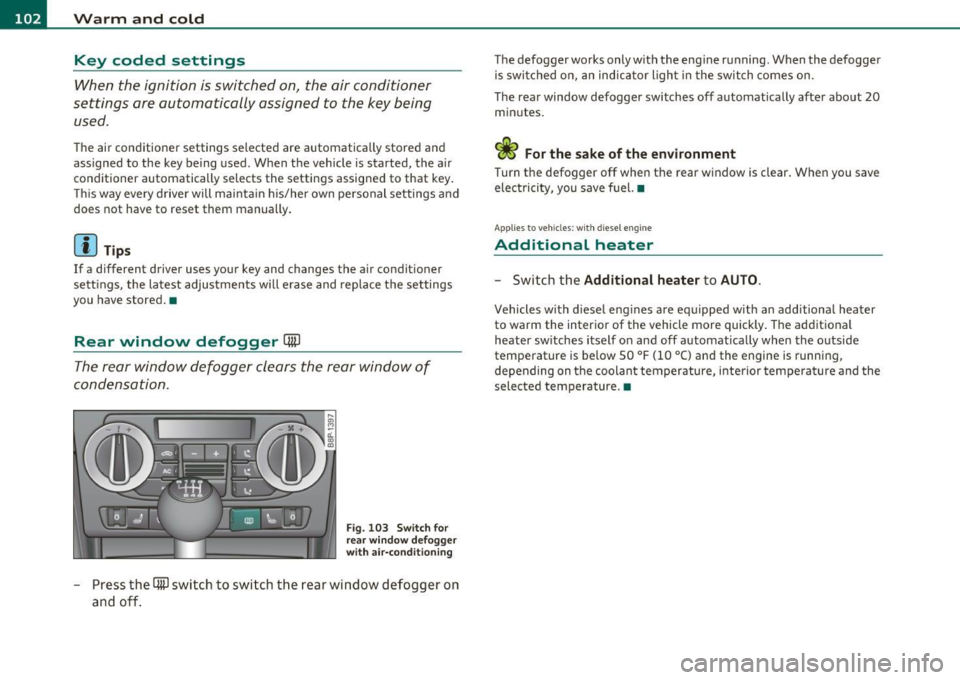
Rear window defogger [ffi)
The rear window defogger clears the rear window of
condensation.
F ig. 103 Swi tch for
rea r w in dow defogg er
wit h air -conditioni ng
- Press the [ml switch to switch the rear window defogger on
and off.
The defogger works only with the eng ine running . When the defogger
is switched on, an indicator ligh t in the switch comes on .
The rear window defogger switches off automatically after about 20 min utes.
elec tricity, you save fuel. •
Applies to veh icles: wit h diesel eng ine
Additional heater
- Switch the
Additional heater to AU TO .
Vehicles w ith d iesel eng ines are equipped with an additional heater
to warm the interior of the vehicle more quickly . T he additional
heater sw itches itself on and off automatically when the outside
temperature is be low 50 °F (10 °C) and the engine is running,
depending on the coolant temperature, i nterior temperature a nd the
selected temperature. •
Page 108 of 320
ffl..__O_ n_ t_h _e_ r_o _ a_ d _________________________________________________ _
Ignition Lock and ignition switch
Ignition lock
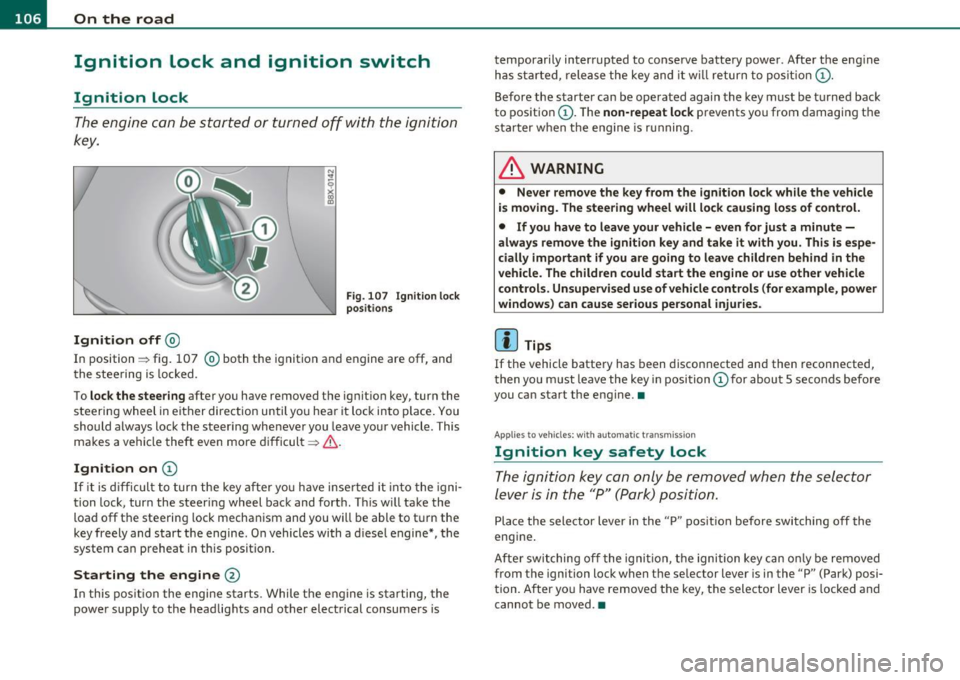
The engine can be started or turned off with the ignition
key.
Ignition off@
Fig. 107 Ignition l ock
p ositions
In position => fig. 107 @ both the ignition and engine are off, and
the stee ring is locked .
To
lock the stee ring after you have removed the ig nit io n key, turn the
steeri ng wheel in either direction until yo u hear it lock into place . You
should always lock the steering whenever you leave your vehicle . This
makes a vehicle theft even more difficult=> & .
Ignition on (D
If it is d ifficul t to turn the key af ter yo u have inse rted it in to the igni
tion lock, tur n the steering wheel back and forth . T hi s w ill take the
load off the steering lock mechanism and you wi ll be able to t urn the
key freely and start the engine . On vehicles with a d iese l engine *, t he
system ca n preheat in this position .
Starting the engine@
In this pos it ion the engi ne s tarts. While the e ngine is s ta rting, the
power supply to the headlights and other electrical consume rs is temporarily interrupted to conserve ba
ttery power . Afte r th e eng ine
h as st arted, relea se the key and it w ill retur n to posit io n (D .
Before the starter can be operated again the key must be t urned back
to positio n (D . T he
non-repeat lock prevents you from damaging the
s ta rt er when t he e ng ine is running .
& WARNING
• Never remove the key from the ignition lock while the vehicle
i s moving . The steering wheel will lock causing loss of control.
• If you have to leave your v ehicle -even for ju st a minute -
always remove the ignition key and take it with you. This is espe·
cially important if you are going to leave children behind in the
vehicle. The children could start the engine or use other vehicle
control s. Unsupervised use of vehicle controls (for example, power
windows ) can cause serious personal injuries .
(I) Tips
If the vehicle battery has been disconnected and then reconnected,
t hen yo u m ust leave the key in posi tion (Dfor abou t
5 seco nds befo re
you can start the eng ine. •
App lies to vehicles: with automat ic transmission
Ignition key safety lock
Th e ignition k ey can only b e removed when the selector
lever is in the "P" (Park) position.
Pla ce the selector lever i n the "P " pos it ion before swit ching off the
eng ine .
Afte r sw itching of f the igni tion , th e ignition key can o nly be re moved
from the ignition lock when t he selector lever is in the "P" (Park) posi
t ion. After yo u have remove d the key, t he selector lever is locked a nd
cannot be moved .•