door lock AUDI A3 2012 Owner´s Manual
[x] Cancel search | Manufacturer: AUDI, Model Year: 2012, Model line: A3, Model: AUDI A3 2012Pages: 280, PDF Size: 70.11 MB
Page 44 of 280
42 Opening and clo sing
Child safety lock
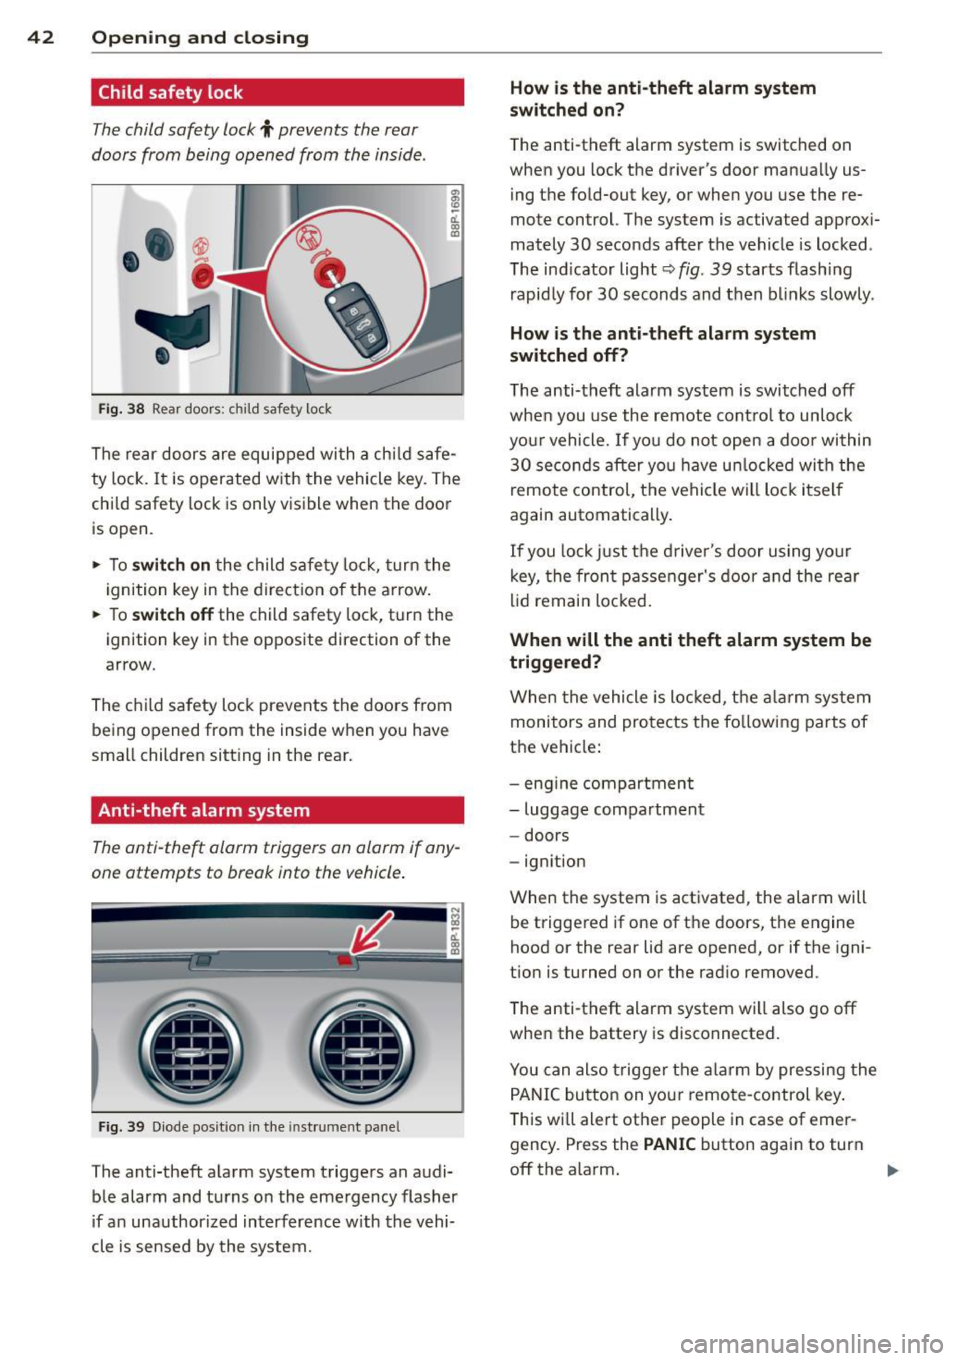
The child saf ety lock t prev ents th e re ar
doors from being opened from the inside .
Fig. 38 Rear doors : child safety lock
The rear doors are equipped wi th a ch ild safe
ty lock.
It is operated w ith the vehicle key. The
child safety lock is only visible when the door
is open.
• To
switch on the child safe ty lo ck , tu rn the
i gnition key in the direct ion of the arrow .
• To
switch off the child safety loc k, t urn the
ignition key in the opposite direction of the
arrow.
The c hild safety lock prevents the doors from
being opened from the inside when you have
small children sitt ing in the rear.
Anti-theft alarm system
The anti -theft alarm triggers an alarm if any
one attempts to break into the vehicle .
Fig. 39 Diode pos it ion in th e in st ru men t pane l
The anti-theft a larm system triggers an audi
ble alarm and tu rns o n the emergency flasher
if a n unauthori zed interference w ith the vehi
cle is sensed by the system.
How is the anti -theft alarm system
switched on?
T he anti -theft alarm system is switched on
when you lock the driver's door manua lly us
ing t he fo ld-out key, or when you use the re
mote control. The system is activated approx i
mately 30 seconds after the vehicle is locked .
The ind icator light¢
fig. 39 starts flash ing
rapid ly for 30 s econds and then blinks slowly.
How is the anti-theft alarm sy stem
switched off?
T he anti-theft alarm system is switched off
when you use the remote cont ro l to unlock
yo ur vehicle.
If you do not open a doo r wi thin
30 se co nds after yo u have u nlocked wi th the
remote control, t he vehicle will loc k it se lf
again automatically .
If you lock just t he d river's door using your
k ey, the fron t passenger's door and the re ar
li d remai n locked.
When will the anti th eft alarm system be
triggered?
When the vehicle is lo cked, t he alar m sys tem
monitors and pro te cts the fo llowi ng parts of
the ve hicle :
- eng ine compartmen t
- luggage compartmen t
- doors
- ignition
When the system is activated, the alarm will be triggered if one of t he doors, t he engine
hood or the rear lid are opened, or if the igni
t ion is turned on or the rad io removed .
The anti-theft alarm system wi ll also go off
whe n the battery is disconnected.
You can also trigge r the alarm by pressing the
P ANIC button on you r remo te-control key .
T his wi ll ale rt ot her people in case of emer
gency . Press the
PANIC button again to turn
off the alarm.
Page 45 of 280
How is the anti-theft alarm switched off
when triggered?
The alarm system is switched off when you
un lock the vehicle using the remote-control
key or when the ignition is switched on. The
alarm will also switch itself off when it comes
to the end of its cycle .
Emergency flasher
The emergency flasher will blink briefly when
the doors, engine hood and rear lid are prop
erly closed .
If the emergency flashers do not blink, check
the doors, engine hood and rear lid to make
sure they are properly closed. If you close a
door, the hood or the rear lid with the anti
theft alarm switched on, the emergency flash
ers will blink only after you have closed the
door or lid .
(D Tips
For the anti-theft alarm system to func
tion properly, make sure all vehicle doors
and windows are closed before leaving the
veh icle.
Power windows
Controls
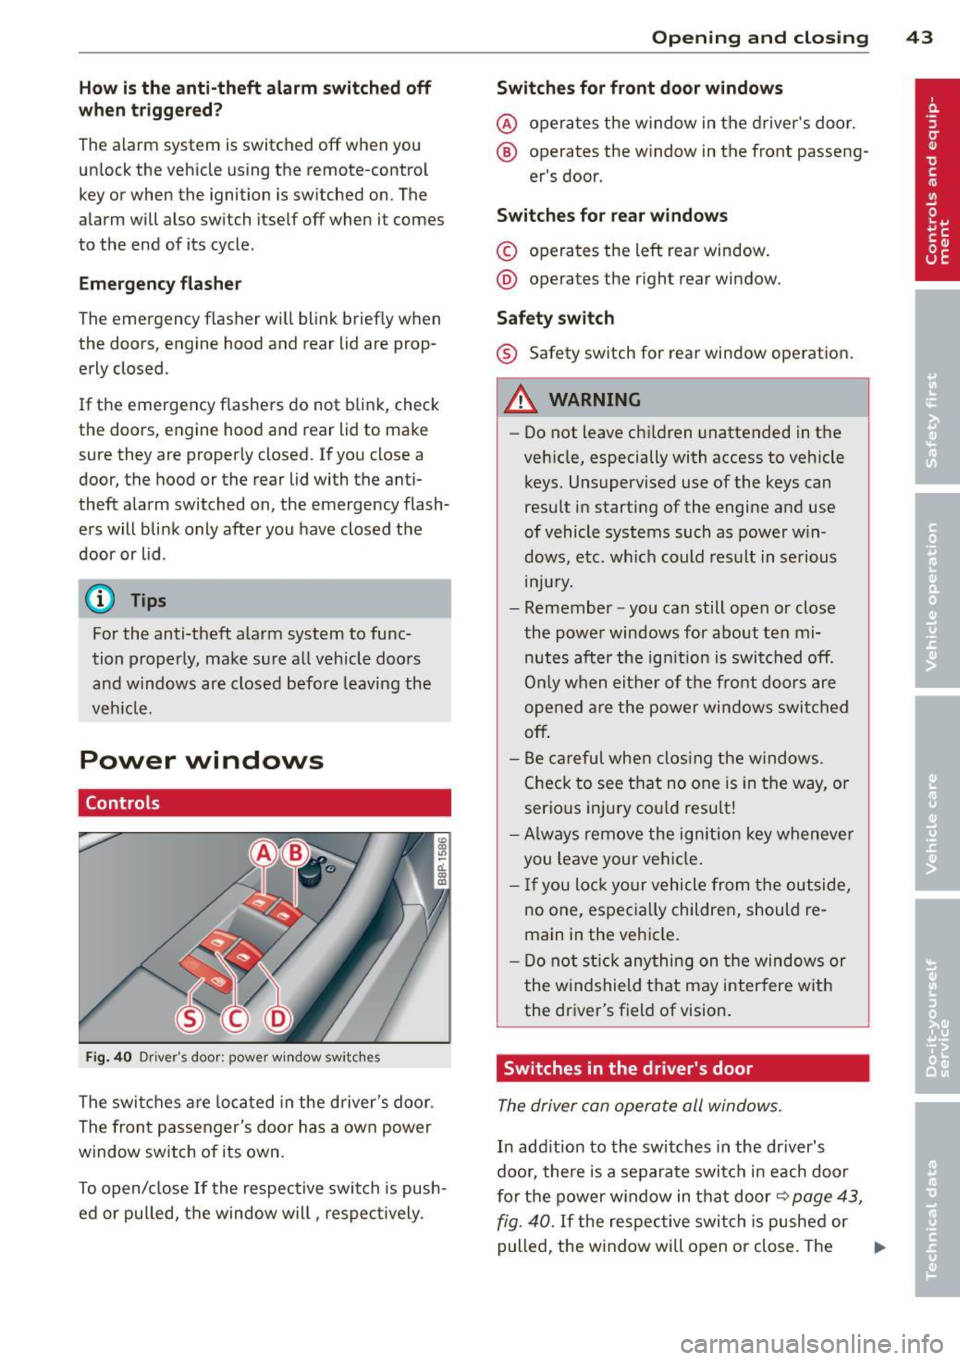
Fig. 40 Dr iver 's door: powe r w ind ow sw itches
The switches are located in the driver's door.
The front passenger's door has a own power
window switch of its own.
To open/close If the respective switch is push
ed or pulled, the window will, respectively.
Opening and closing 43
Switches for front door windows
@ operates the window in the driver's door.
® operates the window in the front passeng -
er 's door.
Switches for rear windows
© operates the left rear window.
@ operates the right rear window.
Safety switch
® Safety switch for rear window operation .
A WARNING
-Do not leave chi ldren unattended in the
veh icle, especially with access to vehicle
keys. Unsupervised use of the keys can
result in starting of the engine and use
of vehicle systems such as power win
dows, etc. wh ich could result in serious
mJury.
- Remember -you can still open or close
the power windows for about ten mi nutes after the ign ition is switched off.
On ly when either of the front doors are
opened are the power windows switched
off .
- Be careful when clos ing the windows .
Check to see that no one is in the way, or
serious injury could result!
-Always remove the ignition key whenever
you leave your vehicle .
- If you lock your vehicle from the outside,
no one, especially children, should re
main in the vehicle.
- Do not stick anything on the windows or
the windshield that may interfere with
the driver's field of vision.
Switches in the driver's door
The driver can operate all windows .
In addition to the switches in the driver's
door, there is a separate switch in each door
for the power window in that door~
page 43,
fig. 40.
If the respective switch is pushed or
pulled, the window will open or close. The
Ill>
Page 46 of 280
44 Opening and closing
power window switches have a two-position
function:
Opening the windows
.. Push the switch to the first stop and hold it
t h ere until the window has lowered to the
desired position .
.. Push the switch briefly to the
second stop:
the window will automatically open all the
way.
.. By briefly pressing/pulling the switch again,
the downward travel of the window can be
stopped in any position
c:> .&. in Controls on
page 43.
Closing the windows
.. Pu ll the switch up to the first stop and ho ld
it there until the window has risen to the de
sired posit ion .
.. Pull the switch qu ickly to the
second posi
tion :
the w indow w ill automatically close all
the way
c:> ,&. in Controls on page 43.
.. By briefly pressing/pulling the switch again,
the upward travel of the window can be
stopped in any position
c:> .&. in Controls on
page 43 .
Activating/deactivating rear windows
.. Push the sw itch to the depressed position
to
activate the rear windows - the light in
the switch w ill go out.
.. Briefly press the switch to
deactivate the
rear windows -the switch will return to the
safety position and the light
LJ will illumi
nate.
The safety switch ®
c:> page 43, fig. 40 in the
armrest on the driver's door turns off the rear
power windows. Only when the safety switch
is depressed can the rear windows be opened
or closed. The symbol in the safety sw itch illu
minates when the power windows in the rear
doors are switched off (button NOT de
p ressed). This feature has been provided for
the safety of small children riding in the rear
of the vehicle.
(D Tips
The windows can still be opened and
closed for about ten minutes after the ig
nition has been turned off. The power w in
dows are not shut off unt il one of the front
doors is opened.
' Convenience close/open feature
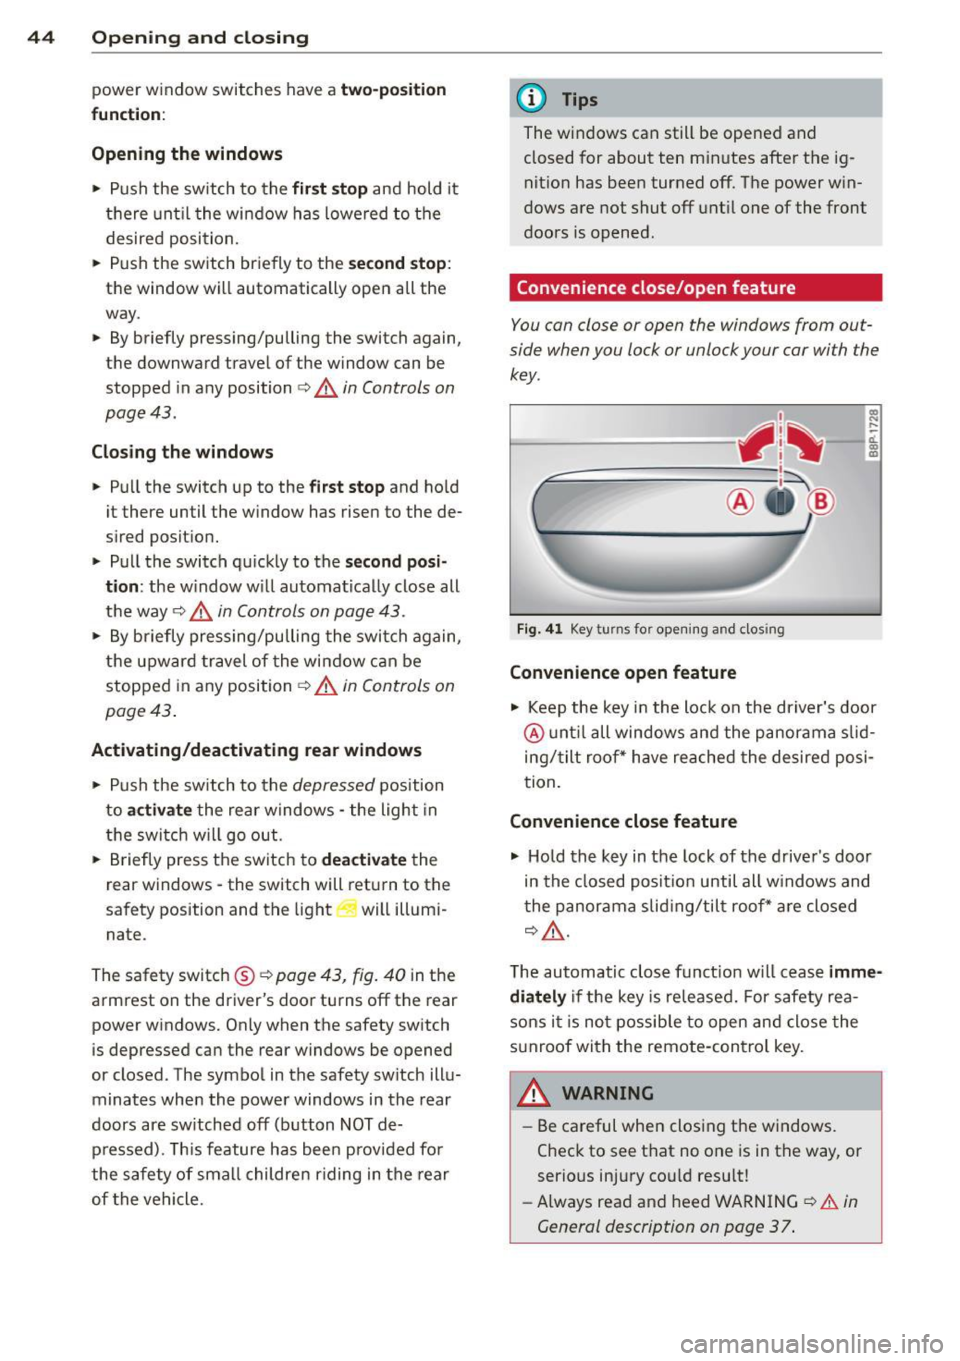
You can close or open the windows from out
side when you lock or unlock your car with the
key.
Fig. 41 Key turns for opening and closing
Convenience open feature
co ... ....
11. a:, a,
"' Keep the key in the lock on the driver's door
@ until all windows and the panorama s lid
ing/tilt roof * have reached the desired posi
tion .
Convenience close feature
"' Hold the key in the lock of the driver's door
in the closed position until all w indows and
the panorama slid ing/tilt roof * are closed
c:> ,&..
The automatic close f unct ion w ill cease imme
diately
if the key is released. For safety rea
sons it is not possible to open and close the
sunroof with the remote-control key.
A WARNING
= -
- Be careful when closing the windows.
Check to see that no one is in the way, or
serious injury cou ld resu lt!
- Always read and heed WARNING
c:> A in
General description on page 37 .
Page 48 of 280
46 Openin g and clo sing
,8. WARNING
Never close the panoramic sliding sunroof
carelessly or without watching - there is a
r isk of personal injury. For th is reason, al
ways remove the ignition key when leav ing
t he vehicle.
(j) Tips
- When you park your vehicle, we general
l y recommend closing the panoramic
s lid ing sunroof and the sun blind.
- When the vehicle is parked, a wet roof shou ld be dried lightly with a soft cloth
befor e it is opened so that water does
not dr ip into the inte rior.
Comfort closing
Applies to vehicles: with panoramic sliding sunroof
The open roof can also be closed from the
outside.
~ Hold the key in the driver's door lock in the
lock pos ition until the roof is closed
~ ,&. .
,8. WARNING
Never close the panoramic sliding sun roof
c arelessly or wit hout w atching - there is a
r is k of personal injury.
Page 50 of 280
48 Clear vis ion
light sensor checked as soon as possible at a
dea lership.
Com ing home /leaving home function *
The function is switched on when the switch is
i n the AU TO* position and the function is
shown as active in the driver info rmation sys
tem .
The
co ming h om e function illuminates the
a rea around the veh icle when the ign it ion is
switched off and the driver 's door is opened.
The length of time the lights remain on can be set in the menu display
( Illumination > Exte
r io r light s> coming hom e).
The leav ing home function illuminates the
area around the vehicle when unlock ing it.
A WARNING
- Never use dayt ime running lights to see
where you are going. They are not bright
enough and w ill not let you see far
enough ahead for safety, especially at
dusk or when it is dark. Always switch on
the low beams at dusk or when it is dark.
- Automatic headlights are only intended
to assist the dr iver . They do not relieve
the driver of his responsibility to check
the headlights and to tu rn them on man
ually according to the current light and
visibili ty cond itions. Fo r example, fog
and rain cannot be detected by the light
sensors . So a lways switch on the head
lights under these weather cond itions
and when driving in the dark
io.
- Crashes can happen when yo u cannot see
the road ahead and when you cannot be seen by other motorists .
- Always turn on the headlights so that
you can see ahead and so tha t others
can see yo ur car from the bac k.
- With the switch in
AUTO front fog lights
ca nnot be t urned on in addition .
- The light sensor fo r headlight contro l is
l ocated in the rear view m irror mount .
Do no t apply any stickers to the w ind- shield in this area to prevent malfunc
tions or fa ilures.
- Some exter io r light ing funct ions can be
adjusted in the driver informat ion sys
tem
~ page 2 7.
- If you remove the ignition from the igni
tion lock while the headlights are still
on, a buzzer will so und as long as the
dr iver's door is open to rem ind you to
turn off the lights.
- Always observe the specif ic loca l regula
tions for your area as to when to use your
lights.
- With automatic headlights, the high
beam funct ion is also available, but wit h
one restrict ion: If you have not switched
the high beams back to low beams dur
ing automatic headlight operation (fo r
example, after d riving through a tunnel) ,
only the low beams come on the nex t
t ime au tomati c headlights are swi tc h ed
on. To use the high beams, you first have
to pull the high beam lever back and
then push the lever fo rward again.
- In cool or damp weather , the inside of
the headlights, turn signals and tail lights can fog over due to the tempera
ture difference between the inside and
outside. They w ill clear shortly after
switching them on. This does not affect
the se rv ice life of the lighting .
- Frequent use of the coming home/leav
ing home function for app roach ing and
depa rting a vehicle parked in the da rk
w ill strain the battery . Thi s ap plies pa r
tic ular ly if only short distances a re d riven
between stops . Occasionally drive longer
dis tances to make sure the battery is re
charged sufficiently.
Page 53 of 280
Notes on these featur es
- The turn signals only work with t he ignition
switched on. The indicator lights
B or IN in
the instrument cluster¢
page 13 also b link.
- After yo u have turned a corner, the turn sig-
nal switches off a utomatica lly.
- The
high beam works only when the head
lights are on. The indicato r light
II in the
instrument cluster illuminates when the
high beams a re on.
- The
headlight flasher wo rks only as long as
you hold the lever -even if there are no
lights switched on. The indicator light
II in
the instrument cluster illuminates when you
use the headlight f lasher.
(D Note
Do not use the high beam or headlight
flasher if you know that these could be
blind ing oncoming traffic.
Interior lights
Interior lights and glove compartment
light
The interior lights include the both reading
lights for the driver and the front passenger.
............. ...... ... ........... ... J :·:::: ::::::::: : :: :::::::::::: . :: : .. :: ::::::::···· .......... ::::::::: :: ::: :! mmr ·::::m :: mu
... mmi ~ mim g gm,
II IIGI II
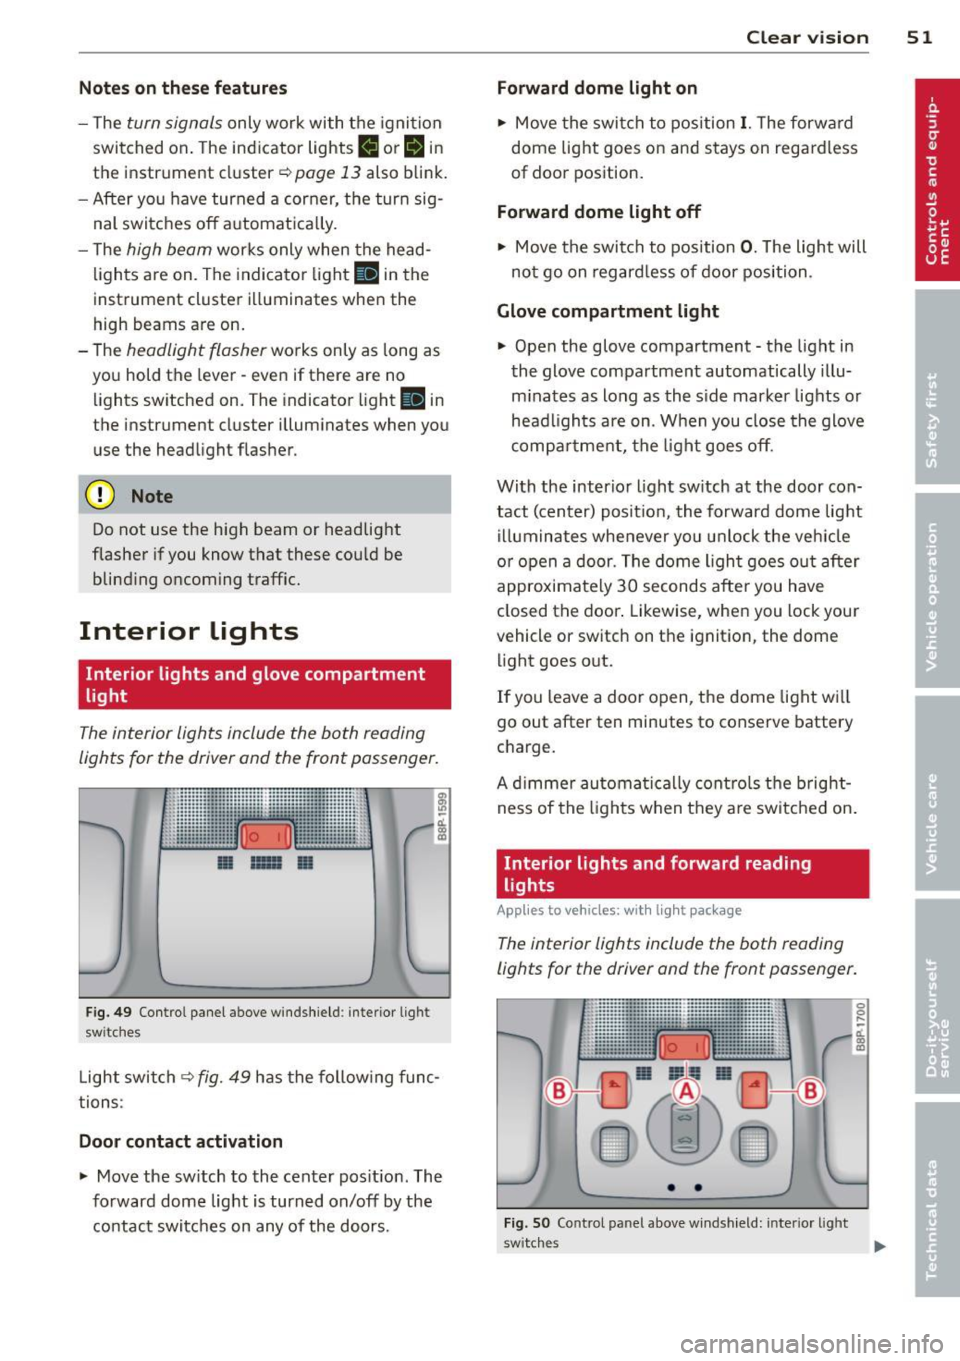
Fig. 49 Control pa nel above winds hield : interior light
switches
L ight switch¢ fig. 49 has the follow ing func
tions:
Door cont act activation
• Move the sw itch to the center pos it io n. The
forward dome light is turned on/off by the contact switches on any of the doors.
Clear vi sion 51
Forward dome light on
• Move the swit ch to position I. The forwa rd
dome light goes on and stays on regardless
of door position.
Forward dome light off
• Move the swi tch to position 0 . The light will
no t go on regard less of door position .
Glove compartment light
• Open the glove compartment -the light in
the glove compartment automatically illu
m inates as long as the side marker lights or
head lights are on. When you close the glove
compa rtme nt, the light goes off.
Wi th the interio r light sw itch at the door con
tact (center) posit ion, the forward dome light
i ll uminates whenever you u nlock the veh icle
or open a door. The dome ligh t goes out after
approximately 30 seconds after you have
closed the door . Likewise, when you lock your
vehicle or switch on the ignition, the dome
li ght goes out.
If you leave a door open, the dome light w ill
go out after ten minutes to conserve battery
charge.
A d immer automa tica lly contro ls t he b rig ht
ness of the lights when they a re switche d on .
Interior lights and forward reading
lights
App lies to vehicles: wit h lig ht pac kage
The interior lights include the both reading
lights for the driver and the front passenger.
• •
Fi g. 50 Control panel above w inds hield: inter ior ligh t
switc hes
0 0 ....
~ CJ) a,
Page 54 of 280

52 Clear vis ion
Light switch @c:::> page 51, fig . 49 has the fo l
lowing functions:
Door cont act activ ation
.. Move t he sw itch to the center posit ion. The
f orward dome light is turned on/off by the
contact switches on any of the doors.
Forw ard dom e light on
.. Move the sw itch to position I. The forward
dome light goes on and stays on regard less
of door position.
Forw ard dome light off
.. Move th e sw itch to position 0 . The light will
not go on regardless of door position.
~ F o rward re a ding light s
.. Press the left or right switch @ to switch
the left or right forward reading light on or
off.
Glove compartment light
.. Open the glove compartment -the light in
the g love compartment automatically illu
mi nates as long as the side marker lights or
headlights are on. When you close the g love
compartment, the light goes off.
With the interior lig ht switch at the door con
tact (center) position, the forward dome light illum inates whenever you unlock the vehicle
or open a door. The dome light goes out after
approximately 30 seconds after you have
closed the door. L ikewise, when you lock your
vehicle or switch on the ign ition, the dome
l ight goes out.
If you leave a door open, the dome light will
go out after ten minutes to conserve battery
cha rge.
A dimmer automatically controls the bright
ness of the lights when they are sw itched on .
Ambient lighting
Applies to vehicles: with light package
The ambient lighting illuminate important
controls for you .
0 0
Fig . 51 Contro l panel above w inds hield: positio n of
amb ient light bulbs
0 ,..
cL
m a,
When you switc h on the ignition, the lights in
t h e door handles illum inate .
When the side marker lights or headlig hts are
switched on, the center conso le is i lluminated
from the ambient light located above the
windshield .
You cannot manua lly turn off these lights.
Rear reading light
Fig. 52 Rear reading light
Rear reading light
Press the sw itch ~ to turn on and off the
readi ng lig ht.
N
0 ,..
-cL m a,
Page 94 of 280

92 On the road
On ly afte r th e ve hic le has come to com
plete stop, shou ld you f irm ly set t he park
ing b rake and either move the gea rshift
lever into 1st. gear (manual transm iss ion)
or move the selector lever into "P" (Auto
mat ic transm ission).
Parking
To prevent a parked vehicle from rolling
away, there are a few things you should do.
When you park your ve hicle, do the following:
• Stop the vehicle using the brake pedal.
• Set the parking brake firmly.
• Move the selector lever into the
P position
( automatic transmi ssion ) or move the gear
shift lever into 1st. gear
( manual t ransmi s
s ion )<=:> .&,. .
• Switch off the eng ine and remove the igni-
t ion key from the ignit ion lock.
What else you shou ld do when p ark ing
your vehicl e on an incline or decline
Turn the stee ring wheel so that if the vehicle
should start to ro ll, it will roll into the curb.
If you are parking on a
decl ine (the front of
your ve hicle facing downhill), turn the front
wheels to the right so that they point
toward
the curb .
If you are parking on an incline (the font of
your ve hicle facing up hill), turn the front
wheels to the left so that they po int
away
from the curb.
Move the selector lever into the P pos ition
( automatic transmiss ion ) or move the gear
sh ift lever into 1st . gear
(manua l tran smis
sion) .
A WARNING
This is how yo u can red uce the risk of i n
jury whe n leaving your veh icle.
- N ever park the v ehicle whe re it can come
in co ntac t wi th dry grass, sp illed f uel or
any ot her flammable m ater ials.
-
- Never a llow anyone -espec ially sma ll
children -to remain in the veh icle when
it is locked. Locked doors make it more
difficult for rescue rs to access t he pas
senger compartment in t he event of an
emergency . Danger to life!
- Never leave children unsuperv ised in the
veh icle. Children could release t he pa rk
i n g b rake or move the gearsh ift leve r out
of gear. The vehicle cou ld start to ro ll
a way an d ca use an acc ident.
- No matte r what the season is, the tem
pe rat ure in a par ked veh icle can reach
d angerous leve ls .
Starting on hills
App lies to vehicles : wi th hill ho ld assist
Hill hold assist makes it easier to start on
hills .
Requirement: The dr iver's door m ust be
cl osed, the seat bel t m ust be buckled and the
engine m ust be running.
The system is activated w hen the brake peda l
is dep ressed
for a few se cond s.
After releasing the brake pedal, the brake
power is held for a
brief moment to p revent
the ve hicl e from rolling back when starting. At
t hi s time, you ca n easi ly beg in to move your
vehicle.
A WARNING
= -
- If you di d no t begin moving immed iate ly
after releasing the brake pedal , under
certain ci rcumstances, the vehicle would
begin to ro ll backward. Depress the
brake peda l immediately or engage the
hand brake.
- Sh ould the engine sta ll, depress the
brake peda l immediately or engage the
hand brake .
- In order to prevent the vehicle from roll
i n g back unintentionally when starting in
stop-and-go traffic, keep the brake pedal
depressed fo r a few seconds before driv-
ing off.
Ii),
Page 112 of 280
110 Driving Safely
&_ WARNING
Always make sure that the doors, all windows, the power roof* and the read lid are
securely closed and locked to reduce the
risk of injury when the vehicle is not being
used.
-After closing the rear lid, always make
sure that it is properly closed and locked.
- Never leave your vehicle unattended es
pecially with the rear lid left open. A
child could crawl into the vehicle through
the luggage compartment and close the
rear lid becoming trapped and unable to
get out. Being trapped in a vehicle can
lead to serious personal injury.
- Never let children play in or around the
vehicle.
- Never let passengers ride in the luggage
compartment. Vehicle occupants must
always be properly restrained in one of
the vehicle's seating positions.
(D Tips
- The tire pressure must correspond to the
load -see the tire pressure sticker on the
fuel filler door.
- The tire pressure must correspond to the
load. The tire pressure is shown on the
tire pressure label. On USA vehicles, the
tire pressure label is located on the driv
er's side B-pillar. On Canada vehicles, the
tire pressure label is located either on
the driver's side B-pillar or inside the fuel
filler flap. The tire pressure label lists
the recommended cold tire inflation pressures for the vehicle at its maximum
capacity weight and the tires that were
on your vehicle at the time it was manu
factured. For recommended tire pres
sures for normal load conditions, please
see chapter ¢
page 216.
-
Tie-downs
The luggage compartment is equipped with
four tie-downs to secure luggage and other
items.
Use the tie-downs to secure your cargo prop
erly
¢ page 109, Loading the luggage com
partment .
In a collision, the laws of physics mean that
even smaller items that are loose in the vehi
cle will become heavy missiles that can cause
serious injury. Items in the vehicle possess en
ergy which vary with vehicle speed and the
weight of the item. Vehicle speed is the most
significant factor.
For example, in a frontal collision at a speed
of 30 mph (48 km/h), the forces acting on a 10-lb (4.5 kg) object are about 20 times the
normal weight of the item . This means that
the weight of the item would suddenly be
about 200 lbs. (90 kg). You can imagine the
injuries that a 200 lbs. (90 kg) item flying
freely through the passenger compartment
could cause in a collision like this.
&_ WARNING ~
Weak, damaged or improper straps used
to secure items to tie-downs can fail dur
ing hard braking or in a collision and cause
serious personal injury.
-Always use suitable mounting straps and
properly secure items to the tie-downs in
the luggage compartment to help pre
vent items from shifting or flying for ward as dangerous missiles.
- When the rear seat backrest is folded
down, always use suitable mounting
straps and properly secure items to the
tie-downs in the luggage compartment
to help prevent items from flying for
ward as dangerous missiles into the pas
senger compartment .
- Never attach a child safety seat tether
strap to a tie-down.
Page 136 of 280

134 Airbag sys te m
Advanced Airbag System in your vehicle was
certified.
I f the front passenger seat is not occ upied,
the front airbag will not deploy, and the
PAS·
SENGER AIR B AG OFF
light will stay on. Nev
er insta ll a rearward-facing child restraint on
the front passenger seat, the safest place for
a child in any kind of child restraint is at one
of the seat ing positions on the rear seat
c:> page 123, Child restraints on the front seat
- some important things to know
and
c:> page 143, Child Safety .
If the PASSENGER AIR BAG OFF light comes
on
when one of the conditions listed above is
met, be sure to check the light regularly to
make certa in that the
PAS SENGER AIR BAG
OFF
light stays on cont inuous ly whenever the
i gnit ion is on.
If the PAS SENGER AIR BAG
OFF
li ght does not appear on and does not
stay on all the time, stop as soon as it is safe
to do so and
- react iva te the system by turning the ignition
off and then turning it on again;
- remove and re insta ll the chi ld restraint.
Make su re that the child res traint is properly
insta lled and that the safety be lt for the
front passenger seat has been correct ly
ro uted throug h the child restraint as descri
bed in the chi ld restraint man ufacturer's in
structions;
- make sure that the convertible locking fea
ture on the safety be lt for the front passen
ger seat has been activated and that the
safety belt has been pulled tight. The belt must not be loose or have loops of slack so
t h at the sensor below the safety be lt latch
on the sea t can do its job
¢ page 152.
- make sure that th ings that may increase the
we ight of t he chi ld and child safety seat are
not be ing tra nspo rted on the front passen
ger seat;
- make su re that the safety be lt tension sen
so r is not b locked. Shake t he safety be lt
l atch on the front passenger seatbac k and
forth;
- If a st rap or te ther is being used to tie the
child safety seat to the front passenger seat, make sure that
it is not so tight that it
causes the weight-sensing mat to measure
more weight than is act ually on the seat.
If the PASSENGER AIR BAG OFF light still
does not come on
and does not stay on con
tin uous ly (when the ignition is switched on),
- t ake the child res train t off the front passen-
ge r seat and ins tall it properly at one of the
rear seat positions. Have the airbag system
inspected by your authorized Audi dea ler
immed iate ly .
- move the child to a rear seat position and
make sure t hat the c hild is properly restra in
ed in a ch ild restra int that is appropriate for
its size and age.
The
PASSENGER AIR BAG OFF light should
NOT come on when t he ignit ion is on and an
adult is s itting in a proper seating position on
the front passenger seat. If the
PASSENGER
AIR BAG OFF
light comes on and stays on or
flashes fo r about 5 seconds wh ile driving, un
der these c ircumstances, make sure that:
- the adult on the front passenger seat is
properly seated on the center of the seat
cushion with his or her back up aga inst the
backrest and the backrest is not recl ined
c:> page 104, Proper seating position for the
driver,
- the adult is not tak ing weight off the seat by
holding on to the passenger assist handle
above the fron t passenger door or s upport
ing their weight on the armres t,
- t he safety belt is be ing properly wo rn and
t hat the re is not a lot o f slack in the safety
be lt webb ing,
- accessory seat covers or cushions or othe r
t hings tha t may cause an incorrec t reading
or impression on the weight-sensing mat
under the upho lstery of the seat have been
removed from the front passenger seat,
- a safety belt extender has not been left in
the safety belt latch for the front passenger
seat.
In add ition to the
PASSENGER AIR BAG OFF
light in the center of the instrument panel,
the message
PASSENGER AIR BAG OFF or