instrument cluster AUDI A3 2015 Owner's Manual
[x] Cancel search | Manufacturer: AUDI, Model Year: 2015, Model line: A3, Model: AUDI A3 2015Pages: 288, PDF Size: 71.46 MB
Page 103 of 288
Driver messages
Applies to vehicles: with Audi side assist
If the side assist switches off automatica lly, a
message appea rs in the instrument cluster
disp lay .
@j Audi active lane assist: currently not
available. No camera view
The radar sensors' vision is affected. Do not
cover the area in fron t of the sensors with bike
wheels, stickers, dirt or other objects. Clean
the area in front of the sensors, if necessary
r::!) page 99, fig. 88.
@j Audi side assist : currently unavailable
Side assist cannot be switched on temporari ly
because there is a malfunction (for example,
the battery charge leve l may be too low) .
@j Audi side assist: System fault!
The system cannot guarantee that it wi ll de
tec t ve hicl es correctly and it is switched off.
The sensors have been displaced or are faulty.
H ave the system checked by an authorized
Audi dealer or authorized Aud i Service Facility
soon.
Audi side assist 101
•
Page 105 of 288
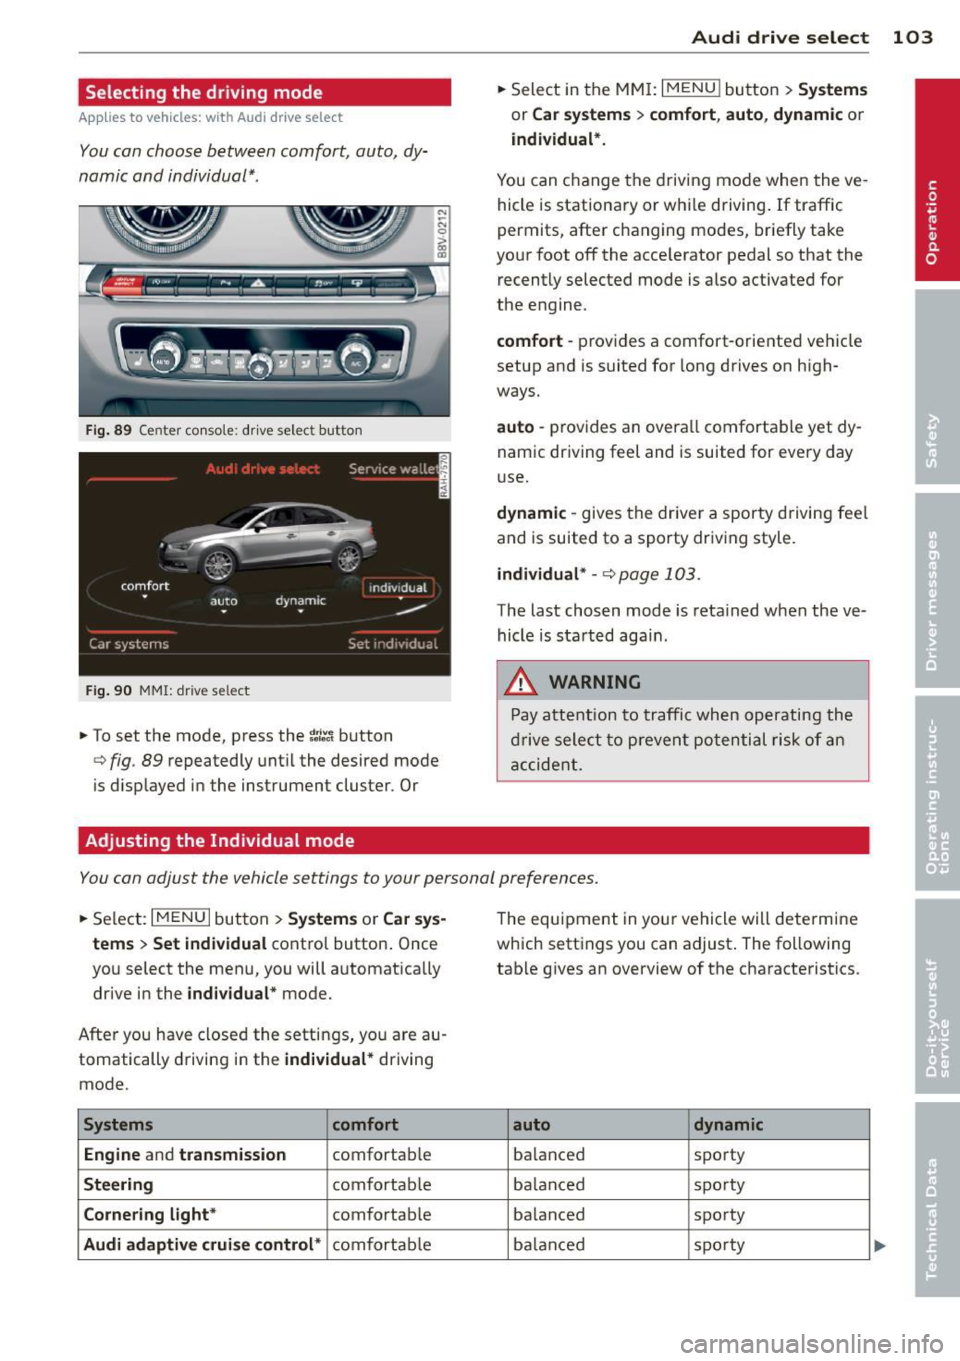
Selecting the driving mode
Applies to vehicles: with Audi drive select
You can choose between comfort, auto, dy
namic and individual* .
Fig. 89 Center conso le : drive select button
Fig. 90 MMI: dr ive se lect
.. To set the mode, press the ~:/:a button
N
-N 0 ::> a, Q)
Q fig . 89 repeatedly until the desired mode
is d isplayed in the instrument cluster . Or
Adjusting the Individual mode Audi drive
select 103
.. Select in the MMI: I MENU I button > Systems
or Car systems > comfort, auto, dynamic or
individual*.
You can change the driving mode when the ve
hicle is stationary or while driving. If traffic
permits, after changing modes, briefly take
your foot off the acce lerator pedal so that the
recently selected mode is also activated for
the engine .
comfort -provides a comfort-oriented vehicle
setup and is suited for long drives on high
ways.
auto -provides an overal l comfortable yet dy
namic driving feet and is suited for every day
use.
dynamic -gives the driver a sporty driving fee l
and is suited to a sporty driv ing style .
individual * -¢ page 103.
The last chosen mode is retained when the ve
hicle is started aga in .
.&_ WARNING
Pay attention to traffic when operating the
drive select to prevent potential risk of an
accident.
You can adjust the vehicle settings to your personal preferences .
.. Select: IM ENU I button > Systems or Car sys
tems > Set individual
control button. Once
you select the menu, you will automatica lly
drive in the
individual* mode.
After you have closed the settings, yo u are au
tomatically driving in the
individual* driving
mode .
Systems comfort
Engine
and transmission comfortable
Steering comfortable
Cornering light* comfortable
Audi adaptive cruise control* comfortable The
equipment in your vehicle will determine
which settings you can adjust . The following
table gives an overview of the characteristics .
auto dynamic
balanced sporty
ba lan ced sporty
ba lanced sporty
ba lanc ed sporty
Page 107 of 288
Automatic
transmission S tronic-transmission
Introduction
Applies to vehicles: with S tronic transmiss ion
Your vehicle is equipped with an electronical
l y -controlled DSG transmission called S tronic.
T wo independent clutches transfer the power
between the engine and transmission. It al
lows the vehicle to accelerate without a no
ticeable interruption in traction .
T he transmission upshifts or downshifts auto
matically. The driving style continuously influ
ences the selection of the driving program .
When a
moderate driving style is used, the
transmission selects the most econom ica l
driving mode. The transmission upshifts at a
lower RPM and downshifts at a higher RPM to
improve fuel effic iency .
T he transmission switches to a sporty mode
after a kick-down or when the driver uses a
sporty driving style characterized by quick ac
celerator pedal movements, heavy accelera
tion, frequent changes in speed and traveling
at the maximum speed.
If desired, the driver can also select the gears
manually (tiptronic mode) r=> page 110,
Shifting manually (tiptronic mode) .
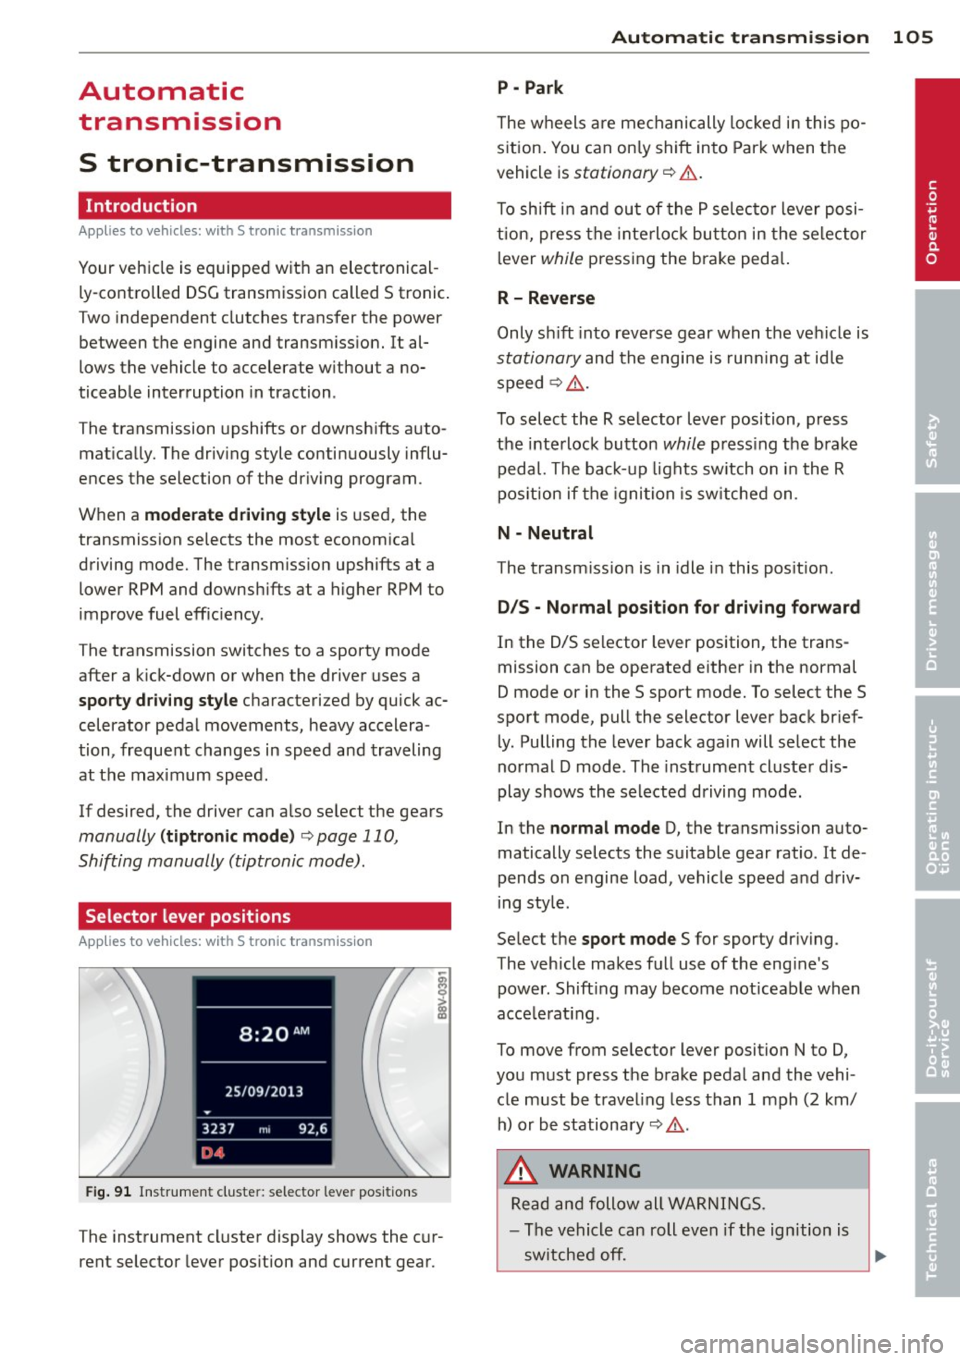
Selector lever positions
Applies to vehicles: with S tro nic transmission
Fig. 91 Instrument cluster: selector leve r positions
The instrument cluster display shows the cur
rent selector lever position and current gear .
Automatic transmission 105
P -Park
The wheels are mechanically locked in this po
sition. You can only shift into Park when the
vehicle is
stationary r=> &..
To shift in and out of the P selector lever posi
tion, press the interlock button in the selector
lever
while pressing the brake peda l.
R- Reverse
Only shift into reverse gear when the vehicle is
stationary and the engine is running at idle
speed
r=> &. .
To select the R selector lever position, press
the interlock button
while press ing the brake
pedal. The back-up lights sw itch on in the R
pos ition if the ignition is switched on .
N -Neutral
The transm iss ion is in idle in this position .
DIS -Normal position for driving forward
In the D/S selector lever position , the trans
mission can be operated either in the normal
D mode or in the S sport mode. To select the S
spor t mode, pull the selector lever back brief
ly. Pulling the lever back again will select the
normal D mode . The instrument cluster dis
play shows the selected driving mode.
In the
normal mode D, the transmission auto
matically selects the suitable gear ratio . It de
pends on engine load, vehicle speed and driv
ing style .
Select the
sport mode S for sporty driving .
The vehicle makes full use of the eng ine's
power. Shift ing may become noticeable when
acce lerat ing.
To move from selector lever position N to D,
you must press the brake pedal and the vehi cle must be traveling less than 1 mph (2 km/
h) or be stationary~ &.-
.&_ WARNING
Read and follow all WARNINGS.
- The vehicle can roll even if the ignition is
switched off. ...
.__ _____________ __J ....
•
Page 145 of 288
Fo r exa mple, the a irbag may depl oy if:
-a small child that is heavier than a typical 1
year-o ld child is on the front passe nger seat
(regardless of whether the child is in one of
the chi ld seats listed
page 168), or
- a ch ild who has outgrown child rest raints is
on the front passenger seat.
If the front passenger airbag is turned off, the
P ASS ENGER AIR B AG OFF light comes on in
the instrument cluster and stays on.
If the front passenger airbag deploys, the
Federal Standard requires the airbag to meet
the "low risk" deployment criter ia to reduce
the r isk of injury through interaction with the
airbag. "Low risk" deployment occurs in those
crashes that take place at lower decelerations
as defined in the electronic control unit
r::> page 153, PASSENGER AIR BAG OFF light.
Always remember, a chi ld seat or infant carri
er insta lled on the front seat may be struck
and knocked out of position by the rapidly in
flating passenger's airbag in a frontal colli
sion. The airbag could greatly reduce the ef
fectiveness of the child restraint and even se
riously injure the child during inflat ion.
For this reason, and because the back seat is
the safest place for children - when properly
restrained according to their age and size - we
strongly recommend that children always sit
in the back seat
r::> page 166, Child Safety .
A WARNING
A child in a rearward-facing child seat in
stalled on the front passenger seat will be
ser iously injured and can be killed if the
front airbag inflates -even with an Ad
vanced Airbag System .
- T he inflating airbag will hit the child seat
or infant carrier with great force and wi ll
smash the child seat and child against
the backrest, center armrest, door or roof.
- Always install rear-facing child seats on
the rear seat.
- If you must install a rearward facing
child seat on the front passenger seat
-
A irbag system 143
because of exceptional circumstances
and the
PAS SENGER AIR BAG OFF light
does not come on and stay on, immed i
ately install the rear-fac ing child seat in a
rear seat ing pos ition and have the airbag
system inspected by your A udi dealer.
- Forward-facing child seats installed on the front passenger's seat may interfere
with the dep loyment of the a irbag and
cause serious persona l injury to the
child.
A WARNING
If, in except iona l circumstances, you must
install a forward -facing child restraint on
the front passenger's seat:
- Always ma ke s ure the forward-facing
seat has been designed and certified by its manufacturer for use on a front seat
with a passenger front and s ide a irbag.
- Never put the forward-facing child re
straint up against or very near the instru
ment panel.
- Always move the passenge r seat into its
rea rmost pos ition in the seat's fore and
aft ad justment range, as far away from
the airbag as possible before installing
the forward-fac ing ch ild restra int. The
backrest must be adjusted to an upright
position.
- Make sure that the
PASSENGER AIR BAG
OFF
l ight comes on and stays on all the
time wheneve r the ig nit ion is switched
on.
A WARNING
To reduce the ri sk of ser ious injury, ma ke
sure that the
PASSENGER AIR BAG OFF
light w ill be displayed whenever a child re
straint is insta lled on the front passenger
seat and the ignition is switched on.
- If the PASSENGER AIR BAG OF F light
does not stay on, perform the checks de
scribed
¢ page 152, Monitoring the Ad-
vanced Airbag System.
~
•
•
•
Page 150 of 288
148 Airbag system
-Always make sure that there is nothing
on the front passenger seat that will
cause the capacitive passenger detection
system in the seat to signal to the Airbag
System that the seat is occupied by a
person when it is not, or to signal that it
is occupied by someone who is heavier
than the person actually sitting on the
seat. The presence of additional objects
could cause the passenger front airbag
to be turned on when it should be off, or
could cause the airbag to work in a way
that is different from the way it would have worked without the object on the
seat.
- Make sure that the
PASSENGER AIR BAG
OFF
light comes on and stays on all the
time whenever the ignition is switched on.
Advanced Airbag System components
The front passenger seat in your vehicle has a
lot of very important parts of the Advanced
Airbag System in it. These parts include the
capacitive passenger detection system, wir
ing, brackets, and more. The control unit
monitors the system on the front passenger
seat when the ignition is switched on and
turns the airbag indicator light on when a
malfunction in the one of the system compo
nents is detected
¢ page 153. Because the
front passenger seat contains important parts
of the Advanced Airbag System, you must
take care to prevent it from being damaged.
Damage to the seat may prevent the Ad
vanced Airbag System for the front passenger
seat from doing its job in a crash.
The front Advanced Airbag System
consists of the following:
- Crash sensors in the front of the vehicle that
measure vehicle acceleration/deceleration
to provide information to the Advanced Air bag System about the severity of the crash .
- An electronic control unit, with integrated
crash sensors for front and side impacts.
The control unit "decides" whether to fire the front
airbags based on the information
received from the crash sensors. The control
unit also "decides" whether the safety belt
pretensioners should be activated.
- An Advanced Airbag with gas generator for
the driver inside the steering wheel hub.
- An Advanced Airbag with gas generator in
side the instrument panel for the front pas
senger.
- A capacitive passenger detection system un
derneath the front passenger seat cover.
This system measures the electrical capaci tance of the person in the seat. The informa
tion registered is sent continuously to the
electronic control unit to regulate deploy ment of the front Advanced Airbag on the
passenger side.
- An airbag monitoring system and indicator
light in the instrument cluster
¢page 152 .
-A sensor in each front seat registers the dis
tance between the respective seat and the steering wheel or instrument panel. The in
formation registered is sent continuously to
the electronic control unit to regulate de
ployment of the front Adv a need Airbags.
- The
PASSENGER AIR BAG OFF light comes
on and stays on in the center of the instru
ment panel
¢ page 210 and tells you when
the front Advanced Airbag on the passenger
side has been turned off.
- A sensor in the safety belt latch for the driv
er and for the front seat passenger that
senses whether that safety belt is latched or not and transmits this information to the
electronic control unit .
A WARNING
--
Damage to the front passenger seat can
prevent the front airbag from working
properly.
- Improper repair or disassembly of the
front passenger and driver seat will pre
vent the Advanced Airbag System from
functioning properly.
- Repairs to the front passenger seat must
be performed by qualified and properly
trained workshop personnel.
~
Page 151 of 288

-Never remove the front passenger or
driver seat from the vehicle.
- Never remove the upholstery from the
front passenger seat.
- Never disassemble or remove parts from
the seat or disconnect wires from it.
- Never carry sharp objects in your pockets
or put them on the seat. The capacitive passenger detection mat in the front
passenger seat will not function properly
if it is punctured .
- Never carry things on your lap or carry
objects on the front passenger seat.
Such objects can influence the capaci
tance registered by the capacitive pas senger detection system, so that incor
rect information is provided to the airbag
control unit.
- Never store items under the front pas
senger seat. Parts of the Advanced Air
bag System under the passenger seat
could be damaged, preventing them and
the airbag system from working proper
ly.
- Never place seat covers or replacement
upholstery that have not been specifical
ly approved by Audi on the front seats.
- Seat covers can prevent the Advanced
Airbag System from recognizing child re
straints or occupants on the front pas
senger seat and prevent the side airbag
in the seat backrest from deploying prop
erly .
- If a seat heater has been retrofitted or
otherwise added to the front passenger
seat, never install any child restraint sys
tem on this seat.
- Never use cushions, pillows, blankets, or
similar items on the front passenger
seat. The additional layers prevent the
capacitive passenger detection system
from accurately measuring the capaci
tance of the child safety seat and/or the
person on the seat and thus keep the Ad
vanced Airbag System from working properly.
- Never place or use any electrical device
(such as a laptop, CD player, electronic
Airbag system 149
games device, power inverter or seat
heater for child seats) on the front pas
senger seat if the device is connected to
the 12-volt socket or the cigarette light
er socket. Such devices can influence the
capacitance registered by the capacitive passenger detection system, so that in
correct information is provided to the air
bag control unit.
- If you must use a child restraint on the
front passenger seat and the child re
straint manufacturer's instructions re
quire the use of a towel, foam cushion or
something else to properly position the
child restraint, make certain that the
PASSENGER AIR BAG OFF light comes
on and stays on whenever the child re
straint is installed on the front passen
ger seat.
- If the
PASSENGER AIR BAG OFF light
does not come on and stay on, immedi
ately install child restraint in a rear seat
ing position and have the airbag system
inspected by your Audi dealer.
.&_ WARNING
If the front passenger seat gets wet, dry it
immediately.
- If liquid soaks into the front passenger
seat, this can keep the airbag system
from working properly and may, for in
stance, deactivate the passenger frontal
airbag. If this happens, the
PASSENGER
AIR BAG OFF
light will come on and stay
on together with the airbag indicator light
fl in the instrument cluster.
- If liquid is pooled on the seat, but has
not soaked in, this may also keep the air
bag system from working properly and
cause the passenger frontal airbag to be
enabled (turned on), even though there is a properly installed child restraint sys
tem on the seat . Wet towels or other wet
things on the seat cushion can have the
same effect. If the front passenger fron
tal airbag is turned on, the
PASSENGER
AIR BAG OFF
light will go out .
•
•
•
Page 162 of 288

160 Airbag system
Side airbags
Description of side airbags
The airbag system can provide supplemental
protection to properly restrained occupants .
Fig. 128 Side a irbag locat ion in the dr iver 's seat
The sid e airbags are located in the sides of the
front seat backrests ¢
fig. 128 and the rear
backrest facing the doors.
The side airbags installed for the front seating
positions have been designed and certified to
help reduce the risk of injury that can be
caused by airbags when they inflate, particu
larly when the occupant sitting next to it is
not seated properly. The side airbag for the
front passenger seat can be used with proper ly installed child restraints. Please be sure to
read the important information and warnings
whenever us ing a child restraint in a vehicle :
Safety belts
c::>page 131, Airbag system
c::>
page 140, Child safety ¢ page 166.
The side airbag system basically consists of:
-the electronic control module and external
side impact sensors
- the two airbags located in the sides of the
front backrests and the two airbags* located
in the rear backrest
- the airbag warning light in the instrument
cluster.
The airbag system is monitored electronically
to make certain that it is functioning properly
at all times. Each time you switch on the igni
tion, the airbag system indicator light will
come on for a few seconds (self diagnostics) .
The side airbag system supplements the safe
ty belts and can help to reduce the risk of in- jury
to the driver's, front and rear passenger's
upper torso on the side of the vehicle that is
struck in a s ide collision. The airbag dep loys
only in side impacts and only when the vehicle
accelerat ion reg istered by the control unit is
high enough. If th is rate is be low the refer
ence value p rogrammed into the control unit,
the side airbags will not be triggered, even
though the car may be badly damaged as a re
sult of the collision.
It is not possible to de
fine an airbag triggering range that will cover
every possible angle of impact, since the cir
cumstances will vary considerably between
one collis ion and another. Important factors
include, for example, the nature (hard or soft)
of the impacting object , the angle of impact,
vehicle speed, etc.¢
page 161, Important
safety instructions on the side airbag system .
Aside from their normal safety function, safe
ty belts work to help keep the driver or front
passenger in position in the event of a side
collision so that the side airbags ca n provide
protection.
The airbag system is
not a substitute for your
safety belt. Rather, it is part of the overall oc
cupant restraint system in your vehicle. Al
ways remember that the side ai rbag system
can only help to prote ct you if you are wearing
yo ur safe ty belt and wearing it properly. This
is another reason why you should always wear
your safety belts, not just because t he law re
quires yo u to do soc::>
page 131, General
notes.
It i s important to remember that while the
supplementa l side airbag system is designed
to reduce the likelihood of serious injuries,
other injuries, for example, swelling, bru is ing,
friction burns and m inor abrasions can a lso be
associated w ith deployed side airbags . Re
member too, side a irbags w ill deploy only
once and only in ce rtain kinds of accidents -
you r safety belts are always the re to offer pro
tection.
Vehicle damage, repair costs or even the lack
of vehicle damage are not necessarily an indi
cation of over-sensitive or failed airbag activa-
tion. In some coll isions, both front and side
lill>
Page 234 of 288
232 Tire s and wheel s
the time it was manufactured . For the
location of the label
c::> page 229, fig . 156.
Most ti res lose a ir naturally over time. They
can also lose some a ir if you drive ove r a pot
ho le or hit a curb while parking . It is usua lly
not possible to see whether the radial tires
used today are under inflated just by looking
at them.
Therefore, be sure to check tire pressures at
l east once a month and always before going
on a long tr ip. Make sure to take the number
of people and the amount of luggage into ac
count when adjusting tire pressure for a trip -
even one that you would not consider to be
" long." See
c::> page 233 , Tires and vehicle
load limits
for more important information .
Always use an accurate tire pressure gauge
when checking and adjusting inflation pres
sures . Check all of the t ires and be sure not to
forget the spare t ire . If the pressure in any tire
is too high when the tire is "cold ," le t air out
of the tire slowly with the edge of the tire
gauge and keep checking the pressure until
you reach the pressure that is correct for the l oad (passengers and luggage) and kind of
driving you plan to do .
I f the pressure in any tire is too low, note the
diffe rence between the pressure in the cold
tire and the pressure you need and add the air
that you need to reach the cor rect pressure for
the vehicle load (passengers and luggage) for
the tires on your veh icle as lis ted on the on
your veh icle and in this manual and the k ind
of dr iv ing you pla n to do .
Never e xceed th e ma ximum inflatio n pres
sure li sted on th e tire s id ewall for an y rea
son .
Remember that the vehicle manufacturer, not
the tire manufacturer, determ ines the correct
tire pressure for the t ires on your vehicle .
It is important to check the tire pressure when
the tires are cold .
- Read the req uired ti re pressure from the tire
pressure label. The tire pressure labe l is lo
cated on the driver's side B-pi llar . - Tu
rn the va lve stem cap counter -clockwise
to remove it from the tire va lve .
- Place the air pressure gauge on the va lve.
- The tire pressu res should only be checked
and adj usted when the tires are co ld. The
slightly raised pressures of warm tires must
not be reduced.
- Adjust the tire pressure to the load you are
carrying.
- Reins tall the valve stem cap on the va lve.
When should I check the tire pr essure ?
The correct tire pressure is especially impor
tant at high speeds. The pressure should
the refore be che cked at least once a mo nth
and always before sta rting a jo urney. Do not
f orget to c heck the ti re p ress ure for the spare
whee l
c::> page 247.
When should I adjust the tire pressures?
Adjust the t ire pr essure to the load you are
ca rrying. After cha ng ing a whee l
or replacing
whee ls you have to adjust the ti re p ress ures
on all whee ls. In addition, you m ust then
store the new tire pressures in the tire pres
s u re monitoring system
c::> page 243 .
A WARNING
Incorrect tire pressures and/or underinfla
tion can lead sudden tire fa ilure, loss of
control, collision, serious personal injury
or even death.
- When the warning symbol
RIJ appears in
the instrument cluster, stop and inspect
the t ires.
- Incorrect tire pressure and/or underinfla
tion can cause increased tire wear and
can affect the handling of the vehicle and
stopping abi lity.
- Inco rrect tire pressures and/or underin
f lation can a lso lead to s udden t ire fail
ure, including a blowout a nd sudden de
f lation, ca using loss of veh icle cont ro l.
- The driver is responsible for the co rrect
tire pressures for all tires on the veh icle.
The appli cable pressure values are locat
ed on a sticker on the dr iver's side B-pil-
lar .
~
Page 246 of 288
24 4 T ire s and wheel s
signal low tire pressure as intended. TPMS
malfunctions may occur for a variety of rea
sons, includ ing the installat ion of replace
ment or a lternate tires or whee ls on the veh i
cle that prevent the TPMS from funct ioning
properly . Always check the TPMS malfunct ion
telltale after replacing one or more t ires or
wheels on your veh icle to ensure that the re
p lacement or a lternate tires and wheels allow
the TPMS to continue to function properly.
If the Tire Pressure Monitoring System
indicator appears
Applies to vehicles: with tire pressure monitoring system
The tire pressure indicator in the instrument
cluster informs you if the tire pressure is too
low or if there is a system malfunction.
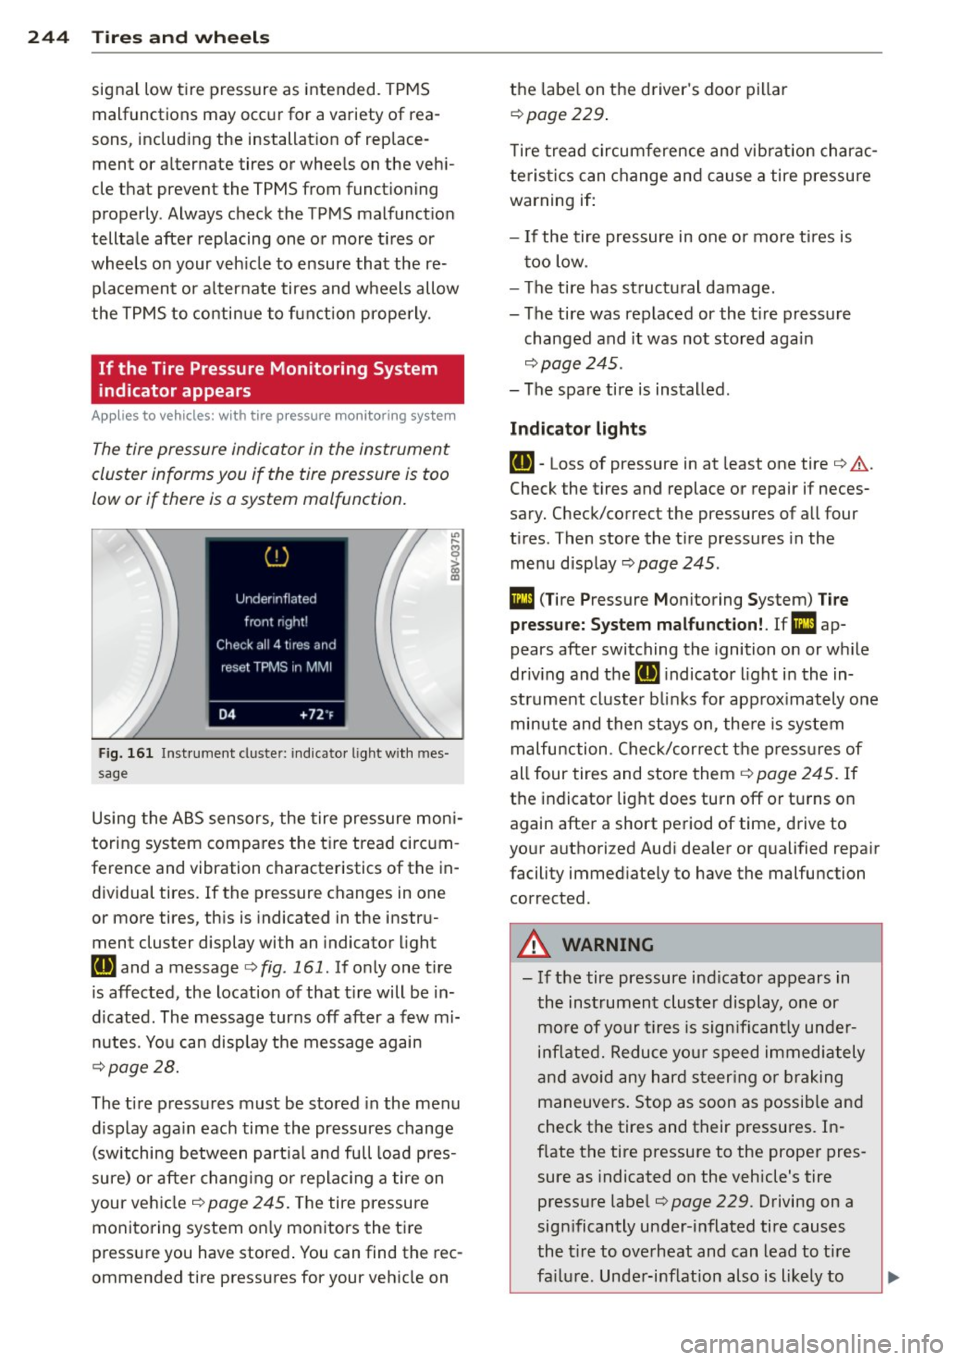
F ig. 161 Ins trumen t cluste r: ind icato r light w it h m es
s age
Using the ABS sensors, the tire pressure moni
toring system compa res the tire tread circum
ference and vibration characteristics of the in
dividual tires .
If the pressure changes in one
or more tires, th is is indicated in the instru
ment cluster display with an indicator light
IE and a message ¢ fig. 161 . If only one t ire
is affected, the location of that t ire will be in
d icated. The message turns off after a few mi
nutes. You can disp lay the message again
¢ page 28.
The tire pressures must be stored in the menu
d isplay aga in each time the pressures change
(switching between part ia l and full load pres
sure) or after chang ing or replac ing a tire on
your ve hicle ¢
page 245. The tire pressure
monitoring system on ly monitors the ti re
press ure you have stored . You can find the rec
ommended tire pressures for your vehicle on the
labe l on the driver's doo r pillar
¢ page 229 .
Tire tread circumference and vib ration charac
teristics can change and cause a tire pressure
warning if:
- I f the tire pressure in one or more ti res is
t oo low.
- The tire has structural damage.
- The tire was replaced or the t ire pressure
changed and it was not stored again
¢ page 245.
-The spare tire is installed .
Indicator lights
IE -Loss of pressure in at least one tire ¢ .&. .
Check the tires and replace or repair if neces
sary. Check/correct the pressures of all four
t ires . Then store the t ire pressures in the
menu display
¢ page 245.
Ill (T ire Pressure Monitoring System) T ire
pre ssure: S ystem mal function!. Ifm:!
ap
pears afte r switching the ignition on or w hile
driv ing and the [ti] indicato r light in the in
strument cluster b links for app rox imately one
minute and then stays on , the re is system
malfu nction . Check/cor rect the p ress ures of
all four tires and store them¢
page 245. If
t h e indicator lig ht does turn off or tu rns on
again after a short pe riod of time, drive to
your authori zed Aud i dea ler or qualified repair
facility immed iately to have the malfunction
corrected .
A WARNING
--- If the tire pressure ind icator appears in
the instrument cluster display , one or
mo re of your t ires is sign ifi cant ly unde r
i n flated. Reduce yo ur speed immedi ately
an d avoid any hard steer ing or b rak ing
maneuvers. Stop as soon as possib le and
check the tires and their pressures. In
f late the tire pressure to the proper pres
sure as indicated on the vehicle's tire
pressure labe l
¢page 229. Driving on a
significantly under-i nflated tire causes
the t ire to overheat and can lead to ti re
fa ilur e. Unde r-inflation also is li kely to
Page 258 of 288
256 Fuses and bulbs
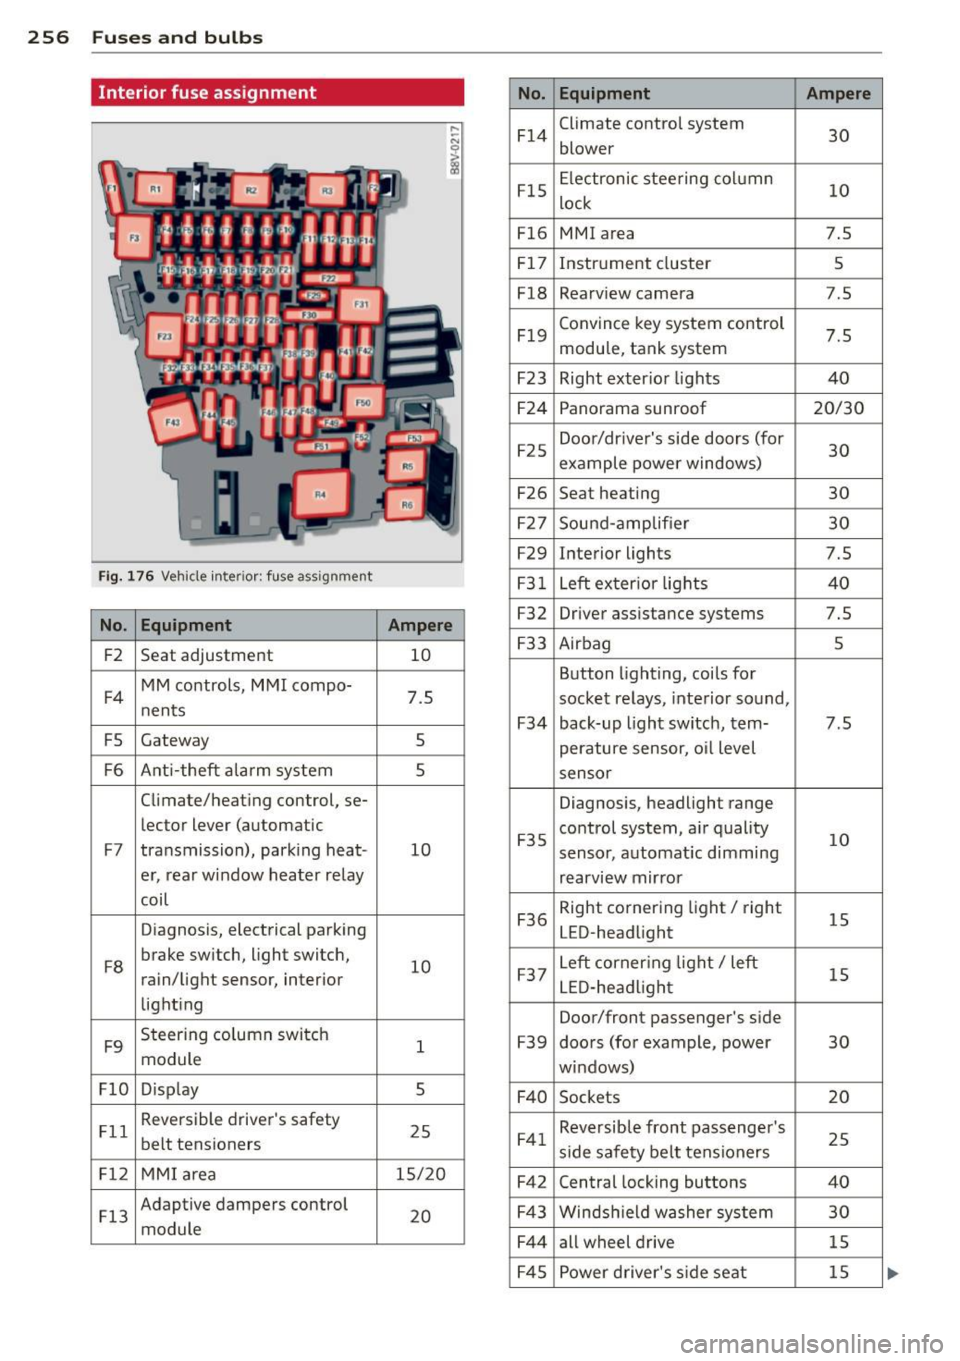
Interior fuse assignment
No. Equipment Ampere
F14
Climate control system
30 blower
F15
Electronic steering column
10 lock
F16 MMI area 7.5
F17
Instrument cluster 5
F18
Rearv iew camera 7 .5
F19
Convince key system control
7.5 module, tank system
F23 Right exter ior lights 40
F24
Panorama sunroof 20/30
F25
Door/driver's side doors (for
30 example power windows)
F26 Seat heating 30
F27
Sound-amp lifier 30
F29
Interior lights 7.5
Fig. 176 Vehicle inte ri or : fuse assignment F31 Left exter ior lights 40
No . Equipment Ampere F32 Driver assista nce systems 7.5
F2
Seat adjustment 10 F33 Airbag 5
F4
MM controls, MMI compo-
7.5 nents
F5 Gateway 5
Button lighting, coils for
socket relays, interior sound,
F34 back-up light switch, tern-7.5
perature sensor, o il level
F6 Ant i-theft alarm system 5 sensor
Climate/heating control, se-
Diagnosis, headlight range
le ctor lever (automatic
F7 transmission), parking heat -10 F35
control system, air quality
10 sensor,
automat ic dimming
er, rear window heater relay
rearview mirror
coil
Diagnosis, electrical parking
F36
Right cornering light/ right
15 LED-headlight
F8
brake switch, light switch,
10 rain/light sensor, interior
lighting
F9
Steering column switch
1 module
F37
Left corner ing light/ left
15 LED-headlight
Door/front passenger's side
F39 doors (for example, power 30
windows)
Fl0 D isp lay 5
F40 Sockets 20
Fll
Reversible driver's safety
25 belt tensioners F41 Reversible front passenger 's
25 side safety belt tensioners
Fl2 MMI area 15/20
F42 Central locking buttons 40
Fl3
Adaptive dampers control
20 module
F43 Windsh ield washer system 30
F44
all wheel drive 15
F45
Power driver's side seat 15