tow AUDI A3 2016 Owner´s Manual
[x] Cancel search | Manufacturer: AUDI, Model Year: 2016, Model line: A3, Model: AUDI A3 2016Pages: 328, PDF Size: 81.78 MB
Page 137 of 328
,....,
N
0 > co ,....,
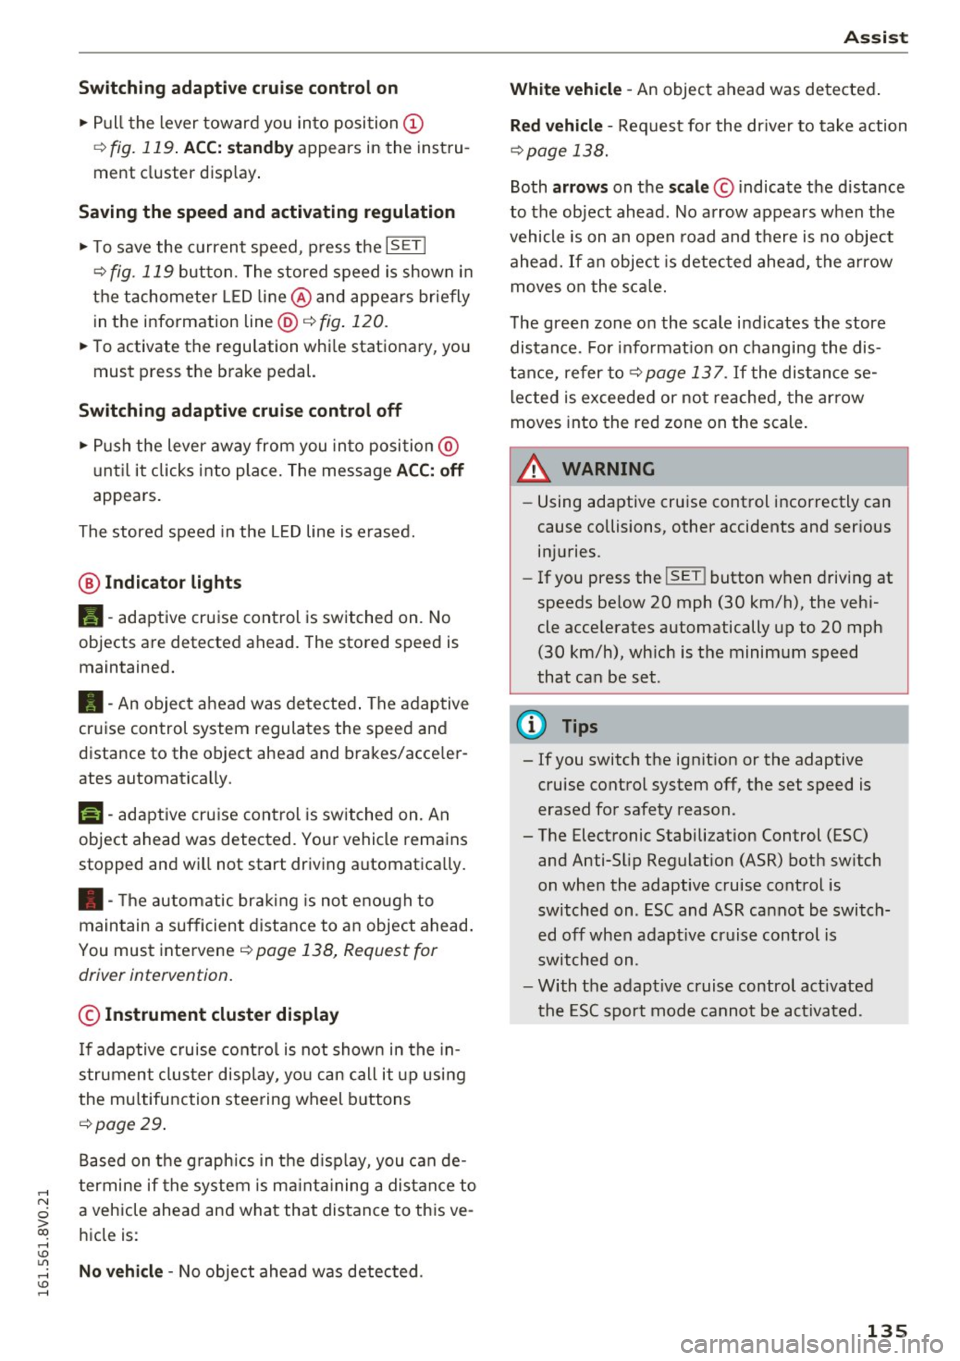
"' Pull the lever toward you into position @
¢fig. 119 . ACC: stan dby appears in the instru
ment cluster disp lay .
Saving the speed and activating regulati on
"'T o save the c urrent speed , press the ISETI
¢fig. 119 button. The stored speed is shown in
t h e tachomete r LED line @and appears briefly
in the information line @¢
fig. 120.
"' To activate the regu lation whi le stationary, you
must press the brake pedal.
Sw itching adaptiv e cruis e control off
"' Push the lever away from you into position @
until it clicks i nto place. The message
AC C: off
appears .
The stored speed in the LED line is erased.
@ Indicato r lights
II -adaptive cruise control is switched on. No
objects are detected ahead. The stored speed is
maintained.
• -An object a head was detected . The adaptive
cruise control system regulates the speed and
d istance to the object ahead and brakes/acce ler
ates automatica lly.
fij -adaptive cru ise control is switched on. An
object ahead was detected. Your vehicle remains
stopped and w ill not start driving automatica lly.
• -T he automatic bra king is no t enough to
maintain a sufficient distance to a n object ahead.
You must intervene ¢
page 138, Request for
driver intervention.
© Instrument clu ster display
If adaptive cruise control is not shown in the in
s trument cluster disp lay, yo u can call it up using
the mu ltifunction steering wheel b uttons
¢ page 29 .
Based on the g raph ics in the d isp lay, you can de
termine if the system is m ainta ining a distance to
a vehicle ahead and what that distance to this ve
hicle is:
No vehi cle -No object ahead was detected.
Assist
White vehicl e -An object ahead was de tected .
Red vehicl e -Request for the dr iver to take action
¢page 138.
Both arrows on the scal e© indicate the d istance
to the object ahead . No arrow appears when the
vehicle is on an open road and t here is no object
ahead. If an object is detec ted ahead, the a rrow
moves on the sca le.
T he green zone o n the scale indicates the store
distance. For informat ion on changing the dis
t a nce, refer to ¢
page 13 7. If the distance se
l ected is exceeded or not reached, the arrow
moves into the red zone on the scale.
A WARNING
- Using adaptive cruise control incorrectly can
cause collisions, other accidents and ser ious
in ju ries.
- If you press the
!SET ! button w hen driving at
speeds be low 20 mph (30 km/h), the vehi
cle acce lerates automatically up to 20 mph
(30 km/h), wh ich is the minimum speed
that can be set.
{!) Tips
- If you switch the ignit ion or the adaptive
cruise control system off, the set speed is
erased for safety reason.
- The Electronic Stabilization Control (ESC) and Anti-S lip Regulat ion (ASR) both sw itch
on when the adaptive cruise control is
switched on . ESC and ASR ca nnot be switch
ed off when adapt ive cruise control is
switched on.
- With the adaptive cruise control act ivated
t he ESC spo rt mode cannot be activated.
135
Page 139 of 328
,....,
N
0 > co ,....,
Ove rriding means ex ceeding the selected speed
when adaptive cruise control is active, for exam
p le when pressing the accelerator peda l when
passing.
"'T o accelerate manua lly, p ull the lever toward
you into position @and ho ld it there. The mes
sage
ACC : over ride appears . Or
"' press the accelerator pedal.
"' To resume cruise control, release the lever or
take your foot off the acce lerator pedal.
Inte rrupting cruise contr ol w hil e driving
"'Move the lever into position @. The message
ACC: standb y appears. Or
"' press the brake pedal.
"' To resume the stored speed, move the lever in
to posit ion @.
Int errupting c rui se contr ol wh en stopped
"' Push the lever away from you into position @.
The message
ACC : stan dby appears.
"' To resume cruise control, press the brake pedal
and pull the lever toward you into position@.
A WARNING
It is dangerous to activate cruise control and
resume the stored speed when the current
road, traffic or weather conditions do not pe r
m it this. This could result in a crash.
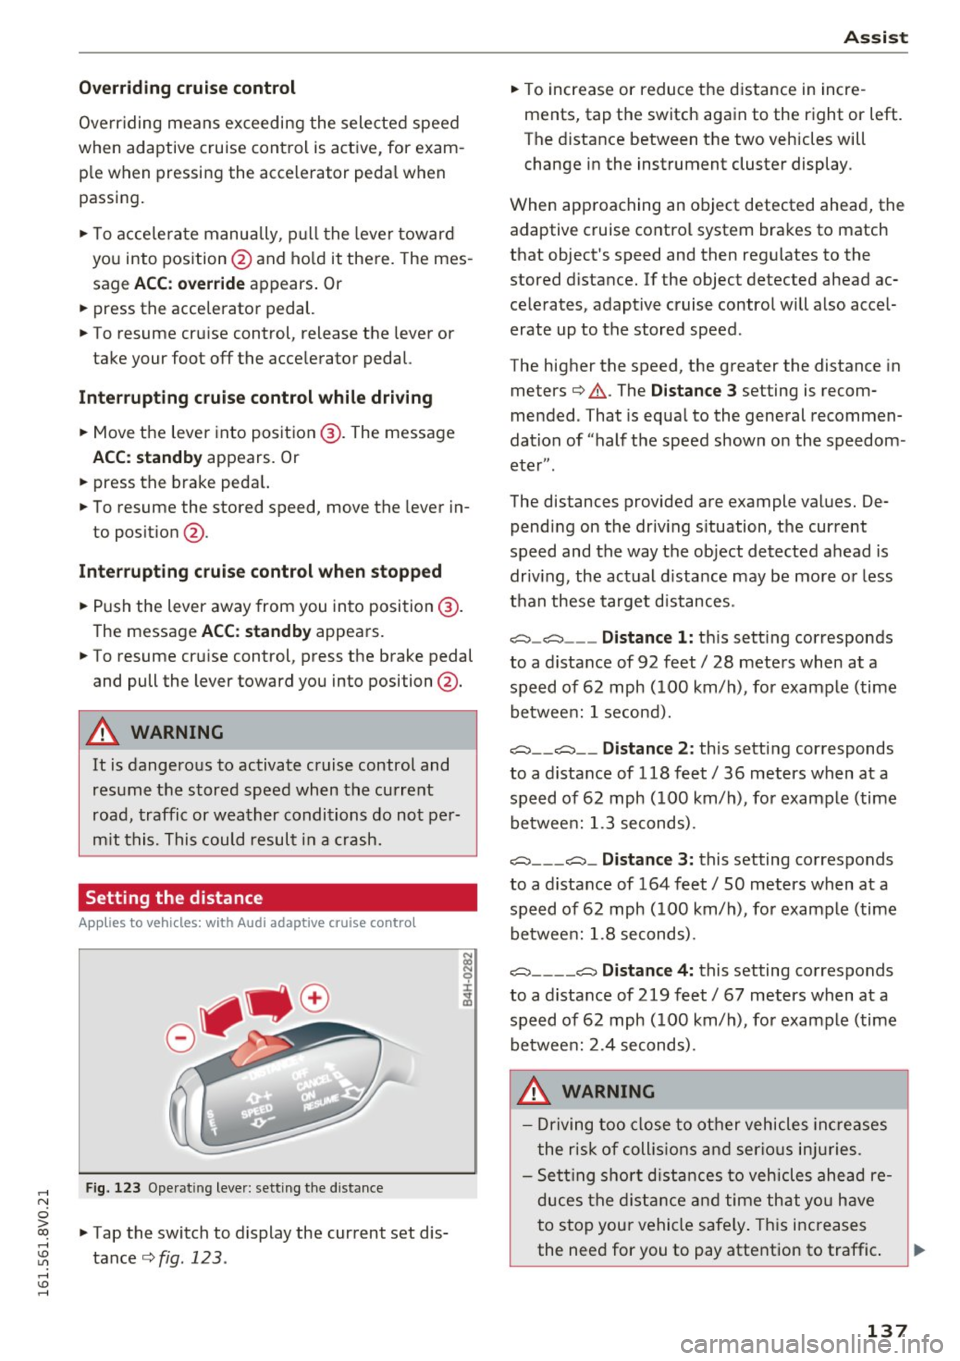
Setting the distance
A ppl ies to v ehicles: with Audi a daptive cruise co ntro l
Fig. 123 Operat ing lever: setting the distance
"' Tap the switch to display the current set dis
tance
c>fig. 123 .
Assist
"'To increase or reduce the d istance in incre
ments, tap the switch again to the right or left.
The distance between the two veh icles will
change in the instrument cluster display.
When approaching an object detected ahead, the adaptive cruise contro l system brakes to match
that object's speed and then regu lates to the
stored distance. If the object detected ahead ac celerates, adaptive cruise control will also accel
erate up to the stored speed.
The higher the speed, the greater the distance in
meters
c> & . The Distance 3 setting is recom
mended. That is equa l to the general recommen
dation of "half t he speed shown on the speedom
eter" .
The distances provided are example values. De pending on the driv ing s ituation, the current
speed and the way the object detected ahead is
driv ing, the actual d ista nce may be more or less
t h an these target d istances .
o::::::::,_o::::::::, ___ Distance 1: th is sett ing corresponds
to a distance of 92 feet/ 28 meters when at a speed of 62 mph ( 100 km/h), for example (time
betwee n: 1 second).
o::::::::, __ o::::::::, __ Distanc e 2: this setting corresponds
to a distance of 118 feet/ 36 meters when at a speed of 62 mph ( 100 km/h), for example (time
betwee n: 1.3 seconds) .
o::::::::, ___ o::::::::,_ Distance 3: this setting corresponds
to a distance of 164 feet
I SO meters when at a
speed of 62 mph ( 100 km/h), for example (time
betwee n: 1.8 seconds) .
o::::::::, ____ o::::::::, Distance 4: this setting corresponds
to a distance of 219 feet
I 67 meters when at a
speed of 62 mph ( 100 km/h), for example (time
betwee n: 2.4 seconds) .
A WARNING
-Driving too close to other vehicles increa ses
the risk of collis ions an d serio us inj uries.
- Se ttin g sho rt d istances to vehicles ahead re
duces the dis tance an d time th at you have
to stop you r vehicle safe ly . Th is increases
the need for you to pay attention to traffic . ..,.
137
Page 147 of 328

.... N
0 > CX)
.... I.Cl U"I
.... I.Cl ....
Late: in this set ting, t he system provides correc
tive steering just before a vehicle whee l touches a
detected lane marker line.
Vibrat ion warning
You can switch the additional vibrating warning
i n the steering wheel on or
off.
& WARNING
With the vibration warning switched off, no
visible warning will appear in the instr ument
cluster display when crossing a lane marker.
@ Tips
Market-specific: your sett ings are stored au
tomatically and assigned to the remote con
trol key in use.
Audi side assist
Description
A pp lies to vehicles: with Audi side assist
Fig. 130 Sensor detectio n range
Fig. 131 D isplay on the exterior mirro r
Side assist he lps you monitor your blind spot and
traffic behind your vehicle. Within the limits of
the system, it warns you about vehicles that are
com ing closer or that are traveling with yo u with-
A ss ist
in senso r range (D ¢ fig. 130 : if a lane change is
classified as critical, the display @ in the exterior
mirror¢
fig. 131 turns on .
T he displ ay in the left exterior mirror p rovides as
sistance when making a lane change to the le ft,
whi le the display in the right exterior mirror pro
vides ass istance when making a lane ch ange to
the right.
Information stag e
As long as you do not a ct ivate the tu rn signal,
side assist
informs you about vehicles that are
detected and classified as critical. The display in
the mirror turns on, but is dim .
T he disp lay remains dim i n the information stage
so that your view toward the front is not distur
bed.
Warning stage
If you activate the turn s ignal, side assist warns
yo u about vehicles that are detected and classi
fied as crit ica l. T he d isp lay in the respective mir
ror blinks bright ly. If this happens, check traffic
by glancing in the rearview mirror and over your
shou lder ¢.&.
in General information on
page 146.
(D Tips
- You can adjust the brightness on of the dis
play on the rearview mirror¢
page 147.
145
Page 156 of 328
Parking system s
General information
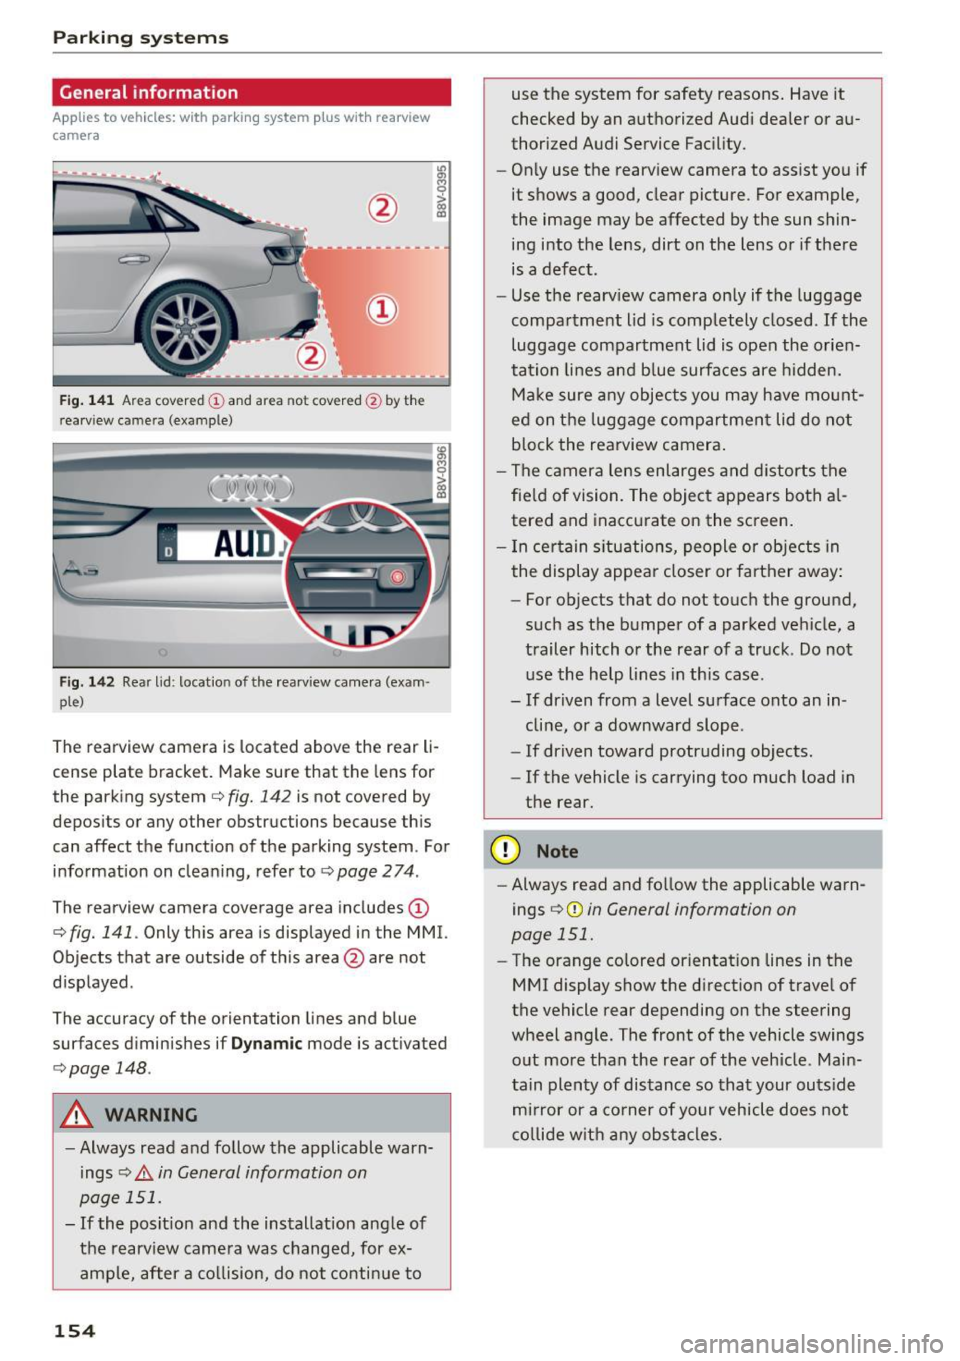
Applies to veh icles: w ith park ing system p lus with rearview
camera
F ig . 14 1 Area covered © and area not covered @by the
r earv iew came ra (example)
Fig. 142 Rear lid : locat io n of the rearview camera (exam ·
ple)
The rearview camera is located above the rear li
cense plate bracket. Make sure that the lens for
the parking system
c.:> fig. 142 is not covered by
depos its or any other obstructions because th is
can affect the function of the parking system . For
information on cleaning, refer to
c.:> page 2 74 .
The rearview camera coverage area includes(!)
c.:> fig. 141. Only this area is displayed in the MMI.
Objects that are outside of th is area @are not
displayed .
The accuracy of the orientation lines and b lue
surfaces d iminishes if
D ynamic mode is activated
¢ page 148.
A WARNING
-Always read and follow the applicable warn
ings
c.:> .&. in General information on
page 151.
- If the posit ion and the installation ang le of
the rearv iew camera was changed, for ex
ample, after a co llision, do not continue to
154
use the system for safety reasons . Have it
checked by an a uthorized Audi dea ler or au
thorized Audi Service Fac ility.
- Only use the rearv iew camera to assist you if
it shows a good, clear picture . For example,
the image may be affected by the sun shin
ing into the lens, dirt on the lens or if there is a defect.
- Use the rearv iew camera on ly if the luggage
compa rtment lid is completely closed.
If the
luggage compartment lid is open the orien
tation lines and b lue surfaces are hidden.
Ma ke sure a ny objec ts you may h ave mo unt
ed on t he luggage compartmen t lid do not
b lock the rearview camera .
- The camera lens enlarges and distorts the
fie ld of vision. The object appears both a l
tered and inaccurate on the screen .
- I n cer tain s itu ations, people or objects in
the display appea r closer or farther away:
- For objects that do not touch the ground,
such as the bumper of a parked vehicle, a
trailer hitch or the rear of a truck . Do not
use the help lines in th is case.
- If dr iven from a level surface onto an in
cline, or a downward slope .
- If driven toward protruding objects.
- If the vehicle is carrying too much load in
the rear .
(D Note
-Always read and fo llow the applicable warn
ings
c.:> (D in General information on
page 151.
- The orange colored orientat ion lines in the
MMI display show the direction of trave l of
the vehicle rear depending on the steering
wheel a ng le . The front of the vehicle swings
o ut more than the rea r of the veh icle. Main
tain plenty of dis tance so that your outs ide
m ir ror or a co rner of your vehicle does not
c o llide w it h any obstacle s.
Page 164 of 328

Intelligent Technology
A WARNING
-New brake pads do not achieve their full
braking effect during the first 250 mi
-
(400 km). They must be "broken in" first .
However, you can compensate for the
slightly reduced braking force by pressing
firmly on the brake pedal. Avoid heavy brak
ing during the break-in period.
- Only apply the brakes for the purpose of
cleaning the brake system when road and
traffic conditions permit. You must not en
danger other road users. This increases the
risk of an accident.
- On steep slopes, reduce the speed and se
lect a lower gear or lower selector lever po
sition. Drive as little as possible while press
ing the brake pedal and avoid putting your
left foot on the brake pedal while driving.
This could cause the brakes to overheat and
impair the efficiency of the brakes.
- Do not let the brakes "grind" by always
keeping your foot on the brake pedal. This
can cause the brakes to overheat, increase
wear and increase braking distance unneces
sarily.
- Certain weather and operating conditions
such as driving through water, driving in heavy rain or driving after washing your ve
hicle can impair the effectiveness of the
brakes . In the winter, ice may build up on
the brake pads, rotors and drums. Check
these components by braking carefully. Ap
plying the brakes carefully several times
dries the brakes and removes ice build-up .
- The efficiency of the brakes can also be im
paired by driving for long stretches on roads
covered with salt without using the brakes.
You can remove salt deposits from the brake rotors and pads by carefully applying
the brakes several times.
- If the front spoiler is damaged or you install
another spoiler, make sure the front wheel brakes are ventilated properly . Otherwise,
the brake system could overheat, which re
duces their effectiveness .
- Failure of a brake circuit impairs braking
performance, which increases braking dis -
162
tance. Avoid driving the vehicle and have it
towed it to the nearest authorized Audi
dealer or authorized Audi Service Facility.
- Never let the vehicle roll while the engine is
stopped because this increases the risk of an
accident .
- If the brake booster is not working, you will
have to press much harder on the brake
pedal to compensate for the lack of the
booster.
(D Note
- Never let the brakes "rub" by pressing the
pedal lightly when braking is not really nec
essary. This causes the brakes to overheat
and increases braking distance and causes
wear .
- Before driving on a long stretch with steep
slopes, reduce your speed and shift to the
next lower gear This makes use of the en
gine braking effect and relieves the brakes.
If you need to brake additionally, brake in
intervals and not continuously.
(D Tips
- If the brake booster is not working, you
must press the brake pedal with much more
force than normal.
- If you retrofit your vehicle with a front spoil
er, wheel covers or similar items, make su re
that the air flow to the front wheels is not
interrupted. Otherwise the brake system
can become too hot.
Electromechanical
steering
The electromechanical steering supports the
driver's steering movements.
Power steering adapts electronically based on
the vehicle speed .
The vehicle still has full steering functionality if
the power steering fails or when the engine is
stopped (towing) . To steer, you must apply much
more force than usual. .,.
Page 165 of 328
,....,
N
0 > co ,....,
• Do not drive vehicle: steering defective
If th is ind icator light turns on and stays on and
this message appears, the power steering may
h ave fa iled.
Do
not cont inue driving . See an authorized Aud i
dealer or authorized Aud i Serv ice Faci lity for as
sistance.
• Do not dr ive vehicle: steering defective
There is a malfunction in the electronic steering
lock. You cannot turn the ignition on.
Do
not tow your vehicle beca use it cannot be
steered. See an authorized A udi dealer or author
ized Audi Service Facility for assistance.
':r- ij Steering malfunction : you can continue driv
ing
I f the indicator light turns on, the steering whee l
may be more diff icult to move o r more sensitive
than usual. The steering wheel may also be at an
angle when driving st raight.
Drive slowly to an author ized Audi dealer or au
thor ized Audi Service Facility to have the mal
function corrected.
1;11 Steering lock: system fault! Please contact
Service
There is a malfunction in the electronic steering
lock.
Drive to an authorized Aud i dea ler or authorized
Aud i Service Faci lity immediately to have the
malfunct ion corrected.
A WARNING -
Have the system malfunction corrected as
soon as possible by an authorized Audi dealer
or authorized Audi Service Facility, as this in
creases the risk of an accident .
(D Tips
If the . or t~ff indicator light only stays on
for a short time, you may continue dr iv in g.
Intelligent Technology
All wheel drive (quattro)
Applies to vehicles: with all wheel drive
In all wheel drive, all four wheels ore powered.
General information
In all wheel dr ive, the driving power is div ided be
tween all fou r wheels . This happens automatical
ly depending on yo ur driving behavior as well as
the current road conditions . A lso see
c> page 159, Electronic stabilization control
(ESC).
The all whee l drive concept is designed for high
engine power. Yo ur vehicle is exceptionally pow
erfu l and has excellent driving characteristics
both under normal driving conditions and on
snow and ice. Always read and follow safety pre
cautions
c> ,&. .
Winter tires
By using all wheel drive, your vehicle has good
forward motion with standard tires in winter con
ditions. However, in winter we recommend using
winter or all season tires on
all four wheels, be
cause this will improve the
broking effect.
Snow chains
If there are snow chain laws, snow chains must
also be used on veh icles w ith all wheel dr ive
c> page 269, Snow chains.
Replacing tires
For vehicles with a ll wheel d rive, only wheels with
the same rolling circumference should be used .
Avoid wheels with different tread depths
c> poge 260.
Offroad vehicle?
Your Audi is not an offroad vehicle -there is not
enough ground clearance. For this reason, avoid
difficu lt terrain . Also see<=)
page 302.
A WARNING
--Also, in veh icles with all whee l drive, adapt
your driving style to the current road and
traffic cond itions. Do not let the increased
safety prov ided tempt you into taking r isks.
163
Page 170 of 328
Driving safety
is as close to this position as possible. Move the
head restraint so that it is as close to the back
of the head as possible.
"' Fasten and wear safety belts correctly
<=> page 179.
"'Always keep both feet in the footwell so that
you are in control of the vehicle at all times.
For detailed information on how to adjust the
driver's seat, see
<=> page 59.
A WARNING
Drivers who are unbelted, out of position or
too close to the airbag can be seriously in
jured by an airbag as it unfolds. To help re
duce the risk of serious personal injury:
- Always adjust the driver's seat and the
steering wheel so that there are at least
10 inches
(25 cm) between your breastbone
and the steering wheel.
- Always adjust the driver's seat and the
steering wheel so that there are at least
4 inches (10 cm) between the knees and the
lower part of the instrument panel.
- Always hold the steering wheel on the out
side of the steering wheel rim with your
hands at the 9 o'clock and 3 o'clock posi
tions to help reduce the risk of personal in
jury if the driver's airbag inflates.
- Never hold the steering wheel at the
12 o'clock position or with your hands at
other positions inside the steering wheel
rim or on the steering wheel hub. Holding
the steering wheel the wrong way can cause
serious injuries to the hands, arms and head if the driver's airbag inflates.
- Pointing the steering wheel toward your
face decreases the ability of the supplemen
tal driver's airbag to protect you in a colli
sion.
- Always sit in an upright position and never
lean against or place any part of your body
too close to the area where the airbags are
located.
- Before driving, always adjust the front seats
properly and make sure that all passengers
are properly restrained.
168
-
- For adjustable head restraints: before driv
ing, always also adjust the head restraints
properly.
- Never adjust the seats while the vehicle is
moving. Your seat may move unexpectedly
and you could lose control of the vehicle.
- Never drive with the backrest reclined or tilted far back! The farther the backrests are
tilted back, the greater the risk of injury due
to incorrect positioning of the safety belt
and improper seating position .
- Children must always ride in child seats
<=> page 209 . Special precautions apply
when installing a child seat on the front
passenger seat
c> page 184.
· Proper seating position for the front
passenger
The proper front passenger seating position is
important for safe , relaxed driving.
For your own safety and to reduce the risk of in
jury in the event of an accident, we recommend
that you adjust the seat for the front passenger
to the following position :
"'Adjust the angle of the seatback so that it is in
an upright position and your back comes in full
contact with it whenever the vehicle is moving.
"' For adjustable head restraints: adjust the head
restraint so the upper edge is as even as possi
ble with the top of your head. If that is not pos
sible, try to adjust the head restraint so that it
is as close to this position as possible
<=> page 170 . Move the head restraint so that it
is as close to the back of the head as possible.
"' Keep both feet flat on the floor in front of the
front passenger seat .
"' Fasten and wear safety belts correctly
<=> page 179 .
For detailed information on how to adjust the
front passenger's seat, see
9 page 58 .
A WARNING
Front seat passengers who are unbelted, out
of position or too close to the airbag can be
Page 174 of 328
Driving safety
mats will prevent them from sliding into posi
tions that could interfere with the pedals or im
pair safe operation of your vehicle in other ways.
A WARNING
Pedals that cannot move freely can result in a
loss of vehicle control and increase the risk of
serious personal injury.
- Always make sure that floor mats are prop
erly secured .
- Never place or install floor mats or other
floor coverings in the vehicle that cannot be
properly secured in place to prevent them
from slipping and interfering with the ped als or the ability to control the vehicle.
- Never place or install floor mats or other
floor coverings on top of already installed
floor mats. Addit ional floor mats and other
coverings will reduce the size of the pedal
area and interfere with the pedals.
- Always properly reinstall and secure floor
mats that have been taken out for cleaning.
- Always make sure that objects cannot fall
into the driver footwell while the veh icle is
moving. Objects can become trapped under
the brake pedal and accelerator pedal caus
ing a loss of vehicle control.
Storing cargo correctly
Loading the luggage compartment
All luggage and other objects must be properly
s towed and secured in the luggage compart
ment.
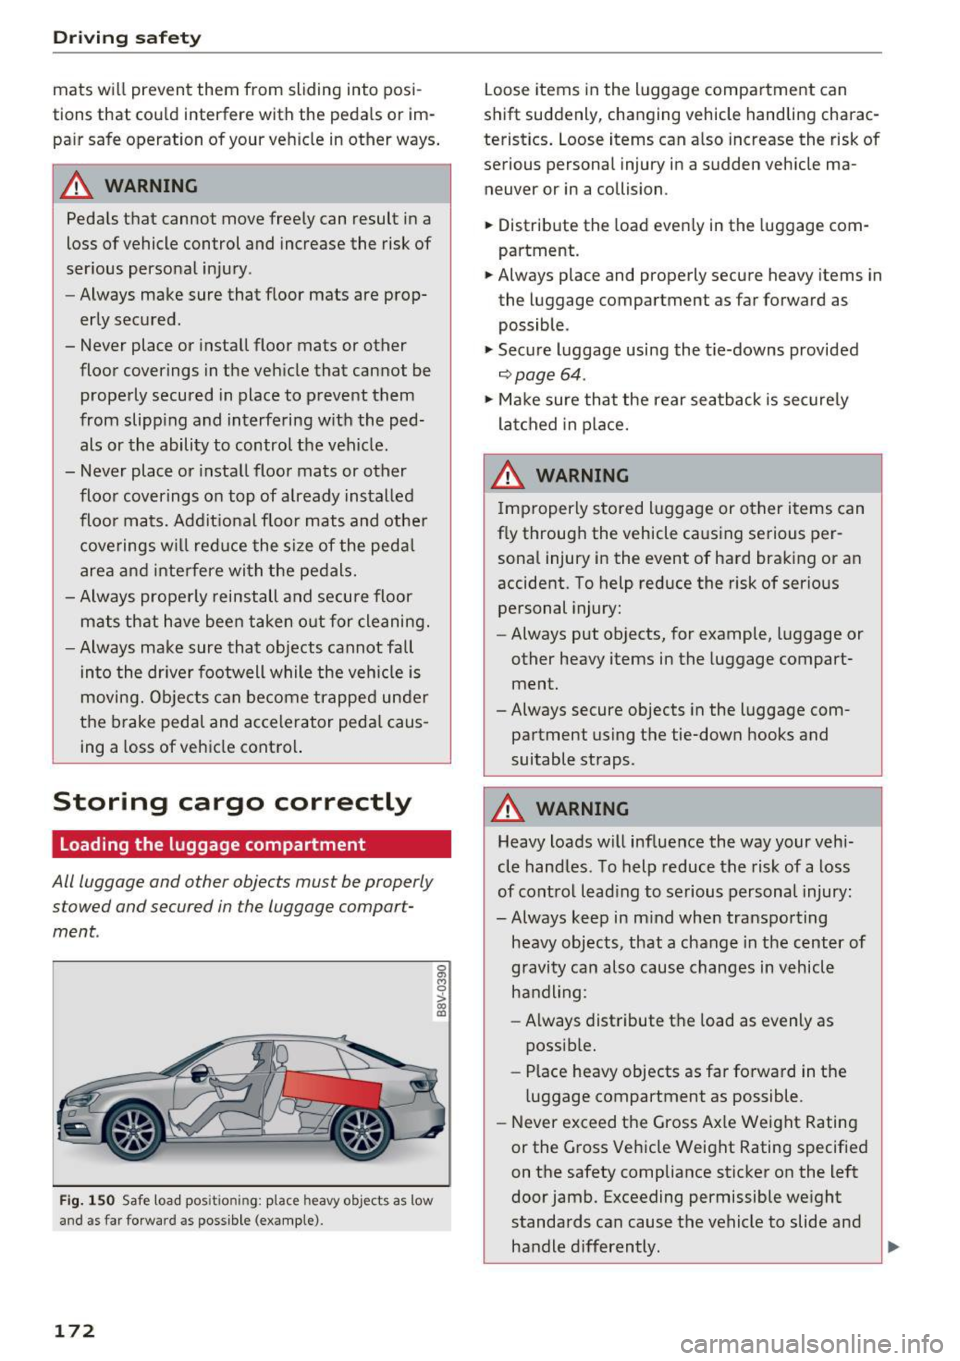
Fig. 150 Safe load pos it io nin g: place heavy objects as low
and as far forward as possible (example) .
172
Loose items in the luggage compartment can
shift suddenly, changing vehicle handling charac
teristics. Loose items can also increase the risk of
serious personal injury in a sudden vehicle ma
neuver or in a collision.
.,. Distribute the load evenly in the luggage com
partment.
.,. Always place and properly secure heavy items in
the luggage compartment as far forward as
possible .
.,. Secure luggage using the t ie-downs provided
~ page 64.
.,. Make sure that the rear seatback is securely
latched in place.
A WARNING
Improperly stored luggage or other items can
fly through the vehicle causing serious per sonal injury in the event of hard braking or an
accident. To help reduce the risk of serious personal injury:
- Always put objects, for example, luggage or
other heavy items in the luggage compart
ment.
-Always secure objects in the luggage com
partment using the tie-down hooks and
suitable straps .
A WARNING
Heavy loads will influence the way your vehi
cle handles . To help reduce the risk of a loss
of control leading to serious personal injury:
-Always keep in mind when transporting heavy objects, that a change in the center of
gravity can also cause changes in vehicle
handling:
- Always distribute the load as evenly as
possible.
- Place heavy objects as far forward in the
luggage compartment as possible .
- Never exceed the Gross Axle Weight Rating
or the Gross Vehicle Weight Rating specified
on the safety compliance sticker on the left
door jamb. Exceeding permissible weight
standards can cause the vehicle to slide and
handle differently .
Ill>-
Page 183 of 328
.... N
0 > CX)
rl I.Cl U"I
rl I.Cl ....
-A loose-fitting safety be lt can cause serious
injuries by shifting its pos ition on your body
from the strong bones to more vulnerable,
soft tissue and cause serious injury.
- Always read and heed all WARNINGS and
other important information
¢ page 178.
Pregnant women must also be correctly
restrained
The best way to protect the fetus is to make sure
that expectant mothers always wear safety belts
correctly -throughout the pregnancy .
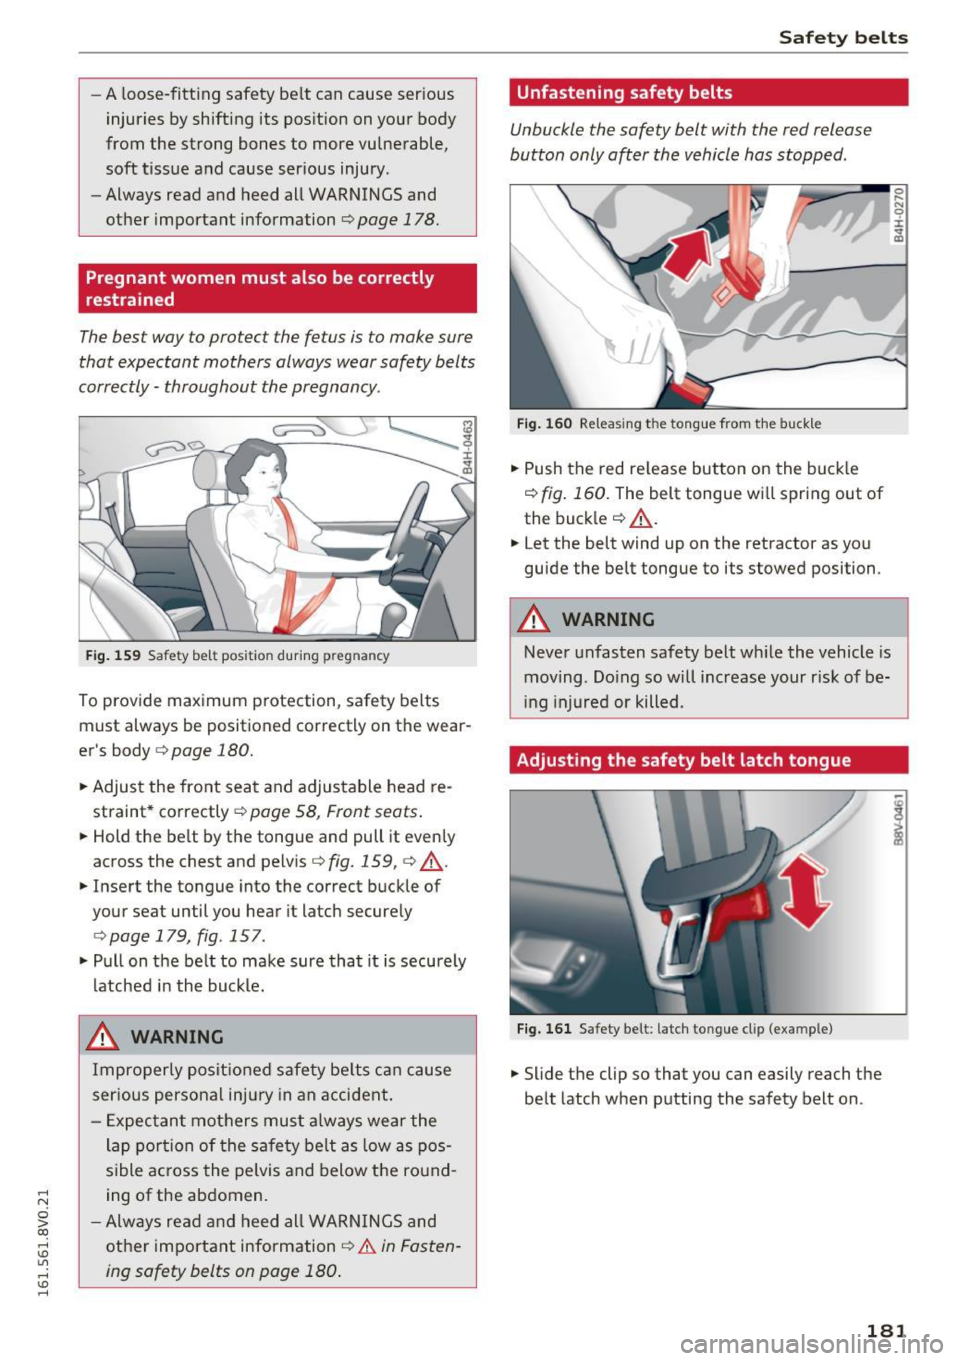
Fig . 159 Safety belt positio n dur ing pregnancy
To provide max imum p rotection, safety belts
must always be positioned correctly on the wear
er's body
<=> page 180.
.,. Adjust the front seat and adjustable head re
straint* correctly ¢
page 58, Front seats .
.,. Hold the belt by the tongue and pull it evenly
across the chest and pelvis
<=>fig. 159, <=> .&_ .
.,. Insert the tongue into the correct buckle of
your seat until you hear it latch securely
¢page 179, fig . 157 .
.,. Pull on the belt to make sure that it is securely
latched in the buckle.
_& WARNING
Improperly posit ioned safety be lts ca n cause
ser ious personal injury in an accident .
- E xpectan t mothers mus t al ways wear the
lap po rtion of the safe ty belt as low as pos
sible ac ross the pelvis and below the ro und
ing of the abdomen .
- Always read a nd heed all WARN INGS and
other important information
¢,&. in Fasten
ing safety belts on page 180 .
Safety bel ts
Unfastening safety belts
Unbuckle the safety belt with the red release
button only a~er the vehicle has stopped .
J-L
Fig . 1 60 Releasing the tongue from the buckle
.,. Push the red re lease button on the buck le
¢ fig . 160. The belt tongue wi ll spring out of
the buckle¢ .&_ .
.,. Let the belt wind up on the retractor as you
guide the belt tongue to its stowed position.
_& WARNING
-Never unfasten safety belt wh ile the vehicle is
moving . Do ing so will increase your r isk of be
i ng injured or killed .
Adjusting the safety belt latch tongue
Fig . 161 Safe ty belt: la tch to ngue cl ip (exa mple)
.,. Slide the clip so that you can easily reach the
belt latch when putting the safety belt on .
0 ..... N 0 :i:
"' CD
181
Page 195 of 328

,....,
N
0 > co ,....,
passenger seat an d the child restraint man
ufacturer's instructions require the use of a
towel, foam cushion or something else to
properly pos ition the ch ild rest raint, make
certain that the
PASSENGER AIR BAG OFF
light comes on and stays on whenever the
child res trai nt is insta lled on the fron t pas
senger seat.
- If the
PASSENGER AIR BAG OFF light does
not come on and stay on, immedia tely in
sta ll child res traint in a rear se ating position
and have the airbag system inspected by
yo ur Audi dealer .
,&_ WARNING
If the front passenger seat gets wet, dry it im
mediately.
- If liqu id soaks into the front passenger seat,
this can keep the airbag system from work ing properly and may, for instance, deact i
vate the passenger frontal airbag. If this happens, the
PASSENGER AIR BAG OFF
light will come on and stay on togethe r with
the a irbag ind icator light
fl (USA mod els)/
fll (Ca nada models) i n the ins trument clus
t er.
- If liquid is poo led on t he seat, but has not
soa ked in, this may also keep the a irbag sys
tem from wo rking properly and ca use the
passenger frontal ai rbag to be enabled
(turned on), even though the re is a properly
installed ch ild restraint system on the seat.
Wet towe ls or other wet t hings on the seat
cushion can have the same effect. If the
fro nt passenger frontal airbag is t urned on,
the
PASSENGER AIR BAG OFF l ight will go
o ut.
How the Advanced Airbag System
components work together
The front Advanced Airbag System an d the side
ai rbags s upplement the protection offered by the
front three -point safety be lts with p retensioners
and load limiters and the adjustable head re
stra ints* to help reduce the risk of injury in a
wide range of accident and crash situat ions. Be
Airb ag sys tem
su re to read the important in format ion about
safety and heed the WARNINGS in this chapter.
D eployment of the Adv anced A irbag System and
the ac tivation of the safety belt pretensioners de
pend on the dece le ration measured by the crash
sensors and registered by the electronic contro l
u nit . Crash severity depends on speed and dece l
eration as well as the mass and stiffness of the
vehicle or object involved in the crash.
On the passenger side, regard less of safety be lt
u se, the front passenge r frontal airbag will be
turned off if the e lectr ica l capacitance measured
by the capacitive passenger detection system on
the front passenger seat is less than the amou nt
programmed in t he e lectron ic co ntrol unit. The
front passenge r frontal a irbag w ill also be turned
off if the capaci tance measu red by the sys tem for
the fron t passenger se at equals th at of a n in fan t
of about one year of age in one of t he ch ild seats
that was used to certify the Advanced Airbag Sys
tem under Fe d era l Motor Vehicle Safety Standard
208. The
PASSENGER AIR BAG OFF light comes
on and stays on to tell you when the front Ad
vanced Airbag System on the passenger side has been turned off
r=:> page 196 .
,&_ WARNING
-To reduce the risk of injury when an airbag in-
flates, always wea r safe ty be lts prope rly.
- If you are u nrestra ined, leaning forward, si t
ting sideways or ou t of posi tion in a ny way,
your r is k of injury is much hig he r.
- You will a lso receive ser ious injuries and
could even be killed if you a re up against the
a ir bag or too close to it when i t in flates -
even with an Advan ced Airb ag
<=:>page 184.
193