headlights AUDI A4 1995 B5 / 1.G Three Way Halogen Headlights Workshop Manual
[x] Cancel search | Manufacturer: AUDI, Model Year: 1995, Model line: A4, Model: AUDI A4 1995 B5 / 1.GPages: 16, PDF Size: 0.32 MB
Page 1 of 16
94-1
Headlights, servicing
Three-way halogen headlights, overview
CAUTION!
Disconnect the battery Ground (GND) strap
before working on the electrical system.
Notes:
Before disconnecting the battery, determine the
correct coding for the anti-theft radio.
After reconnecting the battery, check and
activate the vehicle's electrical equipment
(radio, clock, comfort and convenience
features, etc.) as outlined in this Repair Manual
or the Owner's Manual.
Pa
ge 1 of 16 Headli
ghts, servicin
g
11/20/2002 htt
p://127.0.0.1:8080/audi/servlet/Dis
play?action=Goto&t
yp
e=re
pair&id=AUDI.B5.EE01.94.1
Page 2 of 16
94-2
Notes:
Repair Manual, Maintenance
Some procedures could affect the headlight
beam adjustment, requiring that it be reset
Page 94
-8 .
Adjusting spray for headlights washer nozzles
Page 92
-17
.
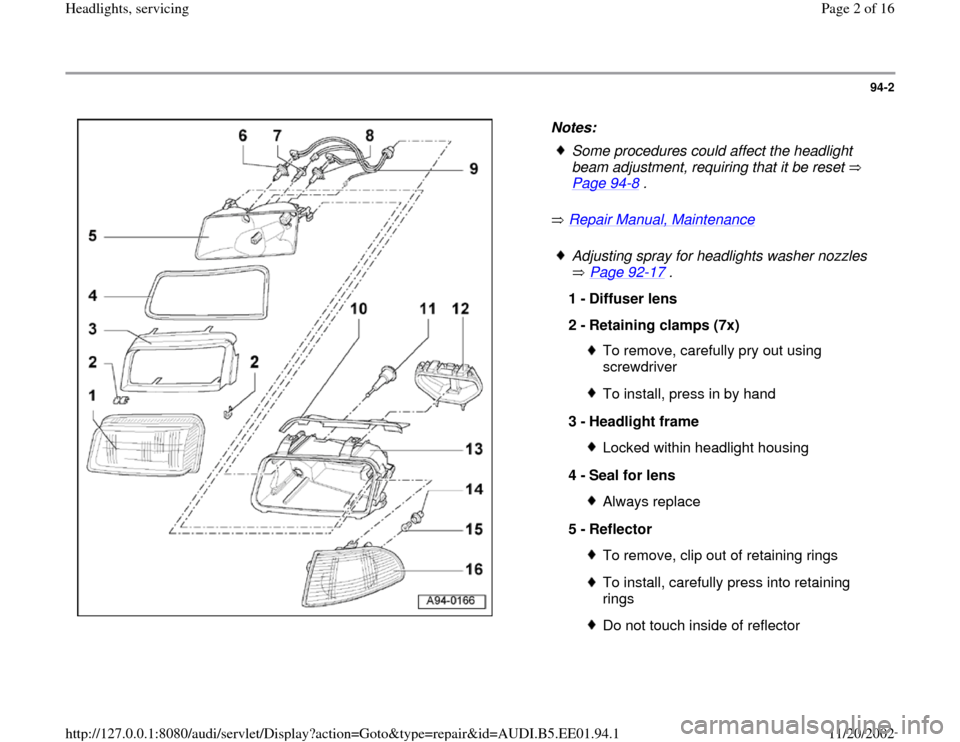
1 -
Diffuser lens
2 -
Retaining clamps (7x)
To remove, carefully pry out using
screwdriver To install, press in by hand
3 -
Headlight frame Locked within headlight housing
4 -
Seal for lens Always replace
5 -
Reflector To remove, clip out of retaining ringsTo install, carefully press into retaining
rings Do not touch inside of reflector
Pa
ge 2 of 16 Headli
ghts, servicin
g
11/20/2002 htt
p://127.0.0.1:8080/audi/servlet/Dis
play?action=Goto&t
yp
e=re
pair&id=AUDI.B5.EE01.94.1
Page 4 of 16
94-4
High intensity gas discharge (Xenon)
headlights, overview
CAUTION!
Disconnect the battery Ground (GND) strap
before working on the electrical system.
Notes:
Before disconnecting the battery, determine the
correct coding for the anti-theft radio.
After reconnecting the battery, check and
activate the vehicle's electrical equipment
(radio, clock, comfort and convenience
features, etc.) as outlined in this Repair Manual
or the Owner's Manual.
Some procedures could affect the headlight
beam adjustment, requiring that it be reset
Page 94
-8 .
Repair Manual, Maintenance
Adjusting spray for headlights washer nozzles
Page 92
-17
.
Pa
ge 4 of 16 Headli
ghts, servicin
g
11/20/2002 htt
p://127.0.0.1:8080/audi/servlet/Dis
play?action=Goto&t
yp
e=re
pair&id=AUDI.B5.EE01.94.1
Page 6 of 16
94-6
Headlights, removing and installing
Note:
Protect bumper using cloth backed tape in
headlight area to prevent damage to paint.
Removing
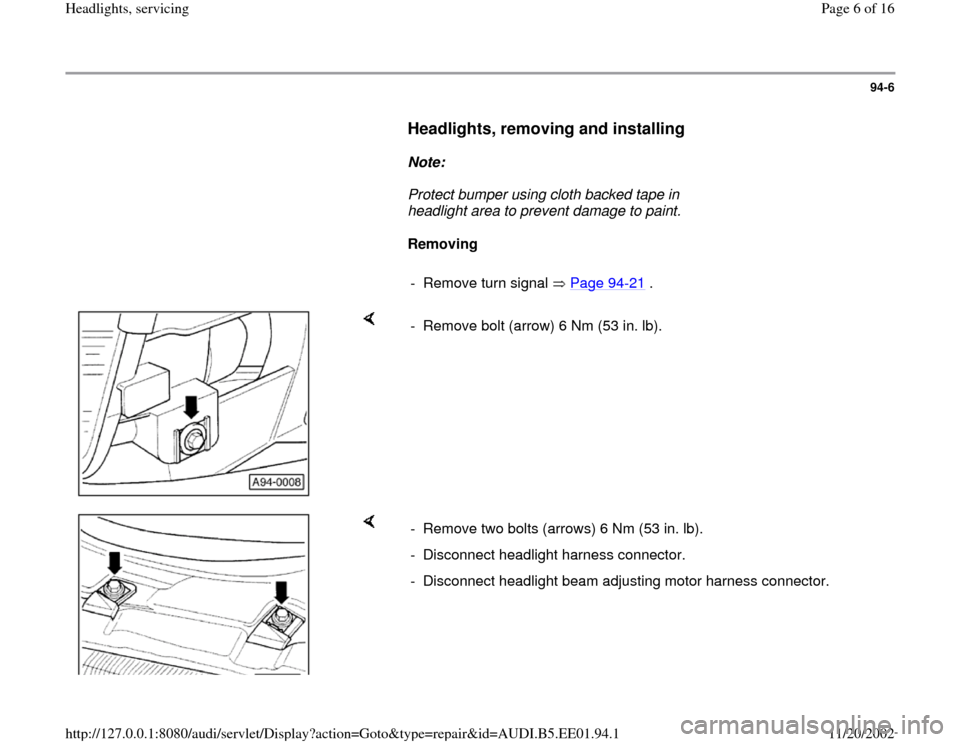
- Remove turn signal Page 94
-21
.
- Remove bolt (arrow) 6 Nm (53 in. lb).
- Remove two bolts (arrows) 6 Nm (53 in. lb).
- Disconnect headlight harness connector.
- Disconnect headlight beam adjusting motor harness connector.
Pa
ge 6 of 16 Headli
ghts, servicin
g
11/20/2002 htt
p://127.0.0.1:8080/audi/servlet/Dis
play?action=Goto&t
yp
e=re
pair&id=AUDI.B5.EE01.94.1
Page 7 of 16
94-7
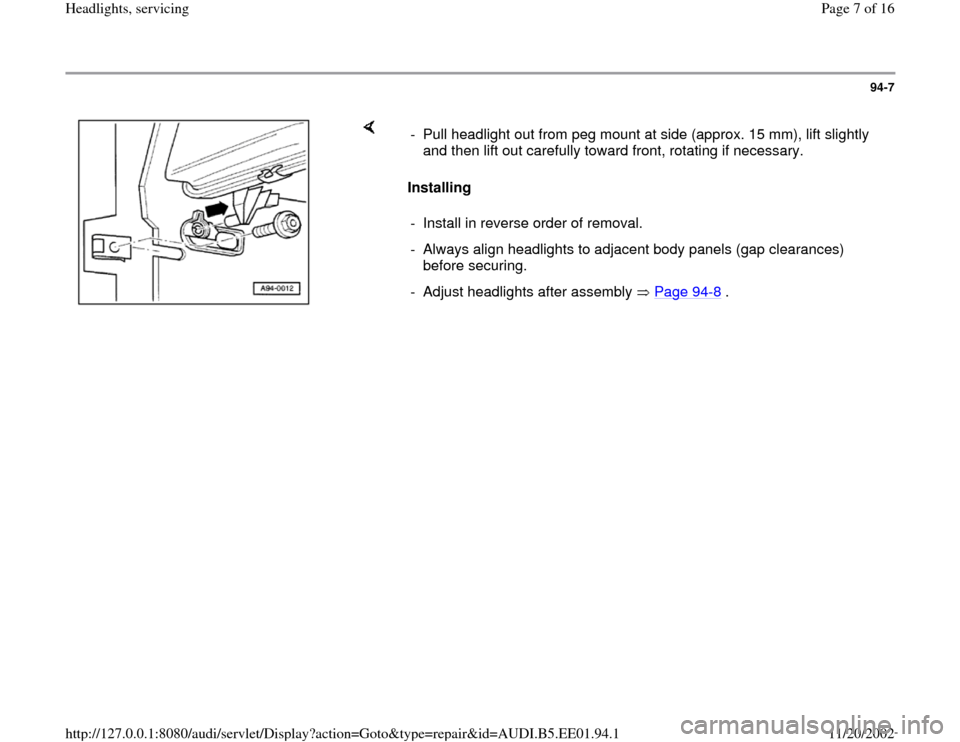
Installing - Pull headlight out from peg mount at side (approx. 15 mm), lift slightly
and then lift out carefully toward front, rotating if necessary.
- Install in reverse order of removal.
- Always align headlights to adjacent body panels (gap clearances)
before securing.
- Adjust headlights after assembly Page 94
-8 .
Pa
ge 7 of 16 Headli
ghts, servicin
g
11/20/2002 htt
p://127.0.0.1:8080/audi/servlet/Dis
play?action=Goto&t
yp
e=re
pair&id=AUDI.B5.EE01.94.1
Page 8 of 16
94-8
Headlights, adjusting
Instructions and specifications on headlight
adjustment:
Repair Manual, Maintenance
Notes:
For vehicles with high intensity gas discharge
(Xenon) headlights, the Diagnostic Trouble
Code (DTC) memory must be checked and
erased before each manual adjustment of the
adjusting screws. The basic adjustment is then
carried out. Headlight automatic vertical aim
control On board Diagnostic (OBD), initiating,
Page 01
-217
.
The aimer must be used for the adjustment.
Repair Manual, Maintenance
Pa
ge 8 of 16 Headli
ghts, servicin
g
11/20/2002 htt
p://127.0.0.1:8080/audi/servlet/Dis
play?action=Goto&t
yp
e=re
pair&id=AUDI.B5.EE01.94.1
Page 11 of 16
94-11
Headlight beam adjusting motor (high
intensity gas discharge -Xenon-
headlights), removing and installing
Note:
Always adjust headlights after headlight beam
adjusting motors are removed, installed or
replaced Page 94
-8 .
Removing
- For right headlight, remove back portion of
intake air duct.
- Remove cover from headlight housing.
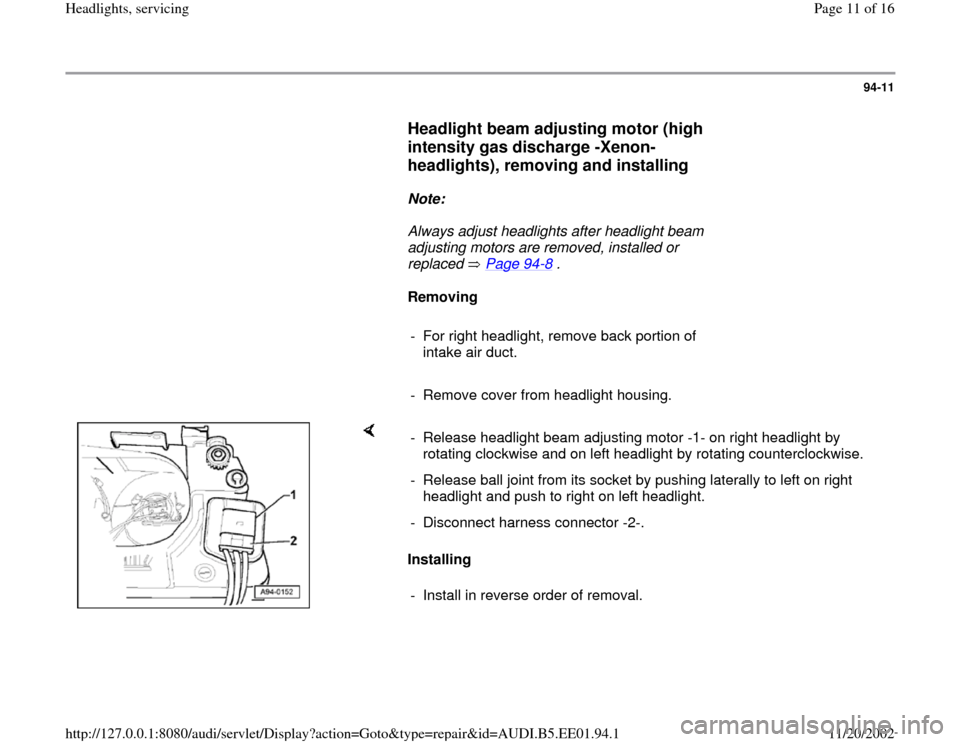
Installing - Release headlight beam adjusting motor -1- on right headlight by
rotating clockwise and on left headlight by rotating counterclockwise.
- Release ball joint from its socket by pushing laterally to left on right
headlight and push to right on left headlight.
- Disconnect harness connector -2-.
- Install in reverse order of removal.
Pa
ge 11 of 16 Headli
ghts, servicin
g
11/20/2002 htt
p://127.0.0.1:8080/audi/servlet/Dis
play?action=Goto&t
yp
e=re
pair&id=AUDI.B5.EE01.94.1