AUDI A4 1998 B5 / 1.G 01V Transmission Torque Tube Assembly Workshop Manual
Manufacturer: AUDI, Model Year: 1998,
Model line: A4,
Model: AUDI A4 1998 B5 / 1.G
Pages: 11, PDF Size: 0.27 MB
AUDI A4 1998 B5 / 1.G 01V Transmission Torque Tube Assembly Workshop Manual
A4 1998 B5 / 1.G
AUDI
AUDI
https://www.carmanualsonline.info/img/6/1212/w960_1212-0.png
AUDI A4 1998 B5 / 1.G 01V Transmission Torque Tube Assembly Workshop Manual
Page 1 of 11
39-102
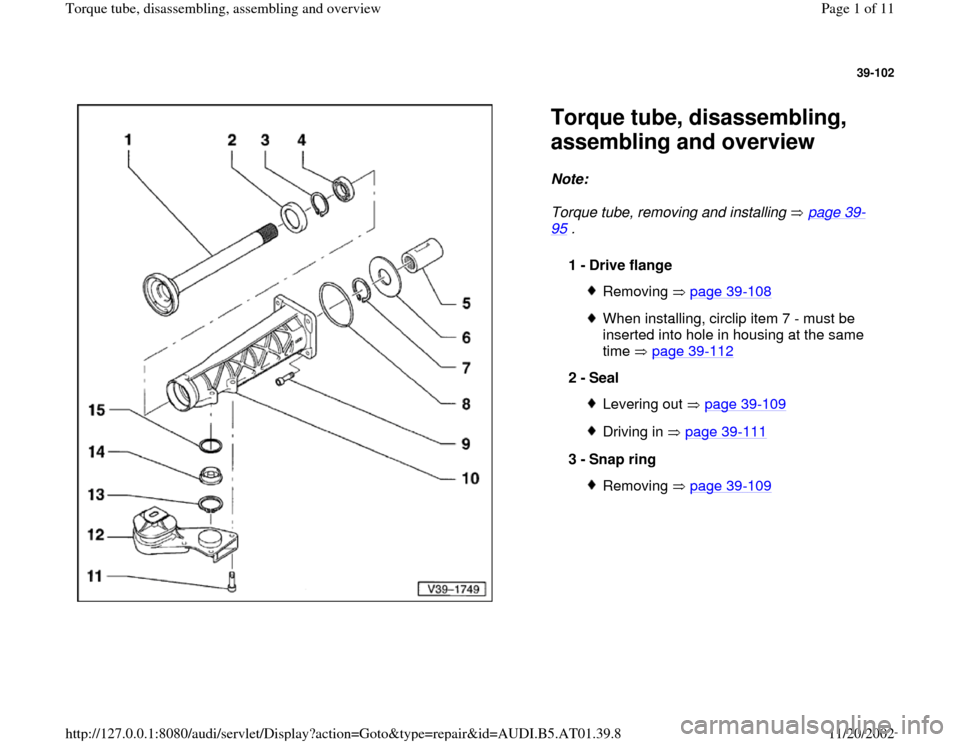
Torque tube, disassembling,
assembling and overview Note:
Torque tube, removing and installing page 39
-
95
. 1 -
Drive flange
Removing page 39
-108
When installing, circlip item 7 - must be
inserted into hole in housing at the same
time page 39
-112
2 -
Seal
Levering out page 39
-109
Driving in page 39
-111
3 -
Snap ring
Removing page 39
-109
Pa
ge 1 of 11 Tor
que tube, disassemblin
g, assemblin
g and overview
11/20/2002 htt
p://127.0.0.1:8080/audi/servlet/Dis
play?action=Goto&t
yp
e=re
pair&id=AUDI.B5.AT01.39.8
Page 2 of 11
39-103
4 -
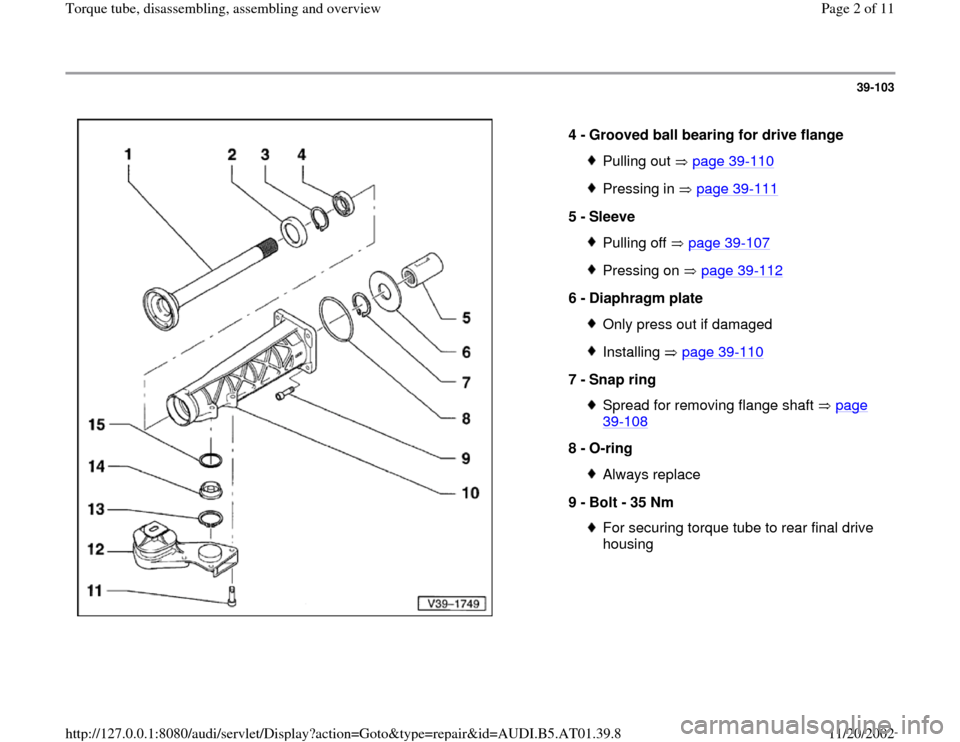
Grooved ball bearing for drive flange
Pulling out page 39
-110
Pressing in page 39
-111
5 -
Sleeve
Pulling off page 39
-107
Pressing on page 39
-112
6 -
Diaphragm plate
Only press out if damagedInstalling page 39
-110
7 -
Snap ring
Spread for removing flange shaft page 39
-108
8 -
O-ring
Always replace
9 -
Bolt - 35 Nm For securing torque tube to rear final drive
housing
Pa
ge 2 of 11 Tor
que tube, disassemblin
g, assemblin
g and overview
11/20/2002 htt
p://127.0.0.1:8080/audi/servlet/Dis
play?action=Goto&t
yp
e=re
pair&id=AUDI.B5.AT01.39.8
Page 3 of 11
39-104
10 -
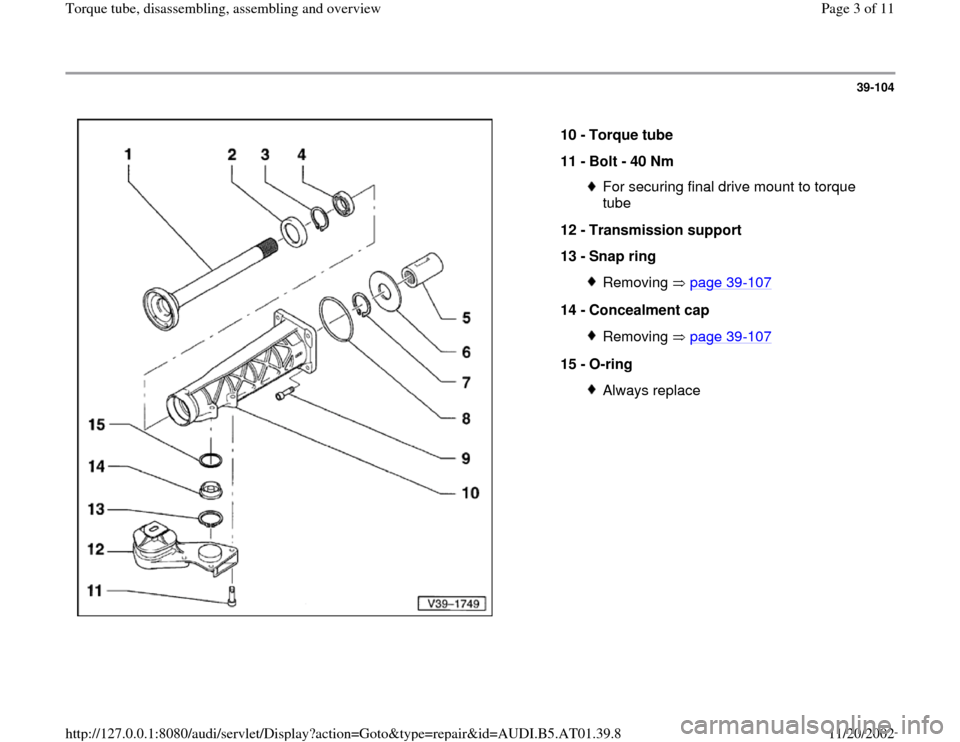
Torque tube
11 -
Bolt - 40 Nm
For securing final drive mount to torque
tube
12 -
Transmission support
13 -
Snap ring Removing page 39
-107
14 -
Concealment cap
Removing page 39
-107
15 -
O-ring
Always replace
Pa
ge 3 of 11 Tor
que tube, disassemblin
g, assemblin
g and overview
11/20/2002 htt
p://127.0.0.1:8080/audi/servlet/Dis
play?action=Goto&t
yp
e=re
pair&id=AUDI.B5.AT01.39.8
Page 4 of 11
39-105
Torque tube, disassembling and
assembling
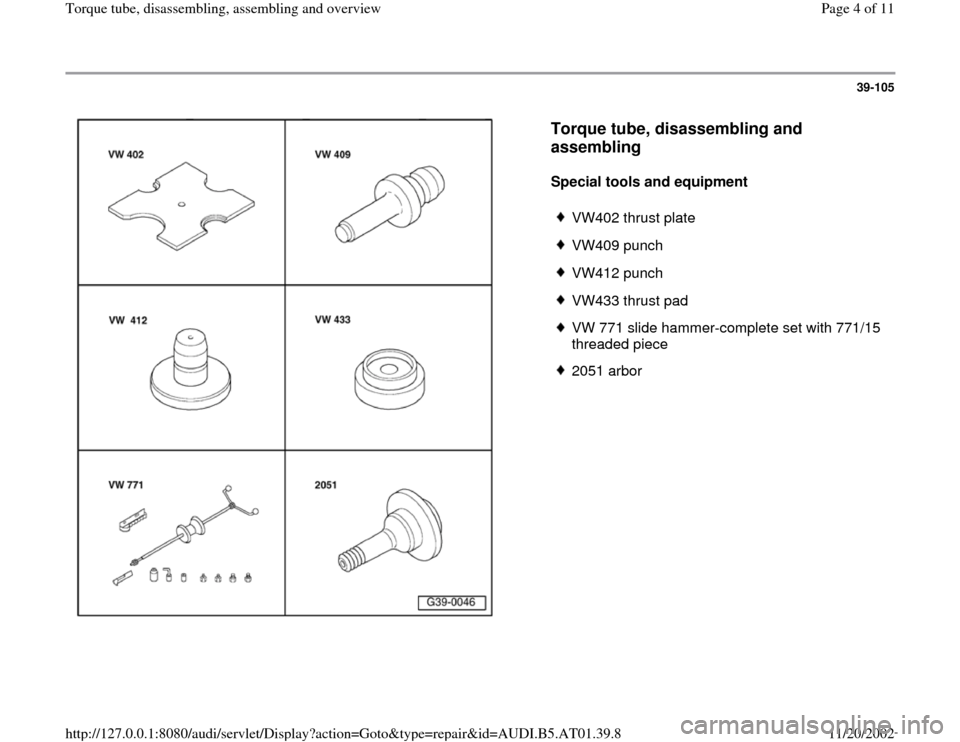
Special tools and equipment
VW402 thrust plate
VW409 punch
VW412 punch
VW433 thrust pad
VW 771 slide hammer-complete set with 771/15
threaded piece
2051 arbor
Pa
ge 4 of 11 Tor
que tube, disassemblin
g, assemblin
g and overview
11/20/2002 htt
p://127.0.0.1:8080/audi/servlet/Dis
play?action=Goto&t
yp
e=re
pair&id=AUDI.B5.AT01.39.8
Page 5 of 11
39-106
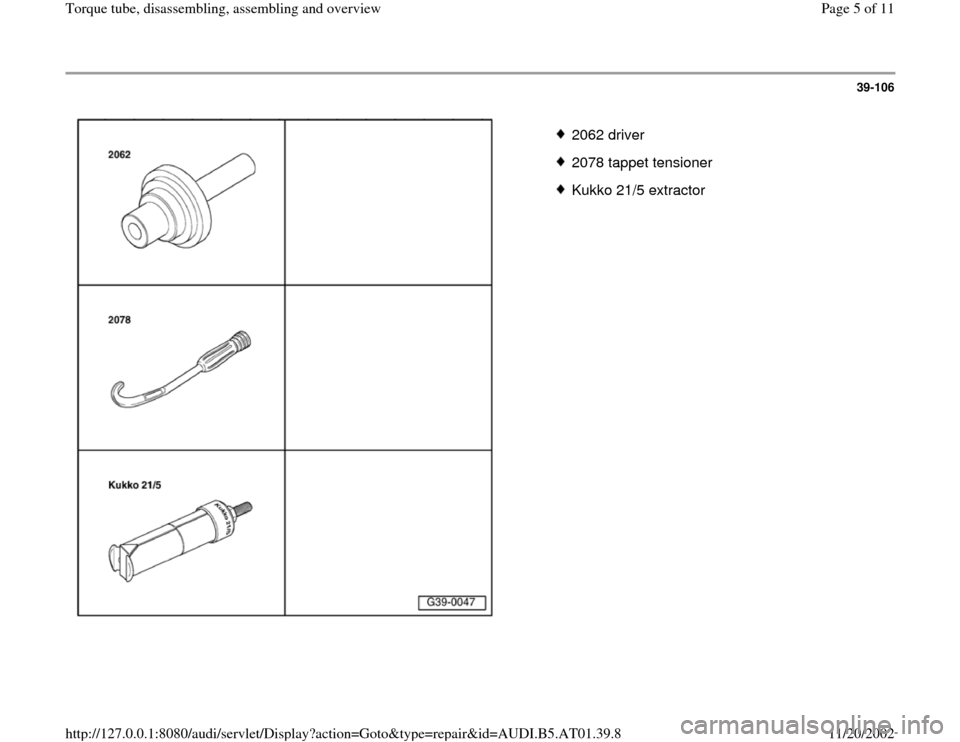
2062 driver
2078 tappet tensioner
Kukko 21/5 extractor
Pa
ge 5 of 11 Tor
que tube, disassemblin
g, assemblin
g and overview
11/20/2002 htt
p://127.0.0.1:8080/audi/servlet/Dis
play?action=Goto&t
yp
e=re
pair&id=AUDI.B5.AT01.39.8
Page 6 of 11
39-107
Note:
Removing and installing torque tube page 39
-
95
.
Disassembly
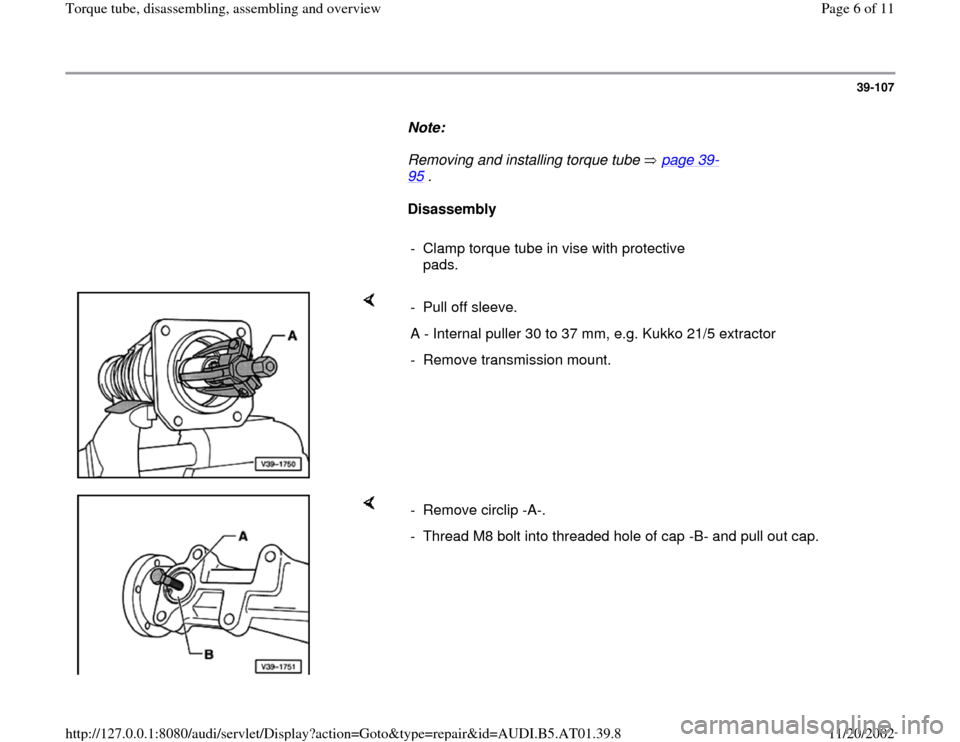
- Clamp torque tube in vise with protective
pads.
- Pull off sleeve.
A - Internal puller 30 to 37 mm, e.g. Kukko 21/5 extractor
- Remove transmission mount.
- Remove circlip -A-.
- Thread M8 bolt into threaded hole of cap -B- and pull out cap.
Pa
ge 6 of 11 Tor
que tube, disassemblin
g, assemblin
g and overview
11/20/2002 htt
p://127.0.0.1:8080/audi/servlet/Dis
play?action=Goto&t
yp
e=re
pair&id=AUDI.B5.AT01.39.8
Page 7 of 11
39-108
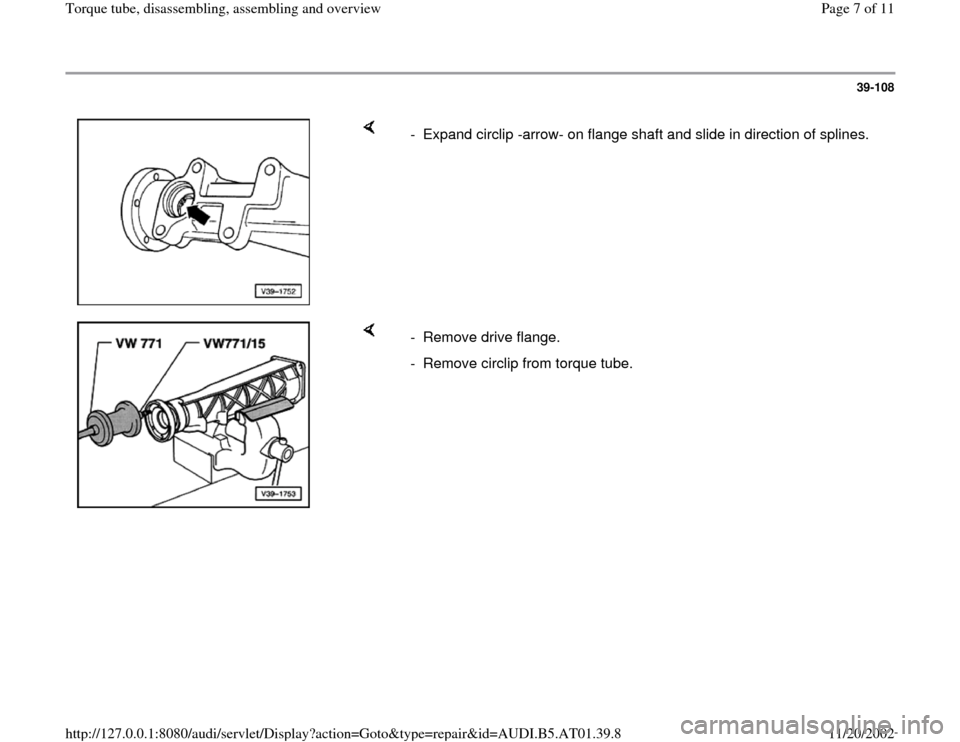
- Expand circlip -arrow- on flange shaft and slide in direction of splines.
- Remove drive flange.
- Remove circlip from torque tube.
Pa
ge 7 of 11 Tor
que tube, disassemblin
g, assemblin
g and overview
11/20/2002 htt
p://127.0.0.1:8080/audi/servlet/Dis
play?action=Goto&t
yp
e=re
pair&id=AUDI.B5.AT01.39.8
Page 8 of 11
39-109
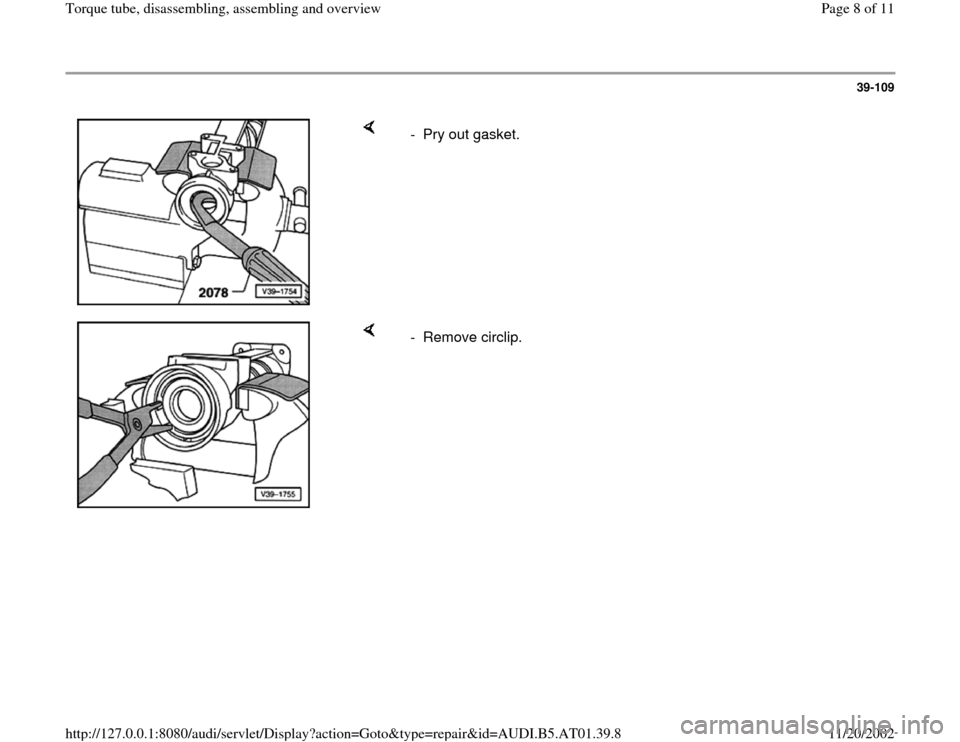
- Pry out gasket.
- Remove circlip.
Pa
ge 8 of 11 Tor
que tube, disassemblin
g, assemblin
g and overview
11/20/2002 htt
p://127.0.0.1:8080/audi/servlet/Dis
play?action=Goto&t
yp
e=re
pair&id=AUDI.B5.AT01.39.8
Page 9 of 11
39-110
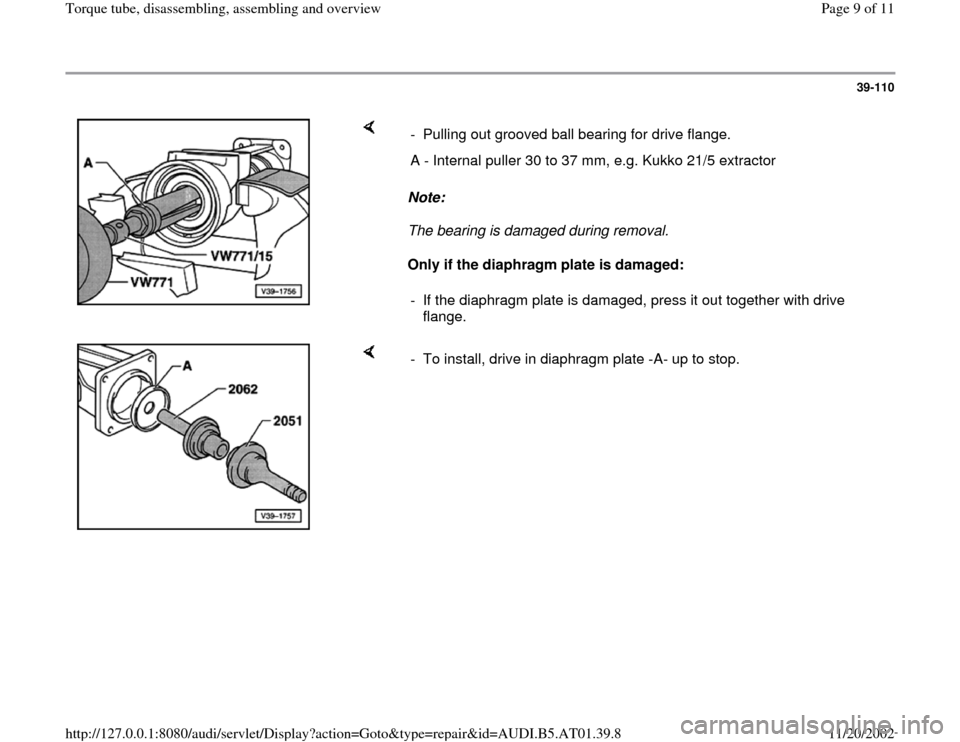
Note:
The bearing is damaged during removal.
Only if the diaphragm plate is damaged: - Pulling out grooved ball bearing for drive flange.
A - Internal puller 30 to 37 mm, e.g. Kukko 21/5 extractor
- If the diaphragm plate is damaged, press it out together with drive
flange.
- To install, drive in diaphragm plate -A- up to stop.
Pa
ge 9 of 11 Tor
que tube, disassemblin
g, assemblin
g and overview
11/20/2002 htt
p://127.0.0.1:8080/audi/servlet/Dis
play?action=Goto&t
yp
e=re
pair&id=AUDI.B5.AT01.39.8
Page 10 of 11
39-111
Assembly
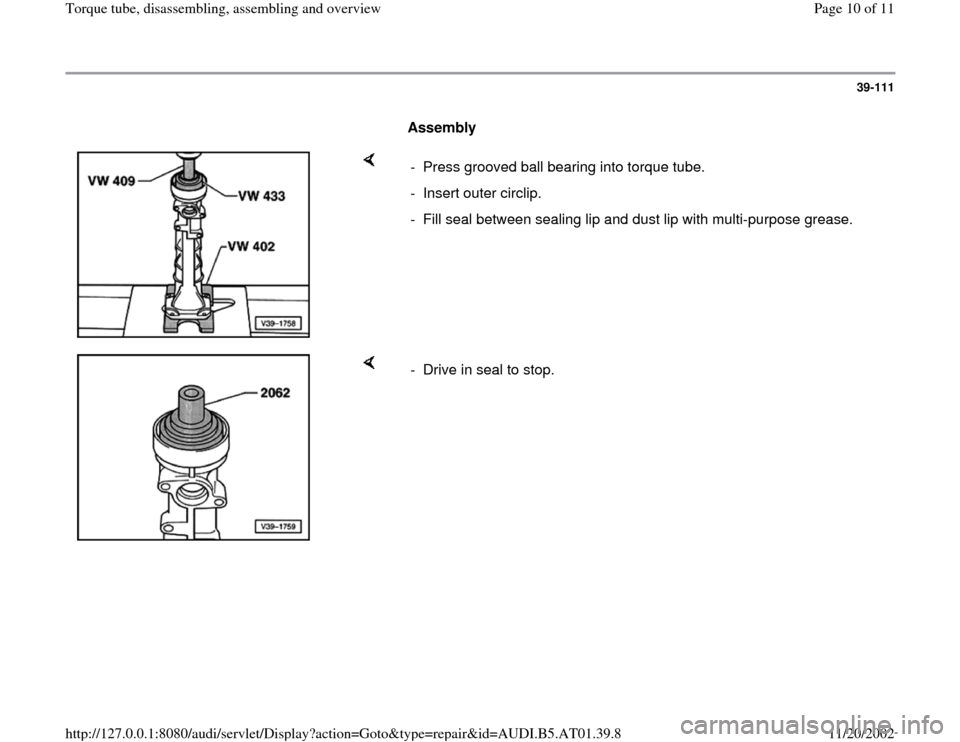
- Press grooved ball bearing into torque tube.
- Insert outer circlip.
- Fill seal between sealing lip and dust lip with multi-purpose grease.
- Drive in seal to stop.
Pa
ge 10 of 11 Tor
que tube, disassemblin
g, assemblin
g and overview
11/20/2002 htt
p://127.0.0.1:8080/audi/servlet/Dis
play?action=Goto&t
yp
e=re
pair&id=AUDI.B5.AT01.39.8
