air condition AUDI A4 1998 B5 / 1.G Climate Control Components In Passenger Compartment Workshop Manual
[x] Cancel search | Manufacturer: AUDI, Model Year: 1998, Model line: A4, Model: AUDI A4 1998 B5 / 1.GPages: 34, PDF Size: 0.61 MB
Page 13 of 34
87-129
Fresh air blower (V2), removing and
installing (1996)
Remove glovebox, glovebox mounting and
mounting for passenger airbag
Repair Manual, Body Interior, Repair Group
70
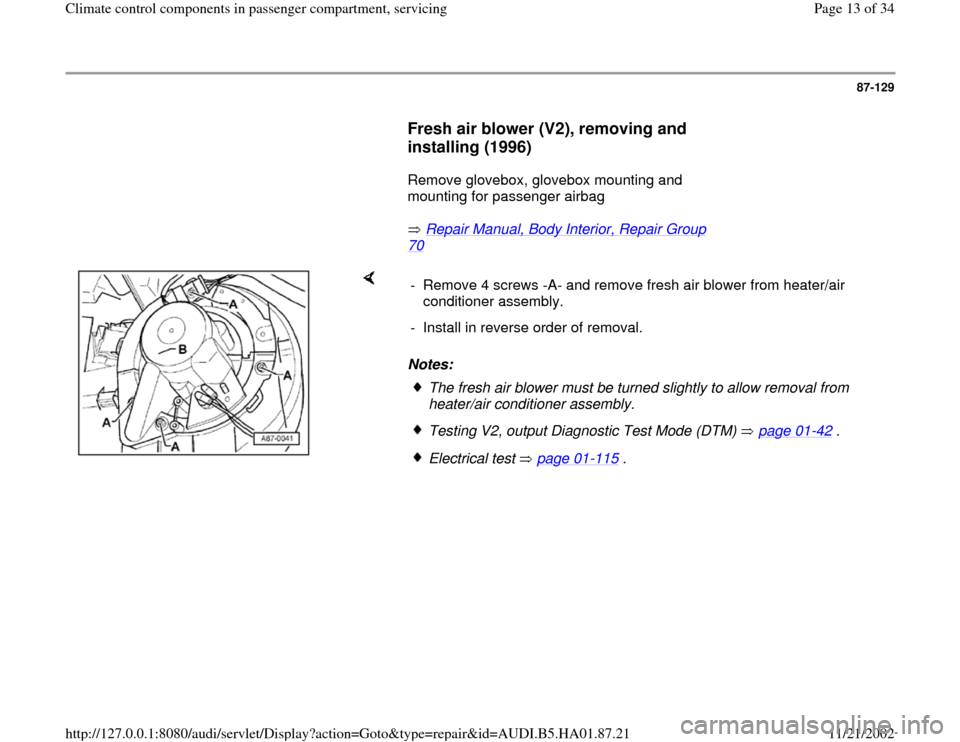
Notes: - Remove 4 screws -A- and remove fresh air blower from heater/air
conditioner assembly.
- Install in reverse order of removal.
The fresh air blower must be turned slightly to allow removal from
heater/air conditioner assembly. Testing V2, output Diagnostic Test Mode (DTM) page 01
-42
.
Electrical test page 01
-115
.
Pa
ge 13 of 34 Climate control com
ponents in
passen
ger com
partment, servicin
g
11/21/2002 htt
p://127.0.0.1:8080/audi/servlet/Dis
play?action=Goto&t
yp
e=re
pair&id=AUDI.B5.HA01.87.21
Page 14 of 34
87-130
Fresh air blower -V2-, removing and
installing (1997 )
Remove glovebox
Repair Manual, Body Interior, Repair Group
70
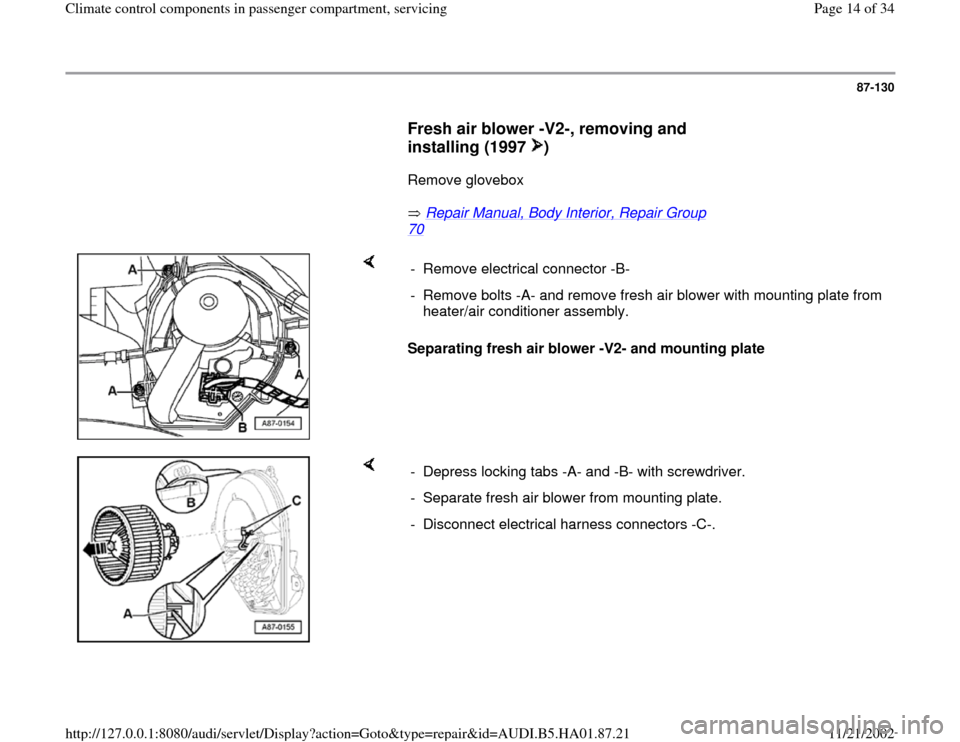
Separating fresh air blower -V2- and mounting plate - Remove electrical connector -B-
- Remove bolts -A- and remove fresh air blower with mounting plate from
heater/air conditioner assembly.
- Depress locking tabs -A- and -B- with screwdriver.
- Separate fresh air blower from mounting plate.
- Disconnect electrical harness connectors -C-.
Pa
ge 14 of 34 Climate control com
ponents in
passen
ger com
partment, servicin
g
11/21/2002 htt
p://127.0.0.1:8080/audi/servlet/Dis
play?action=Goto&t
yp
e=re
pair&id=AUDI.B5.HA01.87.21
Page 15 of 34
87-131
Notes:
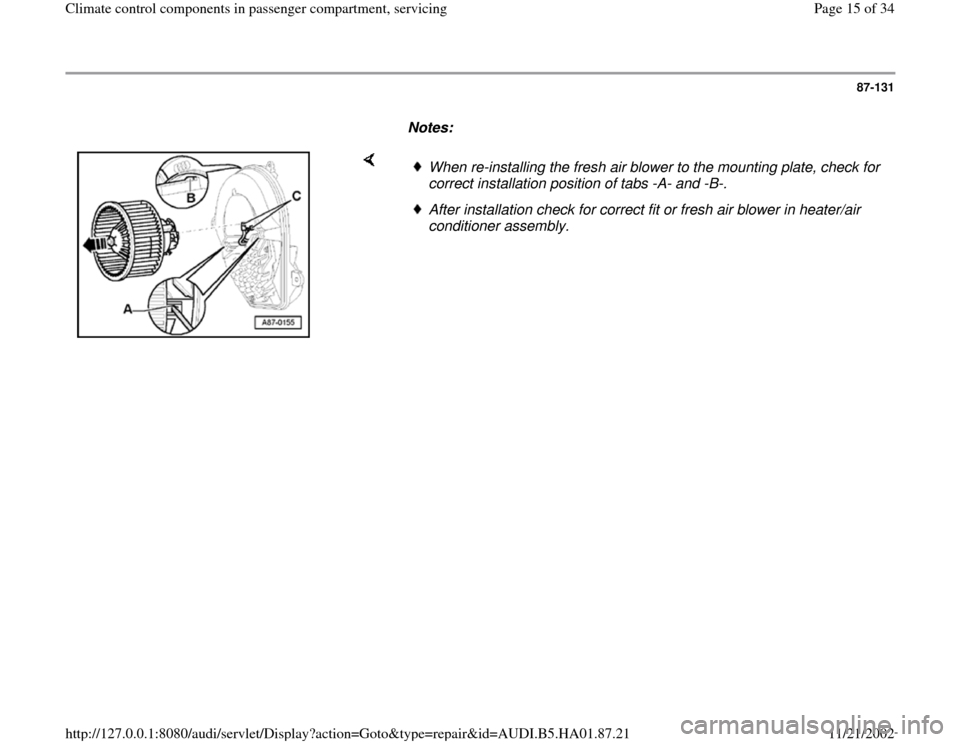
When re-installing the fresh air blower to the mounting plate, check for
correct installation position of tabs -A- and -B-. After installation check for correct fit or fresh air blower in heater/air
conditioner assembly.
Pa
ge 15 of 34 Climate control com
ponents in
passen
ger com
partment, servicin
g
11/21/2002 htt
p://127.0.0.1:8080/audi/servlet/Dis
play?action=Goto&t
yp
e=re
pair&id=AUDI.B5.HA01.87.21
Page 21 of 34
87-137
Notes for installing:
When installing flap motor, ensure that relay
lever -D- is correctly positioned ( illus. A87
-
0161 on page 87
-136
).
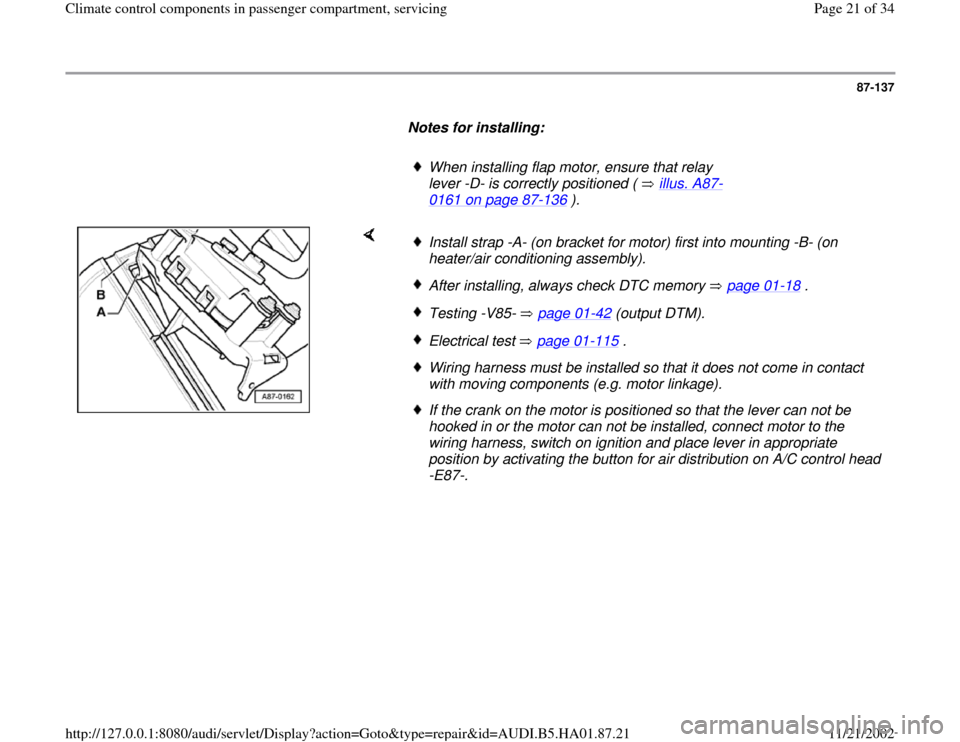
Install strap -A- (on bracket for motor) first into mounting -B- (on
heater/air conditioning assembly). After installing, always check DTC memory page 01
-18
.
Testing -V85- page 01
-42
(output DTM).
Electrical test page 01
-115
.
Wiring harness must be installed so that it does not come in contact
with moving components (e.g. motor linkage). If the crank on the motor is positioned so that the lever can not be
hooked in or the motor can not be installed, connect motor to the
wiring harness, switch on ignition and place lever in appropriate
position by activating the button for air distribution on A/C control head
-E87-.
Pa
ge 21 of 34 Climate control com
ponents in
passen
ger com
partment, servicin
g
11/21/2002 htt
p://127.0.0.1:8080/audi/servlet/Dis
play?action=Goto&t
yp
e=re
pair&id=AUDI.B5.HA01.87.21
Page 30 of 34
87-146
Air flow flap motor -V71-, removing and
installing (1996)
- Remove heater/air conditioner assembly
complete with instrument panel page 87
-159
.
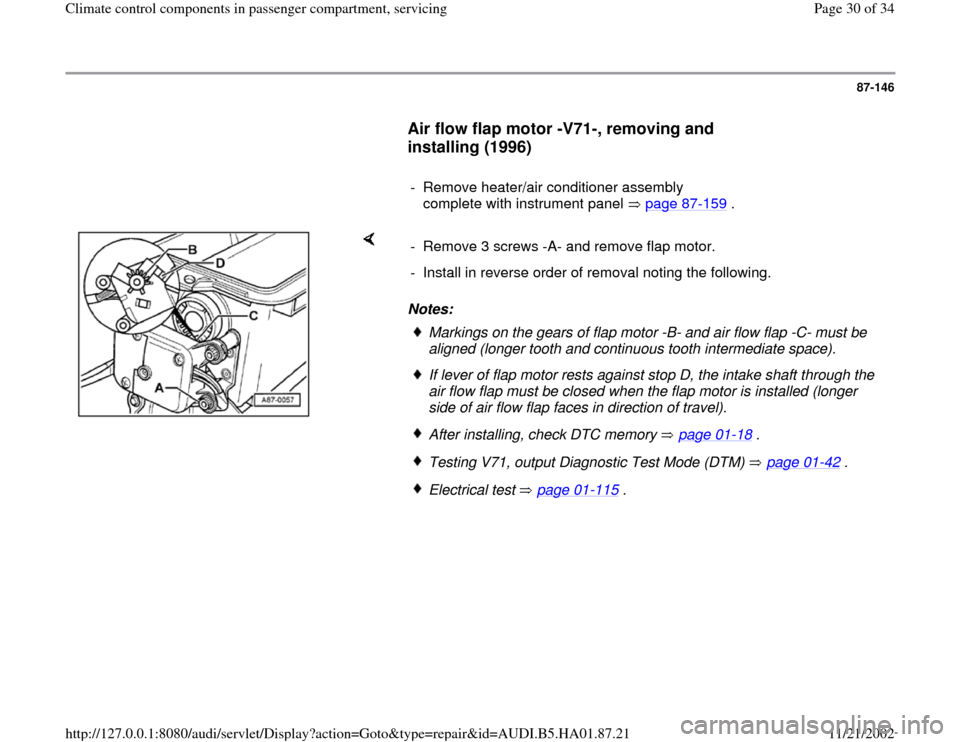
Notes: - Remove 3 screws -A- and remove flap motor.
- Install in reverse order of removal noting the following.
Markings on the gears of flap motor -B- and air flow flap -C- must be
aligned (longer tooth and continuous tooth intermediate space). If lever of flap motor rests against stop D, the intake shaft through the
air flow flap must be closed when the flap motor is installed (longer
side of air flow flap faces in direction of travel). After installing, check DTC memory page 01
-18
.
Testing V71, output Diagnostic Test Mode (DTM) page 01
-42
.
Electrical test page 01
-115
.
Pa
ge 30 of 34 Climate control com
ponents in
passen
ger com
partment, servicin
g
11/21/2002 htt
p://127.0.0.1:8080/audi/servlet/Dis
play?action=Goto&t
yp
e=re
pair&id=AUDI.B5.HA01.87.21
Page 31 of 34
87-147
Air flow flap motor -V71-, removing and
installing (1997 )
Note:
Motor is installed between heater/air conditioning
assembly and bulkhead and operates the air flow
flap and fresh air/recirculating air flap.
Remove glovebox
Repair Manual, Body Interior, Repair Group
70
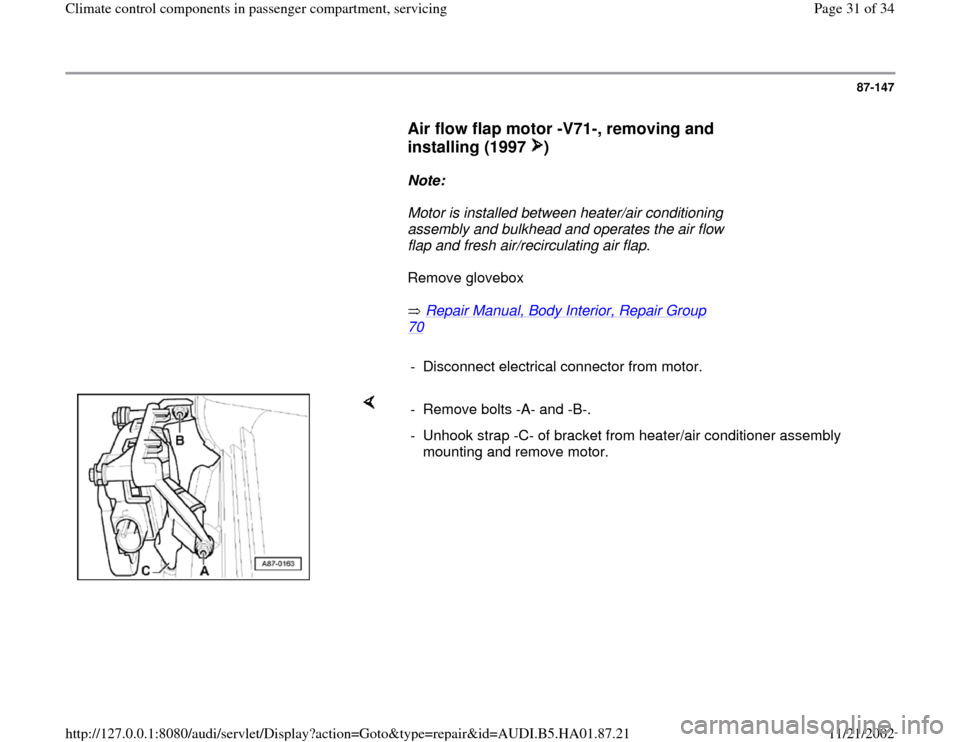
- Disconnect electrical connector from motor.
- Remove bolts -A- and -B-.
- Unhook strap -C- of bracket from heater/air conditioner assembly
mounting and remove motor.
Pa
ge 31 of 34 Climate control com
ponents in
passen
ger com
partment, servicin
g
11/21/2002 htt
p://127.0.0.1:8080/audi/servlet/Dis
play?action=Goto&t
yp
e=re
pair&id=AUDI.B5.HA01.87.21
Page 33 of 34
87-149
Fresh air intake duct temperature
sensor -G89-, removing and installing
(1996)
- Remove heater/air conditioner assembly
complete with instrument panel page 87
-159
.
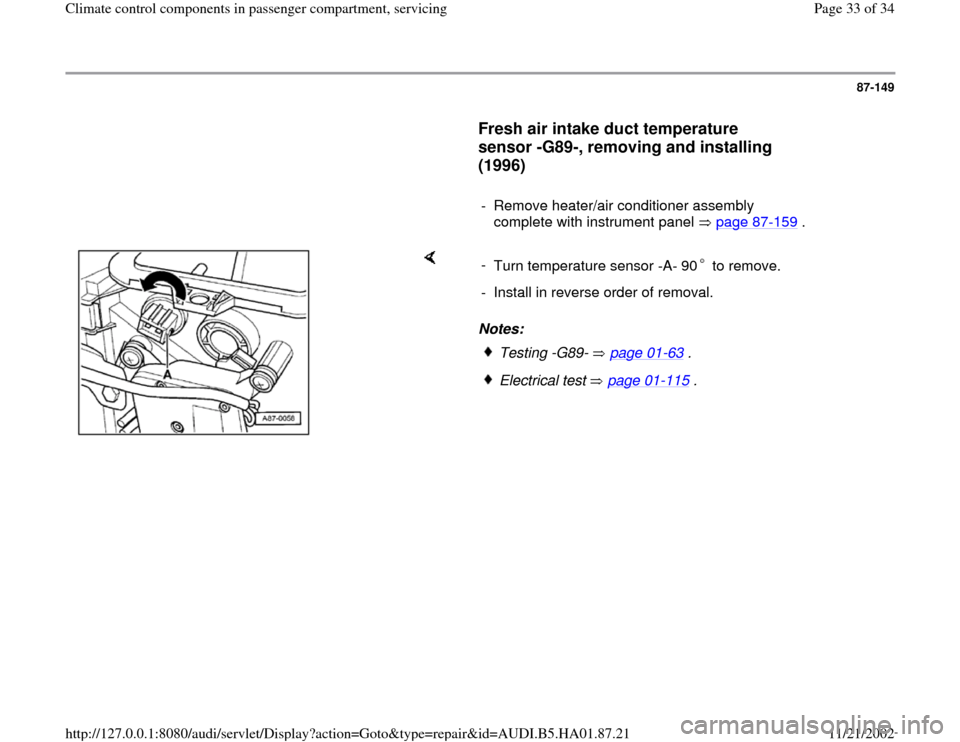
Notes: -
Turn temperature sensor -A- 90 to remove.- Install in reverse order of removal.
Testing -G89- page 01
-63
.
Electrical test page 01
-115
.
Pa
ge 33 of 34 Climate control com
ponents in
passen
ger com
partment, servicin
g
11/21/2002 htt
p://127.0.0.1:8080/audi/servlet/Dis
play?action=Goto&t
yp
e=re
pair&id=AUDI.B5.HA01.87.21
Page 34 of 34
87-150
Fresh air intake duct temperature
sensor -G89-, removing and installing
(1997 )
Remove glovebox
Repair Manual, Body Interior, Repair Group
70
Notes:
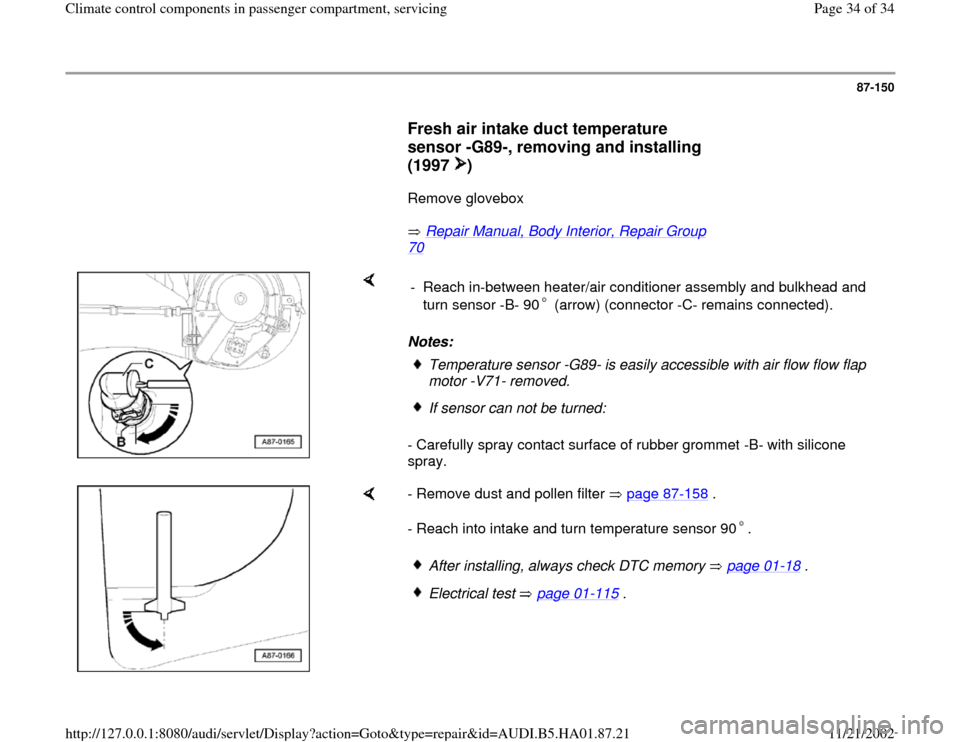
- Carefully spray contact surface of rubber grommet -B- with silicone
spray. - Reach in-between heater/air conditioner assembly and bulkhead and
turn sensor -B- 90 (arrow) (connector -C- remains connected).
Temperature sensor -G89- is easily accessible with air flow flow flap
motor -V71- removed. If sensor can not be turned:
- Remove dust and pollen filter page 87
-158
.
- Reach into intake and turn temperature sensor 90 .
After installing, always check DTC memory page 01
-18
.
Electrical test page 01
-115
.
Pa
ge 34 of 34 Climate control com
ponents in
passen
ger com
partment, servicin
g
11/21/2002 htt
p://127.0.0.1:8080/audi/servlet/Dis
play?action=Goto&t
yp
e=re
pair&id=AUDI.B5.HA01.87.21