light AUDI A4 1998 B5 / 1.G Engine Oil Level Checking Workshop Manual
[x] Cancel search | Manufacturer: AUDI, Model Year: 1998, Model line: A4, Model: AUDI A4 1998 B5 / 1.GPages: 111, PDF Size: 1.26 MB
Page 4 of 111
- Clean sealing surface on engine.
- Lightly oil rubber seal.
- Thread on new filter and tighten by hand.
Pa
ge 4 of 111 Descri
ption of wor
k
11/20/2002 htt
p://127.0.0.1:8080/audi/servlet/Dis
play?action=Goto&t
yp
e=re
pair&id=AUDI.B5.ME01.01.6
Page 10 of 111
16
Delivery inspection:
At delivery inspection coolant level must be at
max. mark on expansion tank (engine cold).
Inspection service:
Coolant level between min. and max. markings.
With engine cold, coolant level must be between
min. and max. markings of reservoir; with engine
warm, level may be slightly above max. marking.
If coolant level is too low but antifreeze protection
is adequate, add required amount of mixture.
If coolant level is too low but antifreeze protection
adequate, add missing quantity according to
following mixing ratios:
Antifreeze
protection down to Coolant
additive Water
-25 C (-13 F)
approx. 40 % approx. 60
%
-35 C (-31 F) approx. 50 % approx. 50
%
-40 C (-40 F) approx. 50 % approx. 50
%
Pa
ge 10 of 111 Descri
ption of wor
k
11/20/2002 htt
p://127.0.0.1:8080/audi/servlet/Dis
play?action=Goto&t
yp
e=re
pair&id=AUDI.B5.ME01.01.6
Page 14 of 111
20
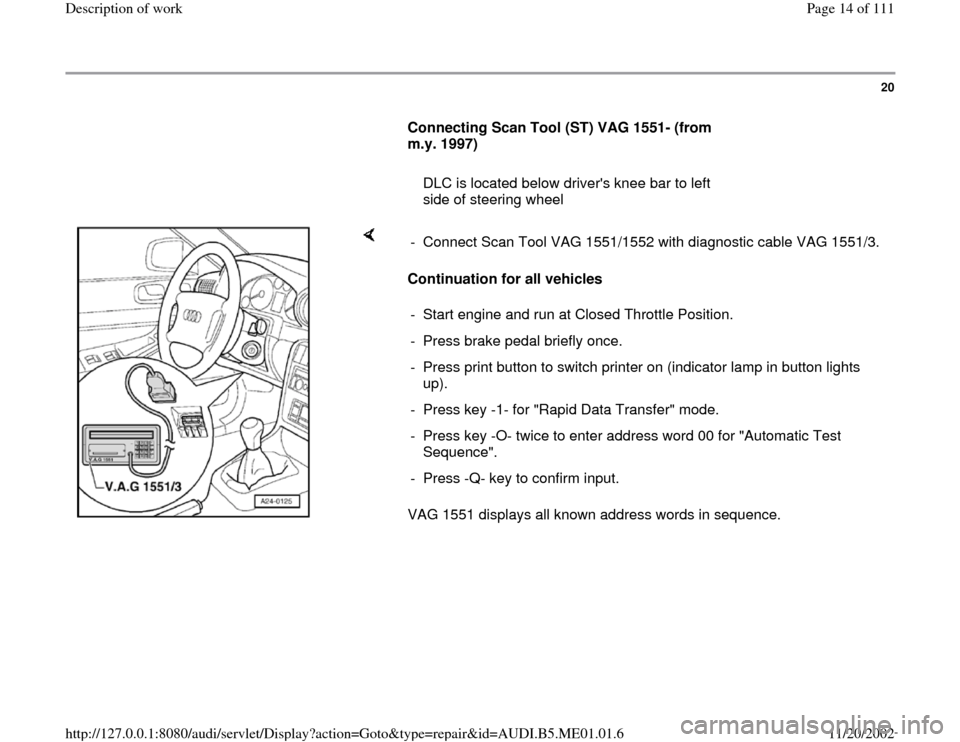
Connecting Scan Tool (ST) VAG 1551- (from
m.y. 1997)
DLC is located below driver's knee bar to left
side of steering wheel
Continuation for all vehicles
VAG 1551 displays all known address words in sequence. - Connect Scan Tool VAG 1551/1552 with diagnostic cable VAG 1551/3.
- Start engine and run at Closed Throttle Position.
- Press brake pedal briefly once.
- Press print button to switch printer on (indicator lamp in button lights
up).
- Press key -1- for "Rapid Data Transfer" mode.
- Press key -O- twice to enter address word 00 for "Automatic Test
Sequence".
- Press -Q- key to confirm input.
Pa
ge 14 of 111 Descri
ption of wor
k
11/20/2002 htt
p://127.0.0.1:8080/audi/servlet/Dis
play?action=Goto&t
yp
e=re
pair&id=AUDI.B5.ME01.01.6
Page 37 of 111
40
CAUTION!
Too much or too liffle ATF will affect the
operation of the transmission. The ATF level
must be checked at regular intervals.
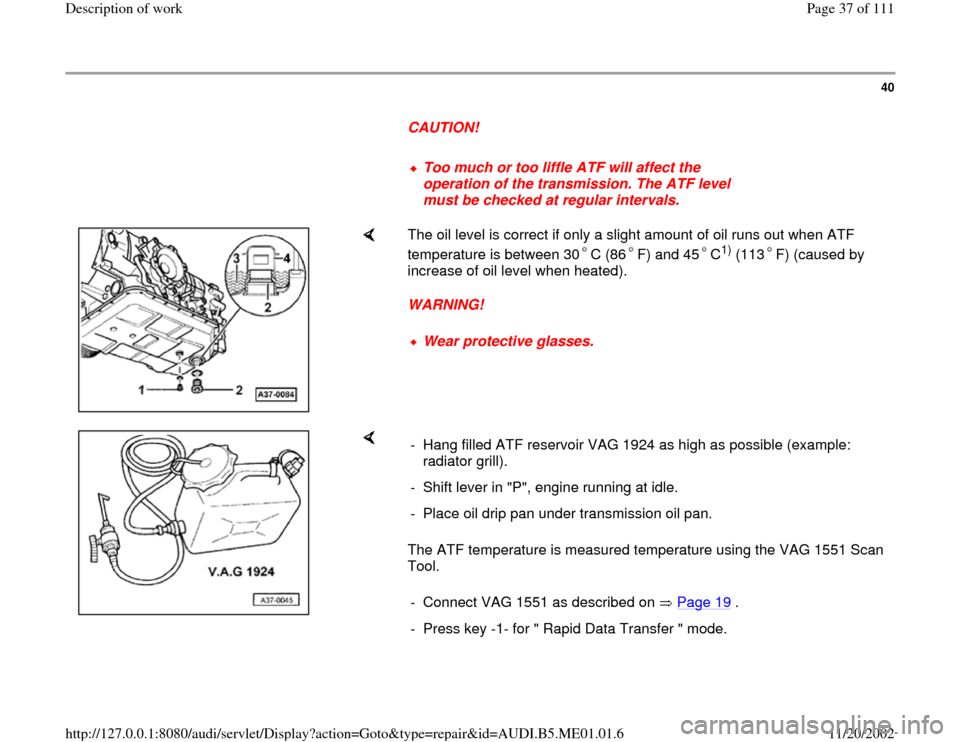
The oil level is correct if only a slight amount of oil runs out when ATF
temperature is between 30 C (86 F) and 45 C
1) (113 F) (caused by
increase of oil level when heated).
WARNING!
Wear protective glasses.
The ATF temperature is measured temperature using the VAG 1551 Scan
Tool. - Hang filled ATF reservoir VAG 1924 as high as possible (example:
radiator grill).
- Shift lever in "P", engine running at idle.
- Place oil drip pan under transmission oil pan.
- Connect VAG 1551 as described on Page 19
.
- Press key -1- for " Rapid Data Transfer " mode.
Pa
ge 37 of 111 Descri
ption of wor
k
11/20/2002 htt
p://127.0.0.1:8080/audi/servlet/Dis
play?action=Goto&t
yp
e=re
pair&id=AUDI.B5.ME01.01.6
Page 39 of 111
41
- Press keys -0- and -2- to select address code -
02- "Transmission Electronics", and confirm with
key -Q-.
-
Press key to advance program.
- Press keys -0- and -8- to select address code -
08- "Read Measuring Value Block' and confirm
with key -Q-.
- Press keys -0- and -4- to select address code -
04- "Display Group Number", and confirm with
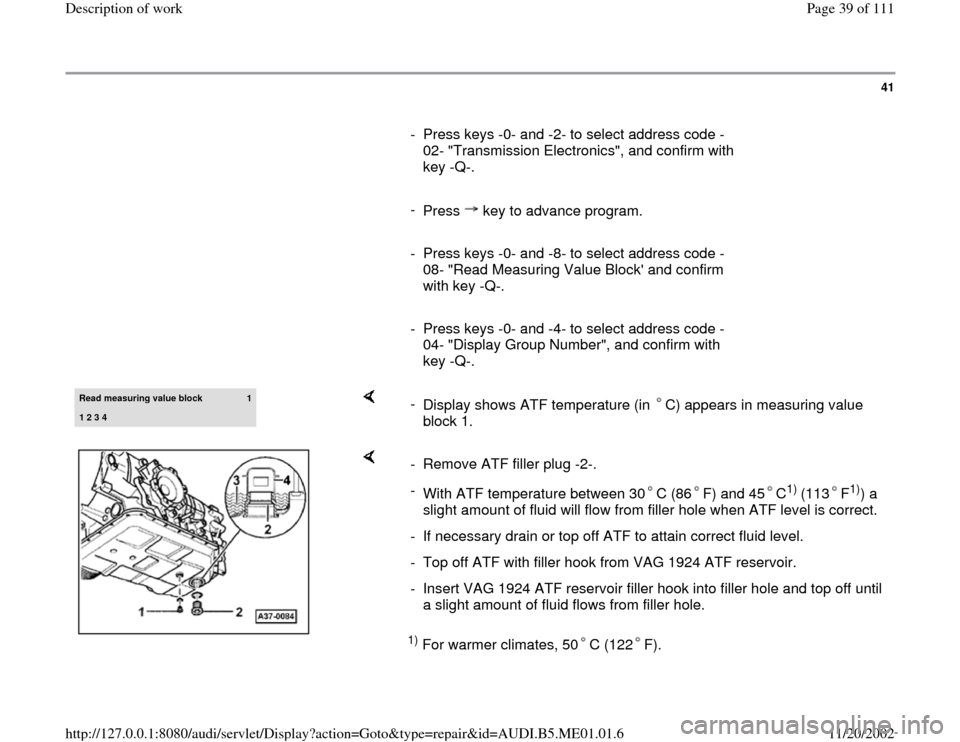
key -Q-. Read measurin
g value block
1
1 2 3 4
-
Display shows ATF temperature (in C) appears in measuring value
block 1.
1) For warmer climates, 50 C (122 F). - Remove ATF filler plug -2-.
-
With ATF temperature between 30 C (86 F) and 45 C
1)
(113 F
1)) a
slight amount of fluid will flow from filler hole when ATF level is correct.
- If necessary drain or top off ATF to attain correct fluid level.
- Top off ATF with filler hook from VAG 1924 ATF reservoir.
- Insert VAG 1924 ATF reservoir filler hook into filler hole and top off until
a slight amount of fluid flows from filler hole.
Pa
ge 39 of 111 Descri
ption of wor
k
11/20/2002 htt
p://127.0.0.1:8080/audi/servlet/Dis
play?action=Goto&t
yp
e=re
pair&id=AUDI.B5.ME01.01.6
Page 50 of 111
50
When installing a wheel, do not torque down
the first wheel bolt immediately (for instance,
with an impact wrench). This would prevent the
other bolts from centering the wheel properly
when they are threaded in; the rim could then
come loose, even though the bolts have been
tightened to the specified torque.
Before installing the wheels, examine the seats
of the wheel bolts and the contact surfaces
between the rims and the hubs for rust and
corrosion. Clean off these parts if necesary,
otherwise this can affect the clamping force of
the bolts after installation, and the rims can
come loose.
WARNING!
If the points listed above are not observed,
the wheel mountings can come loose and the
wheel bolt seats can become distorted.
This distortion may be very slight and not
visible to the naked eye.
Even this slight distortion of the wheel bolt
seats can prevent the rims from being held
firmly and the wheels will come loose
repeatedly.
Pa
ge 50 of 111 Descri
ption of wor
k
11/20/2002 htt
p://127.0.0.1:8080/audi/servlet/Dis
play?action=Goto&t
yp
e=re
pair&id=AUDI.B5.ME01.01.6
Page 51 of 111
51
Brake pad thickness, checking
Inspection service:
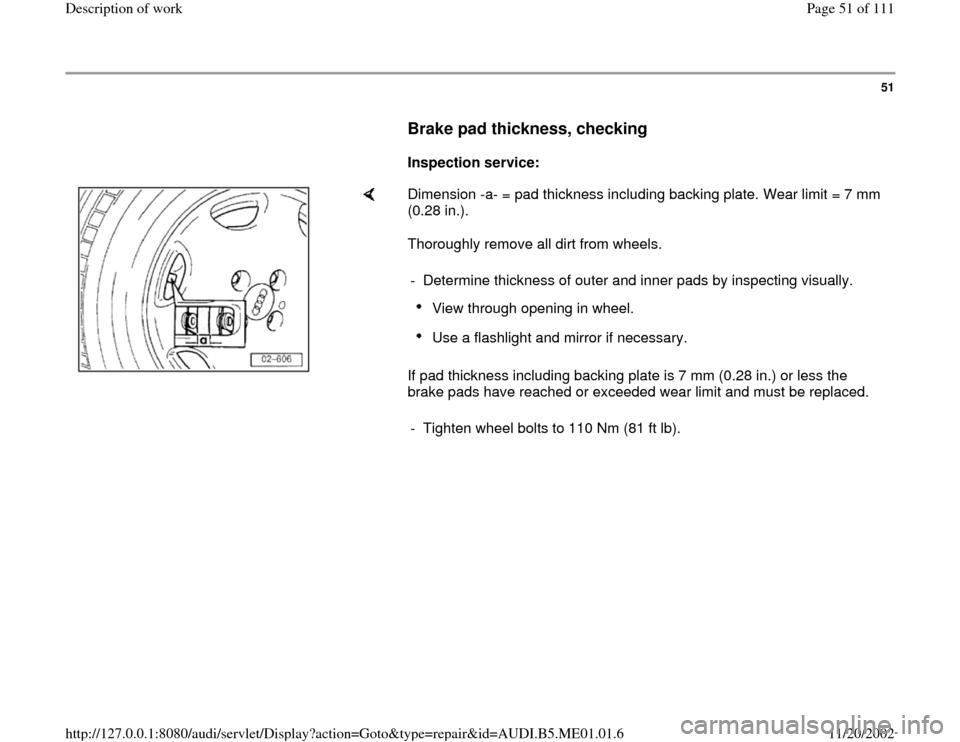
Dimension -a- = pad thickness including backing plate. Wear limit = 7 mm
(0.28 in.).
Thoroughly remove all dirt from wheels.
If pad thickness including backing plate is 7 mm (0.28 in.) or less the
brake pads have reached or exceeded wear limit and must be replaced. - Determine thickness of outer and inner pads by inspecting visually.
View through opening in wheel. Use a flashlight and mirror if necessary.
- Tighten wheel bolts to 110 Nm (81 ft lb).
Pa
ge 51 of 111 Descri
ption of wor
k
11/20/2002 htt
p://127.0.0.1:8080/audi/servlet/Dis
play?action=Goto&t
yp
e=re
pair&id=AUDI.B5.ME01.01.6
Page 54 of 111
54
Inspection service:
- Always consider brake pad wear when checking
brake fluid level. When driving, a slight drop in
brake fluid level results from normal wear and
automatic adjustment of brake pads.
- If brake fluid level is at minimum marking or
slightly above, brake pads are close to wear
limit, it is not necessary to add fluid.
- If brake pads are new or well away from wear
limit, brake fluid level must be between min. and
max. markings.
- If brake fluid level has dropped below min.
marking, check brake system before adding
brake fluid.
Pa
ge 54 of 111 Descri
ption of wor
k
11/20/2002 htt
p://127.0.0.1:8080/audi/servlet/Dis
play?action=Goto&t
yp
e=re
pair&id=AUDI.B5.ME01.01.6
Page 67 of 111
67
Headlights, adjusting
Requirements
Tires inflated to correct pressure.
Lenses clean and in proper condition.
Reflectors in proper condition.
Springs settled (load vehicle with approx. 75
kg (165 Ibs) on driver's seat and roll several
meters (yards).
Vehicle standing on level ground.
Adjust headlight housing from top with
screwdriver or allen wrench.
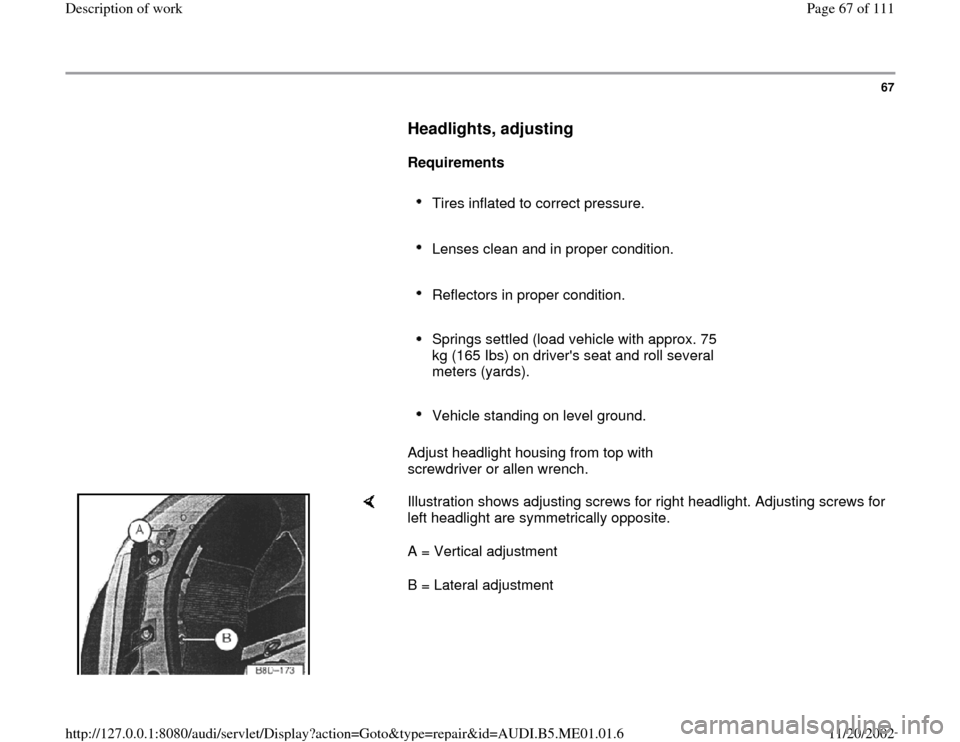
Illustration shows adjusting screws for right headlight. Adjusting screws for
left headlight are symmetrically opposite.
A = Vertical adjustment
B = Lateral adjustment
Pa
ge 67 of 111 Descri
ption of wor
k
11/20/2002 htt
p://127.0.0.1:8080/audi/servlet/Dis
play?action=Goto&t
yp
e=re
pair&id=AUDI.B5.ME01.01.6
Page 68 of 111
68
Headlights, aiming using Hella Universal
Beamsetter IV
Service
Align vehicle headlamps using the VAS 5107
(Hella Universal Beamsetter IV) and the following
procedure:
Additional instructions and diagrams
Instruction Manual for the Hella Beamsetter
Series IV
Have a second technician sit in the driver's seat while aligning the
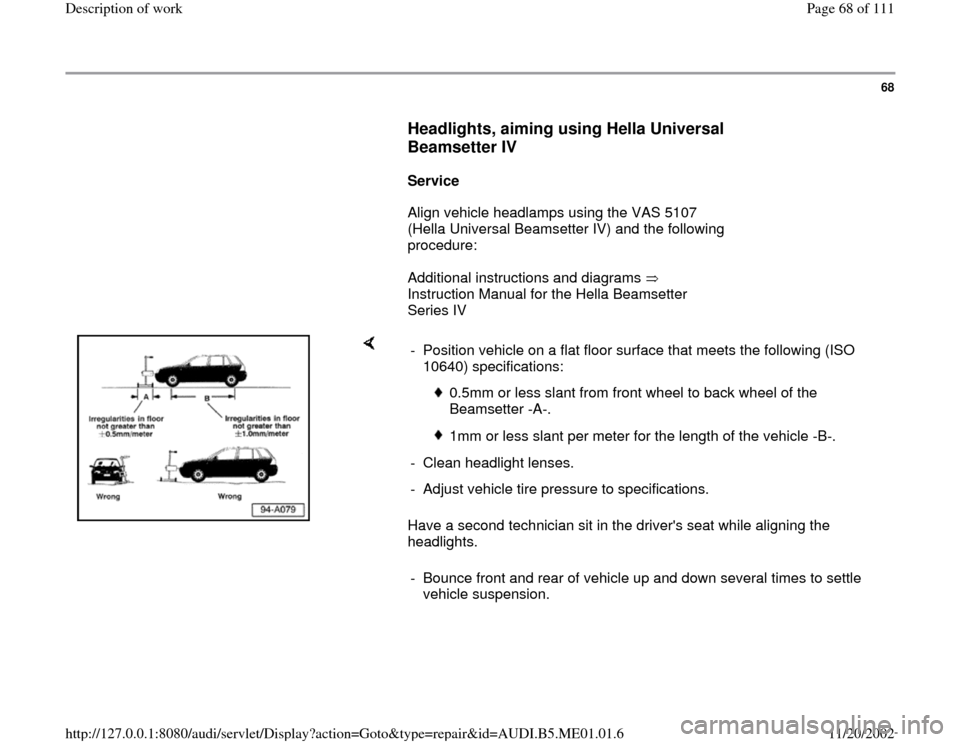
headlights. - Position vehicle on a flat floor surface that meets the following (ISO
10640) specifications:
0.5mm or less slant from front wheel to back wheel of the
Beamsetter -A-.
1mm or less slant per meter for the length of the vehicle -B-.
- Clean headlight lenses.
- Adjust vehicle tire pressure to specifications.
- Bounce front and rear of vehicle up and down several times to settle
vehicle suspension.
Pa
ge 68 of 111 Descri
ption of wor
k
11/20/2002 htt
p://127.0.0.1:8080/audi/servlet/Dis
play?action=Goto&t
yp
e=re
pair&id=AUDI.B5.ME01.01.6