battery AUDI A4 1999 B5 / 1.G Airbag Service User Guide
[x] Cancel search | Manufacturer: AUDI, Model Year: 1999, Model line: A4, Model: AUDI A4 1999 B5 / 1.GPages: 75, PDF Size: 0.91 MB
Page 44 of 75
69-75
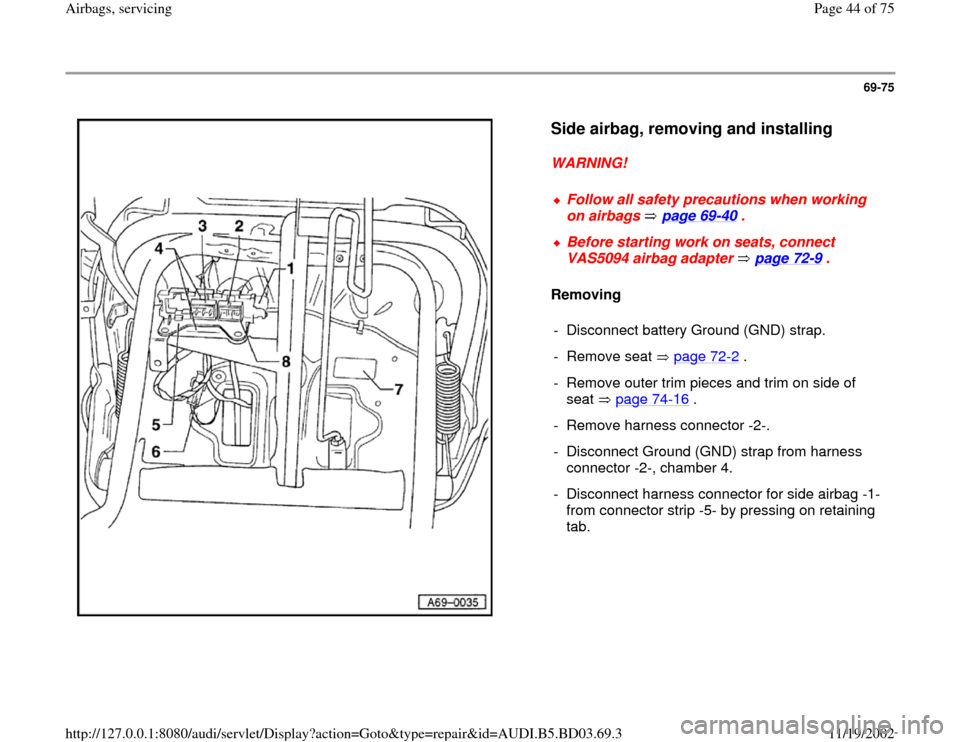
Side airbag, removing and installing
WARNING!
Removing
Follow all safety precautions when working
on airbags page 69
-40
.
Before starting work on seats, connect
VAS5094 airbag adapter page 72
-9 .
- Disconnect battery Ground (GND) strap.
- Remove seat page 72
-2 .
- Remove outer trim pieces and trim on side of
seat page 74
-16
.
- Remove harness connector -2-.
- Disconnect Ground (GND) strap from harness
connector -2-, chamber 4.
- Disconnect harness connector for side airbag -1-
from connector strip -5- by pressing on retaining
tab.
Pa
ge 44 of 75 Airba
gs, servicin
g
11/19/2002 htt
p://127.0.0.1:8080/audi/servlet/Dis
play?action=Goto&t
yp
e=re
pair&id=AUDI.B5.BD03.69.3
Page 46 of 75
69-77
WARNING!
WARNING!
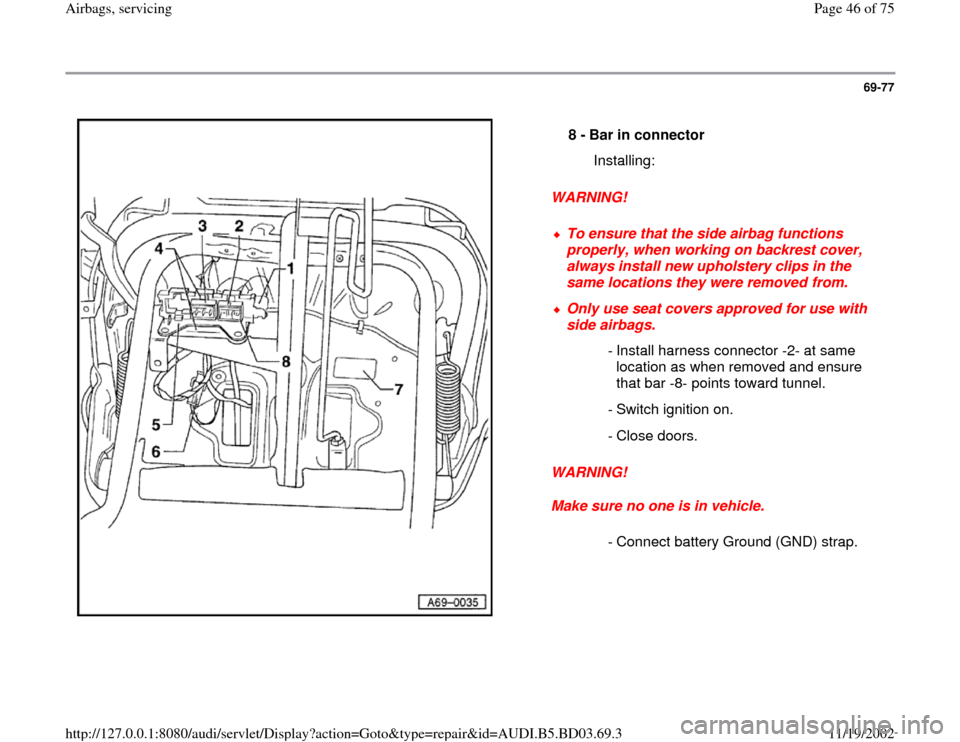
Make sure no one is in vehicle. 8 -
Bar in connector
Installing:
To ensure that the side airbag functions
properly, when working on backrest cover,
always install new upholstery clips in the
same locations they were removed from.
Only use seat covers approved for use with
side airbags.
- Install harness connector -2- at same
location as when removed and ensure
that bar -8- points toward tunnel.
- Switch ignition on.
- Close doors.
- Connect battery Ground (GND) strap.
Pa
ge 46 of 75 Airba
gs, servicin
g
11/19/2002 htt
p://127.0.0.1:8080/audi/servlet/Dis
play?action=Goto&t
yp
e=re
pair&id=AUDI.B5.BD03.69.3
Page 57 of 75
69-86
Removing
- Disconnect battery Ground (GND) strap.
- Remove front seat page 72
-2 .
- Remove lower A-pillar trim page 70
-72
.
- Unclip sill molding and fold upward.
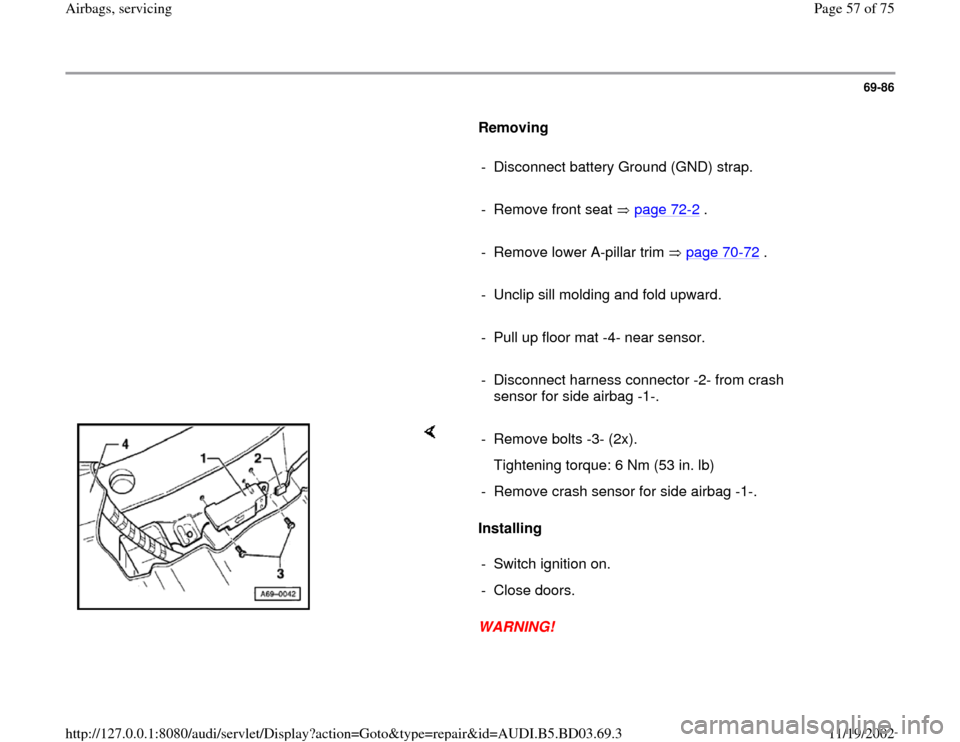
- Pull up floor mat -4- near sensor.
- Disconnect harness connector -2- from crash
sensor for side airbag -1-.
Installing
WARNING! - Remove bolts -3- (2x).
Tightening torque: 6 Nm (53 in. lb)
- Remove crash sensor for side airbag -1-.
- Switch ignition on.
- Close doors.
Pa
ge 57 of 75 Airba
gs, servicin
g
11/19/2002 htt
p://127.0.0.1:8080/audi/servlet/Dis
play?action=Goto&t
yp
e=re
pair&id=AUDI.B5.BD03.69.3
Page 58 of 75
Make sure no one is in vehicle.
- Connect battery Ground (GND) strap.
Pa
ge 58 of 75 Airba
gs, servicin
g
11/19/2002 htt
p://127.0.0.1:8080/audi/servlet/Dis
play?action=Goto&t
yp
e=re
pair&id=AUDI.B5.BD03.69.3
Page 62 of 75
occupied before connecting the battery Ground
(GND) strap.
- Connect battery.
Pa
ge 62 of 75 Airba
gs, servicin
g
11/19/2002 htt
p://127.0.0.1:8080/audi/servlet/Dis
play?action=Goto&t
yp
e=re
pair&id=AUDI.B5.BD03.69.3
Page 66 of 75
69-93
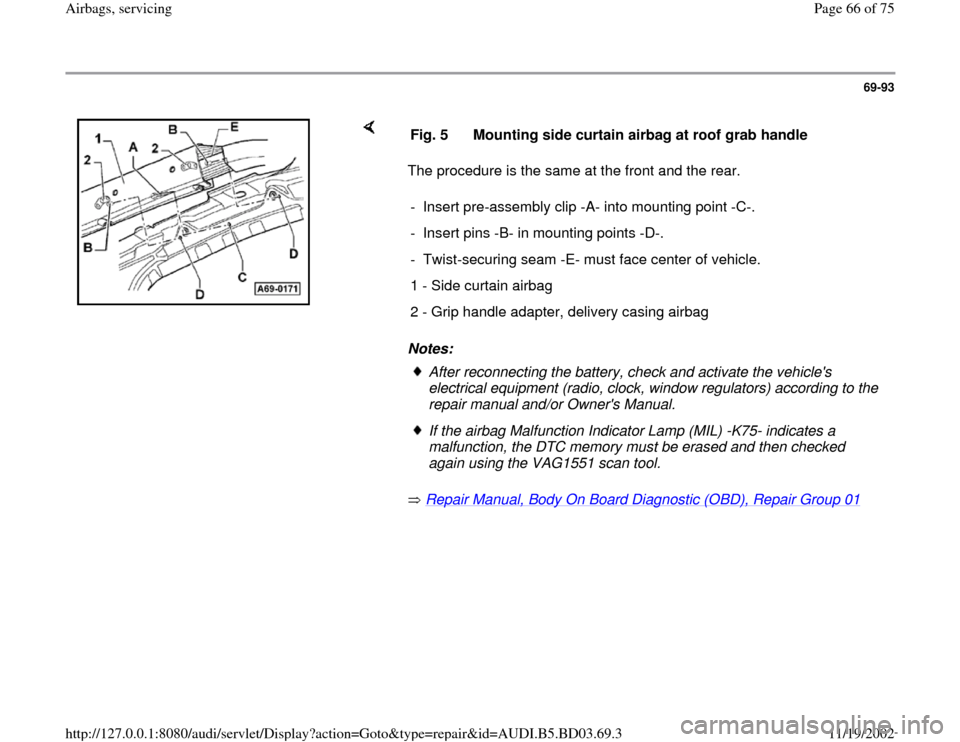
The procedure is the same at the front and the rear.
Notes:
Repair Manual, Body On Board Diagnostic (OBD), Repair Group 01
Fig. 5 Mounting side curtain airbag at roof grab handle
- Insert pre-assembly clip -A- into mounting point -C-.
- Insert pins -B- in mounting points -D-.
- Twist-securing seam -E- must face center of vehicle.
1 - Side curtain airbag
2 - Grip handle adapter, delivery casing airbag
After reconnecting the battery, check and activate the vehicle's
electrical equipment (radio, clock, window regulators) according to the
repair manual and/or Owner's Manual. If the airbag Malfunction Indicator Lamp (MIL) -K75- indicates a
malfunction, the DTC memory must be erased and then checked
again using the VAG1551 scan tool.
Pa
ge 66 of 75 Airba
gs, servicin
g
11/19/2002 htt
p://127.0.0.1:8080/audi/servlet/Dis
play?action=Goto&t
yp
e=re
pair&id=AUDI.B5.BD03.69.3
Page 70 of 75
69-96
WARNING!
Make sure the passenger compartment is not
occupied before connecting the battery Ground
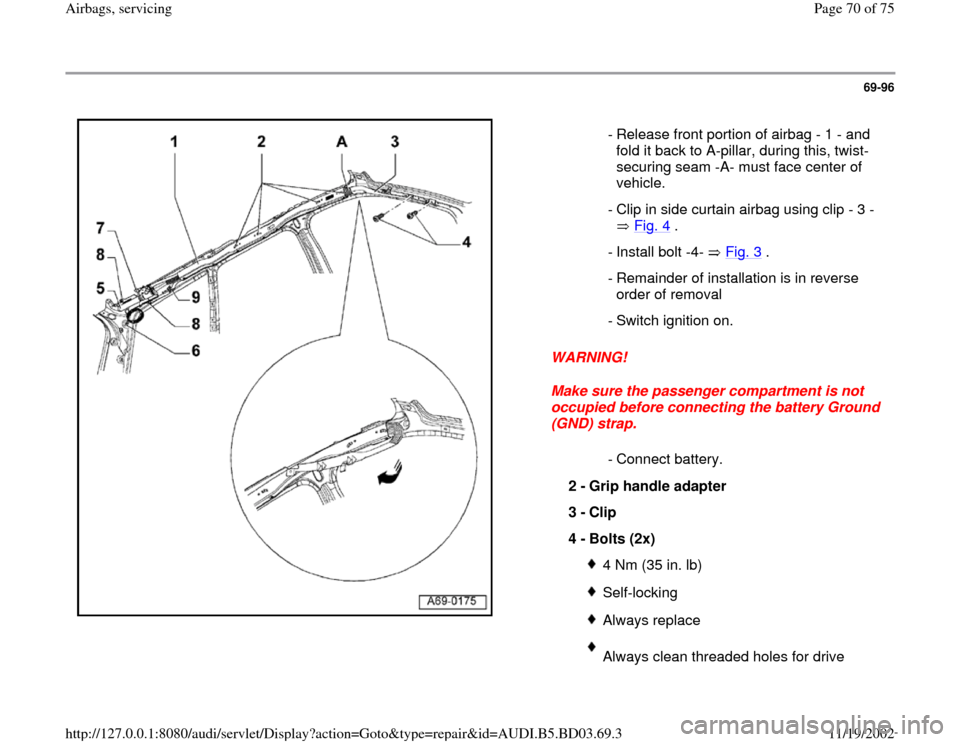
(GND) strap. - Release front portion of airbag - 1 - and
fold it back to A-pillar, during this, twist-
securing seam -A- must face center of
vehicle.
- Clip in side curtain airbag using clip - 3 -
Fig. 4
.
- Install bolt -4- Fig. 3
.
- Remainder of installation is in reverse
order of removal
- Switch ignition on.
- Connect battery.
2 -
Grip handle adapter
3 -
Clip
4 -
Bolts (2x)
4 Nm (35 in. lb)Self-lockingAlways replaceAlways clean threaded holes for drive
Pa
ge 70 of 75 Airba
gs, servicin
g
11/19/2002 htt
p://127.0.0.1:8080/audi/servlet/Dis
play?action=Goto&t
yp
e=re
pair&id=AUDI.B5.BD03.69.3
Page 75 of 75
69-100
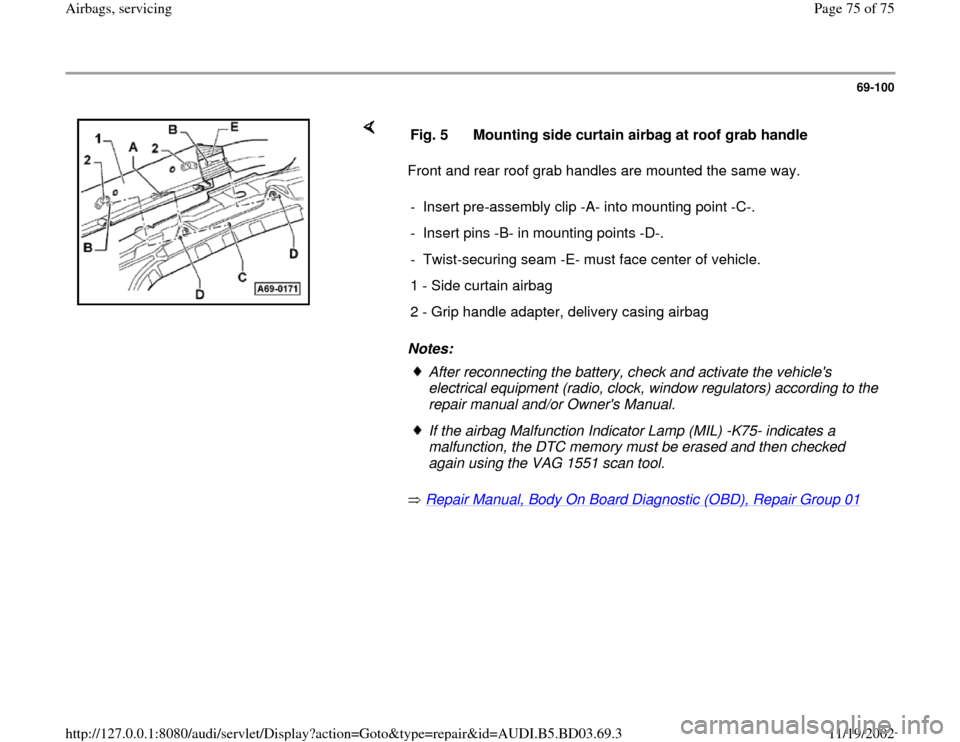
Front and rear roof grab handles are mounted the same way.
Notes:
Repair Manual, Body On Board Diagnostic (OBD), Repair Group 01
Fig. 5 Mounting side curtain airbag at roof grab handle
- Insert pre-assembly clip -A- into mounting point -C-.
- Insert pins -B- in mounting points -D-.
- Twist-securing seam -E- must face center of vehicle.
1 - Side curtain airbag
2 - Grip handle adapter, delivery casing airbag
After reconnecting the battery, check and activate the vehicle's
electrical equipment (radio, clock, window regulators) according to the
repair manual and/or Owner's Manual. If the airbag Malfunction Indicator Lamp (MIL) -K75- indicates a
malfunction, the DTC memory must be erased and then checked
again using the VAG 1551 scan tool.
Pa
ge 75 of 75 Airba
gs, servicin
g
11/19/2002 htt
p://127.0.0.1:8080/audi/servlet/Dis
play?action=Goto&t
yp
e=re
pair&id=AUDI.B5.BD03.69.3