manual transmission AUDI A4 2000 B5 / 1.G 01A Transmission Remove And Install Workshop Manual
[x] Cancel search | Manufacturer: AUDI, Model Year: 2000, Model line: A4, Model: AUDI A4 2000 B5 / 1.GPages: 21, PDF Size: 0.65 MB
Page 3 of 21
34-19
4-cylinder engine
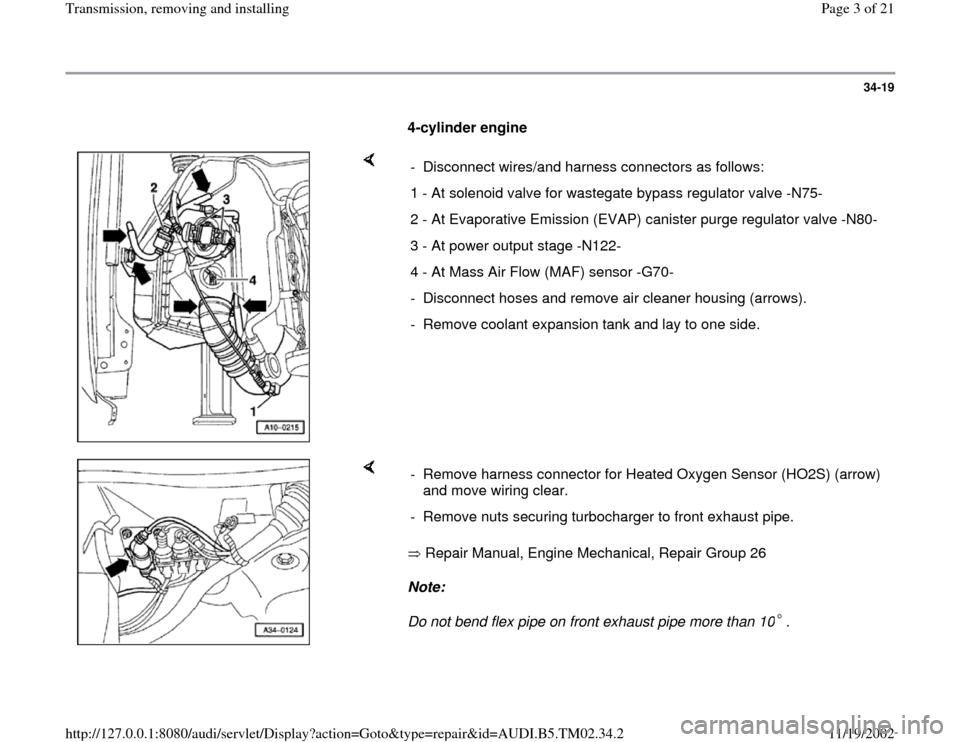
- Disconnect wires/and harness connectors as follows:
1 - At solenoid valve for wastegate bypass regulator valve -N75-
2 - At Evaporative Emission (EVAP) canister purge regulator valve -N80-
3 - At power output stage -N122-
4 - At Mass Air Flow (MAF) sensor -G70-
- Disconnect hoses and remove air cleaner housing (arrows).
- Remove coolant expansion tank and lay to one side.
Repair Manual, Engine Mechanical, Repair Group 26
Note:
Do not bend flex pipe on front exhaust pipe more than 10 . - Remove harness connector for Heated Oxygen Sensor (HO2S) (arrow)
and move wiring clear.
- Remove nuts securing turbocharger to front exhaust pipe.
Pa
ge 3 of 21 Transmission, removin
g and installin
g
11/19/2002 htt
p://127.0.0.1:8080/audi/servlet/Dis
play?action=Goto&t
yp
e=re
pair&id=AUDI.B5.TM02.34.2
Page 6 of 21
34-22
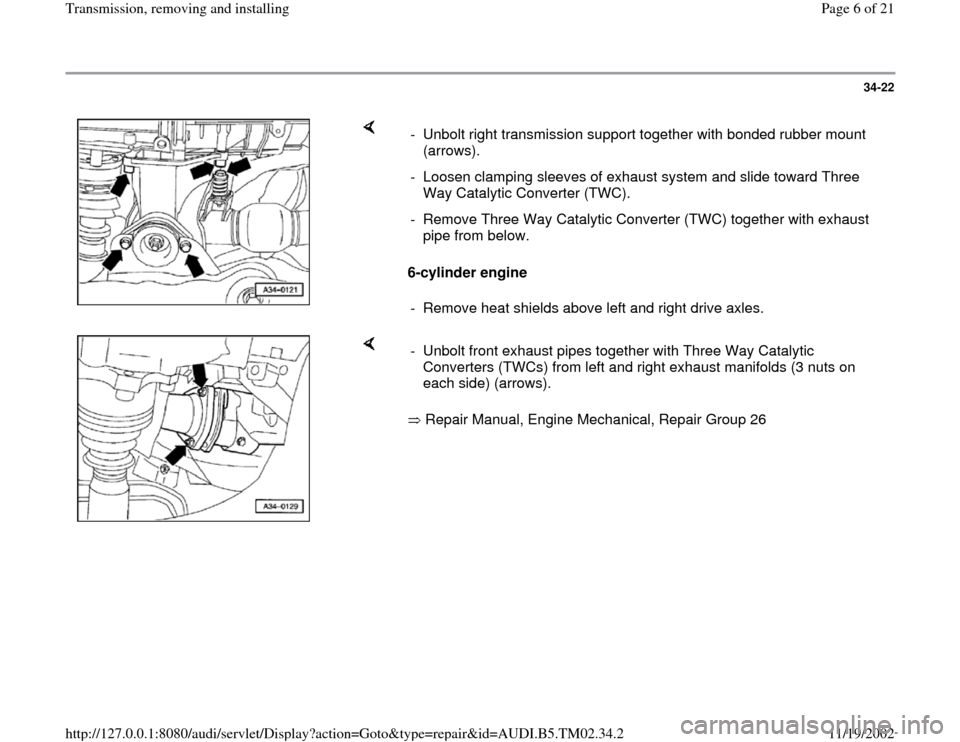
6-cylinder engine - Unbolt right transmission support together with bonded rubber mount
(arrows).
- Loosen clamping sleeves of exhaust system and slide toward Three
Way Catalytic Converter (TWC).
- Remove Three Way Catalytic Converter (TWC) together with exhaust
pipe from below.
- Remove heat shields above left and right drive axles.
Repair Manual, Engine Mechanical, Repair Group 26 - Unbolt front exhaust pipes together with Three Way Catalytic
Converters (TWCs) from left and right exhaust manifolds (3 nuts on
each side) (arrows).
Pa
ge 6 of 21 Transmission, removin
g and installin
g
11/19/2002 htt
p://127.0.0.1:8080/audi/servlet/Dis
play?action=Goto&t
yp
e=re
pair&id=AUDI.B5.TM02.34.2
Page 8 of 21
34-24
Notes:
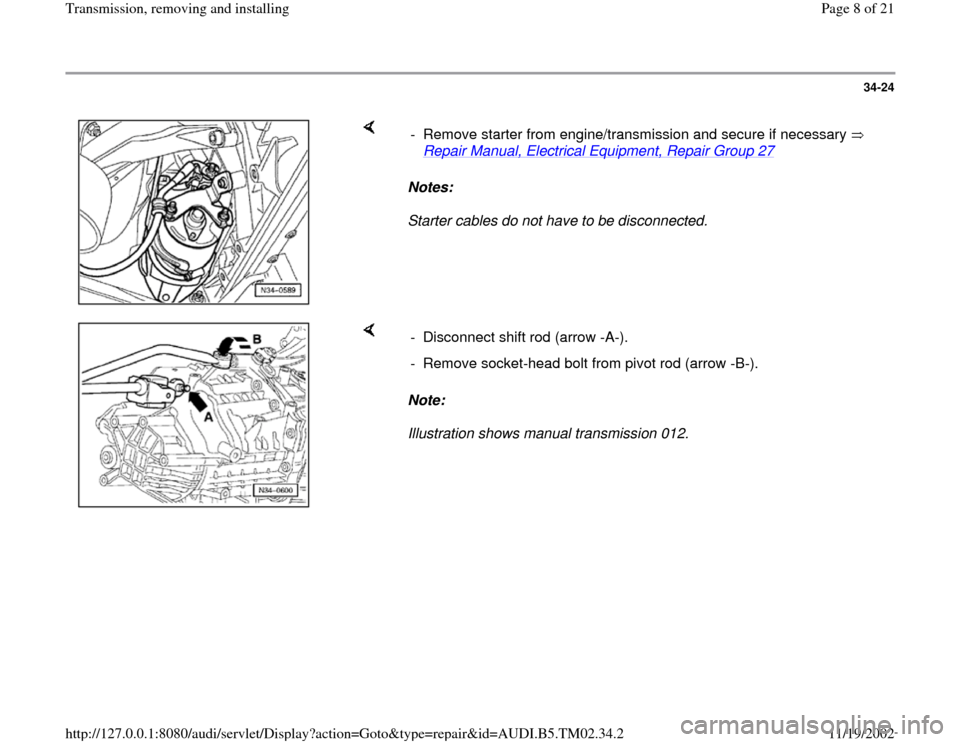
Starter cables do not have to be disconnected. - Remove starter from engine/transmission and secure if necessary
Repair Manual, Electrical Equipment, Repair Group 27
Note:
Illustration shows manual transmission 012. - Disconnect shift rod (arrow -A-).
- Remove socket-head bolt from pivot rod (arrow -B-).
Pa
ge 8 of 21 Transmission, removin
g and installin
g
11/19/2002 htt
p://127.0.0.1:8080/audi/servlet/Dis
play?action=Goto&t
yp
e=re
pair&id=AUDI.B5.TM02.34.2
Page 10 of 21
34-26
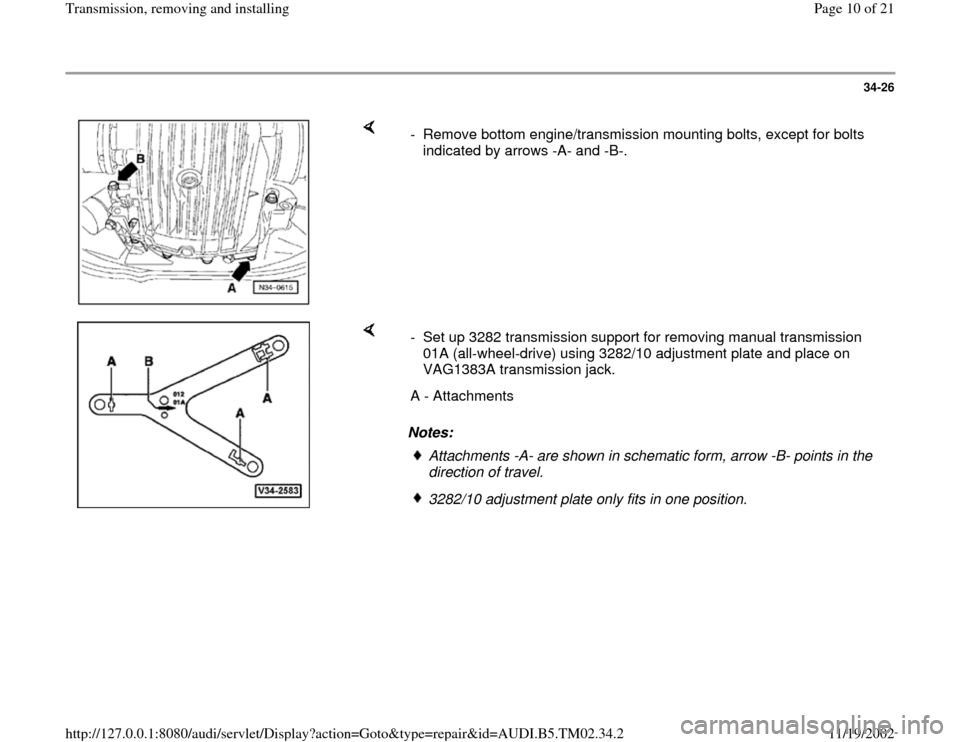
- Remove bottom engine/transmission mounting bolts, except for bolts
indicated by arrows -A- and -B-.
Notes: - Set up 3282 transmission support for removing manual transmission
01A (all-wheel-drive) using 3282/10 adjustment plate and place on
VAG1383A transmission jack.
A - Attachments
Attachments -A- are shown in schematic form, arrow -B- points in the
direction of travel. 3282/10 adjustment plate only fits in one position.
Pa
ge 10 of 21 Transmission, removin
g and installin
g
11/19/2002 htt
p://127.0.0.1:8080/audi/servlet/Dis
play?action=Goto&t
yp
e=re
pair&id=AUDI.B5.TM02.34.2
Page 17 of 21
34-33
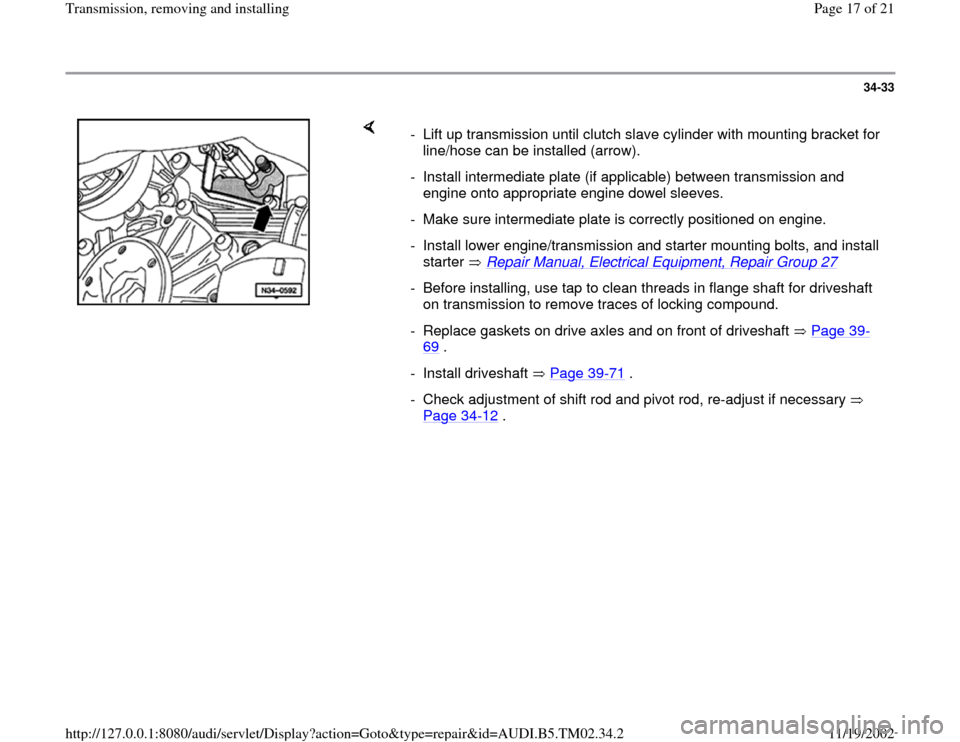
- Lift up transmission until clutch slave cylinder with mounting bracket for
line/hose can be installed (arrow).
- Install intermediate plate (if applicable) between transmission and
engine onto appropriate engine dowel sleeves.
- Make sure intermediate plate is correctly positioned on engine.
- Install lower engine/transmission and starter mounting bolts, and install
starter Repair Manual, Electrical Equipment, Repair Group 27
- Before installing, use tap to clean threads in flange shaft for driveshaft
on transmission to remove traces of locking compound.
- Replace gaskets on drive axles and on front of driveshaft Page 39
-
69
.
- Install driveshaft Page 39
-71
.
- Check adjustment of shift rod and pivot rod, re-adjust if necessary
Page 34
-12
.
Pa
ge 17 of 21 Transmission, removin
g and installin
g
11/19/2002 htt
p://127.0.0.1:8080/audi/servlet/Dis
play?action=Goto&t
yp
e=re
pair&id=AUDI.B5.TM02.34.2
Page 18 of 21
34-34
- Align exhaust system free of stress.
Repair Manual, Engine Mechanical, Repair
Group 26
- Check transmission oil level Page 34
-38
.
- After
connecting
battery,
enter anti-
theft code
for radio
Repair Manual,
Electrical Equipment, Repair Group 91
- Run power windows fully up by pressing
switches.
- Operate all power window switches again and
hold for at least one second in "close" position to
activate automatic one-touch function.
- Set clock to correct time.
Pa
ge 18 of 21 Transmission, removin
g and installin
g
11/19/2002 htt
p://127.0.0.1:8080/audi/servlet/Dis
play?action=Goto&t
yp
e=re
pair&id=AUDI.B5.TM02.34.2