AUDI A4 2000 B5 / 1.G APB Engine Lubrication System Components Repair Manual
Manufacturer: AUDI, Model Year: 2000,
Model line: A4,
Model: AUDI A4 2000 B5 / 1.G
Pages: 74, PDF Size: 1.56 MB
AUDI A4 2000 B5 / 1.G APB Engine Lubrication System Components Repair Manual
A4 2000 B5 / 1.G
AUDI
AUDI
https://www.carmanualsonline.info/img/6/966/w960_966-0.png
AUDI A4 2000 B5 / 1.G APB Engine Lubrication System Components Repair Manual
Trending: oil viscosity, oil temperature, fuel pump, steering wheel, transmission oil, warning light, key
Page 61 of 74
17-56
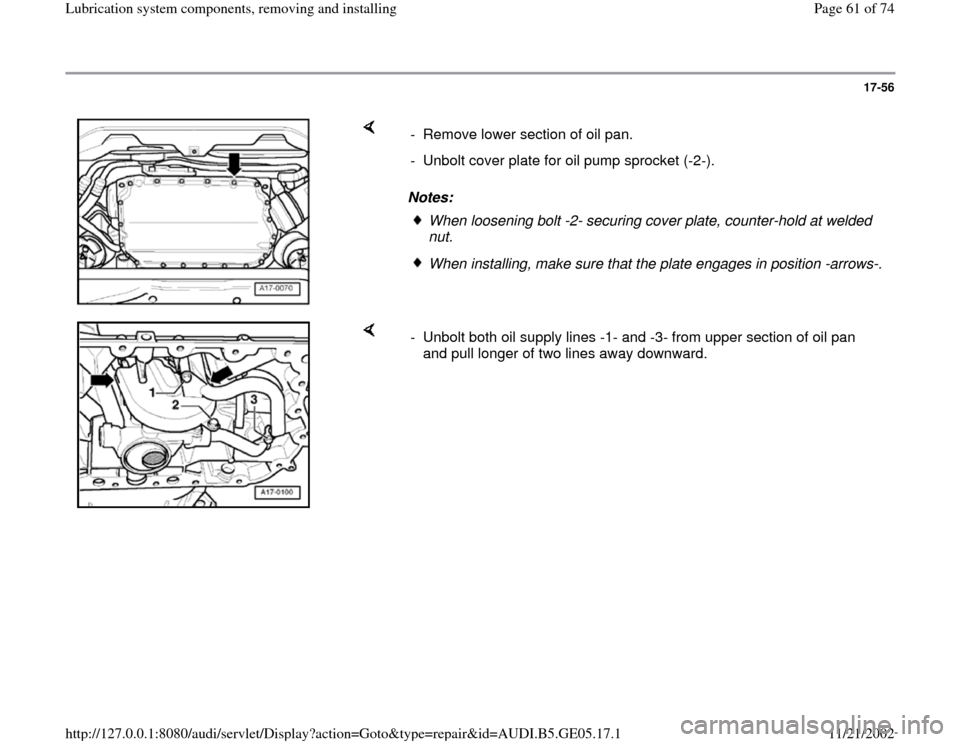
Notes: - Remove lower section of oil pan.
- Unbolt cover plate for oil pump sprocket (-2-).
When loosening bolt -2- securing cover plate, counter-hold at welded
nut. When installing, make sure that the plate engages in position -arrows-.
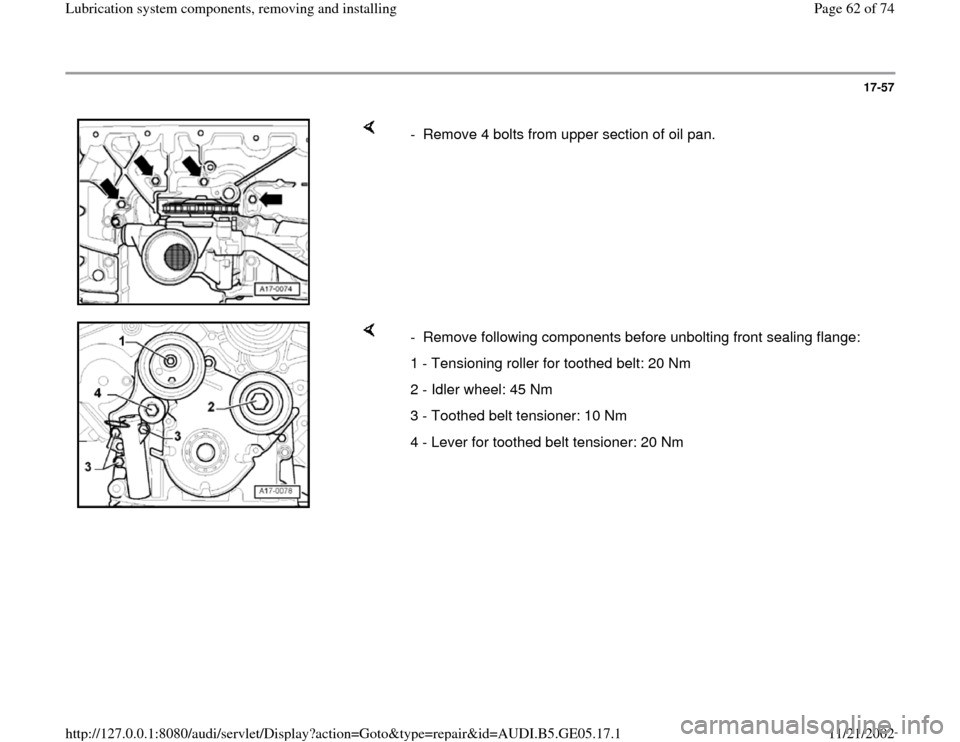
- Unbolt both oil supply lines -1- and -3- from upper section of oil pan
and pull longer of two lines away downward.
Pa
ge 61 of 74 Lubrication s
ystem com
ponents, removin
g and installin
g
11/21/2002 htt
p://127.0.0.1:8080/audi/servlet/Dis
play?action=Goto&t
yp
e=re
pair&id=AUDI.B5.GE05.17.1
Page 62 of 74
17-57
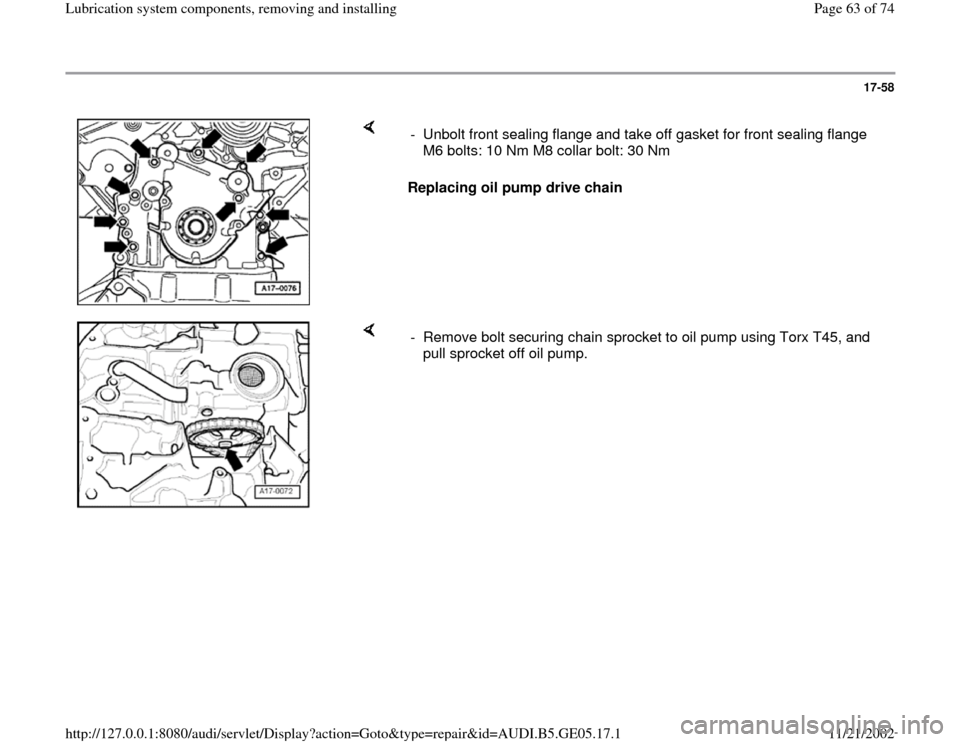
- Remove 4 bolts from upper section of oil pan.
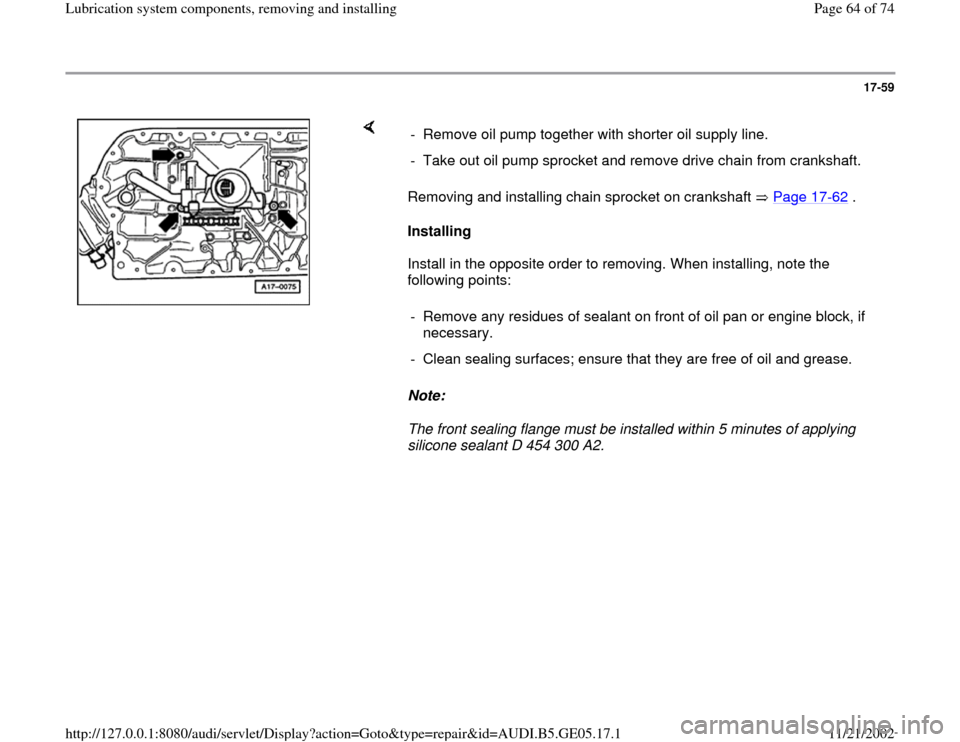
- Remove following components before unbolting front sealing flange:
1 - Tensioning roller for toothed belt: 20 Nm
2 - Idler wheel: 45 Nm
3 - Toothed belt tensioner: 10 Nm
4 - Lever for toothed belt tensioner: 20 Nm
Pa
ge 62 of 74 Lubrication s
ystem com
ponents, removin
g and installin
g
11/21/2002 htt
p://127.0.0.1:8080/audi/servlet/Dis
play?action=Goto&t
yp
e=re
pair&id=AUDI.B5.GE05.17.1
Page 63 of 74
17-58
Replacing oil pump drive chain - Unbolt front sealing flange and take off gasket for front sealing flange
M6 bolts: 10 Nm M8 collar bolt: 30 Nm
- Remove bolt securing chain sprocket to oil pump using Torx T45, and
pull sprocket off oil pump.
Pa
ge 63 of 74 Lubrication s
ystem com
ponents, removin
g and installin
g
11/21/2002 htt
p://127.0.0.1:8080/audi/servlet/Dis
play?action=Goto&t
yp
e=re
pair&id=AUDI.B5.GE05.17.1
Page 64 of 74
17-59
Removing and installing chain sprocket on crankshaft Page 17
-62
.
Installing
Install in the opposite order to removing. When installing, note the
following points:
Note:
The front sealing flange must be installed within 5 minutes of applying
silicone sealant D 454 300 A2. - Remove oil pump together with shorter oil supply line.
- Take out oil pump sprocket and remove drive chain from crankshaft.
- Remove any residues of sealant on front of oil pan or engine block, if
necessary.
- Clean sealing surfaces; ensure that they are free of oil and grease.
Pa
ge 64 of 74 Lubrication s
ystem com
ponents, removin
g and installin
g
11/21/2002 htt
p://127.0.0.1:8080/audi/servlet/Dis
play?action=Goto&t
yp
e=re
pair&id=AUDI.B5.GE05.17.1
Page 65 of 74
17-60
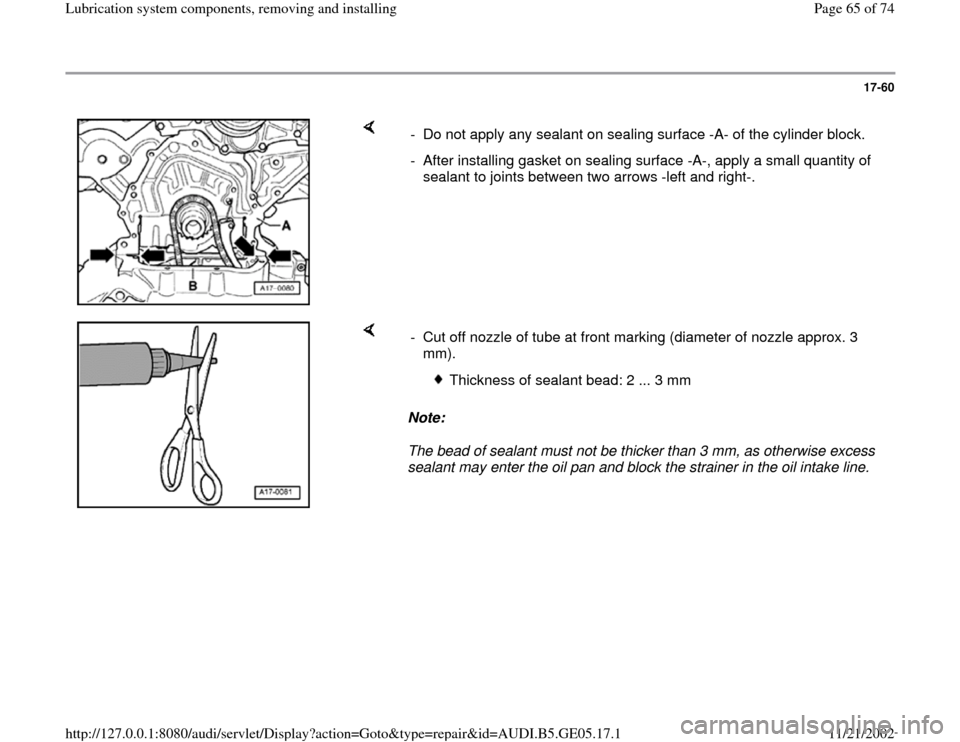
- Do not apply any sealant on sealing surface -A- of the cylinder block.
- After installing gasket on sealing surface -A-, apply a small quantity of
sealant to joints between two arrows -left and right-.
Note:
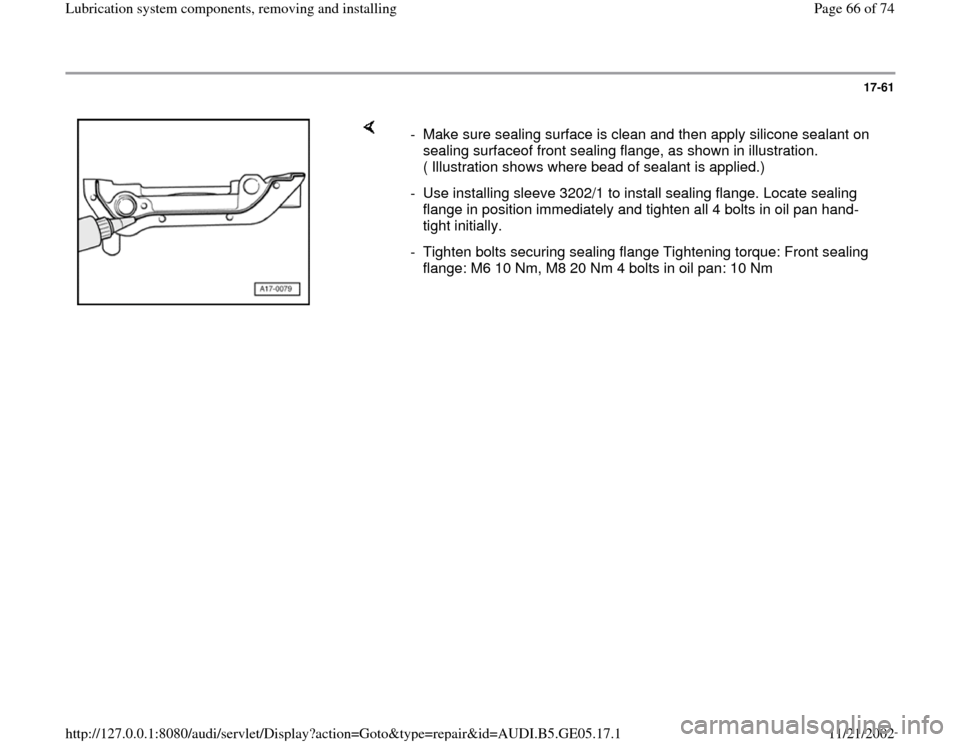
The bead of sealant must not be thicker than 3 mm, as otherwise excess
sealant may enter the oil pan and block the strainer in the oil intake line. - Cut off nozzle of tube at front marking (diameter of nozzle approx. 3
mm).
Thickness of sealant bead: 2 ... 3 mm
Pa
ge 65 of 74 Lubrication s
ystem com
ponents, removin
g and installin
g
11/21/2002 htt
p://127.0.0.1:8080/audi/servlet/Dis
play?action=Goto&t
yp
e=re
pair&id=AUDI.B5.GE05.17.1
Page 66 of 74
17-61
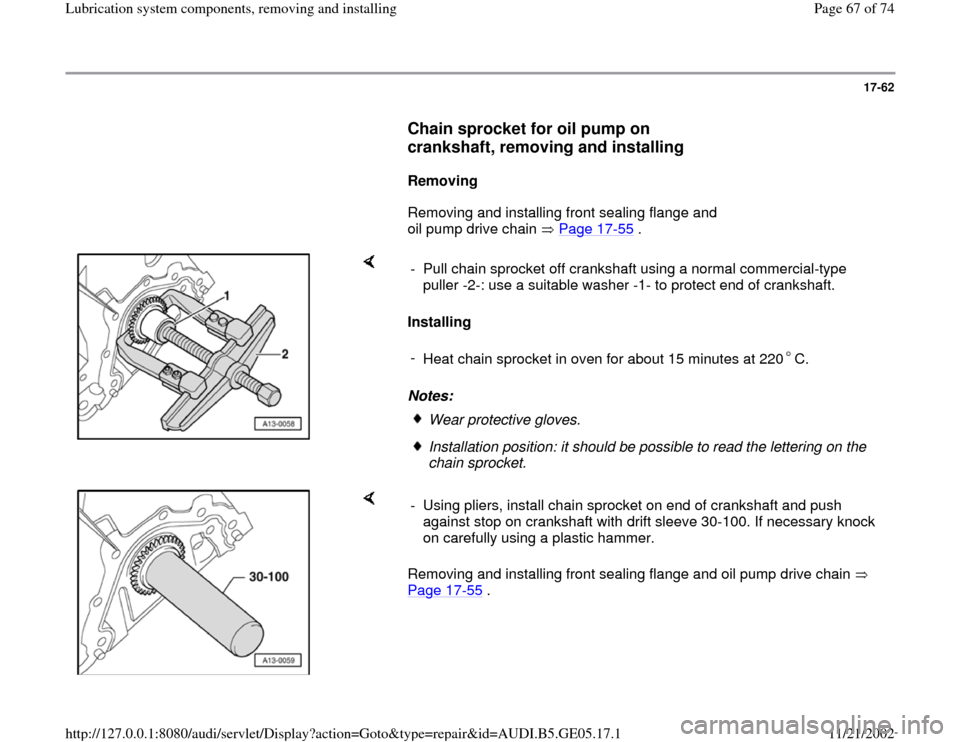
- Make sure sealing surface is clean and then apply silicone sealant on
sealing surfaceof front sealing flange, as shown in illustration.
( Illustration shows where bead of sealant is applied.)
- Use installing sleeve 3202/1 to install sealing flange. Locate sealing
flange in position immediately and tighten all 4 bolts in oil pan hand-
tight initially.
- Tighten bolts securing sealing flange Tightening torque: Front sealing
flange: M6 10 Nm, M8 20 Nm 4 bolts in oil pan: 10 Nm
Pa
ge 66 of 74 Lubrication s
ystem com
ponents, removin
g and installin
g
11/21/2002 htt
p://127.0.0.1:8080/audi/servlet/Dis
play?action=Goto&t
yp
e=re
pair&id=AUDI.B5.GE05.17.1
Page 67 of 74
17-62
Chain sprocket for oil pump on
crankshaft, removing and installing
Removing
Removing and installing front sealing flange and
oil pump drive chain Page 17
-55
.
Installing
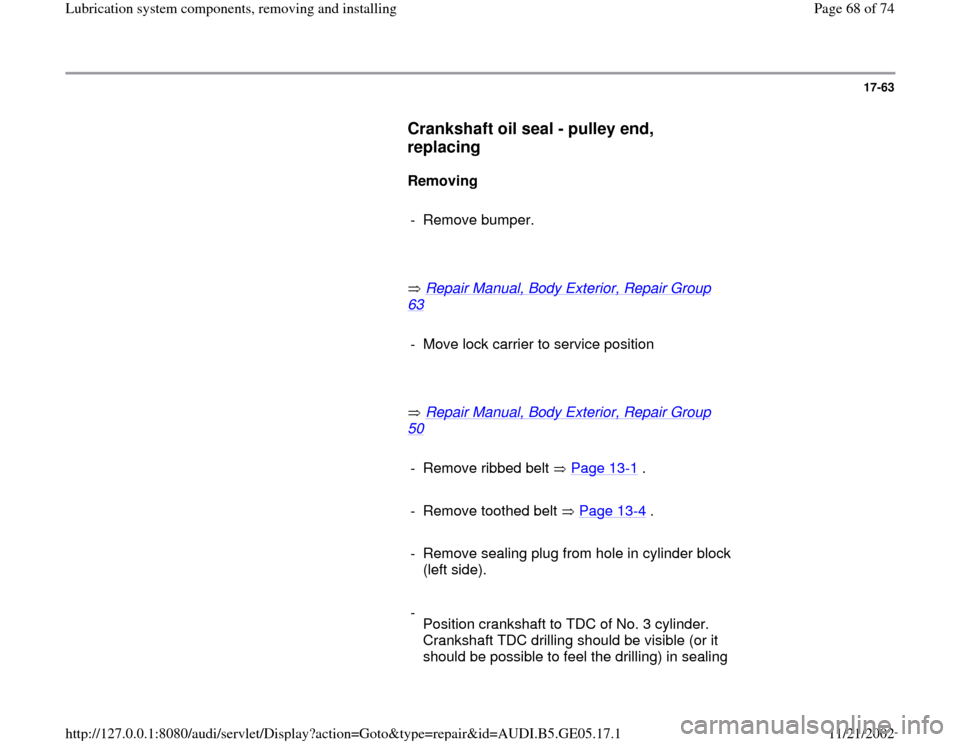
Notes: - Pull chain sprocket off crankshaft using a normal commercial-type
puller -2-: use a suitable washer -1- to protect end of crankshaft.
-
Heat chain sprocket in oven for about 15 minutes at 220 C.
Wear protective gloves. Installation position: it should be possible to read the lettering on the
chain sprocket.
Removing and installing front sealing flange and oil pump drive chain
Page 17
-55
. - Using pliers, install chain sprocket on end of crankshaft and push
against stop on crankshaft with drift sleeve 30-100. If necessary knock
on carefully using a plastic hammer.
Pa
ge 67 of 74 Lubrication s
ystem com
ponents, removin
g and installin
g
11/21/2002 htt
p://127.0.0.1:8080/audi/servlet/Dis
play?action=Goto&t
yp
e=re
pair&id=AUDI.B5.GE05.17.1
Page 68 of 74
17-63
Crankshaft oil seal - pulley end,
replacing
Removing
- Remove bumper.
Repair Manual, Body Exterior, Repair Group
63
- Move lock carrier to service position
Repair Manual, Body Exterior, Repair Group
50
- Remove ribbed belt Page 13
-1 .
- Remove toothed belt Page 13
-4 .
- Remove sealing plug from hole in cylinder block
(left side).
-
Position crankshaft to TDC of No. 3 cylinder.
Crankshaft TDC drilling should be visible (or it
should be possible to feel the drilling) in sealing
Pa
ge 68 of 74 Lubrication s
ystem com
ponents, removin
g and installin
g
11/21/2002 htt
p://127.0.0.1:8080/audi/servlet/Dis
play?action=Goto&t
yp
e=re
pair&id=AUDI.B5.GE05.17.1
Page 69 of 74
plug hole.
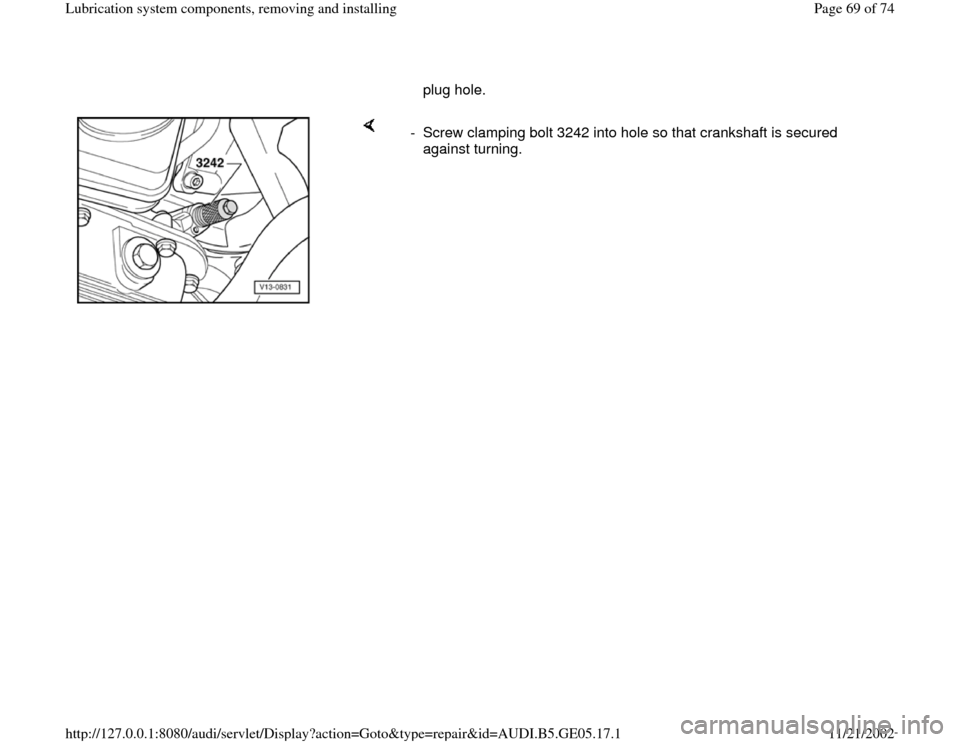
- Screw clamping bolt 3242 into hole so that crankshaft is secured
against turning.
Pa
ge 69 of 74 Lubrication s
ystem com
ponents, removin
g and installin
g
11/21/2002 htt
p://127.0.0.1:8080/audi/servlet/Dis
play?action=Goto&t
yp
e=re
pair&id=AUDI.B5.GE05.17.1
Page 70 of 74
17-64
- Remove crankshaft toothed belt sprocket.
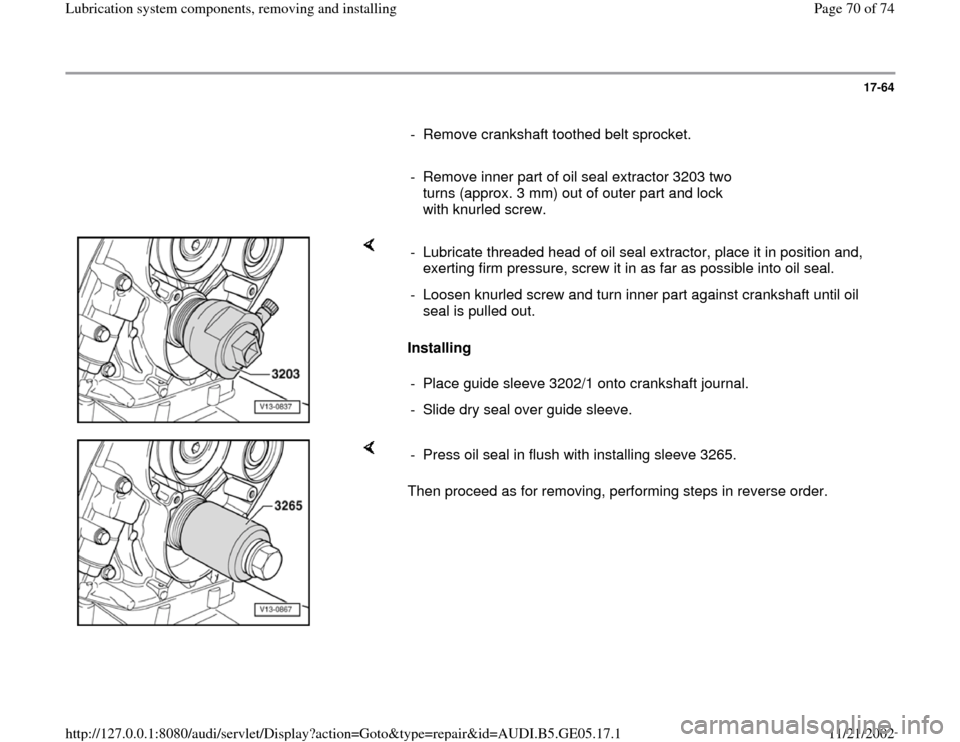
- Remove inner part of oil seal extractor 3203 two
turns (approx. 3 mm) out of outer part and lock
with knurled screw.
Installing - Lubricate threaded head of oil seal extractor, place it in position and,
exerting firm pressure, screw it in as far as possible into oil seal.
- Loosen knurled screw and turn inner part against crankshaft until oil
seal is pulled out.
- Place guide sleeve 3202/1 onto crankshaft journal.
- Slide dry seal over guide sleeve.
Then proceed as for removing, performing steps in reverse order. - Press oil seal in flush with installing sleeve 3265.
Pa
ge 70 of 74 Lubrication s
ystem com
ponents, removin
g and installin
g
11/21/2002 htt
p://127.0.0.1:8080/audi/servlet/Dis
play?action=Goto&t
yp
e=re
pair&id=AUDI.B5.GE05.17.1
Trending: radio, diagram, checking oil, steering, key, check engine, coolant
