AUDI A4 2000 B5 / 1.G APB Engine Valve Gear Service Workshop Manual
A4 2000 B5 / 1.G
AUDI
AUDI
https://www.carmanualsonline.info/img/6/969/w960_969-0.png
AUDI A4 2000 B5 / 1.G APB Engine Valve Gear Service Workshop Manual
Page 1 of 99
15-1
Valve gear, servicing
Notes:
Cylinder heads which have cracks between the
valve seats or between valve seat inserts and
the spark plug thread can be used further
without reducing service life, provided the
cracks do not exceed a maximum of 0.3 mm in
width, or when no more than the first 4 turns of
the spark plug threads are cracked.
After installing new lifters the engine must not
be started for about 30 minutes (otherwise
valves will strike pistons). Turn crankshaft two
complete revolutions before starting.
Carefully apply a small amount of sealant D 454
300 A2 at the four end points of the sealing
surfaces on the cylinder head, using a small
screwdriver Fig. 1
.
Pa
ge 1 of 99 Valve
gear, servicin
g
11/21/2002 htt
p://127.0.0.1:8080/audi/servlet/Dis
play?action=Goto&t
yp
e=re
pair&id=AUDI.B5.GE05.15.1
Page 11 of 99
15-11
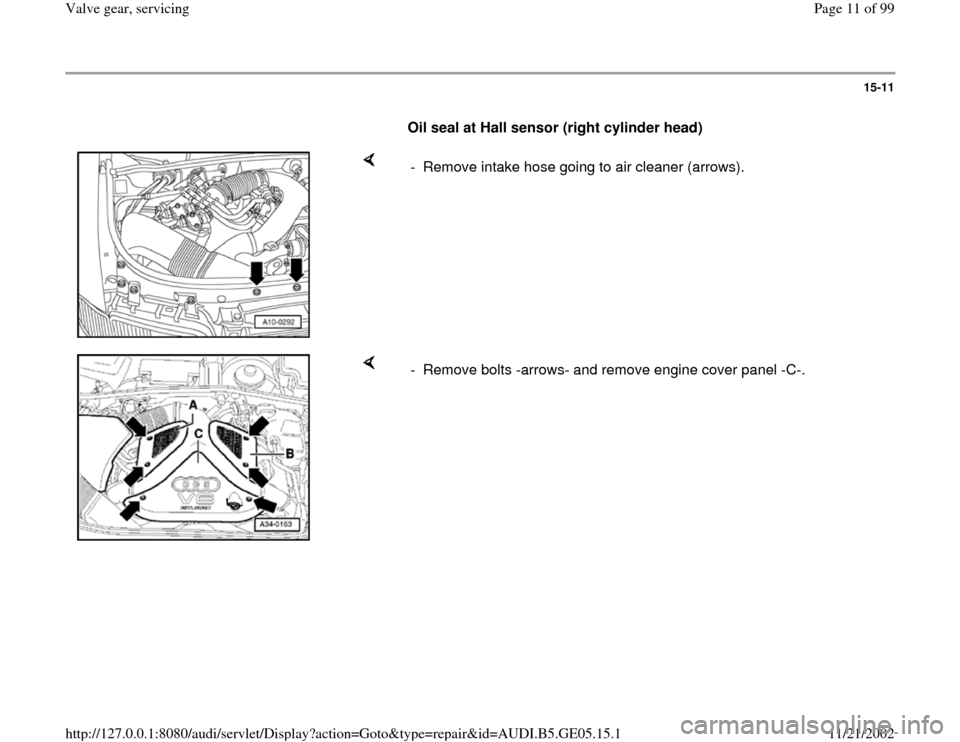
Oil seal at Hall sensor (right cylinder head)
- Remove intake hose going to air cleaner (arrows).
- Remove bolts -arrows- and remove engine cover panel -C-.
Pa
ge 11 of 99 Valve
gear, servicin
g
11/21/2002 htt
p://127.0.0.1:8080/audi/servlet/Dis
play?action=Goto&t
yp
e=re
pair&id=AUDI.B5.GE05.15.1
Page 17 of 99
15-17
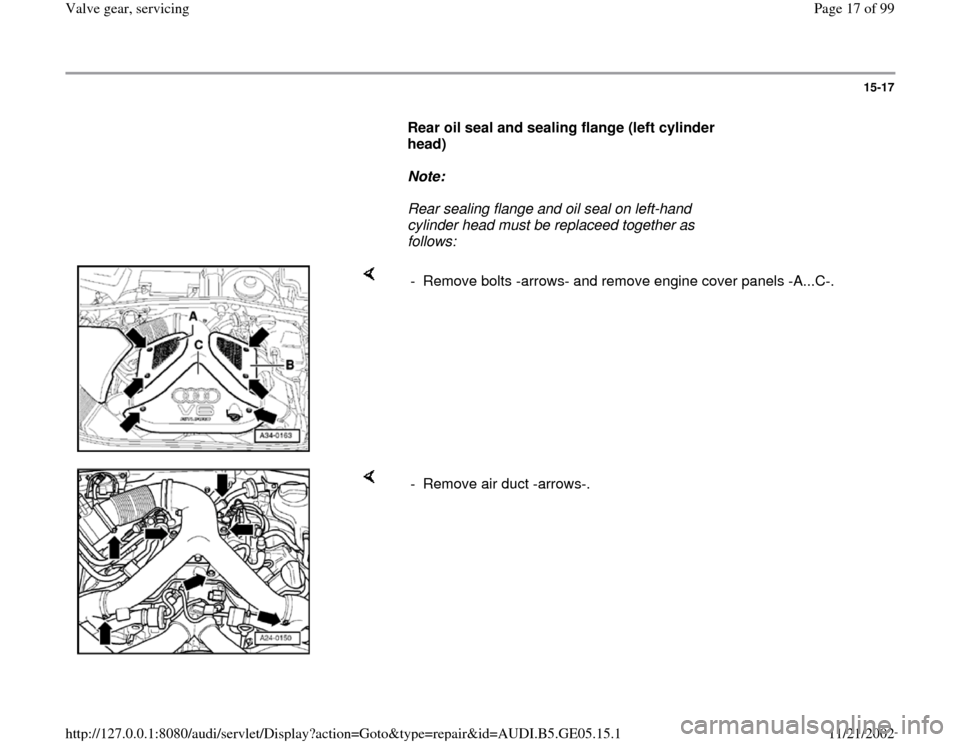
Rear oil seal and sealing flange (left cylinder
head)
Note:
Rear sealing flange and oil seal on left-hand
cylinder head must be replaceed together as
follows:
- Remove bolts -arrows- and remove engine cover panels -A...C-.
- Remove air duct -arrows-.
Pa
ge 17 of 99 Valve
gear, servicin
g
11/21/2002 htt
p://127.0.0.1:8080/audi/servlet/Dis
play?action=Goto&t
yp
e=re
pair&id=AUDI.B5.GE05.15.1
Page 22 of 99
15-22
Cylinder head covers, removing and
installing
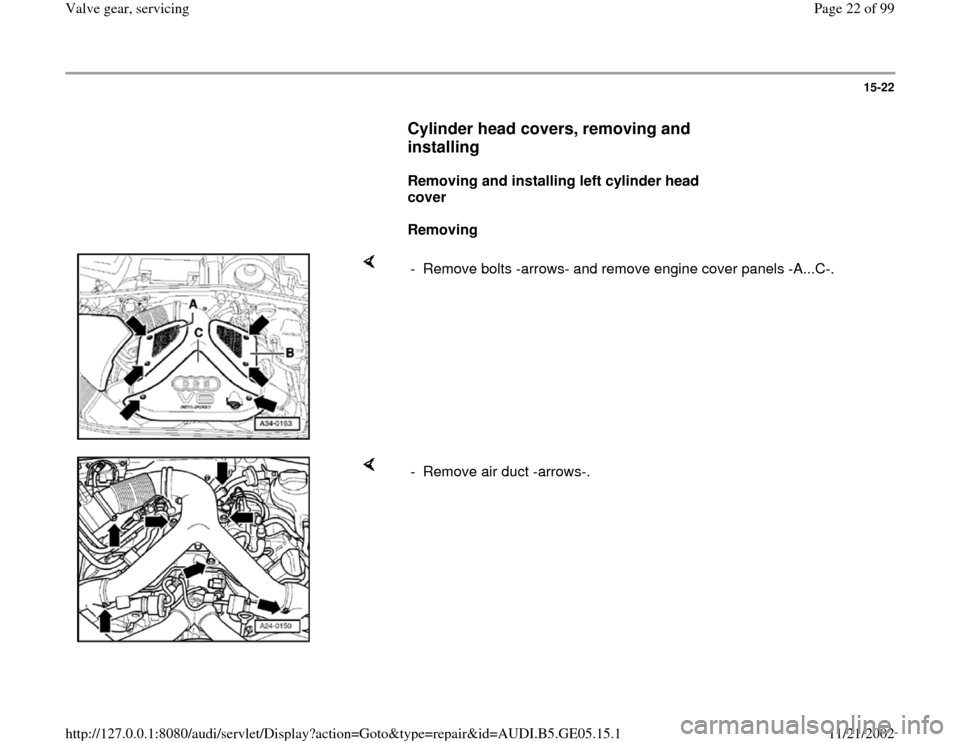
Removing and installing left cylinder head
cover
Removing
- Remove bolts -arrows- and remove engine cover panels -A...C-.
- Remove air duct -arrows-.
Pa
ge 22 of 99 Valve
gear, servicin
g
11/21/2002 htt
p://127.0.0.1:8080/audi/servlet/Dis
play?action=Goto&t
yp
e=re
pair&id=AUDI.B5.GE05.15.1
Page 25 of 99
15-25
Removing and installing right cylinder head
cover
Removing
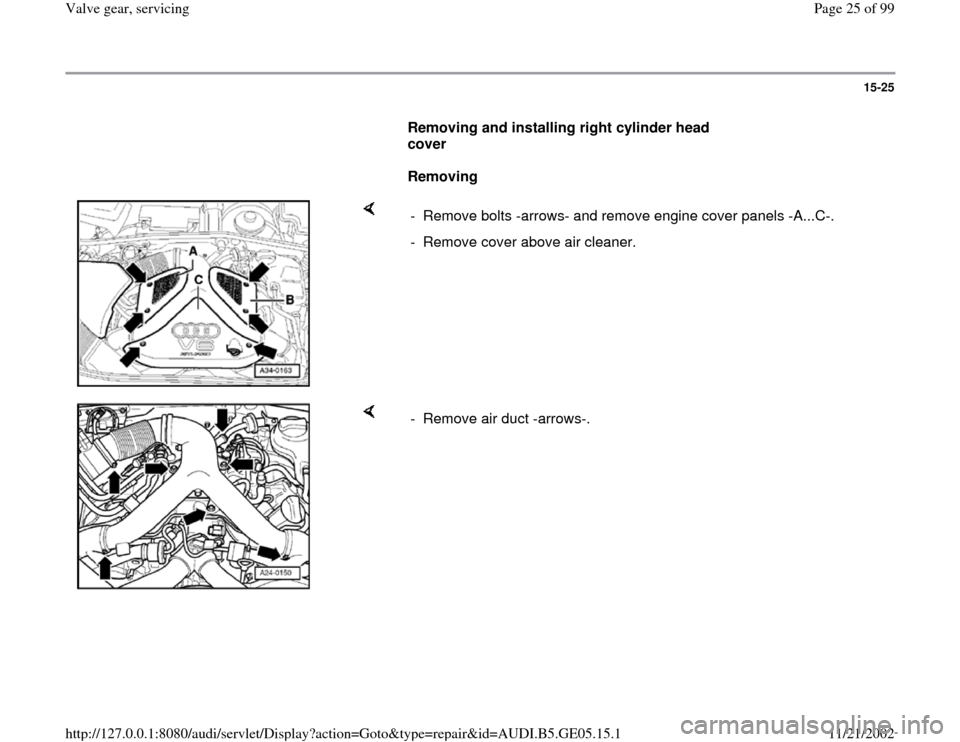
- Remove bolts -arrows- and remove engine cover panels -A...C-.
- Remove cover above air cleaner.
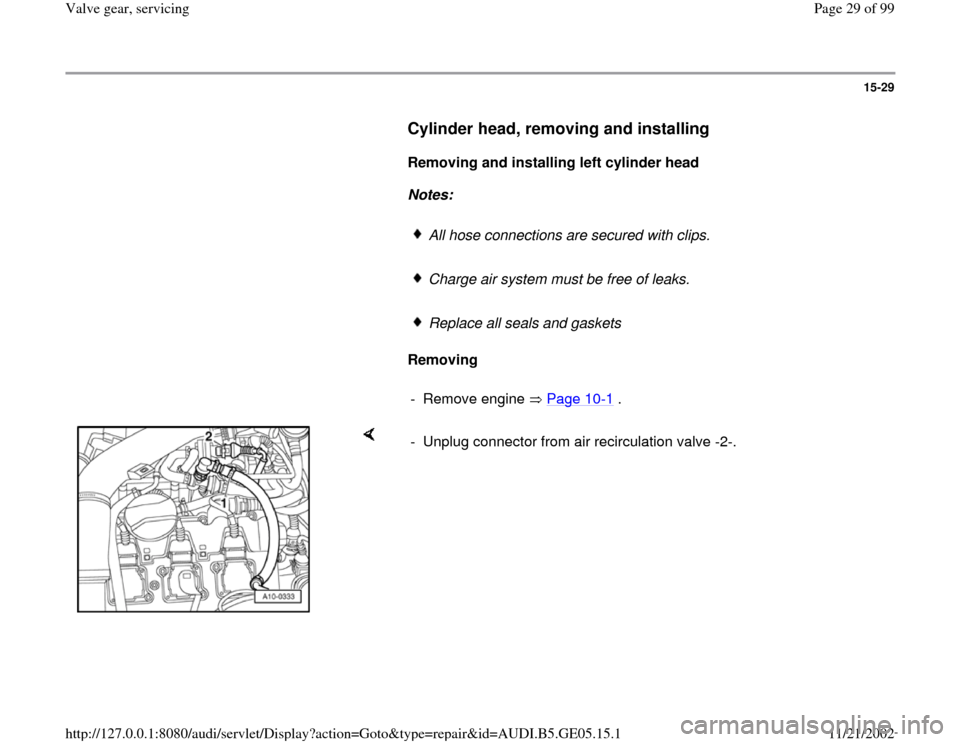
- Remove air duct -arrows-.
Pa
ge 25 of 99 Valve
gear, servicin
g
11/21/2002 htt
p://127.0.0.1:8080/audi/servlet/Dis
play?action=Goto&t
yp
e=re
pair&id=AUDI.B5.GE05.15.1
Page 29 of 99
15-29
Cylinder head, removing and installing
Removing and installing left cylinder head
Notes:
All hose connections are secured with clips.
Charge air system must be free of leaks.
Replace all seals and gaskets
Removing
- Remove engine Page 10
-1 .
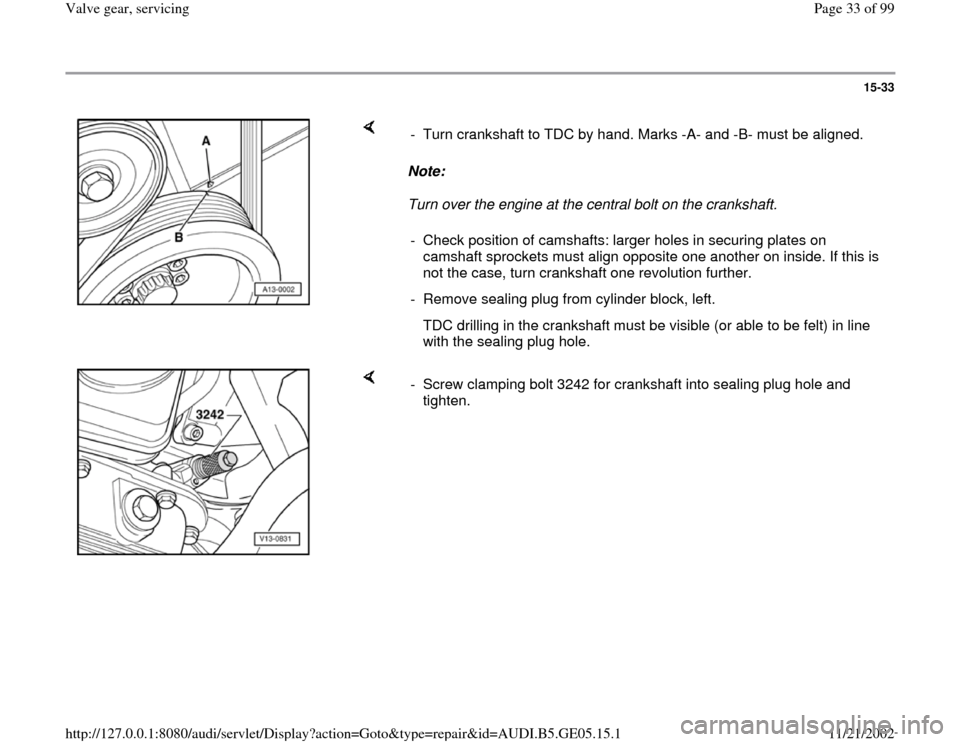
- Unplug connector from air recirculation valve -2-.
Pa
ge 29 of 99 Valve
gear, servicin
g
11/21/2002 htt
p://127.0.0.1:8080/audi/servlet/Dis
play?action=Goto&t
yp
e=re
pair&id=AUDI.B5.GE05.15.1
Page 33 of 99
15-33
Note:
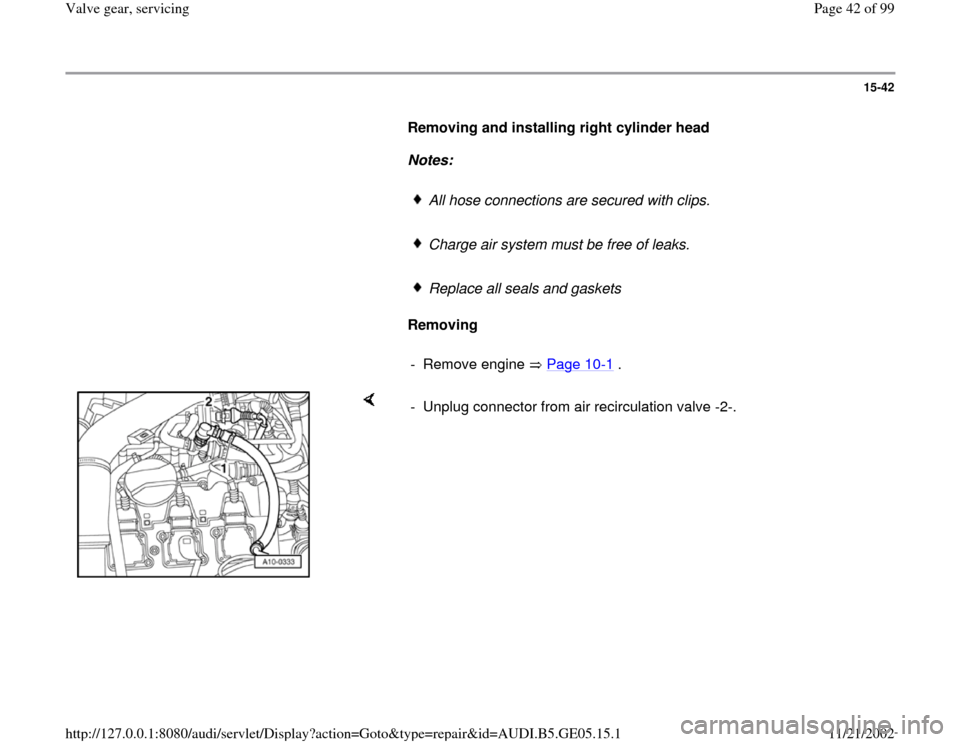
Turn over the engine at the central bolt on the crankshaft. - Turn crankshaft to TDC by hand. Marks -A- and -B- must be aligned.
- Check position of camshafts: larger holes in securing plates on
camshaft sprockets must align opposite one another on inside. If this is
not the case, turn crankshaft one revolution further.
- Remove sealing plug from cylinder block, left.
TDC drilling in the crankshaft must be visible (or able to be felt) in line
with the sealing plug hole.
- Screw clamping bolt 3242 for crankshaft into sealing plug hole and
tighten.
Pa
ge 33 of 99 Valve
gear, servicin
g
11/21/2002 htt
p://127.0.0.1:8080/audi/servlet/Dis
play?action=Goto&t
yp
e=re
pair&id=AUDI.B5.GE05.15.1
Page 42 of 99
15-42
Removing and installing right cylinder head
Notes:
All hose connections are secured with clips.
Charge air system must be free of leaks.
Replace all seals and gaskets
Removing
- Remove engine Page 10
-1 .
- Unplug connector from air recirculation valve -2-.
Pa
ge 42 of 99 Valve
gear, servicin
g
11/21/2002 htt
p://127.0.0.1:8080/audi/servlet/Dis
play?action=Goto&t
yp
e=re
pair&id=AUDI.B5.GE05.15.1
Page 47 of 99
15-47
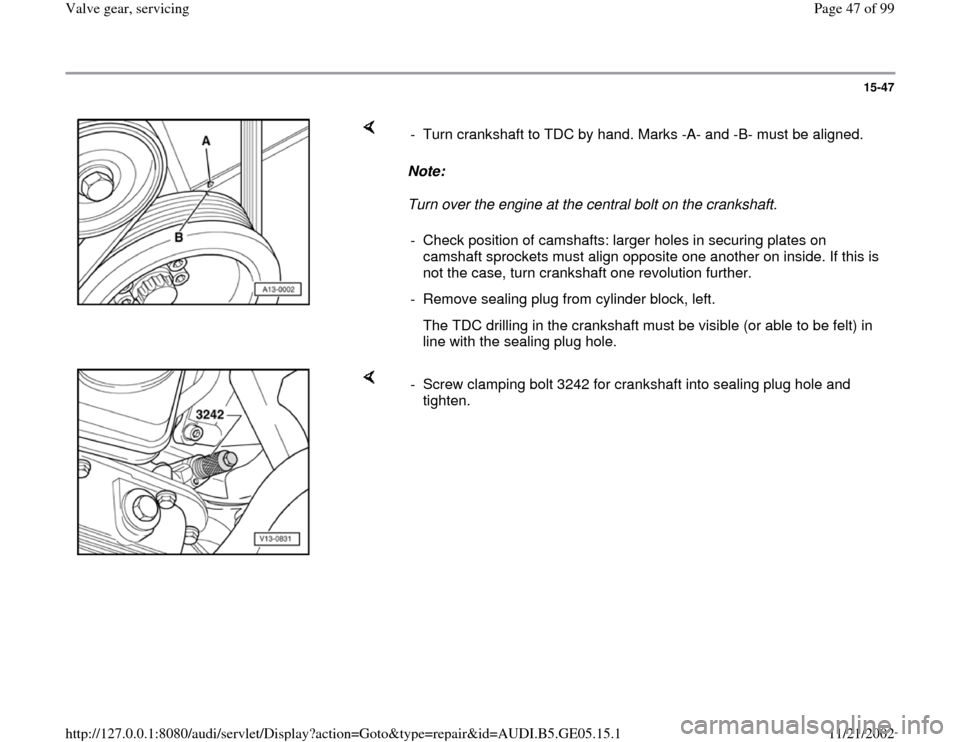
Note:
Turn over the engine at the central bolt on the crankshaft. - Turn crankshaft to TDC by hand. Marks -A- and -B- must be aligned.
- Check position of camshafts: larger holes in securing plates on
camshaft sprockets must align opposite one another on inside. If this is
not the case, turn crankshaft one revolution further.
- Remove sealing plug from cylinder block, left.
The TDC drilling in the crankshaft must be visible (or able to be felt) in
line with the sealing plug hole.
- Screw clamping bolt 3242 for crankshaft into sealing plug hole and
tighten.
Pa
ge 47 of 99 Valve
gear, servicin
g
11/21/2002 htt
p://127.0.0.1:8080/audi/servlet/Dis
play?action=Goto&t
yp
e=re
pair&id=AUDI.B5.GE05.15.1
Page 58 of 99
15-58
Compression, checking
Test requirements:
Engine oil temperature at least 30 C.
Battery fully charged.
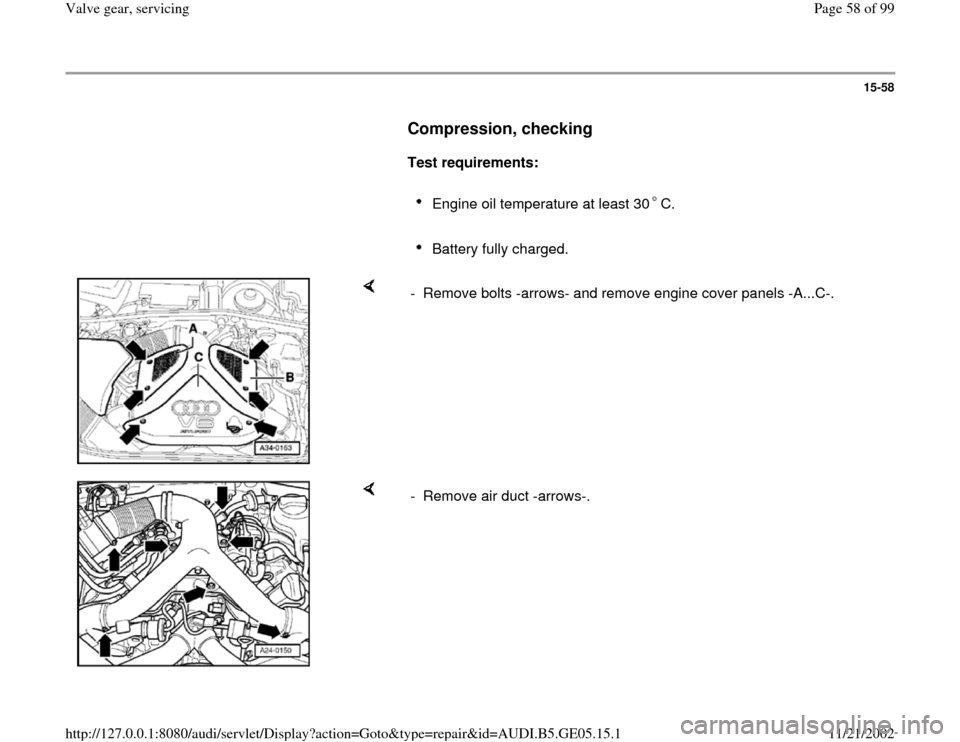
- Remove bolts -arrows- and remove engine cover panels -A...C-.
- Remove air duct -arrows-.
Pa
ge 58 of 99 Valve
gear, servicin
g
11/21/2002 htt
p://127.0.0.1:8080/audi/servlet/Dis
play?action=Goto&t
yp
e=re
pair&id=AUDI.B5.GE05.15.1
