stop start AUDI A4 2008 B8 / 4.G Owners Manual
[x] Cancel search | Manufacturer: AUDI, Model Year: 2008, Model line: A4, Model: AUDI A4 2008 B8 / 4.GPages: 342, PDF Size: 13.14 MB
Page 4 of 342
Contents 2ContentsNotes on this Owner's
Manual
. . . . . . . . . . . . . . . . . . . . . .
Controls
. . . . . . . . . . . . . . . . . . . . .
Controls and displays
. . . . . . . . . .
Overview . . . . . . . . . . . . . . . . . . . . . .
Instruments and
warning/indicator lamps
. . . . . . .
Instruments . . . . . . . . . . . . . . . . . . . .
Fuel gauge . . . . . . . . . . . . . . . . . . . . .
Warning and indicator lamps . . . . .
Driver information system
. . . . . .
Introduction . . . . . . . . . . . . . . . . . . . .
On-board computer . . . . . . . . . . . . .
Speed warning function . . . . . . . . .
Auto-check control . . . . . . . . . . . . . .
Tyre pressure monitoring system .
Doors and windows
. . . . . . . . . . . .
Central locking system . . . . . . . . . .
Boot lid . . . . . . . . . . . . . . . . . . . . . . . .
Child-proof catches . . . . . . . . . . . . .
Electric windows . . . . . . . . . . . . . . .
Sun roof . . . . . . . . . . . . . . . . . . . . . . .
Lights and vision
. . . . . . . . . . . . . . .
Lights . . . . . . . . . . . . . . . . . . . . . . . . .
Interior lights . . . . . . . . . . . . . . . . . . .Clear vision . . . . . . . . . . . . . . . . . . . .
Windscreen wipers . . . . . . . . . . . . .
Rear-view mirrors . . . . . . . . . . . . . .
Digital compass . . . . . . . . . . . . . . . .
Seats and storage
. . . . . . . . . . . . .
Manual adjustment of front seats
Electric adjustment of front seats
Seat memory . . . . . . . . . . . . . . . . . .
Head restraints . . . . . . . . . . . . . . . .
Front armrest . . . . . . . . . . . . . . . . . .
Luggage compartment . . . . . . . . .
Roof carrier . . . . . . . . . . . . . . . . . . . .
Roof load . . . . . . . . . . . . . . . . . . . . .
Cup holders . . . . . . . . . . . . . . . . . . .
Ashtrays . . . . . . . . . . . . . . . . . . . . . .
Cigarette lighter and electrical
sockets . . . . . . . . . . . . . . . . . . . . . . .
On-board 230 Volt Euro socket . . .
Storage compartments . . . . . . . . .
Heating and cooling
. . . . . . . . . . .
Deluxe automatic air conditioner .
Deluxe automatic air conditioner -
basic settings . . . . . . . . . . . . . . . . . .
Deluxe automatic air conditioner
plus . . . . . . . . . . . . . . . . . . . . . . . . . .
Deluxe automatic air conditioner
plus - basic settings . . . . . . . . . . . .
Auxiliary heating and auxiliary
ventilation . . . . . . . . . . . . . . . . . . . . .
Seat heating . . . . . . . . . . . . . . . . . . .
Driving
. . . . . . . . . . . . . . . . . . . . . . . . .
Steering . . . . . . . . . . . . . . . . . . . . . . .
Ignition lock . . . . . . . . . . . . . . . . . . .
Starting and stopping the engine
with the advanced key . . . . . . . . . . Electro-mechanical parking brake
Cruise control system . . . . . . . . . . .
adaptive cruise control (ACC)
. .
Speed and distance control system
Driver messages . . . . . . . . . . . . . . .
System limitations . . . . . . . . . . . . . .
Audi braking guard . . . . . . . . . . . . .
Audi lane assist
. . . . . . . . . . . . . . . .
Audi lane assist . . . . . . . . . . . . . . . .
Audi side assist
. . . . . . . . . . . . . . . .
Lane change assist feature . . . . . .
Notes . . . . . . . . . . . . . . . . . . . . . . . . .
Audi drive select
. . . . . . . . . . . . . . .
Adjusting the vehicle set-up . . . . .
Automatic gearbox
. . . . . . . . . . . . .
multitronic®, tiptronic (6-speed
gearbox) . . . . . . . . . . . . . . . . . . . . . . .
Parking aid
. . . . . . . . . . . . . . . . . . . . .
General notes . . . . . . . . . . . . . . . . . .
Audi parking system . . . . . . . . . . . .
Audi parking system plus . . . . . . . .
Audi parking system advanced . . .
Switching display and acoustic
signals on and off . . . . . . . . . . . . . .
Towing bracket . . . . . . . . . . . . . . . . .
Error messages . . . . . . . . . . . . . . . . .
HomeLink
. . . . . . . . . . . . . . . . . . . . . .
Universal transmitter . . . . . . . . . . . . 5
7
9
9
11
11
14
15
21
21
25
28
30
39
42
42
51
53
53
55
57
57
6364
65
68
71
73
73
74
75
77
78
79
83
84
85
86
87
89
90
93
93
100
101
109
110
114
116
116
116
118121
125
128
128
134
140
142
145
145
149
149
156
159
159
162
162
169
169
169
170
171
177
177
178
179
179
document_0900452a81b1b9de.book Seite 2 Donnerstag, 26. Juli 2007 9:16 09
Page 12 of 342
Controls and displays 10
−Switch for electric sun blind . . . . . . . . . . . . . . . . . . .
−Control for Audi drive select . . . . . . . . . . . . . . . . . . .
Start/stop button . . . . . . . . . . . . . . . . . . . . . . . . . . . . . .
Electro-mechanical parking brake . . . . . . . . . . . . . . . .
Adjustable steering column (hidden behind steering
wheel) . . . . . . . . . . . . . . . . . . . . . . . . . . . . . . . . . . . . . . . .
Depending on equipment fitted:
−Cruise control system . . . . . . . . . . . . . . . . . . . . . . . .
−adaptive cruise control
Bonnet lock release . . . . . . . . . . . . . . . . . . . . . . . . . . . .
Switch for releasing the boot lid . . . . . . . . . . . . . . . . . .
Electric windows . . . . . . . . . . . . . . . . . . . . . . . . . . . . . . . Note
•
Please refer to the separate operating manual for instructions on
using the Multi Media Interface (MMI).
•
The arrangement of switches and controls on right-hand drive
models* may be slightly different from the layout shown in the illus-
tration ⇒page 8, fig. 1. However, the symbols used to identify the
controls are the same.64
159
A27
118
A28
121
A29
116
A30
125
A31
254
A32
51
A33
53
document_0900452a81b1b9de.book Seite 10 Donnerstag, 26. Juli 2007 9:16 09
Page 14 of 342
Instruments and warning/indicator lamps 12Warning symbol in instrument cluster
If the symbol
lights up in the display, this means that either the
coolant temperature is too high or the coolant level is too low
⇒page 33.
If the needle is at the top end of the dial, this means the coolant
temperature is too high. Stop the vehicle, switch off the engine and
wait for it to cool down. If the warning lamp starts flashing again
after just a short distance, contact a qualified workshop.
WARNING
•
Before opening the bonnet and checking the coolant level,
please observe the warning information on ⇒page 255, “Working
on components in the engine compartment”.
•
Never open the bonnet if you can see or hear steam or coolant
escaping from the engine compartment; there is a risk of being
scalded. Wait until you can no longer see or hear escaping steam
or coolant.Caution
•
Additional lights and other accessories in front of the air inlet
reduce the cooling effect of the radiator. At high outside tempera-
tures and high engine loads, there is a risk of the engine over-
heating.
•
The front spoiler also ensures proper distribution of the cooling
air when the vehicle is moving. If the spoiler is damaged this can
reduce the cooling effect, which could cause the engine to overheat.
You should obtain professional assistance.
Rev counter
The rev counter indicates the number of engine revolu-
tions per minute.You should select a lower gear if the engine speed drops below
1500 rpm. The start of the red zone on the dial indicates the
maximum engine speed which may be used briefly when the engine
is warm and after it has been run in properly. However, it is advisable
to change up a gear or move the selector lever to “D” (or lift your
foot off the accelerator) before the needle reaches the red zone.
Caution
Never allow the rev counter needle ⇒page 11, fig. 2 to go into
the red zone on the dial for more than a very brief period: there is a
risk of damaging the engine. The start of the red zone on the dial is
different for some engine versions.
For the sake of the environment
Changing up a gear early will help you to save fuel and minimise
engine noise.
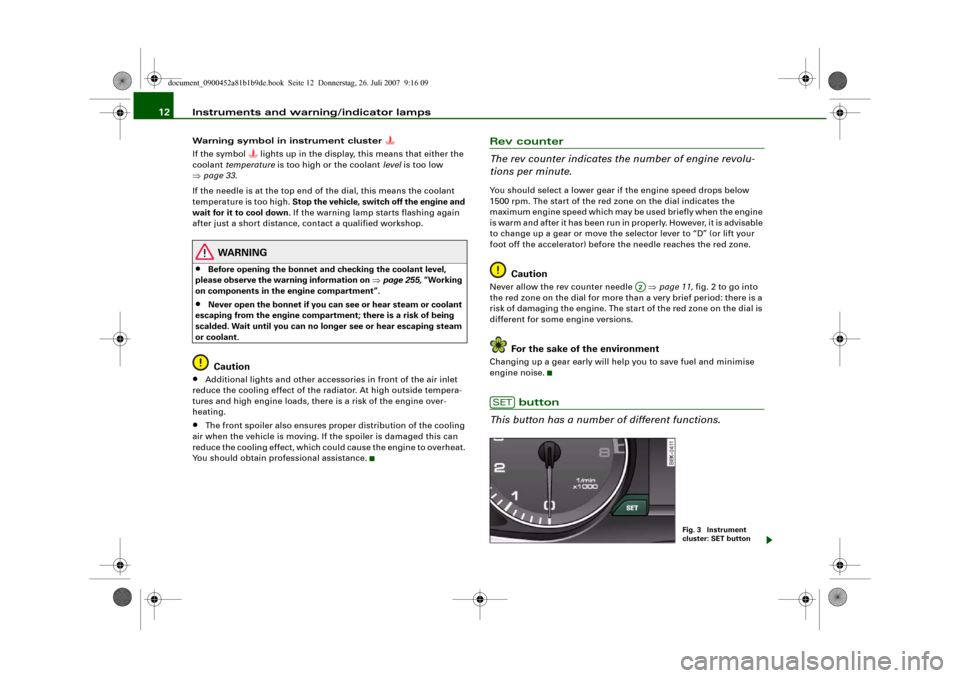
button
This button has a number of different functions.
A2
SET
Fig. 3 Instrument
cluster: SET button
document_0900452a81b1b9de.book Seite 12 Donnerstag, 26. Juli 2007 9:16 09
Page 20 of 342
Instruments and warning/indicator lamps 18Turn signals
Depending on which turn signal is operated, either the left
or
right
indicator lamp flashes. Both indicator lamps will flash when
the hazard warning lights are switched on.
If one turn signal should fail, the indicator lamp will start flashing
twice as fast.
This does not apply when towing a caravan or trailer. The indicator
lamp will stop flashing if one of the turn signals on the vehicle or the
caravan/trailer should fail. For further information on the turn
signals ⇒page 62.
Applies to vehicles: with towing bracketTrailer turn signals
The indicator lamp flashes when the turn signals are
operated while towing a caravan or trailer.The indicator lamp
flashes when the turn signals are operated,
provided a caravan or trailer is correctly attached and connected to
the vehicle.
The indicator lamp will not flash if one of the turn signals on the
trailer fails.
Seat belt warning lamp
The warning lamp acts as a reminder to fasten the seat
belts.After switching on the ignition, the warning lamp
will remain lit
until the driver and front passenger (if applicable) have fastened
their seat belts. When the vehicle has gathered speed you will also
hear a warning chime.
For further information on the seat belts ⇒page 194.
Emission control system
If the warning lamp lights up continuously you should take your
vehicle to a qualified workshop as soon as possible in order to have
the fault rectified.
If the warning lamp flashes drive on at reduced speed and seek
professional help in order to avoid damage to the catalytic
converter.
For further information on the catalytic converter ⇒page 229.Applies to vehicles: with lane assistlane assist (active)
The indicator lamp confirms that the system is fully functional. You
will be warned if you are about to cross the lane markings detected
by the system.
For more information on the lane assist system, please see
⇒page 145.lane assist (inactive)
The warning lamp indicates that the system is switched on.
However, you will not be warned if you cross the lane markings.
For more information on the lane assist system, please see
⇒page 145.Main beam headlights
The indicator lamp
lights up when the main beams are on or
when the headlight flasher is operated.
For further information on the main beam headlights ⇒page 62.
document_0900452a81b1b9de.book Seite 18 Donnerstag, 26. Juli 2007 9:16 09
Page 21 of 342
Instruments and warning/indicator lamps19
Controls
Safety
Driving tips
General maintenance
Self-help
Technical data
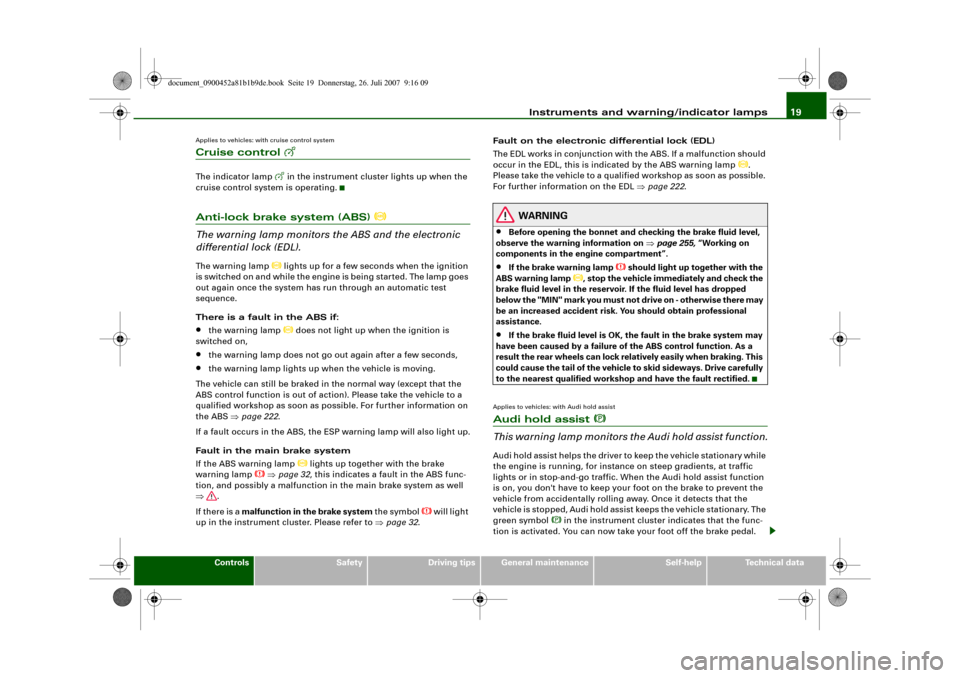
Applies to vehicles: with cruise control systemCruise control
The indicator lamp
in the instrument cluster lights up when the
cruise control system is operating.
Anti-lock brake system (ABS)
The warning lamp monitors the ABS and the electronic
differential lock (EDL).The warning lamp
lights up for a few seconds when the ignition
is switched on and while the engine is being started. The lamp goes
out again once the system has run through an automatic test
sequence.
There is a fault in the ABS if:
•
the warning lamp
does not light up when the ignition is
switched on,
•
the warning lamp does not go out again after a few seconds,
•
the warning lamp lights up when the vehicle is moving.
The vehicle can still be braked in the normal way (except that the
ABS control function is out of action). Please take the vehicle to a
qualified workshop as soon as possible. For further information on
the ABS ⇒page 222.
If a fault occurs in the ABS, the ESP warning lamp will also light up.
Fault in the main brake system
If the ABS warning lamp
lights up together with the brake
warning lamp
⇒page 32, this indicates a fault in the ABS func-
tion, and possibly a malfunction in the main brake system as well
⇒.
If there is a malfunction in the brake system the symbol
will light
up in the instrument cluster. Please refer to ⇒page 32.Fault on the electronic differential lock (EDL)
The EDL works in conjunction with the ABS. If a malfunction should
occur in the EDL, this is indicated by the ABS warning lamp
.
Please take the vehicle to a qualified workshop as soon as possible.
For further information on the EDL ⇒page 222.
WARNING
•
Before opening the bonnet and checking the brake fluid level,
observe the warning information on ⇒page 255, “Working on
components in the engine compartment”.
•
If the brake warning lamp
should light up together with the
ABS warning lamp
, stop the vehicle immediately and check the
brake fluid level in the reservoir. If the fluid level has dropped
below the "MIN" mark you must not drive on - otherwise there may
be an increased accident risk. You should obtain professional
assistance.
•
If the brake fluid level is OK, the fault in the brake system may
have been caused by a failure of the ABS control function. As a
result the rear wheels can lock relatively easily when braking. This
could cause the tail of the vehicle to skid sideways. Drive carefully
to the nearest qualified workshop and have the fault rectified.
Applies to vehicles: with Audi hold assistAudi hold assist
This warning lamp monitors the Audi hold assist function.Audi hold assist helps the driver to keep the vehicle stationary while
the engine is running, for instance on steep gradients, at traffic
lights or in stop-and-go traffic. When the Audi hold assist function
is on, you don't have to keep your foot on the brake to prevent the
vehicle from accidentally rolling away. Once it detects that the
vehicle is stopped, Audi hold assist keeps the vehicle stationary. The
green symbol
in the instrument cluster indicates that the func-
tion is activated. You can now take your foot off the brake pedal.
document_0900452a81b1b9de.book Seite 19 Donnerstag, 26. Juli 2007 9:16 09
Page 35 of 342
Driver information system33
Controls
Safety
Driving tips
General maintenance
Self-help
Technical data easily when braking. This could cause the tail of the vehicle to skid
sideways. Drive carefully to the nearest qualified workshop and
have the fault rectified.
Note
The warning lamp
in the instrument cluster will start flashing as
well if there is a fault in the brake system.
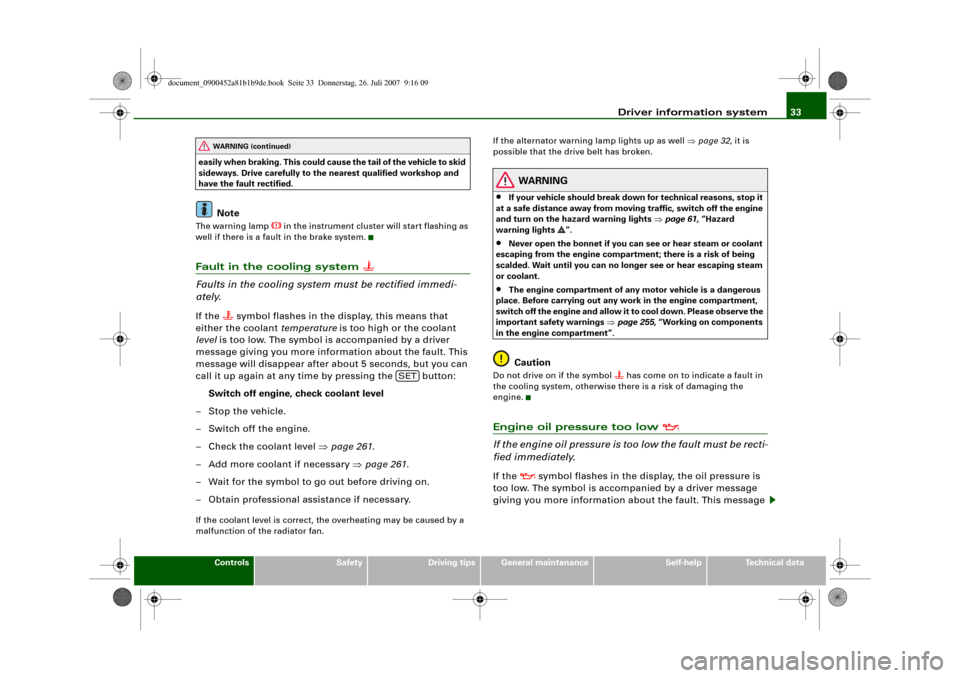
Fault in the cooling system
Faults in the cooling system must be rectified immedi-
ately.If the
symbol flashes in the display, this means that
either the coolant temperature is too high or the coolant
level is too low. The symbol is accompanied by a driver
message giving you more information about the fault. This
message will disappear after about 5 seconds, but you can
call it up again at any time by pressing the button:
Switch off engine, check coolant level
–Stop the vehicle.
– Switch off the engine.
– Check the coolant level ⇒page 261.
– Add more coolant if necessary ⇒page 261.
– Wait for the symbol to go out before driving on.
– Obtain professional assistance if necessary.
If the coolant level is correct, the overheating may be caused by a
malfunction of the radiator fan.If the alternator warning lamp lights up as well ⇒page 32, it is
possible that the drive belt has broken.
WARNING
•
If your vehicle should break down for technical reasons, stop it
at a safe distance away from moving traffic, switch off the engine
and turn on the hazard warning lights ⇒page 61, “Hazard
warning lights ”.
•
Never open the bonnet if you can see or hear steam or coolant
escaping from the engine compartment; there is a risk of being
scalded. Wait until you can no longer see or hear escaping steam
or coolant.
•
The engine compartment of any motor vehicle is a dangerous
place. Before carrying out any work in the engine compartment,
switch off the engine and allow it to cool down. Please observe the
important safety warnings ⇒page 255, “Working on components
in the engine compartment”.Caution
Do not drive on if the symbol
has come on to indicate a fault in
the cooling system, otherwise there is a risk of damaging the
engine.
Engine oil pressure too low
If the engine oil pressure is too low the fault must be recti-
fied immediately.If the
symbol flashes in the display, the oil pressure is
too low. The symbol is accompanied by a driver message
giving you more information about the fault. This message
WARNING (continued)
SET
document_0900452a81b1b9de.book Seite 33 Donnerstag, 26. Juli 2007 9:16 09
Page 37 of 342
Driver information system35
Controls
Safety
Driving tips
General maintenance
Self-help
Technical data
5 seconds, but you can call it up again at any time by
pressing the button:
Ignition lock defective. Contact workshop!
–Do not switch off the engine.
– Drive the vehicle without delay to a qualified workshop
and have the fault repaired.The ignition cannot be switched off if there is a fault in the elec-
tronic ignition lock. For this reason, you should drive the vehicle
without delay to a qualified workshop and have the cause of the
fault repaired.
If the vehicle is equipped with the advanced key* feature, you
should not switch off the engine with the Stop/Start button because
it cannot be started again after the ignition has been switched off.
Note
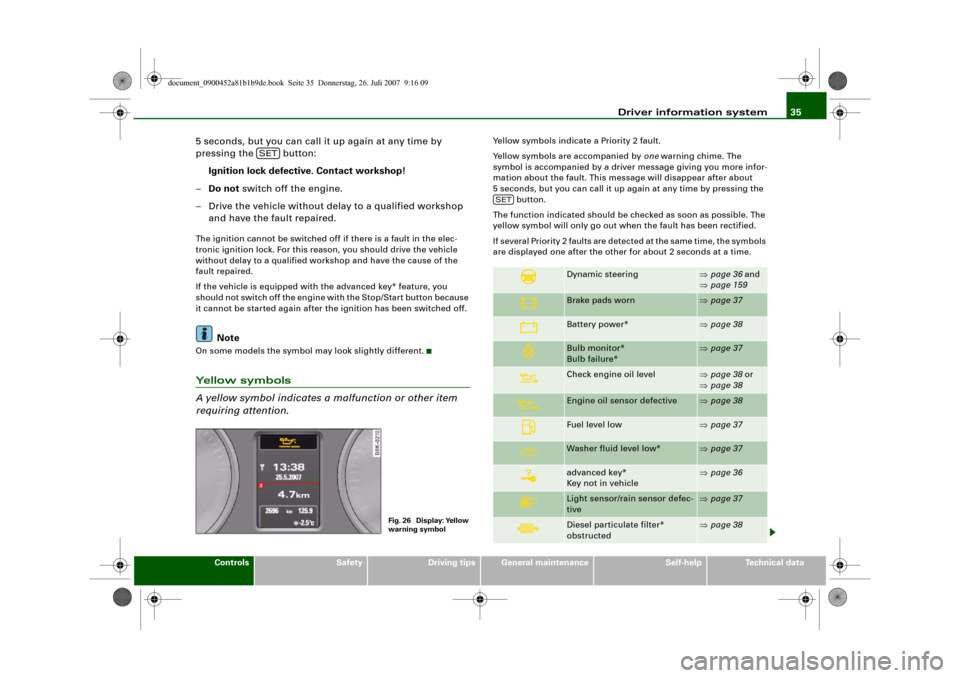
On some models the symbol may look slightly different.Yellow symbols
A yellow symbol indicates a malfunction or other item
requiring attention.
Yellow symbols indicate a Priority 2 fault.
Yellow symbols are accompanied by one warning chime. The
symbol is accompanied by a driver message giving you more infor-
mation about the fault. This message will disappear after about
5 seconds, but you can call it up again at any time by pressing the
button.
The function indicated should be checked as soon as possible. The
yellow symbol will only go out when the fault has been rectified.
If several Priority 2 faults are detected at the same time, the symbols
are displayed one after the other for about 2 seconds at a time.
SET
Fig. 26 Display: Yellow
warning symbol
Dynamic steering
⇒page 36 and
⇒page 159
Brake pads worn
⇒page 37
Battery power*
⇒page 38
Bulb monitor*
Bulb failure*
⇒page 37
Check engine oil level
⇒page 38 or
⇒page 38
Engine oil sensor defective
⇒page 38
Fuel level low
⇒page 37
Washer fluid level low*
⇒page 37
advanced key*
Key not in vehicle
⇒page 36
Light sensor/rain sensor defec-
tive
⇒page 37
Diesel particulate filter*
obstructed
⇒page 38
SET
document_0900452a81b1b9de.book Seite 35 Donnerstag, 26. Juli 2007 9:16 09
Page 38 of 342
Driver information system 36
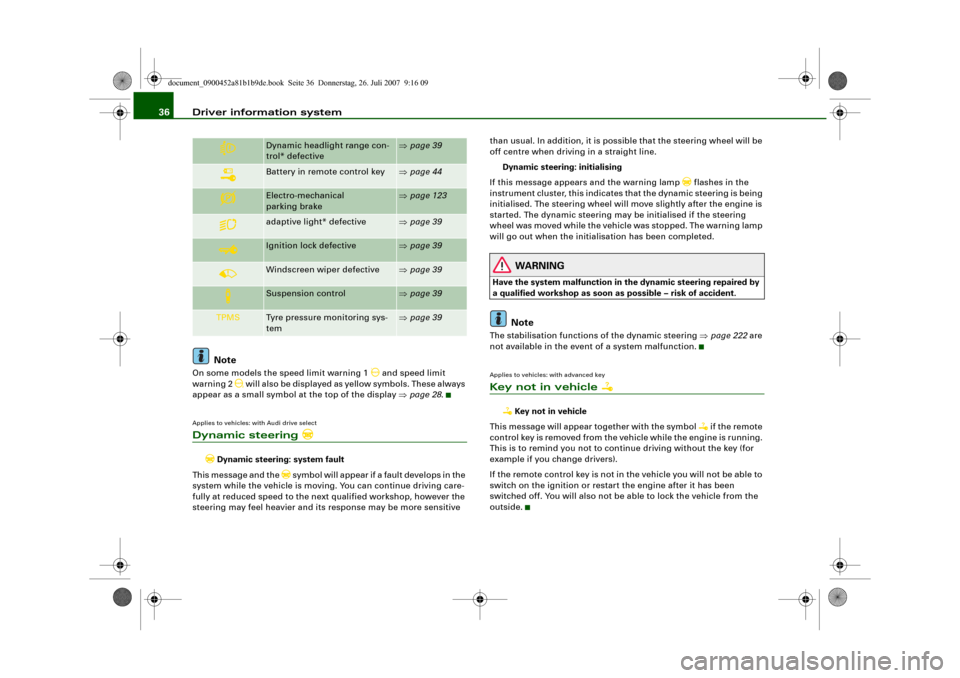
NoteOn some models the speed limit warning 1
and speed limit
warning 2
will also be displayed as yellow symbols. These always
appear as a small symbol at the top of the display ⇒page 28.
Applies to vehicles: with Audi drive selectDynamic steering
Dynamic steering: system fault
This message and the
symbol will appear if a fault develops in the
system while the vehicle is moving. You can continue driving care-
fully at reduced speed to the next qualified workshop, however the
steering may feel heavier and its response may be more sensitive than usual. In addition, it is possible that the steering wheel will be
off centre when driving in a straight line.
Dynamic steering: initialising
If this message appears and the warning lamp
flashes in the
instrument cluster, this indicates that the dynamic steering is being
initialised. The steering wheel will move slightly after the engine is
started. The dynamic steering may be initialised if the steering
wheel was moved while the vehicle was stopped. The warning lamp
will go out when the initialisation has been completed.
WARNING
Have the system malfunction in the dynamic steering repaired by
a qualified workshop as soon as possible – risk of accident.
Note
The stabilisation functions of the dynamic steering ⇒page 222 are
not available in the event of a system malfunction.Applies to vehicles: with advanced keyKey not in vehicle
Key not in vehicle
This message will appear together with the symbol
if the remote
control key is removed from the vehicle while the engine is running.
This is to remind you not to continue driving without the key (for
example if you change drivers).
If the remote control key is not in the vehicle you will not be able to
switch on the ignition or restart the engine after it has been
switched off. You will also not be able to lock the vehicle from the
outside.
Dynamic headlight range con-
trol* defective
⇒page 39
Battery in remote control key
⇒page 44
Electro-mechanical
parking brake
⇒page 123
adaptive light* defective
⇒page 39
Ignition lock defective
⇒page 39
Windscreen wiper defective
⇒page 39
Suspension control
⇒page 39
TPMS
Tyre pressure monitoring sys-
tem
⇒page 39
document_0900452a81b1b9de.book Seite 36 Donnerstag, 26. Juli 2007 9:16 09
Page 56 of 342
Doors and windows 54
Rear door (left-side)*
Rear door (right-side)*
Safety switch
Child safety switch
When the safety switch ⇒page 53, fig. 49 is pressed in, the
symbol
in the switch lights up. The window switches in the rear
doors are deactivated.
WARNING
•
Always take the key with you when leaving the vehicle - even if
you only intend to be gone for a short time. This is especially
important if children are left in the car. They might otherwise be
able to start the engine or use power-operated equipment such as
the electric windows - this could lead to injuries. The window
switches are only deactivated when the driver's door or the front
passenger's door is opened.
•
Always be careful when closing the windows. Careless use of
the electric windows can cause severe injuries.
•
When locking the vehicle from the outside, make sure that
nobody is inside the vehicle, as the windows cannot be opened
from the inside in an emergency.Note
The windows can be operated for about ten minutes after the igni-
tion has been switched off. The window switches are only deacti-
vated when the driver's door or the front passenger's door is
opened.
Convenience open/close function
The convenience open/close function allows you to open
and close the windows and the sun roof* with the remote
control key.You can select which windows are opened in the settings on
the sound system or MMI* ⇒page 55.
Convenience open function
– Press and hold the unlocking button
on the remote
control key until the windows have reached the desired
position and the sun roof* is open.
Convenience close function
– Press and hold the locking button
on the remote
control key until the windows and the sun roof* are
closed ⇒.
Convenience close function with advanced key*
– Touch and keep your hand in contact with the locking
sensor on the door handle until the windows and the sun
roof* are closed.
WARNING
•
Take care when closing the windows and the sun roof*. Care-
less or uncontrolled use can cause injuries.
•
For safety reasons, you should only use the remote control
open and close functions within about 2 metres of the vehicle. To
avoid injuries, always keep an eye on the windows when pressing
the button to close them. The windows and sun roof stop moving
as soon as the button is released.
ACADAS
AS
document_0900452a81b1b9de.book Seite 54 Donnerstag, 26. Juli 2007 9:16 09
Page 68 of 342
Lights and vision 66
Automatic wash and wipe
– Pull the lever to position .
– Release the lever again. The washer will stop and the
wipers will keep running for approximately 4 seconds.
The number of wipe cycles varies according to the length
of time the lever is pulled.
Switching off the wipers
– Move the lever to the "off" position .General notes
The washers and wipers will only work when the ignition is switched
on.
If you stop briefly, e.g. at traffic lights, the wiper speed will automat-
ically be reduced by one level.
The windscreen washer jets are heated when the ignition is
switched on if the outside temperature is low.
Dribble wipe
About 5 seconds after the wash and wipe cycle has finished, the
windscreen wiper system automatically gives the screen one extra
wipe to remove any dribbles of water.
If you want to deactivate the dribble wipe function while driving,
pull the lever to position again within 10 seconds.
The dribble wipe function will be re-activated the next time the igni-
tion is switched off and on.
Rain sensor*
The rain sensor will only function in the intermittent wipe position.
The intermittent wipe function is activated automatically when it
starts to rain.
Before you reach a road speed of 6 km/h you will have to activate the
rain sensor manually by switching it off and back on again.To reduce the sensitivity level of the rain sensor move control
⇒page 65, fig. 67 to the left. To increase the sensitivity level of the
rain sensor move the control to the right.
If you have selected a high sensitivity level for the rain sensor the
windscreen wipers will react sooner to any moisture on the wind-
screen. The wiper intervals in the intermittent wipe setting are also
varied automatically according to the road speed (in addition to the
sensitivity setting).
WARNING
•
Poor visibility can cause accidents. Always ensure that the
wiper blades are in good condition ⇒page 68, “Changing wiper
blades”.
•
The rain sensor is only intended to assist the driver. The driver
is still obliged to manually operate the windscreen wipers as
required depending on visibility.
•
Do not use water-repellent coatings on the windscreen. In bad
visibility conditions such as light rain, low sun or when driving at
night these coatings can cause increased dazzle, which is a
serious safety hazard. Such coatings can also cause the wiper
blades to judder.Caution
•
In icy conditions, always check that the wiper blades are not
frozen to the glass before using the wiper for the first time. If you
switch on the wipers when the wiper blades are frozen to the glass,
this could damage both the wiper blades and the wiper motor.
•
Make sure you switch off the windscreen wiper system (lever in
position "0") before you use an automatic car wash. This will avoid
inadvertent triggering of the wipers and possible damage to the
wiper system.
A5
A0
A5
AA
document_0900452a81b1b9de.book Seite 66 Donnerstag, 26. Juli 2007 9:16 09