technical data AUDI A4 2008 B8 / 4.G Owner's Manual
[x] Cancel search | Manufacturer: AUDI, Model Year: 2008, Model line: A4, Model: AUDI A4 2008 B8 / 4.GPages: 342, PDF Size: 13.14 MB
Page 43 of 342
Driver information system41
Controls
Safety
Driving tips
General maintenance
Self-help
Technical data
Applies to vehicles: with tyre pressure monitoringStoring the tyre pressures
When you change a tyre or the tyre pressure on your
vehicle, you must store the new tyre pressure via the
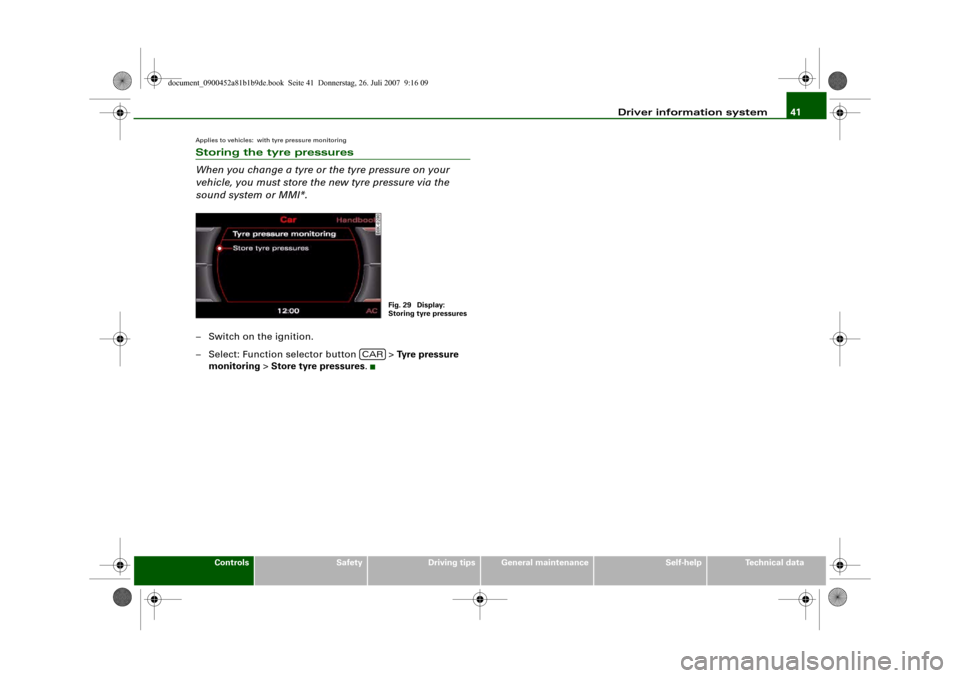
sound system or MMI*.– Switch on the ignition.
– Select: Function selector button > Tyre pressure
monitoring > Store tyre pressures.
Fig. 29 Display:
Storing tyre pressures
CAR
document_0900452a81b1b9de.book Seite 41 Donnerstag, 26. Juli 2007 9:16 09
Page 45 of 342
Doors and windows43
Controls
Safety
Driving tips
General maintenance
Self-help
Technical data To prevent yourself from being locked out, do not lock the vehicle
with the remote control key before closing the doors or boot lid. If
you accidentally press the locking button on your remote control
key when any of the doors (except for the driver's door) are open,
then put the key down inside the car and forget to take it with you
when you close the doors, you can still open the doors for about one
minute before the vehicle is locked.
WARNING
Do not leave anyone (especially children) in the car if it is locked
from the outside and the deadlock mechanism is activated: the
doors and windows cannot then be opened from the inside.
Locked doors could delay assistance in an emergency, potentially
putting lives at risk.
Note
•
Never leave any valuable items in the vehicle unattended. Even a
locked vehicle is not a safe.
•
If the diode on the driver's window sill lights up for about
30 seconds when the vehicle is locked, the central locking system or
anti-theft alarm* is not working properly. Please have the malfunc-
tion repaired by an Audi dealer or qualified workshop.
•
The interior monitor of the anti-theft alarm* system will only
function as intended if the windows and the tilting panorama roof*
are closed.
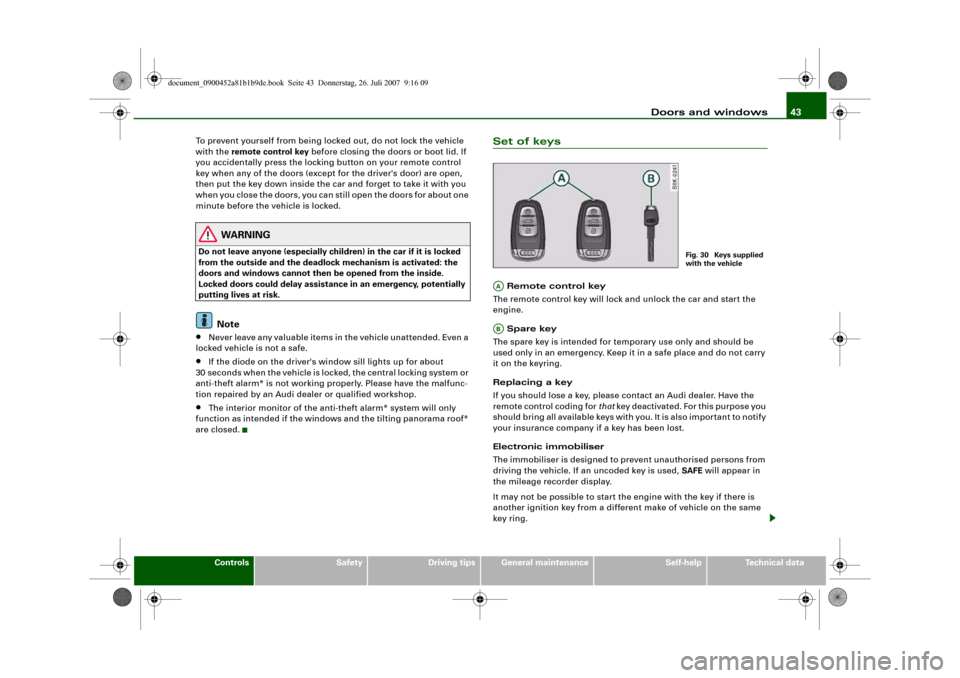
Set of keys Remote control key
The remote control key will lock and unlock the car and start the
engine.
Spare key
The spare key is intended for temporary use only and should be
used only in an emergency. Keep it in a safe place and do not carry
it on the keyring.
Replacing a key
If you should lose a key, please contact an Audi dealer. Have the
remote control coding for that key deactivated. For this purpose you
should bring all available keys with you. It is also important to notify
your insurance company if a key has been lost.
Electronic immobiliser
The immobiliser is designed to prevent unauthorised persons from
driving the vehicle. If an uncoded key is used, SAFE will appear in
the mileage recorder display.
It may not be possible to start the engine with the key if there is
another ignition key from a different make of vehicle on the same
key ring.
Fig. 30 Keys supplied
with the vehicle
AAAB
document_0900452a81b1b9de.book Seite 43 Donnerstag, 26. Juli 2007 9:16 09
Page 47 of 342
Doors and windows45
Controls
Safety
Driving tips
General maintenance
Self-help
Technical data
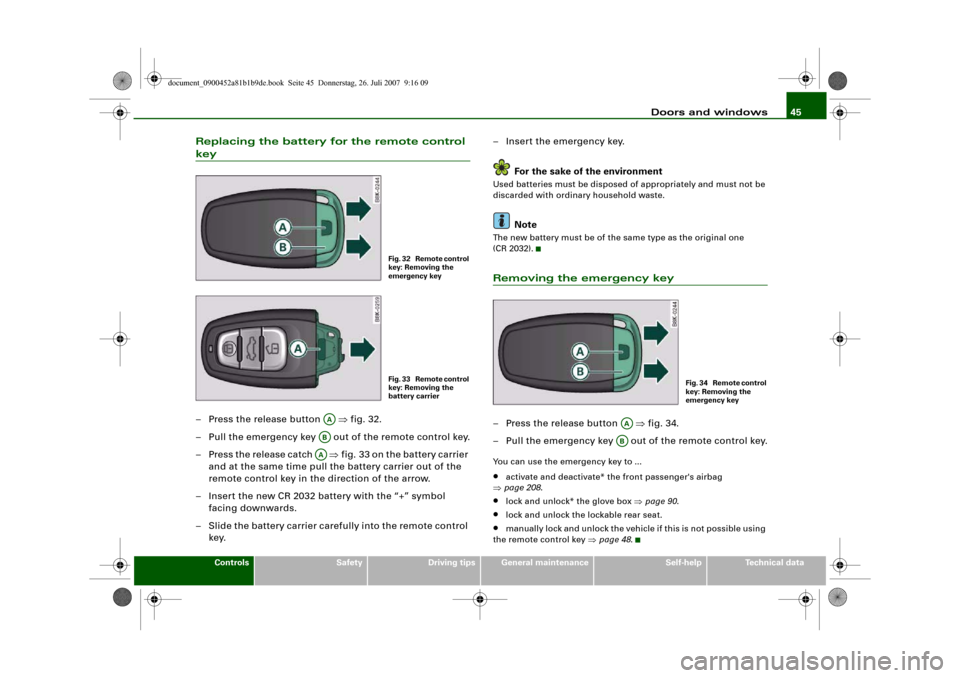
Replacing the battery for the remote control key– Press the release button ⇒fig. 32.
– Pull the emergency key out of the remote control key.
– Press the release catch ⇒fig. 33 on the battery carrier
and at the same time pull the battery carrier out of the
remote control key in the direction of the arrow.
– Insert the new CR 2032 battery with the “+” symbol
facing downwards.
– Slide the battery carrier carefully into the remote control
key.– Insert the emergency key.
For the sake of the environment
Used batteries must be disposed of appropriately and must not be
discarded with ordinary household waste.
Note
The new battery must be of the same type as the original one
(CR 2032).Removing the emergency key– Press the release button ⇒fig. 34.
– Pull the emergency key out of the remote control key.You can use the emergency key to ...•
activate and deactivate* the front passenger's airbag
⇒page 208.
•
lock and unlock* the glove box ⇒page 90.
•
lock and unlock the lockable rear seat.
•
manually lock and unlock the vehicle if this is not possible using
the remote control key ⇒page 48.
Fig. 32 Remote control
key: Removing the
emergency keyFig. 33 Remote control
key: Removing the
battery carrier
AAABAA
F i g . 3 4 R e m o t e c o n t r o l
key: Removing the
emergency key
AAAB
document_0900452a81b1b9de.book Seite 45 Donnerstag, 26. Juli 2007 9:16 09
Page 49 of 342
Doors and windows47
Controls
Safety
Driving tips
General maintenance
Self-help
Technical data
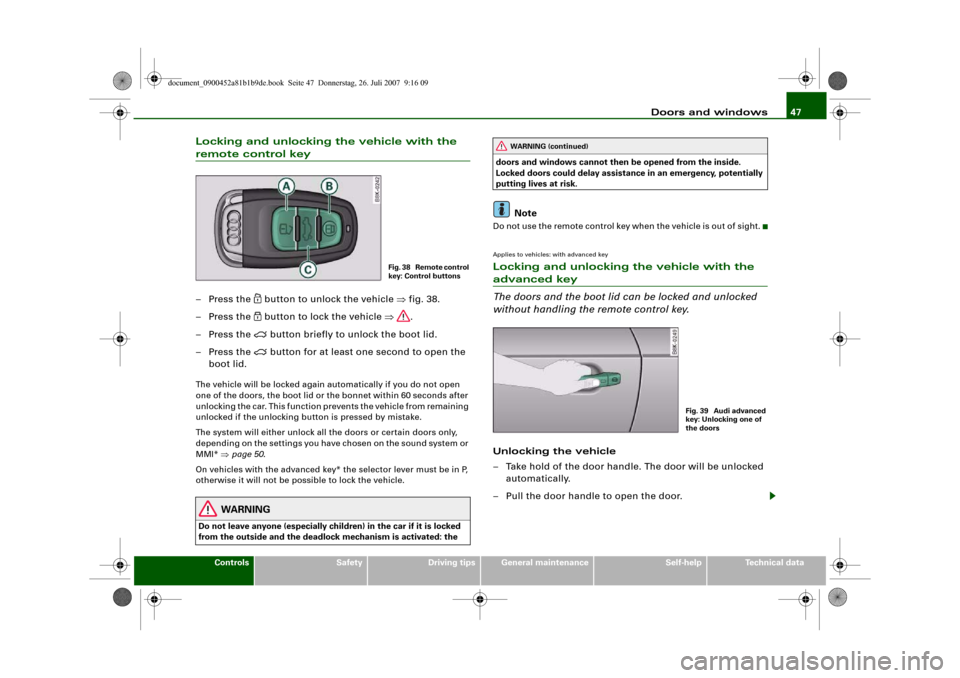
Locking and unlocking the vehicle with the remote control key– Press the
button to unlock the vehicle ⇒fig. 38.
– Press the button to lock the vehicle ⇒.
– Press the
button briefly to unlock the boot lid.
– Press the
button for at least one second to open the
boot lid.
The vehicle will be locked again automatically if you do not open
one of the doors, the boot lid or the bonnet within 60 seconds after
unlocking the car. This function prevents the vehicle from remaining
unlocked if the unlocking button is pressed by mistake.
The system will either unlock all the doors or certain doors only,
depending on the settings you have chosen on the sound system or
MMI* ⇒page 50.
On vehicles with the advanced key* the selector lever must be in P,
otherwise it will not be possible to lock the vehicle.
WARNING
Do not leave anyone (especially children) in the car if it is locked
from the outside and the deadlock mechanism is activated: the doors and windows cannot then be opened from the inside.
Locked doors could delay assistance in an emergency, potentially
putting lives at risk.
Note
Do not use the remote control key when the vehicle is out of sight.Applies to vehicles: with advanced keyLocking and unlocking the vehicle with the advanced key
The doors and the boot lid can be locked and unlocked
without handling the remote control key.Unlocking the vehicle
– Take hold of the door handle. The door will be unlocked
automatically.
– Pull the door handle to open the door.
Fig. 38 Remote control
key: Control buttons
WARNING (continued)
Fig. 39 Audi advanced
key: Unlocking one of
the doors
document_0900452a81b1b9de.book Seite 47 Donnerstag, 26. Juli 2007 9:16 09
Page 51 of 342
Doors and windows49
Controls
Safety
Driving tips
General maintenance
Self-help
Technical data
Locking
– Move the selector lever to position P (automatic
gearbox).
–Turn the key once to position ⇒ to lock the vehicle.
– If you turn the key to position a second time within
2seconds, this will lock the vehicle without activating
the deadlock mechanism.In order to switch off the anti-theft alarm*, you must switch on the
ignition within 15 seconds after opening the driver's door. Other-
wise the alarm will be triggered.
If the central locking system should fail to work at any time, the
passenger's door can be locked manually ⇒page 51.
WARNING
Do not leave anyone (especially children) in the car if it is locked
from the outside and the deadlock mechanism is activated: the
doors and windows cannot then be opened from the inside.
Locked doors could delay assistance in an emergency, potentially
putting lives at risk.
Note
•
The central locking switch and the release button for the boot lid
will function after the ignition is switched on.
•
If the vehicle is locked with the key when the central locking
system is operational, it is only possible to unlock all the doors and
the boot lid centrally with the key within the next 45 seconds. After
this period, the key will only unlock the driver's door.
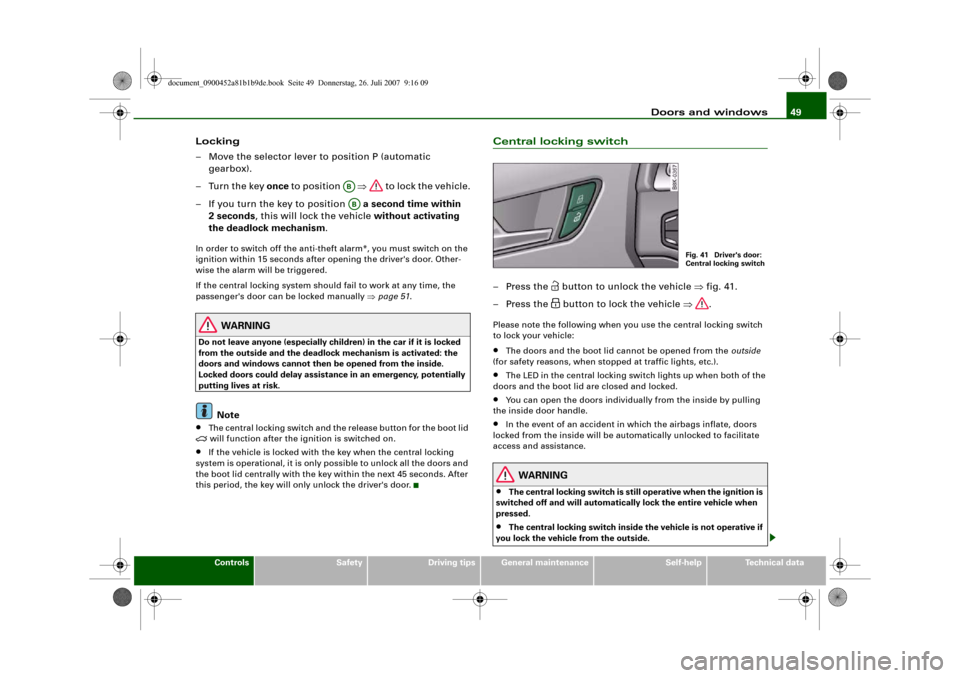
Central locking switch– Press the
button to unlock the vehicle ⇒fig. 41.
– Press the button to lock the vehicle ⇒.
Please note the following when you use the central locking switch
to lock your vehicle:•
The doors and the boot lid cannot be opened from the outside
(for safety reasons, when stopped at traffic lights, etc.).
•
The LED in the central locking switch lights up when both of the
doors and the boot lid are closed and locked.
•
You can open the doors individually from the inside by pulling
the inside door handle.
•
In the event of an accident in which the airbags inflate, doors
locked from the inside will be automatically unlocked to facilitate
access and assistance.
WARNING
•
The central locking switch is still operative when the ignition is
switched off and will automatically lock the entire vehicle when
pressed.
•
The central locking switch inside the vehicle is not operative if
you lock the vehicle from the outside.
ABAB
Fig. 41 Driver's door:
Central locking switch
document_0900452a81b1b9de.book Seite 49 Donnerstag, 26. Juli 2007 9:16 09
Page 53 of 342
Doors and windows51
Controls
Safety
Driving tips
General maintenance
Self-help
Technical data
Deactivating interior monitor
– Press switch ⇒page 50, fig. 43. The diode in the
switch will light up.
Deactivating tow-away protection
– Press switch . The diode in the switch will light up.The interior monitor and tow-away protection will be switched on
again automatically the next time the vehicle is locked.
WARNING
Do not leave anyone (especially children) in the car if it is locked
from the outside and the deadlock mechanism is activated: the
doors and windows cannot then be opened from the inside.
Locked doors could delay assistance in an emergency, potentially
putting lives at risk.Locking the doors manually if the central locking fails to work
If the central locking system should fail to work at any
time, each door will have to be locked separately.
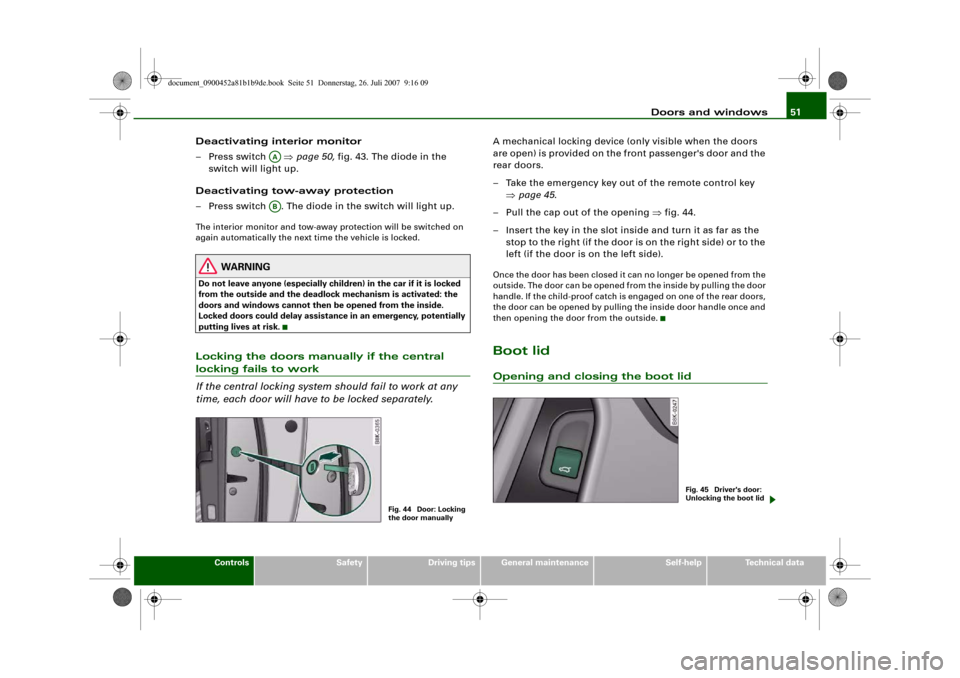
A mechanical locking device (only visible when the doors
are open) is provided on the front passenger's door and the
rear doors.
– Take the emergency key out of the remote control key
⇒page 45.
– Pull the cap out of the opening ⇒fig. 44.
– Insert the key in the slot inside and turn it as far as the
stop to the right (if the door is on the right side) or to the
left (if the door is on the left side).Once the door has been closed it can no longer be opened from the
outside. The door can be opened from the inside by pulling the door
handle. If the child-proof catch is engaged on one of the rear doors,
the door can be opened by pulling the inside door handle once and
then opening the door from the outside.Boot lidOpening and closing the boot lid
AAAB
Fig. 44 Door: Locking
the door manually
Fig. 45 Driver's door:
Unlocking the boot lid
document_0900452a81b1b9de.book Seite 51 Donnerstag, 26. Juli 2007 9:16 09
Page 55 of 342
Doors and windows53
Controls
Safety
Driving tips
General maintenance
Self-help
Technical data
Child-proof catchesChild-proof catches on the rear doors
The child-proof catches prevent the rear doors being
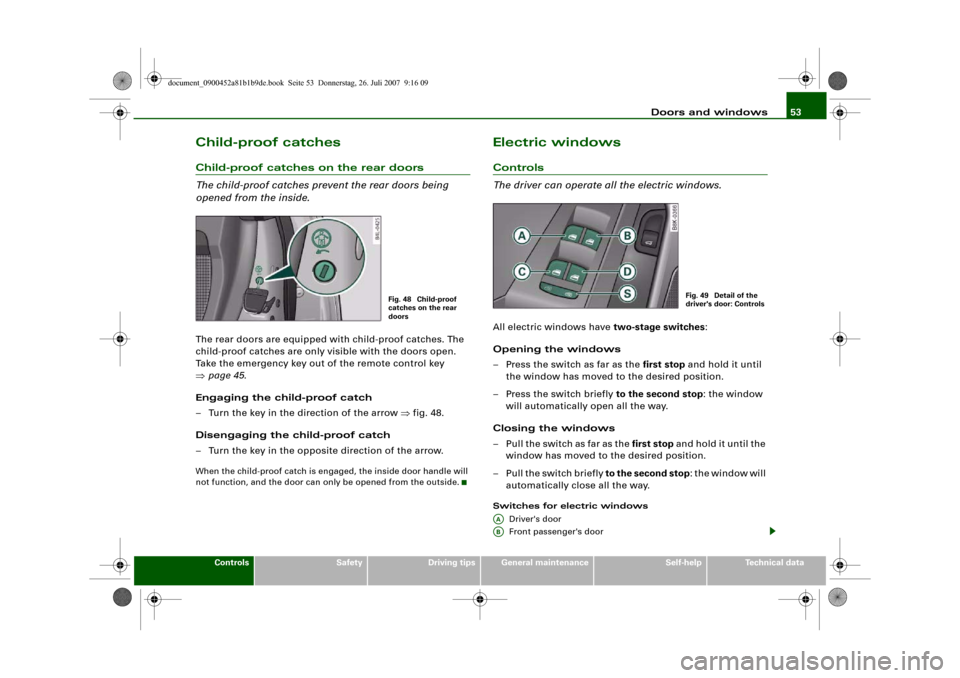
opened from the inside.The rear doors are equipped with child-proof catches. The
child-proof catches are only visible with the doors open.
Take the emergency key out of the remote control key
⇒page 45.
Engaging the child-proof catch
– Turn the key in the direction of the arrow ⇒fig. 48.
Disengaging the child-proof catch
– Turn the key in the opposite direction of the arrow.When the child-proof catch is engaged, the inside door handle will
not function, and the door can only be opened from the outside.
Electric windowsControls
The driver can operate all the electric windows.All electric windows have two-stage switches:
Opening the windows
– Press the switch as far as the first stop and hold it until
the window has moved to the desired position.
– Press the switch briefly to the second stop: the window
will automatically open all the way.
Closing the windows
– Pull the switch as far as the first stop and hold it until the
window has moved to the desired position.
–Pull the switch briefly to the second stop: the window will
automatically close all the way.Switches for electric windows
Driver's door
Front passenger's door
Fig. 48 Child-proof
catches on the rear
doors
Fig. 49 Detail of the
driver's door: Controls
AAAB
document_0900452a81b1b9de.book Seite 53 Donnerstag, 26. Juli 2007 9:16 09
Page 57 of 342
Doors and windows55
Controls
Safety
Driving tips
General maintenance
Self-help
Technical data
Settings for convenience open function
The driver can use the sound system or MMI* to select
which windows are opened.– Select: Function selector button > Windows >
Convenience open.If you wish to use the convenience open function for the windows
and the sun roof*, select on for the functions Front doors, Rear
doors and Sun roof*.What to do after a malfunction
The one-touch open and close function must be reacti-
vated if the battery has been disconnected.– Pull and hold the electric window switch until the
window is fully closed.
– Release the switch and then pull it again for at least one
second.
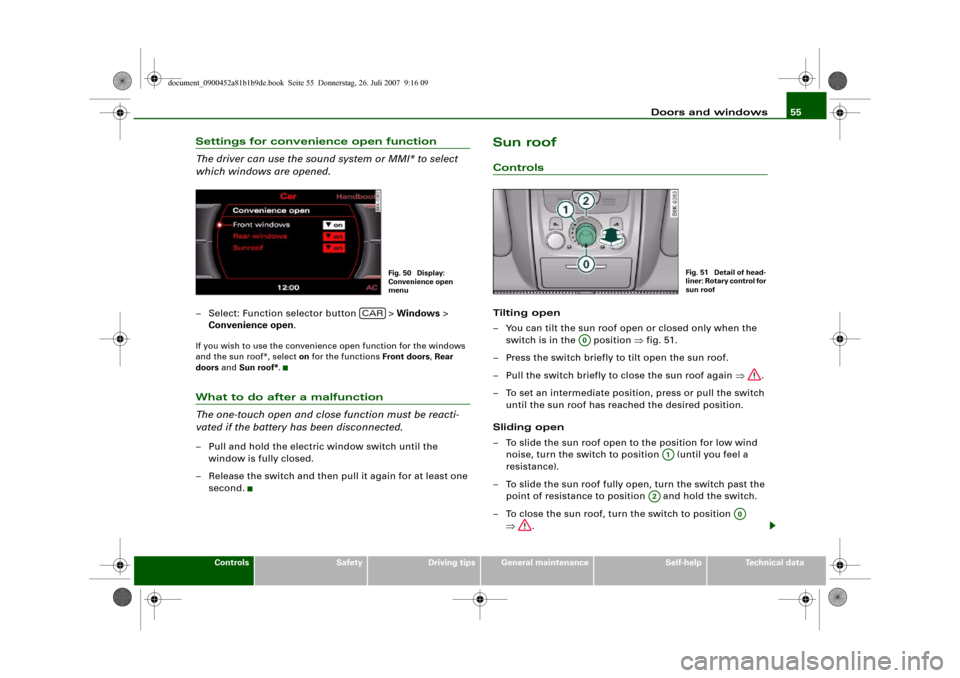
Sun roofControlsTilting open
– You can tilt the sun roof open or closed only when the
switch is in the position ⇒fig. 51.
– Press the switch briefly to tilt open the sun roof.
– Pull the switch briefly to close the sun roof again ⇒.
– To set an intermediate position, press or pull the switch
until the sun roof has reached the desired position.
Sliding open
– To slide the sun roof open to the position for low wind
noise, turn the switch to position (until you feel a
resistance).
– To slide the sun roof fully open, turn the switch past the
point of resistance to position and hold the switch.
– To close the sun roof, turn the switch to position
⇒.
Fig. 50 Display:
Convenience open
menu
CAR
Fig. 51 Detail of head-
liner: Rotary control for
sun roof
A0
A1
A2
A0
document_0900452a81b1b9de.book Seite 55 Donnerstag, 26. Juli 2007 9:16 09
Page 59 of 342
Lights and vision57
Controls
Safety
Driving tips
General maintenance
Self-help
Technical data
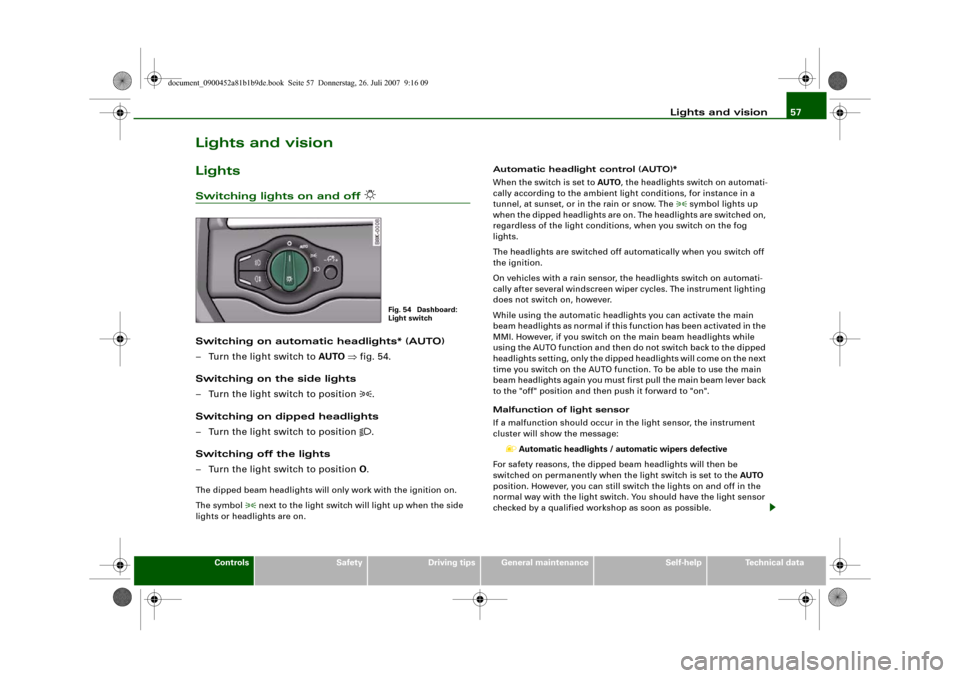
Lights and visionLightsSwitching lights on and off
Switching on automatic headlights* (AUTO)
– Turn the light switch to AUTO ⇒fig. 54.
Switching on the side lights
– Turn the light switch to position
.
Switching on dipped headlights
– Turn the light switch to position
.
Switching off the lights
– Turn the light switch to position O.
The dipped beam headlights will only work with the ignition on.
The symbol
next to the light switch will light up when the side
lights or headlights are on.Automatic headlight control (AUTO)*
When the switch is set to AUTO, the headlights switch on automati-
cally according to the ambient light conditions, for instance in a
tunnel, at sunset, or in the rain or snow. The
symbol lights up
when the dipped headlights are on. The headlights are switched on,
regardless of the light conditions, when you switch on the fog
lights.
The headlights are switched off automatically when you switch off
the ignition.
On vehicles with a rain sensor, the headlights switch on automati-
cally after several windscreen wiper cycles. The instrument lighting
does not switch on, however.
While using the automatic headlights you can activate the main
beam headlights as normal if this function has been activated in the
MMI. However, if you switch on the main beam headlights while
using the AUTO function and then do not switch back to the dipped
headlights setting, only the dipped headlights will come on the next
time you switch on the AUTO function. To be able to use the main
beam headlights again you must first pull the main beam lever back
to the "off" position and then push it forward to "on".
Malfunction of light sensor
If a malfunction should occur in the light sensor, the instrument
cluster will show the message:
Automatic headlights / automatic wipers defective
For safety reasons, the dipped beam headlights will then be
switched on permanently when the light switch is set to the AUTO
position. However, you can still switch the lights on and off in the
normal way with the light switch. You should have the light sensor
checked by a qualified workshop as soon as possible.
Fig. 54 Dashboard:
Light switch
document_0900452a81b1b9de.book Seite 57 Donnerstag, 26. Juli 2007 9:16 09
Page 61 of 342
Lights and vision59
Controls
Safety
Driving tips
General maintenance
Self-help
Technical data
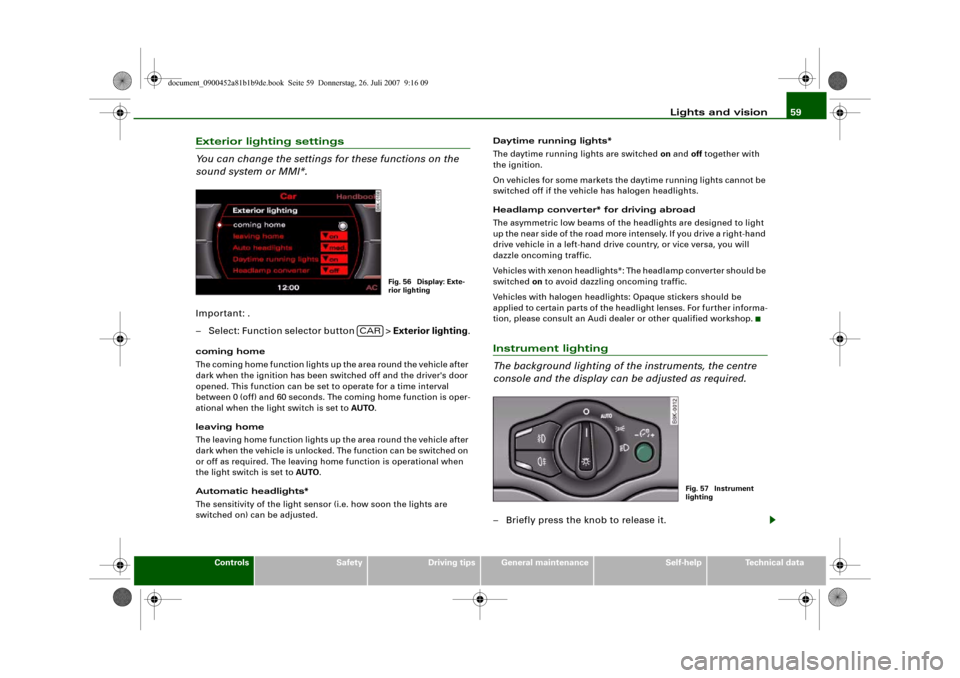
Exterior lighting settings
You can change the settings for these functions on the
sound system or MMI*.Important: .
– Select: Function selector button > Exterior lighting.coming home
The coming home function lights up the area round the vehicle after
dark when the ignition has been switched off and the driver's door
opened. This function can be set to operate for a time interval
between 0 (off) and 60 seconds. The coming home function is oper-
ational when the light switch is set to AUTO.
leaving home
The leaving home function lights up the area round the vehicle after
dark when the vehicle is unlocked. The function can be switched on
or off as required. The leaving home function is operational when
the light switch is set to AUTO.
Automatic headlights*
The sensitivity of the light sensor (i.e. how soon the lights are
switched on) can be adjusted.Daytime running lights*
The daytime running lights are switched on and off together with
the ignition.
On vehicles for some markets the daytime running lights cannot be
switched off if the vehicle has halogen headlights.
Headlamp converter* for driving abroad
The asymmetric low beams of the headlights are designed to light
up the near side of the road more intensely. If you drive a right-hand
drive vehicle in a left-hand drive country, or vice versa, you will
dazzle oncoming traffic.
Vehicles with xenon headlights*: The headlamp converter should be
switched on to avoid dazzling oncoming traffic.
Vehicles with halogen headlights: Opaque stickers should be
applied to certain parts of the headlight lenses. For further informa-
tion, please consult an Audi dealer or other qualified workshop.
Instrument lighting
The background lighting of the instruments, the centre
console and the display can be adjusted as required.– Briefly press the knob to release it.
Fig. 56 Display: Exte-
rior lighting
CAR
Fig. 57 Instrument
lighting
document_0900452a81b1b9de.book Seite 59 Donnerstag, 26. Juli 2007 9:16 09