stop start AUDI A4 2015 User Guide
[x] Cancel search | Manufacturer: AUDI, Model Year: 2015, Model line: A4, Model: AUDI A4 2015Pages: 304, PDF Size: 74.86 MB
Page 89 of 304
M N
~ co
rl I.O
"' rl
"' rl
Shift to N or P to start engine
This message appears when attempting to
start the engine if the selector lever for the
automatic transmission is not in the P or N
position. The engine can only be started with
the selector in these positions .
!!I Is the key in the vehicle?
This message appears if the master key is re
moved from the vehicle with the engine run
ning.
If the master key is no longer in the ve
hicle, you cannot switch on the ignition after
stopping the engine and you also cannot start
the engine again. Moreover, you cannot lock
the vehicle from the outside with the key.
Shift to P otherwise vehicle can roll away.
Doors do not lock if lever is not in P.
This message appears for safety reasons
along with a warning signal.
It appears if the
selector lever for the automatic transmission
is not in the P position when switching off the
ignition. Move the selector lever to the P posi
tion, otherwise the vehicle is not secured
against rolling away. You also cannot lock the
vehicle using the locking button* on the door
handle or using the remote key.
Convenience key defective! Use ignition lock
This message appears if the engine must be
started or stopped using the ignition key and
not the
I START ENGINE STOP! button.
On the road 87
Electromechanical
parking brake
Operation
The electromechanical parking broke replaces
the hand broke.
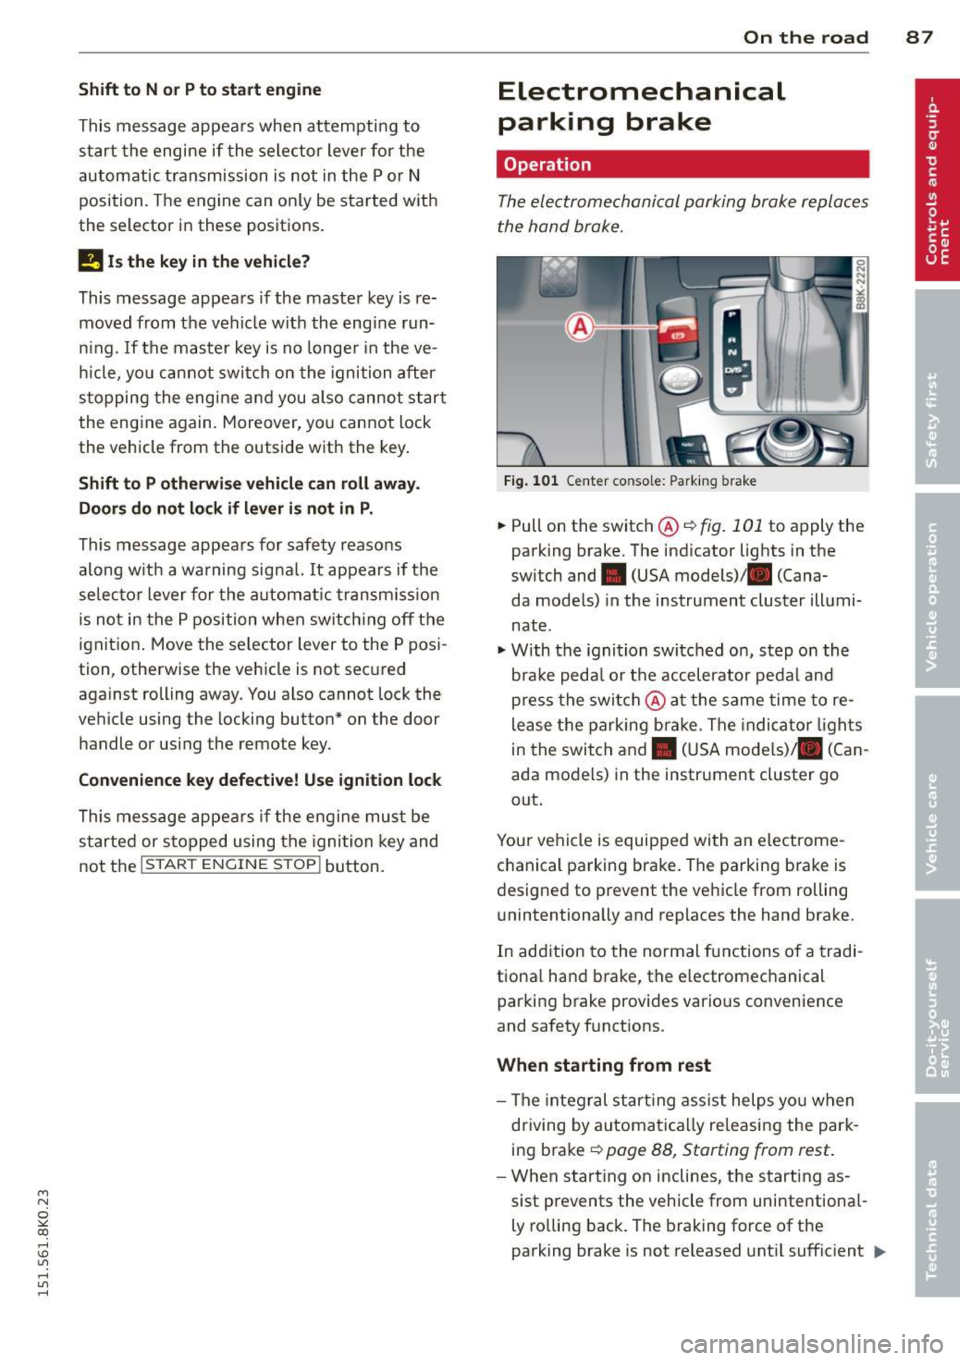
Fig. 101 Center co nsole: Parking b rake
.,. Pull on the switch@¢ fig. 101 to apply the
parking brake. The indicator lights in the
switch and • (USA models) . (Cana-
da models) in the instrument cluster illumi
nate .
"'With the ignition switched on, step on the
brake pedal or the accelerator pedal and
press the switch @at the same time to re
lease the parking brake. The indicator lights
in the switch and. (USA models)/ . (Can
ada models) in the instrument cluster go
out.
Your vehicle is equipped with an electrome
chanical parking brake. The parking brake is
designed to prevent the vehicle from rolling unintentionally and replaces the hand brake.
In addition to the normal functions of a tradi
tional hand brake, the electromechanical
parking brake provides various convenience
and safety functions .
When starting from rest
- The integral starting assist helps you when
driving by automatically releasing the park
ing brake ¢
page 88, Starting from rest.
-When starting on inclines , the starting as-
sist prevents the vehicle from unintentional-
ly rolling back. The braking force of the
parking brake is not released until sufficient
111>
Page 90 of 304
88 On the road
driving force has been built up at the
wheels.
E mergency brake function
An emergency brake ensures t hat the vehicle
can be slowed down even if the
normal brakes
fail c::>
page 89, Emergency braking .
8_ WARNING
If a gear or a drive range (automatic trans
mission) is engaged with the vehicle sta
tionary and the engine running, you must in no instance accelerate or release the
clutch* carelessly. Otherwise the vehicle
will start to move immediately -risk of an
accident .
(D Tips
-If the parking brake is applied with the
ignition switched off, the indicator lights
i n the sw itch and -(USA models)/ .
(Canada models) in the instrument clus
ter will go out after a certain per iod of
time .
- Occas iona l noises when the park ing
brake is applied and re leased a re no rma l
and are not a ca use for concern.
- Wh en the vehicle is parked, the parking
brake goes through a se lf-test cycle a t
regular intervals. Any assoc iated noises
are no rma l.
Parking
.. Press the brake peda l to stop the v ehicle .
.. Pull the switch @c::>
pag e 87, fig. 101 to set
the parking brake .
.. Automatic transmiss ion: Move the selector
lever to P .
.. Turn the eng ine off c::>
&_ .
.. Manua l transm ission: Shift into 1st gear .
.. When on incl ines or decli nes, tu rn the steer
i ng wheel so th at the vehicle will roll into
the curb if it begins to move .
8_ WARNING
-When you leave your vehicle -even if on
ly briefly -always remove the ignition
key . Th is applies particularly whe n chil
dren remain in the vehicle . Otherwise the
children could star t the eng ine , release
the par king brake or operate electrical
equipme nt (e.g. power windows). There
is the risk of an accident.
- W hen the veh icle is locked, no one -pa r
ticularly not children should remain in
the vehicle . Locked doors make it more
difficult for emergency worke rs to get in
to the vehicle -putting lives at risk .
· Starting from rest
The starting assist function ensures that the
parking broke is rel eased automatically upon
starting.
Stopping and appl ying parking brake
.. Pull the sw itch @c::> page 87 , fig. 101 to ap-
p ly the parking bra ke.
Starting and automatically releasing the
parking brake
.. When you start to dr ive as usual, the p ark
ing bra ke is automatica lly released and your
vehicle begins to move .
When stopping at a t raffic signal or stopping
in city t raffic on vehicles with an a utomatic
t ransmission, the parking brake can be ap
plied. The vehicle does not have to be held
with the footbrake . The parking brake elimi
nates the tendency to creep w ith a dr ive range
engaged. As soon as you drive off as usual,
the parking brake is re leased automat ically
and the vehicle starts to move .
Starting on slop es
When starting on inclines, the starting assist
prevents the vehicle from un in tent ionally roll
ing back. The braking force of the parking
brake is not released until suffic ient driving
force has been built up at the wheels .
11>-
Page 91 of 304
"' N
0 ::.,: co ,...., \!) ..,.,
,...., ..,., ,....,
@ Tips
For safety reasons, the par king brake is re
leased au tomatically only when the dr iv
er 's safety belt is engage d in the buckle.
Starting off with a trailer
To prevent rolling back unintentionally on an
incline , do the following:
~ Keep the switch @¢ page 87, fig . 101
pulled and depress the accelerator. The
park ing brake stays app lied and prevents
the vehicle from rolling backward.
~ You can release the switch @once you are
sure that you are develop ing enough dr iv ing
force at the wheels by depress ing the accel
erator .
Depending on the weight of the r ig (vehicle
and trailer) and the severity of the incl ine, you
may roll backwards as you start . You can pre
ve nt rolling backwards by holding the parking
b rake sw itch @pulled out and accelerating -
jus t as you would whe n starting on a hill with
a conventional hand brake.
Emergency braking
In the event that the conventional brake sys
tem fails or locks.
~ I n an eme rgency, pull the sw itch @
¢page 87, fig. 101 and continue to p ull it
to s low your vehi cle down wi th the pa rk ing
brake .
~ As soon as you release the switch @ or ac-
ce lerate, the braking process stops.
I f you pull the switch @and ho ld it above a
speed of about 5 mph (8 km/h), the emergen
cy braking function is initiated . The vehicle is
braked at a ll four wheels by activating the hy
draulic brake system. T he brake performance
is similar to making an emergency stop ¢
&. .
In order not to activate the emergency brak
ing by m istake, an a udible warning tone (buz
zer) sounds when the switch @is pulled. As
soon as the switch @ is released, or the accel-
On th e ro ad 89
erator peda l is depressed, eme rgency braking
stops.
A WARNING
Emergency braking should only be used in
an emergency, when the norma l foot brake
has fa iled or the brake pedal is obstructed.
Using the parking brake to perform emer
gency b rak ing will slow your vehicle down
as if you had made a full bra ke application .
T he laws of physics cannot be suspended
even with ESC and its asso ciated compo
nents (ABS, ASR , EDS) . In corners and
when road or weathe r conditions are bad,
a full brake application can ca use the vehi
cle to sk id or the rear end to break away -
risking an accident.
Speed warning system
Overv iew
The speed warning system helps you to keep
your driving speed below a set speed limit.
The speed warn ing system warns if the driver
exceeds a previous ly stored max imum speed.
A war ning tone w ill so und as soon as the vehi
cle speed exceeds the set speed by about 3 mph (3 km/h). At the same time, a warn ing
symbol appears in the display. The symbo l's
appearance might be different in some mod
els.
T he speed wa rn ing system has one or two*
warning thresholds that func tion independ
en tly of each othe r and that have somewhat
different purposes:
Speed warning 1
You can use speed warn ing 1 to set the maxi
mum speed while you are d riving. This se tting
will re ma in in effec t unti l yo u t urn
off the ig ni
tion, assuming that yo u have no t changed or
reset the setting.
T he . (USA models)/ . (Canada models)
speed wa rning sym bol in the warn ing 1 dis-
play appears w hen you exceed the maximum ..,.
Page 93 of 304
M N
~ co
rl I.O
"' rl
"' rl
Cruise control
Switching on
The cruise control system makes it possible to
drive at a constant speed starting at 20 mph (30 km/h).
0
f
~
0
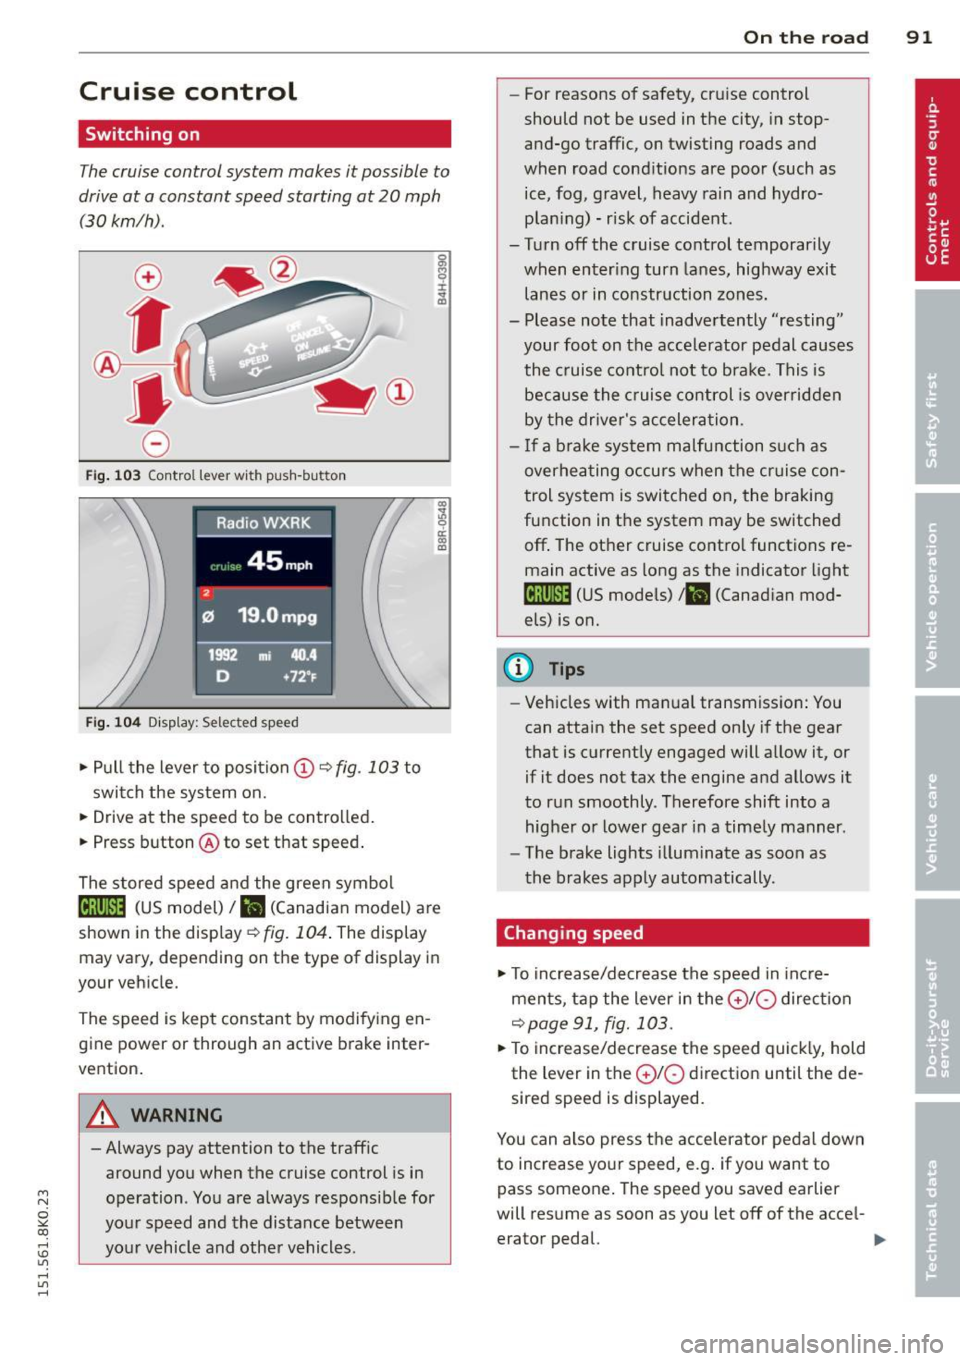
Fig . 103 Contro l lever wi th push-but ton
Fig . 104 Display: Se lected speed
.,. Pull the lever to position(!)~ fig. 103 to
swit ch the system on.
.,. Drive at the speed to be controlled.
.,. Press button @ to set that speed .
.,
;1; 9 a: .,
"'
The stored speed a nd the green symbol
[ij;(i )~14 (US model)/ .. (Canadian model) are
shown in the display~
fig. 104 . The display
may vary, depending on the type of display in
your vehicle.
The speed is kept constant by modifying en gine power or through an active brake inter
vention.
A WARNING
- Always pay attention to the traffic around you when the cruise control is in
operation . You are always responsib le for
your speed and the distance between
your vehicle and other vehicles.
On th e road 91
-For reasons of safety, cruise control
should not be used in the city, in stop
and-go traffic, on twisting roads and
when road conditions are poor (such as ice, fog, gravel, heavy ra in and hydro
plan ing) -risk of accident .
- Turn off the cruise control temporarily when enter ing turn lanes, highway exit
lanes or in construction zones.
- Please note that inadvertently ''resting" your foot on the accelerator pedal causes
the cruise control not to brake. This is
because the cruise control is overridden
by the driver's accelera tion.
- I f a brake system malfunction such as
overhea ting occurs when the cruise con
trol system is switched on, the braking
function in the system may be switched
off . The other cruise contro l functions re
main active as long as the indicator light
lij;(i )~14 (US models) ;a (Canad ian mod
els) is on.
(D Tips
- Vehicles with manual transmission: You
can attain the set speed only if the gear
that is currently engaged will allow it, or
if it does not tax the engine and allows it
to run smoothly . Therefore shift into a
higher or lower gear in a timely manner .
- The brake lights illuminate as soon as
the brakes apply automatically.
Chang ing speed
.,. To increase/decrease the speed in incre
ments, tap the lever in the
0 10 direction
~ page 91, fig.103 .
.,. To increase/decrease the speed quick ly, hold
the lever in the
0 10 direction until the de
sired speed is displayed.
You can also press the accelerator pedal down
to increase your speed, e.g . if you want to
pass someone . The speed you saved earlier
will resume as soon as you let off of the acce l-
erator pedal. .,..
Page 95 of 304
M N
~ co
rl I.O
"' rl
"' rl
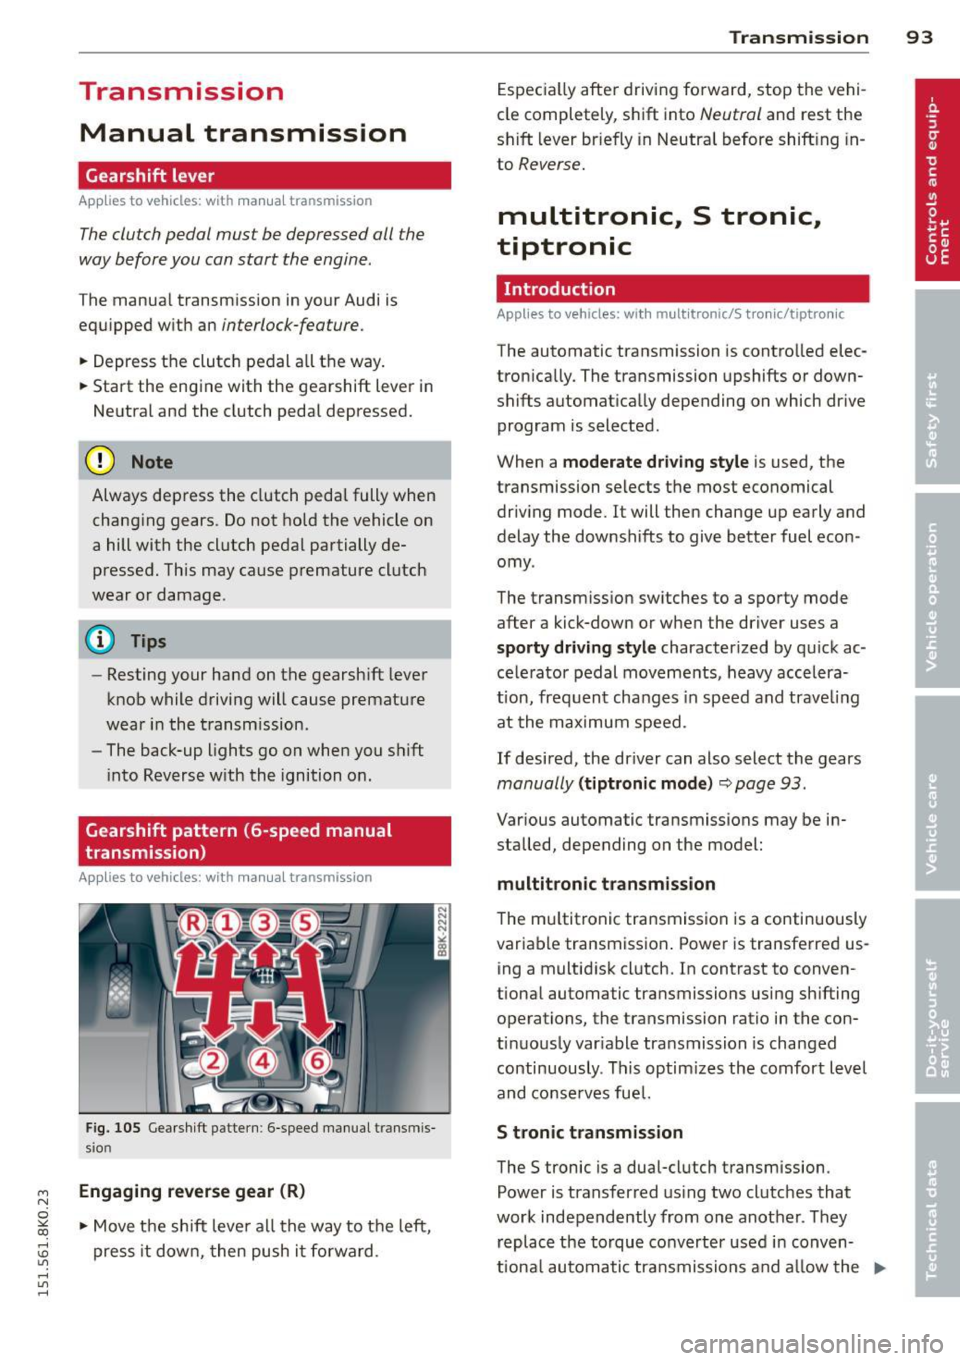
Transmission Manual transmission
Gearshift lever
App lies to vehicles: with manual transmission
The clutch pedal must be depressed all the
way before you can start the engine.
T he manual transmission in your Audi is
equipped with an
interlock-feature.
~ Depress the clutch pedal all the way.
~ Start the eng ine with the gearshift lever in
Neutral and the clutch pedal depressed.
(D Note
Always depress the clutch pedal fully when
changing gears . Do not hold the vehicle on
a hill with the clutch pedal partially de
pressed. This may cause premature clutch
wear or damage .
@ Tips
-Resting your hand on the gearshift lever
knob while driving will cause premature
wear in the transmission.
- The back-up lights go on when you shift
into Reverse w ith the ignition on.
Gearshift pattern (6-speed manual
transmission)
Applies to vehicles: with manual transmission
Fig. 105 Gearshift pattern : 6-speed manual transmis
sio n
Engaging reverse gear (R)
~ Move the shift lever all the way to the left,
press it down, then push it forward . Transmission
93
Especially after driving forward, stop the vehi
cle completely, shift into
Neutral and rest the
shift lever br iefly in Neutral before shift ing in
to
Reverse.
multitronic., S tronic.,
tiptronic
Introduction
Applies to vehicles: with multitronic/S tronic/tiptronic
The automatic transmission is controlled elec
tronically. The transmission upshifts or down
shifts automatically depending on which drive
program is selected .
When a
moderate driving style is used, the
transmission selects the most economical
driving mode. It will then change up early and
delay the downshifts to give better fuel econ
omy .
The transmission switches to a sporty mode
after a kick-down or when the driver uses a
sporty driving style characterized by quick ac
celerator pedal movements, heavy accelera
t ion, frequent changes in speed and trave ling
at the maximum speed.
If desired, the driver can also select the gears
manually (tiptronic mode)~ page 93 .
Various automatic transmissions may be in
stalled, depending on the model:
multitronic transmission
The multitronic transmission is a continuously
variable transmission. Power is transferred us
ing a multidisk clutch. In contrast to conven
tional automatic transmissions using shifting
operations, the transmission ratio in the con
tinuously var iable transmission is changed
continuously . This optimizes the comfort level
and conserves fuel.
S tronic transmission
The S tronic is a dual-clutch transmission .
Power is transferred using two clutches that
work independently from one another_ They
replace the torque converter used in conven
tiona l automatic transmissions and allow the ..,_
Page 98 of 304
96 Transmission Starting the engine
.. The selecto r lever must be in P or N.
Starting off
.. Press and hold the brake pedal.
.. Press and hold the release button in these
lector lever handle, se lect t he des ired selec
tor lever position such as D/S and release
the button .
.. Wait briefly unti l the transmission has shift
ed (you will feel a slight movement) .
.. Remove your foot from the brake pedal and
acce lerate.
Stopping temporarily
.. Keep the vehicle stationary usin g the brak
ing peda l, for examp le at traffic lights .
.. Do not press the accelerator pedal when do
ing this .
.. To prevent the veh icle from rolling when you
start driving, set the parking brake when
stopping on steep inclines
c> _& .
.. The parking brake will release automatically
and the vehicle w ill start moving once you
press the accelerator pedal.
Stopping/parking
If the selector lever is not in the P position
when you open the dr iver's door, the vehicle
could roll. The message
Transmission: Car
may roll! Shift to park!
appears.
.. Press and hold the brake pedal until the ve-
hicle has come to a complete stop .
.. Apply the parking brake
c> page 88, Parking .
.. Select the P selector lever position c> _&.
Stopping on an incline
.. Always press the brake pedal to hold the ve
hicle in place and prevent it from "rolling
back"
c> _& . Do not try to prevent the vehi
cle from "roll ing back" when a gear is en
gaged by increasing the eng ine speed
c> (D.
Starting on an incline
.. Activate the parking brake.
.. With the driving gear se lected, press the ac
celerator pedal carefully. The park ing brake will release automatically if your seat
belt is
fastened .
Under certain circumstances, such as driving
in the mo untains, it may be usefu l to switch
temporarily to the manual shift program in or
der to adjust the gears to the driving cond i
tions by hand
c> page 98.
On slopes, activate the parking brake first and
then move the selector lever to the P position .
This prevents too much stress from being
placed on the locking mechanism .
Vehicles with multitronic transmission: Your
vehicle is equipped with
hill hold assist allow
ing you to start while on an incline. The sys
tem is activated when the brake pedal is
pressed down and he ld
for a few seconds . The
brake pressure will hold for
a moment after
the brake pedal loosens to prevent the vehicle
from roll ing backwards wh ile starting up .
A WARNING
-The vehicle can also roll when the engine
is stopped.
- Unintended vehicle movement can cause
serious injury.
- Never leave your vehicle with the engine
r un ning while in gear. If you must leave
your veh icle when the engine is running,
activate the parking brake and move the
selecto r lever to P.
- Power is still transmitted to the wheels
when the engine is running at idle. To
prevent the vehicle from "creeping", you
must keep your foot on the brake when
the engine is running and the selector
lever is in D/S or R or "tiptronic" mode is
selected .
- Do not press the accelerator pedal when changing the selector lever position
while the veh icle is stationary and the
engine is running.
- Never shift into R or P while driving.
- Before driving down a steep s lope, re-
duce your speed and shift into a lower
gear with "tiptronic".
Page 101 of 304
"' N
0 ::.,: co ,...., \!) ..,.,
,...., ..,., ,....,
A WARNING 1=
Please note that the drive wheels can spin
if kick-down is used on a smooth slippery
road - there is a risk of skidding.
Launch Control Program
App lies to vehicles: with S tronic
The Launch Control Program provides the
best acceleration possible when starting from
a stop .
Requirement : The engine must be at operat
ing temperature and the steering wheel must
not be turned .
~ Sedan: Press the l.e OFFI button ¢ page 187
while the engine is running . The II indica
tor light illuminates in the instrument clus
ter and
Stabilization cont ro l ( ES C): S port .
Warning! R estrict ed s tabilit y
appears in the
driver information system display.
~ all road: Press the l.e O FF I but to n
¢
page 187 while the engine is running.
T he
II indicator light illuminates in the in
strument cluster and
Stabilization control
( ES C): Off ro ad. W arning! Restri cted stabil
it y
appears in the driver information system
display.
~ Move the selector lever to the D/S pos ition
to select sport mode (S) or select the
dy
namic
driving mode in drive select*
¢ page 116.
~ Press the bra ke peda l st rongly wit h your left
foot and hold it dow n for at least 1 second.
~ At the same time, press the accelerator ped
al down complete ly with your right foot un
ti l the engine reaches and maintains a high
RPM .
~ Remove your foot from the brake pedal
within S seconds¢.& .
A WARNING
-Always adapt your driving to the traffic
flow .
- Only use the Launch Control Program when road and traffic condit ions allow it
and other dr ivers will not be endangered
-
Tran sm iss ion 99
or annoyed by your driving and the vehi
cle's acceleration.
- Please note that the driving wheels can
spin and the vehicle can break away
when sport mode/offroad mode is
sw itched on, especially when the road is
slippery.
- Once you have accelerated, you shou ld
sw itch sport mode/offroad mode off by
press ing the
I~ O FFI button .
(l) Tips
- The transmission temperature may in
crease s ignificantly after using the
Launch Control Program. If that hap-
pens, the program may not be availab le
for a few m inutes .
It will be ava ilable
again after a cool-down per iod.
- When accelerating using the Launch
Cont ro l program, a ll vehicle parts are
subjec t to heavy loads. This can result in
increase d wear.
Transmission malfunction
Applies to vehicles: with multitronic/S tronic/tiptronic
[il Transmission : Pre ss brake pedal and se
lect gear again.
Press the br ake peda l and select the desired
selector lever posi tion again. You ca n then
continue driving .
[il Transmi ssion overh eating : Pl ea se drive
con servatively .
The transm iss ion temperature has increased
s ignificantly due to the sporty d riving manner.
D rive in a less sporty ma nner until the tem
perature re turns to the normal range and the
i ndica tor ligh t switches o f.
[O] Transmission malfunction : You can con
tinu e driving
There is a system malfunction i n the transmis
s io n. You may cont inue d rivi ng . Drive to your
authorized Aud i dea le r or qualified repa ir fa
c ili ty soon to have the ma lfunction corrected. ..,.
Page 103 of 304
M N
~ co
rl I.O
"' rl
"' rl
Audi adaptive cruise control and braking guard 101
Audi adaptive cruise
control and braking
guard
Introduction
App lies to vehicles: with Audi adaptive cruise control
The adaptive cruise control system assists the
driver by regu lating vehicle speed and helping
to maintain a set distance to the vehicle
ahead, within the limits of the system . If the
system detects a moving vehicle up ahead,
adaptive cruise control can brake and then ac
celerate your vehicle . This he lps to make driv
ing more comfortable on long highway
stretches.
The braking guard system can warn you about
an impending collision and initiate braking
maneuvers
c::;, page 107.
Adaptive cruise control and braking guard
have technical limitations that you must
know, so please read this section carefully, un
derstand how the system works and use them properly at all times.
General information
General information
Applies to vehicles: with Audi adaptive cruise control
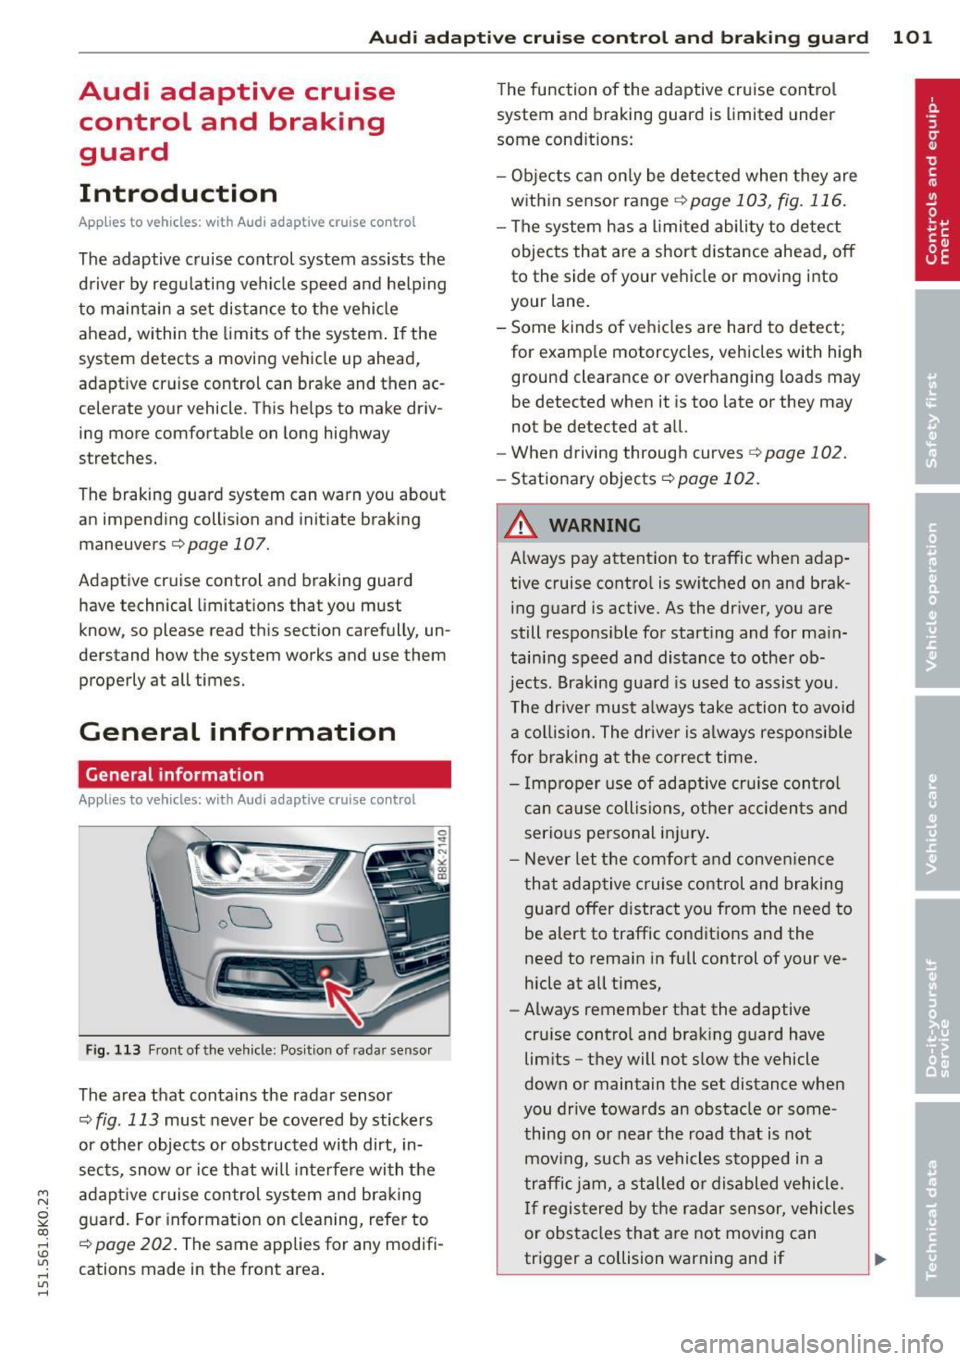
Fig. 113 Front of the vehicle: Position of radar sensor
The area that contains the radar sensor
c::;, fig. 113 must never be covered by stickers
or other objects or obstructed with dirt, in
sects, snow or ice that will interfere with the
adaptive cruise control system and braking
guard. For information on cleaning, refer to
c::;, page 202. The same applies for any modifi
cations made in the front area . The
function of the adaptive cruise control
system and braking guard is limited under
some cond itions:
- Objects can only be detected when they are
within sensor range
.:!>page 103 , fig. 116.
-The system has a limited ability to detect
objects that are a short distance ahead, off
to the side of your vehicle or moving into
your lane.
- Some kinds of vehicles are hard to detect;
for examp le motorcycles, vehicles with high
ground clearance or overhanging loads may
be detected when it is too late or they may
not be detected at all.
- When driving through curves
c::;, page 102.
-Stationary objects c::;, page 102.
A WARNING
-Always pay attention to traffic when adap-
tive cruise control is switched on and brak ing guard is active. As the dr iver, you are
still respons ible for start ing and for main
tain ing speed and distance to other ob
jects. Braking guard is used to assist you.
The driver must always take action to avoid
a collision. The driver is always responsible
for braking at the correct time.
- Improper use of adaptive cruise con trol
can cause collisions, other accidents and
serious personal injury .
- Never let the comfort and convenience
that adaptive cruise control and braking
guard offer d istract you from the need to
be alert to traffic conditions and the
need to remain in fullcontrolofyourve
hicle at all times,
- Always remember that the adaptive
cru ise contro l and braking guard have
limits -they will not slow the vehicle
down or maintain the set distance when
you drive towards an obstacle or some
thing on or near the road that is not
moving, such as vehicles stopped in a
traffic jam, a stalled or disabled vehicle.
If registered by the radar sensor, vehicles
or obstacles that are not moving can
trigger a collision warning and if .,.
Page 120 of 304
118 Park assist
Park assist
Parking system
Applies to vehicles: with pa rking system
Different park assist systems may be used for
parking or maneuvering, depending on the
vehicle's features.
Parking system (rear)*:
For the parking system (rear), the acoustic
park assist system is installed in the rear of
the vehicle
¢ page 118.
The rear parking assist system uses ultrason ic
sensors to determine the distance of the vehi
cle from a detected obstacle. There are a tota l
of four sensors located on the rear bumper
(two in the m iddle and two on the sides).
Parking system (rear, with rear view
camera)*:
For the parking system (rear, with rear view
camera),
the rear acoust ic park assist system
is integrated in the rear of the vehicle and the
rear view camera is integrated in the rear lid
¢page 121.
The parking system (rear, with rear view cam
era)
uses ultrasonic sensors to determine the
distance of the vehicle from a detected obsta
cle . There are a total of four sensors located
on the rear bumper (two in the middle and
two on the sides).
_& WARNING
Make sure the sensors are not covered by
stickers, deposits or any other obstruc
tions as it may impair the sensor function.
For information on cleaning, refer to
qpage 202.
Parking system (rear)
Rear acoustic park assist
Applies to vehicles: with parking system (rear)
The rear acoustic park assist warns you of ob
stacles or objects behind your car .
Description
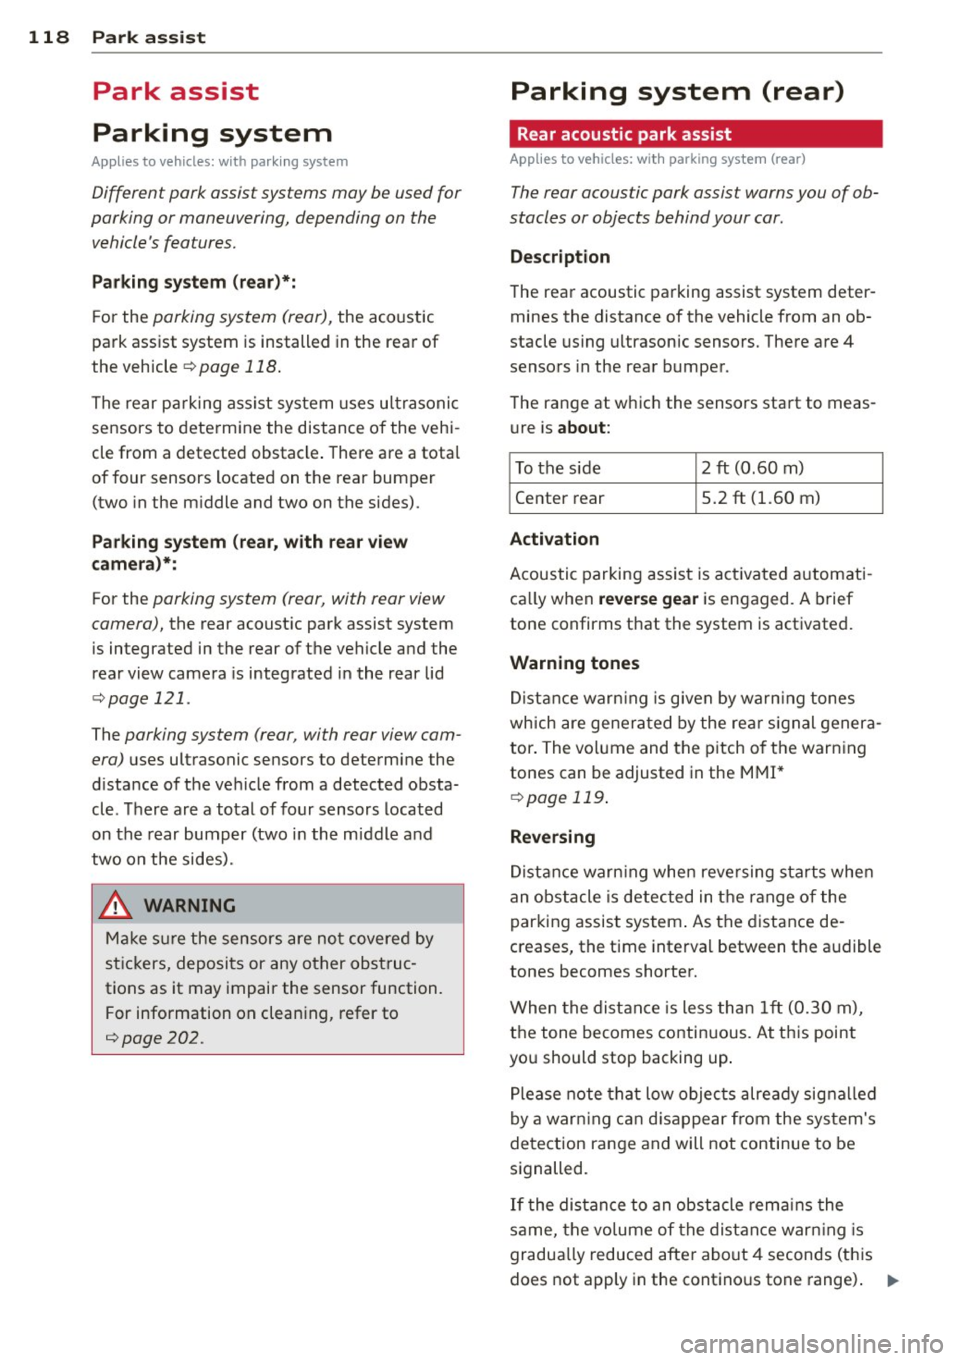
The rear acoustic parking assist system deter
mines the distance of the vehicle from an ob
stacle using ultrasonic sensors. There are 4
sensors in the rear bumper.
The range at which the sensors start to meas
ure is
about:
To the sid e 2 ft (0 .60 m)
Center rear 5.2 ft (1.60 m)
Activation
Acoustic parking assist is activated automati
ca lly when
reverse gear is engaged. A brief
tone confirms that the system is activated.
Warning tones
Distance warning is given by warn ing tones
wh ich are generated by the rear signa l genera
tor. The volume and the pitch of th e warning
tones can be adjusted in the MMI*
¢page 119.
Reversing
Distance warning when reversing starts when
an obstacle is detected in the range of the
parking assist system . As the distance de
creases, the time interval between the a udible
tones becomes shorter.
When the distance is less than 1ft (0.30 m),
the tone becomes continuous. At this point
you should stop backing up .
Please note that low objects already signalled
by a war ning can disappear from the system's
detection range and will not continue to be
signalled .
If the distance to an obstacle remains the
same, the vo lume of the distance warning is
gradually reduced after about 4 seconds (this
does not apply in the continous tone range).
ll-
Page 122 of 304
120 Park assist
Parking system (rear,
with rear view camera)
Introduction
Applies to vehicles: with parking system (rear, with rea r
view camera)
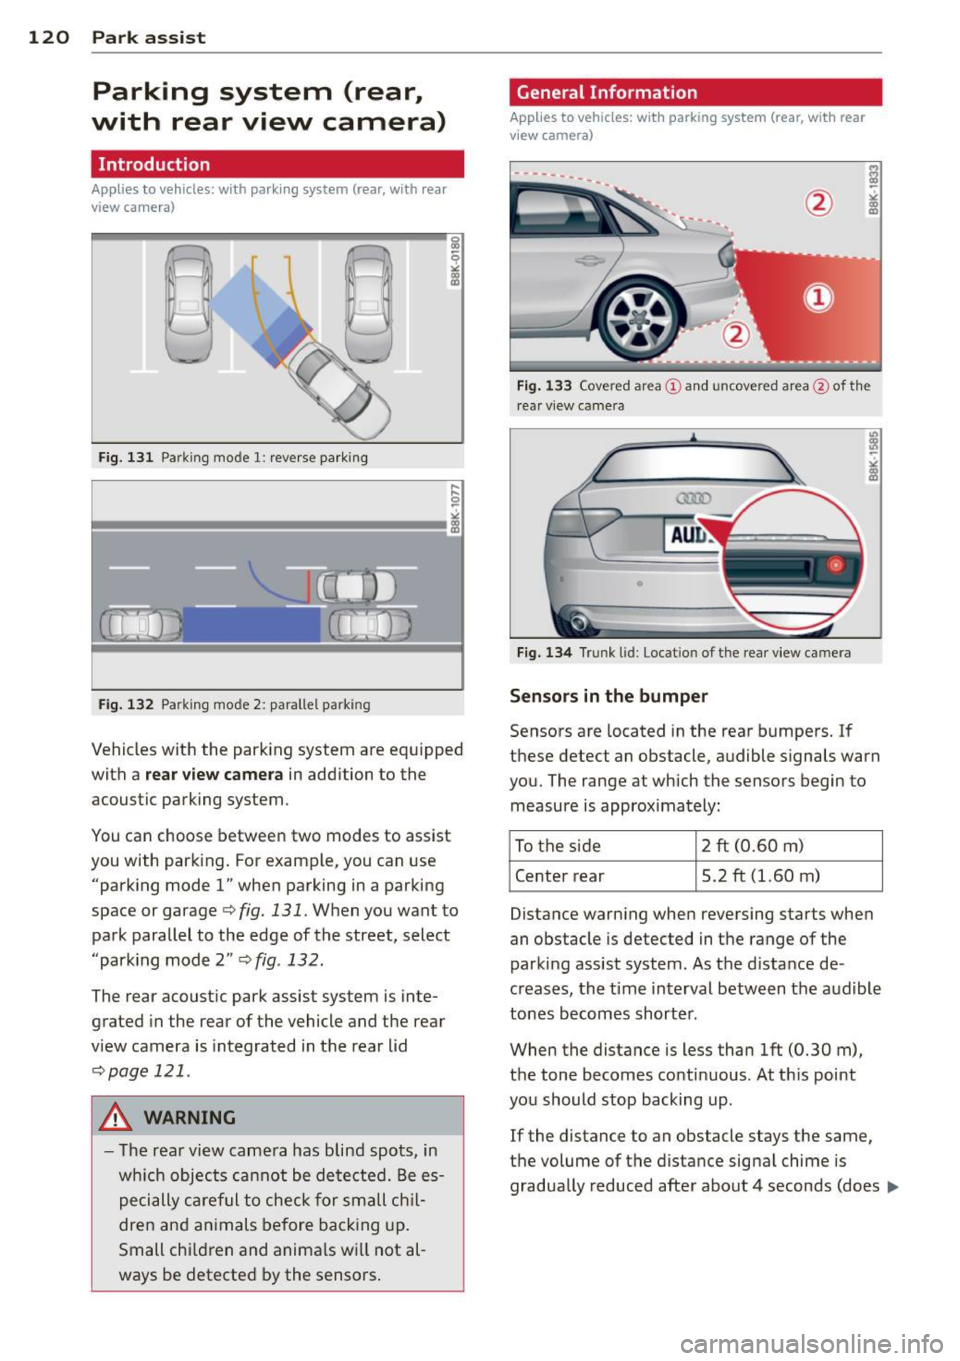
Fig. 131 Parking mode 1: reverse parking
Fig . 132 Parking mode 2: parallel park ing
Vehicles with the parking system are equipped
with a
rear view camera in addition to the
acoustic parking system.
You can choose between two modes to assist
you with parking. For example, you can use "parking mode
l" when parking in a parking
space or garage¢
fig. 131. When you want to
park parallel to the edge of the street, select
"parking mode 2"
¢ fig . 132.
The rear acoustic park assist system is inte
grated in the rear of the vehicle and the rear
view camera is integrated in the rear lid
¢page 121 .
A WARNING
-The rear view camera has blind spots, in
wh ich objects cannot be detected. Be es
pecially careful to check for small chil
dren and animals before backing up.
Small chi ldren and animals wi ll not al
ways be detected by the sensors.
General Information
Applies to vehicles: with parking system (rear, with rear
view camera)
Fig. 133 Covered area @ and uncove red area @of th e
rear view came ra
0
Fig. 134 Trunk l id: Locat io n of the rear view ca mera
Sensors in the bumper
Sensors are located in the rear bumpers. If
these detect an obstacle, audible signals warn
you. The range at which the sensors begin to measure is approximately:
To the side 2 ft
(0.60
m)
Center rear 5.2 ft (1.60 m)
Distance warning when reversing starts when
an obstacle is detected in the range of the
parking assist system . As the d istance de
creases, the time interval between the audible
tones becomes shorter .
When the distance is less than 1ft (0.30 m),
the tone becomes continuous . At this point
you should stop backing up .
If the distance to an obstacle stays the same,
the volume of the distance signal chime is
gradually reduced after about 4 seconds (does ..,.