change wheel AUDI A4 2017 User Guide
[x] Cancel search | Manufacturer: AUDI, Model Year: 2017, Model line: A4, Model: AUDI A4 2017Pages: 386, PDF Size: 96.32 MB
Page 126 of 386
Parking systems
Parking systems
General information
A ppl ies to: ve hicles w ith a rea r parking sys te m /pa rking sys
tem p lus/rearv iew camera/peripheral ca meras
Depending on your vehicle's equipment , various
parking aids will help you when parking and ma
neuvering.
The
rear parking system is an audible parking aid
that warns you of obstacles
behind the vehicle
¢ page 125.
Parking system plus assists you when parking by
using audio and visual signals to indicate objects
detected in
front of and behind the vehicle
¢ page 125.
The rearview camera shows the area behind the
vehicle in the Infotainment display . The lines in
the rearview camera image help you to park or
maneuver ¢
page 126. The parking system plus
functions are also available
¢page 125.
The peripheral cameras give various views to
help you when parking or maneuvering
¢ page 128 . fhe parking system plus functions
are also available
¢ page 125.
A WARNING
- Always look for traffic and check the area
around your vehicle by looking at it directly
as well. The parking system cannot replace
the driver 's attention. The driver is always
responsible when entering or leaving a park
ing space and during similar maneuvers.
- Please note that some surfaces, such as
clothing, are not detected by the system.
-
- Sensors and cameras have blind spots in
which people and objects cannot be detect ed . Be especially cautious of small children
and animals .
- Always keep your eyes on the vehicle's sur
roundings, using the rearview mirror as
well .
- The sensors can be displaced by impacts or
damage to the radiator grille, bumper,
wheel housing and the underbody . The park
ing system may be impaired as a result.
Have an authorized Audi dealer or author-
124
ized Audi Service Facility check their func
tion .
(D Note
-Some objects are not detected or displayed
by the system under certain circumstances:
- Objects such as barrier chains, trailer draw
bars, vertical poles or fences
- Objects above the sensors such as wall ex
tensions
- Objects with certain surfaces or structures
such as chain link fences or powder snow
- If you continue driving closer to a low ob
ject, it may disappear from the sensor range. Note that you will no longer be
warned about th is obstacle .
- Keep enough distance from the curb to
avoid damage to the rims.
(D Tips
-The system may provide a warning even
though there are no obstacles in the cover
age area in some situations, such as :
- certain road surfaces or when there is tall
grass.
- external ultrasonic sources such as from
cleaning vehicles .
- in heavy rain, snow, or thick vehicle ex
haust.
- We recommend that you practice parking in
a traffic-free location or parking lot to be
come familiar with the system . When doing
this, there should be good light and weath
er conditions.
- You can change the volume of the signals
and the display ¢
page 131.
-Please refer to the instructions for trailer
towing in
¢page 132.
- What appears in the infotainment display is
somewhat time-delayed.
- Th e sensors must be kept clean and free of
snow and ice for park assist to operate.
Page 129 of 386
<( a, .... N ,....
N .... 0 0
3 a,
The rearview camera is located above the rear li
cense plate bracket. Mak e sure that the lens for
the rearview camera
c::> fig. 124 is not covered by
deposits or any other obstructions because this
can impair the function of the rearview camera .
For information on cleaning, refer to
c::> page 337 .
The rearview camera coverage area includes (D
c::> fig. 123. Only this a rea is shown in the Info
tainment display . Objects that are outside of this
area @are not displayed.
A WARNING
-Always read and follow the applicable warn
ings
c::> .&. in General information on
page 124.
- If the position and the installation angle of
the rearview camera was changed, for ex
ample after a collision, do not continue to
use the system for safety reasons. Have it
checked by an authorized Audi dealer or au
thorized Audi Service Facility.
- Only use the rearview camera to assist you if
it shows a good, clear picture. For example,
the image may be affected by the sun shin
ing into the lens, dirt on the lens or if there
is a malfunction.
- Use the rearview camera only if the luggage
compartment lid is completely closed. Make
sure any objects you may have mounted on
the luggage compartment lid do not block
the rearview camera .
- The camera lens enlarges and distorts the field of vision . The object appears both al
tered and inexact on the screen .
- In certain situations , people or objects in
the display appear closer or farther away:
- For objects that do not touch the ground,
such as the bumper of a parked vehicle, a
trailer hitch or the rear of a truck. Do not use the orientation lines in this case.
- If driven from a level surface onto an in
cline, or a downward slope.
- If driven toward protruding objects.
- If the vehicle is carrying too much load in
the rear.
Parking systems
(D Note
-Always read and follow the applicable warn
ings
c::> (D in General information on
page 124.
- The orange colored orientation lines in the
Infotainment display show the vehicle path
based on the steering wheel angle. The
front of the vehicle swings out more than
the rear of the vehicle . Maintain plenty of
distance so that an exterior mirror or a cor
ner of the vehicle does not collide with any
obstacles.
Switching on/off
Appl ies to: vehicles wi th rearv iew camera
Switching on
.,. Shift into reverse, or
.,. Press the
PwA button in the center console
c::> page 126, fig. 120. A short confirmation
tone sounds and the LED in the button turns
on.
Switching off
.,. Drive faster than 6 mph (10 km/h), or
.,. Press the
p,qA button , or
.,. Switch the ignition off.
@ Tips
- The visual display in the right part of the
display should help you detect the critical
vehicle area.
- You can change the volume of the signals
and the display
<=:>page 131.
127
Page 131 of 386

General information
Applies to: vehicles with peripheral cameras
Fig. 128 Loca tion of peripheral c amera s
The four periphe ral cameras are located in the ra
diator grille, in the luggage compartment lid and
on both exterior mirrors
q fig . 128 . Make sure
that the lenses are not covered by deposits or any
other obstructions as this may impair the system.
For information on cleaning, refer to
¢page 337.
Black corners are shown in the vehicle silhouette
when in
Surrounding mode. Objects in these
areas are outside of the camera's field of view
and are not detected .
A WARNING
-Always read and follow the applicable warn
ings
~ &. in General information on
page 124.
- If the position or the installation angle of a
camera was changed, for example after a
collision, do not continue to use the system
for safety reasons . Have it checked by an au
thorized Audi dealer or authorized Audi
Service Facility .
- Keep in mind that the image in the display is
incorrect if the exterior mirror housing has
been manually adjusted .
- Use the
Rear mode and the corner view
(rear)
mode only when the luggage com
partment lid is fully closed. Otherwise the
image in the display will be incorrect.
- The vehicle surroundings are shown using
the camera images . The vehicle image is
shown by the system. Objects and obstacles
above the camera are not displayed.
Parking systems
-Camera lenses enlarge and distort the field
of vision. The objects appear both altered
and inexact on the screen .
(D Note
-Always read and follow the applicable warn
ings
~ CD in General information on
page 124.
- The Infotainment display shows the direc
tion in which the rear of the vehicle is travel ing based on the steering wheel angle. The
front of the vehicle swings out more than
the rear of the vehicle . Maintain plenty of
distance so that an exterior mirror or a cor
ner of the vehicle does not collide with any
obstacles.
(D Tips
If the 8/fl;!J/c::5 symbol appears in the dis
play and the respective display area is grayed
out, then the power exterior mirrors were
folded in or the driver's door/front passeng
er's door/luggage compartment lid was
opened.
Switching on/off
Applies to: vehicles with peripheral cameras
-----------
' :_~ '.!! _:-,~~
~ !i'! .. ' !J -,1~ ===:.===. ,
Fig. 129 Center console: button P.a
Fig. 130 In fo tai nment syste m: select the mode
129
Page 266 of 386

Airbag system
A WARNING
A child in a rearward-facing child safety seat
installed on the front passenger seat will be
seriously injured and can be killed if the front
airbag inflates - even with an Advanced Airbag
System.
- The inflating airbag will hit the child safety
seat or infant carrier with great force and
will smash the child safety seat and child against the backrest, center armrest, door
or roof.
- Always install rear-facing child safety seats
on the rear seat.
- If you must install a rearward -facing child
safety seat on the front passenger seat be cause of exceptional circumstances and the
PASSENGER AIR BAG OFF,;, light does not
come on and stay on, immediately install
the rear-facing child safety seat in a rear
seating position and have the airbag system inspected by your authorized Audi dealer .
A WARNING
Objects between you and the airbag will in
crease the risk of injury in a crash by interfer
ing with the way the airbag unfolds or by be
ing pushed into you as the airbag inflates.
- Never hold things in your hands or on your
lap when the vehicle is in use .
- Never transport items on or in the area of
the front passenger seat . Objects could
move into the area of the front airbags dur
ing braking or other sudden maneuvers and
become dangerous projectiles that can
cause serious personal injury if the airbags
inflate.
- Never place or attach accessories or other
objects (such as cupholders, telephone
brackets, large, heavy or bulky objects) on
the doors, over or near the area marked
"AIRBAG" on the steering wheel, instru
ment panel, seat backrests or between
those areas and yourself . These objects
could cause injury in a crash, especially
when the airbags inflate .
- Never recline the front passenger's seat to
transport objects. Items can also move into
264
the area of the side airbag or the front air
bag during braking or in a sudden maneu
ver. Objects near the airbags can become projectiles and cause injury, particularly
when the seat is reclined .
- Never place or transport objects on the
front passenger seat. Objects on the front
passenger seat could cause the capacitive
sensor in the seat to signal to airbag system
that the seat is occupied by a person when it
in fact is not, or that the person on the seat
is heavier than he or she actually is. The
change in electric capacitance because of
such objects can cause the passenger front
airbag to be turned on when it should be
off, or can cause the airbag to work in a way
that is different from the way it would have
worked without objects on the seat .
- Always make sure that there is nothing on
the front passenger seat that will cause the
capacitive passenger detection system in
the seat to signal to the Airbag System that the seat is occupied by a person when it is
not , or to signal that it is occupied by some
one who is heavier than the person actually
sitting on the seat. The presence of an ob
ject could cause the passenger front airbag
to be turned on when it should be off, or
could cause the airbag to work in a way that is different from the way it would have
worked without the object on the seat .
A WARNING
The fine dust created when airbags deploy can
cause breathing problems for people with a
history of asthma or other breathing condi
tions .
- To reduce the risk of breathing problems,
those with asthma or other respiratory con
ditions should get fresh air right away by
getting out of the vehicle or opening win
dows or doors.
- If you are in a collision in which airbags de
ploy , wash your hands and face with mild
soap and water before eating.
- Be careful not to get the dust into your eyes,
or into any cuts or scratches. ..,_
Page 270 of 386

Airbag syste m
Make sure that the PASSENGER AIR BAG
OFF
11;; li ght comes on and stays on all t he
t ime whenever the ignition is switched on.
A WARNING
- If the PA SSEN GER AIR BAG OFF 11;; light
does not go out when an adult is si tting on
the front passe nger seat a fter ta king the
steps described above, make sure the adult is p roperly seated and restrained at one of
the rear seating positions.
- Have the airbag system inspected by your
authorized Aud i dealer before transporting
anyone on the front passenger seat.
@ Tips
If the capacitive passenger detection system
determines that the front passenger seat is
empty, the frontal airbag on the passenge r
side w ill be tu rned off, and the
PASSENGER
AIR BAG OFF
11;; light will stay on.
-
Repair , care and disposal of the airbags
Parts of the a irbag system are installed at many
different places on your Audi. Installing, remov ing, servic ing or repa iring a part in an area of the
ve hicle can damage a part of an airbag system
and prevent that system from working properly
i n a collision .
There are some important things you have to
know to make sure that the effectiveness of the
system w ill not be impaired and that discarded
components do not cause injury or pollute the
env ironment.
A WARNING
Improper care, serv icing and repai r proce
dures can increase the r is k of personal injury
and death by preventing an airbag from de
ploying when needed or dep loying an airbag
unexpectedly:
-
- Never cover, obstruct, or change the stee r
ing wheel horn pad or airbag cover or the in
strument pane l or modify them in any way.
268
- Never attach any objects s uch as c upholders
or telephone mountings to the surfaces cov
ering the a irbag un its.
- For cleaning the horn pad or instrument
panel, use only a soft, dry cloth or one mois
tened w ith plain water. Solvents or cleaners
could damage the airbag cover or change
the st iffness or strength of the material so
that the airbag canno t deploy and p rotect
properly.
- Never repair, adjust , or change any parts of
the airbag system.
- All work on the steering wheel, inst rument
panel, front seats or e lectr ica l system ( in
cluding the installation of a udio eq uipment,
cellular telephones and C B radios, etc.)
m ust be perfo rmed by a qualified techn ician
who has the training and specia l equipment
necessary.
- For any work on the airbag system, we strong ly recommend that you see your au
thorized A udi dealer or qualified workshop.
- Never modify the front b umper or parts of
the vehicle body.
- Always make sure that the side a irbag can
inflate w ithout interference:
- Never install seat covers or replacement
upholstery over the front seatbacks that
have not been specifically approved by
A udi.
- Never use additional seat c ushions that
cover the areas where the side airbags in
flate.
- Damage to the orig inal seat cove rs or to
the seam in the area of the s ide airbag
module mus t always be repaired immedi
ate ly by an autho riz ed Au di dealer.
- The a irbag system can deploy on ly once. Af
ter an airbag h as been deployed, i t m ust be
repla ced with new replacement parts de
signed and approved espec ia lly for your
Audi model version . Replacement of com
plete airbag systems or airbag components
must be perfo rmed by qua lified workshops
only. Make su re that any airbag service ac
tion is entered in your A udi Warranty
&
Ma intenance boo klet under AIRBAG RE-
PLAC EM EN T RECORD.
~
Page 324 of 386
Wheels
Rim
means a metal support for a tire
or a tire and tube assembly upon
which the t ire beads are seated .
Rim diameter
means nominal diameter of the
bead seat . If you change your
wh eel size, you will have to p ur
chase new tires to match the new
rim d iameter .
Rim size designation
means rim diameter and w idth.
Rim width
means nomina l distance between
r im flanges .
Sidewall
means that portion of a t ire be
twee n the tread and bead .
Speed rating (letter code)
means the speed at which a t ire is
designed to be driven for extend
ed periods of ti me. The ratings
range from 93 mph (150 km/h)
to 186 mph (298 km/h)
¢ table
on page 318 .
You may not find
this information on all tires be
cause it is not required by law.
The speed rating letter code,
wh ere applicable, is molded on
the tire sidewall and ind icates the
322
maximum permissible road
speeds
¢ A in Winter tires on
page 332 .
Tire pressure monitoring
system
means a system that detects
when one or mo re of a vehicle 's
tires a re underinflated and illumi
nates a low tire pressure war ning
telltale .
Tread
means that portion of a tire tha t
comes into contact wi th the road.
Tread separation
means pulling away of the tread
from the tire carcass .
Treadwear indicators (TWI)
means the projections wi thin the
pr inc ipal grooves designed to g ive
a visua l indication of the degrees
of wear of the t read . See
¢ page 326, Treadwear indicator
for mo re information on meas ur
ing tire wear.
Uniform Tire Quality Grading
is a tire informa tion system devel
oped by the Unite d States Nation
a l Highway Traffic Safety Admin
is tration (NHTSA) that is designed
to help buyers make re lat ive
..
Page 330 of 386
Wheels
-The tire must flex more if the tire pressure is too low or if
the vehicle speed or load are
too high . This heats the tire up
too much. This increases the
risk of an accident because it
can cause the tire to burst and
result in loss of vehicle con
trol.
-Incorrect tire pressure in creases tire wear and has a
negative effect on driving and
braking behavior, which in
creases the risk of an accident.
(D Note
Replace lost valve caps to re
duce the risk of damage to the
tire valves.
Tire pressure table
Please note that the information
contained in the following table
was correct at the time of print
ing, and the information is sub
ject to change. If there are differ
ences between this information
and the tire pressures specified
on the label on the driver's side 8-pillar, always follow the specifica
tion on the 8-pillar label
¢ page 327, fig. 255.
328
(i} For the sake of the environment
-Tire pressure that is too low
increases fuel consumption.
-Fuel consumption may also in
crease when driving with the
comfort tire pressure is se
lected .
(D Tips
Audi recommends using the
tire pressure specified for a
normal load
¢ table on
page 329
or for a full load
when the vehicle is partially loaded.
Make sure that the tire designa
tion on your tire matches the des ignation on the tire pressure label
and the tire pressure table.
The following table lists recom mended tire pressures in cold
tires according to the load and
the size of the tires installed.
Page 337 of 386
<( a, .... N ,....
N .... 0 0
3 a,
significantly under-inflated tire causes the tire to
overheat and can lead to tire failure. Under-infla
tion also reduces fue l eff ic iency and tire tread
life, and may affect the vehicle's hand ling and
stopping ab ility.
Please note that the TPMS is not a substitute for
proper tire ma intenance, and it is the driver's re
sponsib ility to ma intain correct tire pressure,
even if under-inflation has not reached the leve l
to tr igger illum inat io n of the TPMS low tire p res
sure telltale .
Your veh icle has also been equ ipped w ith a TPMS
malfunct ion indicator to indicate when the sys
tem is not operat ing properly. The TPMS mal
function ind icator is combined w ith the low tire
p ressure tellta le. Whe n the system detects a
malfunct ion, the te lltale will flash fo r approxi
mate ly one m inute and then remain cont inuo usly
illum inated. This sequence will continue upon
subseq uent ve hicle start -ups as long as the ma l
function exists.
When t he mal funct io n ind icator is ill umin ated,
the system may not be ab le to detec t or signal
l ow tire pressure as intended. TPMS ma lfunctions
may occur for a variety of reasons, incl uding the
installation of replacement or alternate t ires or
wheels on the vehicle that prevent the TPMS from functioning properly. Always check the
TPMS malfunction telltale after rep lacing one or
more t ires or whee ls on your ve hicle to ensu re
that the replacement or alte rnate ti res and
wheels a llow the TPMS to con tinue to func tion
p roperly.
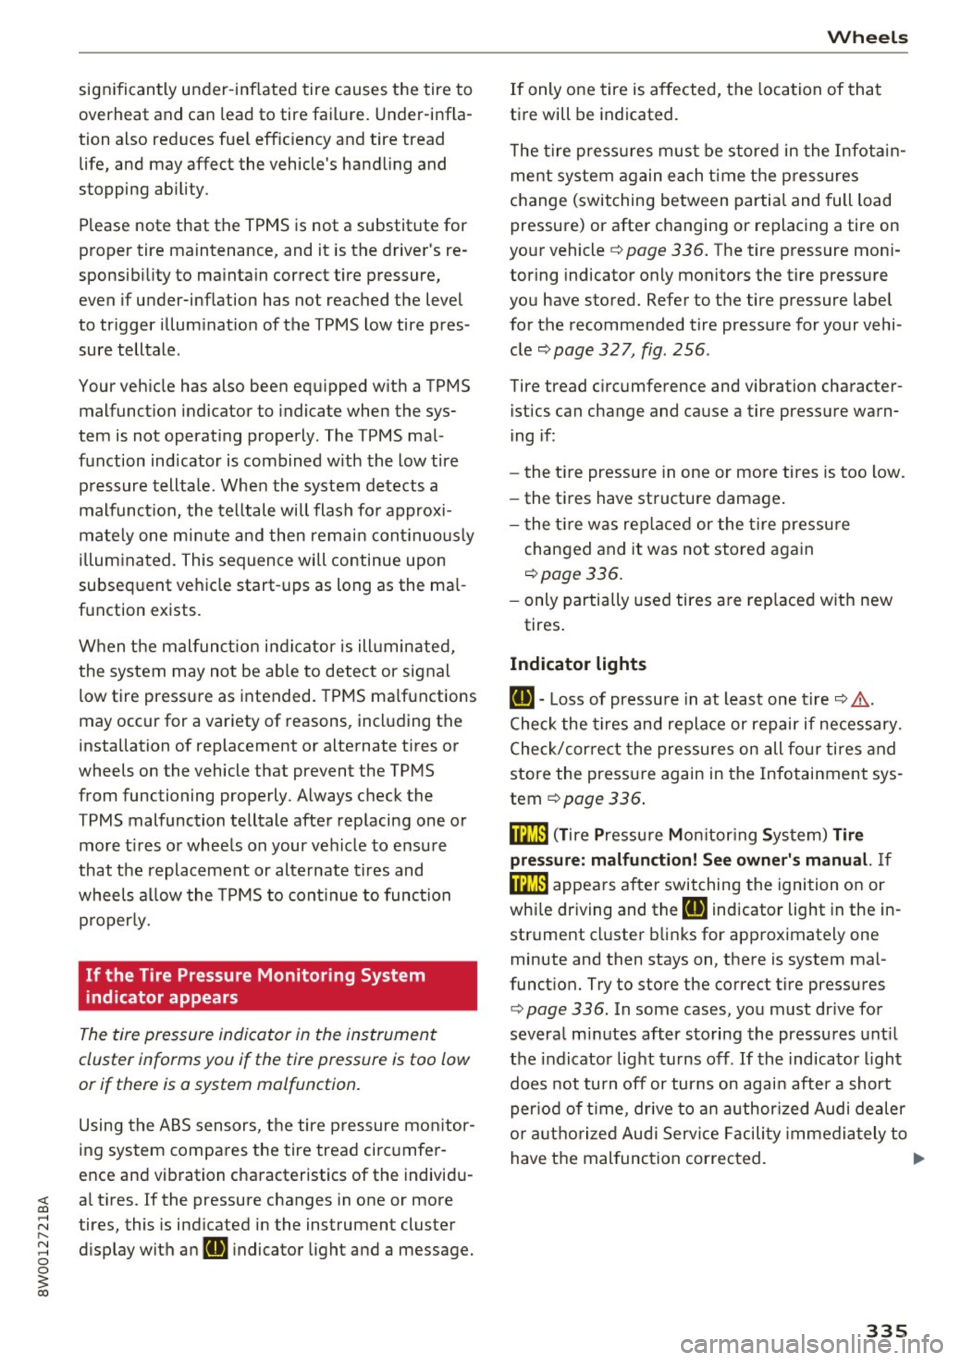
If the Tire Pressure Monitoring System
indicator appears
The tire pressure indicator in the instrument
cluster informs you if the tire pressure is too low
or if there is a system mo/function.
Using the ABS sensors, the tire pressure mo nitor
ing system compa res the tire tread circ umfe r
ence an d vib ration cha racteristics of the individ u
a l tires. If the pressure changes in one or more
tires, this is ind icated in the instrument cluster
d isp lay with an
RE indicator light and a message.
Wh eel s
If only one tire is affected, the location of that
t ir e will be indicated.
T he tire press ures mus t be store d in the Infot ain
ment system again each t ime the pressures
change (switching between partia l and full load
pressure) or after changing or replacing a tire on
yo ur vehicle ¢
page 336 . The tire p ressure mon i
toring indicator only monitors the t ire press ure
you have sto red. Refer to the tire pressure labe l
for the recommended tire press ure for your vehi
cle
¢page 327, fig. 256 .
Tire tread circumference and vibration cha racter
istics can change and cause a tire pressu re warn
i ng if:
- the t ire pressure in one or more tires is too low.
- the ti res have structure damage .
- t he t ire w as rep lace d or the t ire pressu re
changed and it was no t store d aga in
¢page 336.
-only partially used tires a re rep laced w it h new
tires .
Indicator lights
RE-Loss of pressu re in at leas t one tire¢ &.
Check the tires and repla ce or repair if necessary.
C heck/co rrect the pressures on all fou r tires and
store the pressure again in the Infotainment sys
tem ¢
page 336 .
m (T ire Pressure Moni tor ing Sys tem) Tire
pres sure: malfunction! See owner' s manual.
If
m appea rs a fter swi tching the ignition on or
whi le driving and the
RE indicator light in the in
strument cl uster b links for app roximately one
minute and then stays on, the re is system ma l
funct ion. Try to store the correct tire pressu res
¢
page 336. In some cases, yo u m ust dr ive fo r
severa l m inu tes after s toring the pressu res unt il
the indicator lig ht turns off . If the indica tor light
does not turn off or turns on agai n afte r a short
per io d of t ime, dr ive to a n author ized Audi dealer
o r auth o rized Aud i Serv ice F acili ty immedia tely to
have the mal func tion cor rected.
IJI.
335
Page 338 of 386

Wheels
A WARNING
-If the tire pressure indicator appears in the
display, reduce your speed immediately and
avoid any hard steering or braking maneu
vers. Stop as soon as possible and check the
tires and their pressure .
- The driver is responsible for maintaining the
correct tire pressure. You must check the
tire pressure regularly.
- Under certain conditions (such as a sporty
driving style, winter conditions or unpaved
roads), the tire pressure monitoring system
indicator may be delayed.
@ Tips
- The tire pressure monitoring system can al
so stop working when there is an ESC mal
function.
- Using snow chains may result in a system
malfunction.
- The Tire Pressure Monitoring System in your
Audi was calibrated with "Audi Original
Tires "~
page 324. We recommend that you
use these tires.
Storing tire pressures
If the tire pressure changes or a tire is replaced,
it must be confirmed in the Infotainment sys
tem .
.. Before storing the tire pressures, make sure the
tire pressures of all four tires meet the speci
fied values and are adapted to the load
~page 327 .
.. Switch on the ignition .
.. Select in the Infotainment system:
IMENU I but
ton
> Vehicle > Service & checks> Tire pres
sure monitor> Store tire pressure > Yes, store
now.
(D Tips
Do not store the tire pressures if snow chains
are installed .
336
Page 348 of 386
Emerg ency assis ta nce
The vehicle jack mode* switches off automatical
ly at speeds above 6 mph (10 km/h).
A WARNING
If you are changing a tire on a steep hill, use a
block or similar object to block the opposite
wheel to prevent the vehicle from moving.
A WARNING
You or your passengers could be injured wh ile
chang ing a wheel if you do not follow these
safety precautions :
- If you have a flat t i re, move a safe d ista nee
off the road . Turn off the engine, turn the
emergency flashers on and use other warn
ing devices to alert other motorists.
- Make s ure that passengers wa it in a safe
place away from the vehicle and well away
from the road and traffic.
- To help prevent the vehicle from moving
suddenly and possibly slipp ing off the jack,
always fully set the parking brake and block
the wheel diagona lly oppos ite the wheel be
ing changed with the folding chocks or oth
er objects . When one front wheel is lifted
off the ground, placing the Automatic
Transmission in "P" (Park) will
not prevent
the vehicle from moving.
- Before you change a wheel, be sure the
ground is level and firm. If necessary, use a
sturdy board under the jack.
- Always store the veh icle tool k it, the jack
and the replaced tire in the luggage com
partment
c::> page 242.
@ Tips
Obey all laws.
346
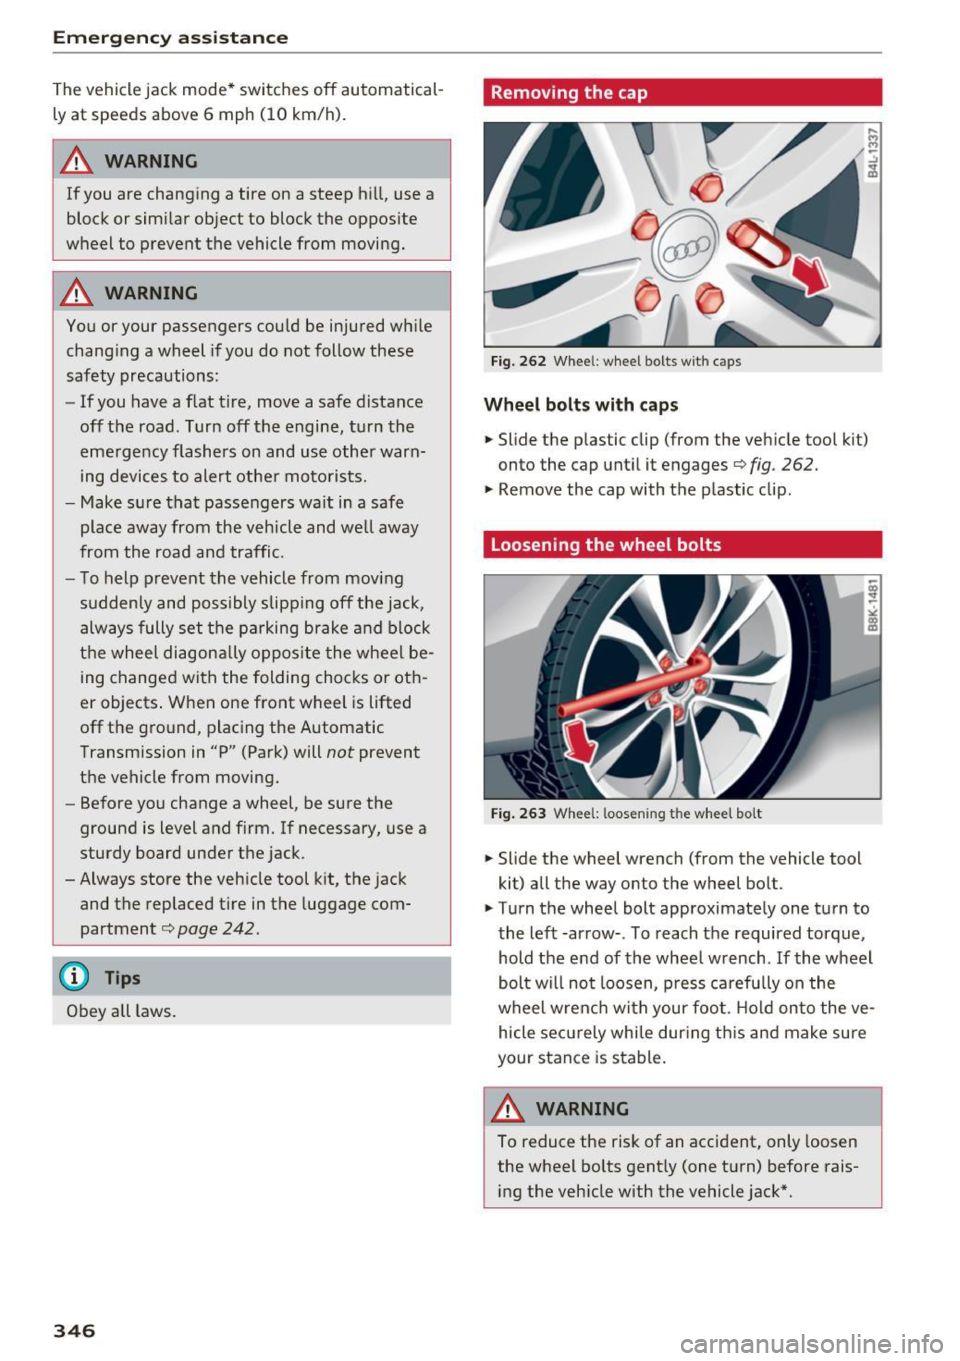
Removing the cap
Fig. 262 Whee l: wheel bolts with c aps
Whee l bolts with cap s
.. Slide the p lastic clip (from the vehicle tool k it)
onto the cap until it engages
c::> fig . 262.
.,. Remove the cap with the plastic clip.
Loosening the wheel bolts
Fig . 263 Whee l: loosen ing t he whee l bolt
.. Slide the wheel wrench (from the vehicle tool
kit) all the way onto the wheel bolt .
.. Turn the wheel bolt approximately one turn to
the left -arrow- . To reach the required torque,
hold the end of the wheel wrench . If the wheel
bolt will not loosen, press ca refu lly on the
wheel wrench with your foo t. H old onto the ve
hicle securely whi le dur ing th is and make sure
your stance is stable.
A WARNING
To reduce the risk of an accident, only loosen
the wheel bolts gent ly (one turn) before rais
i ng the veh icle with the vehicle jack*.