ECO mode AUDI A4 2017 Owners Manual
[x] Cancel search | Manufacturer: AUDI, Model Year: 2017, Model line: A4, Model: AUDI A4 2017Pages: 386, PDF Size: 96.32 MB
Page 11 of 386
<( a, .... N ,....
N .... 0 0
3 a,
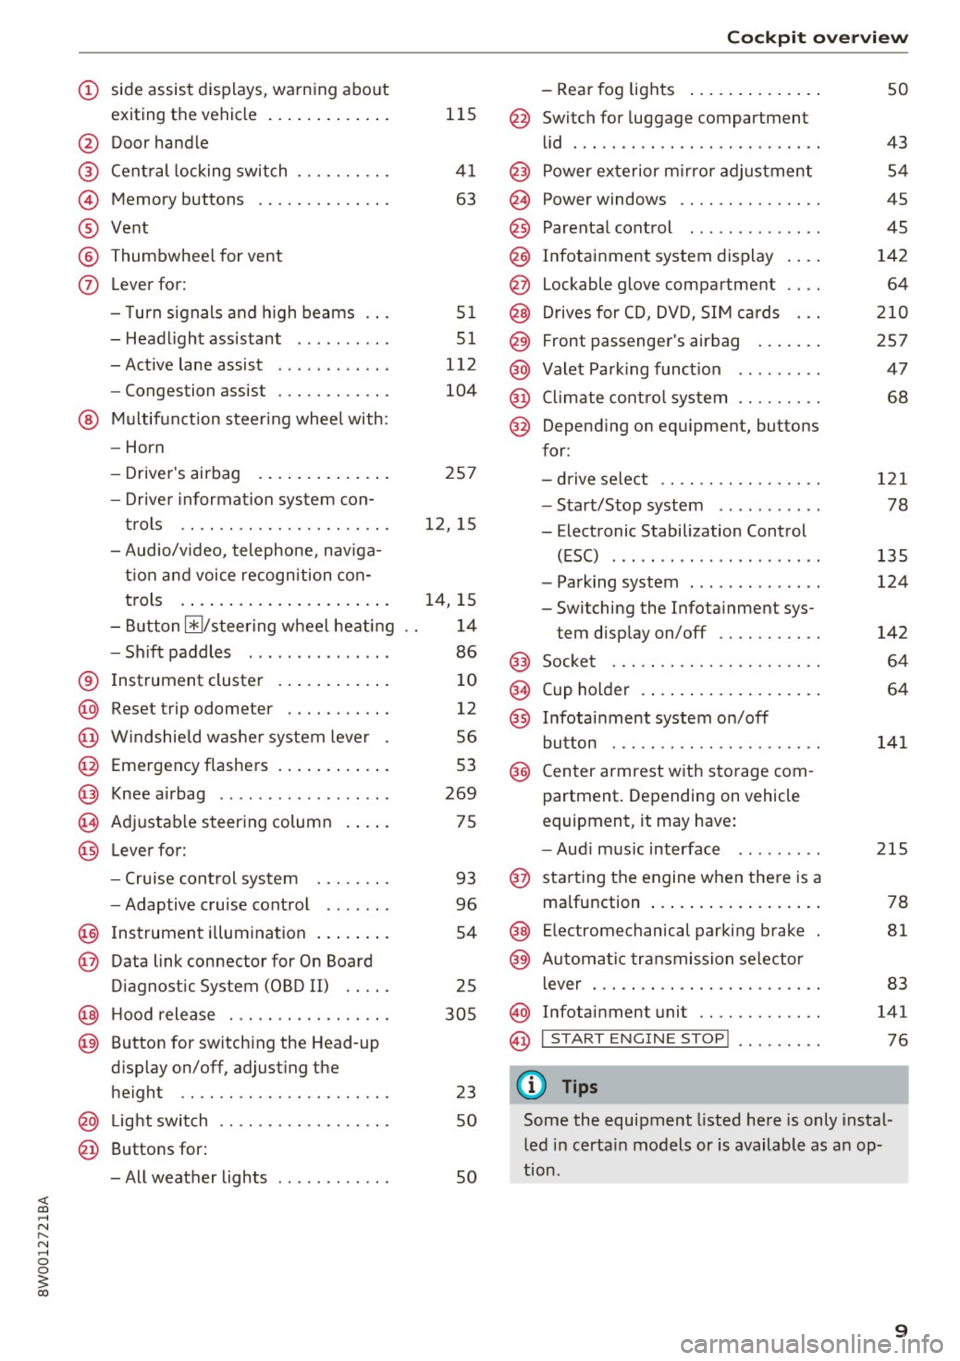
(!) side assist displays, warning abo ut
exiting the vehicle ..... ... .. .. .
@ Door handle
@ Cent ral locking switch ....... .. .
@ Memory buttons ........... .. .
® Vent
® Thumbwhee l for vent
(J) Lever for:
- T urn signals and h igh beams
- Headl ight assistant ......... .
- Active lane assist .. ..... ... . .
- Congestion assist ....... .. .. .
@ Mul tifunction steer ing wheel with:
- Horn
- Driver's airbag . ..... ... .. .. .
- Drive r information system con -
t rols .. .. ............. .. .. .
- Audio/v ideo, telephone, nav iga
t ion and voice recognition con-
trols . ... .... .. .... ... .. .. .
- Button ~/steering wheel heating
- Sh ift paddles .............. .
® Instrument cluster ....... .. .. .
@
@
@
@
~
@
Reset trip odometer ........ .. .
W indshie ld w asher system lever
Emergency flashers .... ... .. .. .
Knee a irbag ........ ... .. ... . .
Adjustable steer ing column
Lever for:
- Cruise cont rol system ..... .. .
- Adaptive cruise cont rol .. ... . .
@ Instrument i llum ination ... .. .. .
@ Data link connector for On Board
Diagnostic System (OBD II) .. .. .
@ H ood release . ........... .. .. .
@ Button for switching the Head-up
d isplay on/off, adjust ing the
height .. .. ............... .. .
@ Lig ht switch ............... .. .
@ Buttons for :
- All weather lights
llS
41
63
5 1
5 1
112
104
25 7
12, 15
14, 15
1 4
86
10
12
56
53
269
75
93
96
54
25
305
23 50
50
Coc kpit o ve rv iew
-Rear fog lights .. .. .. ..... .. .
@ Switch for luggage compartment
li d .... ... .. .. .. .... .. ... .. . .
@ Power exterior m irro r adjustment
@ Power windows .............. .
@ Parental cont rol ............. .
@ Infotainment system dis play . .. .
@ Lockable glove compartment ... .
@ Drives for CD, DVD, SI M cards .. .
@ Front passenger's airbag .... .. .
@ Valet Park ing funct ion ........ .
@ Climate cont ro l system ........ .
@ Depend ing on equ ipment, buttons
for:
- drive select .. .. ............ .
- Start/Stop system . ... ... .. . .
- Electronic Stabilization Control
(ESC) ..... .. .. ... ....... .. .
- Parking system . .... . ..... .. .
- Switching the Infota inment sys-
tem disp lay on/off .......... .
@) Socke t ... .. .. .. ............ .
@ Cup holder . ... .. .... . ..... .. .
@ Infotai nment system on/off
button ... .. .. .. .... .. ... .. . .
@ Center armrest w ith sto rage com
partment . Depending on vehicle
equipment, it may have:
- Aud i m usic interface ........ .
@ starting the engine when the re is a
ma lfunction .. ... .... . ..... .. .
@ E lectromechanical parking brake
@ Automa tic transmission se lector
lever ... .. .. . ... ............ .
@ Infotainment unit ............ .
@ I START EN GIN E STOP ! ........ .
(D Tips
50
43 54
45
45
142 64
2 10
257 47
68
121
78
135
124
142
64
64
141
215
78
81
83
141
76
Some the equipment listed here is only instal
l ed in certa in models or is available as an op-
tion .
9
Page 17 of 386
@l1<1<1 I button /!1>1> 11
- Selecting the previous/next track or station :
press the l1<1<1 I or !1>1>1 1 button.
- Fast forwarding/rewinding audio files : press
and hol d the !1<1<1 1 o r 11>1> 1! bu tton un til the des ired
location in the fi le is re ached .
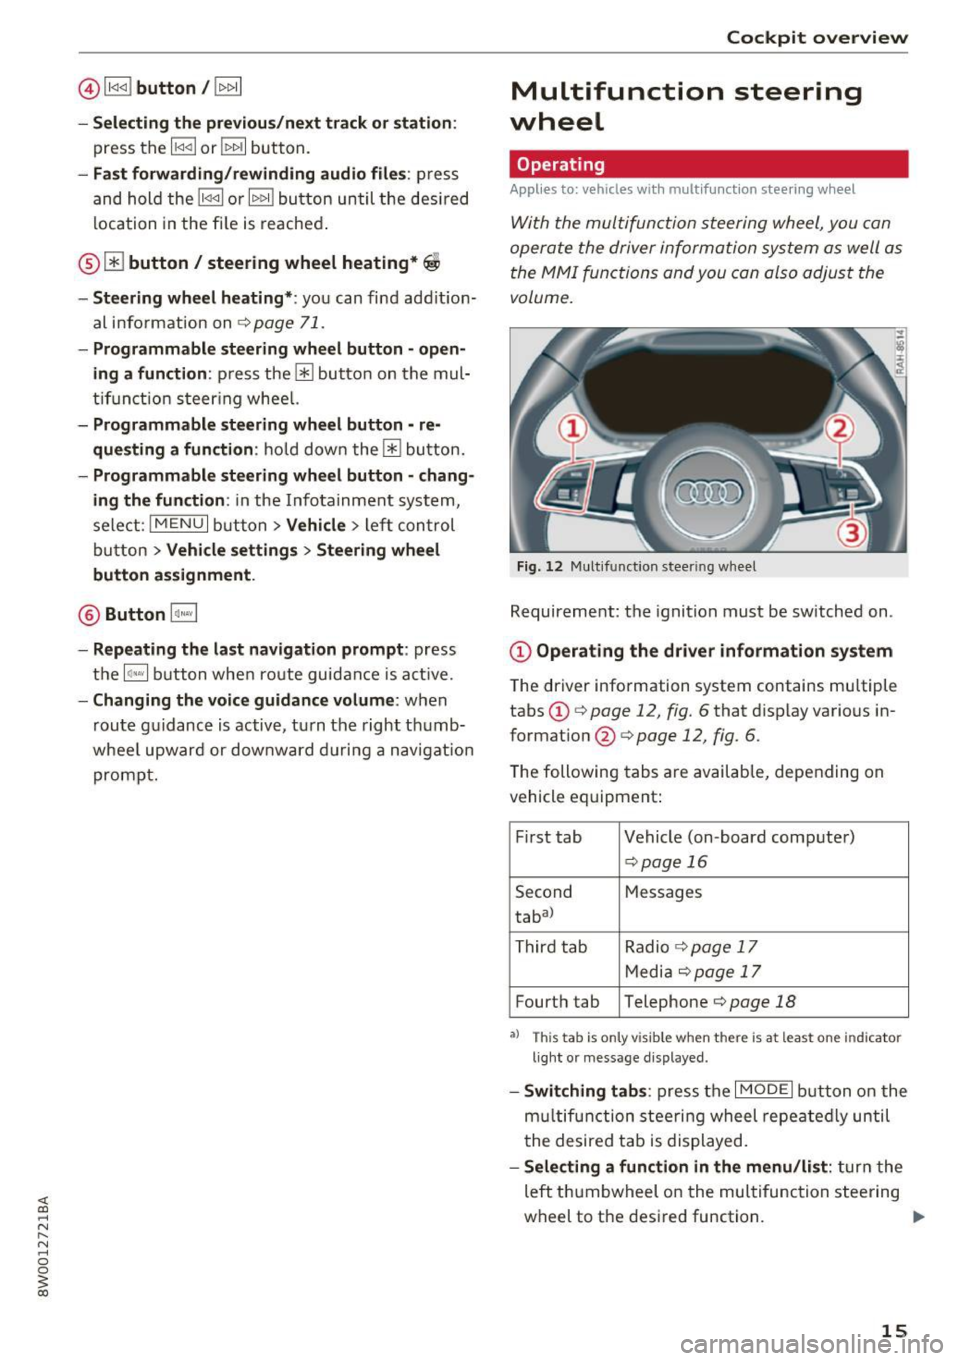
® [i] button / steering wheel heating*~
- Steering wheel heating* :
you can fin d ad ditio n
al info rmat ion on
~ page 71.
-Programmable steering wheel button -open
ing a function :
press the 0 butto n on the mul
t ifun ction steer ing whee l.
-Programmable steering wheel button -re
que sting a function :
ho ld down the [i] bu tton.
- Programmable ste ering whe el button -chang
ing the function :
in the Info tainment sys tem,
sele ct:
IMENU I button> Vehicle > lef t con trol
bu tton >
Vehicle settings > Steering wheel
button assignment .
@ Button 1~·" 1
-Repeating the last navigation prompt : press
t h e
lq ,w l bu tton whe n route guidance is a ct ive.
- Changing the voice guidance volume : when
route g uidance is active, turn the right th umb
whee l upwar d or downward during a navigat ion
p rompt.
Cockpit overview
Multifunction steering
wheel
Operating
Applies to: veh icles w ith multifunction steering wheel
With the multifun ction steering wheel, you con
opera te the driver information system a s well as
t he MMI functions and you con also adjust the
volume.
Fig . 12 Mu ltifunction steer ing whee l
Requireme nt: the ignition must be sw itched on .
(D Operating the dr iver information system
T he driver information system contains mu ltiple
tabs
(D c:> page 12, fig. 6 that d isplay various in
format ion @
c:> page 12, fig. 6.
The following tabs are availab le, depending on
vehicle equipment:
F irst tab Vehicle (on-board comp ute r)
c:> pag e 16
Second M
essages
tabal
T hird tab Radio
c:> page 17
M edi a c:> page 1 7
Fourth tab Telephone c:> page 18
•> T h is tab is only v isible when th ere is at least one ind icator
l ig ht or message d isp layed.
- Swit ching tab s: press the I MODE i button o n the
m ultif unct ion stee ring wheel repea te dl y until
t he de sired tab is displayed.
-Selecting a function in the menu /list : turn the
left t humbwheel on the multifu nction steering
wheel to the desired function. ..,.
15
Page 31 of 386
<( a, .... N ,....
N .... 0 0
3 a,
_J:L
1:1
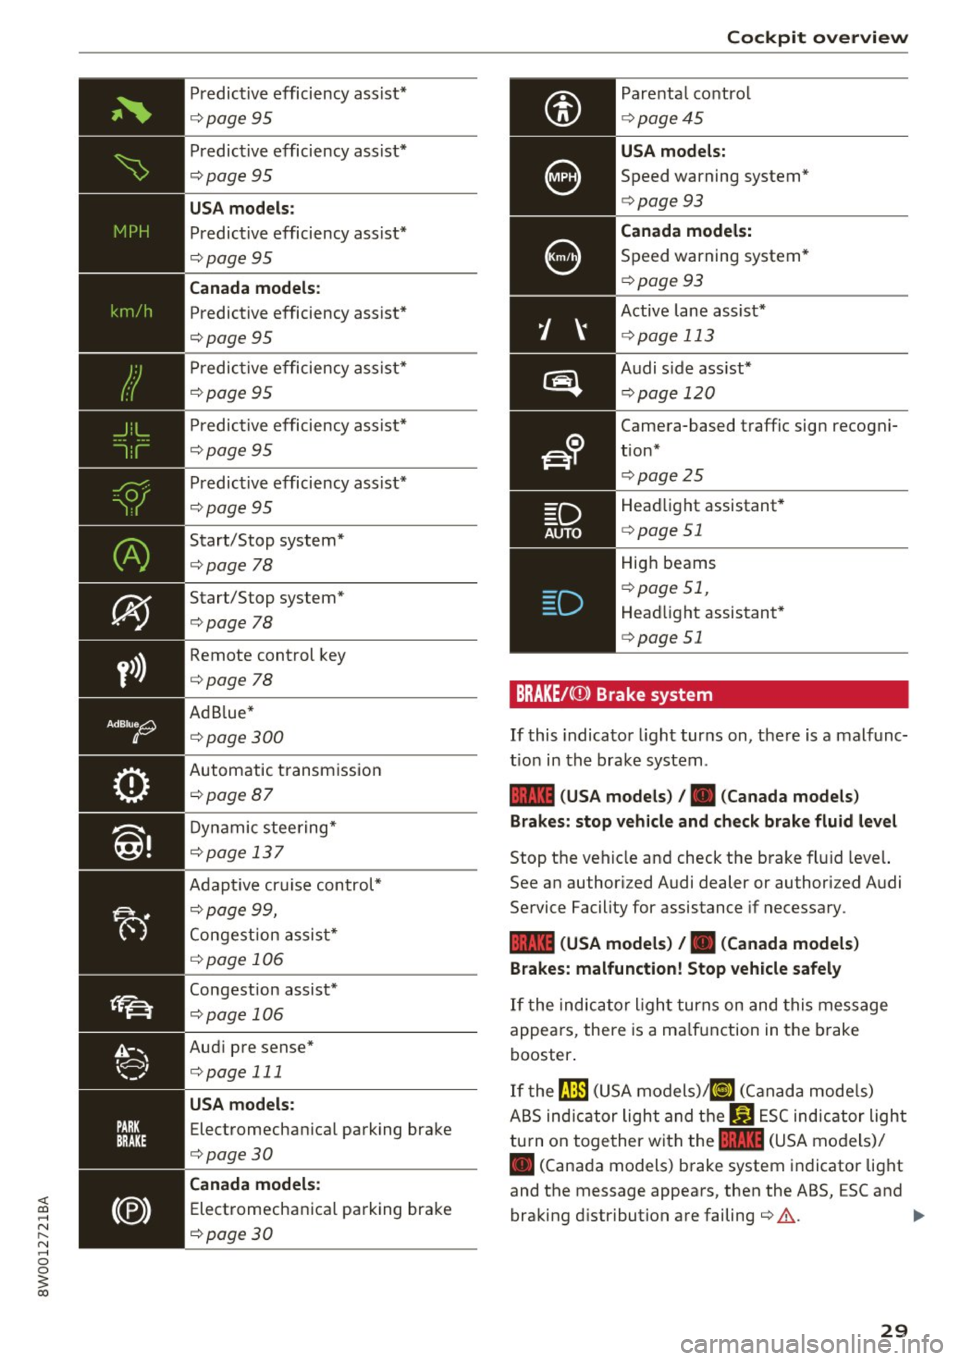
Predict iv e e ffici ency assist *
¢ page 95
Predictive e fficiency assist*
¢page95
USA models :
Predictive efficiency assist*
¢page 95
Canada models :
Predictive efficiency assist*
¢page95
P redictive efficiency assist*
¢page 95
Predictive efficiency assist*
¢page95
Predict ive efficiency assist*
¢page95
Start/Stop system*
¢ page 78
Start/Stop system*
¢page 78
Remote control key
E> page 78
Ad B lue*
¢ page300
Automatic transm ission
¢page87
D ynamic stee ring*
¢page 137
Adapt ive cr uise control*
¢page
99,
Congestion assist*
¢ page 106
Congestion assist*
¢page 106
Aud i pre sense*
c>page 111
USA models :
Electromechanical parking brake
c>page30
Canada models :
Electromechanical pa rking brake
¢ page30 Coc
kpit o ve rv iew
Parenta l control
¢ page 45
USA models:
Speed warning system*
¢ page 93
Canad a model s:
Speed warning system*
¢ page 93
Active lane assist* ¢ page 113
Audi s ide ass ist*
¢ page 120
Camera-based traffic sign recogni
tion* ¢ page 25
Head light assistant*
¢ page 51
High beams
¢ page 51,
Head light assistant*
¢ page 51
BRAKE/((D) Brake system
If this indicator l ight tur ns on, t here is a malfunc
t ion in the brake system .
1111 (USA models ) /. (Canada models )
Brakes: stop vehicle and check brake flu id leve l
Stop the vehicle and check the b rake fl uid leve l.
See an authorized Audi dealer or authorized A udi
Se rvice Facility for assistance if necessary.
1111 (USA model s) /. (Canada model s)
Brakes: malfunction! Stop vehicle safely
If t he indicator ligh t turns on and this message
appea rs, the re is a ma lfunction in the brake
booster .
If the~ (USA models)/ ri] (Canada mode ls)
ABS indicator ligh t and the
J.id [SC indicator light
turn on toge ther with the
1111 (USA models)/
• (Canada models) brake system indicator light
and the message appea rs, then the ABS, ESC and
braking d istribution a re failing
c> ,&. . ..,.
29
Page 59 of 386
<( a, .... N ,....
N .... 0 0
3 a,
(!)-Rain sensor mode. The windshield wipers
switch on once the vehicle speed exceeds approx imately 2 mph (4 km/h) and it is ra ining. The
higher the sensitivity of the rain sensor that is set
(switch @ to the right), the earlier the wind
shield wipers react to moisture on the wind
sh ield . You can deactivate the rain sensor mode
in the Infota inment system, which switches the
intermittent mode on. To do th is, select:
! MENU !
button > Vehicle > left control button > Dri ver
a ss is ta nc e
> Rain sen sor. In intermittent mode ,
you can adjust the interva l time using the switch
@ .
@ -slow wip ing
@ -fast wip ing
© -sing le wipe If you hold the lever in this posi
tion longer, the wipers switch from slow wiping
to fast w iping.
® -clean the windsh ie ld The wipers wipe one
time after several seconds of dr iving to remove
water droplets. You can switch this function off
by moving the lever to position ® within
10 sec
onds of the after-wipe . The after-wipe function is
react ivated the next time you switch the ign ition
on.
C leaning the headlights*. The headlight washer
system* operates only when the low beam head lights are sw itched on . If you move the lever into
position @, the headlights will be cleaned at
fixed intervals.
A WARNING
- T he rain sensor is only intended to assist the
driver. The driver may still be responsible
for manually switching the w ipers on based
on v is ibility conditions.
- The w indshie ld may not be treated with wa
ter -repelling windshield coating agents. Un
favorable conditions, s uch as wetness, dark
ness or low sun, can result in increased
glare, which increases the risk of an acc i
dent . Wiper blade chatter is also poss ible.
- Properly functioning windsh ield wiper
blades are required for a clear view and safe
dr iv ing to red uce the risk of an accident
Light s and Vision
c::> page 58, Changing windshield wiper
blades.
@ Note
- If there is frost, make sure the windshield
wiper blades are not frozen to the wind
shield. Switching on the windshield wipers
when the blades are frozen to the wind
shield can damage the w iper blades.
- Prior to using a car wash, the windshield
wiper system must be sw itched off (lever in
position
0). This prevents the wipers from
switching on unintentionally and caus ing
damage to the windsh ield wiper system.
@ Tips
- The windshield wipers switch off when the
ign ition is switched off. You can activate the
w indshield wipers after the ignition is
switched back on by moving the w indshield
w iper lever to any position.
- Wor n or dirty w indshie ld w iper blades resu lt
in st reaking. T his can affect the rain senso r
function. Check your windshield wiper
blades reg ularly.
- The washer fluid nozz les for the windshield
washer system are heated a t low tempera
tures when the ignition is on .
- Whe n stopping tempo rar ily, such as at a
t raffic lig ht, the speed of the windshield
wipers automatically reduces by one level.
Cleaning windshield wiper blades
Clean the wiper b lades when you see wiper
streaks. Use a soft cloth and a g lass cleaner.
Wind shi eld wiper
... Place t he w indsh ie ld w iper arms in the service
position
c::> page 58 .
... Fold the windshie ld wiper arms away from the
windshie ld.
A WARNING
D irty windshie ld wiper blades can impa ir vi
sion, wh ic h increases the risk of an accident.
57
Page 61 of 386
.. To turn the compass on or off, press the button
@ until the compass in the mirror appears or
disappears.
The digital compass only works when the ign ition
is switched on. The direction is shown in abbrevi
ated form:
N (North), NE (Northeast), E (East),
SE (Southeast), S (South), SW (Southwest), W
(West), NW (Northwest) .
Adjusting the magnetic zone
Applies to: vehicles with digital compass
Lights and V ision
(D Tips
To p revent inaccurate compass readings, do
not br ing any remote controls, electrical devi
ces or metallic objects near the mirror.
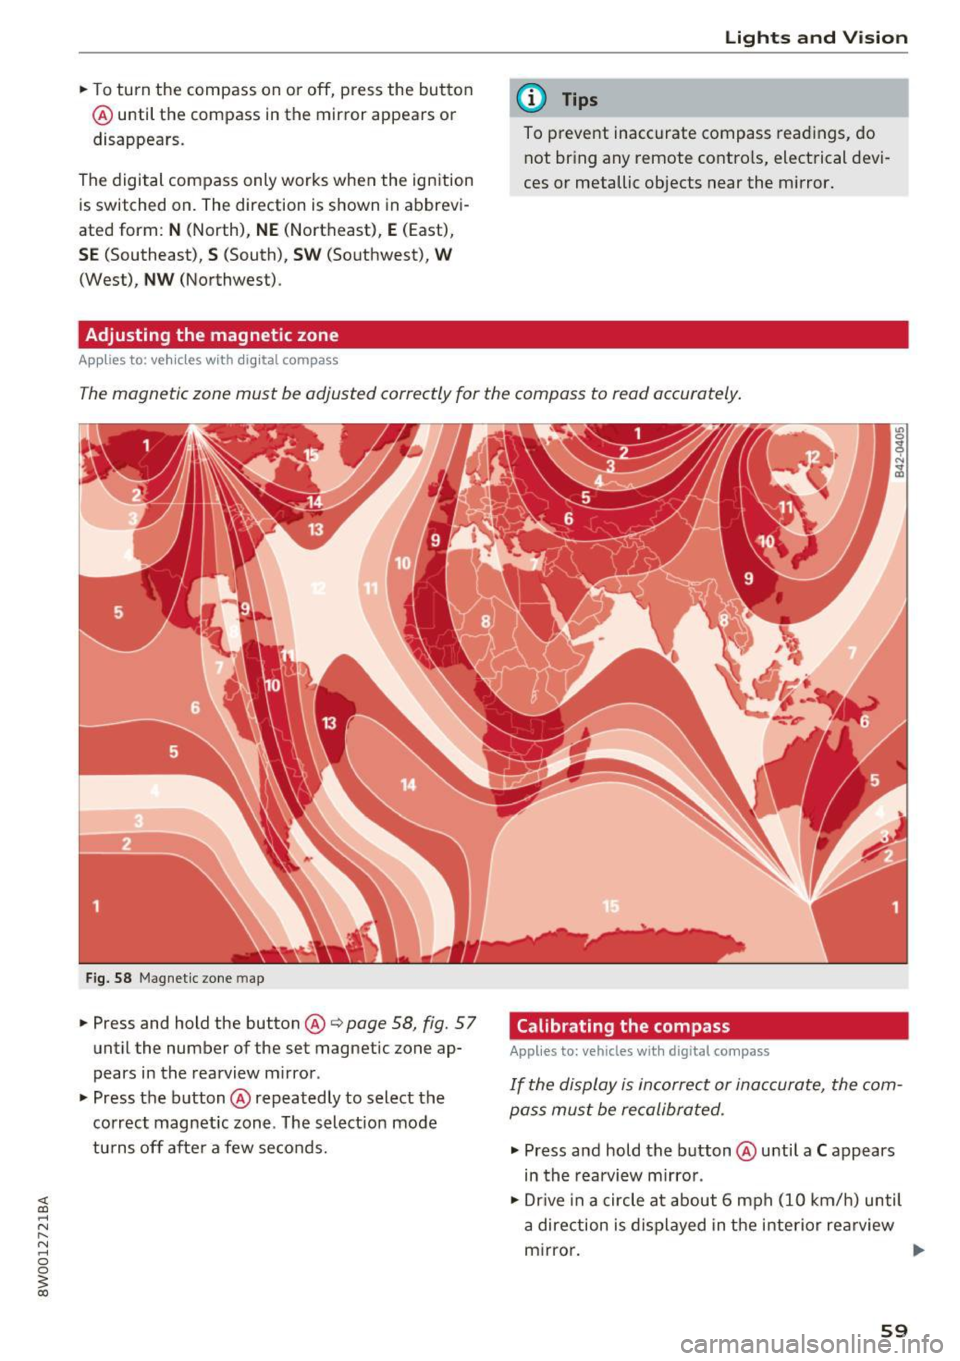
The magnetic zone must be adjusted correctly for the compass to read accurately.
Fig. 58 Magnet ic zone map
.. Press and hold the button@¢ page 58, fig. 57
until the number of the set magnetic zone ap
pears in the rearview mirror .
.. Press the button@repeatedly to select the
correct magnetic zone . The select ion mode
turns off after a few seconds. Calibrating the compass Applies
to: vehicles with digital compass
If the display is incorrect or inaccurate, the com
pass must be recalibrated.
.. Press and hold the button @until a C appears
in the rearview mirror .
.. Dr ive in a circle at about 6 mph (10 km/h) until
a direction is displayed in the interior re arview
mirror. .,.
59
Page 70 of 386
Warm and cold
Warm and cold
Climate control system
Description
The climate control system warms, cools and re moves humidity from the air in the vehicle interi
or. It is the most effective when the windows and
sunroof * are closed. If there is a bui ld-up of heat
inside the vehicle, ventilation can he lp to speed
up the cooling process.
I n all heating mode f unctions except for
defrost ,
the blower only switches to a higher speed once
the engine coolant has reached a sufficient tem
perature .
Pollutant filt er
The po llutant filter removes poll utants such as
dust and pollen from the a ir .
Ke y recognit ion
The climate control settings are automatically
stored and assigned to the remote contro l key
that is in use .
@) For the sake of the environment
-If you wo uld like to reduce fuel consump
tion, switch the ai r cond itioning off. This
will a lso reduce em issions.
68
- In veh icles with a diesel engine, you can
switch the auxiliary heater off in the Info
tainment system.
(D Tips
- To prevent interference with the heating
and cooling output and to prevent the win
dows from fogging over, the a ir intake in
front of the windshield must be free of ice,
snow or leaves.
- Condensation from the cooling system can dr ip and form a puddle of water under the
vehicle . This is normal and does not mean
there is a leak .
- If you see that, for example, the seat heat
ing* or rear w indow defogger are not heat
ing, the energy management system may
have switched them off temporari ly . These
systems a re available again as soon as the
energy supply has been resto red.
Page 71 of 386
Warm and cold
3 zone deluxe automatic climate control
Operating
.... M
~ a,
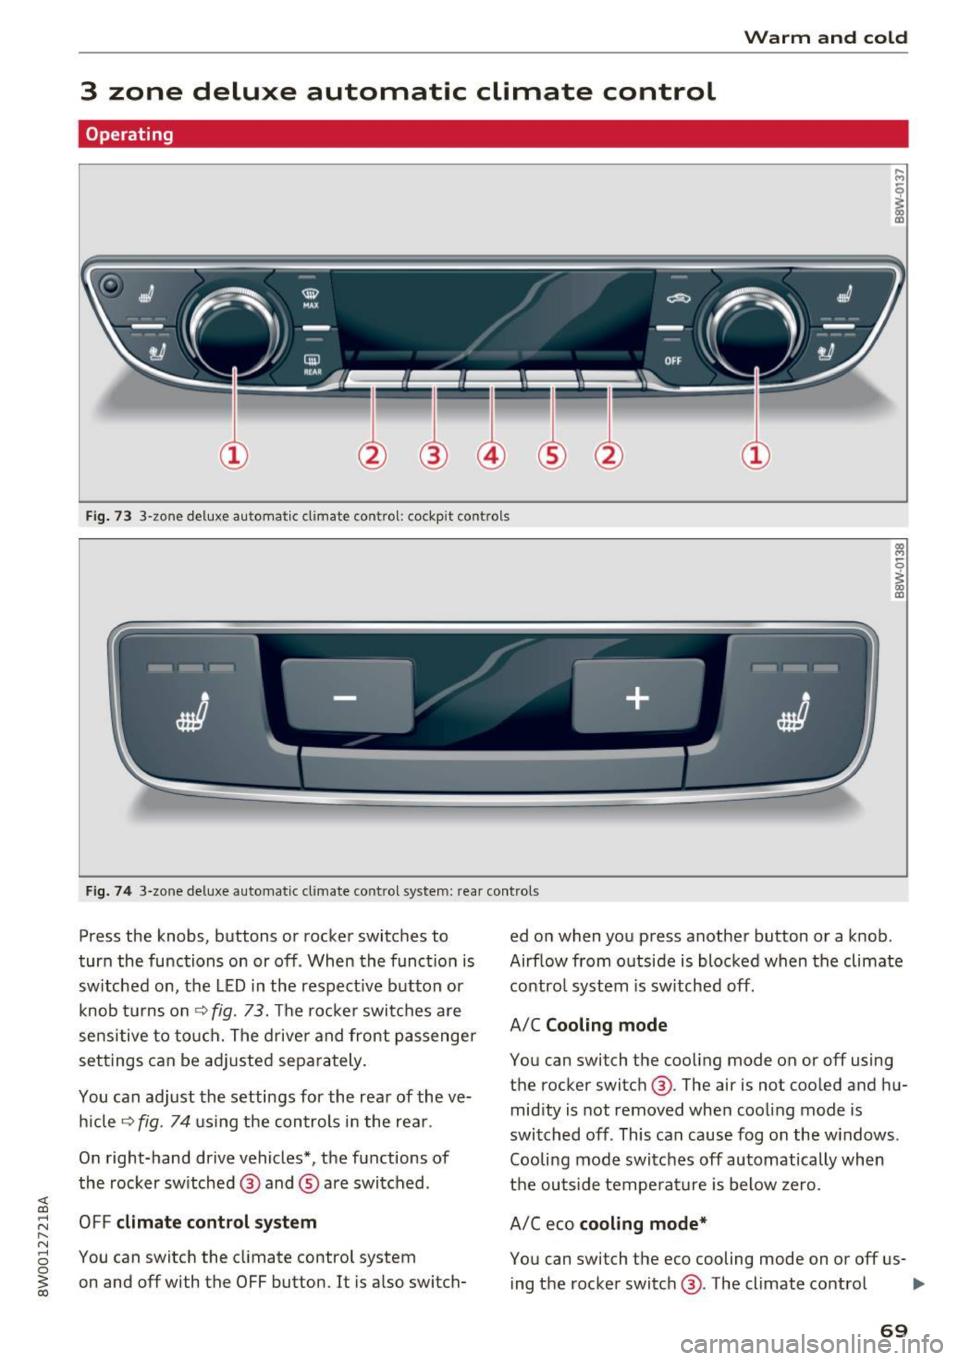
Fig. 73 3-zone de lu xe automat ic cl imate contro l; cockpit controls
Fig. 74 3-zone de luxe automatic cl imate contro l system: rear controls
Press the knobs, buttons or rocker switches to
turn the functions on or off . When the funct ion is
sw itched on, the LED in the respect ive button or
knob t urns on ¢
fig. 73. The rocker switches are
sensitive to touch. The driver and front passenger
settings can be adjusted separately.
You can adjust the settings for the rear of the ve
hi cle
~ fig . 74 using the controls in the rear .
On right-hand drive vehicles*, the functions of
the rocker switched ® and ® are switched .
OFF
climate control system
You can switch the climate control system
on and off with the OFF button.
It is also switch- ed on when you press another button or a knob
.
Airflow from outside is blocked when the climate
contro l system is sw itched off .
A/C
Cooling mode
You can switch the cooling mode on or off using
the rocker switch ®· The air is not cooled and hu
midity is not removed when cooling mode is
switched off. This can cause fog on the w indows .
Cooling mode switches off automatically when
the outside temperature is below zero.
A/Ceco
cooling mode*
You can switch the eco cooling mode on or off us-
ing the rocker switch ®· The climate control ..,.
69
Page 72 of 386
Warm and cold
system operates most efficiently in eco cooling
mode.
A/C MAX cooling mode*
You can switch the maximum cool ing mode on or
off using the rocker switch@. Th e air is not
coo led and humidity is not removed when cooling
mode is switched off. This can cause fog on the
windows. Cooling mode switches off automati
cally when the outside temperature is below
zero. When the cooling mode is switched on, the
vehicle interior is cooled as quickly as possible
and dehumidified .
c:E) Recirculation mode
In recirculation mode, the air inside the vehicle is
circu lated and filtered. This prevents the unfil
tered air outside the vehicle from entering the
vehicle interior. We recommend switching recir
culation mode on when dr iv ing through a tunnel
or when s itting in traffic
c::> ,&.
Using the button, recirculation mode is~ using
the button. You can also switch the recirculation
mode off by pressing the knob
(D :1E or the but
ton.
AUTO
Automatic mode
Automatic mode ma intains a constant tempera
ture inside the vehicle. Air temperature, airflow
and a ir distribution are controlled automatically .
You can switch automatic mode on or off by
pressing the knob@.
Temperature
You can adjust the temperature between 60°F
( + 16°() and 84°F ( +28°() by turn ing the knob
(D . If outside of this range, LO or HI will appear
in the climate control system d isplay. In both
sett ings, the climate control runs constantly at
the maximum cooling or heating level. The tem
pe rat ure is not regulated.
The temperature can be adjusted in the rear us
ing the rear contro ls
c::> fig. 74 .
86'~ Blower
You can adjust the vo lume of air generated by the
blower to your preference using the rocker switch
70
@ . To have the blower regulated automatica lly,
press the knob
(D.
Air distribution
You can use the rocker sw itches @to adjust the
ven ts where the air w ill flow o ut of. P ress the
rocker switches @repeatedly until the desired
air distribution setting is disp layed in the climate
contro l system controls. To have the air distribu
tion regulated automatically, press the knob
(D.
-Jit-OPEN/CLOSE the wide vent
You can open and close the wide vent in the cock
pit using the rocker switch ®·
JI 8M Seat heating and ventilation*
If you press the button JI~ the seat heating/
ventilat ion is switched on at the highest leve l (3).
The LEDs indicate the temperature level. To re
duce the temperature, press the button again. To
switch the seat heating/ventilation off, press the
button repeatedly unti l the LED turns off .
3%i Defrosting
The windshield and side w indows are defrosted
o r cleared of condensation as quick ly as poss ible.
The maxim um amount of air flows mainly from
the vents below the windshield . Recirculation
mode switches off. The temperature should be
set at + 72°F (22°() or higher. The temperature is
controlled automatically.
Defrost is sw itched on and off~ using the but
ton. You can switch the function off by pressing
the knob
(D .
Applies to vehicles with windsh ield heating*:
when outside temperatures are low, the wind
shield heating is automatically switched on . If
you would like to switch the windshield defroster
on manually, press the button.~-The LED in the
button blinks.
Qii) REAR Rear window defogger
Press the button to switch the rear window de
fogger !! on. It on ly operates when the engine is
running. It switches off automatically after 10 to
20 minutes, depending on the outs ide tempera
ture.
Page 75 of 386
Driving
General information
Breaking in
A new vehicle must be broken in, and the break
in distance should be 1,000 mi les ( 1,500 km). Do
not drive at speeds that w ill exceed
2/3 of the
maximum permitted engine speed (RPM) for the
first 600 miles (1,000 km) , and avoid full accel
eration during this period . You may gradually
start increasing the RPM and the speed between
600 miles (1,000 km) and 1,000 miles (1,500 km).
During the first hours of use, the engine has a
higher internal friction than later on when all
moving parts have settled into place with each
other.
How the vehicle is driven during the first 1,000
miles (1,500 km) also affects the engine quality.
Drive at moderate engine speeds after the initial
break-in per iod, part icularly when running a cold
engine . This will reduce engine wear and improve
the mileage .
Do not drive at too
low of an engine speed (RPM).
Shift down when the engine no longer runs
"smoothly" . Extremely high engine speeds are
automatically reduced.
Avoid damaging the vehicle
When you are driving on poor roads, or over
curbs, steep ramps, etc., make certain that low
lying parts such as spoilers and exhaust system
parts do not bottom out and get damaged.
This is especially true for vehicles with low-slung
chassis (sports chassis)* and fully loaded
vehicles.
Driving through water on roads
Note the following to reduce the risk of vehicle
damage when driving through water, for examp le
<( on flooded roads : a, .... N
~ -The wate r must not be any higher than the bot-....
g tom of the vehicle body .
3 a,
Driving
- Do not drive faster than walking speed.
A WARNING
After driv ing through water or mud, the effec
tiveness of the brakes may be reduced due to moisture on the brake rotors and brake pads.
A few careful brake applications should dry
off the brakes .
(D Note
-Vehicle components such as the engine,
transmission, suspens ion or electrical sys
tem can be severely damaged by driving
through water .
- Always switch the Start/Stop system* off
when driving through water
r:';>page 78.
(D Tips
- Determine the depth before driving through
water.
- Do not stop the vehicle, drive in reverse or
switch the engine off when driving through
water.
- Keep in mind that oncoming vehicles may create waves that raise the water level and
make it too deep for your vehicle to drive
through safely.
- Avoid driving through salt water, because
this can cause corrosion .
Economical and environmentally-friendly
dr iving
T he amount of fuel consumpt ion, the environ
mental impact and the wear to the engine,
brakes and tires depends mostly on your driving
style. With an anticipatory and economic driving
style, fuel consumption can be reduced by ap
proximately 10-15%. The following tips will help
you conserve the environment and your money at
the same time .
Anticipatory driving
A vehicle uses the most fuel when accelerating.
When you drive with anticipation, you do not
need to brake as often and so you accelerate less .
When possible, let your vehicle coast with a
gear
engaged,
for example, when you notice that the ..,.
73
Page 80 of 386
Driving Starting the engine when there is a
malfunction
It may not be possible to start the engine under certain circumstances, for example if the battery
in the vehicle key is drained, if interference is af
fected the key or if there is a system malfunc
tion.
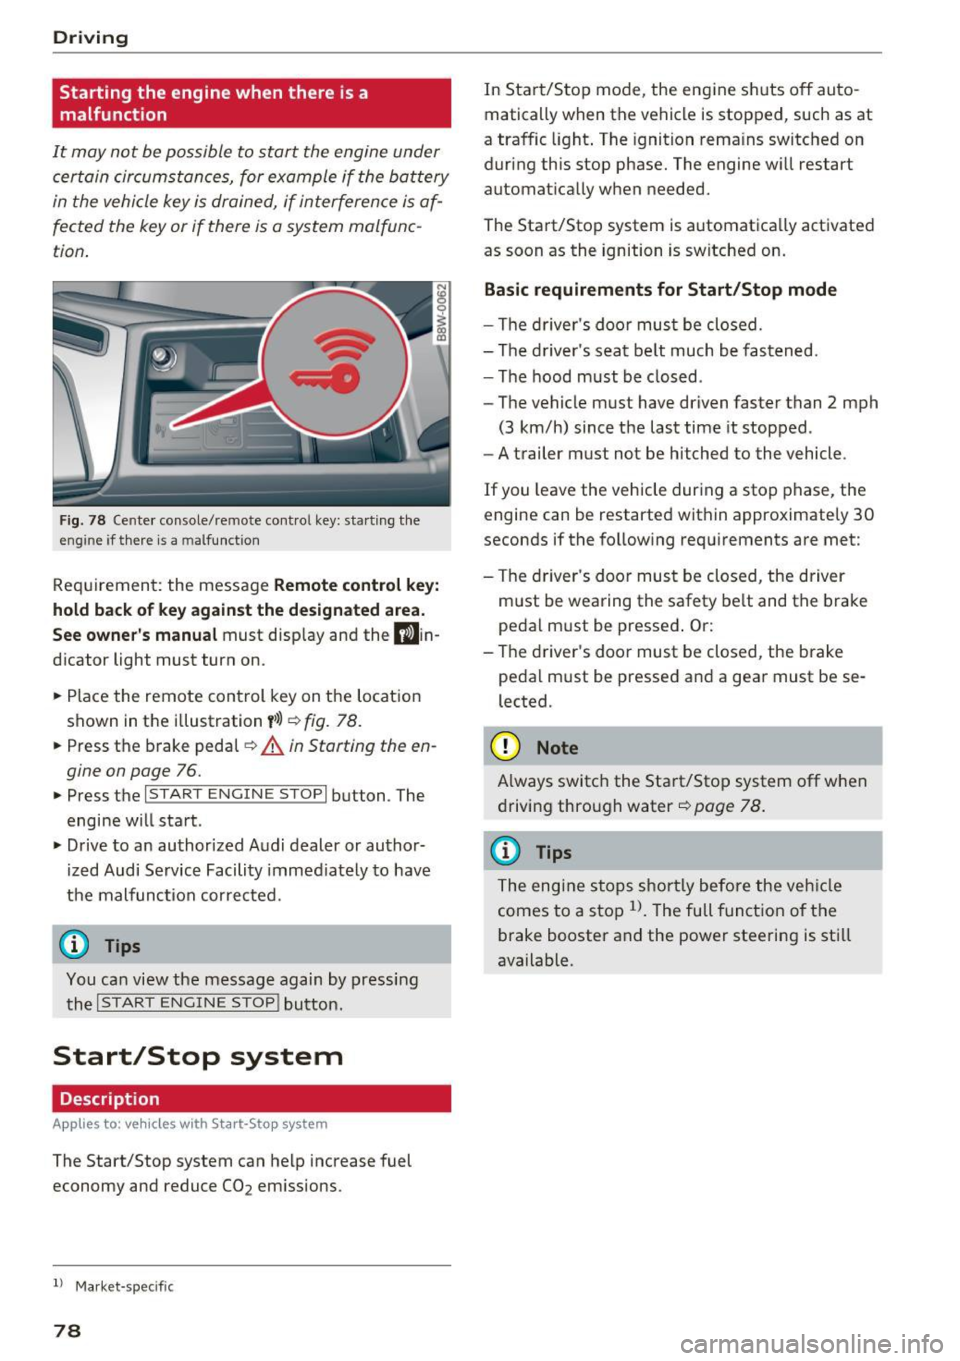
Fig. 78 Center console/remote contro l key: starting the
eng ine if there is a m alfunction
Requirement: the message Remote control key:
hold back of key against the designated area.
See owner's manual must display and the D)in
dicator light must turn on.
.. Place the remote control key on the location
shown in the illustration
y>l) ~ fig. 78.
.. Press the brake pedal~ A in Starting the en
gine on page
76.
.. Press the l~S_T_A_R_T_E_N_G_I_N_E_S_T_O_P_I button . The
engine will start .
.. Drive to an authorized Audi dealer or author
ized Audi Service Facility immediately to have
the malfunction corrected.
(D Tips
You can view the message again by pressing the
I START ENGINE STOP! button.
Start/Stop system
Description
App lies to: ve hicles w ith S ta rt-Sto p system
The Start/Stop system can help increase fuel
economy and reduce CO2 emissions.
l ) Market -spe cific
78
In Start/Stop mode, the engine shuts off auto
matically when the vehicle is stopped, such as at
a traffic light. The ignition remains switched on
during this stop phase. The engine will restart automatically when needed.
The Start/Stop system is automatically activated as soon as the ignition is switched on.
Basic requirements for Start/Stop mode
-The driver's door must be closed.
- The driver 's seat belt much be fastened.
- The hood must be closed .
- The vehicle must have driven faster than
2 mph
(3 km/h) since the last time it stopped .
- A trailer must not be hitched to the vehicle .
If you leave the vehicle during a stop phase, the
engine can be restarted within approximately 30
seconds if the following requirements are met:
- The driver's door must be closed , the driver
must be wearing the safety belt and the brake
pedal must be pressed . Or:
- The driver's door must be closed, the brake
pedal must be pressed and a gear must be se
lected.
({D Note
Always switch the Start/Stop system off when
driving through water
~page 78.
(D Tips
The engine stops shortly before the vehicle
comes to a stop
l). The full function of the
brake booster and the power steering is still
available.