start stop button AUDI A4 2020 User Guide
[x] Cancel search | Manufacturer: AUDI, Model Year: 2020, Model line: A4, Model: AUDI A4 2020Pages: 296, PDF Size: 80.45 MB
Page 105 of 296
8W1012721BB
Driving
manually or automatically when you start to
drive.
Setting and releasing the parking brake
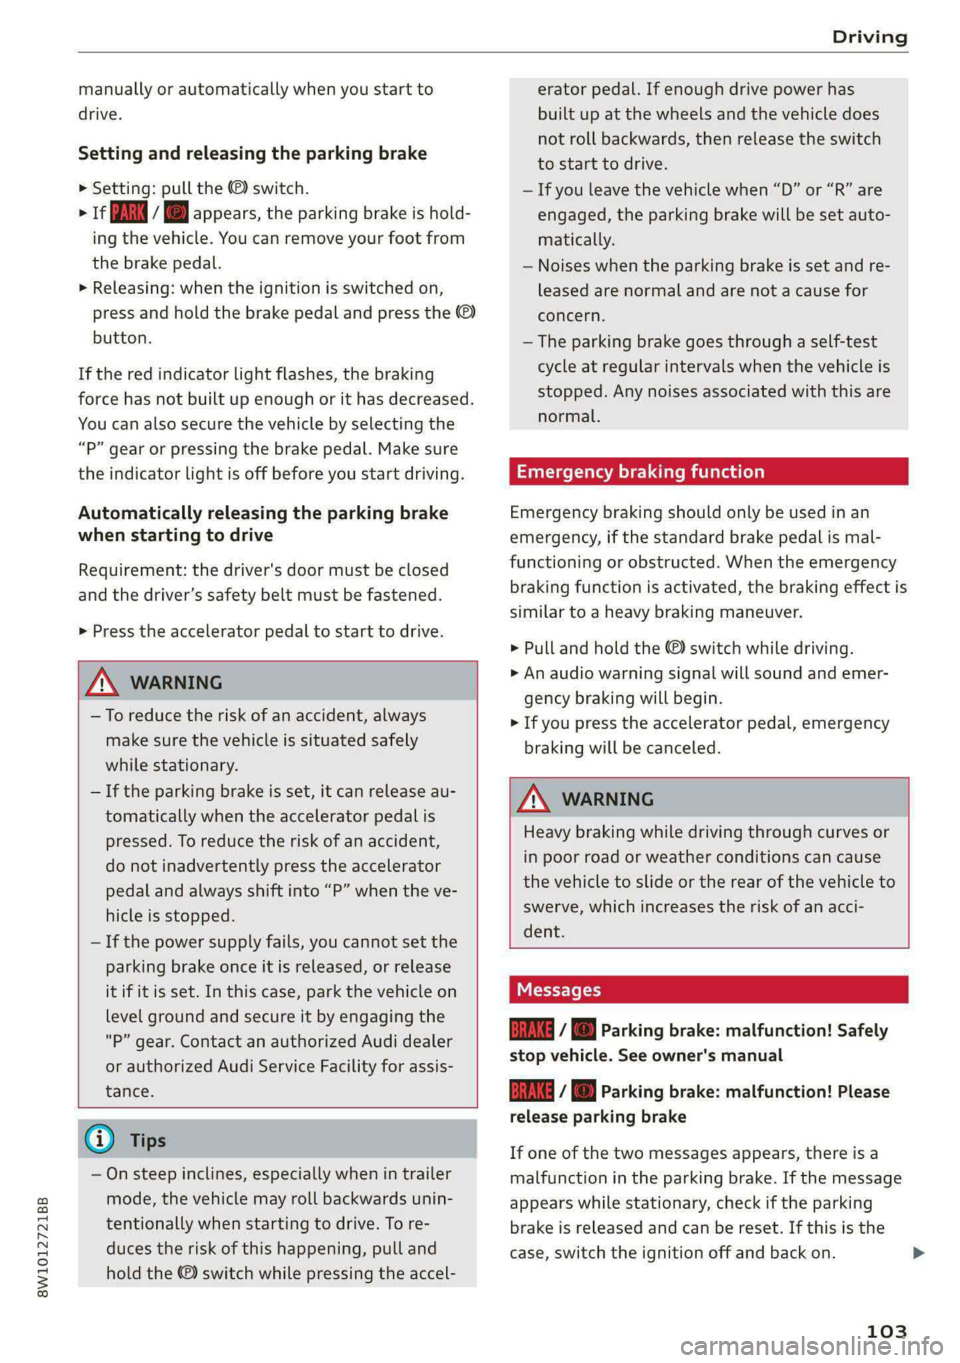
> Setting: pull the ©) switch.
> ris appears, the parking brake is hold-
ing the vehicle. You can remove your foot from
the brake pedal.
> Releasing: when the ignition is switched on,
press and hold the brake pedal and press the ©)
button.
If the red indicator light flashes, the braking
force has not built up enough or it has decreased.
You can also secure the vehicle by selecting the
“P” gear or pressing the brake pedal. Make sure
the indicator light is off before you start driving.
Automatically releasing the parking brake
when starting to drive
Requirement: the driver's door must be closed
and the driver’s safety belt must be fastened.
> Press the accelerator pedal to start to drive.
ZA\ WARNING
—To reduce the risk of an accident, always
make sure the vehicle is situated safely
while stationary.
— If the parking brake is set, it can release au-
tomatically when the accelerator pedal is
pressed. To reduce the risk of an accident,
do not inadvertently press the accelerator
pedal and always shift into “P” when the ve-
hicle is stopped.
— If the power supply fails, you cannot set the
parking brake once it is released, or release
it if it is set. In this case, park the vehicle on
level ground and secure it by engaging the
"P” gear. Contact an authorized Audi dealer
or authorized Audi Service Facility for assis-
tance.
@) Tips
— On steep inclines, especially when in trailer
mode, the vehicle may roll backwards unin-
tentionally when starting to drive. To re-
duces the risk of this happening, pull and
hold the ©) switch while pressing the accel-
erator pedal. If enough drive power has
built up at the wheels and the vehicle does
not roll backwards, then release the switch
to start to drive.
— If you leave the vehicle when “D” or “R” are
engaged, the parking brake will be set auto-
matically.
— Noises when the parking brake is set and re-
leased are normal and are not a cause for
concern.
— The parking brake goes through a self-test
cycle at regular intervals when the vehicle is
stopped. Any noises associated with this are
normal.
Emergency braking function
Emergency braking should only be used in an
emergency, if the standard brake pedal is mal-
functioning or obstructed. When the emergency
braking function is activated, the braking effect is
similar to a heavy braking maneuver.
> Pull and hold the ©) switch while driving.
» An audio warning signal will sound and emer-
gency braking will begin.
> If you press the accelerator pedal, emergency
braking will be canceled.
ZA WARNING
Heavy braking while driving through curves or
in poor road or weather conditions can cause
the vehicle to slide or the rear of the vehicle to
swerve, which increases the risk of an acci-
dent.
Ea / @ Parking brake: malfunction! Safely
stop vehicle. See owner's manual
EG / @ Parking brake: malfunction! Please
release parking brake
If one of the two messages appears, there is a
malfunction in the parking brake. If the message
appears while stationary, check if the parking
brake is released and can be reset. If this is the
case,
switch the ignition off and back on.
103
Page 107 of 296
8W1012721BB
Driving
@ For the sake of the environment
Avoid actions that are damaging to the envi-
ronment. Show respect for the natural envi-
ronment and remain on marked routes.
@ Tips
Clean your vehicle after driving offroad. Dirt
and stones falling off your vehicle can affect
other road users.
Driving through water
If you must drive through water, follow these in-
structions:
— Check the stability of the ground, the current,
and the water depth. If the ground is unstable,
there is a strong current, or there are waves,
the water must only reach up to the lower edge
of the body at the most.
— Deactivate the Start/Stop system*.
— Drive carefully and no faster than at walking
speeds to prevent the front of the vehicle from
creating waves, because they could splash
above the lower edge of the body. Oncoming
vehicles could also create waves.
— Do not stop the vehicle while in the water.
— Drive in reverse.
— Do not turn the engine off.
Hill descent assist
Applies to: vehicles with hill hold assist
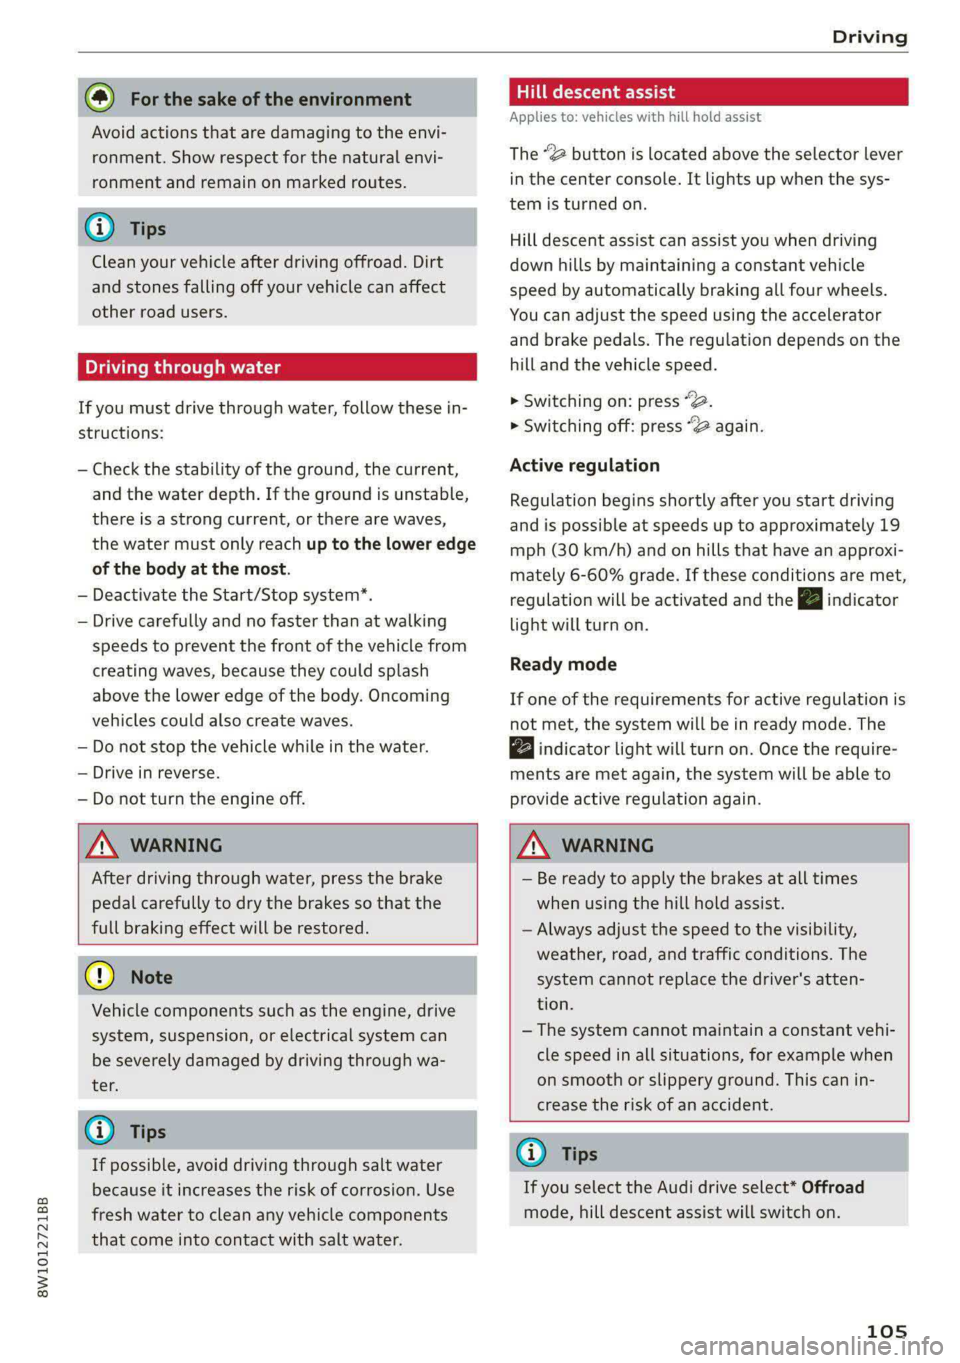
The “2 button is located above the selector lever
in the center console. It lights up when the sys-
tem is turned on.
Hill descent assist can assist you when driving
down hills by maintaining a constant vehicle
speed by automatically braking all four wheels.
You can adjust the speed using the accelerator
and brake pedals. The regulation depends on the
hill and the vehicle speed.
> Switching on: press a
> Switching off: press “2 again.
Active regulation
Regulation begins shortly after you start driving
and is possible at speeds up to approximately 19
mph (30 km/h) and on hills that have an approxi-
mately 6-60% grade. If these conditions are met,
regulation will be activated and the indicator
light will turn on.
Ready mode
If one of the requirements for active regulation is
not met, the system will be in ready mode. The
a indicator light will turn on. Once the require-
ments are met again, the system will be able to
provide active regulation again.
ZA WARNING
After driving through water, press the brake
pedal carefully to dry the brakes so that the
full braking effect will be restored.
@) Note
Vehicle components such as the engine, drive
system, suspension, or electrical system can
be severely damaged by driving through wa-
ter.
@ Tips
If possible, avoid driving through salt water
because it increases the risk of corrosion. Use
fresh water to clean any vehicle components
that come into contact with salt water.
ZA WARNING
— Be ready to apply the brakes at all times
when using the hill hold assist.
— Always adjust the speed to the visibility,
weather, road, and traffic conditions. The
system cannot replace the driver's atten-
tion.
— The system cannot maintain a constant vehi-
cle speed in all situations, for example when
on smooth or slippery ground. This can in-
crease the risk of an accident.
G) Tips
If you select the Audi drive select* Offroad
mode, hill descent assist will switch on.
105
Page 123 of 296
8W1012721BB
— The traffic signs on the road always take pri-
ority over the display. The driver is always
responsible for adhering to the regulations
applicable in the country where the vehicle
is being operated.
— Units of measurement and language set-
tings are displayed based on how they were
set in the MMI system settings > page 206.
Applies to: vehicles with traffic light information
Switching traffic light information on and
off
The system and be switched on and off in the
MMI.
> Applies to: MMI: Select on the home screen:
VEHICLE > Driver assistance > Traffic light in-
formation.
Accessing traffic light information
> Select in the instrument cluster: vehicle func-
tions tab > Traffic signs.
@) Tips
If another tab or another function is selected
in the instrument cluster, the traffic light in-
formation will appear in the status bar on the
instrument cluster.
Applies to: vehicles with traffic light information
Malfunction! See owner's manual
The system could not be configured, for example
due to a network malfunction. Switch the igni-
tion off and shut down the vehicle to restart the
system. Wait several minutes until the vehicle
has shut down completely and then switch the
ignition back on.
Function currently unavailable. See owner's
manual
There is a temporary system malfunction. Check
if one or more of the following situations applies
and correct the issue if necessary:
— Traffic light information is switched off
Driving information
— Data transmission is deactivated
— The vehicle is not equipped with traffic sign rec-
ognition.
— There is no valid license
— Traffic light information is not available in that
area
Lap timer
Introduction
Applies to: vehicles with lap timer
You can record and evaluate lap times with the
lap timer. You can operate the lap timer using the
multifunction steering wheel > page 12.
Opening the lap timer
> Select in the instrument cluster: Vehicle func-
tions tab > J button > Lap times.
An additional indicator appears in the head-up
display”.
ZA WARNING
Your focus should always be on driving your
vehicle safely. As the driver, you have com-
plete responsibility for safety in traffic. To re-
duce the risk of an accident, only use the lap
timer functions in such a way that you always
maintain complete control over your vehicle in
all traffic situations.
@ Tips
You can retrieve information from the trip
computer while the lap timer stopwatch is
running.
Lap times and timing
Applies to: vehicles with lap timer
Requirement: the lap timer must be open
> page 121.
Timing laps
> To start timing manually, select Start lap 1 in
the menu.
> To start timing automatically as soon as you be-
gin to drive, select Start lap 1 by driving off or
Start by driving off in the menu. >
121
Page 124 of 296
Driving information
> To start timing a new lap after driving a lap, se-
lect New lap in the menu. This starts timing
the next lap at the same time.
After completing a lap, the difference between
the last lap and the previous best lap time will be
ayn indicated with a “~” or “+”.
Pausing timing and displaying a split time
> To insert a pause @ select Pause in the menu.
> To resume timing, select Resume in the menu.
> To display a split time, select Split time in the
menu. The split time appears for approxi-
mately ten seconds in the instrument cluster.
The current lap timing will continue running.
Canceling lap timing
The timing of the current lap will stop. The lap
time will be erased and will not be included in the
statistics.
> Select Cancel lap in the menu.
Resetting the time
> Select Reset lap times in the menu.
G) Tips
—A maximum of 99 lap times can be meas-
ured.
— If timing is paused, you can continue it later
even if you switch the ignition off.
— Saved lap times cannot be individually de-
leted from the total results.
— The saved lap timer values will remain after
switching the ignition off.
Lap statistics
Applies to: vehicles with lap timer
Displaying lap statistics
You can display the number of laps driven ES.
aon the fastest lap “+”, the slowest lap “-”, and the
average time “®” in the instrument cluster.
> Select in the instrument cluster: Vehicle func-
tions tab > ] button > Lap statistics.
> Turn the thumbwheel down or up to display the
individual lap times.
> To return to the lap timing that was started, se-
lect the [I button > Lap times.
122
Resetting lap statistics
Requirement: the lap statistics menu must be
displayed.
> To reset the lap statistics, press and hold the
left thumbwheel until the message No lap
times have been recorded yet. appears.
G) Tips
The lap statistics list the lap times for the last
30 laps. The fastest and slowest lap times out
of up to 99 measured laps are also displayed.
Page 132 of 296
Driver assistance
You can set any speed between 15 mph
(20 km/h)» and the maximum possible speed
range @)?) > page 128, fig. 113.
Pausing cruise control
The control can be stopped at any time:
>» While driving or when the vehicle is stationary:
Press the lever away from you in the direction
of the arrow. Or
» While driving: Press the brake pedal.
The A indicator light turns off.
Resuming regulation
The previously set speed can be resumed at any
time after a pause.
> To resume cruise control while driving, pull the
lever toward you in the direction of the arrow.
> To resume cruise control when stationary, pull
the lever toward you in the direction of the ar-
row while pressing the brake pedal.
Changing the speed
> To increase or decrease the set speed in smaller
increments, briefly tap the lever toward @) or
© to the first level.
> To increase or decrease the set speed in larger
increments, briefly tap the lever toward (@) or
© to the second level.
> To increase or decrease the set speed quickly,
hold the lever toward () or () until the mark-
ing in the speedometer (@) > page 128, fig. 113
has reached the desired speed.
Applies to: vehicles with efficiency assist: Predic-
tive control can adjust the set speed automati-
cally based on traffic and road condi-
tions > page 126.
Preselecting a speed
You can also preselect the speed when adaptive
cruise control is not active by moving the lever in
the desired direction @)/(). Activate the previ-
ously selected speed by pulling the lever toward
you in the direction of the arrow.
D Analog instrument cluster: 20 mph (30 km/h)
2) Depends on the country and engine
130
Switching off
If you do not want to use the adaptive cruise con-
trol for a long period of time, you can switch it
off.
> Push the lever away from you into position ©)
until it clicks into place.
The indicator light and the set speed will turn off.
Z\ WARNING
— Follow the safety precautions and note the
limits of the assist systems, sensors, and
cameras > page 114.
— The activated adaptive cruise control is only
an assist system, and the driver is still re-
sponsible for controlling the vehicle. The
driver is especially responsible for braking,
steering, starting to drive, and controlling
the speed and the distance from other
vehicles.
— Turn on the adaptive cruise control only if
the surrounding conditions permit it. Always
adapt your driving style to the current visu-
al, weather, road, and traffic conditions.
— Switch adaptive cruise control off temporari-
ly when driving in turning lanes, on express-
way exits or in construction zones. This pre-
vents the vehicle from accelerating to the
stored speed when in these situations.
— Ifyou press the [SETIQ) button when driving
at speeds below 15 mph (20 km/h)”, the
minimum possible speed that the system
can maintain will be set. If no vehicle is de-
tected ahead of you, the vehicle will acceler-
ate up to that speed.
(i) Tips
— Always keep your hands on the steering
wheel so you can be ready to steer at any
time. The driver is always responsible for
adhering to the regulations applicable in
the country where the vehicle is being oper-
ated.
Page 158 of 296
Parking and maneuvering
— The driver is always responsible when enter-
ing or exiting a parking space and during
similar maneuvers.
— Do not use this function if the vehicle cannot
move freely, for example when on a vehicle
jack.
— Sensors and cameras have spots in which
the surrounding area cannot be detected.
Objects, animals, and people may only be
detected with limitations may not be detect-
ed at all. Always monitor the traffic and the
vehicle's surroundings directly and do not
become distracted.
@ Note
— Do not use the park assist systems when
transporting cargo that extends out of the
vehicle, when snow chains are mounted, or
when the parking space is on a hill or in-
cline.
— Park assist guides the vehicle either away
from curbs or onto them if other vehicles
are parked on the curb. Make sure that your
vehicle's tires and rims are not damaged.
Resume control of the vehicle in time or
stop the parking process if needed to pre-
vent damage.
— In parking spaces without curbs, maintain a
distance of at least 19 inches (50 cm) from
walls and buildings in order to reduce the
risk of vehicle damage.
@ Tips
Follow the legal regulations in the country
where you are located when using Park assist.
Parking with the park assists
Applies to: vehicles with park assist
Requirement: a suitable parking space must be
found and selected > page 154. The vehicle must
initially be stationary.
> Select the reverse gear after stopping briefly.
> Remove your hands from the steering wheel.
> Pay attention to the path of the vehicle. If the
traffic situation permits, accelerate carefully
>A.
156
> Follow the visual instructions in the center dis-
play and the warning tones until the parking
process
has ended.
> The indicators in the center display show the
necessary direction of travel. Drive in the direc-
tion indicated by the arrows or symbols on the
roof in the parking aid image @) > page 154,
fig. 136.
Park assist automatically steers the vehicle into
the parking space while the driver presses the
pedals. The maximum parking speed is approxi-
mately 4 mph (7 km/h).
ZA WARNING
— Follow the safety precautions and note the
limits of the assist systems, sensors, and
cameras > page 114.
— The park assist is an assist system. The driv-
er is still responsible for monitoring the ve-
hicle's surroundings and preventing colli-
sions when using the system.
— When using park assist to drive into or out
of a parking space, the steering wheel turns
quickly on its own. Reaching into the steer-
ing wheel spokes while this is happening can
result in injury.
G) Tips
You can also cancel the driving direction set
by the system by shifting between D and re-
verse gear. Based on the position of the vehi-
cle, the system then calculates the additional
steering and driving directions for maneuver-
ing.
Exiting parking spaces with park assist
Applies to: vehicles with park assist
If you parked the vehicle in a parallel parking
space, park assist can help you drive out of it.
> Start the engine.
> Press the Pe button in the center console.
> Wait until a message appears in the center dis-
play that specifies the direction of travel re-
quired to exit the parking space.
Page 182 of 296
Navigation
Selecting map content (such as POIs) as the
destination
Requirement: map content must be displayed
=> page 186.
> Press on map content on the map (for example,
@) > page 180, fig. 146).
Selecting the destination
> Select: @ > page 180, fig. 146, or
> To display destination details, press on
=> page 180, fig. 146 > Start.
Route guidance will be activated and the map will
be displayed > page 180, fig. 145.
SS) ee meee el
Applies to: vehicles with navigation system
You can enter additional destinations during ac-
tive route guidance.
Entering a stopover
Requirement: route guidance must be active.
> Enter a destination > page 177.
Displaying stopovers or the route plan
All destinations are listed in the route plan.
> Press on 2) page 180, fig. 145 on the map.
Editing stopovers
> Press on %) > page 180, fig. 145 on the map.
> Adding a stopover: Select: Add destination > a
destination > Add.
> Moving a stopover: press Z. Touch the $ sym-
bol and move the entry to the desired position.
Press Done.
> Deleting a stopover: Select: Z > one or more
entries or Select all > Delete > (Done).
Stopping route guidance
Applies to: vehicles with navigation system
Requirement: route guidance must be active and
the map must be displayed.
> Applies to: MMI: Press BX @ > page 180,
fig. 145.
180
> Applies to: multifunction steering wheel: Select
in the instrument cluster: Navigation tab >
button > Cancel route guidance.
Map
Applies to: vehicles with navigation system
Cera
Drees eaey cr amy
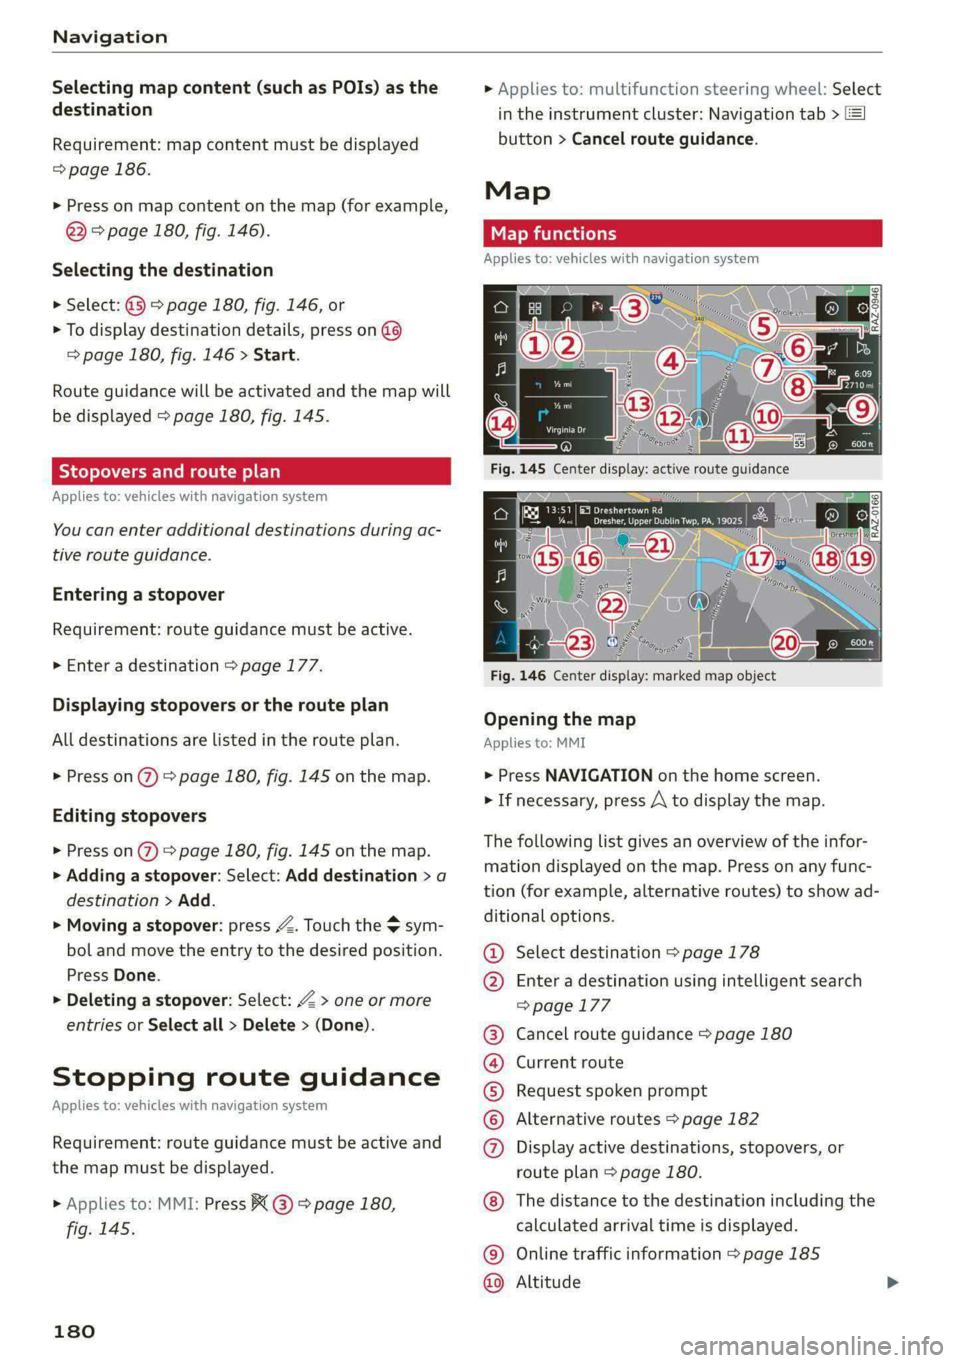
Fig. 146 Center display: marked map object
Opening the map
Applies to: MMI
> Press NAVIGATION on the home screen.
> If necessary, press A to display the map.
The following list gives an overview of the infor-
mation displayed on the map. Press on any func-
tion (for example, alternative routes) to show ad-
ditional options.
Select destination > page 178
Enter a destination using intelligent search
=> page 177
Cancel route guidance > page 180
Current route
Request spoken prompt
Alternative routes > page 182
Display active destinations, stopovers, or
route plan > page 180.
©@
COOH
OO
The distance to the destination including the
calculated arrival time is displayed.
Online traffic information > page 185
Altitude ©©
Page 291 of 296
8W1012721BB
Speed limit information
refer to Traffic sign recognition......... 118
Speed limits
refer to Traffic sign recognition......... 118
Speedometer......... cece eee ee eee 1d,
Speed warning system..............0005 118
Sport differential..............00220008 108
Start/Stop system. .......-...0-.00 ee eee 99
Switching offandon..............000- 100
Starting to drive... ... eee eee eee 93.
Starting (EMGIME)'. . scssese a» wecnse sw apecmae 9 & exe 100
SECOTING . cassene x susows @ eneass a @ stetaie w & ne 107
Audi drive select. ............0 eee e eee 106
also refer to Steering...............55 107
Steering lock: « s saeg ss eae sv pees se eeR ees 92
Steering wheel
AGJUStING!a: « 9 seovos x 3 waxsu a ¢ Hawes 3 2 Bem 4 62
Adjusting manually..................0- 62
Shift
paddles.......... 00... cece sees 96
Steering wheel heating................. 90
also refer to Multifunction steering wheel. . 12
Steps for determining correct load limit... 241
Stopover (navigation) .................. 180
Stopping (ENGIN) ax « = was = 2 eevee 3 « swe s & 100
StOrage areas: = case « = ems sy ewe FE RE Be 78
Stored stations
refer to Presets. « 2 oxo oe aww oo coe vo 190
Sunshade
ReardOorst. « avers s 1 ana w a aumvens 0 0 amine © 6 54
ROOF... eee ee 44
SUN VISOFS 2... eee ee eee 54
SUSPEASION) csr 6 6 ccesere & 6 esennire & presen a 6 stenonts 106
Audi drive select.......... 0.0 eee eee 106
Swapping calls.............-.00022000e 164
Swerve assist... 2.0... e eee eee eee 142
Symbols
Navigation... 0.0.0... 0... e cece ee eee 180
UratfiGws = s wows ss wewe : eens t see cs ee 185
also refer to Indicator lights.............. 7
SYNG (Button) « 0 seen oo snen on onan wo cmon x 89
SYSECMTSELLINGS senses oo cases oo sees o wee» 206
T
Tachometer es s ¢ oases se mewn 2 x qawe 2 nae 11,13
Tail lights
Cleaning « x ccsiese i a scene x = suenens 4 x semcwre wo ome 248
Techriicalidatais © « swivis w sswersse « wees 2 e coe 277
Technical modifications................. 272
Telephone’: « ¢ saws = + sews os eee oe ews ee 158
Accepting/ending acall................ 164
Audi phone box........ 0... e ee eee eee 160
Charging the battery (USB)............. 160
Charging the battery (wireless)......... 160
Connecting a mobile phone............ 158
Diglinig ANUMBEr: « caus « gaan ss pews ae ee 164
Exterior'antennass «+ sccscs ae anne a i atiome a a 160
Mobile device reminder signal.......... 161
Options during aphonecall............ 164
Playing Musi¢ sven «0 ven oe ence omen ve 195
Temperature display (outside temperature) .. 14
Temperature gauge
COOLAME cassie» 5 cxcowms 5 0 esemns 4 0 omnis a 8 ee & 11
TeXtINPUt sss 3 6 cw oo wee oo een oo oe 21
Text messages
SettingS 0.0... 0. cece eee eee eee eee 166
Text messaging settings............... 166
also refer to Text messages............ 166
TiesdOWiS's = saves 5 « ees 3 2 cess ce eae «Fae 84
Tightening specification
Wheel Doltstin so icnasi s 2 aasn <0 mason © svann 258
Tightening specification (wheel bolts) .... . 258
Ti@s: = worms < 5 eeu 2 ¢ ews ge eee Fo ee zs 15
tiptronic
refer to Manual shifting................ 96
Tire Mobility System (tire repair set)....... 253
Tin@S « wee ¢ & wea & Goes x eR ge ROR a 2 227
GRANGIAG' ie = soci 2 eranenss e mweeee a meee 2 255
Low-profile tires. .............00 0-0 ee 243
Repainisets ; swe : seen os een ¢ 5 em vb 253
Senvice liferces < viva + wean @ + sae wo eave 236
Tire pressure... 2... eee eee eee 237
Tire pressure monitoring system.... 244,245
Tire pressure table..................-. 239
Tire pressure (trailer mode)............ 112
Treadwear indicators.................. 236
Uinidireetioniale: « = exces 22 ween 2 ¢ eeem 229, 258
Uniform tire quality grading............ 243
Tires and wheels
Glossary of tire and loading terminology .. 230
Tires and vehicle load limits............ 240
TOO Sissi: ¢ 2 czas ¢ aes 2 Gee EX Ream FE eee 253
Top tether anchor (securing the child safety
S@at)'s « v saws y # ows ¥ 0 eww ey coo Se ED a YY 76
289