ESP AUDI A4 AVANT 2008 Owner's Manual
[x] Cancel search | Manufacturer: AUDI, Model Year: 2008, Model line: A4 AVANT, Model: AUDI A4 AVANT 2008Pages: 368, PDF Size: 46.19 MB
Page 76 of 368
Clear vision
cated, you must use the light switch to turn the low beams on and
off. •
App lies to th e market: USA mode ls
App lies to vehicles: with daytime running lights
Daytime running lights (DRL) (USA models)
Use the activation switch to turn the daytime running
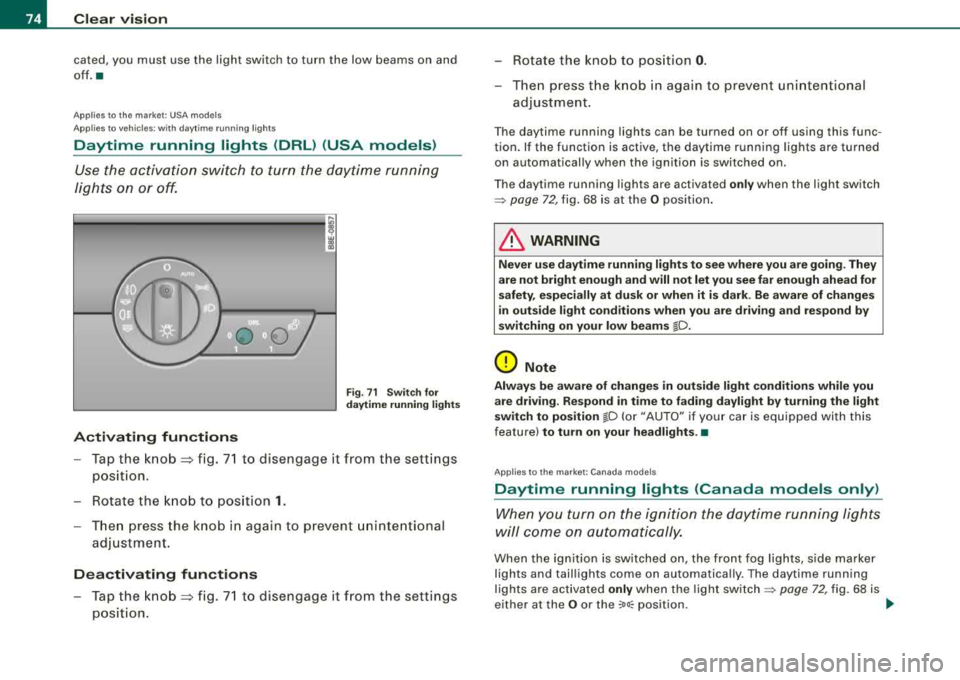
lights on or off.
Activating functions
Fig. 71 Switch for
daytime running lights
- Tap the knob ~ fig. 71 to disengage it from the settings
position .
- Rotate the knob to position
1.
-Then press the knob in again to prevent unintentional
adjustment.
Deactivating functions
- Tap the knob ~ fig. 71 to disengage it from the settings
position. - Rotate the knob to
position
0.
-Then press the knob in again to prevent unintentional
adjustment.
The daytime running lights can be turned on or off using this func
tion. If the function is active, the daytime running lights are turned
on automatically when the ignition is switched on.
The daytime running lights are activated
only when the light switch
=> page 72, fig. 68 is at the O position.
& WARNING
Never use daytime running lights to see where you are going. They
are not bright enough and will not let you see far enough ahead for
safety, especially at dusk or when it is dark. Be aware of changes
in outside light conditions when you are driving and respond by
switching on your low beams
io.
0 Note
Always be aware of changes in outside light conditions while you
are driving. Respond in time to fading daylight by turning the light
switch to position
lD (or "AUTO" if your car is equipped with this
feature)
to turn on your headlights .•
App lies to t he market: Canada models
Daytime running lights (Canada models only)
When you turn on the ignition the daytime running lights
will come on automatically.
When the ignition is switched on, the front fog lights, side marker
lights and taillights come on automatica lly. The daytime running
lights are activated
only when the light switch=> page 72, fig. 68 is
either at the
O or the coo:; position . _.,,
Page 77 of 368
& WARNING
Never use daytime running lights to see where you are going . They
are not bright enough and will not let you see far enough ahead for
safety , espe cially at dusk or when it is dark . Be aware of changes
in outside light conditions when you are driving and respond by
switching on your lo w beams
io.
0 Note
• With the light switch at the O or :oo, position , only your front fog
lights remain turned on when it turns dark outside . Even though
your instruments appear well lit, the road ahead of you is not. The light pattern provided by fog lights alone is not sufficient for safe
driving in poor light or darkness. Therefore:
• Always be aware of changes in outside light conditions while
you are driving. Respond in time to fading daylight by turning the
light switch to position
io (or "AUTO" if your car is equipped with
th is featu re)
to turn on your headlights .•
Controls and equip
ment
Clear vision
App lies to veh ic les: w ith adaptive ligh t
Adaptive light
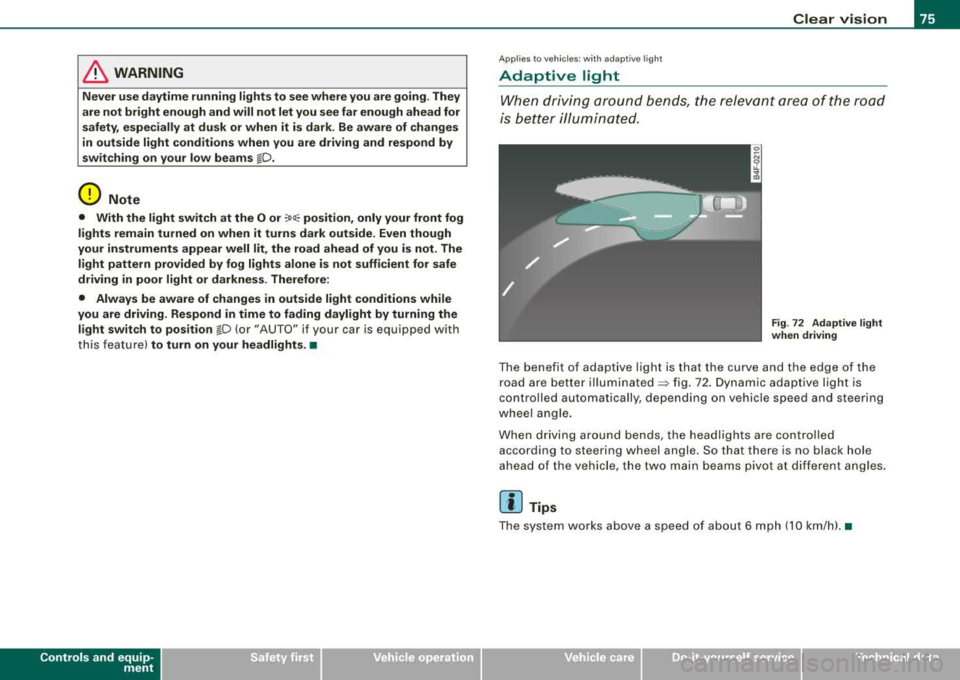
W he n driv ing around bends , the relevan t area of t he road
is bett er illumi nated .
Fig. 72 Ad aptiv e light
when driving
T he benefit of adapt ive light is that the curve and the edge of the
r oad a re be tter
il lu mina te d ~ fig. 72 . D yn ami c ada ptive ligh t is
controlled automatically, depending on vehicle speed and steering
whee l a ng le .
W hen driv ing arou nd bends, the headl ights a re co ntrolled
according to steering wheel angle. So that there is no black hole
a he ad of the vehi cle, the tw o main be ams pivot a t differ ent a ng le s.
[ i] Tips
Th e s ystem works abov e a sp eed o f about 6 mph (10 km /h ). •
Page 81 of 368

• USA models: illumin ation of the in strument clu ste r (gauge s and
needle s), dash and center con sole around the gear shift lever i s
c ontrolled by a light sen sor l oca ted in the in strument panel . The
instrument panel illum ination will automatic ally become dimmer
a s the d aylight f ade s aw ay a nd e ventuall y will go out completel y
wh en out side light is very low . Thi s is to remind you , the driver , to
s witch on the he adlight s before it get s too dark.
• Canada model s: instrument panel illum ination will sta y br ight
rega rdle ss of the inten sity of ambient light . Al ways be aw are of
changes in outside light conditions while you are driving . Respond
in time to fading daylight by tu rning the light switch to position
1[D
(or "AUTO" if your car is equipped with this feature) to turn on your
he adlight s.
•
App lies to veh icle s: w it h xe non head lig hts
Xenon headlights
After sta rting the engine, the xenon head lights are automatica lly
adjusted to the load and angle of the veh ic le ( for example, during
accel eration and braking) . This prevents oncoming traffic from
experienc ing unnecessary headlight glare from your xenon head
lights.
I f the system is not operating properly, a warning symbol in the
Auto-Check Control is
displayed=> page 34. •
Controls and equip
ment
Cl ea r vision
Emergency flasher ~
The emergency flasher ma kes other motorists aware that
you or your vehicle are in an emergency situation .
Fig. 77 Ce nter
co nso le: e merg en cy
fl as he r sw it ch
- Press the switch &1. ~ fig. 77, to switch t he eme rgency
flasher on or off.
When the emergency flasher is on, all four turn signal blink at the
same time. The turn signal indicator lights ¢
9 in the instrument
c luster, as we ll as the light in the emergency flasher
switch ~ blink
likewise.
The emergency flasher wi ll automatically switch on if you are in an
accident where the airbag has deployed .
[ i] Tip s
You shou ld switch on the emergency flasher when :
• you are the las t vehicle standing in a traffic jam so that any other
vehicles coming can see you, or when
• your vehicle has broken down or you are in an emergency situa -
tion, o r when _.,
Page 88 of 368

Clear vision
& WARNING
• Wip er blades a re c ruc ia l f or sa fe dri vin g! On ly whe n the y are in
good condition are th ey able to cl ear the window s properly to
p rovi de un comp romi sed vis ibilit y. Wor n or damaged wiper bl ade s
are a safety
hazard => page 88, "In stalling new wiper blades "!
• The rain sen sor i s onl y des igned to assist and s upport the
driver. It rem ain s entirely the driver's respon sibil ity to monit or
o ut side weather con dit ions and to manu ally acti va te the wipe rs as
s o on as rain or drizz le reduce s vi sibility through th e wind shield .
• The windshi eld mu st not b e treat ed w ith water -r e pellent m ate
rials. T hey can increa se glare u nder poor visibilit y conditi ons such
as w etness, darkne ss, or when the sun i s low on the hori zo n. In
addition , they can caus e the windshield wipers to chatt er.
0 Note
I n freezing or near freezing conditions :
• Always check that the wiper blades are not frozen to the glass
before yo u turn the wipers on. Loosen a wiper b lade which is frozen
in place before operating the w ipers to prevent damage to the wiper
blade or the wiper motor.
• Do not use the wipers to clear a frosted window . Using the
wipers as a convenient ice scraper will destroy the wiper blades .
• Before you take your vehicle to an automatic car wash , make sure
you have the windshield w iper system switched off (lever in position
0), otherwise the windshield wiper system could get damaged in the
car wash if it should suddenly come on .
[ i J Tips
• The rain sensor is part of the interva l wiping system . Turning off
the ignition will also deactivate the rain sensor. To reactivate the sensor, switch off the interval wiping function, then switch it back
on again. •
If you switch off the ignition with the windshield wiper lever sti ll
in the interva l wipe position and then come back a while later and
drive off, the rain sensor will reactivate itself after the vehicle speed
has exceeded 4 mph (6 km/h) .
• Worn or dirty windshield wiper b lades cause smearing which
can affect the opera tion of the rain sensor . Check the conditio n of
your windshield wiper blades regularly .
• Make sure the washer fluid reservoir in the engine compartment
is topped off before going on a long trip . Look
up=> page 291 for
checking and filling the washer container .•
Rear vvindovv vviper (Q
The wiper lever is also used to operate the rear window
wiper and the automatic wiper/w asher function.
F ig . 8 7 Wip er lever:
a cti vating th e rea r
w indo w wipe r an d
was her
The rear win dow wiper a nd the au tomati c wip er/washer
f un ctions are activate d as fo llows:
Page 93 of 368

Disabling auto dimming
- Press button © =>page 90, fig. 92 briefly, -the green
indicator light ® goes out .
Activat ing /reactivating auto dimming
- Press button © briefly, -the green indicator light ®
goes on.
Au toma tic dimming func tion
The automatic dimming function is activated every t ime the ignition
is turned on . The green indicator light is lit to indicate auto dimming
is active.
When dimming is activated, the inside mirror will darken
automati
cally
in respo nse to the amount of light striking the mirror (such as
headlights from rearward approaching vehicles) . Even in dimming
mode, the mirror surface turns b right when:
• the interior light is sw itched on
• reverse gear is engaged.
& WARNING
The glass of the ins ide rearview mirror i s layered and contain s an
ele ctrolyte to achie ve it s properties . Be aware of liquid ele ctrolyte
le aking from a broken mirror gla ss. This liquid can cau se irritation
to skin , eye s, and re spir atory sy stem . If you get ele ctrolyte in your
e yes or on your skin , immed iately rinse with plenty of water . If irri
t a tion per sis ts, s eek medical attention .
0 Note
Liquid electrolyte leaked from a broken mirror glass wi ll damage any
p lastic surfaces it comes in contact with. Clean up spi lled electrolyte
immedia tely w ith c lear water and a sponge.
Controls and equip
ment
Clear v ision
[ i ] Tips
• If you switch off the automatic dimming function on the in side
mirror , automatic dim ming of the out side mirrors will l ikewise be
di sabled .
• Check to make sure there are no objects preventing light from
reaching the inside mirror.
• Do not attach any stickers to the windshield in front of the light
sensor, as this would interfere with both the automatic operation of
the headlights and the automatic dimming of the inside mirror.
• Be aware that au tomatic dimming of the inside mirror can on ly
operate properly if the rear window sun blind * is retracted .•
Outside mirrors
The outside mirrors are electrically adjusted (power
mirrors)
Fig . 93 Forwa rd
s ecti on of dri ver 's
ar mr est : pow er mirr or
co ntr ols
....
irechnical data
Page 97 of 368
Seats and storage
General recommendations
Why is your seat adjustment so important? The safety belts and the airbag system can only provide
maximum protection if the front seats are correctly
adjusted.
There are several different ways you can adjust the driver's seat and
the front passenger's seat so that it conforms to your body size. It is
especially important that the seat be adjusted properly so that:
• you can easily and quickly reach all the switches and controls in
the instrument panel
• your body is properly supported thus reducing physical stress
and fatigue
• the safety belts and Airbag system can offer maximum protec
tion=> page 187
In the following chapters, you will see exactly how you can best
adjust your seats.
There are special regulations and instructions for installing a child
safety seat on the front passenger's seat. Always heed the informa
tion regarding child safety provided
in => page 210, "Child Safety".
& WARNING
Incorrect seating position of the driver and all other passengers
can result in serious personal injury.
• Always keep your feet on the floor when the vehicle is in motion
- never put your feet on top of the instrument panel, out of the
window or on top of the seat cushion! This applies especially to
the passengers. If your seating position is incorrect you increase
the risk of injury in the case of sudden braking or an accident. If
Controls and equip
ment
Seats and storage
& WARNING (continued)
the airbag inflates and the seating position is incorrect this could
result in personal injury or even death.
• It is important for both the driver and front passenger to keep
a distance of at least 10 inches (25
cml between themselves and
the steering wheel and/or instrument panel. If you're sitting any closer than this, the airbag system can protect you properly. In
addition to this, the front seats and head restraints must be
adjusted to your body height so that they can give you maximum
protection.
• Always try to keep as much distance as possible between your
self and the steering wheel or instrument panel.
• Do not adjust the driver's or front passenger's seat while the
vehicle is moving . Your seat may move unexpectedly, causing
sudden loss of vehicle control and personal injury.
If you adjust
your seat while the vehicle is moving, you are out of position. •
Driver's seat
The correct seat position is important for safe and relaxed
driving.
We recommend that you adjust the driver's seat in the
following manner:
-Adjust the seat in fore and aft direction so that you can
easily push the pedals to the floor while keeping your
knee slightly
bent:=> & in "Why is your seat adjustment
so important?".
-Adjust the seatback so that when you sit with your back
against the seatback, you can still grasp the top of the
steering wheel.
...,
Page 99 of 368
Adjusting the lumbar support*
-Press the corresponding depression on the switch shell
© to adjust the height and curvature of the lumbar
support, see
~ page 99.
Adjusting the seatback angle
- Lean forward to take your weight off the seatback.
- Turn the hand wheel © in the direction you want the
seatback to tilt.
Various controls on the manual seats provide a wide range for indi
vidual
adjustments~ page 96, fig. 96 .
G) Moving the seat forward or backward
0 Adjusting the seat h eight
© Adjusting the lumbar support *~ page 99
© Adjusting the seatback angle
& WARNING
• Never adjust the driver's or front passenger seat while the
vehicle is moving. If you do this while the vehicle is moving, you
will be out of position. Always adjust the driver's or front
passenger seat when the vehicle is not moving.
• Be careful when adjusting the seat height. Check to see that no
one is in the way, or serious injury could result!
• To reduce the risk of injury in the case of sudden braking or
accident, front passengers must never ride in a moving vehicle
with the seatback reclined. Safety belts and the airbag system
only offer maximum protection when the seatback is upright and
the safety belts are properly positioned on the body. The more the
seatback is reclined, the greater the risk of personal injury from an
incorrect seating position and improperly positioned safety belts!
Controls and equip
ment
Seats and storage
[ i] Tips
Some of the controls are fitted on certain models only or they are
optional equipment. •
Adjusting the front power seats
Applies to veh ic les: w ith power se ats
Power seat adjustment
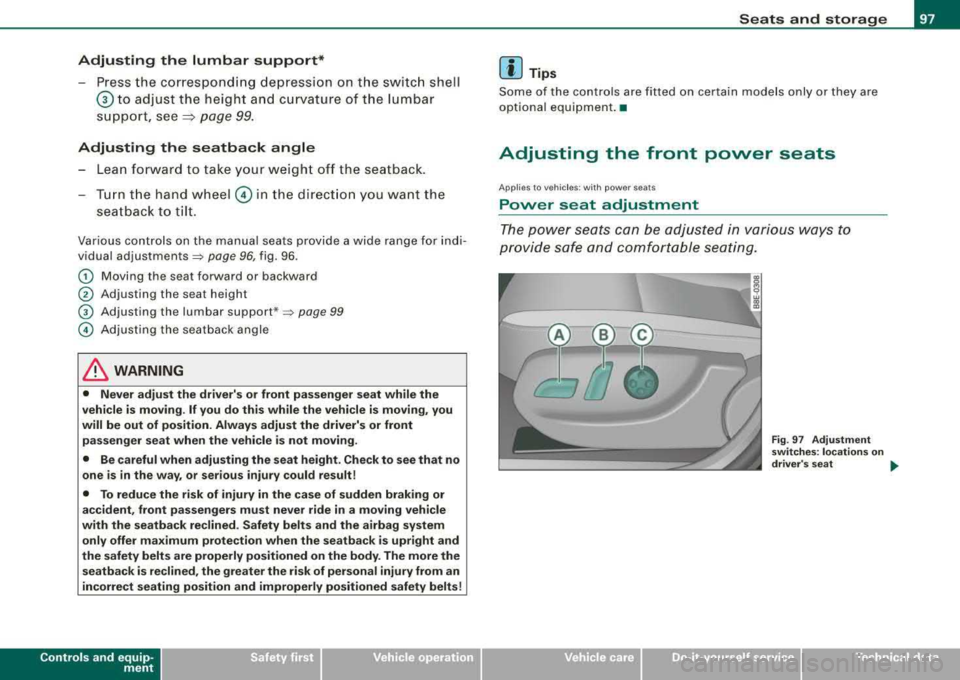
The power seats can be adjusted in various ways to
provide safe and comfortable seating .
Fig. 97 Adjustment
switches : locations on
driver 's seat
...
irechnical data
Page 100 of 368
Seats and storage
! w
--------..Jgj
Fig. 98 Seat cushion
adjustment: switch
motions
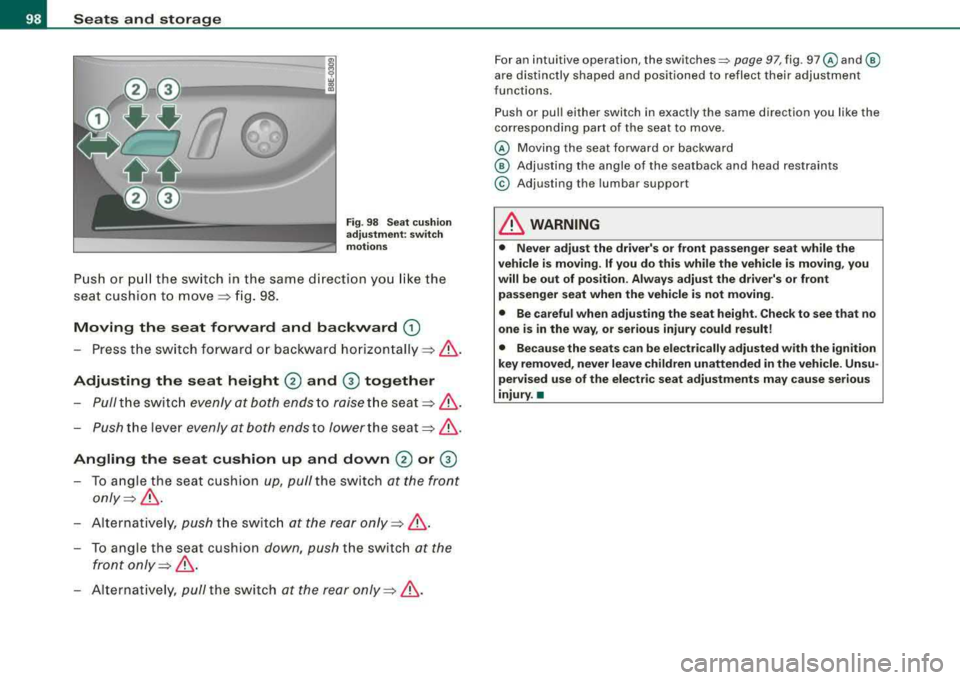
Push or pull the switch in the same direction you like the
seat cushion to
move => fig. 98.
Moving the seat forward and backward
G)
- Press the switch forward or backward horizontally =>& .
Adjusting the seat height 0 and @ together
Pull the sw itch evenly at both ends to raise the
seat=>& .
-Push the lever evenly at both ends to lower the seat=>& .
Angling the seat cushion up and down 0 or @
- To angle the seat cushion up, pull the switch at the front
only=>& .
Alternatively, push the switch at the rear only=> &.
-To angle the seat cushion down, push the switch at the
front
only => &.
- Alternatively , pull the switch at the rear only=>& .
For an i ntui tive operation , the sw itches~ page 97, fig . 97@ and ®
are distinctly shaped and positioned to reflect their adjustment
f u nctions.
Push or pull ei ther switch in exactly the same direct ion you l ik e t he
corresponding part of the seat to move .
@ Moving the seat forward or backward
® Adjusting the angle of the seatback and head restraints
© Adjusting the lumbar s uppor t
& WARNING
• Never adjust the driver's or front passenger seat while the
vehicle is moving.
If you do this while the vehicle is moving , you
will be out of position. Always adjust the driver's or front
passenger seat when the vehicle is not moving.
• Be careful when adjusting the seat height . Check to see that no
one is in the way, or serious injury could result!
• Because the seats can be electrically adjusted with the ignition
key removed, never leave children unattended in the vehicle. Unsu
pervised use of the electric seat adjustments may cause serious
injury. •
Page 103 of 368
________________________________________________ S_ e_ a
_ t_
s _a_ n_d _ s_t _o _ r_ a_ g~ e __ ffllll
Memory buttons
On each memory button (On each memory button G) ,@ , G) and ©
=> page 100, fig. 102 , you can sto re a sea t and outside mirror posi
tion . Up to 4 different drivers can store their
settings .=> page 100,
fig. 102 , you can sto re a seat and outside mirro r position . Up to 4
d iffer ent driv ers can stor e their s ettings .
ST OP b utton
Press the STOP button to switch off the seat memory.
The word
OFF next to the STOP button wi ll illuminate. The 4 different
sea t adjust ments remain stored in th e memory . When the s eat
memory is switched off, then you can only adjust the seat and
outsid e mirrors in th e usual way .
It is recommended to use the STOP feature if your vehicle is going
to be used by another driver temporarily .
[ i ] Ti ps
• The vehicle must be turned on to p rogram the memory button
settings .
• You can recall a seat posi tion using either the memory bu ttons
or using the remote contro l
=> page 102.
• Seat position settings cannot be re ca lled if the s eat back is folded
forward. •
Applies t o vehi cle s: w ith po wer seats and driver's seat memory
Storing a seat position
Before you can store your seat position, the S TOP button
must be engaged (down) .
-Adjust the driver 's seat => page 97 .
Adjust both outside mirrors=> page 91.
Controls and equip
ment
-Press the MEMO button and hold it down. A t th e same time,
press one of the memory buttons for at least one seco nd.
-Re lease the buttons . The seat and outside mirror pos i-
t ions are now stored on that memory button.
Each time to assign a sea t position to a key , you ca ncel the seat posi
t ion, wh ich had be en assigned to that key befor e.
Whenever you store a new pos it ion on a memory button, the former
position is erased. W e recommend you assign m emory buttons
starting with button 1.
When you
l ock your vehicle using the remote control, the las t seat
and mirror position wil l be stored.
When you
unl ock your vehic le the next t ime, the mirrors and the
seat wi ll adjust automat ica lly to the last pos ition stor ed in your k ey .
This wil l not erase the seat posi tion a lready stored on memory
buttons (1) th rough (4).
•
App lies to veh ic les: w ith power seats and d river 's se at memory
Recalling a seat position
You can recall a seat position using either the memory
buttons or using the remote control in your key.
Usin g th e memory buttons
-Driver's door open -press the desired memo ry button.
-Driver's door c losed -press and hold the respective
memory button unt il the seat and the m irrors move into
t h eir store posi tion .
U sing th e remote control
-Un lock the vehicle using the remote contro l. Then open
the driver's door w ithin ten minutes . .,._
Page 105 of 368
__________________________________________________ s_ e_ a_t _s _ a_n _ d_ s_ t
_ o_ r_a ""'g :o.. e _ __.l9I
& WARNING
When folded down, the armrest can restrict the driver's move
ment. When driving in conditions that may call for quick maneu
vers, fold up the armrest . This will allow you to react more quickly
to avoid an accident.
[ i] Tips
The storage area in the center armrest may be equipped with a tele
phone base plate to house a phone cradle. Ask your authorized Audi
dealer if you have questions. •
Rear seats
General information
Safe transportation of passengers on the rear seats
requires proper safety precautions.
All passengers on the rear seats must be seated in compliance with
the safety guidelines explained
in=> page 176 and => page 187. The
correct seating position is safety critical for front
and rear seat
passengers
alike => page 170.
& WARNING
• Vehicle occupants in the front and rear seats must always be
properly restrained .
• Do not let anyone ride in the vehicle without the head restraints
provided . Head restraints help reduce injuries .
• Loose items inside the passenger compartment, can fly
forward in a crash or sudden maneuver and injure occupants.
Always store articles in the luggage compartment and use the
fastening eyes, especially when the rear seat backs have been
folded down.
Controls and equip
ment
& WARNING (continued)
• Read and heed and all WARNINGS => page 170, "Proper seating
positions for passengers in rear seats". •
Rear armrest
The storage bin inside the armrest contains the first-aid
kit*.
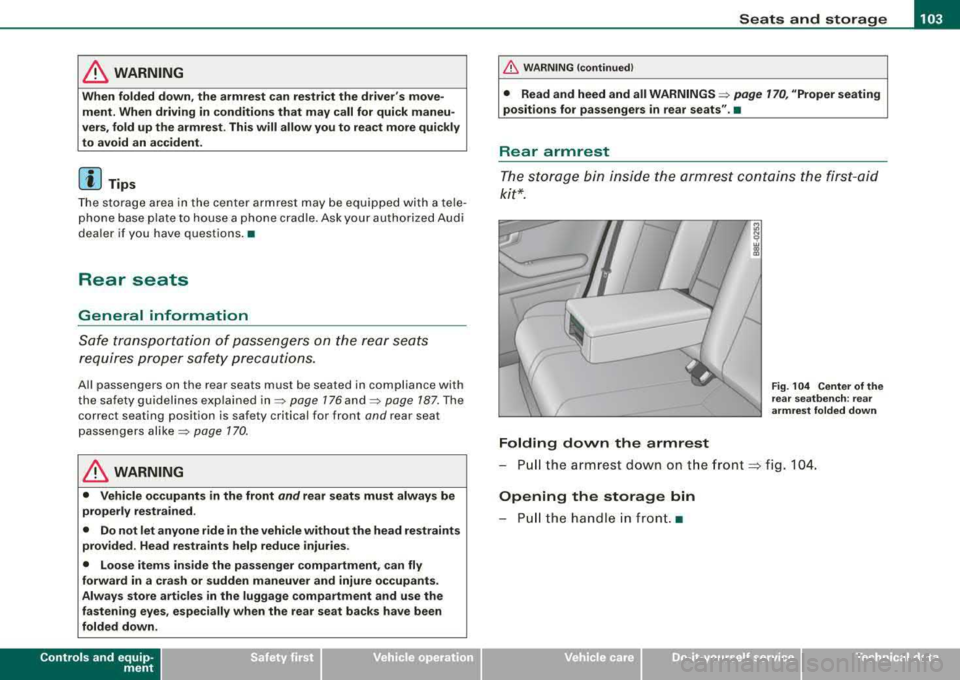
Folding down the armrest
Fig . 104 Center of the
rear seatbench: rear
armrest folded down
-Pull the armrest down on the front ~ fig. 104.
Opening the storage bin
-Pull the handle in front. •
irechnical data