stop start AUDI A4 AVANT 2008 Owner's Manual
[x] Cancel search | Manufacturer: AUDI, Model Year: 2008, Model line: A4 AVANT, Model: AUDI A4 AVANT 2008Pages: 368, PDF Size: 46.19 MB
Page 161 of 368
___________________________________________________ H_ o_m_ e_ L_ i_ n _ k_ ®_~IJII
Ph ase 2:
pro gra mming th e bump er mounted transmitter
7. P oint the original remote control at the bumper below the
left
h eadlig ht => page 158, fig. 160.
8. Hold the remote control at a d istance between 0-12 in.
(0 -30 cm) to the bumper (use the shortest distance
possible).
9. Press and hold the activation button on the remote contro l (see garage door opener operating instructions)
=> page 159, "Canadian programming".
1 0 . Watch the emergency flashers on your ve hicle. Once
programming is successfu lly completed, the emergency
flashers will flash
three tim es (after about 15-60
seconds). You can now release the button on the remote
control.
-To program the two remaining buttons, repeat steps 4 to 9
with the remote control units for the devices you wish to
operate .
The required distance between the hand held transmitter and the
Homelink ® trans mitter depends on the device whose signals you
are learning . It may require several attempts at varying distances
unt il programm ing is successful.
If the 5 minute time limit is exceeded, programming will stop imme
diate ly . The
em erg ency fla sher s will flash one tim e to indicate that
this has occurred.
In this case, you wil l need to reprogram the system. Repeat the
process start ing with
Pha se 1 : programming the o verhead keypad.
If the emergency flashers do not flash three times (after about 15-
60 seconds), programming was not successful. In this case, repeat
Ph ase 2: pro gr amming the bump er mount ed tr an smitte r.
Controls and equip
ment
If programming fai ls in Ca nada, you may have to perform an alter
nate action at step 8
only => page 159, "Canadian programming" .
Perform al l other steps as described above .
& WARNING
• Fo r sa fet y re as on s never rel eas e th e parki ng br ak e o r start the
engin e while an yone i s standing in front of the v ehi cle .
• A g ara ge door or an es ta te gate m ay s ometim es be set in
motion wh en the Homelink ® univer sal remote control i s being
progr ammed . T o avo id possible i njur ies or p ropert y dama ge,
plea se alway s make ab solutely cer tain that no per son s or object s
are l ocated in the r ange of mot ion of an y eq uipm ent being oper
a ted.
0 Note
When you program the Homelink® sys tem, you are wel l advised to
turn off the garage door opener . A garage door opener which is
continuously triggered into action during programming may over
strain and damage its electric motor
-an overheated motor is a f ire
hazard!
[ i ] Tip s
As soon as the Homelink® system is programmed to work with your
garage door opener, two additiona l remote contro lled devices can
be trained on the two remaining transmitter channels. •
Applies to vehic les: with Homel in k® un iversal ra d io frequency remote control
Canadian programming
Remote con trol units for Canadian garage door openers
may require one different programming step.
Remote contro l units for Canadian garage door openers are set to
stop transmitting radio frequency signa ls after two seconds . If this .,._
Page 162 of 368
___ H_ o_m_ e_ L_ in_ k_® ____________________________________________________ _
time interval is not sufficient for the Homelink® system to learn the
radio frequency signal, perform the
alternate step 8 in Phase 2:
programming the bumper mounted transmitter:
Alternate step 8
• Press and re-press ("cycle") the activation button on your remote
control every two seconds.
Once programming is successfully completed, the emergency
flashers will flash
three times (after about 15-60 seconds). You can
now release the button on the remote control.•
Applies to vehi cles: w ith Hom eLink ® un iversal r adio frequency re mo te con tro l
Oper ating the Homelink ® universal remote
control
The Homelink® Universal Remote Control activates the
functions of your garage door opener in precisely the
same manner as the original handheld remote control
that came with the system.
... ...
9 w a,
"'
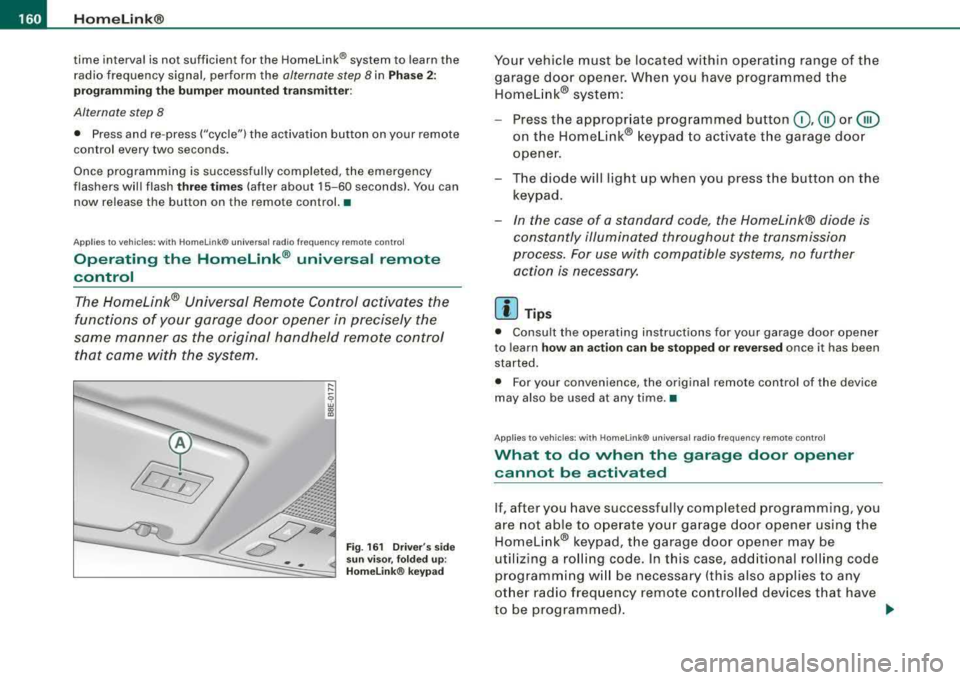
Fig. 161 Driver 's side
sun visor, folded up :
Homelink® keypad
Your vehicle must be located within operating range of the
garage door opener. When you have programmed the Homelink® system:
- Press the appropriate programmed button
0,@ or @
on the Homelink® keypad to activate the garage door
opener.
- The diode will light up when you press the button on the
keypad.
- In the case of a standard code, the Homelink® diode is
constantly illuminated throughout the transmission
process. For use with compatible systems, no further action is necessary.
[ i ] Tips
• Consult the operating instructions for your garage door opener
to learn
how an action can be stopped or reversed once it has been
started.
• For your convenience, the original remote control of the device
may also be used at any time. •
Applies to vehicles : wi th HomeLink® universal radio frequency remote cont ro l
What to do when the garage door op ener
cannot b e activat ed
If, after you have successfully completed programming, you
are not able to operate your garage door opener using the
Homelink® keypad, the garage door opener may be
utilizing a rolling code. In this case, additional rolling code
programming will be necessary (this also applies to any
other radio frequency remote controlled devices that have
to be programmed).
~
Page 252 of 368
III.___T_ r_a _il _e_ r_ t_o _vv_ i_ n """g"'- ---------------------------------------------------
W eig ht d is tri buti on
Towing a loaded tra iler wit h an empty car resu lts in a high ly
unstable distribution of weight . If this cannot be avoided drive at
ve ry low speeds only to avo id the risk of losing steering control.
A "ba lanced" rig is easier to operate and control. This means that
the tow vehicle should be loaded to the extent possible and permis
sib le whi le keeping the trailer as light as possib le under the circum
stances. Whenever possible, transfer some cargo to the luggage
compar tment of the tow veh icle whi le observi ng tongue load
requirements and vehicle loading considerations.
Speed
T he higher the speed, the more difficu lt it becomes for the driver to
contro l the rig . Do not drive at the maximum permissible speed.
Reduce your speed even more under unfavorable load, weather or
wind conditions -part icularly when going dow nh ill.
Reduce vehicle speed
immedi ately if the trailer shows the slightest
sign of swaying.
Do not tr y to stop the s waying by a cceler ating .
Observe speed limits . In some areas speeds for veh ic les towi ng
trai lers are lower than for regular vehicles.
Always app ly brakes early. When driving downhi ll, shift into lower
gear to use the engine braking effect to slow down the vehicle. Use
of the brakes alone can cause them to overheat and fail.
C oo la nt tempe ra tu re
The coola nt temperature gauge => page 13 must be observed care
ful ly. If the needle moves close to the upper end of the scale, reduce
speed immediately and/or switch off the air conditioner.
If the coolant te mperature warning light in the instrument cluster
starts
flashing -~-, pul l off the road, stop and let the engine idle for
about two minutes to prevent heat build -up .
& WARNING
An yone not p rop erl y res trained in a mo ving vehicl e is at a much
gre ate r risk in an accident. Never let an yone rid e in your car who
is not p rop erl y wear ing the re stra int s pro vided b y Aud i. •
Trailer towing tips
Important to know
Your vehicle handles differently when towing a tra iler because of
the additional weight and weight distribution. Safety, performance
and economy wi ll great ly depend on how carefu lly you load your
trai ler and operate your rig.
Before you actual ly tow your tra iler, practice turning, stoppi ng and
backing up in an area away from traffic. Keep practicing unti l you
have comp letely become familiar with the way yo ur vehicle -trailer
combination behaves and responds .
Backing up is difficu lt and requires practice. Backing up with a
trai ler genera lly requ ires steering action oppos ite of that when
backing up your vehic le without a trailer.
Mainta in a greater distance between you r vehic le and the one in
front of you. You will need more room to stop.
To compensate for the trai ler, you wi ll need a larger than normal
t urning radius .
When passing, remember that you cannot accelerate as fast as you nor mally wou ld because of t he added load . Make sure yo u have
enough room to pass. After passing, al low plenty of room for your
trai ler before changing lanes again .
Avo id jerky starts, sharp turns or rapid lane changes.
Page 253 of 368
![AUDI A4 AVANT 2008 Owners Manual Traile r to win g -______________ _,..,_lflllll
[ i] Tip s
• Do not tow a trailer during the break-in period of your vehicle.
• If you tow a trailer, your Audi may require AUDI A4 AVANT 2008 Owners Manual Traile r to win g -______________ _,..,_lflllll
[ i] Tip s
• Do not tow a trailer during the break-in period of your vehicle.
• If you tow a trailer, your Audi may require](/img/6/57552/w960_57552-252.png)
Traile r to win g -______________ _,..,_l'flllll
[ i] Tip s
• Do not tow a trailer during the break-in period of your vehicle.
• If you tow a trailer, your Audi may require more frequent mainte
nance due to the extra load
=> page 346 . •
Parking on a slope
Do not park with a trailer on a slope. If it cannot be
avoided, do so only after doing the following:
Wh en p arkin g:
-Apply the foot brake.
- Have someone place chocks under both the veh ic le and
the trailer wheels .
- Wit h chocks in p lace, s lowly release t he brakes until
wheel blocks absorb t he load.
- T urn t he wheels towards the curb .
- Apply the parking brake.
- Place an automatic transmission in
P , respect ively a
manual transmission in first or reverse gear.
Wh en re starting aft er p arking:
- Start the e ngine .
- Shift transmission into gear.
- Re lease the parking brake and slowly pull out and away
from the wheel blocks.
- Stop and have someone retrieve the whee l blocks.
Controls and equip
ment Safety first Vehicle operation
[ i
] Tip s
If you move the selector lever of the automatic transmission to P
before applying the parking brake and before blocking the wheels,
you may have to use more force later to move the lever out of the
P
position .•
Vehicle care Do-it-yourself service Technical data
Page 275 of 368

Checking and filling -
-----------------------------==--------=--
& WARNING (continued)
ment. Wait until no steam or coolant can be seen or heard before
carefully opening the hood.
•
Closing the engine hood
- Pull the hood down until the pressure from the strut is
reduced.
- Let the hood
drop down and latch in place. Do not try to
push
it shut; it may fail to engage =:>& .
& WARNING
A hood that is not completely latched could fly up and block your
view while driving.
• When you close the engine hood, check it to make sure the
safety catch has properly engaged. The hood should be flush with
the surrounding vehicle body parts.
• If you notice while driving that the hood is not secured prop
erly, stop at once and close it. •
Working in the engine compartment
Be especially careful whenever you work in the engine
compartment.
Whenever you must perform any work in the engine compartment,
for example checking and filling different fluids, there is a risk of
injury, burns and accidents. To prevent personal injury always
observe the following WARNINGS . The engine compartment of any
vehicle is a hazardous area
=> & .
• I I • • I
& WARNING
To help avoid injury, before you check anything under the hood:
• Turn off the engine.
• Remove the ignition key .
• Apply the parking brake.
• Move selector lever of automatic transmission to
"P" (Park);
put manual transmission in Neutral.
• Always let the engine cool down. Hot components will burn
skin on contact.
• To reduce the risk of being burned, never open the hood if you
see or hear steam or coolant escaping from the engine compart
ment. Wait until no steam or coolant can be seen or heard before
carefully opening the hood.
• Keep children away from the engine compartment.
• Never spill fluids on hot engine components. They can cause a
fire.
• Never touch the radiator fan. The auxiliary electric fan is
temperature controlled and can switch on suddenly.
• Never open the coolant reservoir cap when the engine is still
warm . The coolant system is pressurized and hot coolant could
spray out.
• Protect your face, hands and arm from steam or hot engine
coolant by placing a thick rag over the cap when you open the
coolant reservoir .
• If work on the fuel system or the electrical system is necessary: -Always disconnect the battery.
- Never smoke or work near heaters or open flames. Fluids in
the engine compartment could start a fire .
- Keep an approved fire extinguisher immediately available.
• To avoid electrical shock and personal injury while the engine
is running or being started, never touch:
- Ignition cables
.,_
Vehicle care
Page 292 of 368
___ C_ h_ e_c _k_ i_n ~g _ a_n_ d_ f_ il _li_ n~ g~--------------------------------------------
For example, a charging current of 4.5 amps would be used on a
battery rated at 45 Ah. Rated capacity of the battery in your vehicle
is listed on the battery housing .
The battery caps should
not be opened when charging a battery.
& WARNING
Charging a battery can be dangerous.
• Always follow the operating instructions provided by the
battery charger manufacturer when charging your battery.
• Never charge a frozen battery . It may explode because of gas
trapped in the ice. Allow a frozen battery to thaw out first.
• Do not reuse batteries which were frozen. The battery housing
may have cracked and weakened when the battery froze.
• Charge the battery in a well ventilated area. Keep away from
open flame or electrical spark. Do not smoke. Hydrogen gas gener
ated by the battery is explosive.
• To reduce the danger of explosion, never connect or disconnect
charger cables while the charger is operating.
• Fast charging a battery is dangerous and should only be
attempted by a competent technician with the proper equipment.
• Battery acid that may spill during charging should be washed
off with a solution of warm water and baking soda to neutralize
the acid.
0 Note
Never use a fast charger as a booster to start the engine . This will
seriously damage sensitive electronic components, such as control
units, relays, radio, etc ., as well as the battery charger. •
Disconnecting and connecting the battery
When the battery is disconnected some features on the
vehicle will become inoperative and you must reset them
when the battery is reconnected.
When you disconnect the vehicle battery note the following:
• some data stored in the driver information system is erased,
• the clock stops,
• the factory installed radio locks up,
• the engine management system and the one-touch-up and one
touch -down functions of the power windows no longer work .
After you reconnect the battery, you must reset the following
features :
Inoperative because the
battery was discon
nected:
clock
one-touch-up and one-touch
down feature on the power
windows
engine management
seat memory*
radio station coding
Removing battery
To reset after the battery is
reconnected, see:
=> page 14
=> page 67
=> page 135
=> page 100
Sound System Operating Instruc -
tions booklet .
•
Before you check anything in the engine compartment,
always
read and heed all WARNINGS :::> & in "Working in
the engine compartment" on page
273. ~
Page 302 of 368
___ T_ ir_e _ s_ a_ n
_ d_ w_ h_ e_ e_ls _________________________________________________ _
The tire pressure label on your Audi lists the recommended cold tire
inf lation pressures for the new, original equipmen t tires that were
on your vehic le at the time it was manufactured . For the location of
the
labe l=> page 297, fig. 217 .
Most tires lose a ir natural ly over time. They can a lso lose some air if
you drive over a potho le or hit a curb wh ile parking. It is usually not
possible to see whether the radial t ires used today are under inflated
just by looking at them.
Therefore, be su re to check tire pressures at least once a month and
always before going on a long trip . Make sure to take the number of
people and the amount of luggage into account when adjusting tire
pressure for a trip -even one that you wou ld not cons ider to be
" long ."
See => page 301, "Tires and vehicle load limits" for more
important i nformation .
A lways use an accurat e tire pressure gaug e when checking and
adjusting inflat ion pressures. Check a ll of the tires and be sure not
to forget the spare tire . If the pressure in any tire is too high when
the t ire is "cold," let air o ut of the t ire slowly with the edge of the tire
gauge and keep check ing the pressure until you reach the pressure
that is correct for the load (passengers and luggage) and kind of
driving you p lan to do .
I f the pressure in any tire is too low, note the difference between the
pressure in the co ld tire and the pressure you need and add the air
that you need to reach the correct pressure for the vehicle load
(passengers and luggage) fo r the t ires on your veh ic le as listed on
the on your vehicle and in this manual and the kind of driving you pl an to do .
Never exceed the m aximum inflation pressure li sted on the tire
s idewall for an y re ason .
Remem ber that the vehic le manufacturer, not t he tire manufacturer,
determines the correct tire pressure for the tires on your vehicle .
I t is important to check the tire pressure when the tires are cold.
• Read the required tire pressure from the t ire pressure label
located either on driver 's side B -pillar or inside the fuel fi ller flap . •
Turn the va lve stem cap counter -clockwise to remove it from the
t ire valve .
• Place the air pressure gauge on the valve.
• The tire pressures should only be checked and adjusted when
the tires are cold. The s lightly raised pressures of warm tires must
not be reduced.
• Adjust the tire pressure to the load you are carrying.
• Reinstal l the va lve stem cap on the valve .
When should I check the tire pressure?
The correct tire pressure is especially important at high spe eds . The
pressure should the refore be checked at least once a mo nth and
a lways before starting a journey. Do not forget to check the tire pres
sure for the spare whee l
=> page 317.
Wh en should I adjust th e tir e pre ssur es?
Adjust t he tire pressure to the load you are carry ing . After changing
a wheel
o r replacing whee ls you have to ad just the tire pressures on
a ll whee ls . In addition, on vehicles w ith tire pressure monito ring
system* you must then store the new tire pressures in the system
=> page 45.
& WARNING
Incorrect tire pre ssure s and /or underinflation can lead sudden tire
f ai lure , loss of control , collision , seri ous per sonal injury or even
death.
• When the w arning symbol
(l) appe ars in the in strument
clu ster , stop and inspect the tire s.
• Incorrect t ire pres sure and /or underinflat ion can cause
increa sed tire wear and can affect the handling of the vehicle and
s topping ability.
• Incorrect tire pres sures and /or underinflation can also lead to
s udden tire fa ilure , inc luding a blowout and sudden defl ation ,
cau sing los s of vehicle control .
~
Page 358 of 368
___ A_l-=- p _h_ a_ b_e _t_ic _ a_l _in _ d_e _x ____________________________________________ _
Starting .. .. .. ...... .... .... 135, 136
Starting with jumper cables ... .... 330
Stopping . .... .... .... ... .... ... 137
Engine compartment ... .. .... .... ... 274
Safety instructions . . . . . . . . . . . . . . . 273
Working the engine compartment .. 273
Engine coolant system . ...... ...... . 280
Adding coolant .. ...... .......... 282
Checking coo lant leve l .. .. .... .... 281
Checking the engine coo lant leve l .. 281
Radiator fan . . . . . . . . . . . . . . . . . . . . . 283
Engine coolant temperature Gauge ...... ...... .... ........... 13
Engine cooling system Ma lfunction .. .... ..... .. .... .... . 31
Engine data ...... .... .... .......... 343
Engine hood Closing . ...... ..... .. .... ...... . 273
How to release the hood . . . . . . . . . . 272
Engine oil ...... .... .... .... ... .... 275
Adding ... .... ... .... .... ...... . 278
Additives . . . . . . . . . . . . . . . . . . . . . . . 278
Changing ... .. .... .... ...... .... 279
Checking the engine oi l level .. .... . 277
Indications and conditions requiring extra
checking ..... .. .... .... ... .... 277
Oil consumption .. .... .... ... .... 277
Oil grades . . . . . . . . . . . . . . . . . . . . . . . 275
Recommended o il check interva ls .. 277
Specification and viscosity . . . . . . . . 275
Engine oil level .. .... .... .... ... .... . 34
Engine oil pressure Malfunction ...... ..... .. .... .... . 32 Engine oil sensor defective
....... .... . 34
Environment Break -in period .. ...... .... .... .. 243
Catalytic converter .. ...... .... ... 244
Disposing of your vehicle battery ... 291
Driving at high speeds .. .... .... .. 245
Driving to minimize pollution and noise . 245
Fuel ... ...... .... ... .. .... .... .. 269
Fuel economy ....... ...... .... .. 245
Leaks under your vehicle ... .... ... 273
Letting the vehicle stand and warm up .. 246
Proper disposa l of drained brake fluid
284
Proper disposal of drained engine
coo lant ...... ............. ..... 282
Proper disposa l of drained engine oil
278 ,279
Recycling used eng ine oil .. .... ... 278
Un leaded fuel ..... .... ... .... ... 267
What should I do with an old battery?
291
EPC
See Electronic power control .. ... .. . 23
ESP
See Electronic stabi ll ization program
(ESP) . ... .... .... ........ ... 22, 236
Event Data Recorder (EDR) .. ....... .. 236
Expansion tank .. .... ... .... .... .... 281
F
Fahrenheit
Switching between Fahrenheit and Centigrade . ...... .... ...... .... 128
Fan Adjusting the fan speed .. ...... ... 129
Climate controls ................. 129
Radiator ...... .... .... ...... .... 283
Fastening eyes ... .... .... .... .... .. 108
Flat tire ............................. 50
Changing .. .... .... ... .... .... .. 318
Flat tire changing .. ...... .... .... .... 50
Floor mats .. ... ... .... .... .... .... . 172
Fog lights ........................... 76
Fo lding master key with remote control . 52
Foot pedals .. .. .. .... .... .... ...... 17 2
For the sake of the environment Gaso line fumes and the environment 269
Letting your engine warm up ....... 136
Reducing engine noise by early upshifting .... .... ... .... .... ... 13
Reducing engine noise by upshift ing
early . .... .... .... ... .... .... ... 13
Refueling .... .... .... ....... .... 269
Saving fuel by early upshifting . .... . 13
Saving fuel by upshifting early .. .... 13
Using the rear window defogger 131, 132
Front airbags
Description . .... .... ... .... .... .. 191
How they work .. .... ... .... .... .. 196
Front ashtray . . . . . . . . . . . . . . . . . . . . . . . 119
Front fog lights .... .... .... .... .... .. 76
Page 364 of 368

___ A_l-=- p _h_ a_ b_e _t_ic _ a_l _in _ d_e _x ____________________________________________ _
Servotronic ........ .... .... ........ 241
Set menu ........................... 43
Setting Date display . . . . . . . . . . . . . . . . . . . . . . 14
Digital clock . .... .... .... .... .... . 14
Shift buttons . . . . . . . . . . . . . . . . . . . 148, 155
Side airbags Description . ...... .... ...... .... 203
How they work . . . . . . . . . . . . . . . . . . . 205
Side curtain a irbags
Description . ...... .... .... ... ... 207
How they work . . . . . . . . . . . . . . . . . . . 208
Safety instructions . . . . . . . . . . . . . . . 208
Side curtain airbags (SIDEGUARD) ... .. 207
Ski sack ....... .. .... .... ...... .... 114
Snow cha ins . . . . . . . . . . . . . . . . . . . . . . . 311
Sockets . . . . . . . . . . . . . . . . . . . . . . . 120, 121
Sound system Rep lacing ....................... 349
Sound system disp lay
Driver information display .......... 25 Steering
........ .... ... .. ...... .... 134 Tether strap ........ .... .... ... .. ... 230
Lo cking the steering .... .... .... .. 135 Securing the upper tether strap . ... 231
Steering wheel co lumn The first 1,000 miles (1,500 km) and
Adjusting ........ ... .. .... .... .. 134 afterwards ..................... 243
Steps for determining correct load limit 302 Tie -down strap .... .... ... .... .... .. 109
Stopping the engine .. ... .... ... .. ... 137 Tie-downs ..................... 108, 175
Storage . . . . . . . . . . . . . . . . . . . . . . . . . . . 122 Ti lt sensors .. ... .... .... ....... .... . 65
Compartments in the door trims .... 124 Tips for the environment
Cup holder in the center console . .. 118 Saving fuel ... .... .... ........... 117
Cup holder rear center armrest ..... 118 tiptronic® .... ....... .... ........ .. 143
Glove compartment .............. 122
Automatic Sh ift Lock (ASU ....... .. 145
Luggage compartment ............ 114
Driving . . . . . . . . . . . . . . . . . . . . . . . . . 143
Owner's literature . ............... 123
Dynamic shift program ........ .... 146
Ski sack . . . . . . . . . . . . . . . . . . . . . . . . . 114
Fail-safe mode ................... 149
Small objects .. ............. ..... 123
Kick-down ... .. .... .... .... .... .. 146
Sun blind .. ...... ...... .... ... .. .... 84 Manual shift program ...... .... ... 147
Sun visors ...... .... ... .. .... .... ... 84 Selector
lever ....... ... .... .... .. 144
Switches Tire pressure
...... ................. 299
E mergency flasher .............. .. 79 Tire pressure monitoring system ...... . 46
Power sunroof .................... 67 Initialize wheels .... .... ...... ..... 50
Rear window defogger . . . . . . . . . . . . 131 Learning process ... .... .... .... ... 48
Spare wheel . . . . . . . . . . . . . . . . . . . . . . . 317
T
Speed rating letter code ...... .... ... 306 Loss of air pressure .
.... ... .... . 20, 47
Ma lfunctions ........ .... ... .. .... 51
Speed warning 1 ..................... 34 Tachomete r ......................... 13
Speed warning 2 ... .... ... .... .... ... 34
Speed warn ing system .. ...... ...... . 35
Speedometer . . . . . . . . . . . . . . . . . . . . . . . 15
Starting the engine . ...... ...... 135, 136
What should I do if the engine does not
start? . . . . . . . . . . . . . . . . . . . . . . . . . 136
Steel wheels .. ............... ... ... 259 Tailgate
S
ee Rear lid ....... .... .... ....... 61
Technical modifications ... ...... ... .. 349
Temperature Climate controls ................. 127
Setting for the driver 's and front passen
ger's side . . . . . . . . . . . . . . . . . . . . . . 127 Sensors .
. . . . . . . . . . . . . . . . . . . . . . . . 307
Storing tire pressures .............. 48
Tires and wheels .. ....... .. .... .. 307
Valves ...... ...... .... ...... .... 307
Tire service life .... .... ............. 303
Tir es .... ... .. .... .... ......... .... 293
Replacing . .... .... .... .... .... .. 307
Service life .... .... ...... .... .... 303
speed rating letter code .... .... ... 306
Ti re manufacturing date ...... .... . 306