height adjustment AUDI A4 AVANT 2008 Owners Manual
[x] Cancel search | Manufacturer: AUDI, Model Year: 2008, Model line: A4 AVANT, Model: AUDI A4 AVANT 2008Pages: 368, PDF Size: 46.19 MB
Page 97 of 368
Seats and storage
General recommendations
Why is your seat adjustment so important? The safety belts and the airbag system can only provide
maximum protection if the front seats are correctly
adjusted.
There are several different ways you can adjust the driver's seat and
the front passenger's seat so that it conforms to your body size. It is
especially important that the seat be adjusted properly so that:
• you can easily and quickly reach all the switches and controls in
the instrument panel
• your body is properly supported thus reducing physical stress
and fatigue
• the safety belts and Airbag system can offer maximum protec
tion=> page 187
In the following chapters, you will see exactly how you can best
adjust your seats.
There are special regulations and instructions for installing a child
safety seat on the front passenger's seat. Always heed the informa
tion regarding child safety provided
in => page 210, "Child Safety".
& WARNING
Incorrect seating position of the driver and all other passengers
can result in serious personal injury.
• Always keep your feet on the floor when the vehicle is in motion
- never put your feet on top of the instrument panel, out of the
window or on top of the seat cushion! This applies especially to
the passengers. If your seating position is incorrect you increase
the risk of injury in the case of sudden braking or an accident. If
Controls and equip
ment
Seats and storage
& WARNING (continued)
the airbag inflates and the seating position is incorrect this could
result in personal injury or even death.
• It is important for both the driver and front passenger to keep
a distance of at least 10 inches (25
cml between themselves and
the steering wheel and/or instrument panel. If you're sitting any closer than this, the airbag system can protect you properly. In
addition to this, the front seats and head restraints must be
adjusted to your body height so that they can give you maximum
protection.
• Always try to keep as much distance as possible between your
self and the steering wheel or instrument panel.
• Do not adjust the driver's or front passenger's seat while the
vehicle is moving . Your seat may move unexpectedly, causing
sudden loss of vehicle control and personal injury.
If you adjust
your seat while the vehicle is moving, you are out of position. •
Driver's seat
The correct seat position is important for safe and relaxed
driving.
We recommend that you adjust the driver's seat in the
following manner:
-Adjust the seat in fore and aft direction so that you can
easily push the pedals to the floor while keeping your
knee slightly
bent:=> & in "Why is your seat adjustment
so important?".
-Adjust the seatback so that when you sit with your back
against the seatback, you can still grasp the top of the
steering wheel.
...,
Page 98 of 368
Seats and storage
-Position the head restraints according to the occupant's
height. For maximum protection, the upper edge of the
head restra ints should be at least at eye level, or higher
=:> page 105, fig. 106.
& WARNING
Never place any objects in the driver's footwell. An object could
get into the pedal area and interfere with pedal function . In case
of sudden braking or an accident, you would not be able to brake
or accelerate! •
Front passenger's seat
Always move the front passenger seat into the rearmost
position.
To avoid contact with the airbag while it is unfolding, do not
sit any closer to the instrument panel than necessary and
always properly wear the three point safety belt provided.
We recommend that you adjust the driver's seat in the
following manner:
-Adjust the front passenger seat into the rearmost posi
tion of the fore and aft adjustment range
=:> & in "W hy
is your seat adjustment so important?" on page
95.
-Adjust the backrest to the upright position . Do not
recline.
-Adjust the head restraint so the upper edge of the
restraint is level with the top of your head, but no lower
than eye
level =:> page 105, fig. 106.
-Place your feet on the floor in front of the passenger's
seat. •
Adjusting the front seats manually
Applies to veh icles: with manua l seat adjustment
Adjustment actions
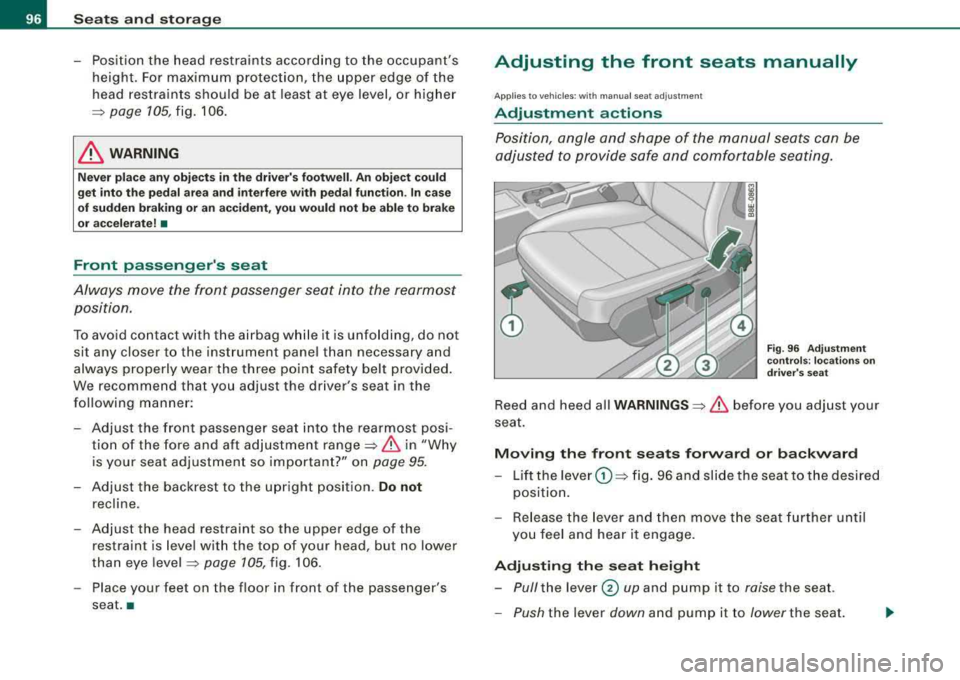
Position, angle and shape of the manual seats can be
adjusted to provide safe and comfortable seating.
Fig . 96 Adjustment
controls: locations on
driver's seat
Reed and heed all WARNINGS =:> & before you adjust your
seat.
Moving the front seats forward or backward
-Lift the lever G) =:> fig. 96 and slide the seat to the desired
position.
-Release the lever and then move the seat further until
you feel and hear it engage.
Adjusting the seat height
-Pull the lever 0 up and pump it to raise the seat.
-Push the lever down and pump it to lower the seat.
Page 99 of 368
Adjusting the lumbar support*
-Press the corresponding depression on the switch shell
© to adjust the height and curvature of the lumbar
support, see
~ page 99.
Adjusting the seatback angle
- Lean forward to take your weight off the seatback.
- Turn the hand wheel © in the direction you want the
seatback to tilt.
Various controls on the manual seats provide a wide range for indi
vidual
adjustments~ page 96, fig. 96 .
G) Moving the seat forward or backward
0 Adjusting the seat h eight
© Adjusting the lumbar support *~ page 99
© Adjusting the seatback angle
& WARNING
• Never adjust the driver's or front passenger seat while the
vehicle is moving. If you do this while the vehicle is moving, you
will be out of position. Always adjust the driver's or front
passenger seat when the vehicle is not moving.
• Be careful when adjusting the seat height. Check to see that no
one is in the way, or serious injury could result!
• To reduce the risk of injury in the case of sudden braking or
accident, front passengers must never ride in a moving vehicle
with the seatback reclined. Safety belts and the airbag system
only offer maximum protection when the seatback is upright and
the safety belts are properly positioned on the body. The more the
seatback is reclined, the greater the risk of personal injury from an
incorrect seating position and improperly positioned safety belts!
Controls and equip
ment
Seats and storage
[ i] Tips
Some of the controls are fitted on certain models only or they are
optional equipment. •
Adjusting the front power seats
Applies to veh ic les: w ith power se ats
Power seat adjustment
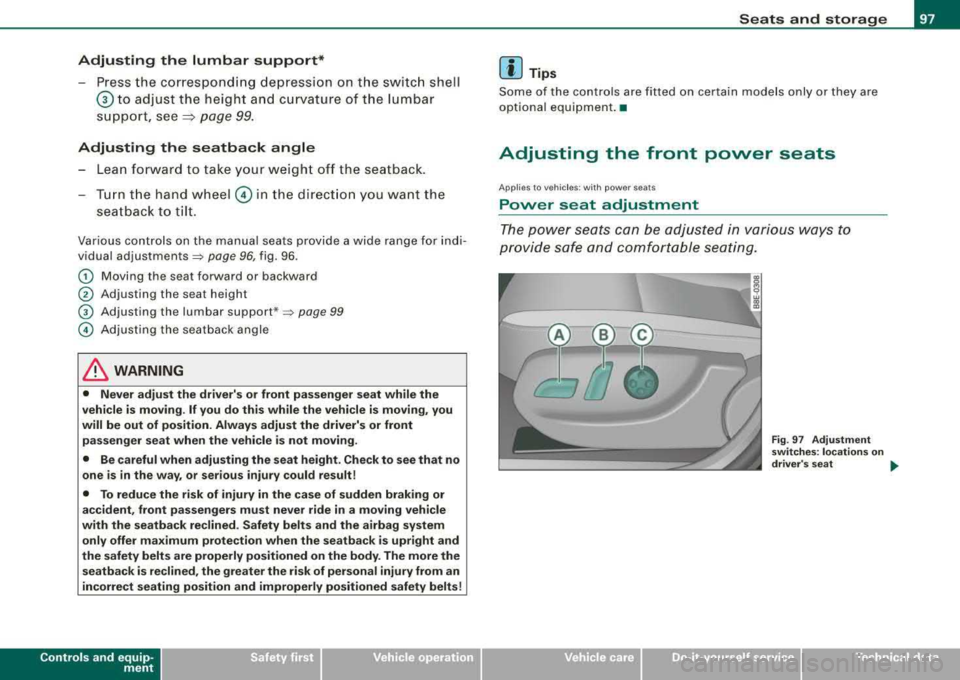
The power seats can be adjusted in various ways to
provide safe and comfortable seating .
Fig. 97 Adjustment
switches : locations on
driver 's seat
...
irechnical data
Page 100 of 368
Seats and storage
! w
--------..Jgj
Fig. 98 Seat cushion
adjustment: switch
motions
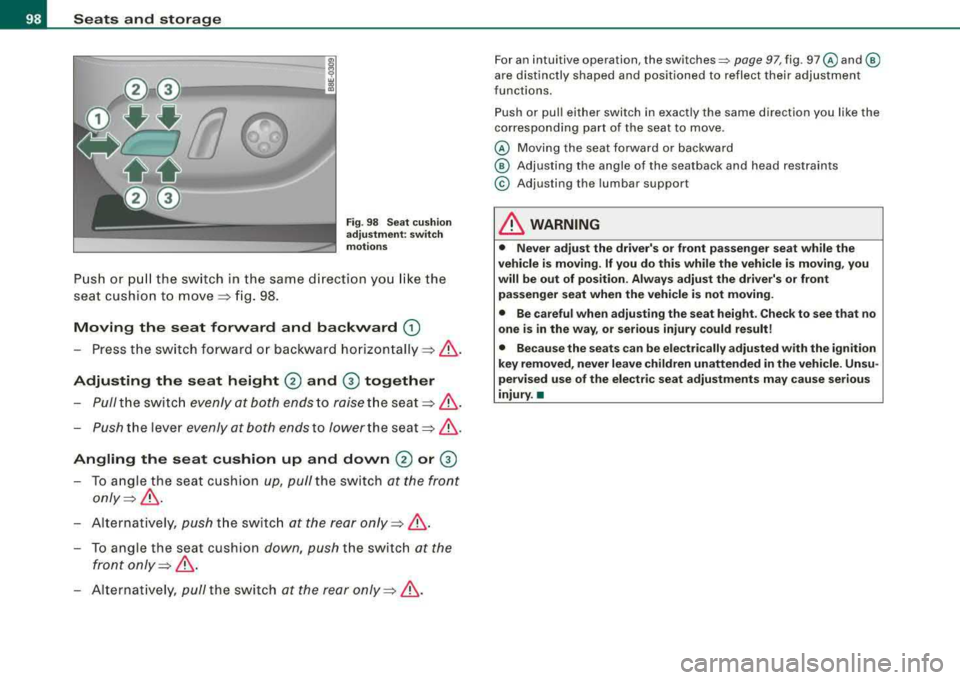
Push or pull the switch in the same direction you like the
seat cushion to
move => fig. 98.
Moving the seat forward and backward
G)
- Press the switch forward or backward horizontally =>& .
Adjusting the seat height 0 and @ together
Pull the sw itch evenly at both ends to raise the
seat=>& .
-Push the lever evenly at both ends to lower the seat=>& .
Angling the seat cushion up and down 0 or @
- To angle the seat cushion up, pull the switch at the front
only=>& .
Alternatively, push the switch at the rear only=> &.
-To angle the seat cushion down, push the switch at the
front
only => &.
- Alternatively , pull the switch at the rear only=>& .
For an i ntui tive operation , the sw itches~ page 97, fig . 97@ and ®
are distinctly shaped and positioned to reflect their adjustment
f u nctions.
Push or pull ei ther switch in exactly the same direct ion you l ik e t he
corresponding part of the seat to move .
@ Moving the seat forward or backward
® Adjusting the angle of the seatback and head restraints
© Adjusting the lumbar s uppor t
& WARNING
• Never adjust the driver's or front passenger seat while the
vehicle is moving.
If you do this while the vehicle is moving , you
will be out of position. Always adjust the driver's or front
passenger seat when the vehicle is not moving.
• Be careful when adjusting the seat height . Check to see that no
one is in the way, or serious injury could result!
• Because the seats can be electrically adjusted with the ignition
key removed, never leave children unattended in the vehicle. Unsu
pervised use of the electric seat adjustments may cause serious
injury. •
Page 101 of 368
App lies to vehic les: wit h powe r seats
Adjusting the seatback
Fig . 99 Driver 's seat :
switch for seatback
adjustment
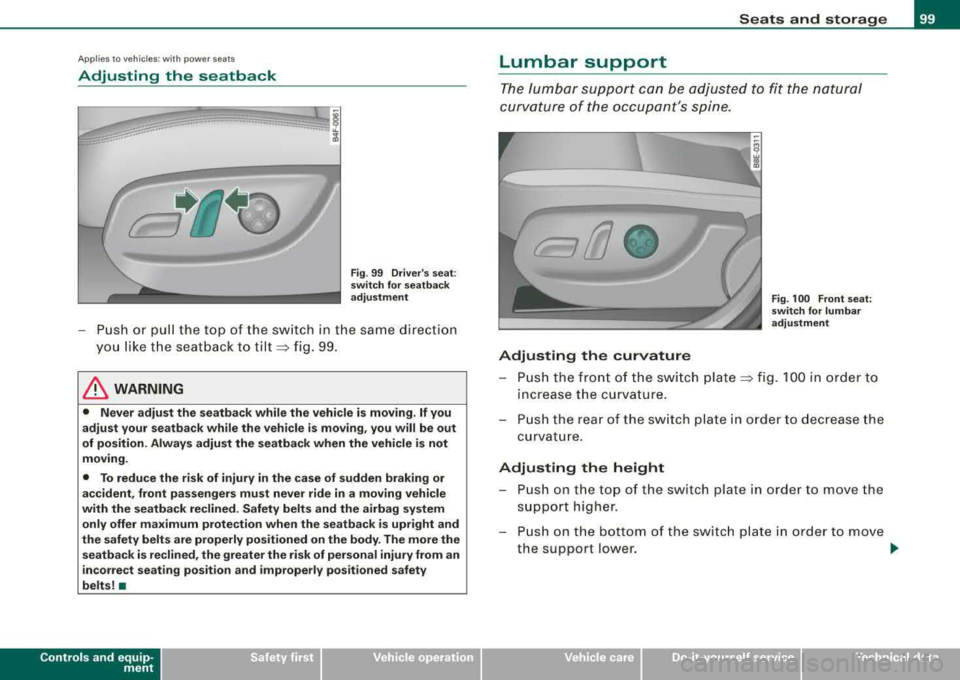
- Push or pull the top of the switch in the same direction
you like the seatback to
tilt~ fig. 99.
& WARNING
• Never adjust the seatback while the vehicle is moving. If you
adjust your seatback while the vehicle is moving, you will be out
of position. Always adjust the seatback when the vehicle is not
moving.
• To reduce the risk of injury in the case of sudden braking or
accident, front passengers must never ride in a moving vehicle
with the seatback reclined. Safety belts and the airbag system
only offer maximum protection when the seatback is upright and
the safety belts are properly positioned on the body. The more the
seatback is reclined, the greater the risk of personal injury from an
incorrect seating position and improperly positioned safety
belts! •
Controls and equip
ment
Seats and storage
Lumbar support
The lumbar support can be adjusted to fit the natural
curvature of the occupant's spine.
Adjusting the curvature
Fig . 100 Front seat:
switch for lumbar
adjustment
- Push the front of the switch plate ~ fig. 100 in order to
i nc rease the curvature.
- Push the rear of the switch plate in order to decrease the
curvature.
Adjusting the height
- Push on the top of th e sw itch plate in o rder to move the
support h igher.
- Push on the bottom of the sw itch plate in order to move
the support lower.
..,_
irechnical data
Page 107 of 368
________________________________________________ s_ e_ a __ ts __ a_ n_d -- s..:t ..:o ..:r..: a;;..: g::!....:. e_--11111
Head restraints
Adjusting head restraints , front seats
The head restraints must be adjusted properly to provide
protection.
Fig. 106 Front seats
head restraints :
adjusting the height
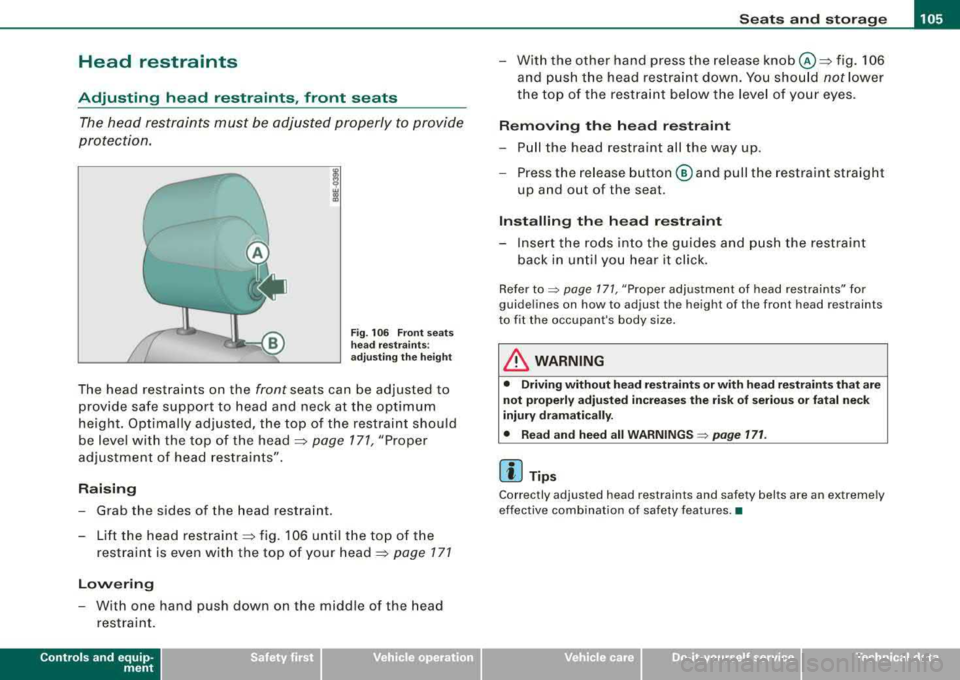
The head restraints on the front seats can be adjusted to
provide safe support to head and neck at the optimum
height. Optimally adjusted, the top of the restraint should
be level with the top of the head
=> page 171, "Proper
adjustment of head restraints".
Raising
- Grab the sides of the head restraint.
- Lift the head
restraint => fig. 106 until the top of the
restraint is even with the top of your
head=> page 171
Lowering
- With one hand push down on the middle of the head
restraint.
Controls and equip
ment
- With the other hand press the release knob@=> fig. 106
and push the head restraint down. You should
not lower
the top of the restraint below the level of your eyes.
Removing the head restraint
-Pull the head restraint all the way up.
- Press the release button @ and pull the restraint straight
up and out of the seat.
Installing the head restraint
- Insert the rods into the guides and push the restraint
back in until you hear it click.
Refer to::::> page 171, "Proper adjustment of head restraints" for
guidelines on how to adjust the height of the front h ead restraints
to fit the occupant's body size.
& WARNING
• Driving without head restraints or with head restraints that are
not properly adjusted increases the risk of serious or fatal neck
injury dramatically.
• Read and heed all
WARNINGS => page 171.
[ i] Tips
Correctly adjusted head restraints and safety belts are an extremely
effective combination of safety features .•
irechnical data
Page 108 of 368
___ S_ e
_ a_t_s _ a_n_ d
__ s _t _o _r_a ...::g==---- e ________________________________________________ _
Rear head restraints (outer seating positions)
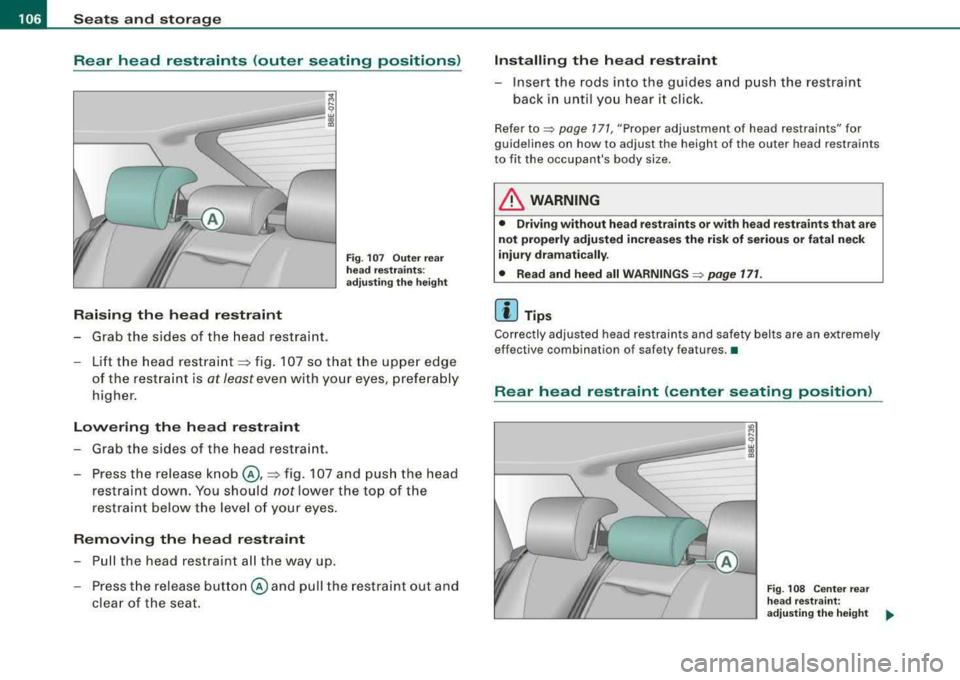
Raising the head restraint
-Grab the sides of the head restraint.
Fig. 107 Outer rear
head restraints :
adjusting the height
-Lift the head restraint => fig. 107 so that the upper edge
of the restraint is
at least even with your eyes, preferably
higher.
Lowering the head restraint
Grab the sides of the head restraint.
Press the release knob @,
=> fig. 107 and push the head
restraint down. You should
not lower the top of the
restraint below the level of your eyes.
Removing the head restraint
-Pull the head restraint all the way up.
-Press the release button @and pull the restraint out and
clear of the seat.
Installing the head restraint
- Insert the rods into the guides and push the restraint
back in until you hear it click.
Refer to~ page 171, "Proper adjustment of head restraints" for
guidelines on how to adjust the height of the outer head restraints
to fit the occupant's body size.
& WARNING
• Driving without head restraints or with head restraints that are
not properly adjusted increases the risk of serious or fatal neck
injury dramatically.
• Read and heed all
WARNINGS ~ page 171.
[ i] Tips
Correctly adjusted head restraints and safety belts are an extremely
e ffectiv e combination of safety fea tures .•
Rear head restraint (center seating position)
Fig . 108 Center rear
head restraint:
adjusting the height
~
Page 109 of 368
________________________________________________ S_ e_ a
_ t_
s _a_ n_d _ s_t _o _ r_ a_ g~ e __ ,n
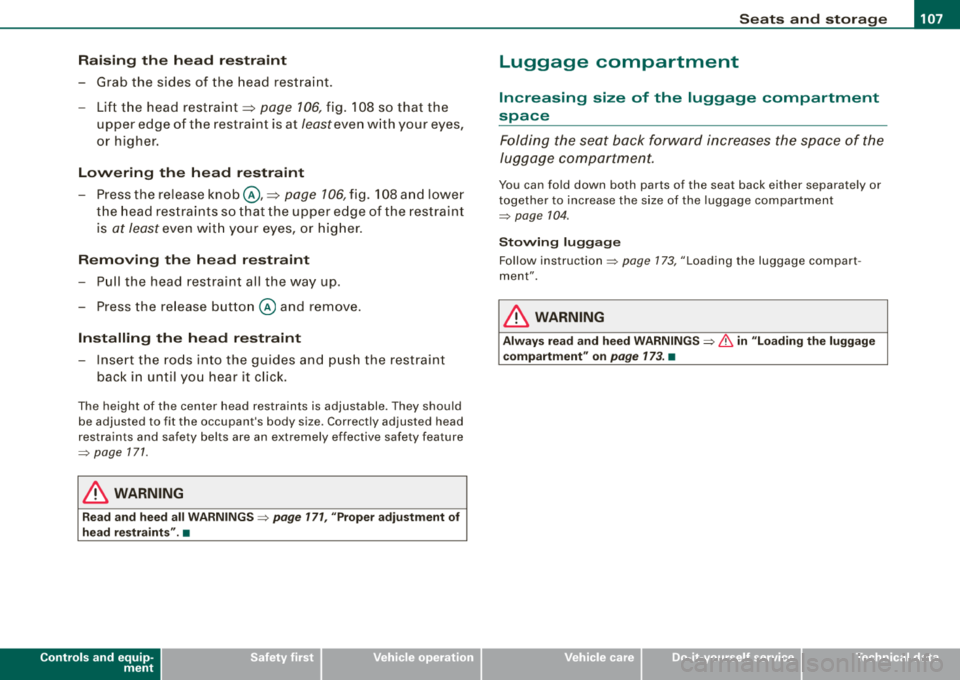
Raising the head restraint
- Grab the sides of the head restraint.
- Lift the head restraint=>
page 106, fig. 108 so that the
upper edge of the restraint is at
least even with your eyes,
or higher.
Lowering the head restraint
- Press the release knob @,::::> page 106, fig. 108 and lower
the head restraints so that the upper edge of the restraint
is
at least even with your eyes, or higher.
Removing the head restraint
-Pull the head restraint all the way up.
- Press the release button @ and remove.
Installing the head restraint
- Insert the rods into the guides and push the restraint
back in until you hear it click.
The height of the center head restraints is adjustable. They should
be adjusted to fit the occupant's body size. Correctly adjusted head
restraints and safety belts are an extremely effective safety feature
=> page 171.
& WARNING
Read and heed all WARNINGS => page 171, "Proper adjustment of
head restraints". •
Controls and equip
ment
Luggage compartment
Increasing size of the luggage compartment
space
Folding the seat back forward increases the space of the
luggage compartment.
You can fold down both parts of the seat back either separately or
together to increase the size of the luggage compartment
=> page 104.
Stowing luggage
Follow instruction => page 173, "Loading the luggage compart
ment".
& WARNING
Always read and heed WARNINGS => & in "Loading the luggage
compartment" on page
173. •
Page 136 of 368
___ O_ n_ t
_ h_ e_ ro_ a_d __________________________________________________ _
On the road
Steering
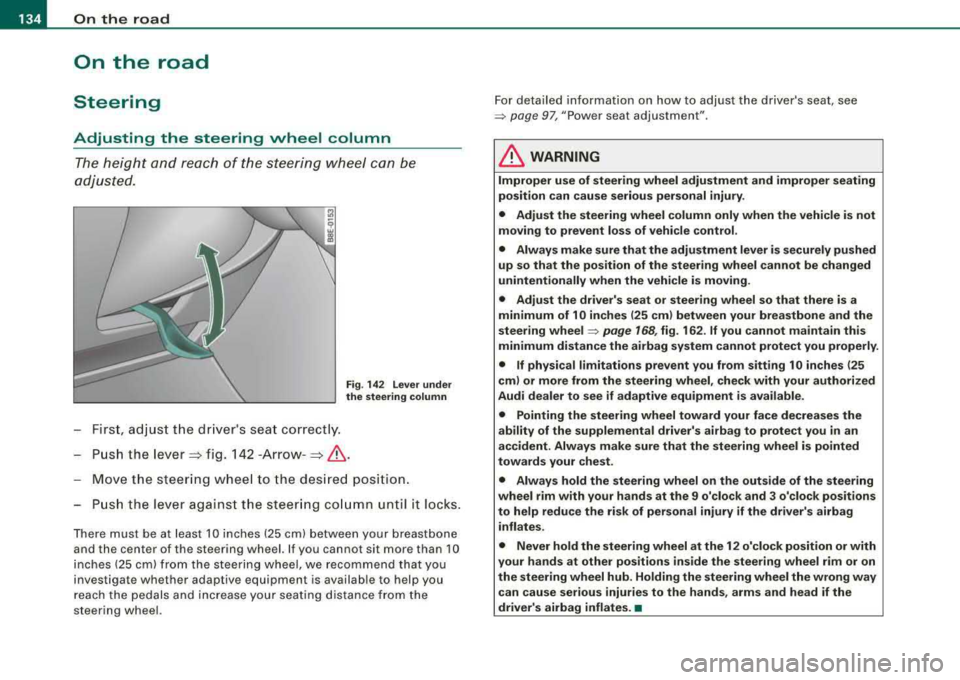
Adjusting the steering wheel column
The height and reach of the steering wheel can be
adjusted.
Fig . 142 Lever under
the steering column
First, adjust the driver's seat correctly.
- Push the
lever => fig. 142 -Arrow- =>& .
Move the steering wheel to the desired position.
- Push the lever against the steering column unt il it locks.
There must be at least 10 inches (25 cm) between your breastbone
and the center of the steering wheel. If you cannot sit more than 10
inches (25 cm) from the steering wheel,
we recommend that you
investigate whether adaptive equipment is available to help you
reach the pedals and increase your seating distance from the
steering wheel. For detailed information on how to adjust the driver's seat, see
=> page 97, "Power seat adjustment"
.
& WARNING
Improper use of steering wheel adjustment and improper seating
position can cause serious personal injury .
• Adjust the steering wheel column only when the vehicle is not
moving to prevent loss of vehicle control.
• Always make sure that the adjustment lever is securely pushed
up so that the position of the steering wheel cannot be changed
unintentionally when the vehicle is moving.
• Adjust the driver's seat or steering wheel so that there is a
minimum of 10 inches (25 cm) between your breastbone and the
steering
wheel ~ page 168, fig. 162. If you cannot maintain this
minimum distance the airbag system cannot protect you properly.
• If physical limitations prevent you from sitting 10 inches (25
cm) or more from the steering wheel, check with your authorized
Audi dealer to see if adaptive equipment is available.
• Pointing the steering wheel toward your face decreases the
ability of the supplemental driver's airbag to protect you in an
accident. Always make sure that the steering wheel is pointed
towards your chest .
• Always hold the steering wheel on the outside of the steering
wheel rim with your hands at the 9 o'clock and 3 o'clock positions
to help reduce the risk of personal injury if the driver's airbag inflates.
• Never hold the steering wheel at the 12 o'clock position or with
your hands at other positions inside the steering wheel rim or on
the steering wheel hub. Holding the steering wheel the wrong way
can cause serious injuries to the hands, arms and head if the
driver's airbag inflates.
•
Page 168 of 368
___ D_ r_ i_v _in -= g'- S
_ a_f _e _lY.,_ ______________________________________________ _
Driving Safely
General notes
Safe driving habits
Please remember -safety first!
This chapter contains important information, tips, suggestions and
warnings that you need to read and observe for your own safety, the safety of your passengers and others. We have summarized here
what you need to know about safety belts, airbags, child restraints as well as child safety. Your safety is for us
priority number 1. Always
observe the information and warnings in this section
-for your own
safety as well as that of your passengers.
The information in this section applies to all model versions of your
vehicle. Some of the features described in this sections may be
standard equipment on some models, or may be optional equip
ment on others. If you are not sure, ask your authorized Audi dealer .
& WARNING
• Always make sure that you follow the suggestions and heed
the WARNINGS in this Manual. It is in your interest and in the interest of your passengers.
• Always keep the complete Owner's Literature in your Audi
when you lend or sell your vehicle so that this important informa
tion will always be available to the driver and passengers.
• Always keep the Owner's literature handy so that you can find
it easily if you have questions. •
Safety equipment
The safety features are part of the occupant restraint
system and work together to help reduce the risk of injury
in a wide variety of accident situations.
Your safety and the safety of your passengers should not be left to
chance. Advances in technology have made a variety of features
available to help reduce the risk of injury in an accident. The
following is a listing of just a few of the safety features in your Audi:
• sophisticated safety belts for driver and all passenger seating
positions,
• safety belt pre-tensioners for the outboard seating positions,
• safety belt height adjustment systems for the front seats,
• front airbags,
• side airbags in the front seats and outer rear seats* ,
• side curtain airbags (SIDEGUARD),
• special LATCH anchorages for child restraints,
• head restraints for each seating position,
• adjustable steering column.
These individual safety features can work together as a system to
help protect you and your passengers in a wide range of accidents.
These features cannot work as a system if they are not always prop
erly adjusted and properly used .
Safety is everybody's responsibility! •