mirror AUDI A4 AVANT 2008 Owners Manual
[x] Cancel search | Manufacturer: AUDI, Model Year: 2008, Model line: A4 AVANT, Model: AUDI A4 AVANT 2008Pages: 368, PDF Size: 46.19 MB
Page 13 of 368
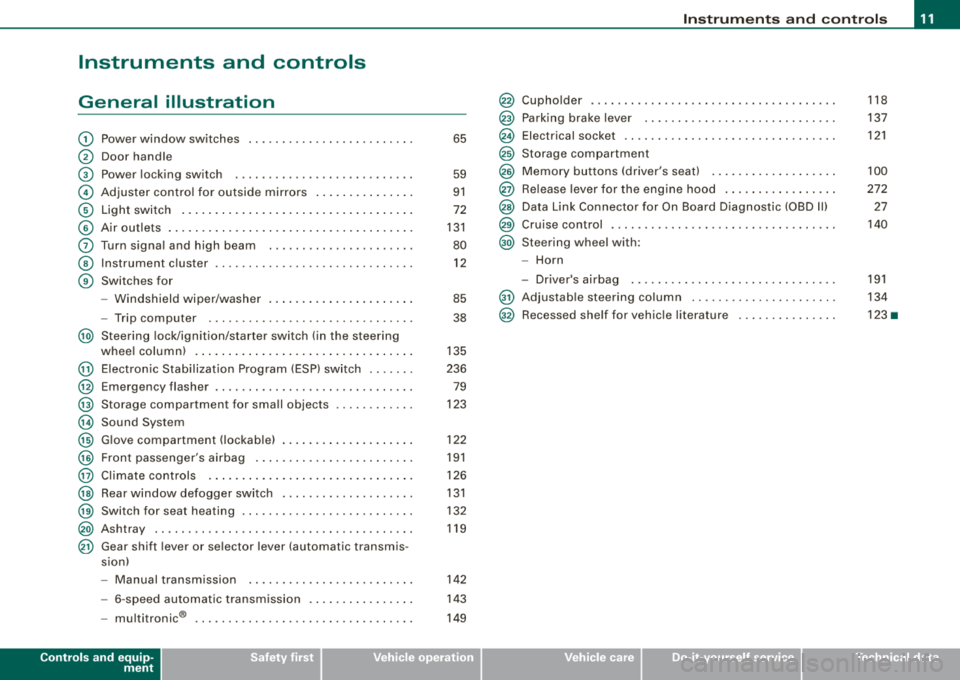
Instruments and controls
General illustration
G) Power window switches ........................ .
0 Door handle
G) Power locking switch .......................... .
© Adjuster control fo r outside mirrors ...... .... .... .
© Light switch .. ...... .... ... .... .... .... .... ... .
© Air o utlets ........ ... .. .... .... ... .... .... .... .
0 Turn s igna l and high beam .. .... .... ......... .. .
© Instrument c luster .. ... .... .... .... ... .. .... ... .
G) Switches for
- Windshield wiper/washer . ...... .... .... ... ... .
- Trip computer ...... .... .... ... .... .... .... . .
@ Steering lock/ignition/starter switch (in the steering
@
@
@
@
@
@
@
@
@
@
@
whee l column) . ...... ... .... .... .... ... .... ... .
Electron ic Stab ilization Prog ram (ESP) switc h ...... .
Emergency flasher ....... .... .... .... .... .... .. .
Storage compartment for sma ll objects
Sound System
G love compartment ( lockab le) ... .. .... .... .... .. .
Front passenger's airbag .... .... .... .... ..... .. .
Cl imate controls .. ..... .... .... ...... .... ... .. .
Rear window defogger switc h .... .... .... .... ... .
Switch for seat heating ......................... .
Ashtray .. ....... .... ............. ...... .... .. .
Gear shift lever or selector lever (automatic transmis
s ion)
- Manual transmission .. ...... ....... ...... ... .
- 6-speed automa tic transm ission .. ...... .... ... .
I .
.
® -mu t1tronic ................................ .
65
59
91
72
131
80
12
85
38
135
236 79
123
122
191
126
131
132
119
142
1 4 3
14 9
Controls and equip
ment • I I • • I
Instrum ents and controls
Cupho lder
Park ing brake lever ............................ .
Electrical socket ............................... .
Storage compartment
Memory buttons (driver's seat) .. ...... .... ... ... .
Re lease lever for t he e ngine hood ...... .... ... ... .
Data Link Connector fo r On Board D iagnostic (OBD Ill
Cruise control .... .... .... .... ....... .... .... .. .
Steering wheel with:
- Horn
D. ' . b - nversa1r ag . ................ .... ......... .
@ Adjustab le steering co lumn .. ...... .... .... .... . .
@ Recessed she lf for vehic le literature .............. .
118
137
121
100
272 27
140
191
134
123 •
Page 75 of 368
![AUDI A4 AVANT 2008 Owners Manual [ i] Tip s
• If you remove the ignition from the ignit ion lock whi le the head
lights are still on, a buzzer wi ll sound as long as the drivers door is
open to remind AUDI A4 AVANT 2008 Owners Manual [ i] Tip s
• If you remove the ignition from the ignit ion lock whi le the head
lights are still on, a buzzer wi ll sound as long as the drivers door is
open to remind](/img/6/57552/w960_57552-74.png)
[ i] Tip s
• If you remove the ignition from the ignit ion lock whi le the head
lights are still on, a buzzer wi ll sound as long as the driver's door is
open to remind you to switch off the lights.
• Always observe the specific loca l regu lat ions for your area when
to use your lights. •
Applies to veh icles : w ith ligh t sens or p ackag e
Sensor activated head- and tail light control
In the "AUTO" position light sensors switch the head -and
tail lights on and off.
Activating
Fig . 70 In stru ment
pane l: light swit ch in
A UTO po siti on
-Tur n th e light swi tch => fig. 70 to pos iti on AUTO.
Deactivating
-Tu rn the light sw itch to posit ion 0.
Controls and equip
ment
Cl ea r vision
In the switch position AUTO the aut omatic head -and taillight
control is activated . The correspo nding symbol on the light sw itch
is li t.
Light sensors located in the inside mirror housing and stem
constantly check the lig ht conditio ns surrounding t he ve hicle . If
ambient brightness falls below a factory set value (e.g . when driving
into a tunnel!, the head -and tai llights i nc ludi ng the l icense plate
il lumination are automatically turned on. When ambient brightness
increases again, t he external lights are turned off
aga in => & .
& WARNING
• Autom atic head - and taillight control is only intended to as sis t
the dri ver . Th is feature does not rel ieve the driver of h is respons i
bili ty to check the headlights and to turn them on manually
a ccord ing to the current light and visibility conditions . For
example , fog and rain cannot be detected by the light sen sors.
Consequently , alway s swit ch the headlight s
io on under these
weather condition s and when driving in the dark .
• Cras hes c an happen when you c annot see the road ahe ad and
when you cannot be seen by other motori sts.
• Alwa ys turn on the headlight s so that you can see ahead and
s o that others can see your car from the back.
[ i ] Tips
• In the AUTO mode, the low bea ms are turned off w hen t he ign i
tion is turned off. The remaining lights are turned off when th e ke y
is take n out of the ignition lock .
• Do not attach stickers to the windshie ld in front of the sensors as
this can disab le the automat ic head -and taill ight contro l and the
automa tic glare-dimming of the rearview mirror(sl.
• Always observe the spec ific loca l regulations for your area when
to use your lights.
• In the event of a light sensor ma lfunction, the drive r inf ormat ion
display wi ll show the
symbol ~. If a light sensor malfunction is indi -..,
Page 79 of 368
Applies to vehi cles: with Ligh ting p ackag e
Coming home/leaving home function
The coming home/leaving home function switches on the
external lights on a vehicle parked in the dark to illumi
nate the surroundings.
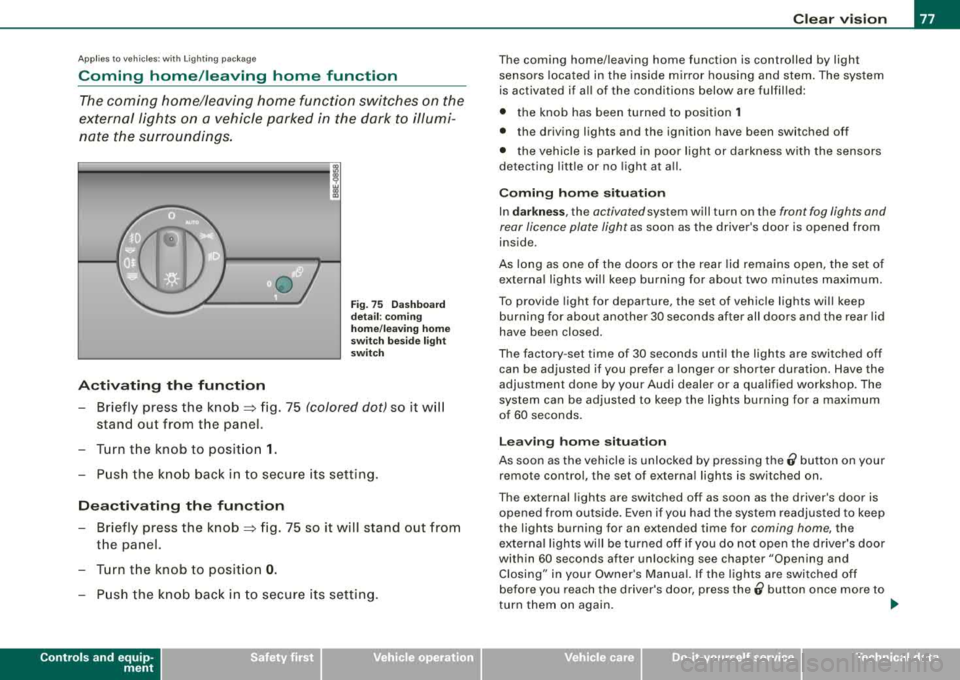
Activating the function
Fig. 75 Dashboard
detail : coming
home/leaving home
switch beside light
switch
- Briefly press the knob => fig. 75 (colored dot) so it will
stand out from the panel.
- Turn the knob to position
1.
- Push the knob back in to secure its setting.
Deactivating the function
- Briefly press the knob => fig. 75 so it will stand out from
the panel.
- Turn the knob to position
0.
- Push the knob back in to secure its setting.
Controls and equip
ment
Clear vision
The coming home/leaving home function is controlled by light
sensors located in the inside mirror housing and stem. The system
is activated if all of the conditions below are fulfilled :
• the knob has been turned to position
1
• the driving lights and the ignition have been switched off
• the vehicle is parked in poor light or darkness with the sensors
detecting little or no light at all.
Coming home situation
In darkness, the activated system will turn on the front fog lights and
rear licence plate light as soon as the driver's door is opened from
inside .
As long as one of the doors or the rear lid remains open, the set of
external lights will keep burning for about two minutes maximum.
To provide light for departure, the set of vehicle lights will keep
burning for about another 30 seconds after all doors and the rear lid
have been closed.
The factory -set time of 30 seconds until the lights are switched off
can be adjusted if you prefer a longer or shorter duration. Have the
adjustment done by your Audi dealer or a qualified workshop. The
system can be adjusted to keep the lights burning for a maximum
of 60 seconds.
Leaving home situation
As soon as the vehicle is unlocked by pressing the ti button on your
remote control, the set of external lights is switched on.
The external lights are switched off as soon as the driver's door is
opened from outside. Even if you had the system readjusted to keep
the lights burning for an extended time for coming home, the
external lights will be turned off if you do not open the driver's door
within 60 seconds after unlocking see chapter "Opening and Closing" in your Owner's Manual. If the lights are switched off
before you reach the driver's door, press the
0 button once more to
turn them on again. _,,,
Page 80 of 368
![AUDI A4 AVANT 2008 Owners Manual Clear vision
[ i] Tips
• Do not attach any stickers to the windshield in front of the two
light sensors, as this would interfere with both the automatic oper
ation of t AUDI A4 AVANT 2008 Owners Manual Clear vision
[ i] Tips
• Do not attach any stickers to the windshield in front of the two
light sensors, as this would interfere with both the automatic oper
ation of t](/img/6/57552/w960_57552-79.png)
Clear vision
[ i] Tips
• Do not attach any stickers to the windshield in front of the two
light sensors, as this would interfere with both the automatic oper
ation of the headlights and the automatic dimming of the inside
mirror(sl.
• If the vehicle is remotely unlocked and locked
three times in
succession,
leaving home will not turn on the lights a fourth time to
safeguard the battery and lights .
• If you wish to use the coming home/leaving home function regu
larly, you can leave it activated at all times without risking perma
nent strain on the electrical system. As the system is controlled by
light sensors, it wi ll only be energized in darkness.
• Frequent use of the coming home/leaving home function for
approaching and departing a vehicle parked in the dark wil l strain
the battery. This applies particularly if only short distances are
driven between stops . Occas ionally drive longer distances to make
sure the battery is recharged sufficiently.
• If the fog lights have been switched on by the coming
home/leaving home function, they will always be switched off when
you switch on the ignition .•
Instrument panel illumination
The glow of the instruments, displays and the center
console can be adjusted to increase or reduce brightness.
Fig. 76 Instrumen t
panel illumination
Press the"+" button to increase the brightness.
- Press the"-" button to reduce the brightness.
Ignition ON, light switch at @.
With the ignition switched ON, the glow of instrument needles can
be adjusted to appear brighter or dimmer.
Ignition ON, light switch at ;oo~ or io.
With the lights switched on, the brightness of instrument cluster
!i.e . needles, gauges and displays) and center console illumination
can be adjusted.
0 Note
The instrument cluster and center console illumination (gauges and needles) comes on when you switch on the ignition and the vehicle
headlights are off. Be aware of the following difference between
models built to US or Canadian specifications : ..,
Page 86 of 368
Clear vision
Vision
Sun visors
Using the sun visors makes driving safer.
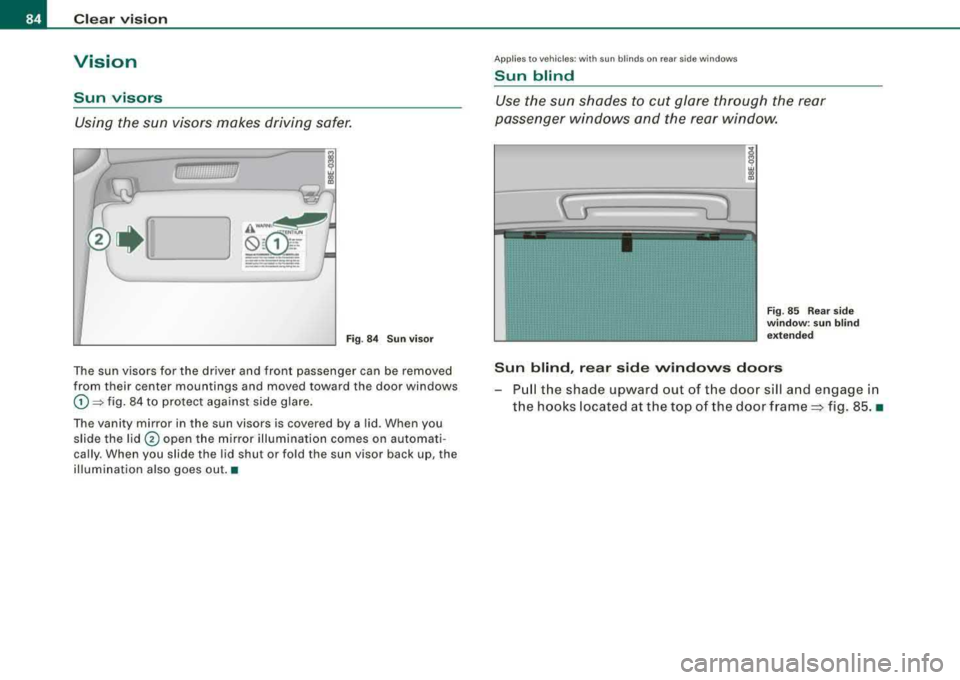
Fig. 84 Sun visor
The sun visors for the driver and front passenger can be removed
from their center mountings and moved toward the door windows
G) ~ fig. 84 to protect against side glare.
Th e vanity mirror in the sun visors is covered by a lid . When you
slide the lid
@ open the mirror illumination comes on automati
cally . When you slide the lid shut or fold the sun visor back up, the
illumination also goes out.•
Applies to veh ic les : w it h sun b lind s on rea r side window s
Sun blind
Use the sun shades to cut glare through the rear
passenger windows and the rear window.
Fig. 85 Rear side
window : sun blind
extended
Sun blind, rear side windows doors
- Pull the shade upward out of the door sill and engage in
the hooks located at the top of the door
frame=> fig. 85. •
Page 92 of 368
Clear vision
Be su re to inspect the condition of your w iper blades regu larly . For
safety reasons, replace your wiper blades once or twice a year if
necessary . See your authorized Aud i dealer for replacement b lades.
& WARNING
• Clean your wiper blades regularly with a windshield washer
solution to prevent streaking . If the wiper blade s are very dirty , for
e xample w ith in se cts , c arefully clean the wiper blade s w ith a
sponge or a soft brush.
• For your safety , you s hould repl ace the wiper blades on ce or
twi ce a year . See your authorized Audi dealer for replacement
blades .
0 Note
• To prevent damage to the wiper system:
-Always loosen blades which are frozen to the windshield
be fore operating wipers .
-Do not use gasoline, kerosene, paint thinner, or other solvents
on or near the wiper blades .
-Do not attemp t to move the wipers by hand.
[ i ] Tips
Commercial hot waxes applied by automatic car washes affect the
cleanabili ty of the g lass surface .•
Mirrors
Manual glare-dimming
Standard setting
-Move the sma ll lever (located on the bottom edge of t he
m irr or) to the front .
Anti-glare setting
Move the sma ll l ever (locate d on th e bottom edge of t he
m irror) to the rea r. •
Ap plies to vehic les: w it h auto matically dimming inside mirro r
Automatically dimming inside mirror
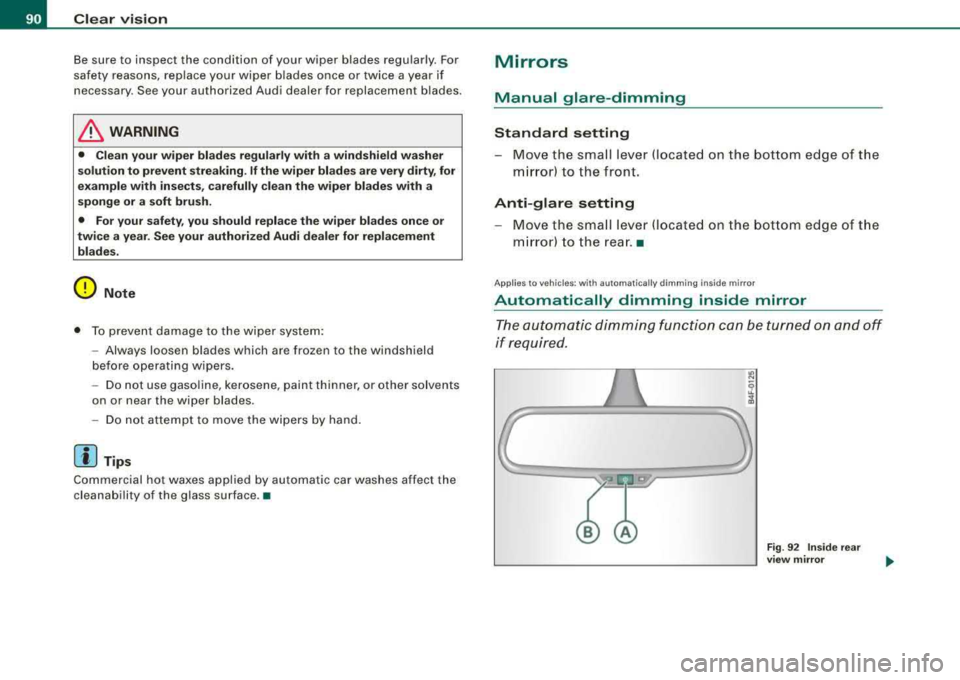
The automatic dimming function can be turned on and off
if required .
Fig . 9 2 Inside re ar
v iew mirror
Page 93 of 368

Disabling auto dimming
- Press button © =>page 90, fig. 92 briefly, -the green
indicator light ® goes out .
Activat ing /reactivating auto dimming
- Press button © briefly, -the green indicator light ®
goes on.
Au toma tic dimming func tion
The automatic dimming function is activated every t ime the ignition
is turned on . The green indicator light is lit to indicate auto dimming
is active.
When dimming is activated, the inside mirror will darken
automati
cally
in respo nse to the amount of light striking the mirror (such as
headlights from rearward approaching vehicles) . Even in dimming
mode, the mirror surface turns b right when:
• the interior light is sw itched on
• reverse gear is engaged.
& WARNING
The glass of the ins ide rearview mirror i s layered and contain s an
ele ctrolyte to achie ve it s properties . Be aware of liquid ele ctrolyte
le aking from a broken mirror gla ss. This liquid can cau se irritation
to skin , eye s, and re spir atory sy stem . If you get ele ctrolyte in your
e yes or on your skin , immed iately rinse with plenty of water . If irri
t a tion per sis ts, s eek medical attention .
0 Note
Liquid electrolyte leaked from a broken mirror glass wi ll damage any
p lastic surfaces it comes in contact with. Clean up spi lled electrolyte
immedia tely w ith c lear water and a sponge.
Controls and equip
ment
Clear v ision
[ i ] Tips
• If you switch off the automatic dimming function on the in side
mirror , automatic dim ming of the out side mirrors will l ikewise be
di sabled .
• Check to make sure there are no objects preventing light from
reaching the inside mirror.
• Do not attach any stickers to the windshield in front of the light
sensor, as this would interfere with both the automatic operation of
the headlights and the automatic dimming of the inside mirror.
• Be aware that au tomatic dimming of the inside mirror can on ly
operate properly if the rear window sun blind * is retracted .•
Outside mirrors
The outside mirrors are electrically adjusted (power
mirrors)
Fig . 93 Forwa rd
s ecti on of dri ver 's
ar mr est : pow er mirr or
co ntr ols
....
irechnical data
Page 94 of 368
Clear vision
Adjusting th e outside mirrors
- Turn the adjus ting knob
to=> page 91, fig. 93 © (drive r's
side ou tside mirror)
to @ (front passenger's outside
m irror).
- Press the knob in the appropriate direction to move the
m irror surface so t hat you have a good view to the rear.
Folding both outside mirrors *
- Turn t he kn ob
to @ .
The mirror surfaces are heated whenever you sw itch on the rear
window defogger regardless of the outside temperature .
You are we ll- advised to fold the outside mirro rs in when maneu
vering in t ight spaces or when leaving the car parked close to other
vehic les.
A uto matic tilt -d own of passen ger side outsid e mirr or*
With the knob turned to posi tion ®=> page 91, fig. 93, the mirror on
the front passenger door will tilt downward s lightly when you move
the selector lever into
R ( R everse) . This feature provides a better
view of the curb when you are backing into a parking space.
T he mirror wil l go back to its original position when you shift out of
Reverse, or when y ou turn the control k nob back
to © or@ .
Memo ry setting for the outsid e mirrors *
On veh ic les w it h the memory function *, w hen you store a seat posi
tion in the memory, the position of the outside mirrors is a lso stored
in the
memory => page 100.
0 Note
• Curved mirror surfaces (co nvex o r spher ical*) i ncrease you r fie ld
of view . Remember that vehic les or other objects wil l appear smaller
and fa rther away than w he n seen in a fla t mi rro r. If yo u use t his mirror to estimate distances of following vehic
les when changing
lanes, you cou ld esti mate incorrec tly a nd cause an acc ident .
• I f the mirror housing is moved unintentional ly (for example,
while parking y our vehicle), t hen you must first fo ld the mirror e lec
trically. Do not readjust the mirror housing manually . You cou ld
damage the m otor which controls t he m irror.
[ i ] Tips
If there shou ld be a malfunction in t he electrical syste m, you can
sti ll ad just the outside mirrors by pressing the edge of the mirror .•
Ap plies to vehicles : wit h au tomat ica lly a djus tin g outs ide mirro rs
Automatic dimming for the outside mirrors
The outside mirro rs d im at t he same t ime as the ins ide mirror. W hen
the ignition is switched on, the mirrors automatical ly dim
depending on the amount of flight striking the mir ro rs (such as
headlights shinin g into the veh ic le from the rear).
When you switch on the in terior light , or when you move the
selector lever into
R (Reverse), the d imm ing function stops and the
mirrors return to their original condition (not darkened).
[ i ] Tips
The automat ic dimming feature on the mirrors wil l not operate
pro per ly if the ligh t shining on the m irrors is blocked by other
objects .•
Page 95 of 368
Digital compass
Applies 10 vehicles: w ith di gita l com pass
Activating or deactivating the compass
The direction is displayed on the interior rear view mirror.
g
Fig . 94 Inside rear
view mirror: digital compass activated
To activate or deactivate, hold the@~ fig. 94 button
down until the red display appears or disappears .
The digital compass only works with the ignition turned on . The
directions are displayed as initials:
N (North), NE (Northeast), E
(East), SE !Southeast), S (South), SW !Southwest), W !West), NW
(Northwest).
[ i] Tips
To avoid inaccurate directions, do not allow any remote controls,
electrical systems, or metal parts close to the mirror .•
Controls and equip
ment
Clear vision
Ap plies 10 vehi cles: w it h digi ta l c ompass
Setting the magnetic deflection zone
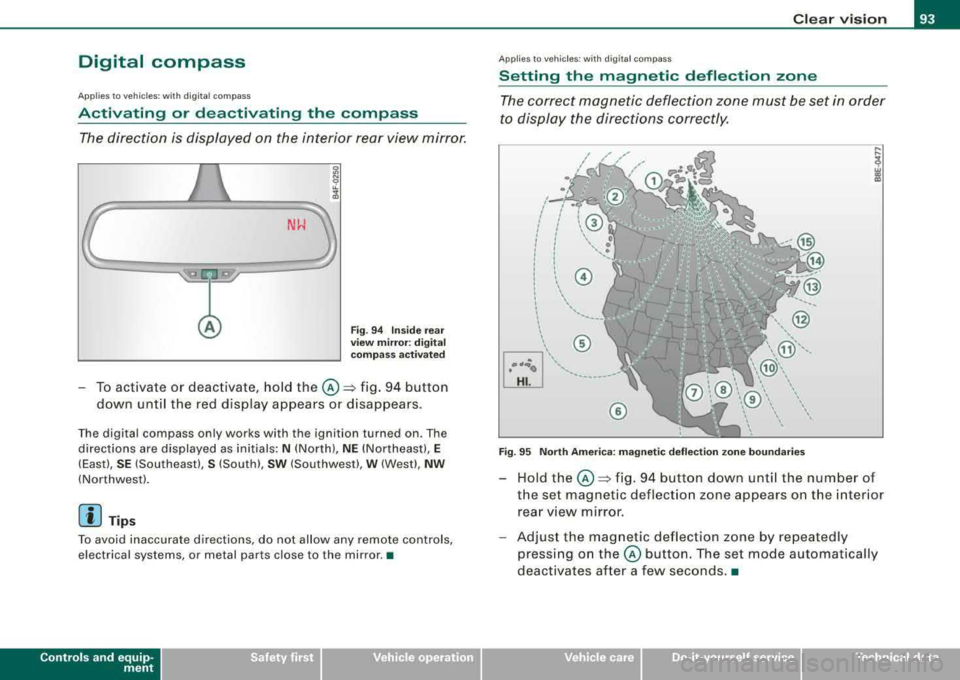
The correct magnetic deflection zone must be set in order
to display the directions correctly.
0
, _,,,,_,~~
(/
I : I I
' I r I I 1 © l I I
I I ' I~ ,.., ___ ~ ,,,..
' 1
'
®
\,, ,, ...... .. ... -------
©
Fig. 95 North America: magnetic deflection zone boundaries
Hold the@~ fig. 94 button down until the number of
the set magnetic deflection zone appears on the interior
. . rear view mirror.
Adjust the magnetic deflection zone by repeatedly pressing on
the @ button. The set mode automatically
deactivates after a few seconds .
•
irechnical data
Page 96 of 368
Clear vision
Applies to vehicles: with d igita l compass
Calibrating the compass
The compass has to be recalibrated if the display is wrong
or inaccurate.
- Hold the @button down until the letter C is displayed on
the interior rear view mirror.
- Drive in a circle at a speed of about 6 mph (10 km/h) unt il
a direction is shown on the interior rear view mirror.
& WARNING
The digital compass is to be used as a directional aid only. Even
though you may want to look at it while you are driving, you must
still pay attention to traffic, road and weather conditions as well
as other possible hazards . •