transmission AUDI A4 AVANT 2008 Owners Manual
[x] Cancel search | Manufacturer: AUDI, Model Year: 2008, Model line: A4 AVANT, Model: AUDI A4 AVANT 2008Pages: 368, PDF Size: 46.19 MB
Page 4 of 368
Table of contents
Table of contents
Vehicle literature ........ .
About this Owner's Manual ..................... .
Controls and
equipment .. ... ... ........ . .
Inst rumen ts and cont rols ..... .
Genera l ill ustration ............. .
Instruments and
warning/indica tor ligh ts ....... .
Instruments ................... .
Warning/indica tor lights ........ .
Driver informa tio n d isplay ..... .
Introduction ................... .
On-Board Diagnostic system
(080)
Auto-Check Control ....... ..... .
Speed warn ing system ... .. .... .
Trip computer ..... ...... ..... . .
Menu display .................. .
T ire pressure monitoring system ..
Opening and c losing .......... .
Keys .......................... .
Power lock ing system .......... .
5
6
9
11
1 1
1 2
1 2
1 9
2 4
2 4
27
28
35
38
41
45
52
52
55
Keyless entry remote contro l . . . . . 56 Doors, power
locks ......... ... .
Rear lid . ......... ............ .
Child safety lock in the rear doo rs
Anti -theft a larm system ........ .
Power w indows .............. .
Slid ing /tilting power sunroof . .. .
C lear v is ion ............ .... .. . .
Lights .............. ....... ... .
Inter ior lights ......... ........ .
V is ion .... .. .. ... ... .... ... ... .
Wiper and washer system ...... .
M irrors .. .. ............ ....• .. .
Digital compass ............ ... .
Seats and storage ......... ... .
Genera l recommenda tions ..... .
Adjust ing the front seats manually
Adjust ing the fro nt powe r se ats .
Lumbar support ............... .
Extending/ shortening the driver's
seat cush ion .................. .
Driver's seat memory ..•..... •..
Center armrest ........ ..... ... .
Rear seats ................. ... .
Head rest rain ts ..... ... .... ... .
Luggage compartment ........ .
Roof rack ins tallation .......... .
Cupho lder .. .... ...... .. .. .. .. .
Asht rays .... ....... ..... ..... .
Cigarette l igh ter /socke t ..... ... .
Storage ......... .......... ... .
War m and cold ............... .
Climate controls .............. .
Electrically heated front seats .. .
Electrically heated rear seats .. . . 58
On t
he road ............. ..... . .
61 Steer ing ..................... · ·
63 Ignition lock and ignition switch
64 Sta rting and stopping the eng ine
65 Parking brake ..... .. .......... .
67 acoustic park assist ........... . .
72 Cru ise control ................ •.
72
Tra nsmissi on .................. .
81 Manual transmission .. ... ..... . .
84 tiptronic® (6-speed automatic
85 transmission) .... ............. .
90 multi tronic™ .... ... ..... ...... .
93
H omeLin k® .... ......... ....... .
95 Universal radio frequency remote
95 con trol ... ... ... ... ...... ... .. .
96
97
99
100
100
102
103
10 5
107
1 16
118
1 19
120
122
125
125
132
133
Safety first ................ .
Driving Safe ly .... ............. .
General notes .......... ....... .
Proper occupant seating pos it ions
Peda l area ... ... .... ..... ... .. .
Stow ing luggage ............. . .
Report ing safety defects ....... .
Safety belts ..... ... ... .. .. .... .
General notes ................ . .
Why safety be lts? ....... ....... . 1
34
134
135
1 36
137
139
1 40
1 42
1 42
143
1 49
157
1 57
1 6 5
1 66
166
168
1 72
1 7 3
1 75
1 7 6
17 6
17 7
Page 13 of 368
Instruments and controls
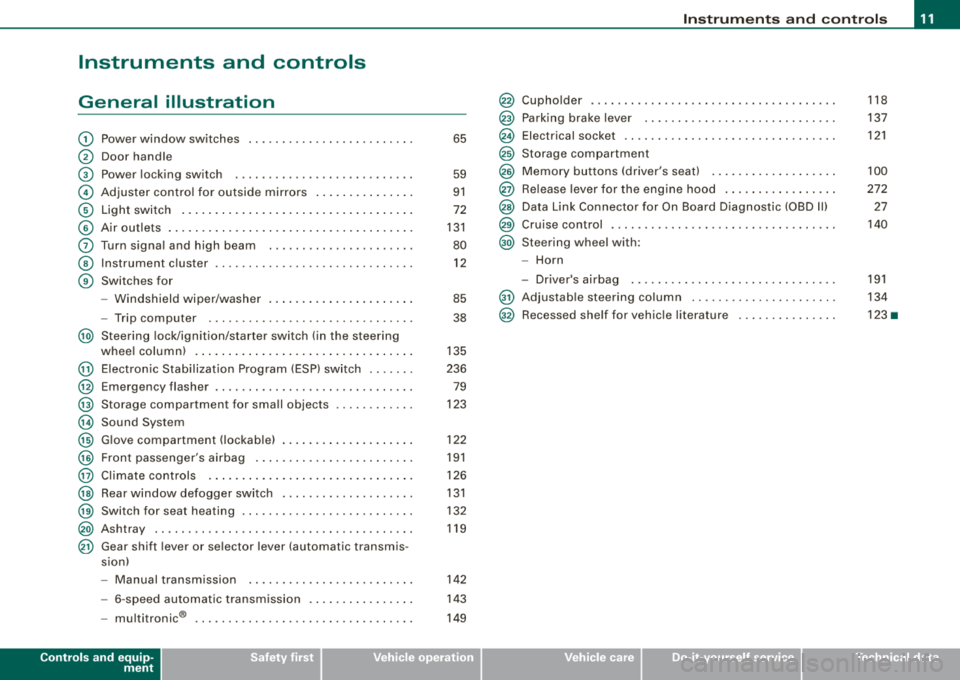
General illustration
G) Power window switches ........................ .
0 Door handle
G) Power locking switch .......................... .
© Adjuster control fo r outside mirrors ...... .... .... .
© Light switch .. ...... .... ... .... .... .... .... ... .
© Air o utlets ........ ... .. .... .... ... .... .... .... .
0 Turn s igna l and high beam .. .... .... ......... .. .
© Instrument c luster .. ... .... .... .... ... .. .... ... .
G) Switches for
- Windshield wiper/washer . ...... .... .... ... ... .
- Trip computer ...... .... .... ... .... .... .... . .
@ Steering lock/ignition/starter switch (in the steering
@
@
@
@
@
@
@
@
@
@
@
whee l column) . ...... ... .... .... .... ... .... ... .
Electron ic Stab ilization Prog ram (ESP) switc h ...... .
Emergency flasher ....... .... .... .... .... .... .. .
Storage compartment for sma ll objects
Sound System
G love compartment ( lockab le) ... .. .... .... .... .. .
Front passenger's airbag .... .... .... .... ..... .. .
Cl imate controls .. ..... .... .... ...... .... ... .. .
Rear window defogger switc h .... .... .... .... ... .
Switch for seat heating ......................... .
Ashtray .. ....... .... ............. ...... .... .. .
Gear shift lever or selector lever (automatic transmis
s ion)
- Manual transmission .. ...... ....... ...... ... .
- 6-speed automa tic transm ission .. ...... .... ... .
I .
.
® -mu t1tronic ................................ .
65
59
91
72
131
80
12
85
38
135
236 79
123
122
191
126
131
132
119
142
1 4 3
14 9
Controls and equip
ment • I I • • I
Instrum ents and controls
Cupho lder
Park ing brake lever ............................ .
Electrical socket ............................... .
Storage compartment
Memory buttons (driver's seat) .. ...... .... ... ... .
Re lease lever for t he e ngine hood ...... .... ... ... .
Data Link Connector fo r On Board D iagnostic (OBD Ill
Cruise control .... .... .... .... ....... .... .... .. .
Steering wheel with:
- Horn
D. ' . b - nversa1r ag . ................ .... ......... .
@ Adjustab le steering co lumn .. ...... .... .... .... . .
@ Recessed she lf for vehic le literature .............. .
118
137
121
100
272 27
140
191
134
123 •
Page 26 of 368
Driver inf orma tion di spl ay
Driver information display
Introduction
Applies to vehicles: w ith Driver information display
General notes
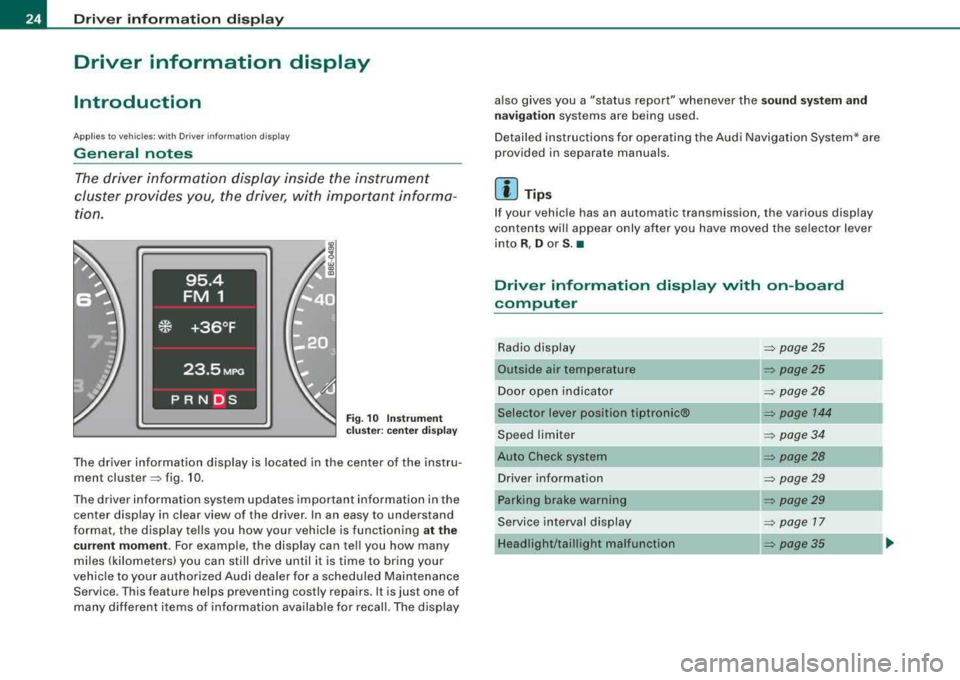
The driver information display inside the instrument
cluster provides you, the driver, with important informa tion.
Fig. 1 O Ins tru ment
c lu st er: ce nte r dis play
The driver information display is located in the center of the instru
ment
cluster:::> fig. 10.
The driver information system updates important information in the center display in clear view of the driver . In an easy to understand
format, the display tel ls you how your vehicle is functioning
at th e
c urr ent m om ent .
For example, the display can te ll you how many
miles (ki lometers) you can still drive until it is time to bring your
vehic le to your authorized Audi dealer for a scheduled Maintenance
Service. This feature helps preventing costly repairs. It is just one of
many different items o f information available for recall. The display also gives you a "status report" whenever the
sou
nd sys te m and
n av igatio n
systems are being used.
Detailed instructions for operating the Aud i Naviga tion System* are
provided in separate manuals.
[ i] Tips
If your vehic le has an automatic transmission, the various display
contents will appear only after you have moved the selector lever
into
R , D or S. •
Driver information display with on -board
computer
Radio display
Outside air temperature
Door open indicator
Selector lever position tiptronic®
Speed limiter
Auto Check system Driver information
Parking brake warning
Service interval disp lay
Headlight/taillight malfunction ::::> page25
=:> page25
=:> page26
=:> page 144
=:> page34
::::> page 28
::::> page 29
=:> page29
=:> page 17
=:> page 35
Page 27 of 368
Tire pressure monitoring system
On-board computer
Audi Navigation System*
Sound system display
~ page45
~ page38
See separate man-
ual •
Fig. 1 1 Center d isp lay:
sound system
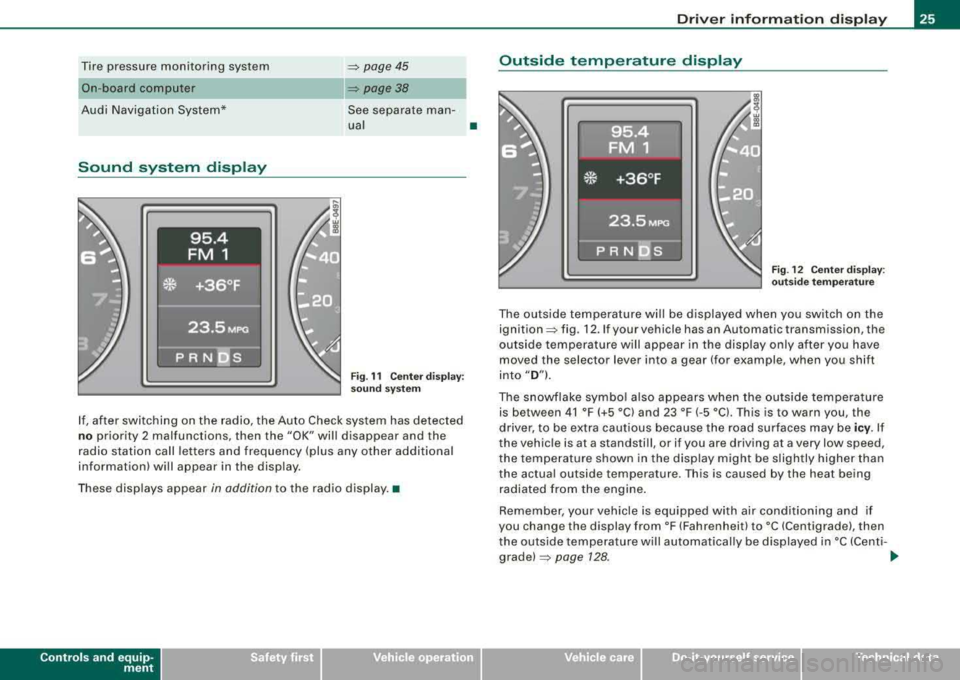
If, after switching on the radio, the Auto Check system has detected
no priority 2 malfunctions, then the "OK" will disappear and the
radio station call letters and frequency (plus any othe r additional
information) will appear in the display.
These displays appear in addition to the radio display.•
Controls and equip
ment
Dri ver inf orma tio n di spl ay
Outside temperature display
F ig. 12 Ce nter disp lay:
o utside te mperature
The outside temperature wil l be displayed when you switch on the
ignition~ fig . 12. If your vehicle has an Automatic transmission, the
outside temperature will appear in the disp lay only after you have
moved the selector lever into a gear (for example, when you shift
into
" D "l.
The snowflake symbo l also appears when the outside temperature
is between 41 °F (+5 °Cl and 23 °F (-5 °Cl. This is to warn you, the
driver, to be extra cautious because the road surfaces may be
ic y. If
the vehicle is at a standstill, or if you are driving at a very low speed,
the tempe rature shown in the display might be s lightly higher than
the actual outside temperature. This is caused by the heat being
radiated from the engine.
Remember, your vehicle is equipped with air conditioning and if
you change the display from °F (Fahrenheit) to °C (Centigrade), then
the outside temperature will automatically be displayed in °C (Centi -
grade)~ page 128. ...
irechnical data
Page 31 of 368

Driver information messages
Along with some particular warning/indicator lights and instrument cluster symbols, additional messages will
appear in the display .
A driver information message will appear in the display when, for
example :
a light bulb has burnt
out => page 35,
or if you drive off with the parking brake s till engaged (pulled up).
or before you move the selector lever in gear (automatic transmis
sion).
Driver information messages can be switched o n by the driver when
a priority 1 symbol appears and flashes =>
page 28.
Sw it c hing on th e dri ver inf orm ati on me ssage
For example, if there is a malfunction in the engine oil pressure, the
~ symbo l will appear in the display . If you press the CHECK button ,
the following message will appear:
Sw itch off en gin e, check oil l evel
The message goes out after approximately 5 seconds. Press the
CHECK button to display the message again.
[ i ] Tip s
The following two messages, Handb ra ke i s a pplie d and Wh en
s tati onary ap ply foot br ake while selecting g ear ,
cannot be
switched on again . T hese messages will remain in the display until
you release the parking brake or unti l you move the selector lever
into a gear .•
Controls and equip
ment
Dri ver inf orma tio n di spl ay
Parking brake warning
To release the parking brake, first press the release button in the
lever and lift the lever s lightly. Then lower it all the way down.
If you should drive off with the parking brake still engaged, a
warning tone will sound to remind you to release the pa rking brake.
Also, the following message will appear in the display :
Handbrake is a pplied
The parking brake warning is activated when you drive longer than
3 seconds and faster than 3 mph (5 km/h) .•
Ap plies to vehi cles: w it h ma nua l trans mission
Function test : manual transmission
Fig. 17 Dis pl ay:
man ual trans missio n
fu ncti on test
perfo rmed
The Auto -Check Control will automatically perform a test each time
you switch on the ignition.
If the functions monitored by the Auto-Check Control are working
properly, the
O K => fig. 17 will light up for a few seconds. .,_
irechnical data
Page 32 of 368

Driver information display
If one or more faults exist, the driver information disappears
approximately 15 seconds after the engine has been started and the
appropriate fault symbol appears in the display.
If neither the OK message nor a malfunction message appears in
the display, have the Auto-Check Contro l inspec ted by your autho
rized Audi dealer. •
Function test: automatic transmission
Fig. 18 Dis play: func
tion test automatic
transmission, ignition
ju st turned on
The Auto-Check Contro l will automatically perform a test each time
you switch on the ignition . When the selector lever in
P or N , the
following message appears in the display:
When stationary apply footbrake while selecting gear.
When you a select a different gear (for example : R, D, etc.), the
message will disappear and the Auto-Check function is displayed. If
there are no ma lfunctions, the OK message illuminates for a few
seconds => fig. 18.
If there is a malfunction, then the malfunction message wil l appear
about 15 seconds after the you start the vehicle. At the same time
you will hear a warning tone . If
neither the OK message nor a malfunction message appear in the
display, have the Auto -Check Control inspected by your authorized
Audi dea ler .•
Red symbols
A red symbol means DANGER.
-Pull of the road and stop the vehicle.
Turn off the engine.
Fig. 19 Display: engine
coolant level warning
( p rio rity 1 )
-Check the malfunctioning system. Contact your autho
rized Audi dealer or a qualified workshop for assistance.
The red symbols mean:
Page 138 of 368
___ o_ n_ t_h _e _ r_o _a_ d __________________________________________________ _
temporarily interrupted to conserve battery power. After the engine
has started, release the key and it will return to position
0-
Before the starter can be operated again the key must be turned
back to position
G) . The non-repeat lock prevents you from
damaging the starter when the engine is running.
_& WARNING
• Never remove the key from the ignition lock while the vehicle is
moving. The steering wheel will lock causing loss of control.
• If you have to leave your vehicle-even for just a minute- always
remove the ignition key and take it with you. This is especially
important if you are going to leave children behind in the vehicle.
The children could start the engine or use other vehicle controls.
Unsupervised use of vehicle controls (for example, power
windows) can cause serious personal injuries.
[ i] Tips
If the vehicle battery has been disconnected and then reconnected,
then you must leave the key in position
0 for about 5 seconds
before you can start the engine. •
Ignition key safety lock
The ignition key can only be removed when the selector
lever is in the
"P" (Park) position.
After switching off the ignition, the ignition key can only be
removed from the ignition lock when the selector lever is in the
"P"
(Park) position. After you have removed the key, the selector lever is
locked and cannot be moved. •
Starting and stopping the engine
Starting the engine
The engine can only be started with your original Audi
key.
-Set the parking brake.
-Move the selector lever to the neutral position (automatic
transmission: selector lever in P or N)
=> & .
-On vehicles with manual transmission, fully depress the
clutch pedal.
-Turn the ignition key to position 0 => page 135, fig. 143
- do not depress the gas pedal when starting the engine!
-Let go of the key as soon as the engine starts.
A cold engine may at first be loud after it has been started. This is
due to the hydraulic valves building up the oil pressure . This is
normal and no need for concern.
If the engine does not start immediately, stop trying after 10
seconds and then try to restart the engine about 30 seconds later.
What to do if the engine does not start
• ~ page 330
• ~ page 332, "Emergency towing with commercial tow truck"
_& WARNING
Never start or let the engine run in a confined or enclosed area.
Exhaust fumes from the engine contain carbon monoxide, a color
less and odorless gas. Carbon monoxide can be fatal if inhaled.
• Never leave the engine idling unattended. An unattended
vehicle with a running engine poses a danger of personal injury or
theft.
~
Page 140 of 368
___ o_ n_ t_h _e _ r_o _a_ d __________________________________________________ _
-Keep the release button pressed and lower the parking
brake~ &.
If you should drive off with the parking brake still set, a warning tone
will sound and the following will appear in the instrument cluster to
remind you to release the parking brake:
Parking brake set
The parking brake warning comes on only after you have driven for
longer than 3 seconds and faster than 5 mph (5 km/h).
The parking brake warning light Brake (USA)/
«Dl (CDN) illuminates
when the parking brake is set and you switch on the ignition.
& WARNING
Always release the parking brake completely. A partially engaged
brake will overheat the rear brakes, reduce their effectiveness and
cause excessive wear. This could lead to brake failure and an acci
dent.
0 Note
Only after the vehicle has come to complete stop, should you firmly
set the parking brake and either move the gearshift lever into 1st.
gear (manual transmission) or move the selector lever into
"P"
(Automatic transmission).•
Parking
To prevent a parked vehicle from rolling away, there are a
few things you should do.
When you park your vehicle, do the following:
-Stop the vehicle using the brake pedal.
-Set the parking brake firmly.
-Move the selector lever into the P position ~ &.
-Switch off the engine and remove the ignition key from
the ignition lock.
What else you should do when parking your vehicle on
an incline or decline
Turn the steering wheel so that if the vehicle should start to roll, it
will roll into the curb.
If you are parking on a
decline (the front of your vehicle facing
downhill), turn the front wheels to the right so that they point
toward the curb.
If you are parking on an incline (the front of your vehicle facing
uphill), turn the front wheels to the left so that they point
away from
the curb.
Move the selector lever into the P position.
& WARNING
This is how you can reduce the risk of injury when leaving your
vehicle.
• Never park the vehicle where it can come in contact with dry
grass, spilled fuel or any other flammable materials.
• Never allow anyone -especially small children -to remain in the
vehicle when it is locked. Locked doors make it more difficult for
rescuers to access the passenger compartment in the event of an
emergency. Danger to life!
• Never leave children unsupervised in the vehicle. Children
could release the parking brake or move the gearshift lever out of
gear. The vehicle could start to roll away and cause an accident.
• No matter what the season is, the temperature in a parked
vehicle can reach dangerous levels. •
Page 143 of 368
_________________________________________________ O
_ n_ t_h _e _ r_o _a _d __ ftllll
D ece le rat e (slow er)
- Lower lever @ toward Q => page 140, fig. 145.
- Release the lever to store the new speed.
You can a lso increase the vehic le speed by depressing the acce ler
ator pedal. The vehicle speed wil l increase as long as you keep the
accelerator pedal depressed . When you let up on the accelerator
pedal, t he veh icle speed w ill automatica lly return the to previously
stored vehicle speed in th e cruis e control.
I f the actua l veh icle speed exceeds the stored vehicle speed in the
cruise control for longer than five minutes and by more than 6 mph
(10 km/h), the c ruise control wil l auto matica lly erase the stored
veh ic le speed and you w ill have to rese t the cruise contro l again.
T apping the lever lightly
@
By lightly tapping the lever @toward 0 => page 140, fig. 145, you
can increase ve hicle speed by approximately 1 mph (2 km/h).
By lightly tapp ing the lever @toward
O => page 140, fig. 145, you
can decrease vehicle speed by approximately 1 mph (2 km/h). •
Switching the system off temporarily
Either of the follow ing actions will tempora rily deact ivate
the cru ise con trol:
- press ing t he brake pedal, or
- p ressing t he c lutch pedal (on manua l transmission
mo dels), or
- pu shing the
lever @ towa rds the instrume nt panel 0
(n ot engaging)=> page 140, fig. 14 5.
When you tempo rari ly deac tiva te the cru ise co ntrol fo r a brie f
period, th e previous ly s tored vehicle speed remains in the memory .
Controls and equip
ment T
o resume the previously stored vehicle speed, release the brake (or
clutch) pedal, or you pull lever @toward t he stee ring wheel
G) .
If no veh ic le speed was stored when you switched off the system
temporarily, you must reset a new vehicle speed : Acce lerate to the
des ired speed and press
button @ (SET) => page 140, fig. 145.
& WARNING
Do not use the cruise control if the stored veh icle speed is faster
than exi sting traffic condition s permit .•
Switching off the cruise control system
While driving
- Pu sh lever © towa rds the inst rument p anel 0 un til it
e n gages => page 140, fig . 1 45.
When the vehicle is at a standstill
- Sw itch off the ignit ion. •
Page 144 of 368
___ T_ r
_ a_ n_s _m_ i_s _s _i_o _n ___________________________________________________ _
Transmission
Manual transmission
Applies to vehicles: w ith 6 -speed manua l transmission
Gearshift lever
The clutch pedal must be depressed all the way before
you can start the engine .
Your Audi with manual transmission is equipped with an
interlock-feature .
-Depress the clutch pedal all the way.
- Start the engine with the gearshift lever in Neutral and
clutch pedal depressed.
0 Note
Always depress the clutch pedal fully when changing gears. Do not
hold the vehicle on a hi ll with the c lutch pedal partially depressed.
This may cause premature clutch wear or damage .
[ i ] Ti ps
• Resting your hand on the gearshift lever knob while driving will
cause premature wear in the transmission.
• The back -up lights go on when you shift into Reverse with the
ignition on .•
Applies to vehicles: with 6-speed manual transmission
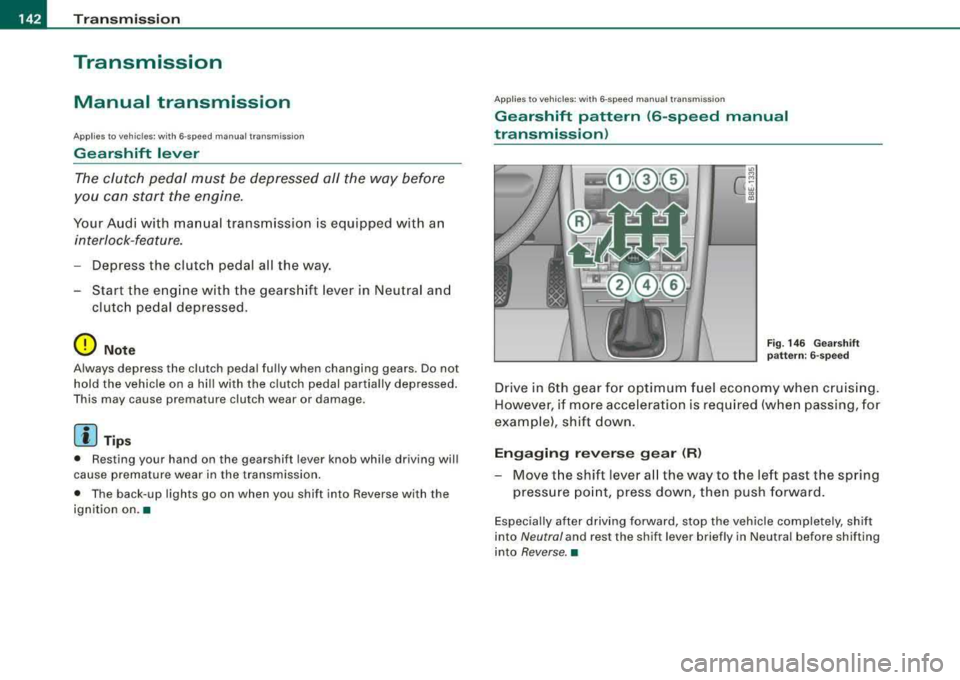
Gearshift pattern (6-speed manual
transmission)
Fi g. 14 6 Gearshi ft
pa ttern: 6-speed
Drive in 6th gear for optimum fuel economy when cruising .
However, if more acceleration is required (when passing, for
example), shift down.
E n gag ing r everse gear (R )
- Move the shift lever all the way to the left past the spring
pressure point, press down, then push forward .
Especially after driving forward, stop the vehicle completely, shift
into
Neutral and rest the shift lever briefly in Neutral before shifting
into
Reverse. •