odometer AUDI A4 CABRIOLET 2009 Owners Manual
[x] Cancel search | Manufacturer: AUDI, Model Year: 2009, Model line: A4 CABRIOLET, Model: AUDI A4 CABRIOLET 2009Pages: 340, PDF Size: 77.32 MB
Page 14 of 340
Instruments and warning/indicator lights
Instruments and warning/indicator lights
Instruments
Instrument cluster and controls
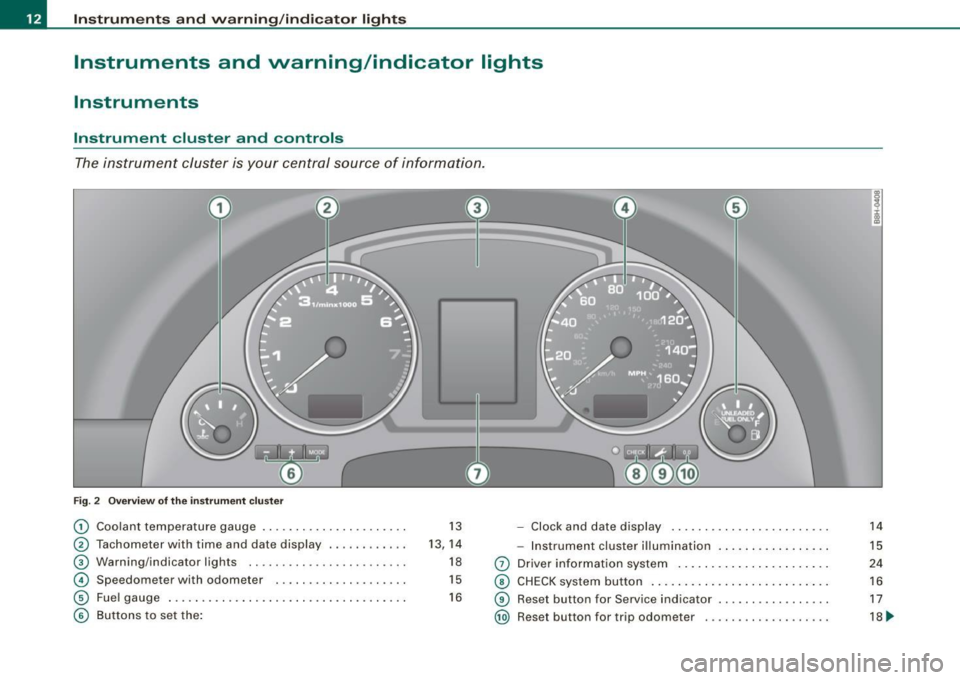
The instrument cluster is your central source of information.
Fig. 2 Overview of the instrument cluster
G) Coolant temperatu re gauge .. ..... ... ... .... ... . . 13 - Clock and date display .. .... ........ .... ... .. .
® Tachometer with time and date display . ....... ... . 13, 14 -Instrument cluster illumination ... .... .... ... .. .
® Warning/indicator l ights .. ... ....... ... ........ . 18 0 Driver information system ...... .... ....... .... . .
© Spe edometer with odometer . .... ...... ..... .. . . 15 © CHECK system button .......... ........... ..... .
© Fuel gauge ...... .... ....... ........ ........ .. . 16 © Reset but ton for Service indicator ................ .
© Buttons to set the: @ Reset button for trip odome ter .................. .
14
15
24
16
17
18 ~
Page 16 of 340
Instruments and warning/indicator lights
ffi For the sake of the environment
Upshifting early saves fuels and reduces engine noise .•
Digital clock with date display
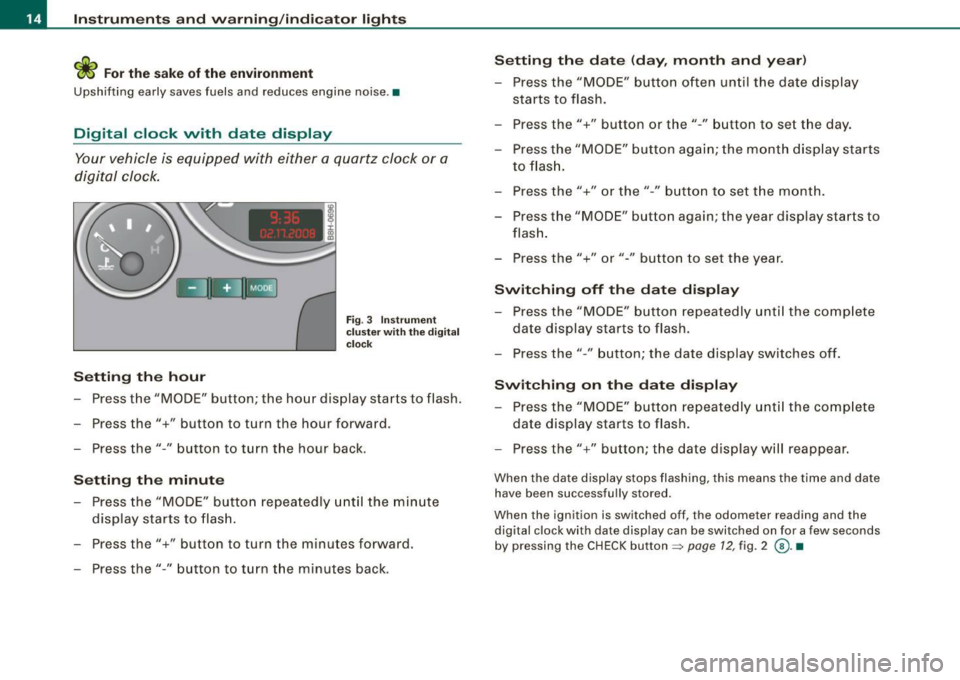
Your vehicle is equipped with either a quartz clock or a
digital clock.
Setting the hour
Fig. 3 Instrument
cluster with the digital
clock
- Press the "MODE" button; the hour display starts to flash.
- Press the"+" button to turn the hour forward .
- Press the"-" button to turn the hour back.
Setting the minute
- Press the "MODE" button repeatedly until the minute
display starts to flash.
- Press the"+" button to turn the minutes forward.
- Press the"-" button to turn the minutes back.
Setting the date (day, month and year)
-Press the "MODE" button often until the date display
starts to flash.
- Press the"+" button or the"-" button to set the day.
- Press the "MODE" button again; the month display starts to flash.
- Press the"+" or the" -" button to set the month.
- Press the "MODE" button again; the year display starts to
flash.
- Press the"+" or"-" button to set the year.
Switching off the date display
-Press the "MODE" button repeatedly until the complete
date display starts to flash.
- Press the" -" button; the date display switches off.
Switching on the date display
- Press the "MODE" button repeatedly until the complete
date display starts to flash.
- Press the"+" button; the date display will reappear.
When the date display stops flashing, this means the time and date
have been successfully stored .
When the ignition is switched off, the odometer reading and the
digital clock with date display can be switched on for a few seconds
by pressing the CHECK button =>
page 12, fig. 2 @ . •
Page 17 of 340
Instrument cluster illumination
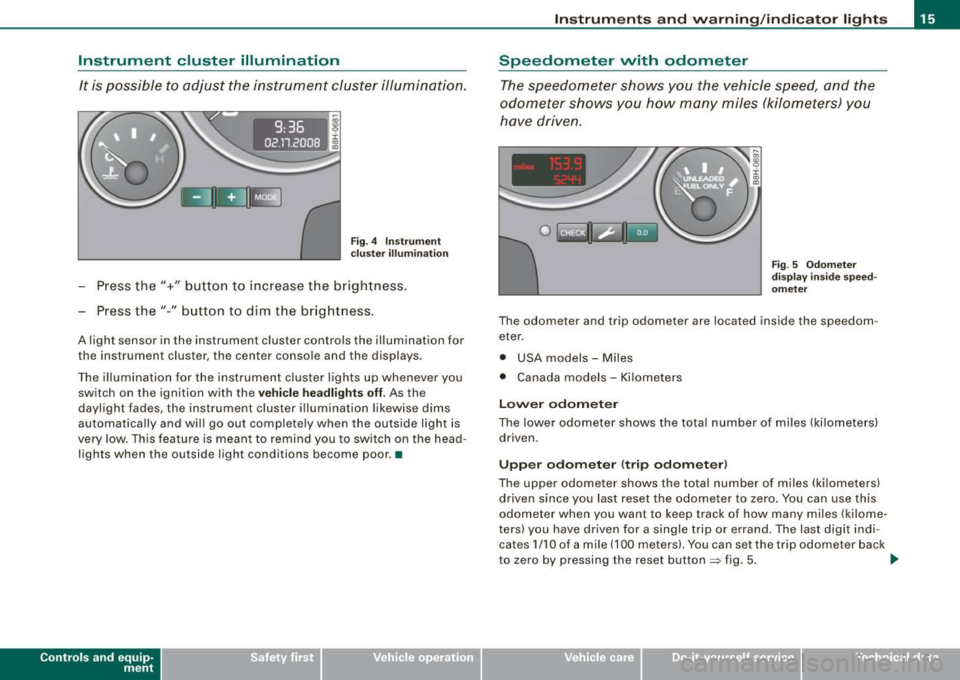
It is possible to adjust the instrument cluster illumination.
9:36
02 .11.200
Fig. 4 In strum ent
c lus ter illum inat io n
- Press the"+" button to increase the brightness.
Press the"-" button to dim the br ightness.
A light sensor in the instrument cluster controls the illumination for
the instrument cluster, the center conso le and the displays.
The illumination for the instrument cluster lights up whenever you switch on the ignition with the
ve hic le head lights off. As the
daylight fades, the instrument c luster illumination likewise dims
automatically and wi ll go out complete ly when the outside light is
very low . This feature is meant to remind you to switch on the head
lights when the outside light conditions become poor. •
Controls and eq uip
ment
In st ru m ent s a nd w arning /indi cator li ght s
Speedometer with odometer
The speedometer shows you the vehicle speed, and the
odometer shows you how many miles (kilometers) you
have driven .
0 1mUc::1 Uni3
Fi g. 5 Odome ter
di sp la y in side s pee d
o m eter
The odometer and trip odometer are located inside the speedom
eter.
• USA models - Miles
• Canada models - Ki lometers
Lo wer odomet er
The lower odometer shows the tota l number of miles (ki lometers)
driven.
Upp er odom ete r (t rip odo m ete r)
The upper odometer shows the total number of miles (kilometers)
driven since you last reset the odometer to zero. You can use this
odometer when you want to keep track of how many miles (kilome
ters) you have driven for a single trip or errand. The last digit indi cates 1/10 of a mile (100 meters). You can set the trip odometer back
to zero by pressing the reset button
~ fig. 5. _,.
~ehicle care Technical data
Page 18 of 340
Inst rum ents and warnin g/indi cato r li ghts
M alfu nction message
If there is a malfunction somewhere in the ins trument cluster, dE F
will appear in the trip odometer and will stay on. Contact your
authorized Audi dea ler to have the prob lem corrected.
Im mob ilizer
Each time you switch on the ignition, the data stored in the vehicle
key are e lectronically scanned to verify that key data and vehicle
data match. If a non -coded or a defective vehic le key is used, the
word
S A FE wi ll appear and remain lit in the upper (trip) odometer
display . If this happens, the vehicle cannot be started=>
page 49. •
Fuel gauge
The fuel gauge works only when the ignition is on .
When the needle reaches the red area, the warning light in the instrument cluster wil l illuminate =>
page 33 [). This means you
have approx imately 2.4 gallons (9 liters) of fuel left in the tank.
Time
t o refu el!
The total tank capacity of your vehicle is listed in=> page 314.
0 Note
Never run the tank completely dry! An irregular supply of fuel can
cause engine misfiring and fuel could enter into the exhaust
system. The catalytic converter could then overheat and be
damaged. •
[ CHE CK] button
You can perform different functions with this button.
I S2YY
0
Fig. 6 C HECK butto n in
th e ins tru men t c lu ste r
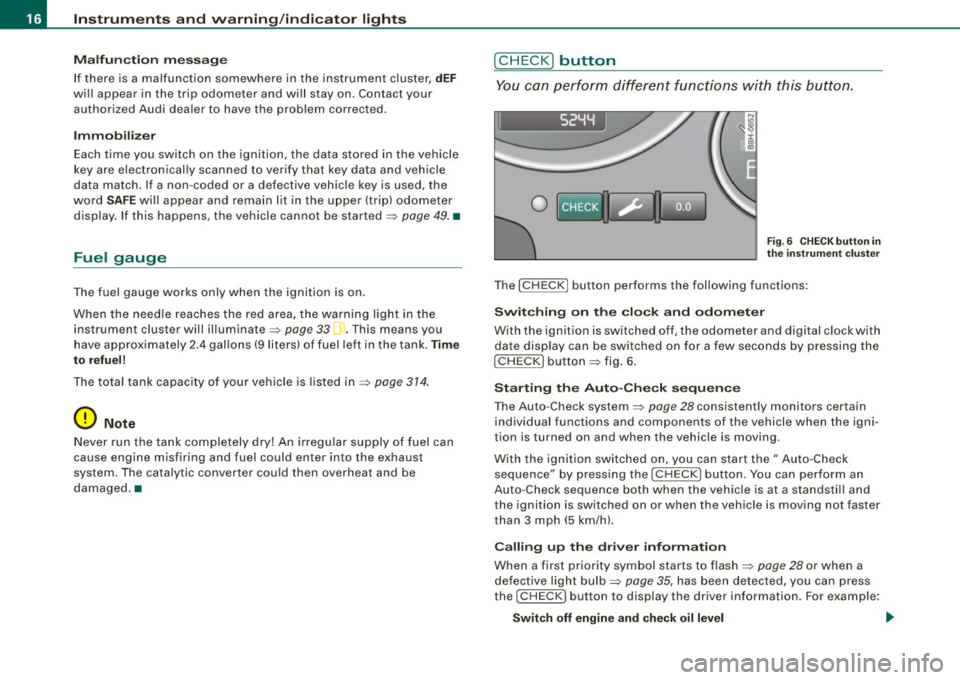
The [ CHECK] button performs the following functions:
S wi tch ing on t he cl ock and odome ter
With the ignition is switched off, the odometer and digital clock with
date disp lay can be switched on for a few seconds by pressing the
[CHECK] button=> fig. 6.
Sta rtin g t he A uto-Che ck se qu ence
The Auto-Check system=> page 28 consistently monitors certain
individual functions and componen ts of the vehicle when the igni
tion is turned on and when the vehicle is moving.
With the ignition switched on, you can start the" Auto-Check
sequence" by pressing the [
CHECK I button. You can perform an
Auto -Check sequence both when the vehic le is at a standstill and
the ignition is switched on or when the veh ic le is mov ing not faster
than 3 mph (5 km/h).
Ca lling up th e dri ver inform ation
When a first priority symbol starts to flash=> page 28 or when a
defective light bulb=>
page 35, has been detected, you can press
the
! CHECK] button to display the driver information. For example:
S witch off engine and chec k oi l le vel
Page 20 of 340
Instruments and warning /indicator lights
• The service display information will remain intact even if the
battery is disconnected .
• If a priority 1 malfunction is detected (red symbol), you cannot
display the distance remaining. •
Reset button
The "0.0" button=> page 17, fig. 7 @ performs the following func
tions :
Resetting the trip odometer
The upper odometer (trip odometer) => page 15 can be reset back to
zero by pressing the reset button.
Resetting the service interval
The service interva l display=> page 17 can be reset by pressing the
reset button (first select the "reset" mode in the service indicator
display). •
Warning /indicator lights
Overview
The warning/indicator lights indicate different functions
or a possible malfunction.
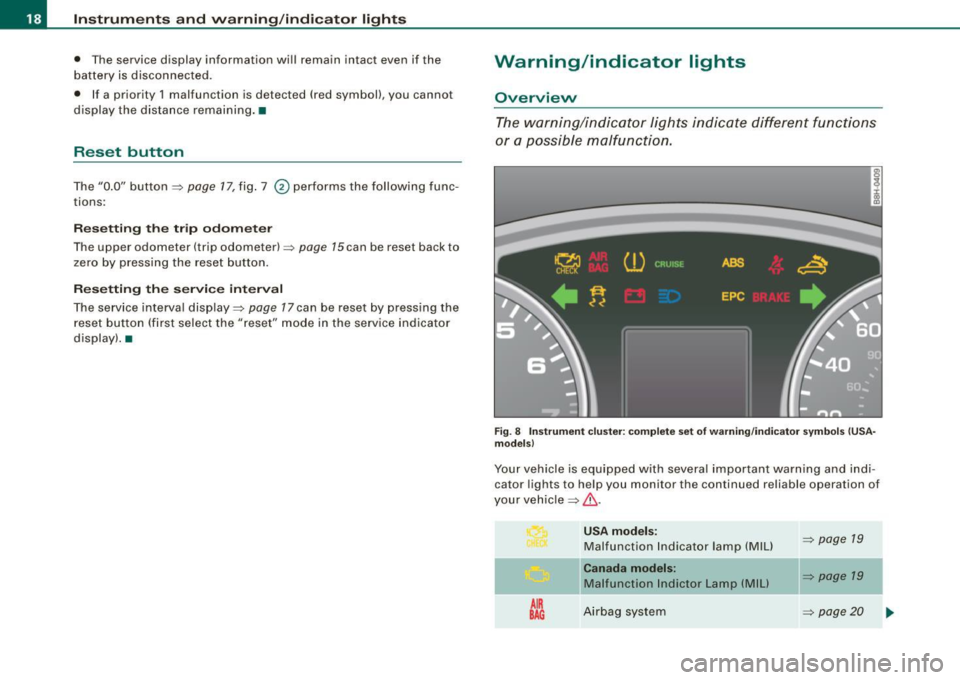
Fig. 8 Instrument clu ste r: complete set of warning /indi cator symbols (USA
models)
Your vehicle is equipped with several important warning and indi
cator lights to help you monitor the continued reliable operation of
your vehic le~
& -
AIR
BAG
USA models :
Malfunction Indicator lamp (MIU
Canada models:
Malfunction lndictor Lamp (MIU
Airbag sys tem
~ page 19
~ page 19
~ page20
Page 39 of 340
Saving a maximum sp eed
- Turn off the ignition .
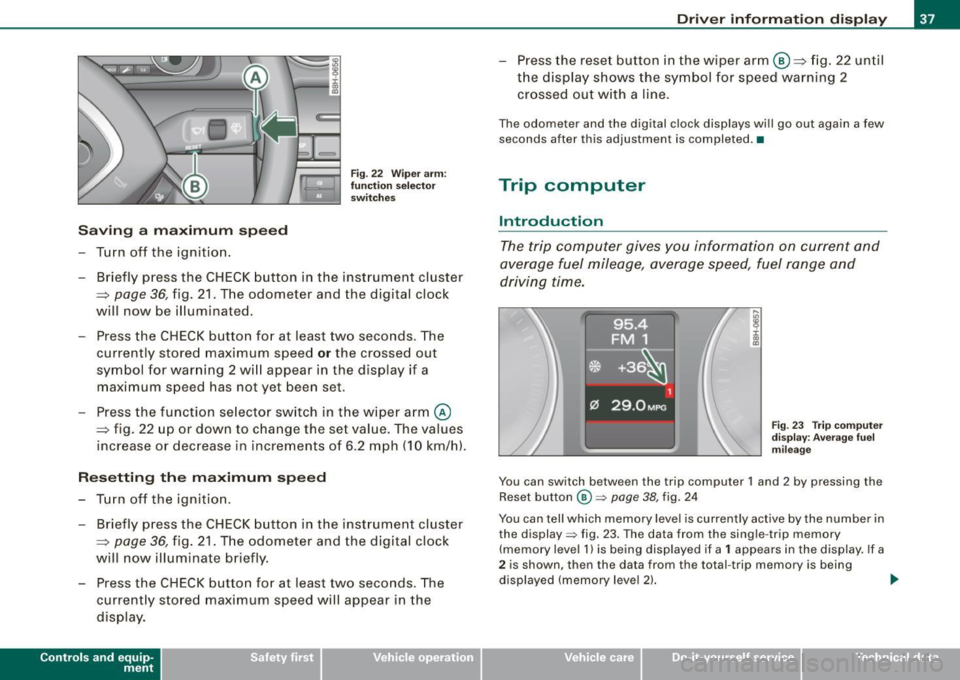
Fig. 22 Wiper arm :
fu nc tio n se lec to r
switches
- Briefly press the CHECK button in the instrument cluster
=> page
36, fig. 21 . The odometer and the digital clock
will now be illuminated.
Press the CHECK button for at least two seconds. The
currently stored maximum speed
o r the crossed out
symbol for warning 2 wi ll appear in the display if a
maximum speed has not yet been set.
Press the function se lector switch in the wiper arm@
=> fig. 22 up or down to change the set value . The values
increase or decrease in increments of 6 .2 mph (10 km/h).
R ese tting th e m aximum sp eed
- Turn off the ignition .
- Briefly p ress the CHECK button in the instrument cluster
=> page 36, fig. 21. The odometer and the digital clock
will now illuminate briefly .
- Press the CHECK button for at least two seconds. The
cu rrently stored maximum speed will appear in the
disp lay.
Contro ls and eq uip
ment
Dri ver informa tio n di spl ay
- Press the rese t button in the wiper arm@=> fig. 22 until
t h e d isplay shows the symbol for spe ed warning 2
crossed out w ith a line .
The odometer and the digital clock disp lays wi ll go out again a few
seconds after this adjustment is completed .•
Trip computer
Introduction
The trip computer gives you information on current and
average fuel mileage, average speed, fuel range and
driving time.
F ig . 23 Tr ip co mput er
d is pl ay : Ave ra ge f uel
mi leage
You can switch between the trip computer 1 and 2 by pressing the
Reset button
@ => page 38, fig. 24
You can tell which memory level is currently active by the number in
the display => fig. 23. The data from the single -trip memory
(memory level 1 l is being displayed if a
1 appears in the display. If a
2 is shown, then the data from the total -trip memory is being
displayed (memory leve l 2) . ..,_
~ehicle care Technical data
Page 51 of 340
Master key battery replacement
Each master key contains a battery housed under the
cover.
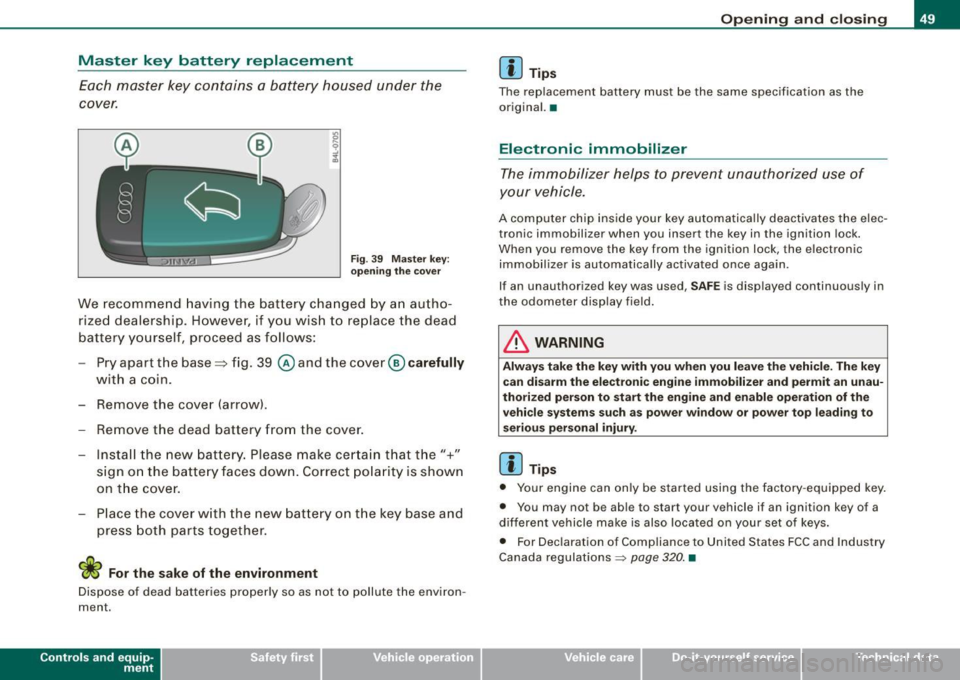
Fig. 39 Master key:
opening the cover
We recommend having the battery changed by an autho
rized dealership. However, if you wish to replace the dead
battery yourself, proceed as follows:
- Pry apart the base=> fig. 39
@ and the cover @carefully
with a coin.
- Remove the cover (arrow).
- Remove the dead battery from the cover.
- Install the new battery. Please make certain that the"+"
sign on the battery faces down. Correct polarity is shown
on the cover.
- Place the cover with the new battery on the key base and
press both parts together.
W For the sake of the environment
Dispose of dead batteries properly so as not to pollute the environ
ment.
Contro ls and eq uip
ment
Opening and closing
[ i] Tips
The replacement battery must be the same specification as the
original. •
Electronic immobilizer
The immobilizer helps to prevent unauthorized use of
your vehicle.
A computer chip inside your key automatically deactivates the elec
tronic immobilizer when you insert the key in the ignition lock.
When you remove the key from the ignition lock, the electronic
immobilizer is automatically activated once again.
If an unauthorized key was used,
SAFE is displayed continuously in
the odometer display field.
in. WARNING
Always take the key with you when you leave the vehicle. The key
can disarm the electronic engine immobilizer and permit an unau
thorized person to start the engine and enable operation of the
vehicle systems such as power window or power top leading to
serious personal injury.
[ i] Tips
• Your engine can only be started using the factory -equipped key.
• You may not be able to start your vehicle if an ignition key of a
different vehicle make is also located on your set of keys.
• For Declaration of Compliance to United States FCC and Industry
Canada regulations
~ page 320. •
~ehicle care irechnical data
Page 329 of 340

Alph ab eti ca l ind ex --------------=-----
Convertible locking retractor
Activating ...... ... .. .... ...... .. 202
Deactivating .. ... ..... ..... .. ... . 203
Using to secure a child safety seat 200 ,
202
Convertible top ........ .... .... .... .. 61
Coolant system
Cooling System 257
Expansion tank ... .... ...... .... .. 258
cornering light . .......... .. .... .... .. 79
Cruise control .. ... ... ...... ...... .. 123
Changing a stored sp eed . .... .... . 124
Setting and storing a vehicle speed . 124
Switching off .................... 125
Switching off temporari ly .. ........ 124
Switching on .... .... .... ...... .. 124
Warning/indicator lights ... ... .... .. 20
Cruising range .. .... .... .... ...... ... 37
Cupholder . ... .. ...... ..... .. .. .... 104
D
Data . .... ... . ... .. ... ... .... ..... . 314
Data recorder ... .... ...... ..... .... . 212
Date dis play . . . . . . . . . . . . . . . . . . . . . . . . . 14
Daytime running lights ... .. ... .. ... ... 78
Declaration of compliance Cell phone package .. .. .... .... ... 320
Elect ronic immobilizer . ..... .. .... 320
Homelink® universal remote con trol 320
Remote control key .. .... .... .... . 320
Tire pressure monitoring system ... 320
Controls and equip
ment Safety first
def
Dublicate key ... ...... ... .. . ... .... .. 47
What does this mean when it appears in
Dynamic shift program ....... ... ... . . 136
the trip odometer display? .. ...... . 15
Defogging the windows . ....... ..... . 116
E
Defrosting the windows .. ... ..... ... . 116
Determining correct load lim it ... .... . 276 ECON
Digi tal clock ............. .. ... ... .... 14 When should I use ECON?
... .... .. . 113
Setting the time ......... .... .... .. 14 EDL
Digital compass . ... ... . ... ... .. .... .. 90 See Electronic differential lock (EDU . 213
Dimensions ..... .... .... .... .... ... 313 Electric roof .
..... ... ..... .. .... .... . 61
Dipstick Electrically heated front seats .
.. .... .. 116
Reading the dipstick properly ...... 254 Electronic differential lock
Distance ... .... ... ... .. ... .... .... .. 38 Warning/indicator
lights ..... ... .... 20
Doors, power locks ........ ....... .... 53
Driver Electronic differ
ential lock (EDU
How the system works ...... .. .... 213
See S eating position .. ... ... ... ... 148 Electronic immobilizer ..
.. .. . .. .. .. 15, 49
Driver information dis play
Miles (kilometers) to empty .. .. ... .. 26 Electronic power control
EPC warning/indicator light ......... 22
Parking brake warning ... ... ..... .. 30 Electronic sp
eed limiter ..... .. .... .... 28
D river information sys.tern . .... ...... .. 24 Electronic stabilization program (ESP)
Driver information messages .. .... .. 29 How the system works ...
..... .. .. 212
Fuel filler cap . .. . ........ ....... .. 27 Elec
tronic stabiliza tion program (ESP)
Menu button .... . .. .. .... .... .... . 40 Warning/indicator lights
.... ...... .. 22
Menu display .... ... .... .... . ... .. 39 Emerg
ency flasher ... .... ... .. ....... 82
Open door or rear lid warning ...... . 26 Warning/indicator
lights .... ...... .. 21
Outside temperatu re disp lay ... ..... 25
Emergency locking . .... .... ... .. .. . .. 55
Sound system display .... .... .... .. 25
Emergency starting ..... ....... .. .... 304
Driver's seat memory ... .... .... ..... 101
Emergency towing . .. ... .. .. .... .... 306
Recalling a seat position .... .... ... 102
Engine
Storing a seat position ... ... .... .. 102
4-cylinder (200 hp) . ... .. .. .... .. .. 251
Driving messages ...... ........ ..... . 29
6-cylinder (255 hp) . ... .. .. .... .. .. 252
Driving safely . ... .. . ... .. .... .... ... 146
Compartment .... ... .. ...... .... . 251
Driving time . .... ...... .... ... .. .... . 37 Coolant ...
.. ... .... .... .... ..... 257
Vehicle operation Vehicle care Do-it-yourself service Technical data
Page 331 of 340
______________________________________________ A_ l_,_ p _h_ a_ b_e _t_i c_ a _ l _in _ d_e _ x __ fflll
Front seats
Adjusting .... ........... .... .... 149
Adjusting the manual seats ........ . 94
Child restraints in the front seat .... 170
Heated seat . . . . . . . . . . . . . . . . . . . . . 116
Frontal collisions and the laws of physics 160
Fuel Additives ............. .... .... ... 244
Blended gasoline ................. 244
Capacity ................. ....... 314
Consumption ..................... 37
Filler neck .. ...... .... ...... ... .. 245
Fuel gauge ...... .... .... ... .... .. 16
Gaso li n e ... .. .... .... ... .... .... 244
Gaso line additives ..... ... .... .... 245
Low fuel level ... .. .... .... .... . 16, 33
Octane rating ............. ....... 244
Recommendation ................ 244
Refuelling ..... ... ....... ..... ... 246
Reserve . .......... ............... 16
Unlocking the fuel filler flap by hand 248
Fuel filler cap . ...... .... .... ... .... .. 27
Fuse arrangement ... .... .... ... .... . 30 1
G
Garage door opener .. ...... .... .... . 139
Garage door opener {Homelink®) ..... 139
Gas discharge lamps .. ...... ... .... . 302
Gauges Eng ine coolant temperature ... ... .. 13
Fuel gauge ....................... 16
Speedome ter . ....... ..... ... .... . 15
Controls and equip
ment Safety first
T
achometer .... ... .. ... ... .. .... . 13
Trip odometer ...... .. .... ....... . 15
Genera l illus tration
Instruments and controls .... ... .. .. 11
Generator Warning/ind icator lights ...... .... .. 22
G lossary of tire and loading terminology .. .
268
G love compar tment . .... .... .... .... 107
A ir vent ilat ion . ........ .... ....... 108
Gross Vehicle Weight Rating {GVWR) ... 313
H
Head restraints .. .... ...... ... ...... 151
Adjusting .......... .......... 95, 151
Rear seats ... , .. , ...... , ........ , 101
Headlight range c ontr ol
Defective ... .. ... .... .... .... .... . 34
Headlights ...... ... .... .... .... .... . 76
adaptive ligh t .... ... .... .... ..... . 79
De fective ... .. ... .... .... .... .... . 35
Fr ont fog light s ...... .... .... .... . 79
Swi tching off .... .... .... .... .... . 76
Switching on .... .... .... .... .... . 76
Washer system .... ........ ........ 86
Headrest
See Head restrain ts . ...... .... .... . 95
Heated rear seats ....... ....... ... .... .. 117
Heated outside mirrors .... .... ....... . 89
Heated seats rear ... .. .... ...... ... .. .... .... 1 17 Heated washer jets
Wiper and washer system ... .... ... . 85
Heavy cl othing and safety belts .. ...... 162
High beam ....................... 76, 83
Warning/ind icator lights ............ 22
High vo ltage warning label ........... 312
Home link® ...... .... ... .... .... ... 1 39
Homelink® universal remote control .. . 139
Hood Release lever ... ........ ... ..... .. 249
Horn . ...... .... .... .... ... .... .... . 11
How many airbags does my vehicle have? ..
175
How often should I check my tire pressures?
275
How safety be lt p retensioners wo rk .... 166
Hydroplaning ....................... 279
I
Ignition key ............ ........ .... . 119
Ign it io n l ock
Positions ...... .... ... .... .... ... 11 9
Immob ilizer ...... ....... .... ....... . 15
Important things to do before driving .. 146
Imp roperly w orn safety be lts .. ....... . 166
Indicator light
Airbag system ............... 179, 180
PASSENGER A IR BAG OFF .......... 180
Indicator lights ... .... .... ..... .. .... . 18
Vehicle operation Vehicle care Do-it-yourself service Technical data
Page 333 of 340
Alph ab eti ca l ind ex -
-------------=----
Master key ........ .... . .... .. .. .... . 48
Battery replacement . .... .... ...... 49
Menu button ... .. ...... .... ...... ... 40
Menu display .... .... .... ... .... .... . 39
Mi leage
Average . ...... .. .... .... .... ..... 37
Instantaneous .................... 37
Mi les to empty . ... .. .... .... ...... ... 26
Mirrors Activating the digita l compass ..... . 90
Adjusting the ant i-g lare ... .... .... . 88
Automatic dimming for the outside mirrors . .... .... ....... ....... .. 90
Automatically dimming inside mirror . 88
Inside rearview mirror . .... ...... ... 88
Interior mirror .... .... .... .. ...... 88
Manual glare dimming ............ . 88
Outs ide mirrors . ........ ... .... ... 89
Recalling posit ion of outside mirrors 102
Storing positio n of outside mirrors .. 102
Monitoring the Advanced Airbag System ..
179
multitronic® ... ..... ... .... .... .... 131
Automatic Shift Lock (ASU . .... .... 135
Dr iving the multitronic® . ..... .... . 132
Dynamic shift program ... .... .... . 136
Fail -safe mode ... .... .... .... .... 137
Kick -down ... .... .... .... ... .... . 135
Manual sh ift program .. ...... .... . 136
Selector lever . . . . . . . . . . . . . . . . . . . . 133
Steering wheel with tiptronic® ..... 137
tiptronic .. ... .... .... ... .... .... 136
Controls and equip
ment Safety first
N
Natural leather
... .... .... .... ... .... 239
New tires and whee ls ...... ... .... ... 279
NH TSA
Contacting . ...... ..... .. .... .... 155
Number of seats .................... 159
0
Occupant seating positions . .... ...... 148
Octane rating .... .... .... .... .... ... 244
Odometer ........ ..... .. .... .... ... . 15
Oil See Engine oi l ....... ....... .. .... 252
O lder chi ldren and safety bel ts . ...... . 199
On -Board Diagnostic System ... .. .. .. .. 28
Electronic speed limiter ............ 28
Malfunction Indicator Lamp (MIU .... 27
On-Board Diagnostic System (OBD) .... . 28
Data Link Connector (DLC) ...... .... 28
Open do or o r rear l id wa rn ing ... .. .... . 26
Opening Power top .... ...... .... ..... .... . 62
Operate your vehicle economically and mini -
mize po llution ...... .... .... .... 221
Optional equipment Marked with an asterisk ... .... .... .. 6
Outlets ... .. .... ..... .. .... .... .... 1 06
Outside air pollution How to prevent from entering the vehicle 113
Outside mirrors ..... .... .... .... .... . 89 Outside temperature display
...... ..... 25
Owner's manual How the Owne r's Manual is orga nized . 6
p
Paint
Touch -up ... .. .... .... ... .... .... 235
Paint No ... ... .... .... ....... .... ... 312
Park assist ... .... .... ... .... ..... .. 122
Parking ...... .... .... ... .... .... ... 1 21
Automatic transmission .. ..... .... 126
multitronic® ....... ... .... .... ... 1 32
Parking brake ........ .... ... ........ 121
B rake warn ing .................... 30
Set ting a nd re leasi ng ..... .... .... 121
Parking light Defective . .... ........ .... ........ 35
Parking on a decline (downhill) ... ... .. 121
Parking on an incline (uphill) ... .... ... 121
Parktronic See Acoustic park assist .. ... ..... . 122
Parts rep lacement . ....... ... .... .... 318
PASSENGER A IR BAG OFF light ........ 180
Passive safety system . .... ...... .... . 146
Pedals . ... .. .... .... .... ... .... .... 152
Physica l principles of a frontal collision . 160
Po lishing ... .. .... .... ... .... .... ... 234
Power lock ing system ..... .... .... .... 50
Conven ience close/open feature .... . 53
Lock ing and unlocking the vehicle fr om
inside ... .... .... ... .... ..... .. . 54
Locking switch .... .... ... .... ..... 5 4
Vehicle operation Vehicle care Do-it-yourself service Technical data