oil pressure AUDI A4 SEDAN 2013 Owners Manual
[x] Cancel search | Manufacturer: AUDI, Model Year: 2013, Model line: A4 SEDAN, Model: AUDI A4 SEDAN 2013Pages: 294, PDF Size: 73.71 MB
Page 5 of 294
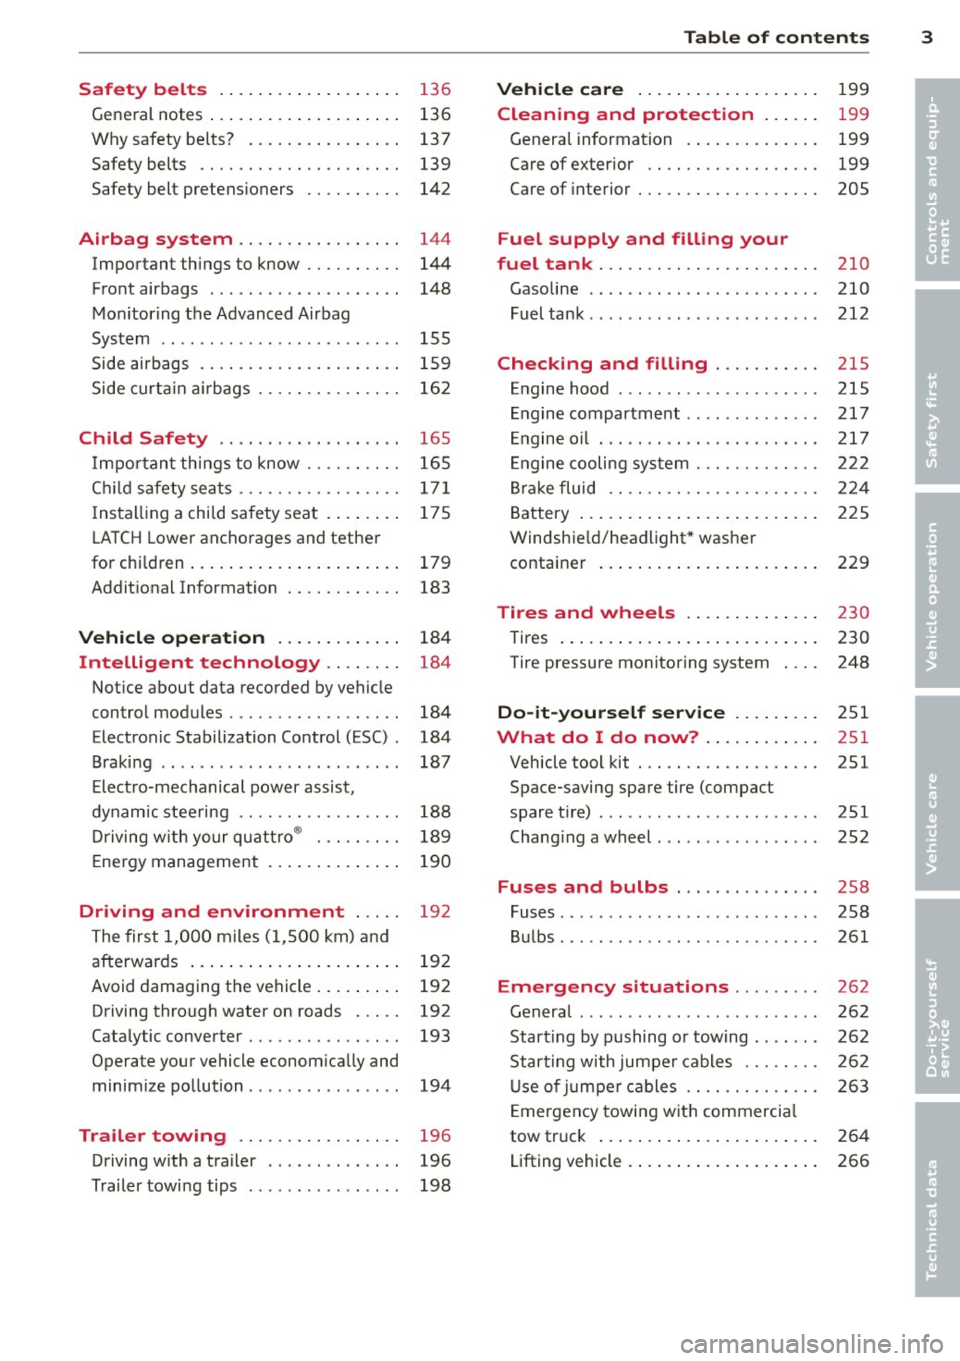
Safety belts . . . . . . . . . . . . . . . . . . . 136
General notes . . . . . . . . . . . . . . . . . . . . 136
Why safety be lts? . . . . . . . . . . . . . . . . 137
Safety belts . . . . . . . . . . . . . . . . . . . . . 139
Safety belt pretens ioners . . . . . . . . . . 142
Airbag system ................ .
Important things to know ......... .
Front airbags ................... .
Mon itor ing the Advanced Airbag
System ........................ .
Side airbags ............. .... .. . .
Side curta in a irbags .............. .
Child Safety ........ .... ... .. . .
Impor tant th ings to know ......... .
C hi ld safety sea ts ................ .
I nstall ing a chi ld safety seat . ... .. . .
L A T CH Lower anchorages and tether
for children ... .... .... ... .. .. .. . .
Addit ional Information
Vehi cle operat ion ..... .. .. .. . .
Intelligent technology .. .. .. . .
Not ice about data recorded by vehicle
control modules .......... .... .. . .
Electronic Stabilization Control (ESC) .
Braking .. ... ................ ... .
E lect ro-mechanical power assist ,
dynamic stee ring ................ .
Driving w ith your qu attro ® ... .. .. . . 144
144
148
155
1 59
162
165
165
17 1
175
179
183
184
184
184
184
187
188
189
E nergy management . . . . . . . . . . . . . . 190
Driving and environment . . . . . 192
The first 1,000 miles (1,500 km) and
afterwards . . . . . . . . . . . . . . . . . . . . . . 192
Avoid damaging the vehicle . . . . . . . . . 192
Driving through water on roads . . . . . 192
Catalytic converter . . . . . . . . . . . . . . . . 193
Operate your vehicle econom ically and
minim ize pollution . . . . . . . . . . . . . . . . 194
Trailer towing . . . . . . . . . . . . . . . . . 196
Driving w ith a trailer . . . . . . . . . . . . . . 196
Trailer towing tips . . . . . . . . . . . . . . . . 198
Table of contents 3
Vehicle care . . . . . . . . . . . . . . . . . . .
199
Cleaning and protection . . . . . . 199
Genera l information . . . . . . . . . . . . . . 199
Care of exterior . . . . . . . . . . . . . . . . . . 199
Care of interior . . . . . . . . . . . . . . . . . . . 205
Fuel supply and filling your
fuel tank ... .. .. .. . .............
210
Gasoline . . . . . . . . . . . . . . . . . . . . . . . . 210
Fuel tank .. .. .. .. .. . .. .... ...... . 212
Checking and filling . . . . . . . . . . . 21S
Engine hood . . . . . . . . . . . . . . . . . . . . . 215
Engine compartment . . . . . . . . . . . . . . 217
E ngine oil . . . . . . . . . . . . . . . . . . . . . . . 217
E ngine cooling system . . . . . . . . . . . . . 222
B ra ke fluid . . . . . . . . . . . . . . . . . . . . . . 224
Battery . . . . . . . . . . . . . . . . . . . . . . . . . 225
Windshie ld/headlight* washer
container . . . . . . . . . . . . . . . . . . . . . . . 229
Tires and wheels . . . . . . . . . . . . . . 230
Tires . . . . . . . . . . . . . . . . . . . . . . . . . . . 230
Tire pressure monitoring system 248
Do-it-yourself service . . . . . . . . . 251
What do I do now? . . . . . . . . . . . . 251
Vehicle tool kit . . . . . . . . . . . . . . . . . . . 251
Space-saving spare tire (compact
spare tir e) . . . . . . . . . . . . . . . . . . . . . . . 251
Changi ng a wheel . . . . . . . . . . . . . . . . . 252
Fuses and bulbs . . . . . . . . . . . . . . . 258
Fuses ... .. .. .. .. .. . .. .... ...... . 258
Bulbs . . . . . . . . . . . . . . . . . . . . . . . . . . . 261
Emergency situations . . . . . . . . . 262
General . . . . . . . . . . . . . . . . . . . . . . . . . 262
Starting by pushing or towing . . . . . . . 262
Star ting with jumpe r cables . . . . . . . . 262
U se of jumpe r cables . . . . . . . . . . . . . . 263
E mergency towing with commercia l
tow truck . . . . . . . . . . . . . . . . . . . . . . . 264
Lifting vehicle . . . . . . . . . . . . . . . . . . . . 266
•
•
Page 15 of 294
Instrument s and warnin g/indic ator ligh ts 13
(D Note
Never run the tank completely dry! An ir
reg ular supply of fuel can cause eng ine
m isfiring and fuel could enter into the ex
haust system. The catalyt ic converter
could the n overheat and be damaged .
Warning/indicator
Lights
Description
The indicator lights in the instrument cluster
blink or turn on . They indicate functions or
malfunct ions ¢,&. .
Messages may appear with some indicator
lights. A warning signal will sound at the
same time . The messages disappear again af
ter a short t ime . To display a message again ,
pressthelSE T!button
¢ page 11. If severa l
malfunc tions occu r, each of the indica to r/
warn ing lamps will be d isplayed in succession
for abo ut two seconds at a time .
Some ind icators lights in the disp lay can turn
on in several colors.
_& WARNING
- F ailure to heed warning lights and o ther
impor tant vehicle info rmation may result
in serious persona l injury o r vehicle dam
age.
- Whenever sta lled or stopped for repair,
move the vehicle a safe distance off the
road, stop the engine, and turn on the
eme rgency flasher¢
page 46.
-The e ngine compartment of any motor
vehicle is a potentially hazardous area.
Before you check anything in the engine
compartment, stop the engine and let it
cool down. Always exercise extreme cau
t ion when wor king under the hood
¢ page 208, Engine compartment
(D Tips
Ma lfunctions or faults w ill be identified ei
ther with a red symbo l (pr io rity 1 -Dan- ger!) or with a yellow symbol (prio
rit y 2 -
Warning).
' Overview
Some indicator lights t urn on briefly to check
the function of that system when you switch
the ignit ion on . These systems are marked
with a../ in the fo llow ing tables . If one of
these indicator lights does not tu rn on, there
i s a ma lf u nct ion in that system.
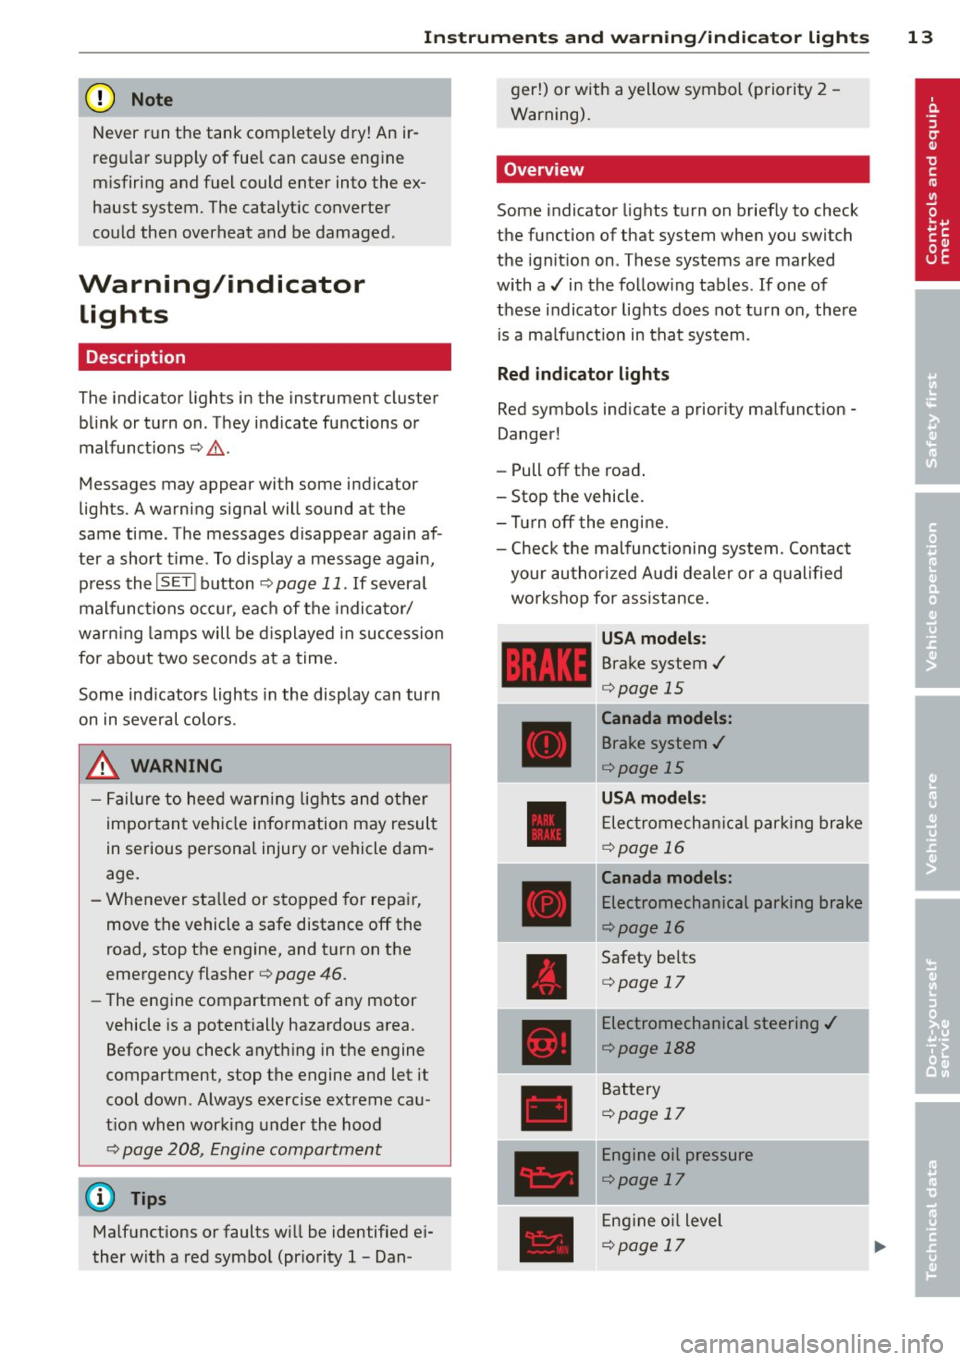
Red indicator lights
Red symbo ls indicate a prior ity ma lfunction -
Danger!
- Pull off the road .
- Stop the vehicle.
- Tur n off the engi ne.
- Check t he malfunc tioning system. Contac t
your author ized A udi dealer or a q ualified
workshop for assistance.
USA models :
Brake system../
¢page 15
----~r~
Canada models:
Brake system ../
¢page 15
USA mod els :
Elec tromech anical parki ng br ake
¢ page 16
Canada models:
Electromechanical parking brake
¢page 16
Safety be lts
¢ page 17
Electromechanical steering ../
¢page 188
Battery
¢page 17
Engine oil pressure
¢page 17
Eng ine oil level
¢page 17
Page 16 of 294
14 Instrum ent s and w arn ing /indic ato r light s
Engine cooling system Tire pressure monitor ing
¢ page 18
system,/
¢page249
Steering column lock Tire pressure monitoring system
¢ page 18
1181~1 ¢page249
Ignition lock
Im
Electronic power cont ro l ,/
r:::;,page 18
c:>page20
U SA mod els:
•
Malfunction indicator Lamp
Speed warning system (MIL),/
r:::;, page 79
c:> page 20
Canada models :
•
Engine speed limitation
Speed warning system c:>page 21
r:::;,page 79
Engine oil level
Aud i adapt ive cru ise control./
•
c:>page 17
¢ page 100
•
Engine o il sensor
Yellow indic ato r lights c:> page 21
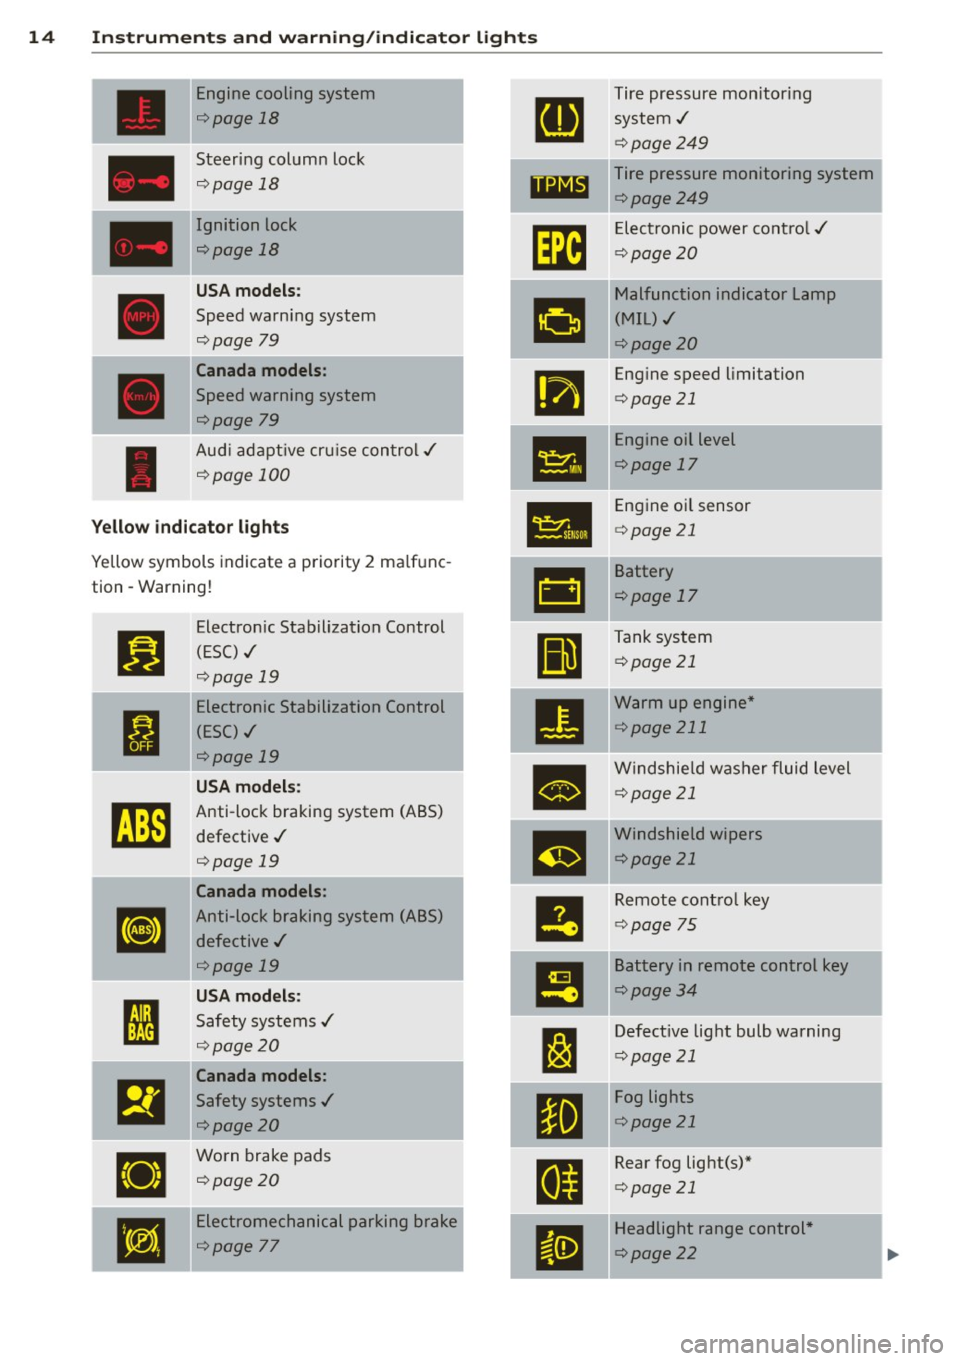
Yellow symbols indicate a priority 2 ma lfunc-
-
&1
Battery
tion -Warning!
c:>page 17
Jj]
Electron ic Stabilization Control
Ill
Tank system
(ESC) ,/
c:>page 21
r:::;, page 19
-Electronic Stabilization Control
•
Warm up engine *
ti
(ESC) ./ c:>
page 211
r:::;, page 19
•
Windshie ld washer fluid level
U SA m odel s: c:>page 21
~
Anti-lock braking system (ABS)
defective ,/
m
Windshield wipers
r:::;, page 19 c:>page
21
Canada models :
le
Remote control key
[I]
Anti-lock braking system (ABS)
c:>page 75
defective ,/
r:::;, page 19
I!
Battery in remote control key
USA models: c:>page 34
I
Safety systems ,/ --
l:J
Defective light bulb warning ' r:::;, page 20
c:>page 21
Canada models :
El
Safety systems ,/
•
Fog lights
<=>page20 c:>
page 21
•
Worn brake pads
E
Rear fog light(s)*
<=> page 20
c:>page 21
•
Electromechanical parking brake
II
Headlight range control *
<=>page
77 c:> page 22
Page 19 of 294
Instruments and warning/indicator lights 17
malfunction. Drive to your autho rized Audi
dealer or qualified workshop immediately to
have the malfunction corrected.
~ Safety belts
This warning/indicator light reminds you to
put on your safety belt.
The . warning/ind icator light ill uminates
when the ignition is switched on to remind
the driver and any front passenger to put on
the safety belt. Additionally, an acoustic warn
ing (gong) will also sound.
For more Information ¢
page 136, Safety
belt warning light.
0 Battery
T he . warning/indicator light illuminates
when you switch on the ignition and must go
out after the engine has started.
• Alternator fault: Battery is not being
charged
If the indicator light turns on and the mes
sage appears, there is a malfunction in the
generator or vehicle e lectrica l system .
Drive to your autho rized Aud i dealer or quali
fied workshop immediately . Because the vehi
cle battery is discharging, turn
off all unnec
essary electrical equipment such as the radio .
Seek professional assistance if the battery
charge level is too low.
(•) Low battery: Battery will be charged
while driving
If the indicator light turns on and the mes
sage appears , there may be limited starting
ability .
If thi s message turns off after a litt le w hile,
the battery charged eno ugh wh ile driving.
If the message does not turn
off, have your
author ized Audi dealer or qualified workshop
correct the malfunction.
"l::;r: Engine oil pressure
The red engine oil pressure warning symbol
requires immediate service or repair . Driving
with a low-oil-pressure indication is likely to
inflict severe damage to the engine.
• Turn off engine! Oil pressure too low
If the indicator light turns on and the mes
sage appears, the oil pressure is too low.
.,. Pull
off the road .
.,. Stop the vehicle.
.,. Turn
off the engine.
.,. Check the engine oil level ¢ page 220.
.,. If the eng ine oil level is too low, add eng ine
oil ¢
page 220 . Make sure that the oil pres
sure warning symbol. appears no longer
in the display before you start dr iv in g again .
.,. If the engine oil level is correct and the ind i
cator light still turns on, turn the engine
off
and do not continue driving. Seek professio
na l assistance .
(D Tips
- The engine oil pressure symbol. is
not an indicator for a low engine oil lev
el. Do not rely on it. Instead, check the
oil level in your engine at regular inter
vals, preferably each time you refuel,
and always before going on a long trip.
- The yellow oil level warning indication
l!I requires oil refill or workshop serv
ice without delay. Do not wait until the
red oil pressure warning. starts to
flash before you respond to the low oil
level warning
1!1-By then, your engine
may already have suffered serious dam
age.
~ .. Engine oil level
• WARNING: Please add oil immediately
If the indicator light and the message appear,
add engine oil immediately
¢ page 220.
Page 77 of 294
CD Note
If the engine has been under heavy load
for an extended period, heat builds up in
the engine compartment after the engine
is switched off- there is a risk of damaging
the engine . Allow the engine to run at idle
for about two minutes before switching it
off.
Convenience key
Starting the engine
Applies to vehicles: with convenience key
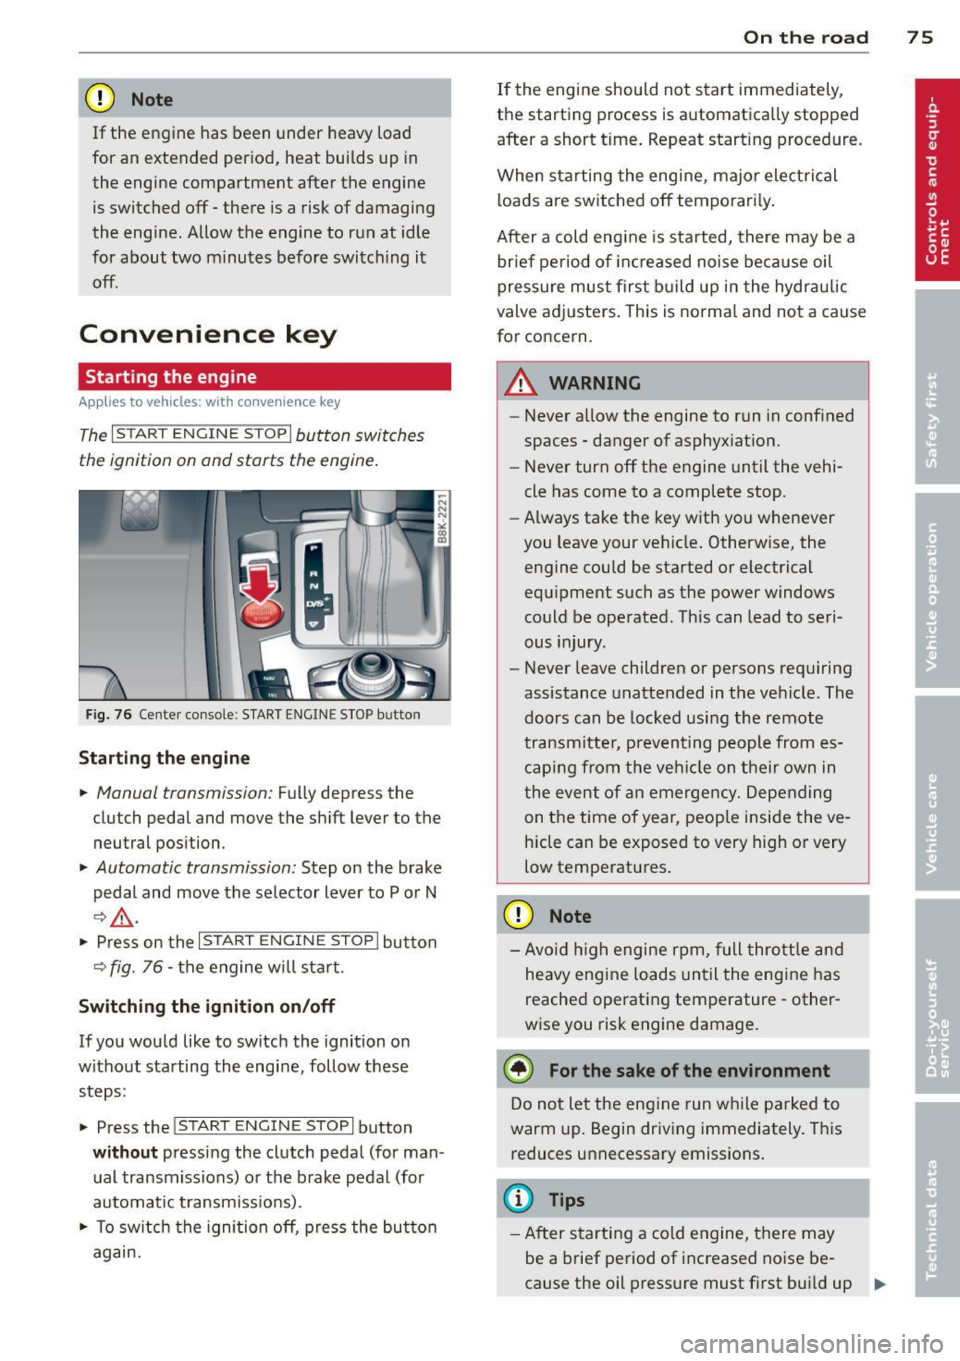
The I STAR T ENGINE ST OPI button switches
the ignition on and starts the engine.
Fig. 76 Ce nter console : S TART ENGINE STOP b utto n
Starting the engine
.. Manual transmission: Fully depress the
clutch pedal and
move the shift lever to the
neutral position .
.. Automatic transmission: Step on the brake
pedal and
move the selector lever to P or N
~ .&, .
.. Press on the I STAR T ENGINE S T OPI button
~ fig . 76 - the engine will sta rt.
Switching the ignition on/off
If you would like to switch the ignition on
without starting the engine, follow these
steps :
.. Press the
!START E NGIN E STOPI button
without pressing the clutch pedal (for man
ual transmissions) or the brake pedal (for
automatic transmissions) .
.. To switch the ignition off, press the button
again.
On the road 75
If the engine should not start immediately,
the starting process is automatically stopped
after a short time. Repeat starting procedure .
When starting the engine , major electrical
loads are switched off temporarily.
After a cold engine is started, there may be a
brief period of inc reased noise because oil
pressure must first build up in the hydraulic
valve adjusters. This is norma l and not a cause
for concern.
A WARNING
- Never allow the engine to run in confined
spaces - danger of asphyxiation.
- Never turn off the engine until the vehi
cle has come to a complete stop.
- Always take the key with you whenever
you leave your vehicle. Otherwise, the
engine could be started or electrical
equipment such as the power windows
could be operated . This can lead to seri
ous injury .
- Never leave children or persons requiring
assistance unattended in the vehicle. The
doors can be locked using the remote
transmitter, preventing people from es
caping from the vehicle on their own in
the event of an emergency. Depending
on the time of year, peop le inside the ve
hicle can be exposed to very high or very
low temperatures .
CD Note
-Avo id high engine rpm, full throttle and
heavy engine loads until the engine has
reached operating temperature - other
wise you risk engine damage.
@ For the sake of the environment
Do not let the engine run while parked to
warm up. Begin driving immediately. This
reduces unnecessary emissions.
(D Tips
-After starting a cold engine, there may
be a brief period of increased noise be-
cause the oil pressure must first bui ld up
II-
Page 221 of 294
temperatures stay below freezing point for l ong periods.
Detergent add itives in the o il w il l make fresh
oil look dark after the eng ine has been run
ning fo r a short time . This is norma l and is not
a reason to change the oi l more often than
recommended.
D am ag e or m alfun ction s due to lack of
ma intenanc e
It is essential that you change your oil at the
r ecommended inte rva ls using only engine o il
t hat complies wi th A udi oi l standard
VW 502 00 . Your Limited New Vehicle War
ranty does not cover damage or malfunctions
d ue to fa ilure to fo llow recommended mainte
nance and use requ irements as set forth in
the Audi Owner's Manua l and Warranty
&
Maintenance book let . Your dea ler will have to
deny warranty coverage u nless you present to
the dea ler p roof in the fo rm of Serv ice or Re
pa ir Orde rs that all s chedu led maintenance
wa s pe rformed in a t imely manner .
Engine oil consumption
The engine in your vehicle dep ends on an ade
quate amount of oil to lubricate and cool all
of its moving parts.
In o rder to provide effective lubrication and
cool ing of i nternal engine components, a ll in
ternal comb ustion eng ines consume a cert ain
amo unt of o il. Oil cons umption varies from
engine to engine and may change significantly
over the life of the engine. Typ ica lly, engines
with a specified break-in per iod (see
¢
page 192) consume more oil during the
break-in per iod than they consume after oil
consumption has stabilized .
Under norma l conditions, the rate of oil con
sumpt ion depends on the quality and viscosity
of the oil, the RPM (revo lutions per m inute) at
which the engine is operated, the amb ient
temperature and road condit ions. Furthe r fac
tors ar e the amount of o il d ilution from wate r
condensation or fuel residue and the ox ida
tion level of the oi l. As any engine is s ubje ct to
Checkin g and fillin g 219
wear as m ileage builds up, the oil consump
tion may increase over time until replacement
of worn components may become necessary.
Wi th a ll these variab les coming into p lay, no
standard rate of oil consumpt ion can be es
tablished or specified. There is no alternative
to regular and frequent check ing of the o il lev
el, see
Note .
If the yellow engine oil leve l warning symbo l
1\1 in the instrument cluster lights up , you
sho uld check the oil leve l as soon as possib le
¢
page 220. Top off the oil at your earliest
convenience ¢
page 220.
A WARNING
Before you check anythi ng i n the engi ne
compartment, always read a nd heed all
WARNINGS¢ .&.
in Working in th e engine
c ompartment on page 215.
(D Note
D riving w ith an insufficient o il level is like
ly to cause sever e damage to the engine .
(D Tips
- The oil pressure warning display. is
not an indicator of the oil le vel. Do not
rely on it . Instead, check the oil level in
your engine at regu lar intervals, pref
erably ea ch time you refuel, and always
before going on a long trip .
-If you have the impression yo ur engi ne
c ons umes ex ce ss ive amoun ts of o il, we
recommend that you consul t an a uthor
ized Aud i dea ler to have the cause of
your concern properly d iagnosed. Keep in
mind that the accurate measu rement of
oil consumption requ ires great care and
may take some t ime. An authorized Aud i
dealer has instructions about how to
measu re oil consumption accurately.
-
•
•
Page 225 of 294
The location of the coolant expansion tank
can be seen in the engine compartment illus
tration
q page 217 .
To obtain an accurate read ing , the eng ine
must be switched off .
The expa nsion tank in you r vehicle is equipped
with an elec tric coolant level sensor.
When the coolant level is too low, the warning
light in the Auto-Check System
q page 18 wi ll
b lin k until you add coo lant and the level has
been restored to norma l. Even t hough the re is
an e lec tric coolant level sensor, we s till rec
ommend you check the coolant leve l from
time to time .
Coolant loss
Coolant loss may indi cate a leak in the coo ling
sys tem. In the event of coolant loss, the cool
ing system should be inspected immedia tely
by your authorized A udi dealer. It is not
enough merely to add coolant.
I n a
s ealed system, losses can occur only if
the boiling point of the coolant is exceeded as
a result of overheating.
A WARNING
The cooling system is unde r press ure and
can get ve ry hot. Reduce the risk of sca ld
ing from hot coolant by following these
steps.
- Turn off the engine and allow it to coo l
down.
- Protect yo ur face, hands and arms from
escaping fluid and steam by covering the
cap with a large, thick rag.
- Turn the cap slowly and very carefu lly in
a counter-clockwise direction wh ile ap
plying light, downward pressure on the
t op of the cap .
- To avoid being bu rned, do not spill ant i
freeze or coo lant on the exhaust system
o r hot eng ine parts . Unde r certai n condi
t ions, the ethy lene g lycol in engine cool
an t ca n catc h fire.
Checkin g and fillin g 223
@ Note
Do not ad d any type of radiator leak sea l
ant to your ve hicle's engine coolant. Add
i ng radiator repa ir flui d may adverse ly af
fect the funct ion and performance of your
cooling system and could result in damage not cove red by your New Vehicle l imi ted
Warranty .
Adding coolant
Be very careful when adding engine coolant.
Before you check anyth ing in the eng ine com
partment,
always read and heed all WARN
INGS q & in Working in the engine compart
ment on page
215 .
.,. Turn off the engine.
.,. let the engi ne cool down.
.,. Place a thick rag over the coolant expansion
tank
q page 222, fig . 170 and carefully turn
the cap counter-clockwise
q &_ .
.,. Add coo la nt.
.,. Twist the cap o n aga in
tightly.
Rep lacement engine coo lant must confo rm to
exact spec ificat ions
q page 222, Coolant. We
recommend using on ly coo lant additive G 12+
+ , G 13 or in an eme rgency G12+. Do
not use a
different additive. In an emergency use pla in
water until you can get the correct additive
and can restore the correct ratio . This sho uld
be done as soon as possible.
If you have los t a cons iderab le amount o f
coolant , then you sho uld add cold antifreeze
and co ld water on ly when the engine is cold.
A lw ays use
new engine coo lant w hen refilling.
Do not f ill coo lant above t he "MAX" mark. Ex
cess coola nt w ill be fo rced o ut through t he
pressure relief valve in the cap when the en
gine becomes hot.
A WARNING
- The cooling system is under pressure and
can get very hot. Reduce the risk of ..,.
•
•
Page 249 of 294
driving a few yards and correct if neces
sary . Follow the instructions from the
snow cha in manufacturer when doing so.
(D Tips
Where snow chains are mandatory oncer
tain roads, this norma lly also applies to
veh icles with all wheel drive.
Wheel bolts
Wheel bolts must always be tightened to the
correct torque.
The design o f whee l bolts is matched to the
factory insta lled r ims . If different rims are fit
ted, the correct wheel bo lts wit h the right
l ength and correctly shaped bolt heads must
be used. This ensures that wheels are f itted
securely and that the brake system functions
correctly .
In certain circumstances, you may not use
wheel bo lts from a different vehicle -even if it
is the same model
<=> page 274.
A WARNING
Improperly tightened or maintained wheel
bolts can become loose caus ing loss of
cont ro l, a co llision and serious persona l in
Jury .
- Always keep the w heel bolts and the
threads in the wheel hubs clea n so the
w hee l bolts can t urn easily and be p rop
erly t igh tened.
- Never grease or oil the wheel bolts and
the threads in the wheel h ubs. They can
become loose wh ile d riving if greased or
oiled, even if tightened to the specified
torq ue.
- Only use whee l bo lts that belong to the
rim being installed .
- Never use different whee ls bolts on your
vehicle.
- Alw ays m ain ta in the co rrec t tig hten ing
torq ue fo r the wheel bo lts to reduce the
risk of a wheel loss . If the tightening tor
que of the wheel bo lts is too low, they
can loosen and come out when the vehi-
Tire s an d wheel s 24 7
cle is mov ing. If the tightening torq ue is
too high, the wheel bolts and threads
can be damaged and the whee l can be
come loose.
@ Note
The specified torque for the whee l bolts is
90 ft lbs . (120 Nm) w ith a tolerance of
± 7,4 ft lbs. (± 10 Nm). Torque whee l bolts
diagonally . After changi ng a wheel, the
torque m ust be checked as soon as poss i
ble with a to rque wrench -preferably by an
a uthorized Aud i dea le r or qualified wor k
shop.
Low aspect ratio tires
Your A udi is fac tory -eq uipped w ith low aspect
ratio tires . These tires have been tho ro ughly
tested and been se lected specifically for your
model for their superb performance, road fee l
and handling under a variety of driving condi
tions . Ask your authorized Aud i dealer for
more details.
The low aspect ratio of these t ires is ind icated
by a numeral of
55 or less in the tire's size
designation. The numera l represents the ratio
of the tire's sidewa ll height in relation to its
tread width exp ressed in percentage. Conven
tiona l tires have a he ight/w idth ratio of 60 or
more.
The performance of low-a spect-r atio tire s is
particularly sensit ive to improper inflation
pre ssure. It is therefor e important that low
a spect ratio tire s are inflated to the specified
pres sure and that th e inflation pr essure i s
regularly checked and maintained. Tire pre s
sure s should be chec ked at lea st once a
month and always before a long trip
<=> page 236, Checking tire pressure.
What you can do to avo id tire and rim
damage
Low aspect ratio tires can be damaged mo re
easily by impact w ith potholes, curbs, gull ies
or ridges on the road, particularly if the tire is
under inflated . ..,.
•
•
Page 283 of 294
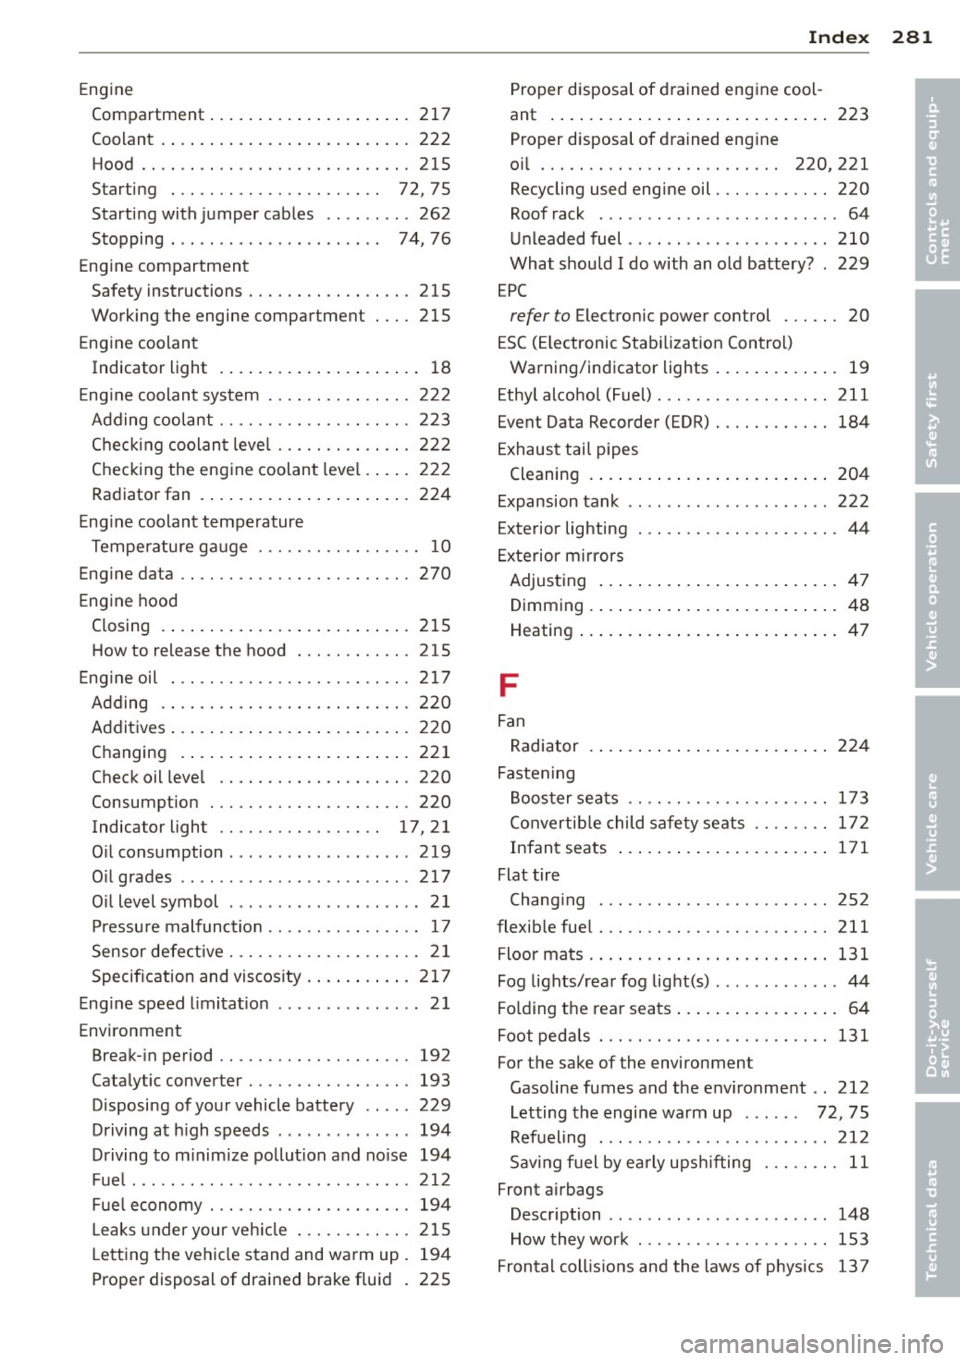
Engine Compartment ................ .. ... 217
Coolant .. .. ................. .. .. . 222
Hood .... .. ................. .. ... 215
Starting . . . . . . . . . . . . . . . . . . . . . . 72, 75
Starting with jumper cables .. .. . ... . 262
Stopping . . . . . . . . . . . . . . . . . . . . . . 74, 76
Engine compartment Safety instructions ........ .. .. .. .. . 215
Working the engine compartment 215
Engine coolant
Indicator light . . . . . . . . . . . . . . . . . . . . . 18
Engine coolant system ...... .. .. .. .. . 222
Adding coolant ........... .... .. .. . 223
Checking coolant leve l ..... .. .. .. .. . 222
Checking the engine coolant level .. .. . 222
Radiator fan ................ ... ... 224
Engine coolant temperature
Temperatu re gauge ....... .. .. .. .. .. 10
Engine data .. ............. .... .. ... 270
Engine hood Closing . . . . . . . . . . . . . . . . . . . . . . . . . . 215
How to release the hood ... .. .. .. .. . 215
Engine oil ... .. ........... .. .. .. ... 217
Adding .. .. ............. .... .. ... 220
Additives ... ................ ... ... 220
Changing . ................. ... ... 221
Check oil level ........... .. .. .. ... 220
Consumption ............ .... .. .. . 220
Indicator light ........... .. .. .. 17,21
Oil consumption . ............. ... .. 219
Oil grades ................ ... ... .. 217
O il level symbol ............. ... ... . 21
Pressure malfunction ...... .. .. .. .. .. 17
Sensor defective . . . . . . . . . . . . . . . . . . . . 21
Specification and viscosity . . . . . . . . . . . 217
Engine speed limitation ........ .... ... 21
Environment Break-in period ........... .... .. ... 192
Catalytic converter ........ .. .. .. .. . 193
Disposing of your vehicle battery .. .. . 229
Driving at high speeds .......... .... 194
Driving to minimize pollution and noise 194
Fuel ..... .. ................. .. ... 212
Fuel economy . ........... .. .. .. ... 194
Leaks under your vehicle ... .. .. .. .. . 215
Letting the vehicle stand and warm up. 194
Proper disposal of drained brake fluid . 225
Index 281
Proper disposal of drained engine cool-
ant ....... ... .... ............... 223
Proper disposal of drained eng ine
oil . . . . . . . . . . . . . . . . . . . . . . . . . 220, 221
Recycling used engine oil ............ 220
Roof rack . . . . . . . . . . . . . . . . . . . . . . . . . 64
Unleaded fuel .. .. .. . .. .... ........ 210
What should I do with an old battery? . 229
EPC
refer to E lectronic power control . . . . . . 20
ESC (Electronic Stabilization Control)
Warning/indicator lights ............. 19
Ethyl alcohol (Fuel) . . . . . . . . . . . . . . . . . . 211
Event Data Recorder (EDR) ............ 184
Exhaust tail pipes
Cleaning ... ..... .. ............... 204
Expansion tank .. .. .. ............... 222
Exterior lighting . .. ............... .. .
44
Exterior mirrors
Adjusting ..... .... ................ 47
Dimming ... ..... .. ................ 48
Heating ....... .... ................ 47
F
Fan
Radiator 224
Fastening Booster seats .. .. .... ......... .... 173
Convertib le child safety seats .... .. .. 172
Infant seats ..... ................. 171
Flat tire
Chang ing ... .. .... ... .......... .. 252
flexible fuel . .. .. .. .. .. ........... .. 211
Floor mats ... ... .... ............... 131
Fog lights/rear fog light(s) ............. 44
Fo lding the rear seats ............... .. 64
Foot pedals . .. .. .. .. . .............. 131
For the sake of the environment Gasoline fumes and the environment .. 212
Letting the engine warm up . . . . . . 72, 75
Refueling . .. .. .. .. ............... 212
Saving fuel by early upsh ifting ..... .. . 11
Front airbags Description . . . . . . . . . . . . . . . . . . . . . . . 148
How they work ... .. ... ....... .... . 153
Frontal collisions and the laws of physics 137
•
•