headlights AUDI A5 2008 8T / 1.G User Guide
[x] Cancel search | Manufacturer: AUDI, Model Year: 2008, Model line: A5, Model: AUDI A5 2008 8T / 1.GPages: 313, PDF Size: 12.13 MB
Page 58 of 313
Lights and vision 56
CautionTo avoid dazzling the traffic behind you, the rear fog light should
only be used in accordance with statutory regulations.Exterior lighting settings
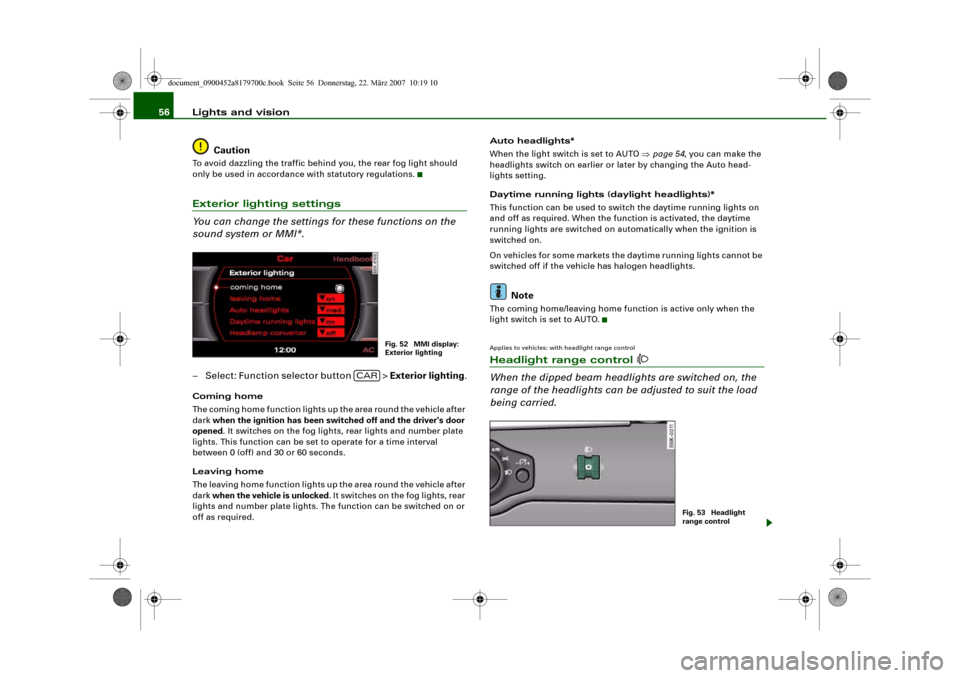
You can change the settings for these functions on the
sound system or MMI*.– Select: Function selector button > Exterior lighting.Coming home
The coming home function lights up the area round the vehicle after
dark when the ignition has been switched off and the driver's door
opened. It switches on the fog lights, rear lights and number plate
lights. This function can be set to operate for a time interval
between 0 (off) and 30 or 60 seconds.
Leaving home
The leaving home function lights up the area round the vehicle after
dark when the vehicle is unlocked. It switches on the fog lights, rear
lights and number plate lights. The function can be switched on or
off as required.Auto headlights*
When the light switch is set to AUTO ⇒page 54, you can make the
headlights switch on earlier or later by changing the Auto head-
lights setting.
Daytime running lights (daylight headlights)*
This function can be used to switch the daytime running lights on
and off as required. When the function is activated, the daytime
running lights are switched on automatically when the ignition is
switched on.
On vehicles for some markets the daytime running lights cannot be
switched off if the vehicle has halogen headlights.
Note
The coming home/leaving home function is active only when the
light switch is set to AUTO.Applies to vehicles: with headlight range controlHeadlight range control
When the dipped beam headlights are switched on, the
range of the headlights can be adjusted to suit the load
being carried.
Fig. 52 MMI display:
Exterior lighting
CAR
Fig. 53 Headlight
range control
document_0900452a8179700c.book Seite 56 Donnerstag, 22. März 2007 10:19 10
Page 59 of 313
Lights and vision57
Controls
Safety
Driving tips
General maintenance
Self-help
Technical data
– Turn the thumbwheel
⇒page 56, fig. 53 to the appro-
priate setting.
Adjustment settings
The settings correspond roughly to the following load conditions:
Two front occupants, luggage compartment empty
All seats occupied, luggage compartment empty
All seats occupied, luggage compartment loaded
Driver only, luggage compartment loaded
Caution
Always adjust the headlights to avoid dazzling oncoming traffic.
Make sure you lower the headlights when the vehicle is carrying a
heavy load.Instrument lighting
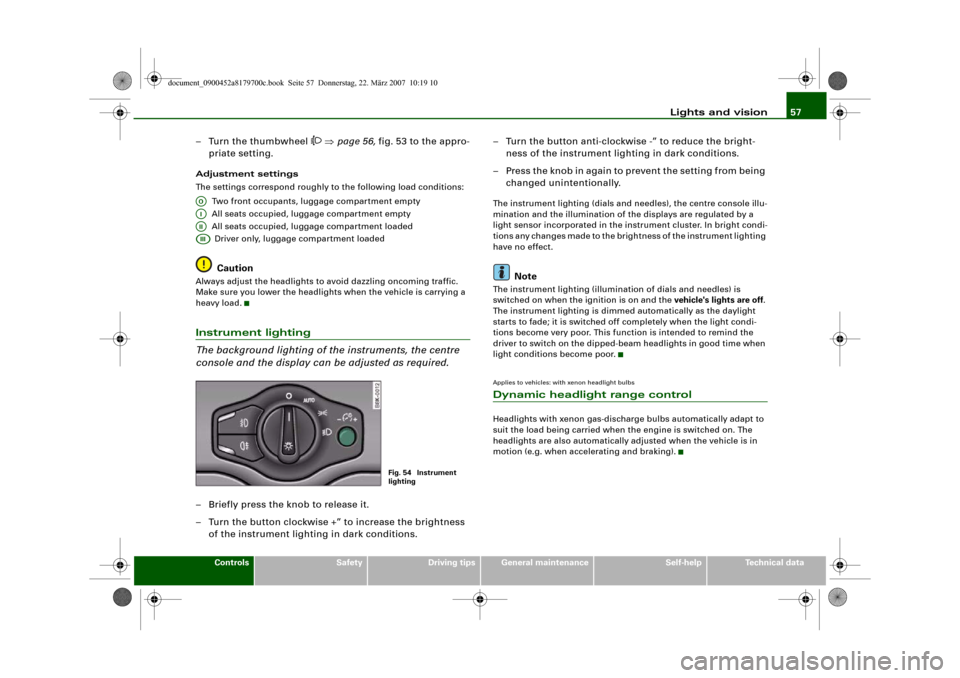
The background lighting of the instruments, the centre
console and the display can be adjusted as required.– Briefly press the knob to release it.
– Turn the button clockwise +” to increase the brightness
of the instrument lighting in dark conditions.– Turn the button anti-clockwise -” to reduce the bright-
ness of the instrument lighting in dark conditions.
– Press the knob in again to prevent the setting from being
changed unintentionally.
The instrument lighting (dials and needles), the centre console illu-
mination and the illumination of the displays are regulated by a
light sensor incorporated in the instrument cluster. In bright condi-
tions any changes made to the brightness of the instrument lighting
have no effect.
Note
The instrument lighting (illumination of dials and needles) is
switched on when the ignition is on and the vehicle's lights are off.
The instrument lighting is dimmed automatically as the daylight
starts to fade; it is switched off completely when the light condi-
tions become very poor. This function is intended to remind the
driver to switch on the dipped-beam headlights in good time when
light conditions become poor.Applies to vehicles: with xenon headlight bulbsDynamic headlight range controlHeadlights with xenon gas-discharge bulbs automatically adapt to
suit the load being carried when the engine is switched on. The
headlights are also automatically adjusted when the vehicle is in
motion (e.g. when accelerating and braking).
AOAIAIIAIII
Fig. 54 Instrument
lighting
document_0900452a8179700c.book Seite 57 Donnerstag, 22. März 2007 10:19 10
Page 60 of 313
Lights and vision 58Applies to vehicles: with adaptive lightadaptive light
This feature provides better illumination when you drive
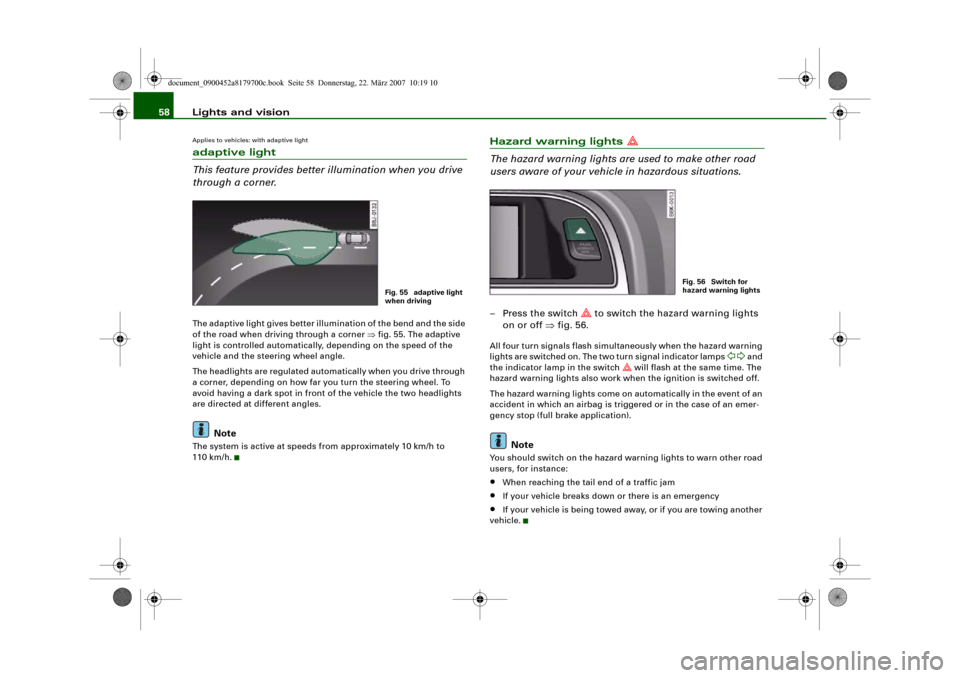
through a corner.The adaptive light gives better illumination of the bend and the side
of the road when driving through a corner ⇒fig. 55. The adaptive
light is controlled automatically, depending on the speed of the
vehicle and the steering wheel angle.
The headlights are regulated automatically when you drive through
a corner, depending on how far you turn the steering wheel. To
avoid having a dark spot in front of the vehicle the two headlights
are directed at different angles.
Note
The system is active at speeds from approximately 10 km/h to
110 km/h.
Hazard warning lights
The hazard warning lights are used to make other road
users aware of your vehicle in hazardous situations.– Press the switch
to switch the hazard warning lights
on or off ⇒fig. 56.
All four turn signals flash simultaneously when the hazard warning
lights are switched on. The two turn signal indicator lamps
and
the indicator lamp in the switch
will flash at the same time. The
hazard warning lights also work when the ignition is switched off.
The hazard warning lights come on automatically in the event of an
accident in which an airbag is triggered or in the case of an emer-
gency stop (full brake application).
Note
You should switch on the hazard warning lights to warn other road
users, for instance:•
When reaching the tail end of a traffic jam
•
If your vehicle breaks down or there is an emergency
•
If your vehicle is being towed away, or if you are towing another
vehicle.
Fig. 55 adaptive light
when driving
Fig. 56 Switch for
hazard warning lights
document_0900452a8179700c.book Seite 58 Donnerstag, 22. März 2007 10:19 10
Page 61 of 313
Lights and vision59
Controls
Safety
Driving tips
General maintenance
Self-help
Technical data
Turn signal and main beam lever
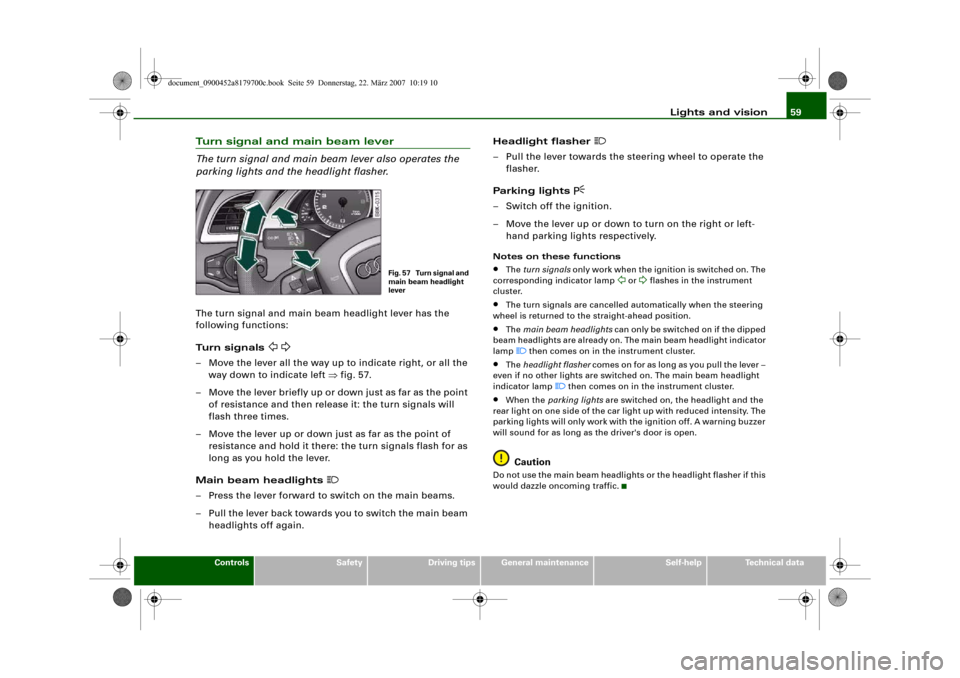
The turn signal and main beam lever also operates the
parking lights and the headlight flasher.The turn signal and main beam headlight lever has the
following functions:
Turn signals
– Move the lever all the way up to indicate right, or all the
way down to indicate left ⇒fig. 57.
– Move the lever briefly up or down just as far as the point
of resistance and then release it: the turn signals will
flash three times.
– Move the lever up or down just as far as the point of
resistance and hold it there: the turn signals flash for as
long as you hold the lever.
Main beam headlights
– Press the lever forward to switch on the main beams.
– Pull the lever back towards you to switch the main beam
headlights off again.Headlight flasher
– Pull the lever towards the steering wheel to operate the
flasher.
Parking lights
– Switch off the ignition.
– Move the lever up or down to turn on the right or left-
hand parking lights respectively.Notes on these functions•
The turn signals only work when the ignition is switched on. The
corresponding indicator lamp
or
flashes in the instrument
cluster.
•
The turn signals are cancelled automatically when the steering
wheel is returned to the straight-ahead position.
•
The main beam headlights can only be switched on if the dipped
beam headlights are already on. The main beam headlight indicator
lamp then comes on in the instrument cluster.
•
The headlight flasher comes on for as long as you pull the lever –
even if no other lights are switched on. The main beam headlight
indicator lamp
then comes on in the instrument cluster.
•
When the parking lights are switched on, the headlight and the
rear light on one side of the car light up with reduced intensity. The
parking lights will only work with the ignition off. A warning buzzer
will sound for as long as the driver's door is open.Caution
Do not use the main beam headlights or the headlight flasher if this
would dazzle oncoming traffic.
Fig. 57 Turn signal and
main beam headlight
lever
document_0900452a8179700c.book Seite 59 Donnerstag, 22. März 2007 10:19 10
Page 66 of 313
Lights and vision 64
Note•
Check that the washer fluid reservoir is full before starting a long
journey. Filling the reservoir ⇒page 242.
•
Worn or dirty wiper blades can cause smearing on the glass
which can also impair the effectiveness of the rain sensor. Please
check the wiper blades regularly.
Applies to vehicles: with headlight washersHeadlight washer systemThe headlight washer system only operates when the lights
are switched on.
– Move the automatic wash and wipe lever to position
⇒page 62, fig. 64.The headlight washer system is always activated the first time you
operate the automatic wash and wipe. Subsequently, it is only acti-
vated about every five wash and wipe cycles. The headlights are
always washed if you hold the lever for longer than about
2 seconds.
The headlight washer jets come out of the bumper automatically
(under water pressure).
Clean off stubborn dirt (insects, etc.) from the lenses at regular
intervals, for instance when stopping for fuel.
To ensure that the system works properly in winter, keep the nozzle
holders free of snow and remove any ice with a de-icer spray.
Service position
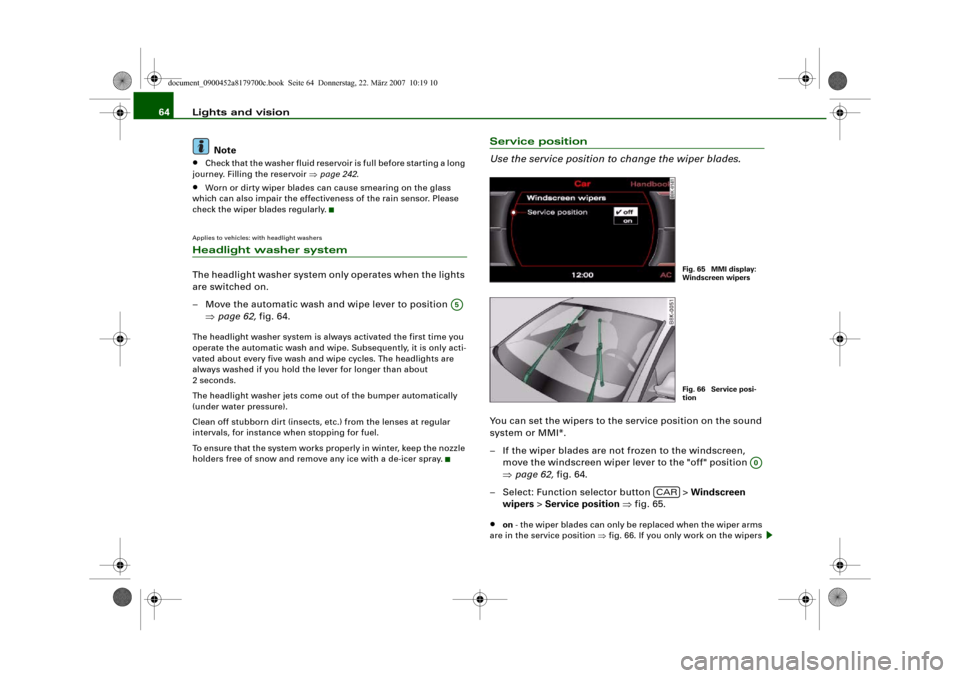
Use the service position to change the wiper blades.You can set the wipers to the service position on the sound
system or MMI*.
– If the wiper blades are not frozen to the windscreen,
move the windscreen wiper lever to the "off" position
⇒page 62, fig. 64.
– Select: Function selector button > Windscreen
wipers > Service position ⇒fig. 65.•
on - the wiper blades can only be replaced when the wiper arms
are in the service position ⇒fig. 66. If you only work on the wipers
A5
Fig. 65 MMI display:
Windscreen wipersFig. 66 Service posi-
tion
A0
CAR
document_0900452a8179700c.book Seite 64 Donnerstag, 22. März 2007 10:19 10
Page 68 of 313
Lights and vision 66
Anti-dazzle setting
– Pull the lever at the bottom of the mirror towards you.Applies to vehicles: with automatic anti-dazzle adjustment for interior mirrorAutomatic anti-dazzle adjustment
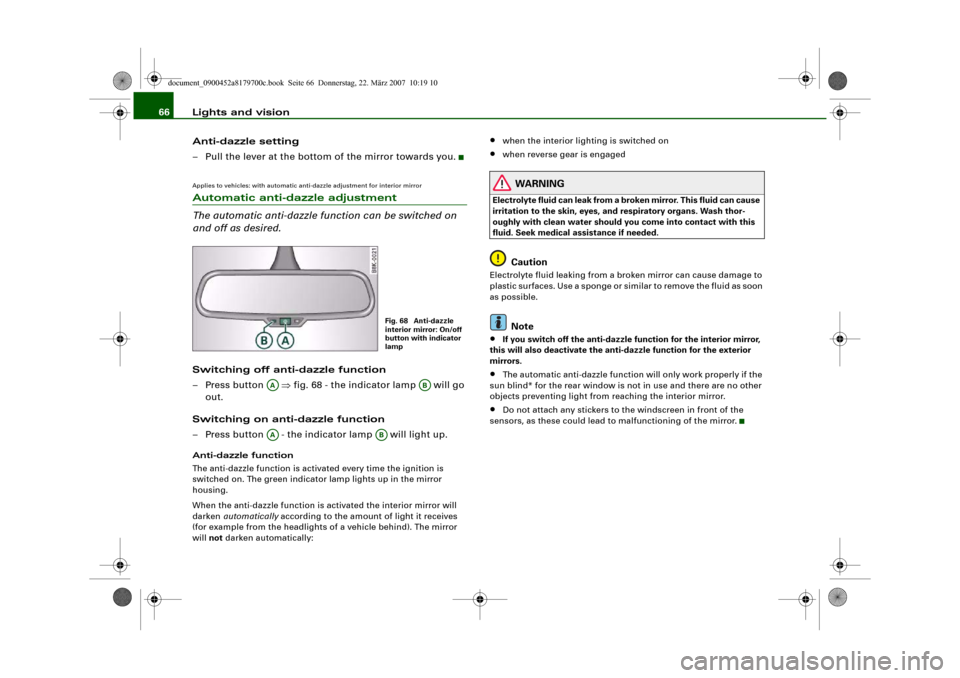
The automatic anti-dazzle function can be switched on
and off as desired.Switching off anti-dazzle function
– Press button ⇒fig. 68 - the indicator lamp will go
out.
Switching on anti-dazzle function
– Press button - the indicator lamp will light up.Anti-dazzle function
The anti-dazzle function is activated every time the ignition is
switched on. The green indicator lamp lights up in the mirror
housing.
When the anti-dazzle function is activated the interior mirror will
darken automatically according to the amount of light it receives
(for example from the headlights of a vehicle behind). The mirror
will not darken automatically:
•
when the interior lighting is switched on
•
when reverse gear is engaged
WARNING
Electrolyte fluid can leak from a broken mirror. This fluid can cause
irritation to the skin, eyes, and respiratory organs. Wash thor-
oughly with clean water should you come into contact with this
fluid. Seek medical assistance if needed.
Caution
Electrolyte fluid leaking from a broken mirror can cause damage to
plastic surfaces. Use a sponge or similar to remove the fluid as soon
as possible.
Note
•
If you switch off the anti-dazzle function for the interior mirror,
this will also deactivate the anti-dazzle function for the exterior
mirrors.
•
The automatic anti-dazzle function will only work properly if the
sun blind* for the rear window is not in use and there are no other
objects preventing light from reaching the interior mirror.
•
Do not attach any stickers to the windscreen in front of the
sensors, as these could lead to malfunctioning of the mirror.
Fig. 68 Anti-dazzle
interior mirror: On/off
button with indicator
lamp
AA
AB
AA
AB
document_0900452a8179700c.book Seite 66 Donnerstag, 22. März 2007 10:19 10
Page 70 of 313
Lights and vision 68Applies to vehicles: with automatic anti-dazzle adjustment for exterior mirrorsAutomatic anti-dazzle adjustment for exterior mirrorsThe exterior mirrors darken together with the automatically
adjusting interior mirror. When the ignition is on, the mirrors will
darken automatically according to the amount of light received (for
example from the headlights of a vehicle behind).
When the interior lights are switched on, or when reverse gear is
engaged, the mirrors revert to their original (i.e. not darkened)
condition.
WARNING
Electrolyte fluid can leak from a broken mirror. This fluid can cause
irritation to the skin, eyes, and respiratory organs. Wash thor-
oughly with clean water should you come into contact with this
fluid. Seek medical assistance if needed.
Caution
Electrolyte fluid leaking from a broken mirror can cause damage to
the paintwork or plastic surfaces. Use a sponge or similar to remove
the fluid as soon as possible.
Note
•
If you switch off the anti-dazzle function for the interior mirror,
this will also deactivate the anti-dazzle function for the exterior
mirrors.
•
The automatic anti-dazzle function will only work properly if the
sun blind* for the rear window is not in use and there are no other
objects preventing light from reaching the interior mirror.
Digital compassApplies to vehicles: with digital compassActivating and deactivating the compass
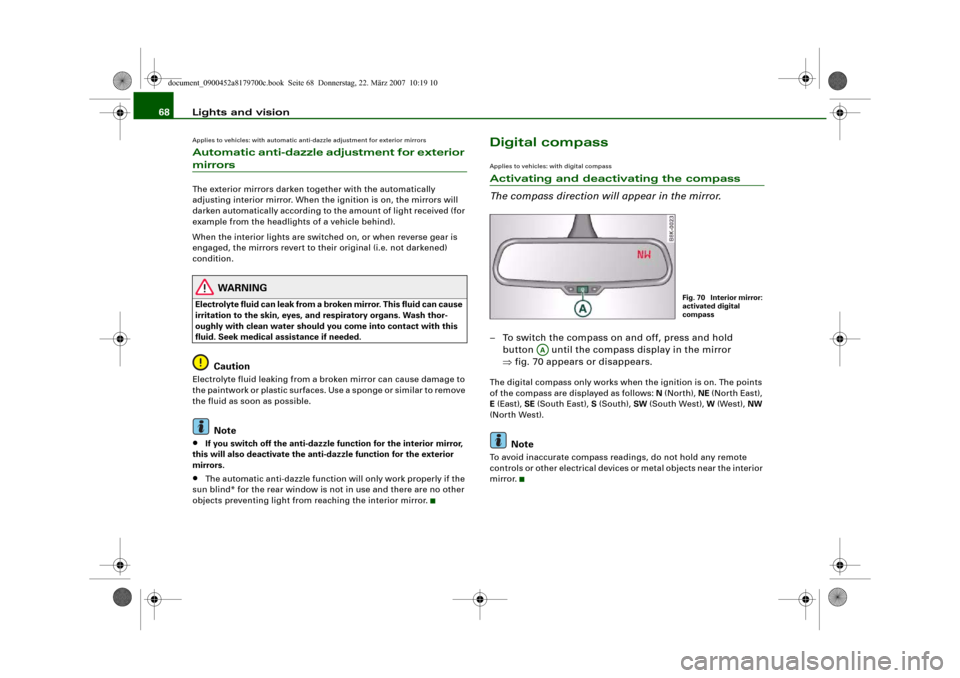
The compass direction will appear in the mirror.– To switch the compass on and off, press and hold
button until the compass display in the mirror
⇒fig. 70 appears or disappears.The digital compass only works when the ignition is on. The points
of the compass are displayed as follows: N (North), NE (North East),
E (East), SE (South East), S (South), SW (South West), W (West), NW
(North West).
Note
To avoid inaccurate compass readings, do not hold any remote
controls or other electrical devices or metal objects near the interior
mirror.
Fig. 70 Interior mirror:
activated digital
compass
AA
document_0900452a8179700c.book Seite 68 Donnerstag, 22. März 2007 10:19 10
Page 207 of 313
Your vehicle and the environment205
Controls
Safety
Driving tips
General maintenance
Self-help
Technical data
Your vehicle and the environmentRunning inA new vehicle should be run in over a distance of 1,500 km. For the
first 1,000 km the engine speed should not exceed 2/3 of the
maximum permissible engine speed – do not use full throttle and do
not tow a trailer or caravan. From 1,000 to 1,500 km you can gradu-
ally increase the engine rpm and road speed.
During its first few hours of running, the internal friction in the
engine is greater than later on when all the moving parts have
bedded down.
How the vehicle is driven for the first 1,500 km also influences the
engine quality. After the first 1,500 km you should continue driving
at moderate engine speeds, in particular when the engine is cold.
This helps to reduce wear and tear on the engine and increases the
potential mileage which can be covered by the engine.
You should also avoid driving with the engine speed too low.
Change down to a lower gear when the engine no longer runs
“smoothly”. Excessively high engine speeds are prevented by an
automatic rev limiter.Emission control systemsCatalytic converter
Applies to vehicles with petrol engine: The vehicle must only be
used with unleaded petrol, otherwise the catalytic converter will be
destroyed.
Never run the tank completely dry. The irregular fuel supply can
cause misfiring, which would allow unburnt fuel to enter the
exhaust system, which could cause overheating and damage the
catalytic converter.Diesel particulate filter
Applies to vehicles with diesel engine: The diesel particulate filter
can filter out almost all soot particles contained in the exhaust gas.
In normal driving conditions the filter is self-cleaning. Should the
self-cleaning function of the filter not be able to operate, e.g. when
the vehicle is continuously used only for short trips, the filter
becomes obstructed with soot and the symbol
for the diesel
particulate filter lights up ⇒page 37.
WARNING
•
Because of the high temperatures which can occur in the emis-
sion control system (catalytic converter or diesel particulate
filter), do not park the vehicle where the exhaust can come into
contact with flammable materials under the car (e.g. on grass or
at the forest edge). - Fire hazard!
•
Do not apply any underseal agents in the area around the
exhaust system - fire hazard!
Driving abroadChanging over headlight dip settings
The asymmetric low beams of the headlights are designed to light
up the near side of the road more intensely. If you drive in a country
where traffic drives on the opposite side of the road to the home
country, this will dazzle oncoming traffic.
Headlights with halogen bulbs: To avoid dazzling oncoming traffic
you can apply opaque stickers to certain parts of the headlight
lenses.
Headlights with xenon gas-discharge bulbs*: The headlight dip
settings must be changed to avoid dazzling oncoming traffic. For
document_0900452a8179700c.book Seite 205 Donnerstag, 22. März 2007 10:19 10
Page 211 of 313
Towing a trailer209
Controls
Safety
Driving tips
General maintenance
Self-help
Technical data additional mirrors fitted. Both exterior mirrors should be mounted
on hinged extension brackets. Adjust the mirrors to give sufficient
vision to the rear.
Headlights
Before starting a journey, check the headlight beam settings with
the trailer hitched up. If necessary, alter the height of the headlight
beams by means of the headlight range control ⇒page 56.
Power supply
When you remove the ignition key the power supply to the trailer is
interrupted.
Removable ball joint coupling
Vehicles with a factory-fitted towing bracket are equipped with a
removable ball joint coupling. It is carried under the floor panel on
the left-hand side of the luggage compartment.
Note
We recommend having the car serviced between the normal inspec-
tion intervals if it used frequently for towing a trailer.Applies to vehicles: with towing bracketTrailer stabilisation system
Trailer stabilisation helps to reduce the risk of the vehicle
skidding when towing a trailer.When is the trailer stabilisation system activated?
Trailer stabilisation is active when the following requirements are
met:•
The ESP must NOT be switched off ⇒page 196,
•
The trailer connector must be properly secured in the vehicle
socket.
•
Vehicle speed must be higher than approx. 60 km/h.How trailer stabilisation works:
In many cases, the driver can stabilise a swaying trailer by manually
braking the vehicle.
However, if the ESP detects that the trailer is swaying and this is
affecting the towing vehicle, it will automatically brake the vehicle
to stabilise the trailer by slowing it down. The warning lamp
will
light up in the instrument cluster. If possible, do not turn the
steering wheel at this stage.
In order to warn traffic behind you, the brake lights will come on
during this automatic braking operation.
A trailer weighing less than 70% of the kerb weight of the towing
vehicle may sway quite considerably without the trailer stabilisation
system intervening. This can happen when the swaying movements
of the light-weight trailer are not or hardly passed on to the towing
vehicle and are therefore not detected by the ESP.
If the system for activating the trailer brake lights is defective, this
will be indicated in the instrument cluster display ⇒page 36, “Bulb
monitor ”.
Requirements for correct functioning of the trailer
stabilisation system
If these conditions are not met in full, the trailer stabilisation system
will only intervene to a limited extent or not at all ⇒.
•
The electrical connection between the towing vehicle and the
trailer must be functioning correctly, without any defects.
•
The load on the trailer must be properly secured.
•
The tyre pressures on both the vehicle and the trailer must be
adapted to the load that is being carried.
•
Where possible, operate the trailer with the maximum permitted
draw bar weight.
•
The trailer overrun brake must be set correctly. This is important
to ensure that the trailer can be braked correctly, to avoid the vehicle
and trailer “jack-knifing” and to prevent excess braking of the trailer.
document_0900452a8179700c.book Seite 209 Donnerstag, 22. März 2007 10:19 10
Page 223 of 313
Care of vehicle and cleaning221
Controls
Safety
Driving tips
General maintenance
Self-help
Technical data
WARNING
•
Do not wash the vehicle with the ignition switched on – risk of
accident.
•
Do not clean the underside of the car or inside the wheel arches
without protecting your hands and arms. You may cut yourself on
sharp metal parts.
•
Take care when washing the car during the winter: moisture
and ice on the brakes may affect braking efficiency – this could
cause an accident.Caution
•
Do not wash the vehicle in direct sunlight – otherwise the paint
can be damaged.
•
Do not use insect sponges, or abrasive household sponges, etc.
– they can damage the surfaces.
•
The headlights should only be washed with water – do not wipe
them with a dry cloth or sponge. It is best to use soapy water.
•
Never wash tyres with a jet that sprays the water out in a direct
stream. This could damage the tyres – even if the spray is kept at a
distance and only used for a very short time.For the sake of the environment
The car should only be washed in special wash bays. This prevents
oily water from getting into the public drains. In some districts,
washing vehicles anywhere else may be prohibited.Waxing and polishingWaxing
Waxing protects the paintwork. It is time to apply a good coat of wax
when water no longer forms droplets and rolls off the clean paint-
work.Even if a wax solution is used regularly in the car wash, it is advis-
able to protect the paint with a coat of wax at least twice a year.
In the summer, you will find it is much easier to remove dead insects
(which accumulate on the bumper and the front of the bonnet) if the
car has been waxed recently.
Polishing
Polishing is only necessary if the paint has lost its shine, and the
gloss cannot be brought back by putting on wax.
The car must be waxed after polishing if the polish used does not
contain wax compounds to seal the paint.
Caution
Matt painted and plastic parts must not be treated with wax or
polish.Ornamental trim and mouldingsThe metal brightwork on the body is made of aluminium rather than
chrome (for environmental reasons).
Dirt or marks on the trim mouldings should be removed with an
acid-free cleaning agent (do not use a chrome cleaner). Body polish
is also unsuitable for use on trim mouldings. The intensive cleaning
fluids often used before the car goes into a car wash may contain
alkaline substances, which can cause dull or milky patches when
they dry out.
Audi dealers carry stocks of cleaning products which have been
tested for use on your vehicle and are not harmful to the
environment.
document_0900452a8179700c.book Seite 221 Donnerstag, 22. März 2007 10:19 10