brake AUDI A5 2021 Owners Manual
[x] Cancel search | Manufacturer: AUDI, Model Year: 2021, Model line: A5, Model: AUDI A5 2021Pages: 318, PDF Size: 85.96 MB
Page 4 of 318
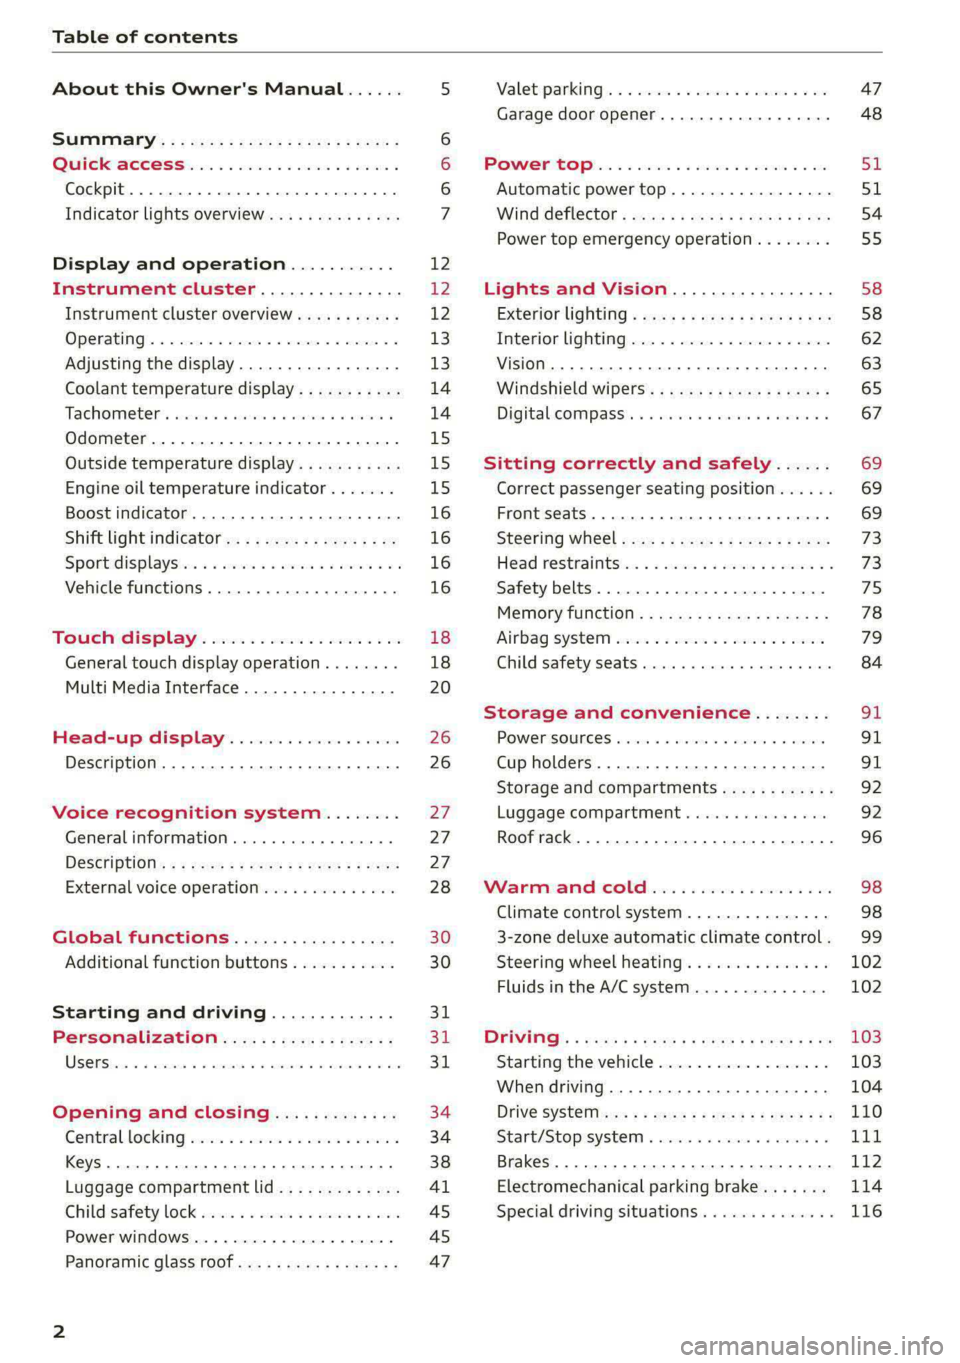
Table of contents
About this Owner's Manual......
SUMIMAry: < = exe : eens: Seen cs sens
QutckeaeCe ssh: «i esis se ois a eaves @
Cockpit. ...... 0... eee eee eee eee
Indicator lights overview...........4..
Display and operation...........
Instrument cluster...............
Instrument cluster overview...........
Operating. ecccuse w+ were oo wens oo ayes 9 ¥
Adjusting the display.................
Coolant temperature display...........
Tachometer’ series i ewe so snes ¥ & ome
Odometer.............. cee eee eee ee
Outside temperature display...........
Engine oil temperature indicator.......
Boost indicator...............0--000.
Shift light indicator..................
Sportidisplaystens « scwne x » eum os vomew «02
Vehicle functions ..............00000.
TOUCH AISPLAY ' sevece: 3 seisas 6 sessen 6 6 ws
General touch display operation........
Multi Media Interface................
Head-up display..................
Description............0.. ee cee eee
Voice recognition system........
General information..............00.
DESGriptiOns « = seen ¢ = seme xs eee st eee
External voice operation..............
Global functions.................
Additional function buttons...........
Starting and driving.............
Personalization..................
Opening and closing.............
Central locking) sani x x swasien © x sponae 2 aaaonor
Keys... eee
Luggage compartment lid.............
Childisafety lock seis 2 « sere ¥ © were 3 ¢ overs
Power windows............000eeeeee
Panorartiic glass roof 0... ieee s ieee es
12 12 12
13
13
14 14
15
15
15
16
16
16
16 18
18
20 26 26 27 27 27
28
30
30
311.
Bi
3,
34
34
38
Al 45 45
47
Valetiparking = s ssse «x cscs ov crue a ¥ oe 47
Garage door opener..........--.00 eee 48
POWOEPRtOP lies. 5 6 sisi. ae sic ao oie & wae 51
Automatic power top................. 51
Wind deflect6r « cccs ss pees sv eeea sv ees 54
Power top emergency operation........ 55
Lights and Vision................. 58
Exteriorlighting « css < «sees < ¢ caew soars 58
Interior lightinGpenis « « sen 0 mew © 2 amore 62
VISION. 2... eee ee eee eee 63
Windshield wipers..................- 65
Digital. compass’. « . ceria ss caw s cei es 67
Sitting correctly and safely...... 69
Correct passenger seating position...... 69
Front seats ....... 0c eee 69
Steering Wheel sows » s wou sg wane x x see 73
Head restraintsti:. «ose a a nase ao oan ae 73
Safety belts. .............0...00000. 75
Memory function..............ee sees 78
‘Airbag SYSteM eviscie co soaae es werae oo eee 79
Child
safety seats... ...... 00... eee eee 84
Storage and convenience........ 91
POWEPISQUIGES vases + arouse « 6 eomaime « + eects 91
Cup holders............. eee eee eee 91
Storage and compartments............ 92
Luggage compartment............... 92
Roof rack... 2.0.2... 2c eee eee eee 96
Warmandicoled ioc. es isco & 6 anes 9 5 ae 98
Climate control system............... 98
3-zone deluxe automatic climate control. 99
Steering wheel heating............... 102
Fluids in the A/C system.............. 102
DYPIVITVE: « eens ¢ & cars ¢ & seme 4 2 HasEE Ee 103
Starting the vehicle.................. 103
When driving.............00eeee eens 104
Drive SYStE Misses ¢ = sawe + « mee se eee sb 110
Start/Stopisystei « sso so aceon 4 @ suena a 111
Brakes... . 2.2.2.0... 2c eee ee eee eee 112
Electromechanical parking brake....... 114
Special driving situations.............. 116
Page 6 of 318
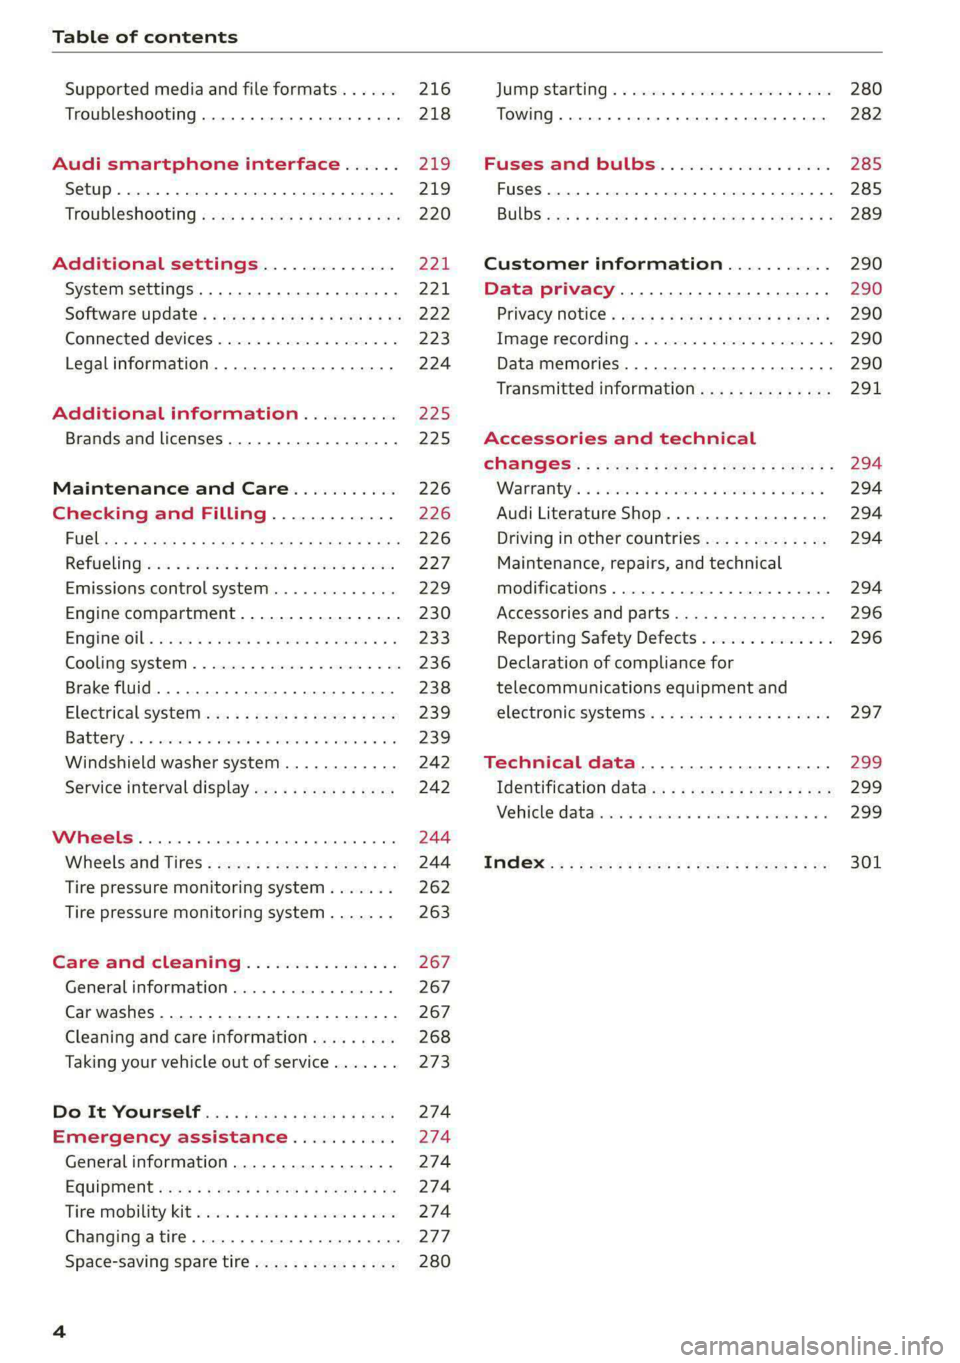
Table of contents
Supported media and file formats...... 216
Troubleshooting..............000eeee 218
Audi smartphone interface...... 219
Setup... .. 0... eee eee eee 219
Troubleshooting «cx «sess se eee s 3 ves 220
Additional settings.............. 221
System settingS..............e ee eee 221
Software update: « ccs ss e054 een ee ve 222
Connected devices............00.0 00s 223
Legalinformation................... 224
Additional information.......... 225
Brands and licenses..........-...0-5- 225
Maintenance and Care........... 226
Checking and Filling............. 226
FilClae « ¢ agisu @ & maven 2 e SINS BE SePeE YE ee 226
RePUCLINGiecs + 2 mein oo een eae ¥ wer 227
Emissions control system............. 229
Engine compartment................. 230
EMGine Oils: seas 2 = wave = ¢ eoume 5 y couse 6 2g 233
Cooling systeM...........00 0-2 ee eee 236
Brake fllid. 0.2... eee eee eee ee 238
ElectricalsysteM esa. ecw + y pews se ee 239
Battenyis « o masse © o cxasane «a sincere « a averse © ere 239
Windshield washer system...........- 242
Service interval display............... 242
Wheels .......... 66. cece eee eee eee 244
Whieelsiaind Tires « caus « « cara sv eee eo 9 244
Tire pressure monitoring system....... 262
Tire pressure monitoring system....... 263
Care and cleaning................ 267
General information 0... ..c.6 eee 267
Car washes....................0000. 267
Cleaning and care information......... 268
Taking your vehicle out of service....... 273
DO Tt VOUrSEUF ics « sce g + pass ss pews 274
Emergency assistance........... 274
Generalinformation................. 274
EQUIPITIONE sce + & wswu + wowe xe eee a ee 274
Tire MODILitY KE eccsins se sonceoe a x oneivens a ares 274
Changingatire............... 2. eee 277
Space-saving spare tire............... 280
JUIMIPFSTANEING 5 x exces 6 w erates @ a cawcens vw ae 280
TOWING... cece ete 282
Fuses and bulbs.................. 285
Fuses... 0... eee ee eee eee 285
BUILDS: sss s = wavs & & ees 5 2 ctetDs sb eG ee 289
Customer information........... 290
Data privacy................000 eee 290
Privacy NOLICE « naw, 2 w aay ¥ Kaew + Meee © 290
Timage reGOrding). « « canew + sect ws caver a os 290
Data memories............00.00e eee 290
Transmitted information.............. 291
Accessories and technical
CINERGSS:. « » sem: : x ews ce ee be ee ee 294
Warranty’ « = eon x 2 manors 6 o ois wv ee 6 294
Audi Literature Shop.............000- 294
Driving in other countries............. 294
Maintenance, repairs, and technical
modifications..................00008 294
Accessories and parts..............-. 296
Reporting Safety Defects.............. 296
Declaration of compliance for
telecommunications equipment and
electroniesystems's « «cows se mean 2 news 297
Technical data.................... 299
Identification data................... 299
Vehicle datatics ss saves o srewa sv awe 0 ve 299
TAAGK es = see « = wee « = owe Be nee eg oe 301
Page 9 of 318
8W7012721BB
Quick access
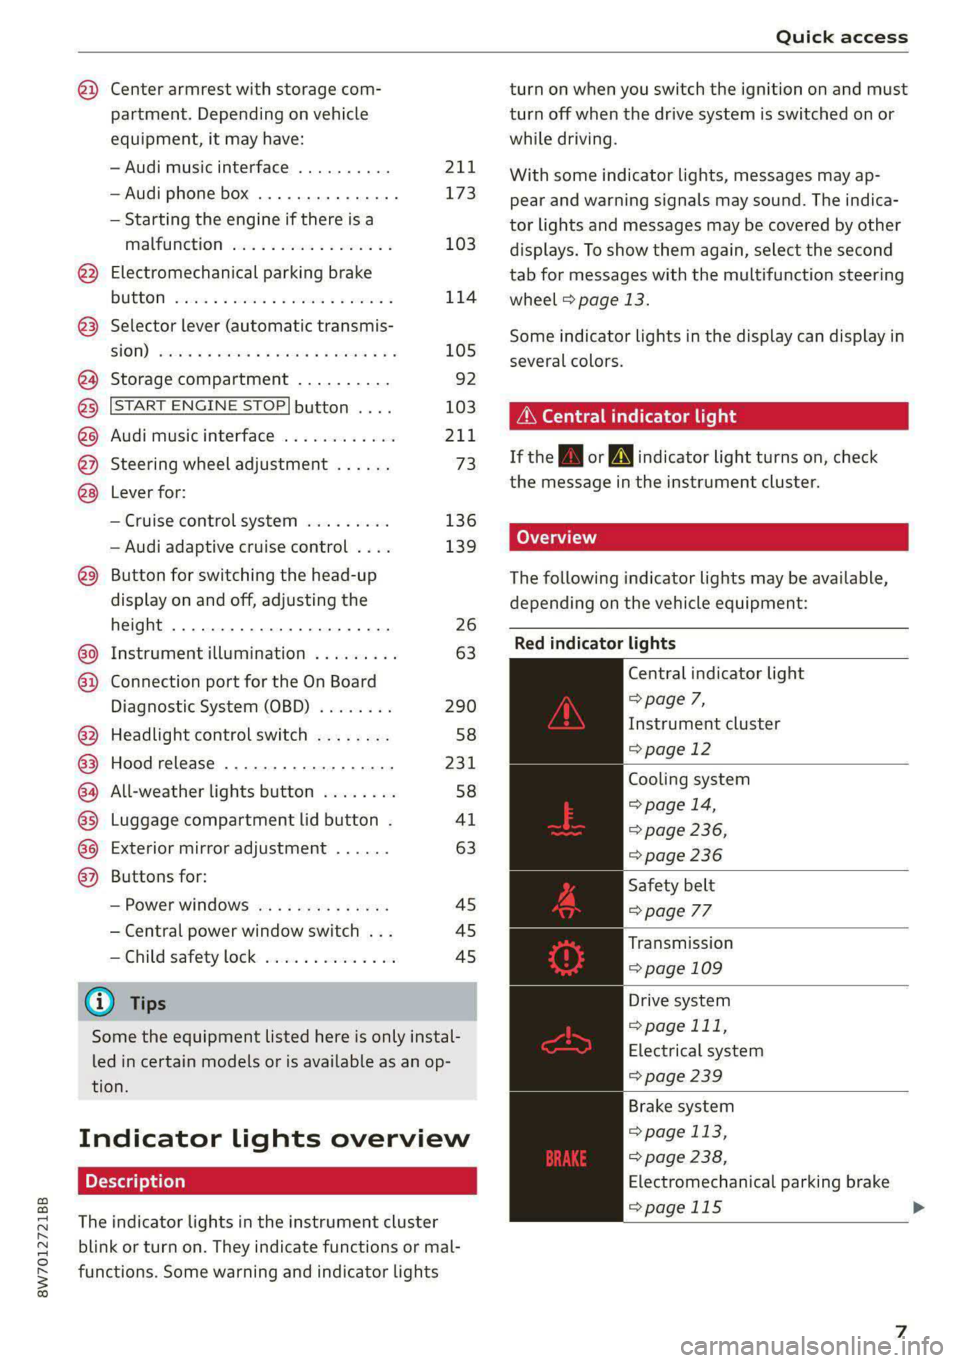
@) Center armrest with storage com-
partment. Depending on vehicle
equipment, it may have:
— Audi music interface .......... 211
—Audi phone box ............... 173
— Starting the engine if there is a
MALFUMERION since oo sxosoue x 2 seems ss 103
@) Electromechanical parking brake
BUGGOT sieves so cman « 2 ewes 2s men 2 114
@) Selector lever (automatic transmis-
SIOM) seo so neon & v Howe & eRe Fa 105
@4 Storage compartment .......... 92
@) [START ENGINE STOP]button .... 103
@6 Audi music interface ............ 211
@) Steering wheel adjustment ...... 73
Lever for:
— Cruise control system ......... 136
— Audi adaptive cruise control .... 139
@9) Button for switching the head-up
display on and off, adjusting the
height ........ 2... cee eee eee 26
60 Instrument illumination ......... 63
@) Connection port for the On Board
Diagnostic System (OBD) ........ 290
@2 Headlight control switch ........ 58
@3) Hood release .............-.0-% 231
@4 All-weather lights button ........ 58
@5) Luggage compartment lid button . 41
G8 Exterior mirror adjustment ...... 63
6 Buttons for:
— Power windows ...........00. 45
— Central power window switch ... 45
—Child safety lock .............. 45
G@) Tips
Some the equipment listed here is only instal-
led in certain models or is available as an op-
tion.
Indicator lights overview
The indicator lights in the instrument cluster
blink or turn on. They indicate functions or mal-
functions. Some warning and indicator lights
turn on when you switch the ignition on and must
turn off when the drive system is switched on or
while driving.
With some indicator lights, messages may ap-
pear and warning signals may sound. The indica-
tor lights and messages may be covered by other
displays. To show them again, select the second
tab for messages with the multifunction steering
wheel > page 13.
Some indicator lights in the display can display in
several colors.
OMe ere ella Uf
If the wA or AN] indicator light turns on, check
the message in the instrument cluster.
(oT T\ i
The following indicator lights may be available,
depending on the vehicle equipment:
Red indicator lights
Central indicator light
=> page 7,
Instrument cluster
=>page 12
Cooling system
=> page 14,
=> page 236,
=> page 236
Safety belt
=> page 77
Transmission
=> page 109
Drive system
> page 111,
Electrical system
=> page 239
Brake system
= page 113,
> page 238,
Electromechanical parking brake
=>page 115 >
Page 10 of 318
Quick access
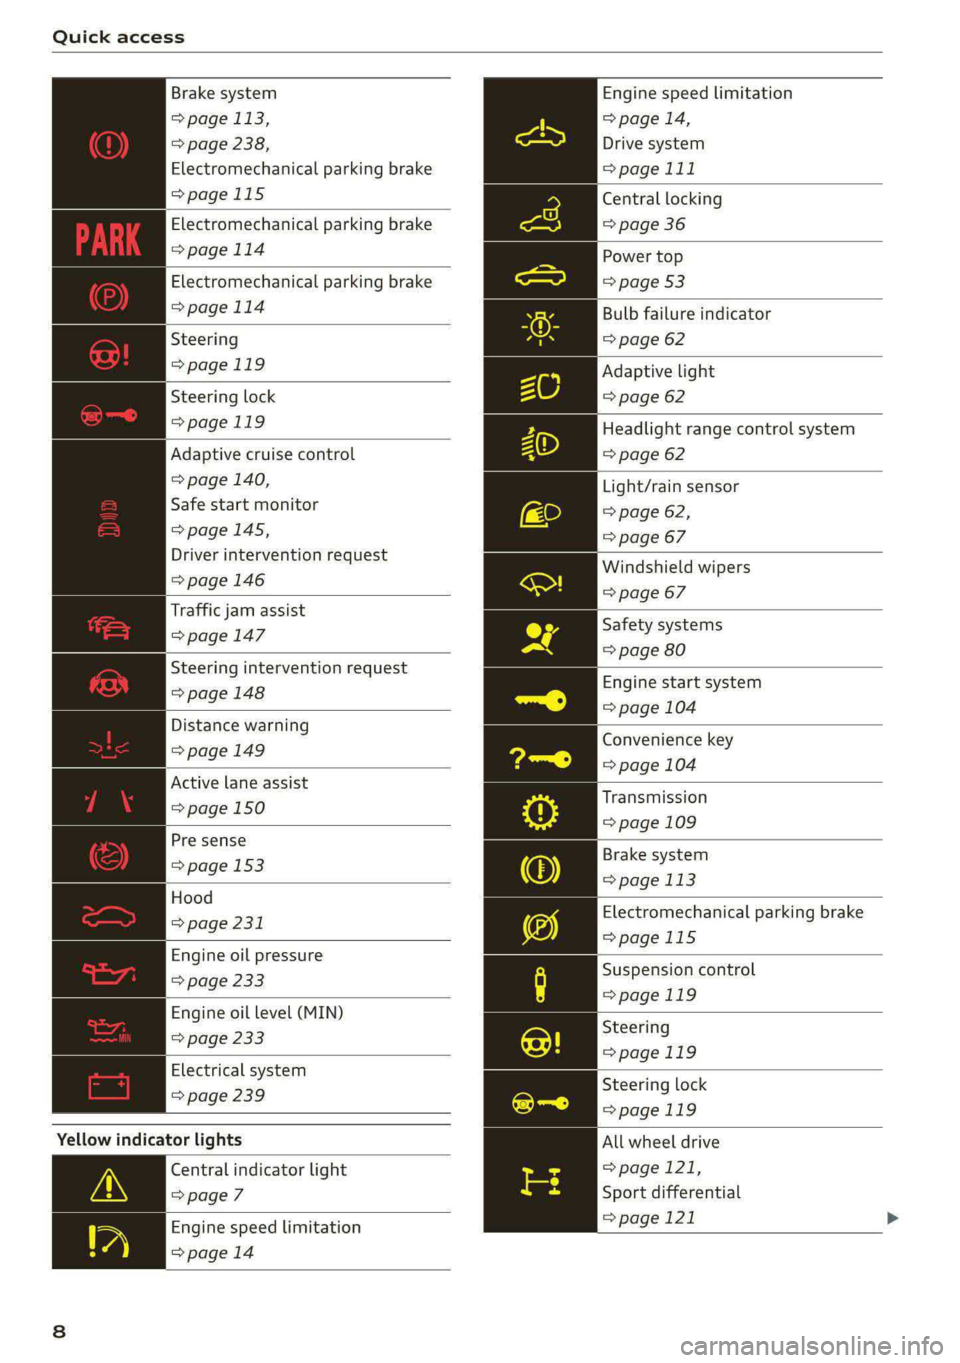
Brake system
> page 113,
> page 238,
Electromechanical parking brake
>page 115
Electromechanical parking brake
=>page 114
Electromechanical parking brake
>page 114
Steering
=>page 119
Steering lock
>page 119
Adaptive cruise control
=> page 140,
Safe start monitor
=>page 145,
Driver intervention request
=>page 146
Traffic jam assist
=>page 147
Steering intervention request
=>page 148
Distance warning
=>page 149
Active lane assist
=> page 150
Pre sense
> page 153
Hood
> page 231
Engine oil pressure
=> page 233
Engine oil level (MIN)
=> page 233
Electrical system
> page 239
Yellow indicator lights
Central indicator light
=> page 7
Engine speed limitation
=>page 14
Engine speed limitation
> page 14,
Drive system
>page 111
Central
locking
=> page 36
Power top
=> page 53
Bulb failure indicator
=> page 62
Adaptive light
=> page 62
Headlight range control system
=> page 62
Light/rain sensor
=> page 62,
=> page 67
Windshield wipers
=> page 67
Safety systems
=> page 80
Engine start system
=> page 104
Convenience key
=> page 104
Transmission
=> page 109
Brake system
=> page 113
Electromechanical parking brake
=>page 115
Suspension control
=>page 119
Steering
>page 119
Steering lock
>page 119
All wheel drive
> page 121,
Sport differential
=> page 121
Page 12 of 318

Quick access
Efficiency assist
=> page 138
Efficiency assist
=> page 138
Efficiency assist
=> page 138
Efficiency assist
=> page 138
Efficiency assist
> page 138
Adaptive cruise control
=> page 140
Adaptive cruise control
=> page 140
Adaptive cruise control
=> page 140
Adaptive cruise control
=> page 140
Adaptive cruise control
=> page 145
Traffic jam assist
=> page 147
Traffic jam assist
=> page 147
Active lane assist
=> page 150
High beam headlights
=> page 59,
=>page 59
High beam assistant
=> page 59,
=> page 60
Laser lights
=> page 60
Child safety lock
=>page 45
Child safety lock
=> page 45
Child safety lock
=>page 45
10
Power top
=> page 53
High beam assistant
=> page 59,
=> page 60,
=> page 62
Convenience key
=> page 104
Transmission
=> page 109
Start/Stop system
> page 112
Electromechanical parking brake
>page 115
Electromechanical parking brake
=>page 115
Hold assist
=>page 115
Steering
=>page 119
Speed warning system
=> page 130
Speed warning system
= page 130
Camera-based traffic sign recog-
nition
> page 131
Cruise control system
=> page 136,
=> page 137,
=> page 137
CRUISE
Cruise control system
=> page 136,
=> page 137,
=> page 137
Efficiency assist
=> page 138,
Predictive control
> page 143,
Adaptive cruise control
=> page 147,
Traffic jam assist
=>page 148
Adaptive cruise control
=> page 143
Page 57 of 318
8W7012721BB
Power top
Power top emergency
operation
Applies to: vehicles with power top
B8W-0258
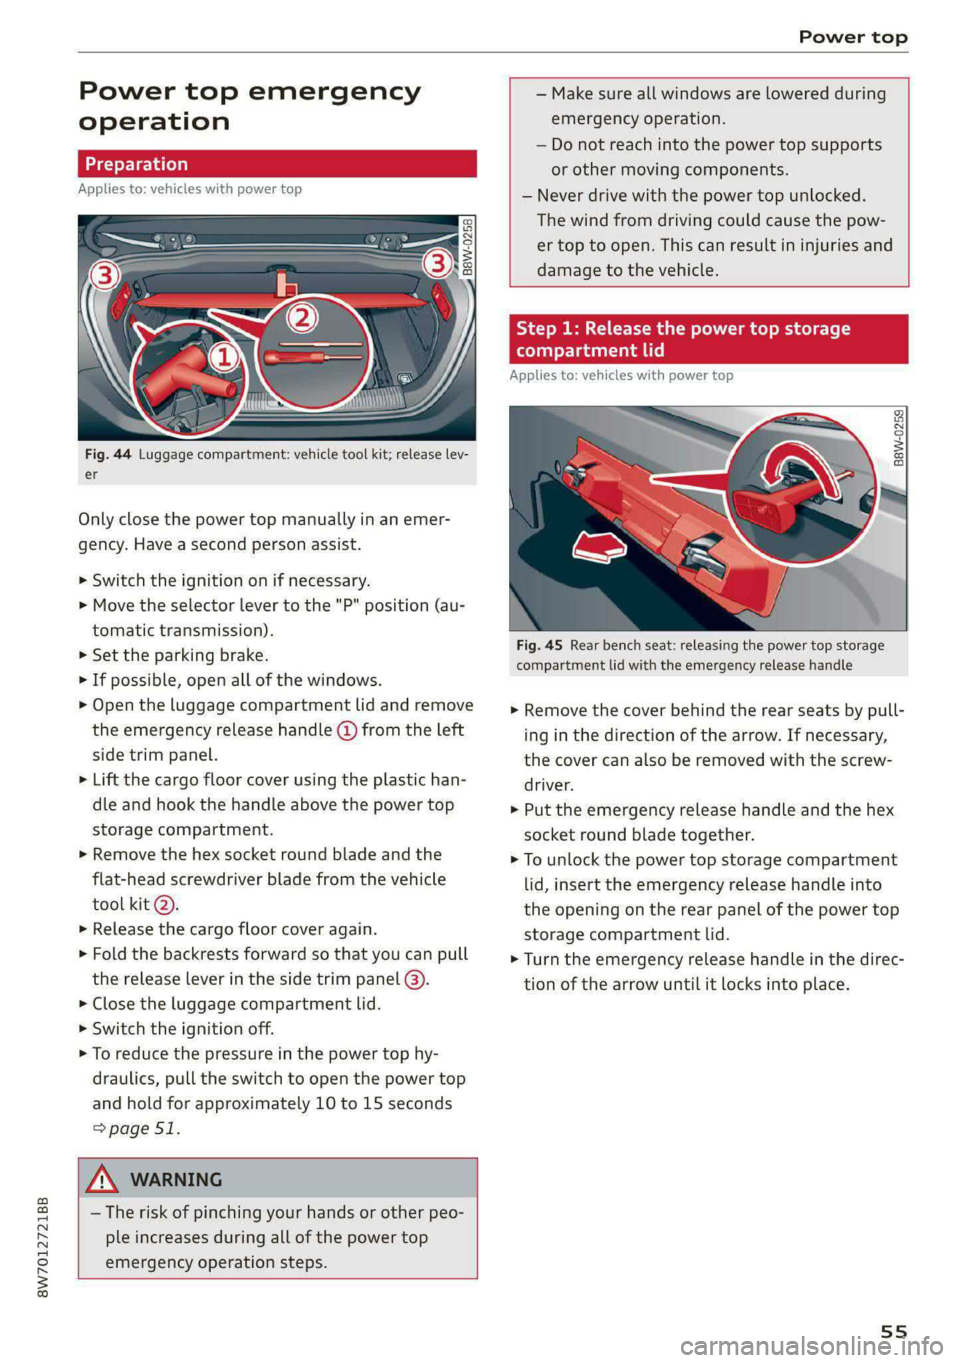
Fig. 44 Luggage compartment: vehicle tool kit; release lev-
er
Only close the power top manually in an emer-
gency. Have a second person assist.
> Switch the ignition on if necessary.
> Move the selector lever to the "P" position (au-
tomatic transmission).
> Set the parking brake.
> If possible, open all of the windows.
> Open the luggage compartment lid and remove
the emergency release handle (d) from the left
side trim panel.
> Lift the cargo floor cover using the plastic han-
dle and hook the handle above the power top
storage compartment.
> Remove the hex socket round blade and the
flat-head screwdriver blade from the vehicle
tool kit @).
>» Release the cargo floor cover again.
> Fold the backrests forward so that you can pull
the release lever in the side trim panel @).
> Close the luggage compartment lid.
> Switch the ignition off.
> To reduce the pressure in the power top hy-
draulics, pull the switch to open the power top
and hold for approximately 10 to 15 seconds
=> page 51.
Z\ WARNING
— The risk of pinching your hands or other peo-
ple increases during all of the power top
emergency operation steps.
— Make sure all windows are lowered during
emergency operation.
— Do not reach into the power top supports
or other moving components.
— Never drive with the power top unlocked.
The wind from driving could cause the pow-
er top to open. This can result in injuries and
damage to the vehicle.
Step 1: Release the power top storage
compartment lid
Applies to: vehicles with power top
B8W-0259
Fig. 45 Rear bench seat: releasing the power top storage
compartment lid with the emergency release handle
> Remove the cover behind the rear seats by pull-
ing in the direction of the arrow. If necessary,
the cover can also be removed with the screw-
driver.
> Put the emergency release handle and the hex
socket round blade together.
> To unlock the power top storage compartment
lid, insert the emergency release handle into
the opening on the rear panel of the power top
storage compartment lid.
> Turn the emergency release handle in the direc-
tion of the arrow until it locks into place.
55
Page 105 of 318

8W7012721BB
Driving
Driving
Starting the vehicle
(eta
Applies to: vehicles with convenience key
Fig. 100 Center console: starting the engine
Requirement: the key must be in the vehicle.
Starting the engine
> Press and hold the brake pedal.
> Press the [START ENGINE STOP] button. The
engine will start.
Equipment that uses a lot of electricity is switch-
ed off temporarily when you start the engine. If
the engine does not start immediately, the start-
ing procedure stops automatically after a short
time. If this is the case, repeat the starting pro-
cedure after approximately 30 seconds.
Stopping the engine
> Bring the vehicle to a full stop.
> Press the [START ENGINE STOP] button. The
engine will switch off.
Applies to: vehicles with steering lock: The steer-
ing is locked when you turn off the engine and
open the driver's door. The steering lock helps
prevent vehicle theft. “P” must be engaged on
vehicles with an automatic transmission.
Stopping the engine in an emergency
If necessary in an emergency, the engine can also
be stopped while driving using the emergency off
function*.
> Press the [START ENGINE STOP] button twice in
a row or press and hold it one time.
Switching on and off
If you would like to switch the ignition on or off
without starting the engine, follow these steps:
> Press the [START ENGINE STOP] button without
pressing the brake pedal.
Switching the ignition off automatically
To prevent the vehicle battery from draining, the
ignition and possibly the exterior lighting may
switch off automatically.
Requirements:
— The Start/Stop system must have stopped the
engine.
— You must have left the vehicle for longer than
30 seconds.
— The ignition must be switched on.
Among other indicators, the system detects that
you have left the vehicle based on the following
factors:
— The driver's door has been opened.
— The driver's safety belt has been unbuckled.
— The brake pedal is not being pressed.
The ignition will also be switched off after 30 mi-
nutes or if you lock the vehicle from the outside.
Z\ WARNING
—To reduce the risk of asphyxiation, never al-
low the engine to run in confined spaces.
— Never turn off the engine before the vehicle
has come to a complete stop. Switching it
off before the vehicle has stopped may im-
pair the function of the brake booster and
power steering. You would then need to use
more force to steer and brake the vehicle.
The fact that you cannot steer and brake as
usual may increase the risk of accidents and
serious injuries.
— Secure the vehicle against rolling before ex-
iting the vehicle > page 104.
CG) Note
— Avoid high engine speed, full throttle, and
heavy engine load if the engine has not
reached operating temperature yet. You
could damage the engine.
103
Page 106 of 318

Driving
— If the engine has been under heavy load for
an extended period of time, heat builds up
in the engine compartment after the engine
is switched off and there is a risk of damag-
ing the engine. For this reason, let the en-
gine run at idle for approximately two mi-
nutes before shutting it off.
G) Tips
— Brief noises are normal when starting and
stopping the vehicle and are no cause for
concern.
— For up to 10 minutes after stopping the en-
gine, the radiator fan may turn on again au-
tomatically or it may continue to run, even if
the ignition is switched off.
— It may not be possible to start the vehicle in
extremely low temperatures.
— Power will be fully available once the engine
is at operating temperature.
Messages
= Engine start system: malfunction! Please
contact Service
There is a malfunction in the engine start system.
Drive immediately to an authorized Audi dealer
or authorized Audi Service Facility to have the
malfunction repaired.
B Remote control key: key not detected. Is the
key
still in the vehicle?
The vehicle key was removed from the vehicle
while the engine is running. If the vehicle key is
no longer in the vehicle, you cannot switch the ig-
nition on or start the engine once you stop it. You
also cannot lock the vehicle from the outside.
Remote control key: hold back of key
against the designated area. See owner's man-
ual
The battery in the vehicle key may be drained or
there may be a malfunction. To start the vehicle,
you must also hold the vehicle key against the lo-
cation shown P) > page 103, fig. 100.
If the malfunction remains, drive immediately to
an authorized Audi dealer or authorized Audi
104
Service Facility to have the malfunction correct-
ed.
When driving
Starting to drive, stopping, and parking
Starting from a stop
> Press and hold the brake pedal.
> Start the engine.
> Select a gear.
> Release the parking brake.
> Release the brake pedal. The vehicle may roll.
> Press the accelerator pedal to accelerate.
Securing the vehicle against rolling
Secure your vehicle to prevent it from rolling be-
fore exiting the vehicle.
> Set the parking brake.
> Select the “P” selector lever position.
> If parking on a steep road, turn the steering
wheel so that your vehicle will roll against the
curb in case it should start to move.
If one of these measures is not possible, for ex-
ample because there is no vehicle power, you
must secure your vehicle against rolling using ad-
ditional measures.
> Only park the vehicle on a level surface.
> Use suitable objects to block the front and rear
wheels.
Set the parking brake before selecting the “P” se-
lector lever position. This prevents too much
stress from being placed on the locking mecha-
nism when parking on a steep surface.
ZA WARNING
— Always set the parking brake when leaving
your vehicle, even if for a short period of
time. If the parking brake is not set, the ve-
hicle could roll away, increasing the risk of
an accident.
— Do not leave your vehicle unattended while
the engine is running, because this increases
the risk of an accident.
— If the parking brake is set, it can release au-
tomatically when the accelerator pedal is
pressed. To reduce the risk of an accident, >
Page 107 of 318
8W7012721BB
Driving
do not inadvertently press the accelerator
pedal and always shift into “P” when the ve-
hicle is stopped.
— If you leave the vehicle, switch the ignition
off and take the key with you. This is espe-
cially important when leaving persons or an-
imals in the vehicle. Otherwise, the vehicle
could start unintentionally, the parking
brake could release, or electronic equipment
could activate, which increases the risk of an
accident.
— No persons or animals should be left in a
locked vehicle. Locked doors make it more
difficult for emergency workers to enter the
vehicle, which puts lives at risk.
— If you do not begin driving immediately af-
ter releasing the brake pedal, your vehicle
may begin to roll backward. Press the brake
pedal or set the parking brake immediately.
@) Note
If you have to stop on an incline, always press
the brake pedal to hold the vehicle in place to
reduce the risk of the vehicle rolling back-
ward. Do not try to hold the vehicle in place
by pressing and holding the accelerator pedal.
The transmission can overheat, which increas-
es the risk of damage.
Hill hold assist
If you take your foot off of the brake pedal when
driving on hills, the braking force will be held for
several seconds. At that time, you can start driv-
ing without the vehicle rolling backward.
Requirement: the driver's door must be closed,
the engine must be on, and the vehicle must be
traveling uphill.
> To activate hill hold assist, press and hold the
brake pedal for several seconds while the vehi-
cle is stationary.
ZA WARNING
— If you do not begin driving immediately af-
ter releasing the brake pedal, your vehicle
may begin to roll backward. Press the brake
pedal or set the parking brake immediately.
— The hill hold assist cannot hold the vehicle
on inclines in every scenario (for example,
on slippery or icy ground).
Gears and driving programs
(y—
(2—*
RAZ-0410:
R
N
i
D/S
~~ NEI
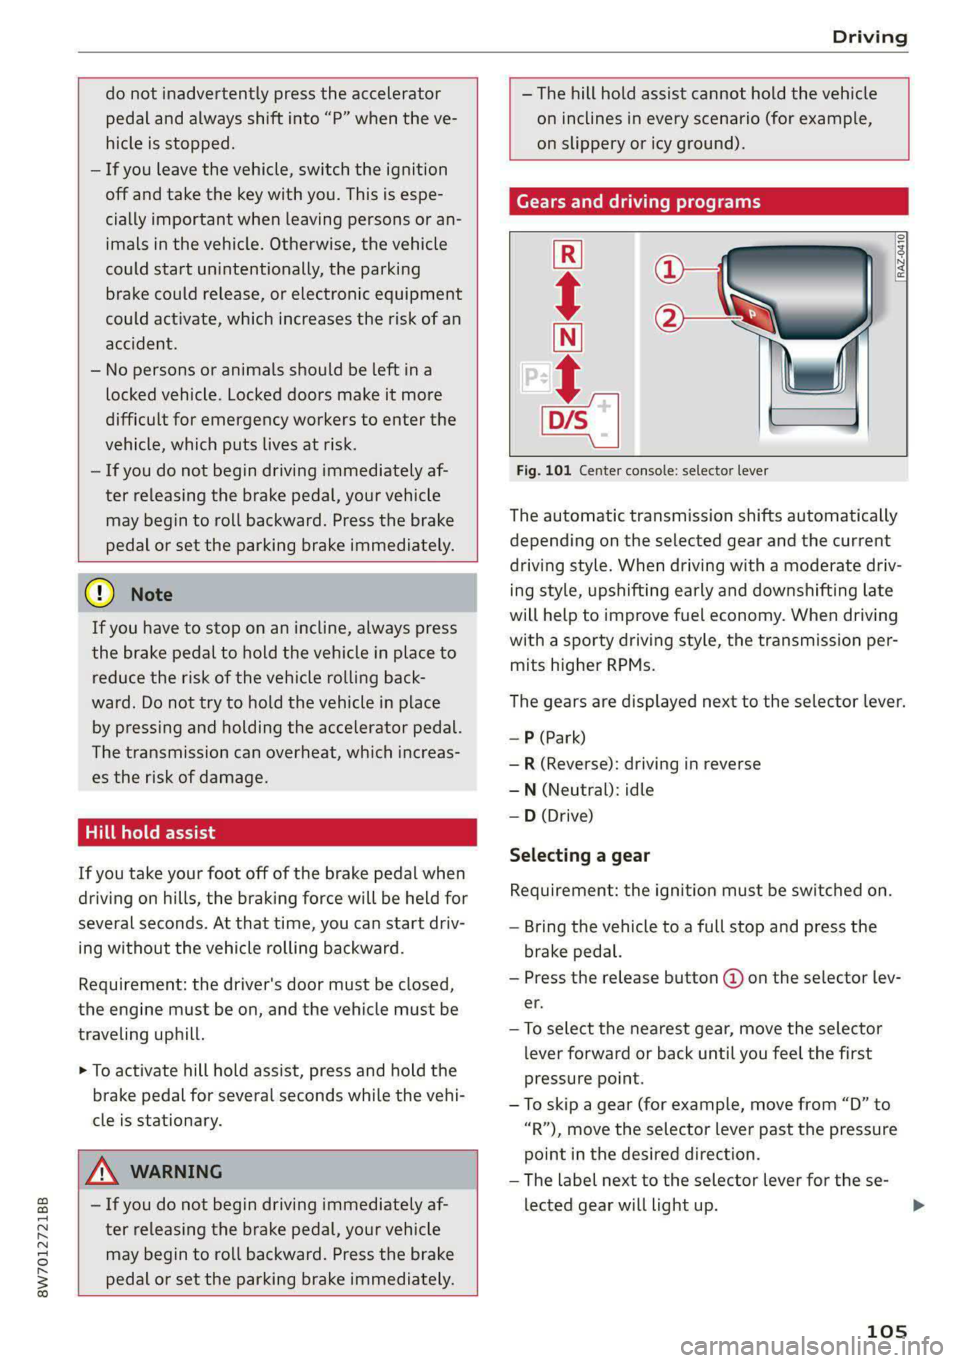
Fig. 101 Center console: selector lever
The automatic transmission shifts automatically
depending on the selected gear and the current
driving style. When driving with a moderate driv-
ing style, upshifting early and downshifting late
will help to improve fuel economy. When driving
with a sporty driving style, the transmission per-
mits higher RPMs.
The gears are displayed next to the selector lever.
— P (Park)
—R (Reverse): driving in reverse
—N (Neutral): idle
—D (Drive)
Selecting a gear
Requirement: the ignition must be switched on.
— Bring the vehicle to a full stop and press the
brake pedal.
— Press the release button (@ on the selector lev-
er.
—To select the nearest gear, move the selector
lever forward or back until you feel the first
pressure point.
—To skip a gear (for example, move from “D” to
“R”), move the selector lever past the pressure
point in the desired direction.
—The label next to the selector lever for the se-
lected gear will light up.
105
Page 108 of 318
Driving
“N” (Neutral) gear
In the “N” gear, power is not transmitted to the
driving wheels. Use the “N” gear in a car wash
(with conveyor belts), for example.
If you unintentionally select “N” while driving
(faster than 1 mph (2 km/h)), you can also shift
back to “D” without pressing the brake pedal.
For safety reasons, the vehicle cannot be locked
when the transmission is in the "N” gear.
“Pp” (Park) gear
Requirement: the ignition must be switched on.
The vehicle is secured from rolling away by the
parking lock when in the “P” gear.
— Bring the vehicle to a full stop and press the
brake pedal.
— Press the “P” button @) on the selector lever.
— The “P” next to the selector lever will light up.
“P” engages automatically if you switch the en-
gine off while the “D” or “R” gear is selected. If
you switch the engine off in “N”, “P” will engage
automatically after approximately 30 minutes.
If you want to switch from “P” to “D” or “R”, the
engine must be running.
If you cannot shift out of “P”, for example be-
cause the vehicle has no power, you may need to
use the emergency release for the parking lock
=> page 108.
Selecting a driving program
Various driving programs can be selected when in
the “D” gear. The programs influence when the
transmission shifts and how the accelerator ped-
al responds.
The selected driving program is displayed in the
instrument cluster.
—D (Drive): normal driving mode
— S (Sport): sporty driving mode
If you select the Dynamic mode in Audi drive se-
lect*, the “S” driving program will be activated.
When the ignition is switched off, the driving pro-
gram may be reset to “D”.
106
To switch between the current driving program
and “S”, push the selector lever toward the rear.
ZA WARNING
— Before you start driving, check if the label
for the desired selector lever position next
to the selector lever is lit up.
— Secure the vehicle against rolling before ex-
iting the vehicle > page 104.
— Power is still transmitted to the wheels
when the engine is running at idle. To pre-
vent the vehicle from “creeping”, you must
keep your foot on the brake in all selector
lever positions (except "P" and "N") when
the engine is running.
— To reduce the risk of an accident, do not
press the accelerator pedal when changing
gears if the vehicle is stationary and the en-
gine is running.
— Never select the “R" or "P” gears while driv-
ing. Doing so could cause an accident.
— The vehicle can roll even if the ignition is
switched off.
@) Tips
If you shift between “D” and “R” within one
second, you do not need to press the brake
pedal. This makes it possible to “rock” if it is
stuck, for example.