window AUDI A5 CABRIOLET 2013 User Guide
[x] Cancel search | Manufacturer: AUDI, Model Year: 2013, Model line: A5 CABRIOLET, Model: AUDI A5 CABRIOLET 2013Pages: 290, PDF Size: 72.35 MB
Page 74 of 290
72 Warm and cold
switching rec irculat ion mode on when driving
throug h a t unnel or when sitting in traffic
c:::> &. .
The IAUTOI button or I@ FRONT I butt on
switches recircu lation mode off .
IAUTO I Switching automatic mode on
Automatic mode ma inta ins a constant tem
perature inside the vehicle. Air temperature,
airflow and air distribution are controlled au
tomatically.
Adjusting the temperature
Temperatures between 60 °F (+16 °C) and
84 °F (+28 °C) can be set . Outside of this
range,
LO or HI will appea r in the climate con
trol system disp lay. At both of these settings,
the climate control system runs continuously
at maximum cooling or heating power . There
is no temperature regu lation.
~ Adjusting the airflow
You can adjust the a irflow manually to su it
your needs . To have the airflow regulated au
tomatically, press the
!AUTO ! button.
~ Adjusting the air distribution
You can manually select the ve nts where the
a ir will flow. To have the air d istribution regu
la ted automatically, press the
IAUTOI button .
~ Adjusting seat heating*
Pressing the button switches the seat heat ing
on at the highest sett ing (level 3) . The LEDs
indicate the tempe rature leve l. To reduce the
temperature, press the button again. To
switch the seat heating off, press the button
repeatedly until the LED turns off.
After 10 minutes, the seat heating automati
cally switches from level 3 to leve l 2.
[ill Adjusting seat ventilation*
Pressing the button switches the seat ventila
tion on at the highest setting (level 3) . The
LE Ds indicate the ventilat ion level. To reduce
the ventilation leve l, press the button again.
To switch the seat ventilat ion off, p ress the
b utton repeatedly until the LED turns off.
I@ FRONT I Switch the defroster on /off
T he w indshield and side windows are defrost
ed or cleared of condensation as quickly as
possible . The maximum amount of air flows
mainly from the vents below the windshield.
Recircu lation mode switches off. The tempera
ture is controlled automatically.
The
i AUTO I button switches the defroster off.
lliil REARI Switching rear window heater
on/off
T he rear window heater only operates when
the engine is running. It switches off auto
matically after a few minutes, depending on
the outside temperature.
T o p revent the rear window heater from
switching off automatically, press and hold
the
l oo REARI button for more than 2 seconds.
This remains stored until the ignition is
switched off.
Air vents
You can open and close the center and rear air
vents using the thumbwheels. The levers ad
just the direction of the airflow from the
vents.
In veh icles with a 3-zone deluxe automatic cli
mate control system*, you can adjust the air
temperature in the rear by turning the thumb
whee l toward the red side to make it warmer
or toward the blue side to make it cooler.
A WARNING
-- Do not use the recirculation for extended
pe riods of time . The windows could fog
up since no fresh a ir can enter the vehi
cle. If the windows fog up, p ress the air
recirc ulation button again immediately
to switch off the air recirc ulation func
tion or se lect defrost .
- I ndividuals w ith reduced sensitivity to
pain or temperature could develop burns
when using the seat heating function. To reduce the risk of injury, these individu
als shou ld not use seat heating.
Page 75 of 290
(D Note
To avoid damage to the heating elements in the seats, do not kneel on the seats or
place heavy loads on a small area of the
seat.
(D Tips
The seat heating only works when the seat
detects body weight on it. Placing objects
on the seat could create enough weight to
switch seat heating on.
Setup
The basic climate control settings can be ad
justed in the radio or MM!* .
.. Se lect: I CARI funct ion button> A/C control
button. Or
.. Se lect:
I CARI function button > Car sys-
tems *
control button > AC.
Automatic recirculation*
When switched on, automatic recirculation
controls the recirculation mode automat ica lly.
If the windows fog up, press the
l
button.
Synchronization*
When synchronization is switched on, the
same settings are applied to both the driver
and front passenger, except for the seat heat
ing/ventilation*. Synchroni zation switches off
when you adjust the settings on the front pas
senger's side.
You can also switch synchronization on by pressing and holding the knob on the driver's
side.
Supplementary heater
The supplementary heater warms the interior
of vehicles with flexible fue l engines more
quickly . The supplementary heater is control
led automatically in the
Auto setting.
Warm and cold 7 3
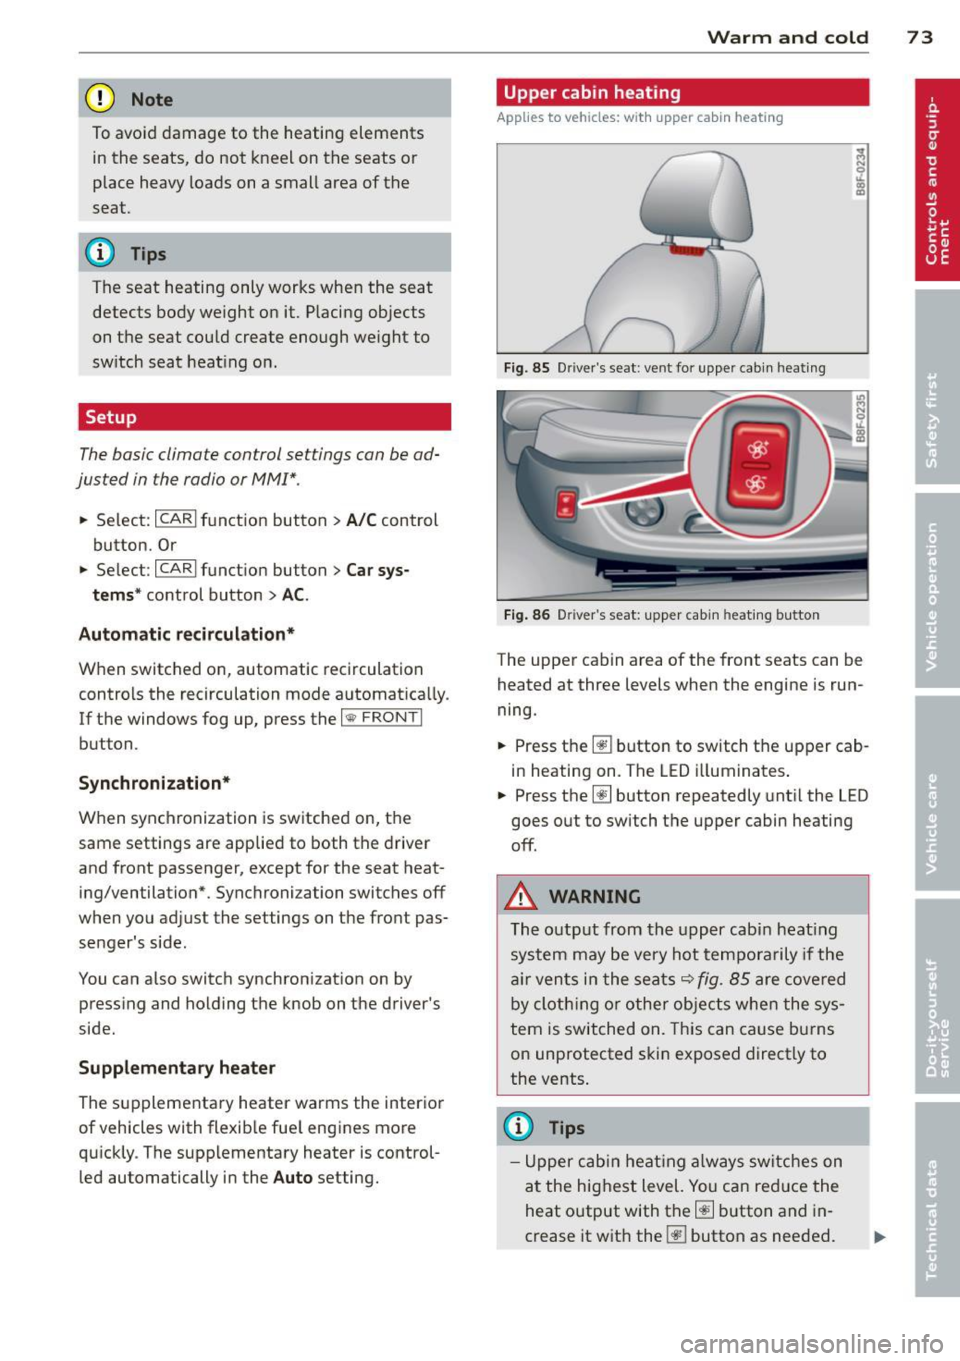
Upper cabin heating
Applies to vehicles: with upper cabin heating
Fig. 85 Driver 's seat: ve nt for upper cabin heating
Fig. 86 Driver's seat: upper cabin heating button
I (I) m
The upper cabin area of the front seats can be
heated at three levels when the engine is run
ning.
.. Press the~ button to switch the upper cab
in heating on. The LED illuminates.
.. Press the~ button repeatedly until the LED
goes out to switch the upper cabin heating
off.
A WARNING
-
The output from the upper cabin heating
system may be very hot temporarily if the
air vents in the seats
r::!;>fig. 85 are cove red
by cloth ing or other objects when the sys
tem is switched on. This can cause burns
on unprotected skin exposed direct ly to
the vents .
{!) Tips
-Upper cabin heating always switches on
at the highest level. You can red uce the
heat output with the~ button and in
crease it with the~ button as needed.
Page 78 of 290
76 On the road
• Press the key¢ fig. 88 -the engine will
start.
Switching the ignition on /off
If you wou ld like to switch the ignition o n
witho ut starting the eng ine, follow these
steps:
• Insert the key into the ignition lock.
• Press the key b riefly
without p ress ing the
brake pedal.
• To switch the ignition off, press the key
again .
When starting the engine, major e lectr ica l
l oads are swit ched off temporarily.
You can only remove the key w ith the ignition
switched off.
If the engine should not start immediately,
the starting process is automatically stopped
after a short time. Repeat starting procedure.
A WARNING
- N ever allow the engine to ru n in confined
spaces - dange r of asphyxiation.
- Never remove the ign ition key from the
ignition look whi le the vehicle is mov ing.
Ot herw ise, the stee ring lo ck coul d sud
denly engage and you would not be ab le
to steer the vehicle .
- Always ta ke t he key wi th yo u wheneve r
yo u leave your vehicle. Otherwise, the
engine could be started or e lectrica l
equipment such as the power windows
cou ld be operated. This can lead to seri
ous injury.
- Never leave children or persons requiring
assistance unattended in the vehicle. The
doors can be locked using the remote
transmitter, preventing people from es
caping from the vehicle on their own in
the event of an eme rgency . Depend ing
on the time of year, people inside the ve hicle c an be exposed to very h igh or ve ry
low temperatures.
(D Note
Avoid high engine rpm, fu ll throttle and
heavy engine loads unti l the engine has
reached operating tempe rat ure - other
wise you risk eng ine damage.
@ For the sake of the environment
Do not let the engine run w hile pa rked to
warm up. Begin dr iving immediately. Th is
reduces u nnecessary emissions.
(D Tips
- If the key cannot be removed from the
ign ition lock, you have to pull the me
chanical key out of the master key in or
der to be able to lock the vehicle
¢page 34 .
-After starting a cold engine, there may
be a brief pe riod of increased noise be
cause the oil pressure must fi rst bu ild up
in the hydraulic valve ad juste rs. This is
normal and not a cause for concer n.
- If you leave the ve hicle w ith the ignition
sw itched on, the ig nit io n w ill sw itch off
afte r a cer tain per iod of t ime. Please
no te that electri cal eq uipment such as
exterior ligh ts will sw itch off as well
w hen that happens .
Page 79 of 290
Starting the vehicle with the emergency
key
Applies to vehicles: with ignitio n lock
You can use the emergency key as an ignition
key in an emergency.
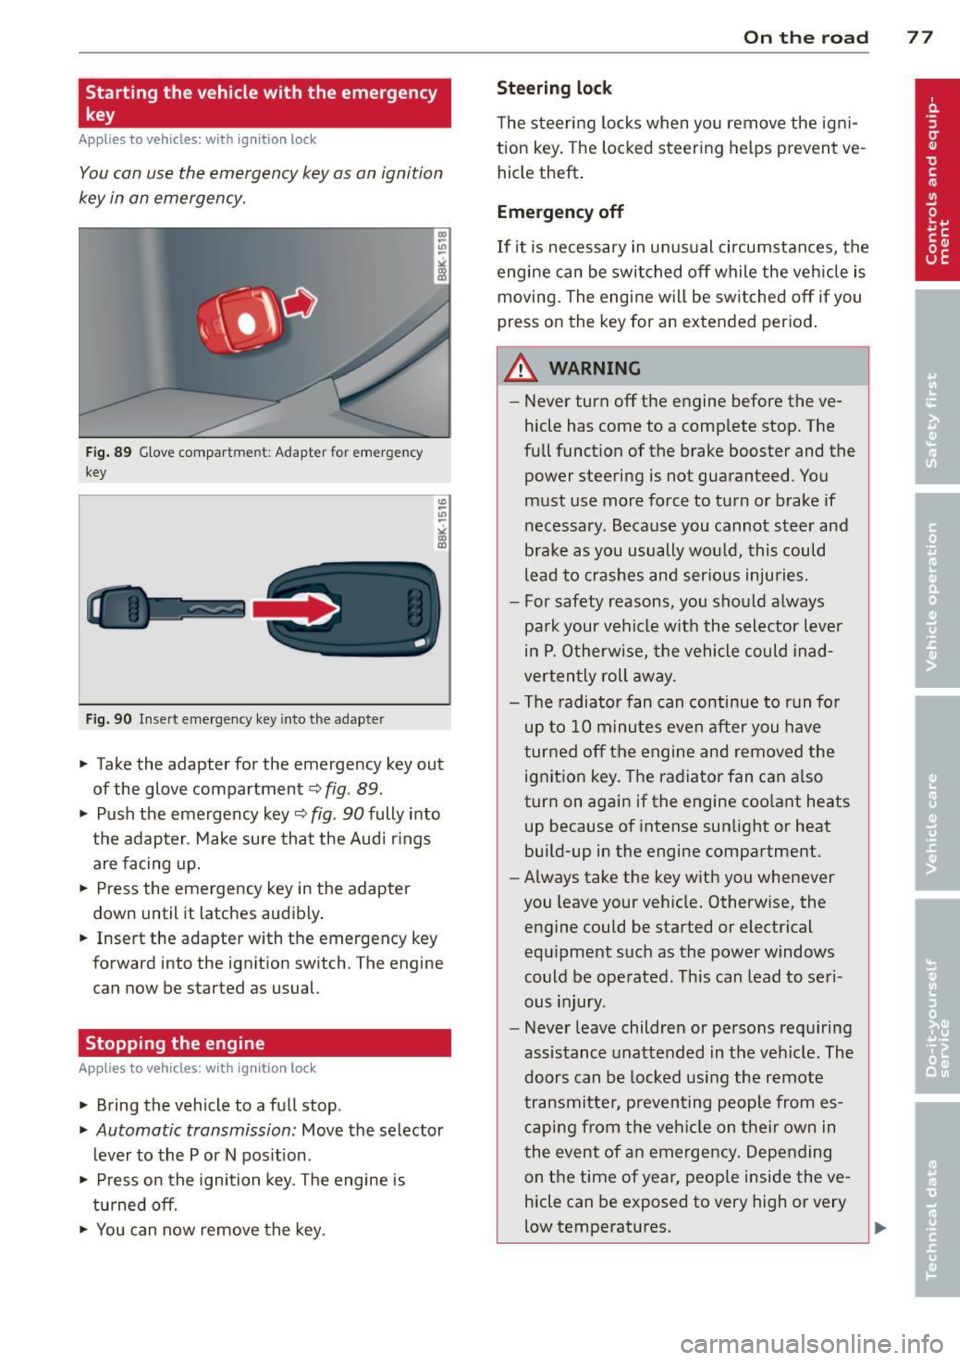
Fig . 89 G lo ve compar tment: A dapt er fo r em ergen cy
key
Fig. 90 In ser t emergen cy key in to the adapter
.,.. Take the adapter for the emergency key out
of the glove compartment
c:> fig . 89 .
.,.. Push the emergency key~ fig . 90 fully into
the adap ter . Make sure that the Audi r ings
are facing up.
.,.. Press the emergency key in the adapter
down un til it latches audibly .
.,.. Insert the adapter with the emergency k ey
forwa rd into the ignition swit ch . T he eng ine
can now be sta rted a s usual.
Stopping the engine
App lies to vehicles: with ig ni tion loc k
.,.. Bring the vehicle to a full stop .
.,.. Automatic transmission : Move the selector
lever to the P or N pos ition .
.,.. Press on the ignition key. The engine is
tu rned off.
.,.. You can now remove the key.
On th e road 77
Ste ering lock
The steering locks when yo u remove the ig ni
tion key . The lo cked steering helps prevent ve
hicle theft .
Emergency off
If it is necessary in unus ual circumstances, the
engine can be switched off while the veh icle is
moving. The engine will be switched off if you
press on the key for an extended period .
A WARNING
-Never turn off the engine before the ve
hicle has come to a comp lete stop. The
full funct ion of the brake booster and the
power steering is not guaranteed . You
must use more force to turn or brake if
necessary . Because you cannot steer and
brake as you usually wo uld, this could
lead to crashes and ser ious injuries.
- For safety reasons , you should always
pa rk your vehicle w ith the selector lever
in P . Otherwise, the vehicle could inad
verten tly roll away .
- The radiator fan can continue to run fo r
up to 10 minutes even after you have
turned off the engine and removed the ignition key. The radiator fan can a lso
turn on again if the engine coo lant heats
up because of intense sunlight or heat
build-up in the engine compartment.
- Always take the key with you whenever
you leave your vehicle. Otherw ise, the
engine could be started or electrical
equ ipment such as the power windows
could be operated . This can lead to seri
ous injury.
- Never leave children or persons requiring
assistance unattended in the vehicle. The
doors can be locked using the remote
transmitter, preven ting people from es
caping from the veh icle on their own in
the event of an emergency. Depending
on the time of year, peop le inside the ve
hicle can be exposed to very high or very
low temperatures .
Page 80 of 290
78 On the road
(D Note
If the engine has been under heavy load
for an extended period, heat builds up in
the engine compartment after the engine
is switched off -there is a risk of damaging
the engine. Allow the engine to run at idle
for about two minutes before switching it
off.
Convenience key
Starting the engine
Appl ies to vehicles: w it h co nve nience key
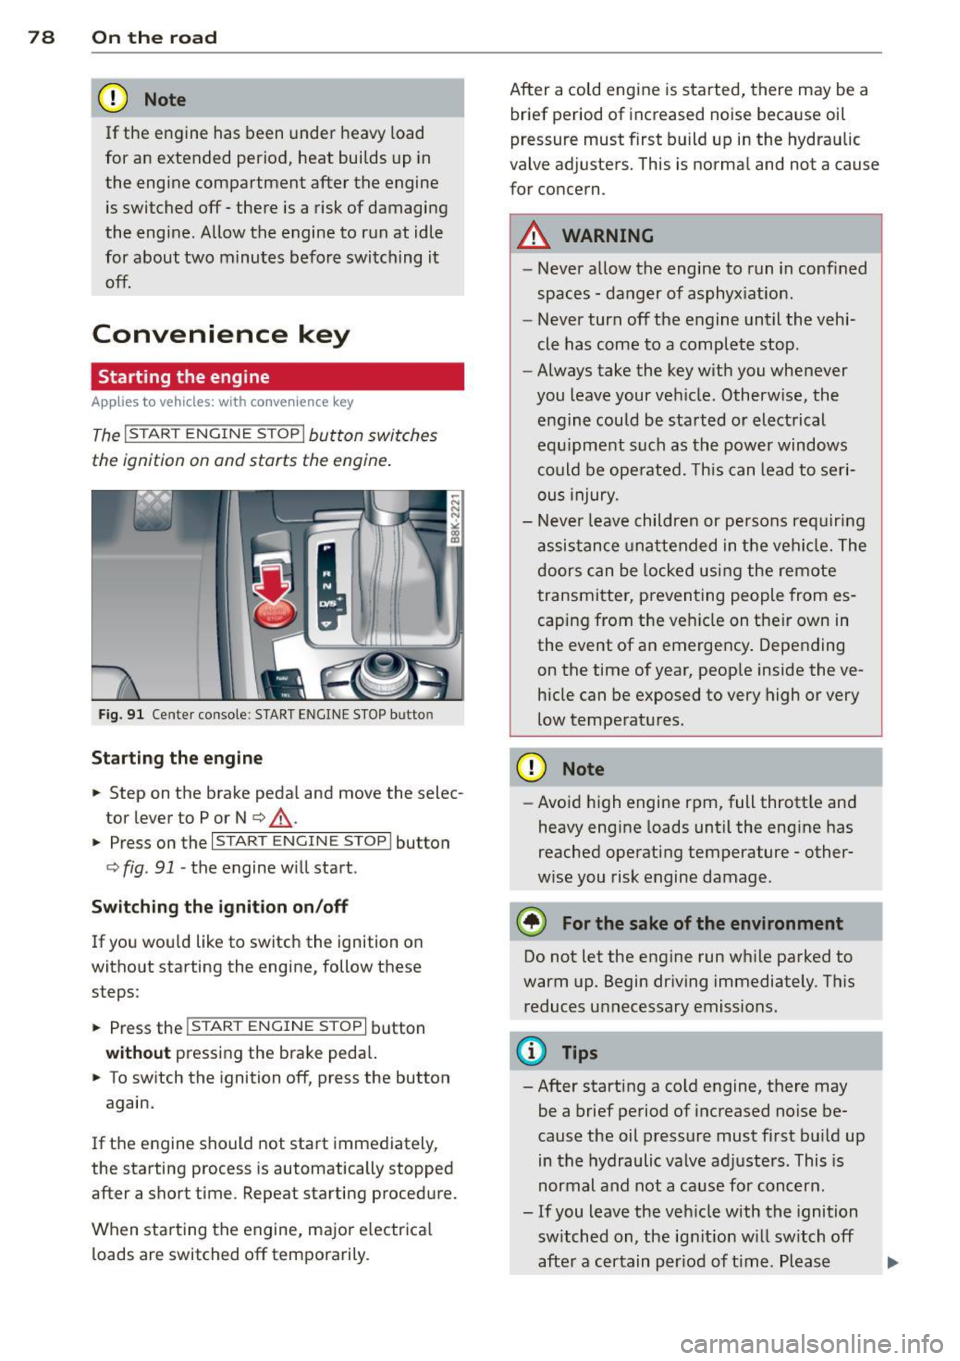
The I STAR T ENGINE S TOP! button switches
the ignition on and starts the engine .
Fig. 91 Cente r conso le: S TART ENGINE S TOP butto n
Starting the engine
.. Step on the brake peda l and move the selec
tor lever to P or N
q &, .
.. Press on the ,..., 1s==T=--= A-=R ==T:-=:E~N ~G-;-,IN ;-;--;:::: E--;: S:-::;T =-::O :;-;: P:;-,I butto n
q fig. 91 -the engine w ill start .
Switch ing the ignition on /off
If yo u wou ld like to switch the ignition on
without starting the engine, follow these
steps:
.. Press the
!S TAR T ENGINE STOP! button
without pressing the brake peda l.
.. To switch the ignition off, press the button
again.
If the engine should not start immediately,
the starting process is automatically stopped after a short time . Repeat starting procedure.
When starting the engine, major e lectr ica l
loads are switched off temporarily. After a cold engine is started, there may be a
brief period of increased noise beca use oil
pressure must first bu ild up in the hydrau lic
valve adjusters. This is normal and not a cause
for concern .
A WARNING
=
-Never allow the engine to run in confined
spaces -danger of asphyx iat ion.
- Never turn off the e ngine until the vehi
cle has come to a complete stop.
- Always take the key with you whenever
you leave your veh icle . Otherw ise, the
engine could be started or electrical
equ ipment such as th e power windows
could be ope rated. Th is can lead to seri
ous injury.
- Never leave children or persons req uiring
a ssis tance u nattended in t he vehi cle. The
doors can be locked usi ng the remote
transmitter, preventing people from es
caping from the veh icle on the ir own in
the event of an emergency . Depending
on the time of year, peop le inside the ve
hicle can be exposed to very high or very
low temperatures.
(D Note
- Avoid high engine rpm, full thrott le and
heavy eng ine loads unt il the eng ine has
reached operating temperature -other
w ise you risk engine damage.
® For the sake of the env ironment
Do not let the engine run wh ile parked to
warm up. Begin dr iving immediately. This
reduces unnecessary emissions .
¢j) Tips
- After starting a co ld engine, there may
be a brief period of increased noise be
cause the oil pressure must fi rst bu ild up
in the hydraulic valve ad justers. This is
normal and not a cause for concern .
- If you leave the veh icle with the ignition
switched on, the ignit ion w ill switch off
afte r a certain per iod of t ime . Please
1JJ1,
Page 81 of 290

note that electrica l equipment such as
exterior lights wi ll switch off as well
when that happens.
Switching engine off
App lies to vehicles: with conve nien ce key
.,. Bring your vehicle to a complete stop.
.,. Move the selector lever to the P or N posi
t ion.
... Press the
!START E NGIN E STOPI button
~fig. 91.
St eering lock
The steering locks when you turn the engine
off us ing the
I STAR T ENGINE STOP I button
and open the dr iver's door . The locked steer
ing he lps prevent vehicle theft.
E mergenc y off
If necessary, the eng ine can be sw itched off
with the selector lever in the R or D/S pos i
tions. To do so, step on the brake peda l and
press and hold the
I STAR T ENGINE STOP I but
ton vehicle speed must be less than 6 mph
(10 km/h).
.&, WARNING
-Never t urn off the eng ine be fore the ve
hicle has come to a complete stop . The
f ull function of the brake booster and the
power steering is not guaranteed . You
must use more force to turn or brake if
necessary. Because you cannot steer and
brake as you usua lly would, this could
lead to c rashes and serious injur ies.
- For safety reasons, you should always
park your vehicle with the se lector lever
in P . Otherwise, the veh icle could i nad
vertent ly roll away .
- The rad iator fan can continue to run for
up to 10 minutes eve n after you have
tu rned off the eng ine and removed the
ignition key. The radiator fan can also
turn on again i f the engine coolant hea ts
up because of intense sunlight or hea t
build -up in the engine compartment.
On th e ro ad 79
-Always take the key w ith you whenever
you leave your ve hicle. Otherw ise, the
e ngine could be started or electrical
equipment such as the power windows
could be operated. This can lead to seri
ous injury.
(D Note
If the engine has been under heavy load
for an extended period, heat bu ilds up in
the eng ine compartment after the eng ine
i s sw itched off - there is a r is k of damag ing
the e ngine. A llow the eng ine to run at id le
for abo ut two minutes before switching it
off.
Driver messages
I g nition i s on
This message appears and a warning tone
sounds if you open the d river's door when the
ignition is sw itched on .
No key ident ified
This message appears when the
I S TART ENGINE STOP I button is pressed if
there is no master key ins ide the ve hicle or if
the system does not recognize it . For exam
ple, the master key cannot be recognized if it
i s covered by an object (e .g . aluminum brief
case) which
screens the radio s ignal. Electron
ic dev ices such as cell p ho nes can also inte r
f ere with the radio s ignal.
Pr ess brake p edal to start engine
This message appears if you do not press the
brake pedal to start the eng ine .
Shift to N or P to start engine
T h is message appears w hen a ttempt ing to
star t the eng ine if the selecto r lever for the
automatic transmiss ion is not in the P or N
pos ition . The engine can only be started with
the se lector in these positions.
Is the ke y in the vehicle ?
Page 83 of 290
(D Note
If the . symbol i n the display or the
1111 (USA models) ;II (Canada models)
ind icator lig ht in the instrument cluster
flashes, there is a ma lfu nction in the brake
system. By press ing the
!SETI butto n, you
can br ing up a d river message which ex
plains the malfunction in more detail.
If
the dr iver message Parking brak e! ap
pea rs, there is an operating ma lfunction in
the parking brake which you should have
repaired immediately by an authorized
Audi dea ler or other q ualified workshop
¢page 15.
@ Tips
-You can apply the parking brake at any
time - even with the ignition switched
off . The ignit ion must be t urned on in or
der to release the parking brake.
- Occasiona l noises when the parking
brake is applied and re leased are norma l
and are not a cause for concern.
- When the vehicle is parked, the parking
brake goes through a se lf-test cycle at
regular intervals. Any assoc iated noises
are norma l.
Parking
P ar king
• Press the brake pedal to stop the vehicle .
• Pull the button®¢
fig. 92 to set the park-
ing brake .
• Move the selecto r leve r to P .
• T urn the eng ine off¢ ,&..
In addition on inclines and grad es
• T urn the steer ing wheel so that your vehicle
will roll against the curb in case it should
sta rt to move .
A WARNING
-When you leave your veh icle -eve n if on
ly b rief ly - a lways remove the ign ition
key . This applies part icu larly when chil
dre n remain in the vehicle . Otherw ise the
On th e ro ad 81
children could start the eng ine, release
the park ing brake or operate electrical
equ ipment (e.g. power windows). There
is t he risk of an acc ident .
- When the veh icle is locked, no one -par
ticularly not children should rema in in
the vehicle. Locked doors make it more
difficult for emergency wo rke rs to get in
to the veh icle - putting lives at risk.
Starting from rest
The starting assist function ensures that the
parking brake is released automatically upon
starting .
Stopping and applying parking brake
• Pull the switch®¢ fig. 92 to app ly the
parking brake.
Sta rting and automatically rel easing the
parking brake
• When you start to drive as usual, the park
ing brake is automatically released and your
veh icle beg ins to move .
When stopping at a traffic signal or stopping in city traff ic on vehicles with an automatic
transmission, the parking brake can be ap plied . The vehicle does not have to be he ld
with the footbrake. The pa rking brake elimi
nates the tende ncy to creep w ith a dr ive range
engaged. As soon as yo u drive off as usu al,
t h e parking bra ke is re leased automatic ally
and the vehicle starts to move.
Starting on slopes
When starting on inclines, the sta rting assist
prevents t he vehi cle from u nintent ionally roll
ing back. The bra king force of the par kin g
brake is no t re leased unti l su ff ic ient d riving
f orce has been built up at the wheels.
(D Tips
F o r safety reaso ns, t he pa rking br ake is re
l eased automatic ally o nly when the d riv
e r's safety belt is engaged in the buckle .
Page 107 of 290
-Improper reliance on the side assist sys
tem can cause collisions and serious
personal injury:
- Never rely only on side assist when
changing lanes.
- Always check rear view mirrors to make
sure that it is safe to change lanes.
- Side assist cannot detect all vehicles un
der all conditions- danger of accident!
- Please note that side assist indicates
there are approaching vehicles, or
vehicles in your blind spot, only after
your vehicle has reached a driving speed
of at least 19 mph (30 km/h).
- In certain situations, the system may not
function or its function may be limited.
For example:
- if vehicles are approaching or being left
behind very quickly. The display may
not turn on in time.
- in poor weather conditions such as
heavy rain, snow or heavy mist .
- on very wide lanes, in tight curves or if
there is a rise in the road surface .
Vehicles in the adjacent lane may not
be detected because they are outside
of the sensor range.
(D Note
The sensors can be displaced by impacts or
damage to the bumper, wheel housing and
underbody. This can affect the system .
Have your authorized Audi dealer or au
thorized Audi Service Facility check their
function.
(D Tips
- If the window glass in the driver's door
or front passenger's door has been tint
ed, the display in the exterior mirror may be misinterpreted.
- For Declaration of Compliance to United
States FCC and Industry Canada regula
tions
~page 272.
Audi side assist 105
Activating and deactivating
Applies to vehicles : wi th Aud i side ass ist
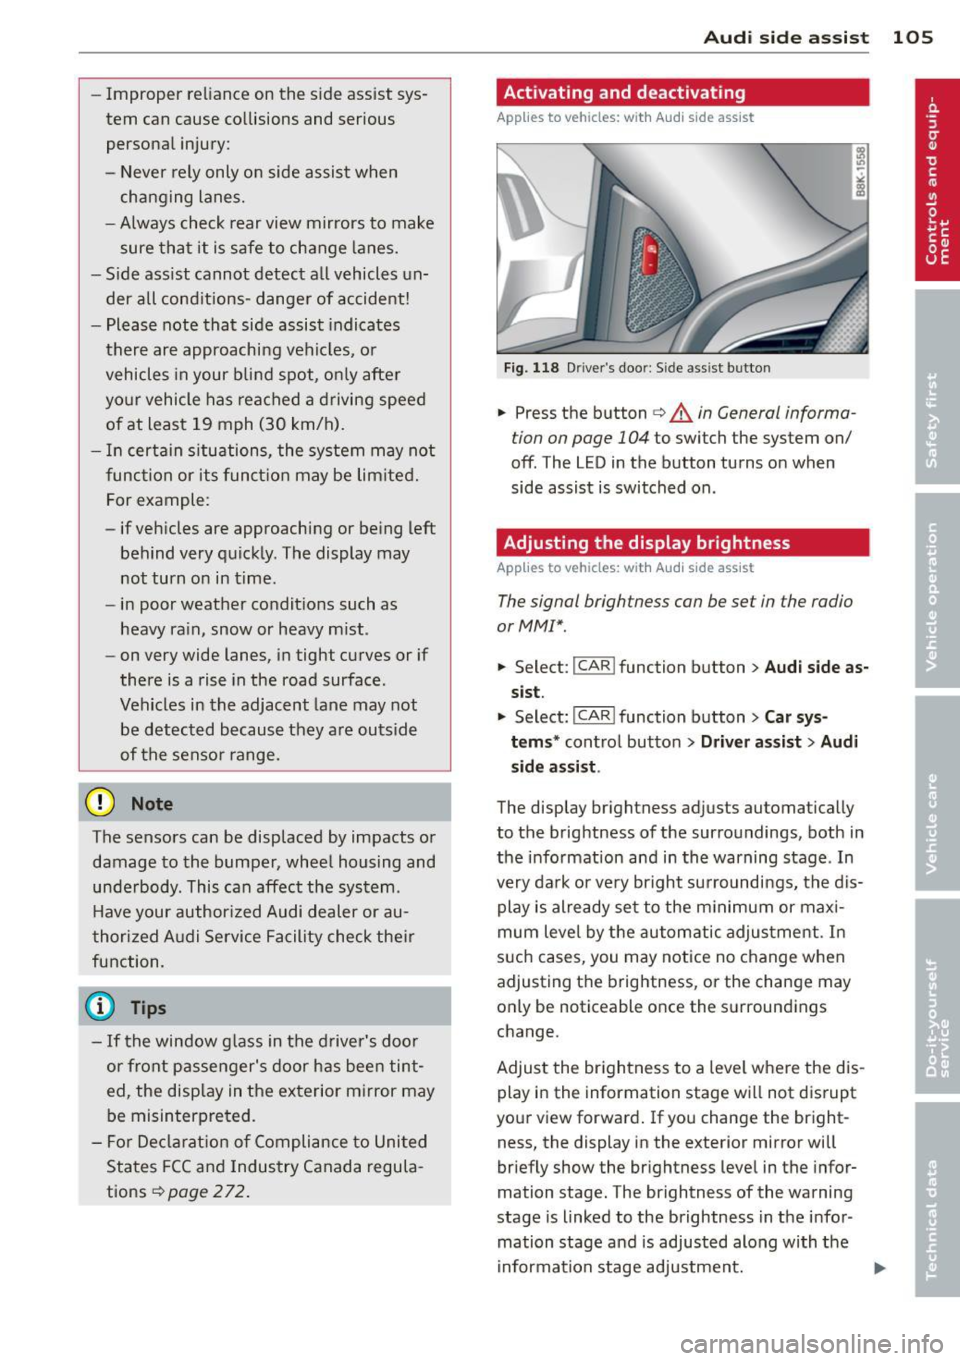
Fig. 118 Driver 's doo r: Side assis t button
.,. Press the button c> .&. in General informa
tion on page 104
to switch the system on/
off . The LED in the button turns on when
side assist is switched on.
Adjusting the display brightness
App lies to vehicles: wit h Audi side ass ist
The signal brightness can be set in the radio
orMMI* .
.,. Select: I CAR I function button > Audi side as
sist.
.,. Select: I CAR ! function button > Car sys
tems*
control button > Driver assist > Audi
side assist .
The display brightness adjusts automatically
to the brightness of the surroundings, both in
the information and in the warning stage . In
very dark or very bright surroundings, the dis play is already set to the minimum or maxi
mum level by the automatic adjustment. In
such cases, you may notice no change when
adjusting the brightness, or the change may
only be noticeable once the surroundings
change.
Adjust the brightness to a level where the dis
play in the information stage will not disrupt
your view forward. If you change the bright
ness, the display in the exterior mirror will
briefly show the brightness level in the infor
mation stage. The brightness of the warning
stage is linked to the brightness in the infor
mation stage and is adjusted along with the
information stage adjustment.
Page 123 of 290
Driving Safely
General notes
Safe driving habits
Please remember -safety first!
This chapter contains important information,
tips, instructions and warnings that you need
to read and observe for your own safety, the
safety of your passengers and others . We have
summarized here what you need to know
about safety belts, airbags, child restraints as
well as child safety. Your safety is for us
priori
ty number 1.
Always observe the information
and warnings in this section - for your own
safety as well as that of your passengers.
The information in this section applies to all
model versions of your vehicle . Some of the
features described in this sections may be
standard equipment on some models, or may
be optional equipment on others. If you are
not sure, ask your authorized Audi dealer.
A WARNING
-Always make sure that you follow the in
structions and heed the WARNINGS in
this Manual. It is in your interest and in
the interest of your passengers.
- Always keep the complete Owner's Liter
ature in your Audi when you lend or sell
your vehicle so that this important infor
mation will always be available to the
driver and passengers.
- Always keep the Owner's literature handy
so that you can find it easily if you have
questions.
Safety equipment
The safety features are part of the occupant
restraint system and work together to help
reduce the risk of injury in a wide variety of
accident situations .
Your safety and the safety of your passengers
should not be left to chance. Advances in
technology have made a variety of features
available to help reduce the risk of injury in an
Driving Safely 121
accident. The following is a list of just a few of
the safety features in your Audi :
- sophisticated safety belts for driver and all
passenger seating positions,
- belt force limiters for the front seats,
- belt pretensioners for the seats,
- head restraints for each seating position,
- front airbags,
- side airbags in the front seats,
- special LATCH anchorages for child re-
straints,
- adjustable steering column.
These individual safety features, can work to
gether as a system to help protect you and
your passengers in a wide range of accidents.
These features cannot work as a system if
they are not always correctly adjusted and cor
rectly used.
Safety is everybody's responsibility!
Important things to do before driving
Safety is everybody's job! Vehide and occv
pant safety always depends on the informed
and careful driver.
For your safety and the safety of your passen
gers,
before driving always:
.,. Make sure that all lights and signals are op
erating correctly .
"' Make sure that the tire pressure is correct.
.,. Make sure that all windows are clean and
afford good visibility to the outside.
.,. Secure all luggage and other items carefully
r=)page 66.
.,. Make sur e that nothing can interf ere with
the pedals .
.,. Adjust front seat, head restraint and mir
rors correctly for your height.
.,. Instruct passengers to adjust the head re
straints according to their height .
"' Make sure to use the right child restraint
correctly to protect children
r=) page 161,
Child Safety.
.,. Sit properly in your seat and make sure that
your passengers do the same
r=) page 61,
Seats and storage.
ll>
•
•
Page 127 of 290
The head restraints must be correctly adjust
ed to achieve the best protection.
.,. Adjust the head restraints so the upper
edge is as even as poss ible with the top of
your head. If that is not possib le, try to ad
just the head restraint so that it is as close to this position as possible ¢
fig. 133.
Adjusting head rest raints ¢ page 64 .
A WARNING
All seats are equipped with head re
straints . Driving without head restraints or
w ith head restraints that are not properly
adjusted increases the risk of ser ious or fa
tal neck injury dramat ically. To help reduce
the risk of in ju ry:
- Always drive with the head restraints in
place and proper ly adjusted.
- Every person in the veh icle must have a
properly adjusted head restra int.
-Always make sure each person in the ve hicle properly adjusts the ir head re
straint. Adj ust the head restraints so the
upper edge is as even as possible w ith
the top of your head .
If that is not possi
ble, try to adjus t the head restra int so
that it is as close to this position as pos
sible.
- Never a ttempt to adju st head re st rain t
wh ile driving. If you have driven off and
must adjust the dr iver head rest for any
reason, first stop the vehicle safe ly be
fore attempting to adjust the head re straint.
- Children must always be properly re
strained in a ch ild restraint that is appro
pr iate for their age and size <=>
page 161.
Examples of improper seating positions
The occupant restraint system can only re
duce the risk of injury if vehicle occupants are
properly seated.
I mp roper seating positions can ca use serio us
in ju ry or death. Safety belts can on ly work
when they are properly posit ioned on the
Dr iving S afel y 125
body. Improper seating positions re duce the
effectiveness of safety belts and wi ll even in
crease the r is k of i njury and death by moving
the safety belt to crit ica l areas of the body.
Improper seating positions a lso increase the
risk of serious injury and death when an a ir
bag deploys and str ikes an occupant w ho is
not in the p roper seating posit ion. A dr iver is
responsible fo r the safety of all veh icle occu
pan ts and espec ially for children. The re fore :
... Never allow anyone to assume an incorrect
seating position when the vehicle is being
used ¢,& .
The following bulletins list on ly some sample
pos itions that will increase the risk of serious
i njury and death. Ou r hope is that these e xam
ple s will ma ke yo u mo re aware o f seati ng po
s itions tha t are d angerous.
Therefore , whenever the vehicle is
moving:
- neve r stand up in the vehicle
- neve r stand on the seats
- never kneel on the seats
- never ride w it h the seatback reclined
- never lie down on the rear seat
- never lean up against the instrument panel
- never s it on the edge of the seat
- neve r sit sideways
- neve r lean out the window
- neve r put your feet out the window
- never put your feet on the instr ument panel
- never rest your feet on the seat cush ion or
back of the seat
- neve r ride in the footwell
- neve r ride in the cargo area
A WARNING
--=
Imp ro p er seating posit ions increase the
risk of serious persona l injury and death
whenever a vehicle is being used.
- Always make sure that all vehicle occu-
pants stay in a proper seating position
and are properly restrained whenever the
veh icle is being used.
-
•
•