display AUDI A5 COUPE 2008 Repair Manual
[x] Cancel search | Manufacturer: AUDI, Model Year: 2008, Model line: A5 COUPE, Model: AUDI A5 COUPE 2008Pages: 313, PDF Size: 13.86 MB
Page 129 of 313
Driving127
Controls
Safety
Driving tips
General maintenance
Self-help
Technical data
– Pull the lever to position ⇒page 125, fig. 138 to
switch on the system.
– Drive at the speed you wish to set the system to (must be higher than 30 km/h).
– Briefly press button .When the pushbutton is released, the current speed is stored in the
memory and the vehicle will maintain this speed. The cruise control
system is then operating. If you ha ve selected the display for the on-
board computer 1 or 2, a green symbol in the instrument cluster
display indicates that the cruise control is operating ⇒page 126,
fig. 140. The speed which is being maintained is displayed next to
the symbol.
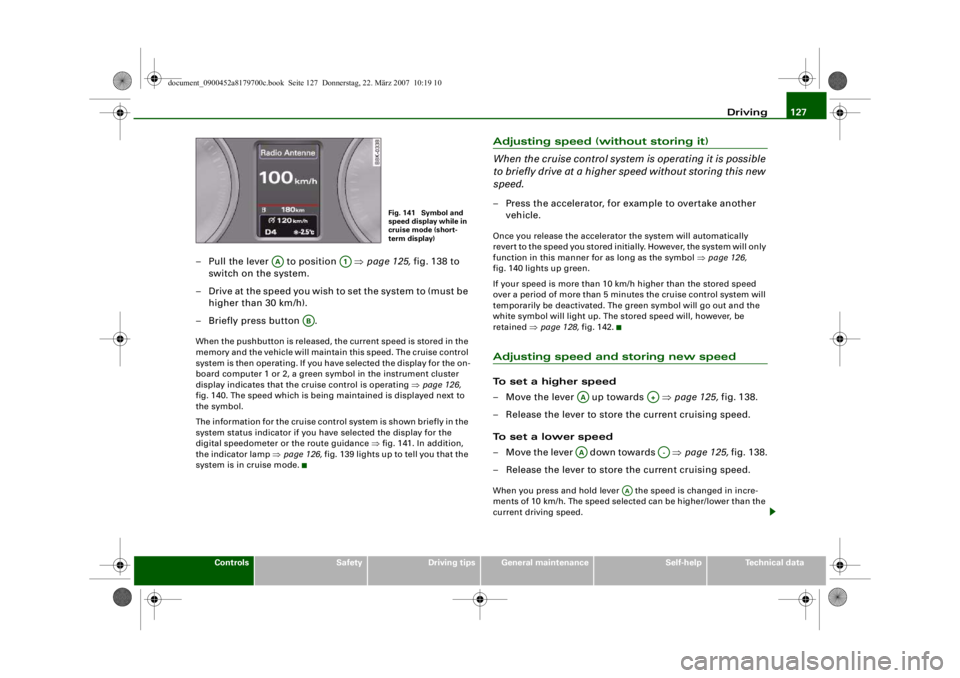
The information for the cruise control system is shown briefly in the
system status indicator if you have selected the display for the
digital speedometer or the route guidance ⇒fig. 141. In addition,
the indicator lamp ⇒ page 126, fig. 139 lights up to tell you that the
system is in cruise mode.
Adjusting speed (without storing it)
When the cruise control system is operating it is possible
to briefly drive at a higher speed without storing this new
speed.– Press the accelerator, for example to overtake another
vehicle.Once you release the accelerator the system will automatically
revert to the speed you stored initially. However, the system will only
function in this manner fo r as long as the symbol ⇒page 126,
fig. 140 lights up green.
If your speed is more than 10 k m/h higher than the stored speed
over a period of more than 5 minutes the cruise control system will
temporarily be deactivated. The gr een symbol will go out and the
white symbol will light up. The stored speed will, however, be
retained ⇒page 128, fig. 142.Adjusting speed and storing new speedTo set a higher speed
– Move the lever up towards ⇒page 125, fig. 138.
– Release the lever to store the current cruising speed.
To set a lower speed
– Move the lever down towards ⇒page 125, fig. 138.
– Release the lever to store the current cruising speed.When you press and hold lever the speed is changed in incre-
ments of 10 km/h. The speed selected can be higher/lower than the
current driving speed.
Fig. 141 Symbol and
speed display while in
cruise mode (short-
term display)
AA
A1
AB
AA
A+
AA
A-
AA
document_0900452a8179700c.book Seite 127 Donnerstag, 22. März 2007 10:19 10
--4 -
-T
-+
•
+-
•
Page 130 of 313
Driving
128Pressing lever briefly
You can increase the set speed in steps of 1 km/h by briefly pressing
the lever up towards ⇒page 125, fig. 138.
You can decrease the set speed in steps of about 1 km/h by briefly
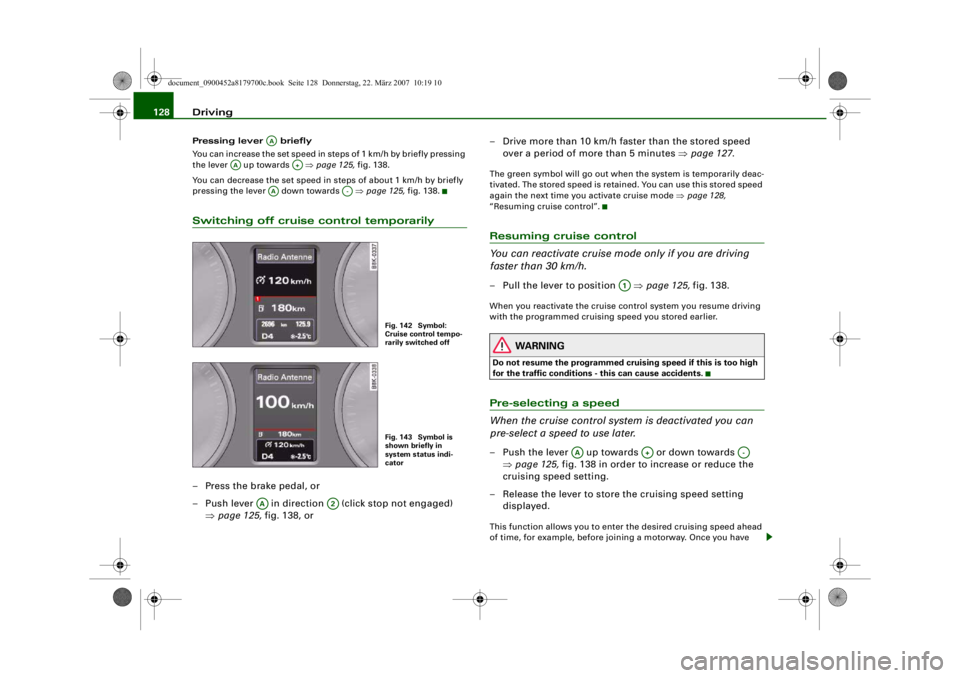
pressing the lever down towards ⇒page 125, fig. 138.Switching off cruise control temporarily– Press the brake pedal, or
– Push lever in direction (click stop not engaged)
⇒page 125, fig. 138, or – Drive more than 10 km/h faster than the stored speed
over a period of more than 5 minutes ⇒page 127 .
The green symbol will go out when the system is temporarily deac-
tivated. The stored speed is retained. You can use this stored speed
again the next time you activate cruise mode ⇒page 128,
“Resuming cruise control”.Resuming cruise control
You can reactivate cruise mode only if you are driving
faster than 30 km/h.– Pull the lever to position ⇒page 125, fig. 138.When you reactivate the cruise control system you resume driving
with the programmed cruising speed you stored earlier.
WARNING
Do not resume the programmed crui sing speed if this is too high
for the traffic conditions - this can cause accidents.Pre-selecting a speed
When the cruise control syst em is deactivated you can
pre-select a speed to use later.– Push the lever up towards or down towards
⇒page 125, fig. 138 in order to increase or reduce the
cruising speed setting.
– Release the lever to store the cruising speed setting displayed.This function allows you to enter the desired cruising speed ahead
of time, for example, before joining a motorway. Once you have
AA
AA
A+
AA
A-
Fig. 142 Symbol:
Cruise control tempo-
rarily switched offFig. 143 Symbol is
shown briefly in
system status indi-
cator
AA
A2
A1
AA
A+
A-
document_0900452a8179700c.book Seite 128 Donnerstag, 22. März 2007 10:19 10
--4 -
-T
•
•
-+ +-
•
Page 133 of 313

Automatic gearbox131
Controls
Safety
Driving tips
General maintenance
Self-help
Technical data
– To prevent the vehicle from rolling away, apply the
parking brake before moving off on steep gradients
⇒ .
– As soon as you accelerate as normal, the parking brake will automatically be released and the vehicle will start
moving.
Pa rking the c ar
– Press and hold the brake pedal ⇒.
– Apply the parking brake.
– Press and hold the interlock button, move the selector lever to P and release the interlock button.Your vehicle is equipped with the hill hold assist function which
makes it easier to drive away on a slope. The system is activated
when you press and hold the brake pedal for a few seconds. When
you release the brake pedal the braking force will be maintained for
a moment in order to prevent the vehicle rolling back when you drive
away.
The engine c an only be started when the selector lever is at P or N.
On level ground it is sufficient to move the selector lever to P. On a
gradient the parking brake should be applied first and the selector
lever should be moved to P. This reduces the load on the locking
mechanism and makes it easier to move the selector lever out of
position P.
WARNING
•
Do not press the accelerator while selecting a gear with the
vehicle stationary and the engine running, as this could cause an
accident.
•
Please note that some power will still be transmitted when you
stop temporarily with the selector lever in position D, S or R. For this reason, to avoid ri
sking an accident, appl y the footbrake firmly
when stopping to prevent the vehicle rolling away.
•
Never move the selector lever to R or P when driving, as this
could cause an accident.
Applies to vehicles: with multitronic®Selector lever positions
This section covers all the selector lever positions.The current selector lever position is shown in the instrument
cluster display.
P - Parking lock
This locks the driving wheels mechanically. The parking lock must
only be engaged when the vehicle is stationary ⇒.
The interlock button (the button in the selector lever handle) must
be pressed in and the brake pedal must be depressed before
moving the selector lever either in or out of position P. The lever can
only be moved out of position P when the ignition is on.
R - Reverse gear
When reverse gear is engaged the gearbox automatically selects the
lowest gear ratio.
Fig. 145 Display:
Selector lever posi-
tions
document_0900452a8179700c.book Seite 131 Donnerstag, 22. März 2007 10:19 10
--4 -
-T
•
-+ +-
Page 135 of 313
Automatic gearbox133
Controls
Safety
Driving tips
General maintenance
Self-help
Technical data
– Press the brake pedal and at the same time press in the
interlock button.Automatic selector lever lock
The selector lever is locked in the P and N positions when the igni-
tion is on. The brake pedal must be depressed before the lever can
be moved out of either of these positions. The following message
appears in the instrument display as a reminder for the driver when
the selector lever is in position P or N:
WHEN STATIONARY APPLY FOOTBRAKE WHILE SELECTING GEAR.
The selector lever lock only works if the vehicle is stationary or
driving at speeds up to 5 km/h. At higher speeds the selector lever
lock in the N position is disengaged automatically.
The selector lever lock is not engaged if the selector lever is moved
quickly through position N (e.g. when shifting from R to D). This
makes it possible, for instance, to “rock” the vehicle backwards and
forwards if it is stuck in snow or mud. The selector lever lock
engages automatically if the brake pedal is not depressed and the
lever is in position N for more than about a second.
Interlock button
The interlock button on the selector lever handle prevents the driver
from inadvertently engaging particul ar gears. Press the button in to
disengage the selector lever lock. Th e illustration shows the selector
lever positions in which the button has to be pressed, highlighted in
colour ⇒page 132, fig. 146.
Safety interlock for ignition key
The key can only be withdrawn with the ignition switched off and
the selector lever in position P. When the ignition key is removed,
the selector lever is locked in position P.
Applies to vehicles: with multitronic®Kick-down feature
The kick-down feature is designed to give maximum
acceleration.When the accelerator pedal is pressed right down past the point of
resistance at full throttle, the gearbox will select a lower gear,
depending on road speed and engine speed. While you keep the
accelerator depressed the engine speed is automatically controlled
to give your vehicle maximum acceleration.
WARNING
Please note that if the road surf ace is slippery or wet, the kick-
down feature could cause the driv ing wheels to spin, which could
result in skidding.Applies to vehicles: with multitronic®Dynamic gear control program (DCP)
The multitronic
® gearbox is controlled electronically.
The vehicle is equipped with an electronically controlled gearbox.
The gear ratios are selected automatically according to preset gear-
shift programmes.
When you drive at moderate speeds the gearbox will select the most
economical shift programme. It will then change up early and delay
the downshifts to give better fuel economy.
If you drive at higher speeds with heavy acceleration, if you open the
throttle quickly, or if you use the kick-down or the car's maximum
speed, the gearbox will automaticall y select the more “sporty” shift
programmes.
The gearbox is self-adapting, and continuously selects the most
suitable shift programme. At the same time, the driver can also
make the gearbox switch to a more "sporty" programme by pressing
document_0900452a8179700c.book Seite 133 Donnerstag, 22. März 2007 10:19 10
--4 -
-T
-+ +-
•
Page 136 of 313
Automatic gearbox
134the accelerator quickly. Depending on road speed, this makes the
gearbox shift down early into a lower gear ratio for more rapid accel-
eration (for instance to pass another vehicle), without having to
press the accelerator all the way down into the kick-down position.
After the gearbox has shifted back up it returns to the original
programme, depending on your style of driving.
The gearbox continuously adapts the gear ratios on uphill gradi-
ents. If the brake pedal is pressed on a downhill gradient the
gearbox automatically shifts to a lower gear ratio. This increases the
engine braking effect.Applies to vehicles: with multitronic®Manual gear selection (tiptronic mode)
With the manual shift programme (tiptronic) the driver
can manually select seven pre-programmed gears.
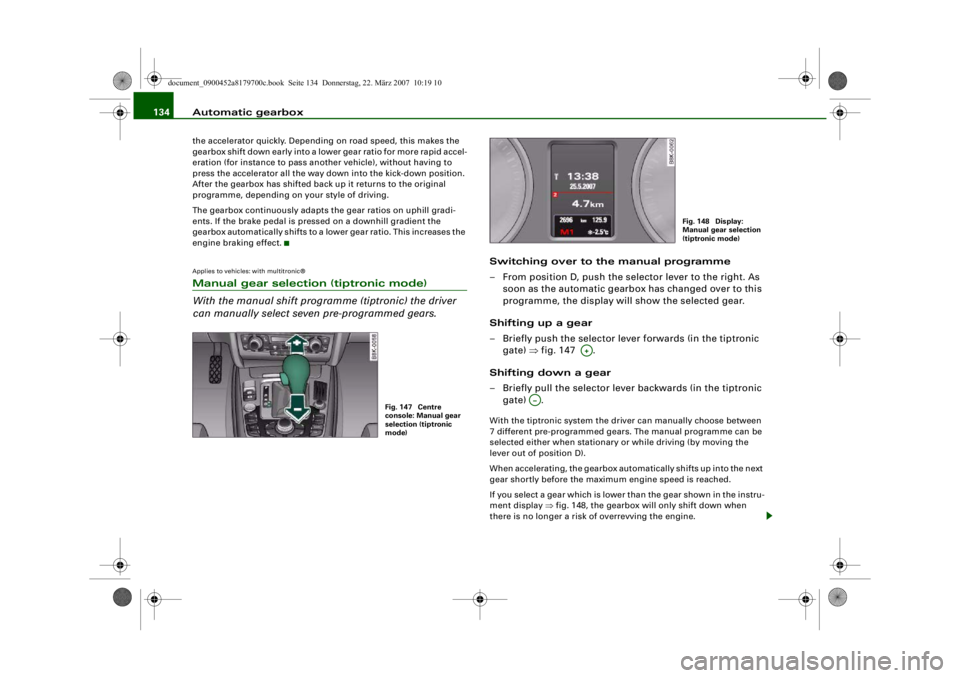
Switching over to the manual programme
– From position D, push the selector lever to the right. As
soon as the automatic gearbox has changed over to this
programme, the display will show the selected gear.
Shifting up a gear
– Briefly push the selector lever forwards (in the tiptronic gate) ⇒fig. 147 .
Shifting down a gear
– Briefly pull the selector lever backwards (in the tiptronic gate) .With the tiptronic system the driver can manually choose between
7 different pre-programmed gears. The manual programme can be
selected either when stationary or while driving (by moving the
lever out of position D).
When accelerating, the gearbox automatically shifts up into the next
gear shortly before the maximum engine speed is reached.
If you select a gear which is lower than the gear shown in the instru-
ment display ⇒fig. 148, the gearbox will only shift down when
there is no longer a risk of overrevving the engine.
Fig. 147 Centre
console: Manual gear
selection (tiptronic
mode)
Fig. 148 Display:
Manual gear selection
(tiptronic mode)
A+
A…
document_0900452a8179700c.book Seite 134 Donnerstag, 22. März 2007 10:19 10
--4 -
-T
•
-+ +-
Page 137 of 313
Automatic gearbox135
Controls
Safety
Driving tips
General maintenance
Self-help
Technical data
When the vehicle slows down (for
instance when braking), the
gearbox automatically shifts down into the next gear when the
minimum engine speed is reached.
Changing down to a lower gear increases the engine braking effect
on downhill gradients.
When the accelerator pedal is pressed right down past the point of
resistance at full throttle, the ge arbox will select a lower gear,
depending on road speed and engine speed.
Applies to vehicles: with multitronic®Back-up programme
A back-up system is in place should a fault occur in the
control system.The automatic gearbox switches to the back-up programme if a fault
should occur in the control system. This is indicated by all segments
of the display panel either lighti ng up together or going out
completely.
It is still possible to move the selector lever to all positions. The
manual shift programme (tiptronic) is not available when the back-
up programme is active.
It will still be possible to use reverse gear in the normal way.
However, the electronic lock for reverse gear will be switched off.
Caution
Should the gearbox ever switch into the back-up programme, you
should take the vehicle to an Audi dealer or qualified workshop as
soon as possible.
Applies to vehicles: Tiptronic controls on steering wheelSteering wheel with tiptronic controls
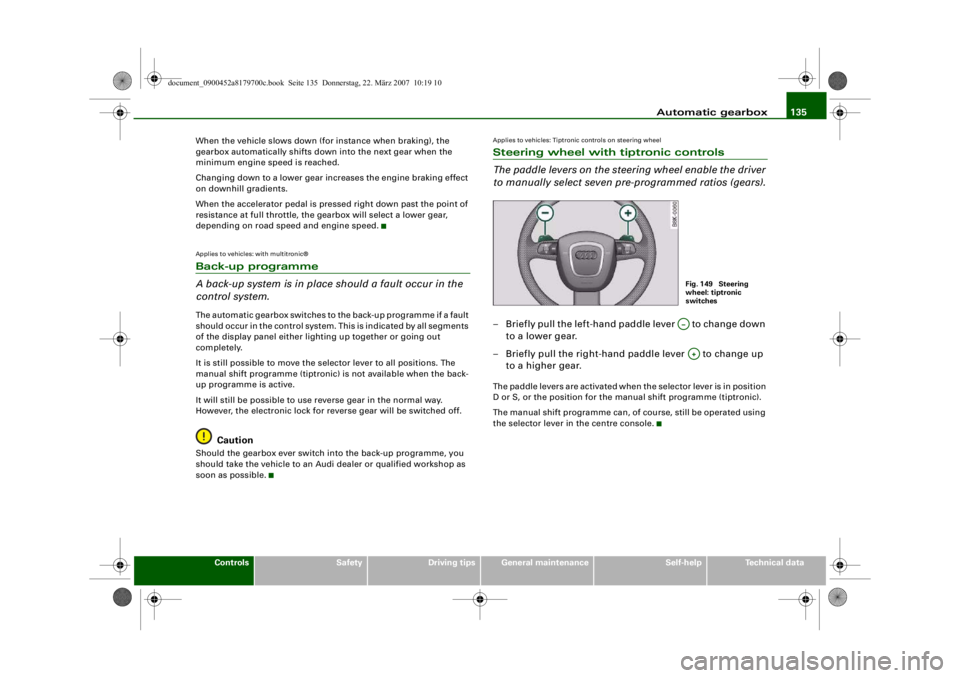
The paddle levers on the steering wheel enable the driver
to manually select seven pre-programmed ratios (gears).– Briefly pull the left-hand paddle lever to change down to a lower gear.
– Briefly pull the right-hand paddle lever to change up to a higher gear.The paddle levers are activated when the selector lever is in position
D or S, or the position for the manual shift programme (tiptronic).
The manual shift programme can, of course, still be operated using
the selector lever in the centre console.
Fig. 149 Steering
wheel: tiptronic
switchesA…A+
document_0900452a8179700c.book Seite 135 Donnerstag, 22. März 2007 10:19 10
--4 -
-T
•
-+ +-
•
CD
•
Page 139 of 313
Audi parking system137
Controls
Safety
Driving tips
General maintenance
Self-help
Technical data
Audi parking systemParking aid systemsApplies to vehicles: with parking systemGeneral notes
Depending on the optional equipment fitted, there are
various parking aid systems to assist you when parking or
manoeuvring in tight spaces.parking system*:
The parking system comprises the rear acoustic parking aid
⇒ page 137 .
The rear acoustic parking system uses ultrasonic sensors to
measure the distance between the vehicle and an obstacle which
has been detected. There are four sensors which are located in the
rear bumper (two in the centre, two at the sides).
parking system plus*:
The parking system plus* comprises the rear and front acoustic
parking aid ⇒page 138 in conjunction with a graphic display.
The parking system plus* uses ultrasonic sensors to measure the
distance between the vehicle and an obstacle which has been
detected. There are a total of 8 sensors located in the front and rear
bumpers (2 in the centre and 2 on the side of each bumper).
parking system advanced*:
The parking system advanced* comprises the rear and front
acoustic parking aid in conjunction with the graphic display as well
as a reversing camera (Rear View) ⇒page 140 .
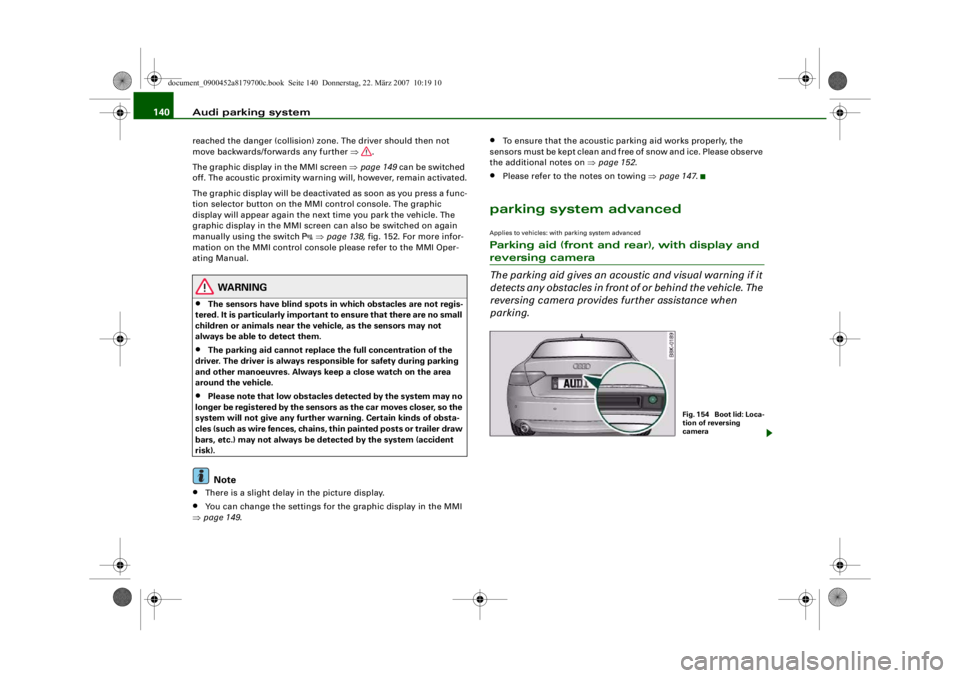
The reversing camera is located in the boot lid ⇒page 140, fig. 154
and assists the driver when parking or manoeuvring in tight spaces.
The reversing camera provides an image which is shown in the MMI display. It represents the mirror image of a section of the area
behind the vehicle ⇒
page 144, fig. 159.
Note
There is a slight delay in the picture display.parking systemApplies to vehicles: with parking systemRear parking aid
The parking aid gives an acoustic warning if it detects any
obstacles behind the vehicle.– Engage reverse gear. You will hear a short beep to
confirm that the rear parking aid has been activated. The
rear parking aid remains active for as long as the reverse
gear is engaged.The measuring range of the sensors in the rear bumper starts at
approximately :
Reversing
When the vehicle is reversing, the system starts to beep when it
registers an obstacle within its detection range (see above). The
warnings will beep increasingly rapidly as the vehicle approaches
the obstacle.Rear
Side
0.60 m
Centre
1.60 m
document_0900452a8179700c.book Seite 137 Donnerstag, 22. März 2007 10:19 10
--4 -
-T
----
[I)
•
-+ +-
Page 140 of 313
Audi parking system
138When the vehicle is less than appro x. 0.30 m away from the obstacle
the warning tone will sound continuously. From here at the latest,
the driver should then not reverse any further.
The volume of the warning beeps will be gradually reduced after
about 4 seconds if the vehicle remains at a constant distance from
a detected obstacle (it will not be reduced if the obstacle is closer
than 0.30 m). The warnings will then return to the normal volume if
the vehicle approaches th e detected obstacle again.
Warning beeps
The warning beeps are produced by sound boxes. The volume and
pitch of the beeps can be adjusted in the MMI ⇒page 148 .
WARNING
•
The sensors have blind spots in which obstacles are not regis-
tered. It is particular ly important to ensure that there are no small
children or animals near the vehicle, as the sensors may not
always be able to detect them.
•
The parking aid cannot replace th e full concentration of the
driver. The driver is always resp onsible for safety during parking
and other manoeuvres. Always keep a close watch on the area
around the vehicle.
•
Please note that low obstacles detected by the system may no
longer be registered by the sensors as the car moves closer, so the
system will not give any further warning. Certain kinds of obsta-
cles (such as wire fences, chains, thin painted posts or trailer draw
bars, etc.) may not always be de tected by the system (accident
risk).Note
•
To ensure that the acoustic parking aid works properly, the
sensors must be kept clean and free of snow and ice. Please observe
the additional notes on ⇒page 152 .
•
Please refer to the notes on towing ⇒ page 147.
parking system plusApplies to vehicles: with parking system plusParking aid (front and rear), with display
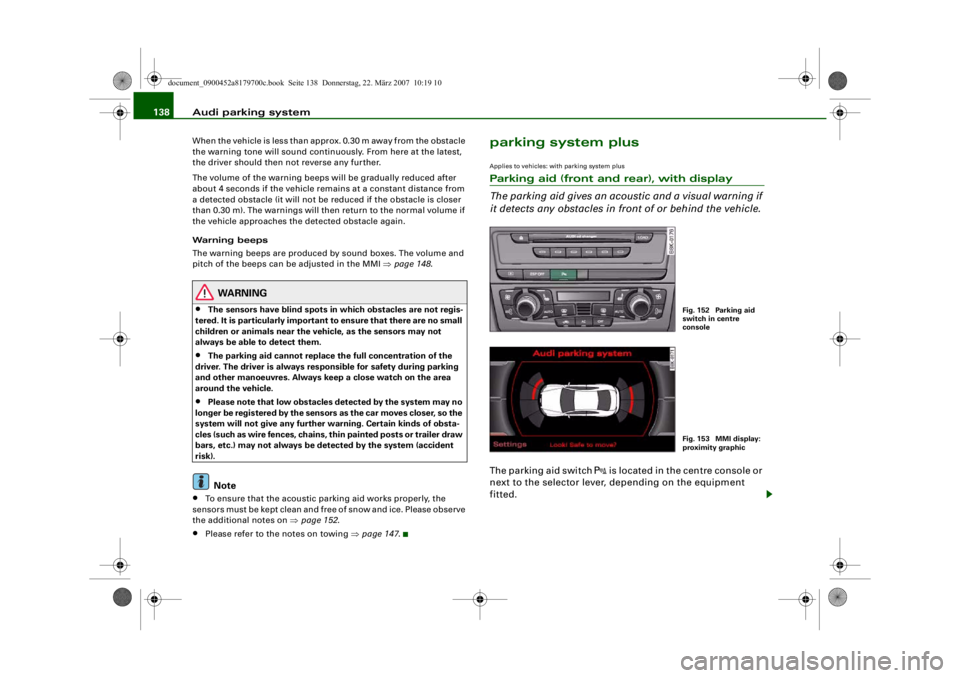
The parking aid gives an acoust ic and a visual warning if
it detects any obstacles in front of or behind the vehicle.The parking aid switch
is located in the centre console or
next to the selector lever, depending on the equipment
fitted.
Fig. 152 Parking aid
switch in centre
consoleFig. 153 MMI display:
proximity graphic
document_0900452a8179700c.book Seite 138 Donnerstag, 22. März 2007 10:19 10
--4 -
-T
' • ~I
-+ +-
[I]
•
Page 141 of 313
Audi parking system139
Controls
Safety
Driving tips
General maintenance
Self-help
Technical data
Activating
– Engage reverse gear to automatically activate the
parking system plus, or
– Press the switch
⇒ page 138, fig. 152 in the centre
console to activate the parking system plus manually.
You will hear a short beep to confirm that the parking
system has been activated. The indicator lamp in the
switch will light up.
Deactivating
– Drive forwards faster than approx. 10 km/h, or
– Switch off the ignition to automatically deactivate the complete parking system, or
– Press the switch
⇒ page 138, fig. 152 to deactivate the
parking system plus manually. The indicator lamp in the
switch will go out.
Activate the system manually if you are driving forwards and would
like the system to give a warnin g as you approach potential obsta-
cles, for instance when parking.
The measuring range of the sensors in the front and rear bumpers
starts at approximately :
Warning beeps
The warning beeps are produced by sound boxes. The volume and
pitch of the beeps can be adjusted in the MMI ⇒page 148 . Mute function
An acoustic proximity warning is
cancelled when you apply the
parking brake or move the selector lever of the automatic gearbox
to position P. However, the system remains active. The warning
beeps will start again as soon as you release the parking brake or
move the selector lever out of position P if the system has detected
an obstacle.
Reversing/driving forwards
When the vehicle is reversing/driving forwards, the system starts to
beep if it registers an obstacle within its detection range (see
above). The warnings will beep increasingly rapidly as the vehicle
approaches the obstacle.
When the vehicle is less than appro x. 0.30 m away from the obstacle
the warning tone will sound continuously. From here at the latest,
the driver should then not reverse/drive forwards any further.
The volume of the warning beeps will be gradually reduced after
about 4 seconds if the vehicle remains at a constant distance from
a detected obstacle (it will not be reduced if the obstacle is closer
than 0.30 m). The warnings will then return to the normal volume if
the vehicle approaches th e detected obstacle again.
Parking
If the parking manoeuvre involves shunting backwards and
forwards, the warning sound will be switched off temporarily while
you change gear. The proximity gr aphic will, however, still be
displayed on the MMI screen. The warnings will then return to the
normal volume if the vehicle approaches the detected obstacle
again.
Graphic display
The segments in the MMI display indicate the distance between the
vehicle and a detected obstacle. The number of segments shown
depends on the obstacle in front of or behind the vehicle. The closer
the vehicle gets to the obstacle the closer the segments move
towards the vehicle in the graphic ⇒page 138, fig. 153. At the latest
when the penultimate segment is highlighted the vehicle has Front
Side
0.90 m
Centre
1.20 m
Rear
Side
0.60 m
Centre
1.60 m
document_0900452a8179700c.book Seite 139 Donnerstag, 22. März 2007 10:19 10
--4 -
-T
-+ +-
Page 142 of 313
Audi parking system
140reached the danger (collision) zone. The driver should then not
move backwards/forwards any further ⇒ .
The graphic display in the MMI screen ⇒page 149 can be switched
off. The acoustic proximity warning will, however, remain activated.
The graphic display will be deacti vated as soon as you press a func-
tion selector button on the MMI control console. The graphic
display will appear again the next time you park the vehicle. The
graphic display in the MMI screen can also be switched on again
manually using the switch
⇒ page 138, fig. 152. For more infor-
mation on the MMI cont rol console please refer to the MMI Oper-
ating Manual.
WARNING
•
The sensors have blind spots in which obstacles are not regis-
tered. It is particular ly important to ensure that there are no small
children or animals near the vehicle, as the sensors may not
always be able to detect them.
•
The parking aid cannot replace th e full concentration of the
driver. The driver is always resp onsible for safety during parking
and other manoeuvres. Always keep a close watch on the area
around the vehicle.
•
Please note that low obstacles detected by the system may no
longer be registered by the sensors as the car moves closer, so the
system will not give any further warning. Certain kinds of obsta-
cles (such as wire fences, chains, thin painted posts or trailer draw
bars, etc.) may not always be de tected by the system (accident
risk).Note
•
There is a slight delay in the picture display.
•
You can change the settings for the graphic display in the MMI
⇒ page 149 .
•
To ensure that the acoustic parking aid works properly, the
sensors must be kept clean and free of snow and ice. Please observe
the additional notes on ⇒page 152 .
•
Please refer to the notes on towing ⇒page 147 .
parking system advancedApplies to vehicles: with parking system advancedParking aid (front and rear), with display and reversing camera
The parking aid gives an acoustic and visual warning if it
detects any obstacles in front of or behind the vehicle. The
reversing camera provides further assistance when
parking.
Fig. 1 54 Bo o t lid : Lo c a-
tion of reversing
camera
document_0900452a8179700c.book Seite 140 Donnerstag, 22. März 2007 10:19 10
--4 -
-T
•
-+ +-
[I)