key AUDI A5 COUPE 2010 Owner's Manual
[x] Cancel search | Manufacturer: AUDI, Model Year: 2010, Model line: A5 COUPE, Model: AUDI A5 COUPE 2010Pages: 360, PDF Size: 84.39 MB
Page 61 of 360

Interior lights
Front interior lights
The front interior lights also contain reading lights for the
driver and passenger.
M N N
-
!
Fig. 58 Headliner :
Front interior lights
The rocker switch @~fig . 58 for operating the interior
lighting has the following functions:
Door contact switch
- Place the switch @ in the middle position.
Interior light switched on
- Place the switch@ in posit ion
I.
Interior light switched off
- Place the switch @in position 0 .
Front reading lights
«~
- Press one of the switches ® to turn the right or left
reading light on or off .
Contro ls and eq uip
ment
Clear vision
With the door contact switch turned on, the interior lights turn on
as soon as you unlock the vehicle or open the doors. The lighting is
also turned on when the ignition key is removed. The lights go out
about 30 seconds after the doors are closed . When the vehicle is
locked or when the ignition is turned on, the interior lights are
turned off.
When a door is open, the interior lights are turned off after about 10
minutes to preven t draining of the battery .
The brightness of the lights is controlled automatically by a dimmer
when they are switched on and off. •
Rear interior lights
There are reading lights in the rear for the passengers.
Q)
Fig. 59 Headliner : R ea r
reading lights
The reading lights are switched on and off using the buttons "< ~. •
Vehicle care I I Technical data
Page 67 of 360

[ i J Tips
• If you sw itch off the automatic dimming function on the in side
mirror, autom ati c dimming of the outs ide mirror s will likewise be
di sabled.
• Check to make sure there are no objects preventing light from
reaching the inside mirror.
• Do not attach any sticke rs to the windshield in front of the light
sensor*, as this wou ld interfere with both the automatic operation
of the headlights and the automatic dimming of the inside mirror .
• Be aware that automatic dimming of the inside mirror can on ly
operate proper ly if the rear window sun blind* is retracted .•
Outsid e mirrors
The outside mirrors are electrically adjusted (power
mirrors) .
Adjusting exterior mirrors
Fig. 6 8 Fo rwa rd
se ction of driver's
arm re st : po wer mirr or
c ontrol s
-Rotat e th e kno b to th e© pos ition (driver's exter ior
m ir ror) o r to the ® pos ition (passenger's exterior m irro r)
:::::, fig . 68.
- Rotate the knob a nd t he mi rror so that you have a clear
view to the r ear .
Con tro ls and eq uip
ment
Clear vision
Heated mirrors
- Rotate the knob to pos ition
@ .
Depending on the outside temperature, the mirror surfaces are
heated until the ignition is switched off -even if the knob is no
longer in position
@ .
You are well -advised to fold the outside mirrors in when maneu
vering in tight spaces or when leaving the car parked close to other
vehic les.
Mem ory for e xte rior mirrors *
On vehicles wi th memory for the d river's seat, the cur rent setting for
the ex ter ior mirrors is automatically s tored along wi th the seat posi
tion :::}
page 74.
Tilt function f or the passenge r's mirro r* (only w ith
memory for exterior mirrors )
When the reverse gear is engaged, the mirror surface t ilt s down
ward slight ly if the setting is for the passenger's mirror (knob in
pos it ion @ ~ fig. 68) . This allows you to see the curb during parallel
parking.
The mirror returns to its initia l pos ition as soon as reverse gear is
disengaged and vehic le speed is above about 9 mph (15 km/h) . T he
mirro r also returns to its initia l p osition if the swi tch is moved to the
driver's outside mirror© or the ignition is switched off.
I f the position of the mirror surface is changed on a ti lted mirror, this
new pos it ion will be automa tically assigned to the remote key when
the vehicle is taken out of reverse gear.
0 Note
Curved mirror surfaces (convex or spherical*) increase your field of
v iew . Remember that vehicles or o ther objects wi ll appear sma ller
and farther away than when seen in a flat mirror. If you use this
mirror t o estimate distances of following vehic les when changing
lanes, you cou ld estimate incorrectly and cause an acc ident. .,.
Vehicle care I I irechnical data
Page 75 of 360
Applies to vehicles: w it h p ow er adju stable seats
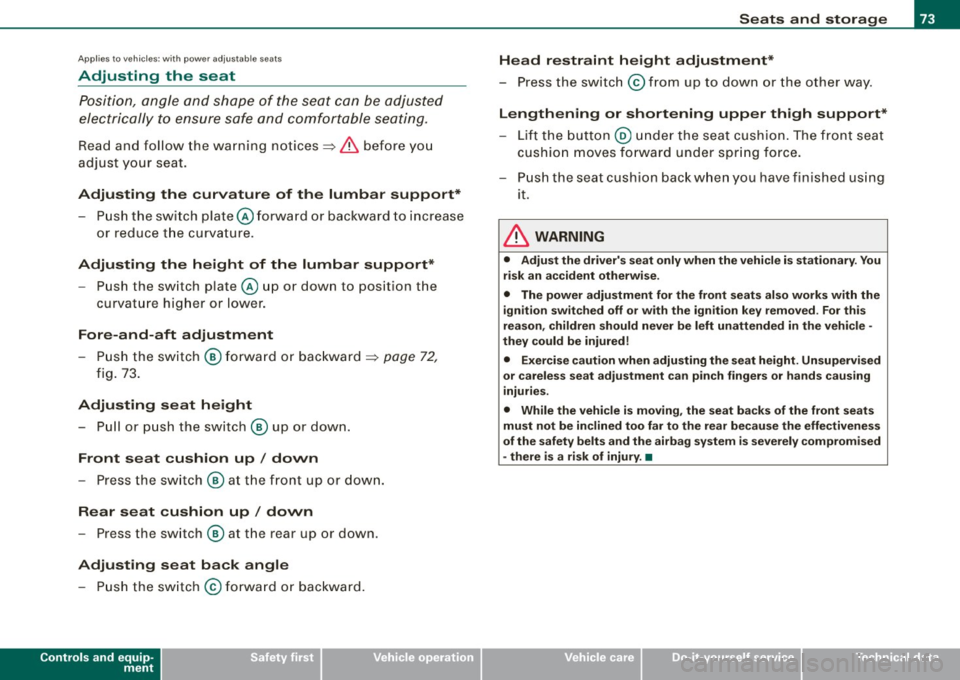
Adjusting the seat
Position, angle and shape of the seat can be adjusted
electrically to ensure safe and comfortable seating.
Read and follow the warning notices~ & before you
adjust your seat.
Adjusting the curvature of the lumbar support* - Push the switch plate@forward or backward to increase
or reduce the curvature.
Adjusting the height of the lumbar support*
- Push the switch plate@ up or down to position the
curvature higher or lower.
Fore-and-aft adjustment
-Push the switch @ forward or backward ~ page 72,
fig. 73.
Adjusting seat height - Pull or push the switch @ up or down.
Front seat cushion up/ down
- Press the switch@ at the front up or down.
Rear seat cushion up / down
- Press the switch @ at the rear up or down.
Adjusting seat back angle - Push the switch @ forward or backward.
Controls and equip
ment
Seats and storage
Head restraint height adjustment*
- Press the switch @ from up to down or the other way .
Lengthening or shortening upper thigh support*
- Lift the button@ under the seat cushion. The front seat
cushion moves forward under spring force.
- Push the seat cush ion back when you have fin ished using
it.
& WARNING
• Adjust the driver's seat only when the vehicle is stationary. You
risk an accident otherwise.
• The power adjustment for the front seats also works with the
ignition switched off or with the ignition key removed . For this
reason, children should never be left unattended in the vehicle -
they could be injured!
• Exercise caution when adjusting the seat height. Unsupervised
or careless seat adjustment can pinch fingers or hands causing
injuries.
• While the vehicle is moving, the seat backs of the front seats
must not be inclined too far to the rear because the effectiveness
of the safety belts and the airbag system is severely compromised
- there is a risk of injury. •
I • •
Page 77 of 360
Storing and recalling settings
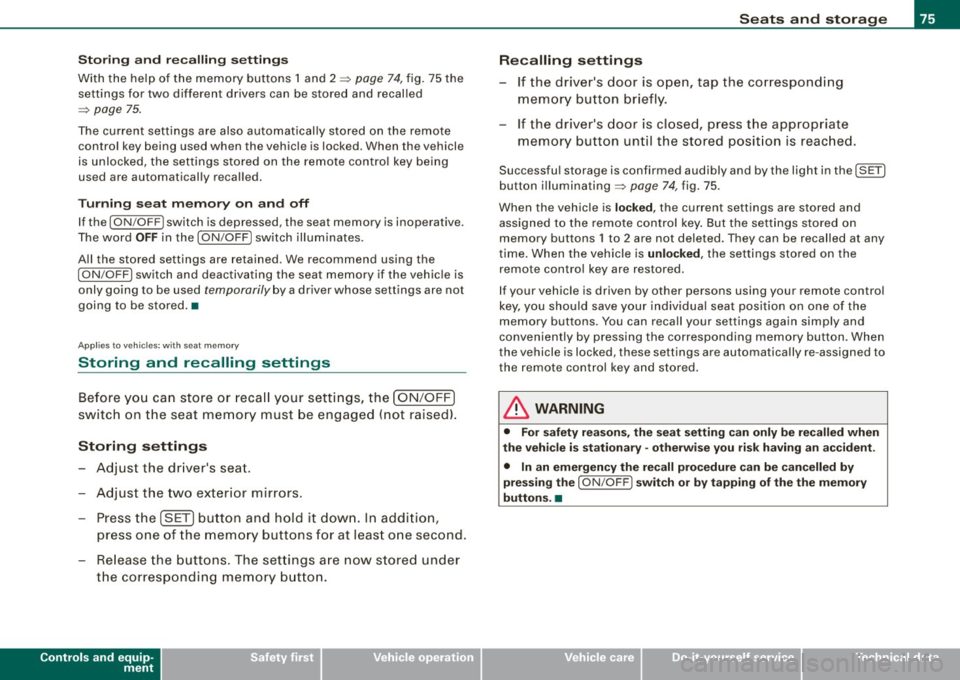
With the help of the memory buttons 1 and 2
~ page 74, fig. 75 the
settings for two different drivers can be stored and recalled
~ page 75.
The current settings are also automatically stored on the remote
control key being used when the vehicle is locked. When the vehicle
is unlocked, the settings stored on the remote control key being
used are automatically recalled.
Turning seat memory on and off
If the [ ON /OFF
I switch is depressed, the seat memory is inoperative.
The word
OFF in the [ON/OFF I switch illuminates.
All the stored settings are retained . We recommend using the
I ON/OFF I switch and deactivating the seat memory if the vehicle is
only going to be used
temporarily by a driver whose settings are not
going to be stored. •
Applies to vehicles : w ith seat m emo ry
Storing and recalling settings
Before you can store or recall your settings, the [ON/OFF]
switch on the seat memory must be engaged (not raised).
Storing settings
- Adjust the driver's seat .
- Adjust the two exterior mirrors.
- Press the [SET] button and hold it down. In addition ,
press one of the memory buttons for at least one second.
- Release the buttons. The settings are now stored under
the corresponding memory button.
Controls and equip
ment
Seats and storage
Recalling settings If the driver's door is open, tap the corresponding
memory button briefly.
If the driver's door is closed, press the appropriate
memory button until the stored position is reached.
Successful storage is confirmed audibly and by the light in the [SETI
button illuminating ~ page 74, fig. 75.
When the vehicle is
locked, the current settings are stored and
assigned to the remote control key. But the settings stored on
memory buttons 1 to 2 are not deleted. They can be recalled at any
time. When the vehicle is
unlocked, the settings stored on the
remote control key are restored.
If your vehicle is driven by other persons using your remote control
key, you should save your individual seat position on one of the
memory buttons. You can recall your settings again simply and
conveniently by pressing the corresponding memory button. When
the vehicle is locked, these settings are automatically re-assigned to
the remote control key and stored.
& WARNING
• For safety reasons, the seat setting can only be recalled when
the vehicle is stationary -otherwise you risk having an accident .
• In an emergency the recall procedure can be cancelled by
pressing the [
ON/OFF I switch or by tapping of the the memory
buttons. •
I • •
Page 78 of 360
Seats and storage
Applies to vehicles: with seat memory
Activating remote control key memory
To be able to recall the stored settings with the remote
control key, the function has to be activated in the radio
or MM/*.
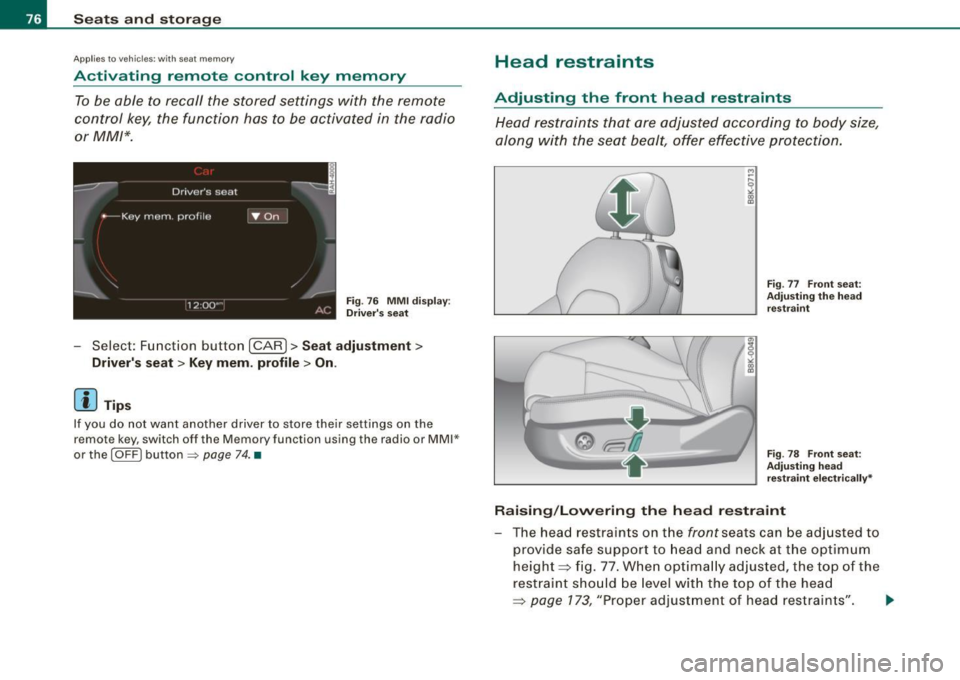
Fig. 76 MMI display:
Driver's seat
-Select: Function button [CAR]> Seat adjustment>
Driver's seat > Key mem. profile> On .
[ i ] Tips
If you do not want another driver to store their settings on the
remote key, switch off the Memory function using the radio or MMI*
or the
I OFF ) button => page 74. •
Head restraints
Adjusting the front head restraints
Head restraints that are adjusted according to body size,
along with the seat bealt, offer effective protection.
Fig. 77 Front seat:
Adjusting the head
restraint
Fig . 78 Front seat:
Adjusting head restraint electrically*
Raising/Lowering the head restraint
- The head restraints on the front seats can be adjusted to
provide safe support to head and neck at the optimum
height~ fig. 77. When optimally adjusted, the top of the
restraint should be level with the top of the head
~ page 173, "Proper adjustment of head restraints". ~
Page 83 of 360
Applies to vehi cle s: wi th fo ldi ng seat bac k
Enlarging cargo capacity of the luggage
compartment
The se at backs can be folded f orw ard to enl arge the c argo
c ap acity.
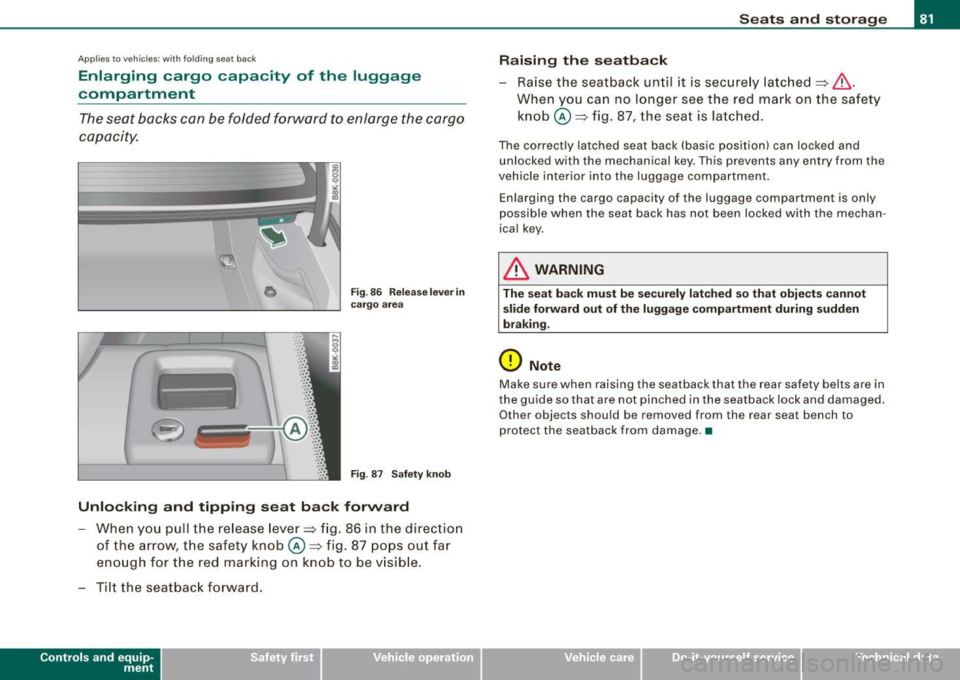
0 Fi g. 86 Relea se lev er in
car go ar ea
Fig . 8 7
S afet y k nob
Unlocking and tipping seat back forward
-When y ou pu ll the re le a se lev er=? fig. 86 in the di rec tion
of th e arr ow, t he safe ty knob @~ fig. 87 pops ou t far
eno ugh for t he re d markin g on kno b to be visib le.
- Tilt th e sea tb ac k f orwa rd .
Con tro ls and eq uip
ment
Seats and storag e
Raising the seatback
- Raise the seatback un til it is secure ly la tc h ed =? &.
When you can no lon ger see the red mark on the safety
knob @~ fig. 87, the sea t is l atch ed .
The correctly latched seat back (basic position) can locked and
unlocked with the mechanical key . This preven ts any entry from the
vehicle interior into the luggage compartment .
Enlarging the cargo capacity of the luggage compartment is only
possible when the seat back has not been locked with the mechan
ica l key.
& WARNING
The seat back must be se curely lat ched so that obje cts cannot
s lide forward out of the luggage compartment during sudden
braki ng.
0 Note
Make sure when raising the seatback that the rear safety be lts are in
t he guide so that a re not pinched in th e sea tback lock and damaged .
Other objects should be removed from the rear seat bench to
protect the seat back from damage. •
Vehicle care I I irechnical data
Page 84 of 360
Seats and storage
Applies to vehicles: wi th fo lding seat back
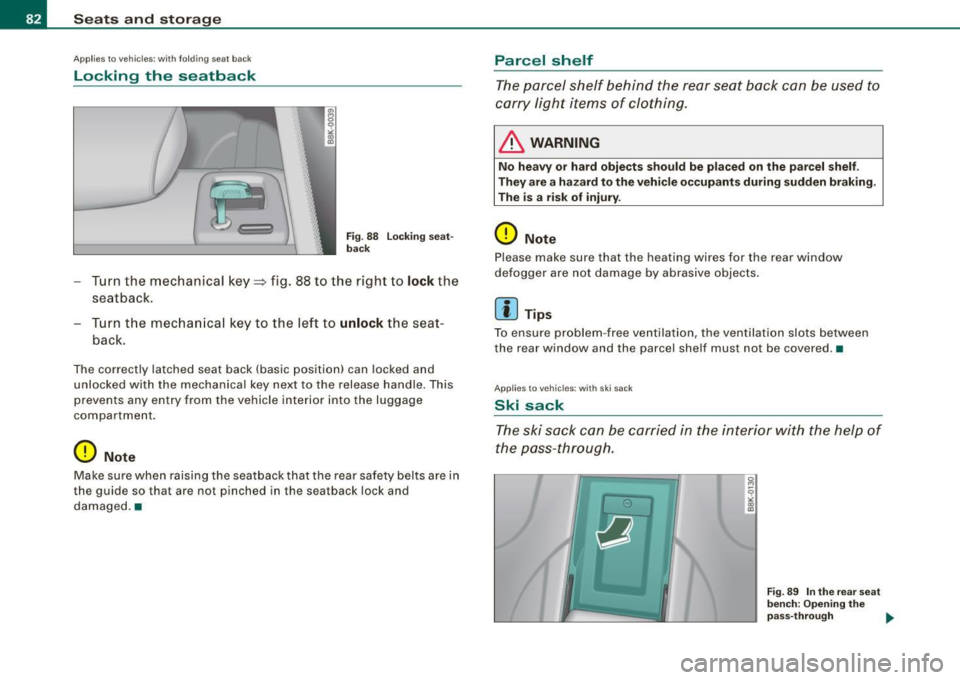
Locking the seatback
Fig. 88 Locking seat
back
- Turn the mechanical key~ fig . 88 to the right to lock the
seatback.
- Turn the mechanical key to the left to
unlock the seat
back.
The correctly latched seat back (basic position) can locked and
unlocked with the mechanical key next to the release handle . This
prevents any entry from the vehicle interior into the luggage
compartment.
0 Note
Make sure when raising the seatback that the rear safety belts are in
the guide so that are not pinched in the seatback lock and
damaged. •
Parcel shelf
The parcel shelf behind the rear seat bock con be used to
carry light items of clothing.
& WARNING
No heavy or hard objects should be placed on the parcel shelf.
They are a hazard to the vehicle occupants during sudden braking.
The is a risk of injury.
0 Note
Please make sure that the heating wires for the rear window
defogger are not damage by abrasive objects.
[ i ] Tips
To ensure problem -free ventilation, the ventilation slots between
the rear window and the parcel shelf must not be covered. •
Applies to vehicles: with ski sack
Ski sack
The ski sock con be carried in the interior with the help of
the poss-through.
e
Fig. 89 In the rear seat
bench: Opening the
pass-through
~
Page 85 of 360
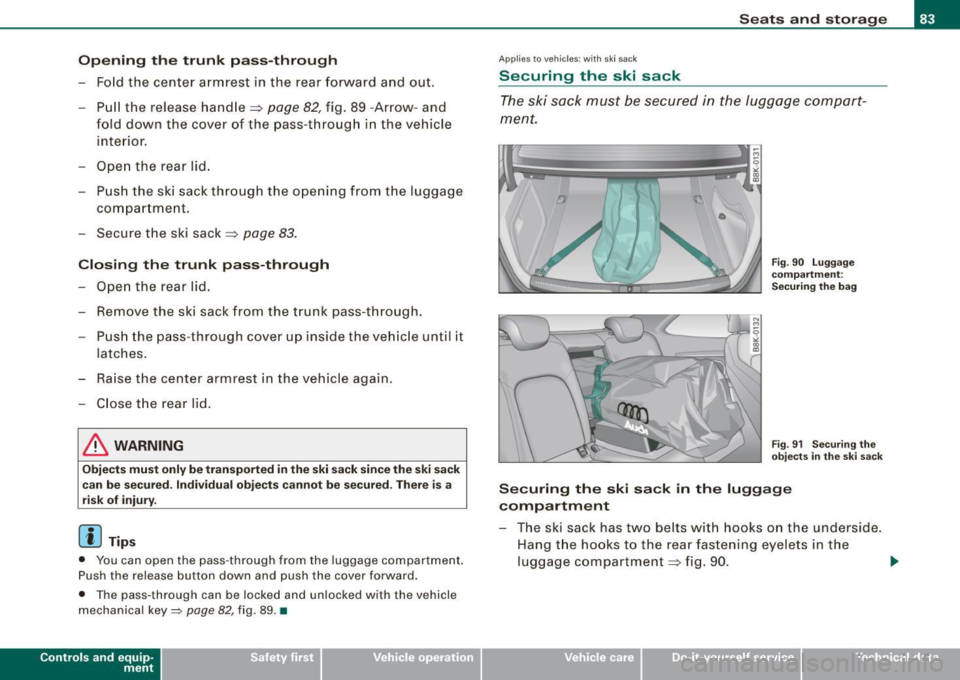
Opening the trunk pass-through
-Fold the center armrest in the rear forward and out .
- Pull the release handle=:> page
82, fig. 89 -Arrow- and
fold down the cover of the pass-through in the vehicle interior.
- Open the rear lid.
- Push the ski sack through the opening from the luggage
compartment.
- Secure the ski sack => page
83.
Closing the trunk pass-through
- Open the rear lid.
- Remove the ski sack from the trunk pass-through.
- Push the pass-through cover up inside the vehicle until it
latches.
- Raise the center armrest in the vehicle again .
- Close the rear lid .
& WARNING
Objects must only be transported in the ski sack since the ski sack
can be secured. Individual objects cannot be secured. There is a
risk of injury.
[ i] Tips
• You can open the pass -through from the luggage compartment.
Push the release button down and push the cover forward.
• The pass -through can be locked and unlocked with the vehicle
mechanical key:::::, page
82, fig. 89 . •
Con tro ls and eq uip
ment
A pp lies to vehicles: wit h ski sa ck
Securing the ski sack
Seats and storage
The ski sack must be secured in the luggage compart
ment.
Fig . 90 Luggage
compartment :
Securing the bag
Fig . 91 Securing the
objects in the ski sack
Securing the ski sack in the luggage
compartment
- The ski sack has two belts with hooks on the underside.
Hang the hooks to the rear fastening eyelets in the
luggage compartment => fig. 90.
Vehicle care I I irechnical data
Page 90 of 360
Seats and storage
Before you purchase any accessories, always read and follow the
information in=> page 341, "Additional accessories and parts
replacement".
& WARNING
• Use care when using the cigarette lighter. Inattentive or unsu
pervised use of the cigarette lighter can cause burns -risk of
injury!
• The cigarette lighter works when the ignition is switched off or
with the ignition key removed . Children should never be left unsu
pervised in the vehicle, or there could be risk of fire!
• The power outlets and therefore the electrical accessories
connected to them operate only with the ignition on. Improper use
of the outlets or of electrical accessories can lead to serious inju
ries or cause a fire. For this reason, children should never be left
unattended in the vehicle -they could be injured!
0 Note
• To avoid damaging the socket, only use plugs that fit properly .
• Only use the cigarette lighter socket as a power source for elec
trical accessories for short durations . Use the sockets* in the
vehicle when a power source is needed for longer durations.
[ i] Tips
When the engine is off and accessories are still plugged in and are
on, the vehicle battery can still be drained .•
Storage
General overview
There are numerous places to store items in your vehicle.
Glove compartment => page 89
Storage compartment in the roof =>
page 89
Coat hooks => page 89
- -Storage in the trim panels in the luggage
compartment
& WARNING
• Always remove objects from the instrument panel. Any items
not put away could slide around inside the vehicle while driving or
when accelerating or when applying the brakes or when driving around a corner .
• When you are driving make sure that anything you may have
placed in the center console or other storage locations cannot fall
out into the footwells. In case of sudden braking you would not be
able to brake, depress the clutch or accelerate.
• Any pieces of clothing that you have hung up must not interfere
with the driver's view. The coat hooks are designed only for light
weight clothing. Never hang any clothing with hard, pointed or
heavy objects in the pockets on the coat hooks . During sudden
braking or in an accident - especially if the airbag is deployed -
these objects could injure any passengers inside the vehicle . •
Page 91 of 360

Glove compartment
The glove compa rtmen t is illumin ated an d can be Jocke d.
To open glove compartment
Fig . 97 Glov e comp art
m ent
- Pull t he handle i n th e direc tion o f the arrow =:> fig. 97 and
swing t he cover down to open .
To close glove compartment
-Push the glove compartment lid upward unt il the loc k
engages.
T here are holders for a pen and a pad of paper in the glove compart
ment l id .
On the right side in the glove compartment is a holder with the key
b ody into which the emergency key must be clipped to be a ble to
start the vehicle .
& WARNING
To reduce the risk of personal inju ry in an a ccident or sudde n stop ,
alway s keep the glove compartment closed while driving . •
Con tro ls and eq uip
ment
Seats and storag e
Storage compartment in the roof
,.,,,O;E\ 11111
fl([]') G)
o .. o
!.---~\.;;;;;;;;. ] Fig. 98 Storage p ocket
in th e roof
- T o open t he li d yo u have to tou ch the bar =:> fig. 98
(Ar row). T he lid opens a utom atic ally.
- To close the lid, push i t up un til it enga ges.
& WARNING
Alway s keep the lid closed while driving to reduce the risk of injury
during a sudden braking maneuver or in the event of an a ccident. •
Coat hooks
The coat hooks are lo cated on the side on t he pillar in the
rear.
& WARNING
• Make sure that hanging clothing doe s not obscure the view to
the rear .
• Hang only lightweight clothing and be sure that there are no
heavy or sharp -edged object s in the po cket s.
• Do not u se co at hanger s to han g the clothing otherwi se the effi
c a cy of the head a ir b ags* is compromi sed. •
Vehicle care
I I irechnical data