roof AUDI A5 COUPE 2010 Owners Manual
[x] Cancel search | Manufacturer: AUDI, Model Year: 2010, Model line: A5 COUPE, Model: AUDI A5 COUPE 2010Pages: 360, PDF Size: 84.39 MB
Page 4 of 360
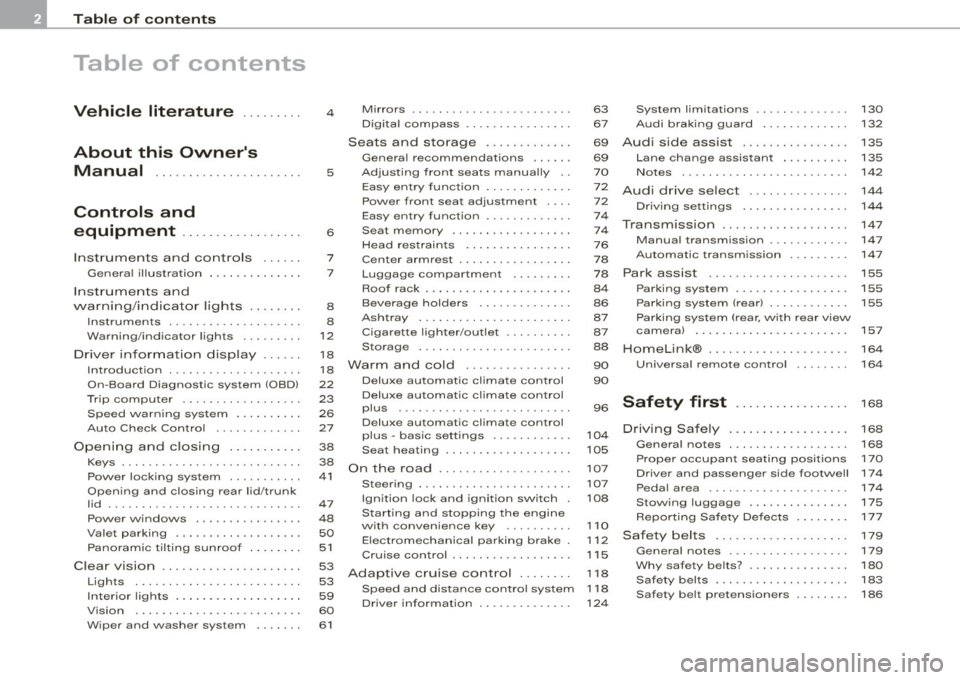
Table of contents
Table of contents
Vehicle literature ........ .
About this Owner's Manual ..... . .. ...... ....... .
Controls and
equipment ................. .
Instrumen ts and con trols ..... .
Genera l ill ustration ............. .
Ins trumen ts and
warning/indicat or lig hts ....... .
Instruments ... .... ........... . .
Warning/indicator lights ........ .
Driver in fo rma tion disp lay ... .. .
Introduction ... .......... ... ... .
On-Board Diagnostic system (OBD)
Trip compute r ................. .
Speed war ning system .... ..... .
Auto Chec k Control ... ... ...... .
Opening a nd closing ..... .... . .
Keys ..................... ..... .
Power loc king system .......... .
Opening and closing rear lid/trunk
lid ... ... ... ... ...... ......... . .
Power windows ... .... ... •.....
Valet pa rking .................. .
Pa no ramic t ilt in g sunroof ... ... . .
C lear v ision ............... ..... .
Lights ............. ........... .
Inter io r ligh ts .. ....... ....... .. .
V is ion ........................ .
Wiper and washer system ... ... .
4
5
6
7
7
8
8
12
1 8
1 8
22
23
26
27
38
38
41
47
48
50
51
53 53
59
60
61
Mirrors ... . ...... ...... ...... . .
Digital compass ............... .
Seats and storage ............ .
Genera l recommendations ..... .
Ad just ing fro nt sea ts manua lly ..
E asy entry funct ion ............ .
Power front seat ad justment ... .
Easy entry function ........ ... . .
Seat memory ................. .
Head res train ts ... ..... .. ... .. .
Center armrest ................ .
Luggage compartment . ... ... . .
Roof rack ................ ..... .
Beverage holders . .... ........ .
As htray ................ ...... .
Cigarette lighter/outlet .. .• .... ..
Storage ......... ......... ... . .
War m and cold ........... ... . .
Deluxe automat ic climate contro l
Deluxe automatic c limate control
plus ... ... ............ .... .. . .
Deluxe automatic c limate control
plus -basic settings ........... .
Seat heating ........... .. .. ... .
On the road .... ........... ... . .
Steering ... ... ......... ... ... . .
Ignition lock and ignition switch .
Starting and stopping the engine
with convenience key .. ...... . .
Elect romec hanical parking brake .
Cr uise control ................. .
Adaptive cruise control ....... .
Speed and distance con trol system
Drive r information ............. .
63
67
69
69
7 0
7 2
72
74
7 4
7 6
78
78
84
86
87
87
88
90
90
96
10 4
105
107
107
108
1 10
1 12
1 15
1 18
1 18
124
System limitations .. .... ... •....
Audi brak ing guard .. .......... .
Audi side assist ............... .
Lane change assistant ......... .
No tes ........................ .
Audi drive select ..... ..... .... .
Driv ing settings ............... .
Transmission .............. ... . .
Manua l transmission ........... .
Automatic transm ission ........ .
Park assist .................... .
Parking system .. ... ... ... ... .. .
Parking system (r ear) ........... .
Parking system (rear, w ith rear view
camera) ...................... .
HomeLink® .................... .
Universal remote control
Safety first ...... ...... .... .
Driving Safe ly . ....... ..... .... .
General notes ................ . .
Prope r occupan t seating pos it ions
Driver and passenger side footwe ll
Peda l area ...... ... ........... .
Stow ing luggage .......... .... .
Report ing Safety Defects ... .... .
Safety belts ................... .
General notes ....... ...... .... .
Why safe ty be lts? .......... .... .
Safety belts ............... .... .
Safety belt pretensioners ....... .
130
132
135
135
142
144
144
147
147
147
155
155
155
157
164
164
168
168
168
170
174
17 4
175
17 7
179
1 7 9
180
183
186
Page 51 of 360
& WARNING
• Do not leave children unattended in the vehicle, especially with
access to vehicle keys. Unsupervised use of the keys can result in
starting of the engine and use of vehicle systems such as power
windows, etc. which could result in serious injury.
• Remember -you can still open or close the power windows for
about ten minutes after the ignition is switched off. Only when
either of the doors are opened are the power windows switched
off.
• Be careful when closing the windows . Check to see that no one
is in the way, or serious injury could result!
• Always remove the ignition key whenever you leave your
vehicle.
• If you lock your vehicle from the outside, no one, especially chil
dren, should remain in the vehicle.
• Do not stick anything on the windows or the windshield that
may interfere with the driver's field of vision.
[ i) Tips
• When you open the doors, the windows automatically lower
about 10 mm .
• Afte r the ignition has been switched off , the windows can still be
opened or closed for about 10 minutes . The window regulators are
not switched until the driver's or passenger 's door is opened. •
Controls and equip
ment
Opening and closing
Convenience opening /closing
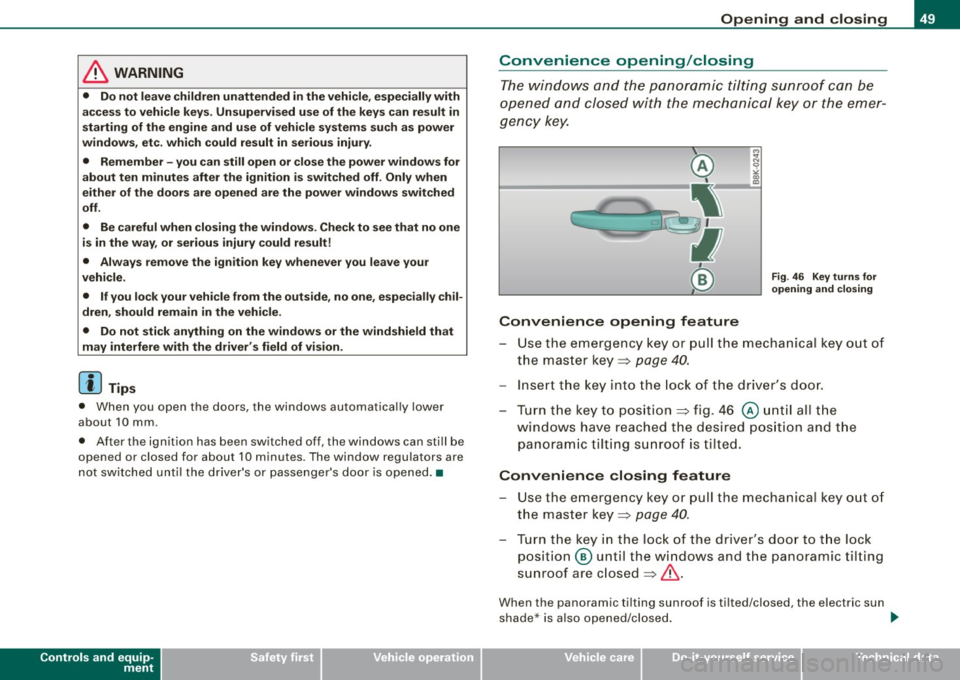
The windows and the panoramic tilting sunroof can be
opened and closed with the mechanical key or the emer
gency key.
Convenience opening feature
~ N 0
"' "' m
Fig. 46 Key turns for
opening and closing
- Use the emergency key or pull the mechanical key out of
the master key::} page
40.
- Insert the key into the lock of the driver's door.
Turn the key to position ::} fig. 46
@ until all the
windows have reached the desired position and the
panoramic tilting sunroof is tilted.
Convenience closing feature
-Use the emergency key or pull the mechanical key out of
the master key::} page
40.
Turn the key in the lock of the driver's door to the lock
position @ until the windows and the panoramic tilting
sunroof are closed::}& .
When the panoramic tilting sunroof is tilted/closed, the electric sun
shade * is also opened /closed. ._
I • •
Page 52 of 360
Opening and closing
& WARNING
• Never close the windows and thepanoramic tilting sunroof
inattentively and without checking -there is risk of injury.
• You must always watch when the windows are being raised so
that no one can be trapped. If you release the key, the closing
action is immediately canceled.
• Always read and heed WARNING~
& in "General description"
on
page 41 . •
Correcting window regulator malfunction
After disconnecting the vehicle battery, the one-touch up
and down feature must be activated again.
- Pull and hold the power window switch until the window
is completely closed.
- Release the switch.
- Pull the switch again for one second. The automatic closing/opening is now reactivated. •
Valet parking
Through the "valet parking" feature the luggage compart
ment of your vehicle is secured from unauthorized access
during the valet parking service.
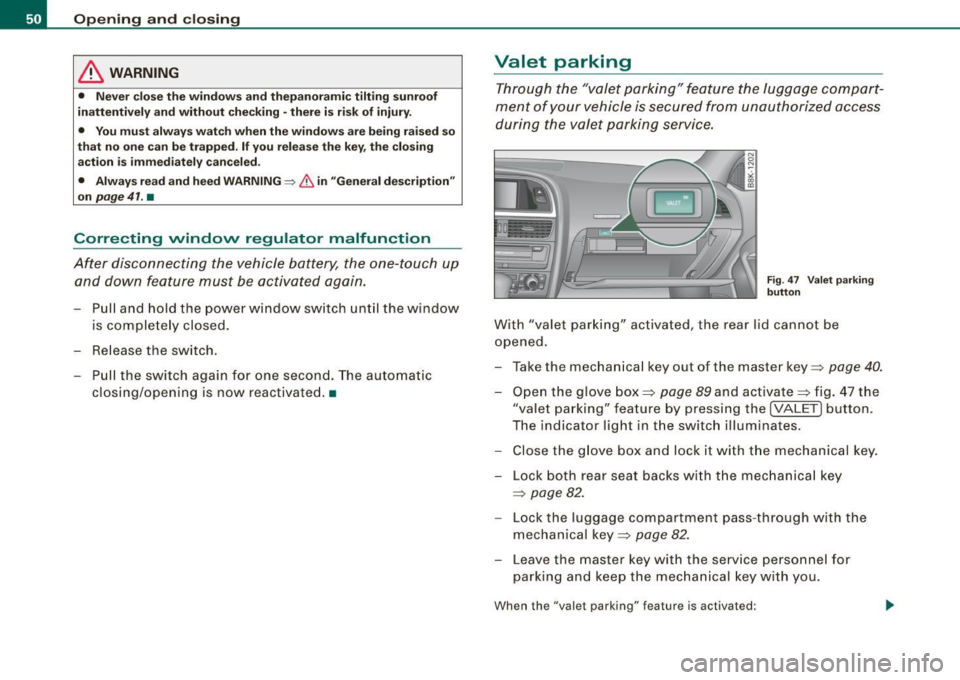
Fig . 47 Valet parking
button
With "valet parking" activated, the rear lid cannot be
opened.
- Take the mechanical key out of the master key=>
page 40.
- Open the glove box=> page 89 and activate => fig. 47 the
"valet parking" feature by pressing the [VALET] button.
The indicator light in t he switch illuminates.
- Close the glove box and lock it with the mechanical key.
- Lock both rear seat backs with the mechanical key
=> page 82.
-Lock the luggage compartment pass -through with the
mechanical key=>
page 82.
-Leave the master key with the service personnel for
parking and keep the mechanical key with you.
When the "valet parking" feature is activated:
Page 53 of 360
• the unlocking button for the rear lid~ in the driver's door is
inactive
• the button
~ on the master key is inactive
• the opening hand le in the rear lid is inactive.
T he vehic le can be driven and locked and unlocked with the master
key. Access to the luggage compartment is blocked. •
Panoramic tilting sunroof
Tilting and closing
""' CT;B ,;;.
;i N 0 ,;
"' CX)
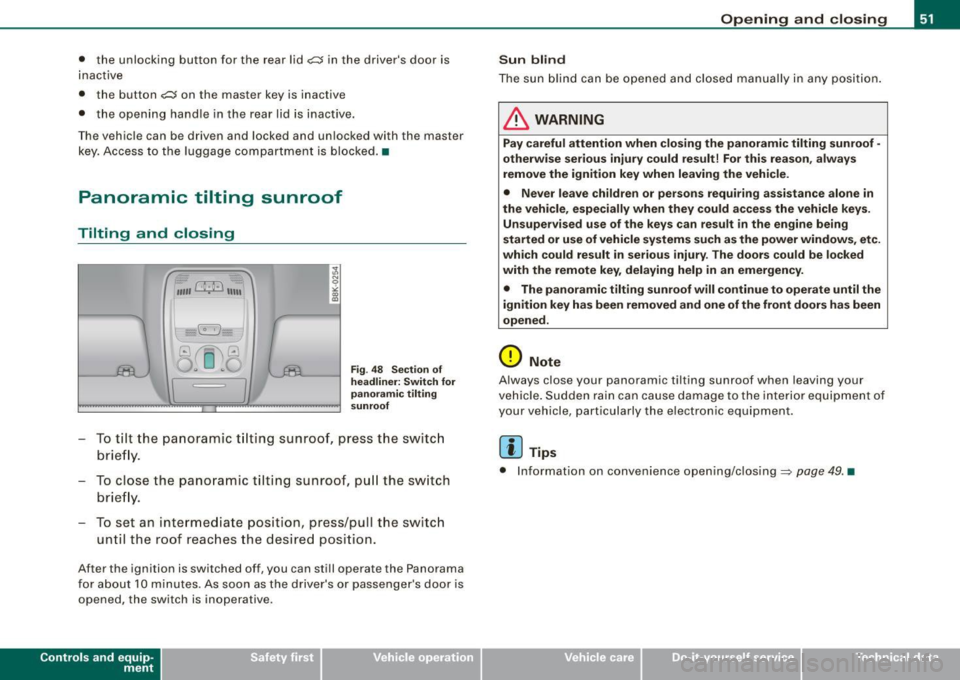
Fig. 4 8 Sec tio n of
he adlin er: Sw itch fo r
pa noram ic til ting
s u nro of
To tilt the panoramic t ilting sunroof, press the switc h
brie fly.
To close the panoramic tilting sunroof, pu ll the sw itch
brie fly.
To set an intermediate position, press/pull the switch until the roof reaches the desired position.
After the ignition is switched off, you can sti ll operate the Panorama
for about 10 minutes . As soon as the driver's or passenger's door is
opened, the switch is inoperative.
Con tro ls and eq uip
ment
Op ening and clo sing
S un blind
The sun b lind can be opened and closed manually in any position .
& WARNING
Pay careful attention when clo sing the panoramic tilting sunroof -
other wise seriou s injury could re sult! For t his r easo n, a lwa ys
remove the ignition key when leaving the vehi cle.
• Never le ave children or per sons requiring a ssist ance alone in
the v ehicle , e spe cially when they cou ld acce ss the vehi cle ke ys.
Un supervised use of the ke ys c an re sult in the engine being
s ta rted or use of vehicle system s such as the pow er windows, etc.
whi ch co uld r esult in serio us injur y. The door s could b e locked
with th e re m ote ke y, del aying h elp in an em ergency .
• The panor ami c tilting sunro of w ill continue to operate until the
igniti on ke y has been r em oved and one of th e front d oors ha s been
o pened .
0 Note
Always close your panoramic tilting sunroof when leaving your
vehicle . Sudden rain can cause damage to the interior equipment of
your vehicle, particularly the electronic equipment.
[ i ] Tip s
• Information on convenience opening/closing=> page 49. •
Vehicle care I I irechnical data
Page 54 of 360
Opening and closing
Emergency closing of the panoramic tilting
sunroof
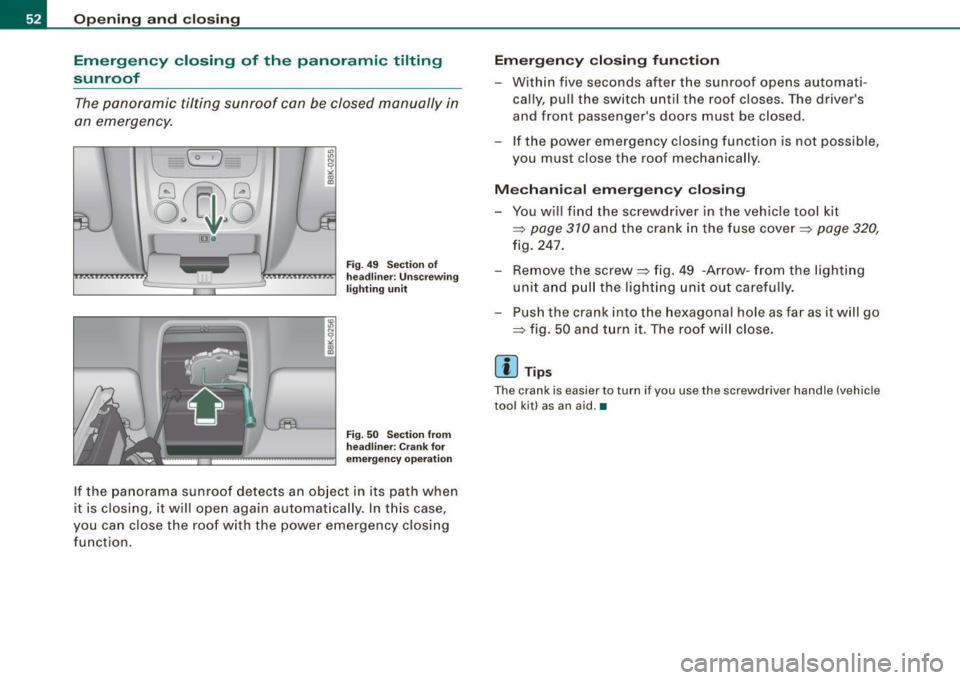
The panoramic tilting sunroof can be closed manually in
an emergency.
"' "' N 0 ,;
"' (D
Fig. 49 Section of
. .. . ..... ..• . ... .. . ..•.. ...• headliner : Unscrewing
L._--==~~=--__:; lighting unit
Fig . 50 Section from
headliner: Crank for
emergency operation
If the panorama sunroof detects an object in its path when
it is closing, it will open again automatically. In this case,
you can close the roof with the power emergency closing
function.
Emergency closing function
- Within five seconds after the sunroof opens automati
cally, pull the switch until the roof closes. The driver's
and front passenger's doors must be closed.
- If the power emergency closing funct ion is not possible,
you must close the roof mechanically .
Mechanical emergency closing
-You will find the screwdr iver in the vehicle tool kit
=;> page 310 and the crank in the fuse cover::::;> page 320,
fig. 247.
- Remove the screw ::::;> fig. 49 -Arrow- from the lighting
unit and pull the lighting unit out carefully.
- Push the crank into the hexagonal hole as far as it will go
::::;> fig. 50 and turn it. The roof will close.
Ii ] Tips
The crank is easier to turn if you use the screwdriver handle (vehicle
tool kit) as an aid .•
Page 86 of 360
Seats and storage
Securing the objects in the ski sack
- Pull the safety be lt taut=> page 83, fi g. 91 at the free e nd
of the be lt.
[ i J Tips
Make sure that the ski sack is not stored wet. •
Roof rack
Description
Additional cargo can be carried with a roof luggage rack.
If luggage o r cargo is to be carr ied on the roof, you must observe the
following:
• Your vehic le has aerodynamic rain gutters mo lded into the roof.
This is why co nventiona l roof luggage rac ks cannot be used . We
recommend using roof racks from the Audi original accessories
program.
• These approved roof racks are the basis fo r a complete roof rack
system . Addit ional attachments for the basic roof rack are neces
sary to safely transport luggage, bicycles, surf boards, skis or smal l
boats. All necessary ha rdware for these sys tems is available at your
authorized Audi dealer.
• We rec ommend tha t you keep the installation instructions for
your roof rack system together with your Owner's literature in the
vehic le .
When should the roof r ack be removed?
• Before goin g through an automat ic car wash (it is best to ask the
car wash operator for advice).
• When not in use, to reduce fue l consumption, wind noise and to
guard against theft.
& WARNING
• Use of an unappro ved roof rack o r in correct mounting of an
approved roof r ack can cause the roof rack or the items attached
to it to fall off the roof onto the road .
• Objects falling from the roof of a vehi cle can cau se a crash and
person al injur y.
• Only mount the system between the markings shown in
=> page 85 , fig . 92 .
• The roof rack sy stem mu st be in stalled e xactly according to the
instruct ions provided .
0 Note
• Your vehicle warranty does not cover any damages to the vehicle
caused by using roof racks or mounting structures not approved by
Audi for your vehicle. The same app lies to damage resulting from
incorrect r oof rac k in sta llation .
• Always check the roof rack mountings and hardware before each
trip and du ring a tr ip to make su re everything is securely tightened.
I f necessary, retighten the mountings and check the entire system
from time to time.
• After mounting a roof rack system, or when you transport
objects on the roof of your vehicle, the he ight of the vehicle is nat u
rally increased . B e carefu l when driving under low bridges or in
parking garages for example . This could cause da mage to th e lo ad
and even the vehic le itself .•
Page 87 of 360

Mounting points
The roof r ack must be a ttached onl y at the loc ations
marked .
Installation
Fig . 92 Mou ntin g lo ca
tion s for r oof rac k
When ins tall ing the front fee t, make sure that they are p ositioned
exactly on the positioning bolts provided @between the side panel
and the upper roof frame=> fig. 92. The bol t is visible as soon as you
push back the seal from the upper roof frame us ing the insta llation
t ool s upplied with the roof rack . The rear markings ® are identified
at the upper edge of the side g lass by two smal l arrowheads.
& WARNING
After tra veling several mile s, ens ure that the roof ra ck is secure .
[ i ] Tip s
The roof rack indicates whether it is to be mounted in the front or
b ack .•
Con tro ls and eq uip
ment
Seats and storag e
Roof load
The cargo on the roof must be securely attached.
Han dling c har acteristic s change when c argo is trans
ported .
The permissible roof load for your vehicle is 165 lb s. (75 kgl. The roof
load is a combination of the weight of the carrier system and the
cargo .
W hen using roof rack systems with a lower load capacity, you
cannot use the maximum permissib le roof load . In this case , the
ro of rack can only be loaded to the we ight li mit given in the instal
lation guide.
& WARNING
• The cargo must be se curel y attached on the roof ra ck, other
wise you risk an a ccident.
• You mu st under no cir cumstances exceed the permissible roof
load , the permi ssible axle load s and the permis sible overall we ight
of your vehicle -risk of an a ccident.
• Consider that when tra nspo rting heavy obje cts or one with a
la rg e surface , the handling characteristi cs change due to shift in
the center of gravity or the greater surface exposed to the w ind.
So adapt your driv ing and your speed to pre vailing condit ion s.
<£> For the sake of the environment
As a result of the increase wind resistance created by a roof rack ,
your vehicle is using fuel unnecessarily . So remove the roof rack
after using i t.•
Vehicle care I I irechnical data
Page 90 of 360
Seats and storage
Before you purchase any accessories, always read and follow the
information in=> page 341, "Additional accessories and parts
replacement".
& WARNING
• Use care when using the cigarette lighter. Inattentive or unsu
pervised use of the cigarette lighter can cause burns -risk of
injury!
• The cigarette lighter works when the ignition is switched off or
with the ignition key removed . Children should never be left unsu
pervised in the vehicle, or there could be risk of fire!
• The power outlets and therefore the electrical accessories
connected to them operate only with the ignition on. Improper use
of the outlets or of electrical accessories can lead to serious inju
ries or cause a fire. For this reason, children should never be left
unattended in the vehicle -they could be injured!
0 Note
• To avoid damaging the socket, only use plugs that fit properly .
• Only use the cigarette lighter socket as a power source for elec
trical accessories for short durations . Use the sockets* in the
vehicle when a power source is needed for longer durations.
[ i] Tips
When the engine is off and accessories are still plugged in and are
on, the vehicle battery can still be drained .•
Storage
General overview
There are numerous places to store items in your vehicle.
Glove compartment => page 89
Storage compartment in the roof =>
page 89
Coat hooks => page 89
- -Storage in the trim panels in the luggage
compartment
& WARNING
• Always remove objects from the instrument panel. Any items
not put away could slide around inside the vehicle while driving or
when accelerating or when applying the brakes or when driving around a corner .
• When you are driving make sure that anything you may have
placed in the center console or other storage locations cannot fall
out into the footwells. In case of sudden braking you would not be
able to brake, depress the clutch or accelerate.
• Any pieces of clothing that you have hung up must not interfere
with the driver's view. The coat hooks are designed only for light
weight clothing. Never hang any clothing with hard, pointed or
heavy objects in the pockets on the coat hooks . During sudden
braking or in an accident - especially if the airbag is deployed -
these objects could injure any passengers inside the vehicle . •
Page 91 of 360

Glove compartment
The glove compa rtmen t is illumin ated an d can be Jocke d.
To open glove compartment
Fig . 97 Glov e comp art
m ent
- Pull t he handle i n th e direc tion o f the arrow =:> fig. 97 and
swing t he cover down to open .
To close glove compartment
-Push the glove compartment lid upward unt il the loc k
engages.
T here are holders for a pen and a pad of paper in the glove compart
ment l id .
On the right side in the glove compartment is a holder with the key
b ody into which the emergency key must be clipped to be a ble to
start the vehicle .
& WARNING
To reduce the risk of personal inju ry in an a ccident or sudde n stop ,
alway s keep the glove compartment closed while driving . •
Con tro ls and eq uip
ment
Seats and storag e
Storage compartment in the roof
,.,,,O;E\ 11111
fl([]') G)
o .. o
!.---~\.;;;;;;;;. ] Fig. 98 Storage p ocket
in th e roof
- T o open t he li d yo u have to tou ch the bar =:> fig. 98
(Ar row). T he lid opens a utom atic ally.
- To close the lid, push i t up un til it enga ges.
& WARNING
Alway s keep the lid closed while driving to reduce the risk of injury
during a sudden braking maneuver or in the event of an a ccident. •
Coat hooks
The coat hooks are lo cated on the side on t he pillar in the
rear.
& WARNING
• Make sure that hanging clothing doe s not obscure the view to
the rear .
• Hang only lightweight clothing and be sure that there are no
heavy or sharp -edged object s in the po cket s.
• Do not u se co at hanger s to han g the clothing otherwi se the effi
c a cy of the head a ir b ags* is compromi sed. •
Vehicle care
I I irechnical data
Page 93 of 360
& WARNING !continued)
control system as well as the proper procedure for defog
ging/defrosting the windows.
0 Note
• If you suspect that the automatic climate control system has
been damaged, switch the system off to avoid further damage and
have it inspected by a qualified dealership.
• Repairs to the Audi automatic climate control system require
specialized knowledge and special tools. Therefore, contact an
authorized dealer in the event of malfunctions.
[ i) Tips
• To avoid adversely affecting heating and cooling performance
and to prevent condensation on the windows, the air intake in front
of the windshield must be free of ice, snow and leaves .
• The air flowing out of the vents and throughout the vehicle's
entire interior is discharged at the rear of the vehicle. Make sure that
the outlet slots are not covered by clothing, etc.
• Th e automatic climate control system works most effectively if
the windows and the panorama/tilting sunroof* are closed.
However, if the interior of a parked vehicle is extremely hot from the
sun, briefly opening the windows can speed up the cooling
process. •
Contro ls and eq uip
ment
Warm and cold
Ap plies to veh icles: with deluxe automat ic climate contro l
Controls
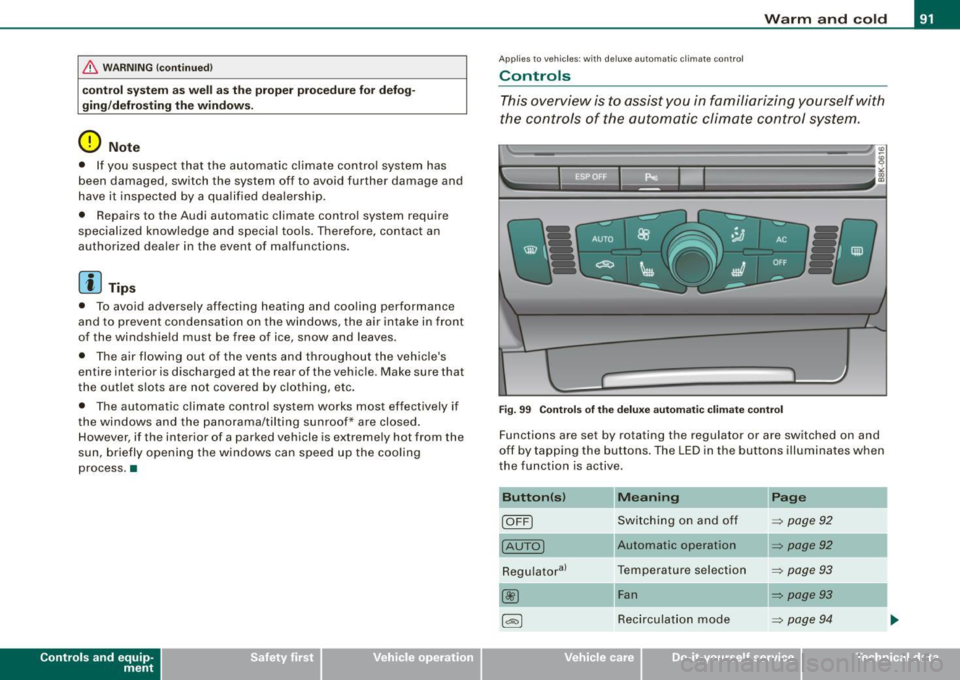
This overview is to assist you in familiarizing yourself with
the controls of the automatic climate control system.
Fig. 99 Controls of the deluxe automatic climate control
Functions are set by rotating the regulator or are switched on and
off by tapping the buttons . The LED in the buttons illuminates when
the function is active .
Button(s) Meaning Page
!OFF] Switching on and off => page 92
(AUTO] Automatic operation => page 92
Regu latoral T
emperature selection => page 93
@ Fan => page 93
1~1 Recirculation mode => page 94
Vehicle care
I I irechnical data