remote control AUDI A5 COUPE 2011 User Guide
[x] Cancel search | Manufacturer: AUDI, Model Year: 2011, Model line: A5 COUPE, Model: AUDI A5 COUPE 2011Pages: 362, PDF Size: 84.88 MB
Page 115 of 362

On the road -
----------------
& WARNING (co ntinued )
• Never leave children or per sons requiring a ssistan ce unat
tended in the vehicle. The doors can be locked using the remote transmitter, p reventing people from escaping from the vehicle on
their own in the event of an emergency. Depending on the time of
year , people inside the vehicle can be e xposed to very high or very
low t emperatures .
• Never remove the ignition key from the ignition look while the
vehicle is moving. Otherw ise, the steering lock could suddenly
engage and you would not be able to steer the vehicle.
0 Note
• In the event of a malfunct ion in the electronic ignit ion lock a
symbo l in th e i nstr umen t cluster flashes wi th the message
Ignition
lock defective .
• Avoid high eng ine spee ds, fast a cce le ra ti on or heavy eng ine load s
whi le the engine is still cold. This cou ld damage t he eng ine .
do no t let your vehicle s tand and w arm up. Be re ady to dr ive off i mme
diately after starting your ve hicle . Maintain moderate speed unt il the
engine is complete ly warm . R emember, the engine per forms best at
operati ng temperature .
[I) Tips
• If the key ca nnot be removed from the ignition loc k, yo u have to
pull the mec hanical key o ut of t he maste r key in orde r to be able to
loc k the ve hicle The ve hicle can b e loc ked wi th the mec hani ca l key
=> page 44.
• If you open the driver's doo r wi th the ig nit io n switched on, a
buzzer soun ds an d the message
Ignition is on appea rs in the instru
m ent cl uster d isplay. Swit ch the ig nitio n off. •
Controls and equip
ment Safety first
Stopping the engine
-
Bring th e v ehicle t o a f ull s to p.
- Automatic transmission*: Move th e selector lever to t he P
or N position .
-Press on the igni tion key. The e ngi ne is tu rned off .
Emergency off
If it i s n ecess ary in unusu al circum stances, the eng ine can be
switched of f while the vehicle is mov ing. The engine will be switched
o ff if you pres s on t he key fo r an e xtende d peri od.
& WARNING
• Never turn off the engine until the vehicle has come to a
complete stop.
• The brake booster and servotronic only work when the engine
is running. With the ignition turned off , you have to apply more
force when steering or braking. Since you cannot steer and stop
normally , this can lead to accidents and serious injuries .
• The radiator fan can continue to run for up to 10 minutes even
after you have turned off the engine and removed the ignition key.
The radiator fan can also turn on again if the engine coolant heat s
up because of intense sunlight or heat build-up in the engine
c ompartment.
0 Note
Do no t stop the engine im medi ately a fter hard or ex tended dr iv ing.
Keep the eng ine running for approx imately two m in utes to prevent
exces sive he at build- up. •
Vehicle care Technical data
Page 135 of 362
Adaptive cruise control ml ____________ __._ __ _
• A red vehicle is shown in the instrument cluster display
=>
page 132, fig. 123.
• The text
DISTANCE! appears in the status line .
• The indicator light in the Instrument cluster blinks red .
• A warning tone sounds.
[I) Tips
• If the adaptive cruise control initiates brak ing, the hydraulic brake
system is under pressure . Therefore, the brake pedal distance is
shorter and the pedal "feels" harder .
• Adaptive cruise control is switched off after press ing the foot
brake . The speed saved up this point can be resumed.
• To resume the saved speed, release the brake pedal and press the
control lever=>
page 126, "Turning adaptive cruise control off
temporarily ".
• If you use the accelerator to go faster than the speed of the object
ahead of you, the
driver intervention prompt will not be accompa
nied by a warn ing signal.
• If the speed you previously set is exceeded, the indicator light in
the speedometer will switch off.•
Applies to ve hicle s: with ad aptive cru ise co ntro l
MMI settings
Individual settings for adaptive cruise control can be
selected in the fv1fv1I*.
Settings for the driving program can be adjusted individually
to the particular user and saved in the MMI*.
- Select: [CAR] function button
> Adaptive Cruise Control >
Driving program .
Controls and equip
ment Safety first
Setting the driving program
In
the driving program menu you can adjust the character istics of
adaptive cru ise control to what you want using
dynamic , standard or
comfort.
Saving settings
Your individual settings are automatica lly saved and assigned to the
remote control key being used (remote key storage) . If the key is
given to another person, the saved settings remain as they are .•
System limitations
App lies to ve hicles : w it h ada ptiv e cr uise cont ro l
General information
Some driving situations which affect the function of the
radar sensor are described below.
When driving, the adaptive cru ise contro l is governed by physical and
system-specified limits. Also, under certain circumstances, the ACC
system may react unexpectedly or late from the driver's point of view.
Therefore, a lways be attentive and intervene, if necessary:
• when driving around curves=>
page 134
• when vehicles in front are not in line with your vehicle=> page 134
• when other ve hicles are changing lanes=> page 134
• when other veh icles are difficult to detect=> page 135.
& WARNING
The radar sensor's vision can be reduced by rain, snow and heavy
spray . This can result in vehicles driving ahead being inadequately
detected or , in some circumstances , not detected at all. If neces
sary, take action yourself!•
Vehicle care Technical data
Page 151 of 362
________________________________________________ A_u_ d_i_ d_ r_iv _ e_ s_e _ le_ c_t __ _
& WARNING
Pay attention to traffic when operating Audi drive s elect to
prevent potential risk of an a ccident.
[I] Tips
If you remove the ign it ion key, A UTO mode is set the next time you
start the ign it ion. •
Applies to v ehicles: w it h MM! and driv e se lect
Setting the INDIVIDUAL mode
You con personally s pecify th e vehicle setup in th e MM I.
- Select : [CA R]> Audi drive select individual.
You need to se lect this control to d rive in the recently set INDIVIDUAL
mode ~ page 14 8.
[I] Tips
Your I NDIVID UA L mo de se ttings a re automa tic ally sto red and
assigned to the remote con trol key being used .•
Controls and equip
ment Safety first
Vehicle care Technical data
Page 161 of 362
___________________________________________________ P_a _r _k _ a_s _s_ i_s _t __ _
Please note that low objects a lready s ignalled by a war ning can disap
pe ar from the sys te m 's d etection r ange and will not co nti nue to be
signa lled .
If the distance to an obstacle remains t he same, the vo lume of the
dis tan ce warn ing is gradu ally redu ced af ter abou t 4 seco nds.
Approaching another obstacle will result in the distance warning
s ou nding a t th e normal vo lume aga in.
Malfunctions in the system
If a wa rning tone is aud ible fo r about five seconds when you turn o n
the ignition , there is a ma lfunction in the system. Have the prob lem
c o rrected by yo ur auth orized Aud i de aler.
Keep the sensors in the rear bumper clean and free from ice so t hat
t he acous tic par k ass ist system can func tion prope rly.
& WARNING
• Sens ors have dead space s in whi ch objects cannot be dete cted.
Be especi ally alert for small children and animals , since they are
not alway s detected by the sen sors.
• The acou stic parking system is not a substitute for the dr iver 's
own caution and alertne ss. Ultimate respon sibility alway s
remains w ith the driver during parking and similar maneuvers.
Alway s w atch wh ere you are driving .
• You should always adjust the volume and frequency of the
warning tone s so that you can e asily hear the acoustic di stan ce
wa rning e ven if the radio is pl aying, the air -conditioner blowe r is
on High or there i s a high level of out side noi se .
- Check the setting s whenever anyone else has driven the
vehicle before you.
0 Note
• Remember that low obst acles fo r which a warning has a lready
been issued may "d ive" below the system 's sensing zone if the ve hicle
is be ing b acked up closer . In th is case, the wa rni ng so und shutting off
Controls and equip
ment Safety first
does not ind
icate that you have cleared the obstacle . Instead, impact
is imm inen t.
• Objects such as trai ler hitches, chains, narrow posts or fences
c ove red by a th in layer of paint m ay no t always be detec ted by the
system . They can st ill damage your vehicle w ithout warning .
lI] Tips
Keep the sensors in the rear b umper clean and free of snow and ice so
that the aco ustic parki ng assist system can function proper ly .•
App lies to ve hicles : w it h pa rkin g system (re ar)
Adjusting the warning tones
The warning tones can be adjusted in the MMI*.
-Select : [CAR]> Parking sy stem .
• Rear volume · rear sensor vol ume
• Rear frequ ency -rear sensor frequency
• In-car entertainment fad er-when the park ing system is switched
on , the vol ume of the active audio source is lowered .
Th e newly adj usted value is br iefly heard from the signa l gene rator.
The settings are automatically stored and ass igned to the master key
with remote control. •
Vehicle care Technical data
Page 167 of 362
Park assist IIJII _________________________________ _____;.....:;_;_.:..:,____;;_ ____ _
0 Note
In the MMI display, the d irect ion of t ravel of the vehicle rear is rep re
sented depend ing on the steering wheel angle. The vehicle front
swi ngs ou t mo re t han t he ve hicle re ar. M ain tain ple nty of dist ance
from an obstacle so t hat your outs ide mirror or a corner of your
vehicle d oes no t collide with any o bstacles - dange r of accide nt!
[ i ) Tips
Th e left or right or ientat ion lines and s urfaces will be displ aye d,
depending on the tu rn signal being used. •
App lies to veh icles : with park ing syst em (rear, wit h rea r view cam era)
Adjusting the display and warning tones
The display and warning tones are adjusted in the radio
or fv1fv1 I*.
-Select : [CAR]> Parking system.
Display
• Off -
when the parking system is switched off, only aud ible sig nals
are given.
• On -when the pa rking system is switc hed on, the pic ture from the
rea r view camera is displayed.
Warning tones
• Rear volume -rear sensor vo lume
• Rear frequency -rear sensor frequency
• In-car entertainment fader -when the par kin g sys tem i s sw itched
on, the volume of the active audio source is lowered.
T he newly a djusted value is br iefly hear d from the signal generator .
T he settings are automatica lly stored and assigned to the remote
cont rol key.
Controls and equip
ment Safety first
& WARNING
•
Always make sure that the volume and frequency of the
warning tones i s adju sted so that you can easily hear the acou stic
distance signal even if the radio is playing , the air-conditioner
blower is on High or there is a high level of outside noise.
• Check the settings whenever someone else has driven the
vehicle before you.
[I] Tips
• Th e warning tones can also be ad justed directly from the rea r view
camera image . Simply p ress the
[Settings I* cont rol b utton .
• C han ged settings are a ctivat ed w hen parking assist is switched on
again .•
A pplies to v ehicl es: w ith park ing syst em (r e a r, wi th re ar view cam era)
Error messages
If a warni ng tone is aud ible fo r about five se conds when yo u turn on
the ignition, the re is a ma lfunction in t he system. Have the prob lem
co rrected by yo ur a utho rized Audi dea ler .
K eep the se nsors in the rear b umper clean and free from i ce s o th at
the acoustic pa rk assist system can function p roper ly .•
Vehicle care Technical data
Page 168 of 362

lffll.__ __ H_o_ m_ e_ L_ in_ k_® ____________________________________________________ _
Homelink®
Universal remote control
Applies to veh icles: w ith Hom elin k® un iversal re m ote contro l
General information
The Homelink ® feature can learn up to three radio
frequency codes for most current transmitters used for
operating garage doors, estate gates , home or outdoor
lighting systems, and other devices.
Yo u must fi rst p rogr am the Home link® tra nsmi tte r be fore you can
use the system=>
page 167, "Programming the Homelink ® trans
m itter".
In order to program the Homelink ® transm itter fo r devices utilizing
rolling code, a second person on a ladder who can sa fely reach t he
garage door opener motor is recommended. It is also necessary to
locate the "learn" button on yo ur garage door opener motor . Re fer to
t he oper ating ins truc tions fo r th e opene r, as the loca tion and color o f
this button may vary by manufacturer .
Yo u can still use the original remote control for the device at any
t ime .
& WARNING
• Never use the Homelink'"' transmitter with any garage door
opener that does have not the safety stop and rever se feature as
required by fed eral safety standards. This includes any garage
door opener model manufactured before April
l , 1982 .
• A garage door opener which cannot detect an object, signaling
the door to stop and reverse does not meet current federal safety
standards . Using a garage door opener without these features
increases risk of serious injury or death.
& WARNING (cont inu ed )
• For safety reasons never release the parking brake o r start the
engine while anyone i s standing in front of the vehicle .
• A ga rage door or an estate gate may sometimes be set in
motion when the Homelink ® remote control is being
programmed. If the device is repeatedly activated, this can over
s train motor and dam age its electri cal components · an over
heated motor is a fi re hazard!
• To avoid pos sible injurie s
or property damage , plea se always
make absolutely certain that no persons or objects are located in
the range of motion of any equipment being operated.
[ i ] Tips
• If you would like mo re inf orma tion o n Hom eli nk ®, whe re to
purchase the Homelink ® compat ible products, or would like to
purc hase the Homeli nk® Home Lighting Pac kage, p lease ca ll to ll
free : 1-800-355-3515 .
• F or Declaration of Compliance to United Sta tes FCC an d Indus try
Canada regulations=>
page 343. •
Page 169 of 362

_________________________________________________ H_ o_ m_ e_ L_in _ k_® _ __.fflll
App lies to veh icles : w ith Home link® un iversa l remote control
Progr amming the Homelink ® tr ansmitter
The transmitter is programmed in two phases . For rolling
code transmitters, a third phase is also necessary .
,,,,, r, o: o "'' '''"
Fig. 161 Ove rhead
console: Homelink ®
keypa d
Fig. 162 Rad iator
g rille
Phase 1: progr amming the overhe ad keyp ad
1. Make sure your vehicle is within operating range of the
r emote controlled garage door opener .
2 . Set the parking brake:::::>
& in "General information " on
page 166.
3. Turn the ignition on. Do not start the engine!
Con tro ls a nd e quip
m en t Vehicle
OP-eration
4. Press and hold the two outside Homelink ® buttons G)and
@ for approximately
20 seconds until indicator light@
:::::> fig. 161 begins to flash . Then release both buttons. Do
not hold the buttons for longer than
30 seconds .
- This procedure only needs to be performed
once. It erases
the factory-set default codes and does not have to be repeated to program additional remote controls.
5. Press and hold the Homelink ® button G), @ or@ until
the indicator light @starts flashing
slowly . Release the
button.
- The system will remain in programming mode for 5
minutes .
Co to the front of the vehicle and proceed with
phase
2 .
Phase 2: at the rad iator g rille
6. Point the o rigi nal r emote control to the m iddle of the
radiator grille of your vehicle=> fig.
162 .
7. Hold the original remote control at a distance between O
S in. (0-13 cm) (use the shortest distance possible) .
8 . Press and hold the activation button on the remote
control.
- May be different in Canada . If so, press and re-press
(cycle) the activation button on your remote control every
two seconds.
9. The emergency flashers will flash
three tim es (after about
15-60 seconds) when the programming is successful.
Release the button on the remote control.
- To program more devices , repeat steps 4 to 9.
Vehicle care Do-it-yourselt service iTechnical data
Page 170 of 362
fflL----.:H....:..: o:....:m..:..:.. e= L:.:.i :....: n :.:.k :....: ® __________________________________________________ _
10. Press and hold the trained Homelink® button and
o bserve the in dicator light©==>
page 167, fig. 161.
- If the indicator light is solid/continuous, programming is
complete and your device should activate when you press
and release the trained Homelink ® button .
- If the indicator light blinks rapidly for 2 seconds and is
then a solid/continuous light , proceed with phase 3 to
program a rolling code device .
Phase 3: rolling code progr amming
- A second person on a ladder who can safely reach the
garage door opener motor is recommended.
11. Locate the "learn" button on the garage door opener
motor (refer to the operating instructions for the opener,
as the location of this button may vary by manufacturer) .
12. Press and release the learn button on the garage door opener motor.
- Note: once the button is pressed, the re are 30 seconds in
which to initiate the next s tep .
13. On the Homelink ® keyJ)ad inside the vehicle, firmly press
and hold the Homelink ® button previously programmed
in phases 1 and 2 for two seconds and release . Repeat this
sequence
twice .
-Some vehicles may require the press/hold/release
sequence up to three times to complete the training
process .
-Homelink ® should now activate your rolling code
equipped device .
If the 5 minute time limit is exceeded, the emergency fl ash ers will
fla sh one time
to ind icate that the process has been terminated. In
this case, repeat steps 4 t hrough 9 .
If the emergency flashers do not flash
three t imes (after about 15-
60 seconds), programming was not s uccessful. In th is case, repeat
steps 4 through 9.
Remote control un its for garage doo r openers in Canada are se t to
stop transmitting radio frequency s ignals after two seconds. Th is
time may not be sufficient for the Homelink ® system to learn the
radio frequency signal. Perform all other steps as descr ibed above .•
App lies to veh icles: with H omeli nk® un iv ers al re m ote con tro l
Operating the Homelink ® transmitter
The Homelink ® transmitter works in the same manner as
the original hand held remote control that came with the
system .
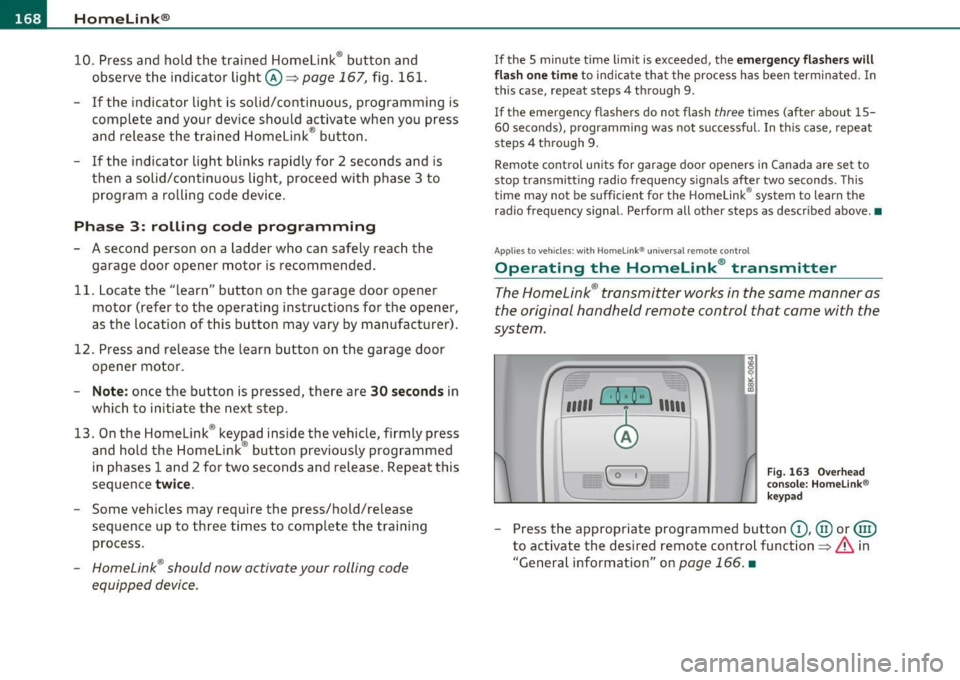
,,,,, r. o; o ,,, ) 1 ,111
F
ig. 1 63 O ve rh ead
co nso le : H om elink ®
k ey p ad
- Press the appropriate programmed button G), @ or@)
to activate the desired remote control function==>
& in
"General information " on
page 166. •
Page 171 of 362
___________________________________________________ H_o_ m_ e_L_ i_ n _ k_ ® __ _
Applies to vehicles : w ith Home link® un iversa l remote cont rol
Reprogramming a single button
A HomeLink ® button con be reprogrammed individually
without affecting the other button allocations .
Programming the overhead keypad
Press the appropriate Homelink® button until the indi
cator light begins flashing slowly.
At the radiator grille
1. Point the original remote control to the middle of the
radiator grille of your vehicle~
page 167, fig. 162.
2. Hold the original r emote control at a distance between O
S in . (0 -13 cm) (use the shortest distance poss ible) .
3 . Press and hold the activation button on the remote
control.
4. The emergency flashers will flash three times (after about
15-60 seconds) when the programming is successful.
Now release the button on the remote control.
- If the device utilizes a rolling code, please follow phase 3
of ~
page 167 , "Programming the Homelink® trans
mitter" for rolling code programming.
This procedure will cause the existing programming on the
Homelink ® button to be erased! •
Controls and equip
ment Safety first
App
lies to vehicles : w ith Home link® un iversa l remote cont rol
Erasing the programming of the
Homelink ® transmitter
When you erase the programming, the programming on
all three of the transmitter channels with be lost!
- Perform steps 1 to 4 as described on~ page 167, "Phase
1: programming the overhead keypad" .
When completed, the Homelink® system will b e in the programming
mode and is then ready to learn the codes for remote controlled
d evices.
[I] Tips
• Programm ed buttons canno t be e ras ed ind iv idually.
• For security reasons you are adv ised to erase the programming of
the Horne Link ® system befo re you sell your vehicle. •
Vehicle care Technical data
Page 345 of 362
______________________________________________ C _o_ n _ s_u_ m_ e_r_ I_n _f_ o_ r_m _ a_t_ i_ o _ n __ _
0 Note
• If items o ther th a n genui ne Aud i spare parts, add-on equipment
and accessory items are used or if repair work is not performed
ac cording to specified methods , this can res ult in seve re damage to
your vehicle's engine and body (such as corrosion) and adversely
affect your vehicle's wa rra nty.
• If emergency repairs must be performed elsewhere, have the
vehicle exam ined by an authorized Audi dealer as soon as possib le .
• T he manufacturer cannot be held liable for damage which occ urs
due to failu re to comply with these stipulat ions. •
Technical Modifications
Our guidelines must be complied with when technical
modifications are made.
Always consult an authorized Audi dealer b efore starting work on any
modifications .
T his w ill help ensure that veh icle function, perfo rmance and safety
are not impaired ~& .
Attempting to work on e lectron ic components and the software used
with them can cause malfunct ions . Because of the way electronic
components are interconnected w ith each other, suc h ma lfunct ions
can also have an adverse affect on other systems that are not directly
involved. This means that you risk both a substantial reduction in the
operat iona l safety of yo ur vehicle and an increased wear of vehicle
parts ~& -
Author ized A udi dea le rs will pe rform th is wor k in a professio na l and
competent manner or, in specia l cases, refer you to a professional
company that specializes in such mod ifications .
Safety first
& WARNING
Imprope r rep airs and modifi cations can chang e the way vehicle
sys tem s w ork and cau se serious per sonal injur y.
0 Note
If emergency repa irs must be performed elsewhere, have the vehicle
examined by an authorized Audi dealer as soon as possible .•
Declaration of Compliance,
Telecommunications and Electronic Systems
Radio Frequency Devices and Radiocommunication
Equipment User Manual Notice.
The manufacturer is not responsible for any radio or TV interference
caused by un authorized modifi cations to this eq uipment.
Dev ices
The fo llow ing dev ices each comply wit h FCC Part 15.19, FCC Par t
15.21 and RSS-Gen Issue
1:
• Adaptive cruise cont ro l*
• Convenience key*
• Audi s ide assist*
• Cell phone package*
• Electronic immobilizer
• Homel ink® universa l remote con trol*
• Remote control key
• Tire p ressure mon itoring system*
Do-it,yourself service Technical data