service indicator AUDI A5 COUPE 2011 User Guide
[x] Cancel search | Manufacturer: AUDI, Model Year: 2011, Model line: A5 COUPE, Model: AUDI A5 COUPE 2011Pages: 362, PDF Size: 84.88 MB
Page 205 of 362
_________________________________________________ A_ ir_ b_ a_,,g :;..__ s-=y '"- s_ t_ e_ m __ _
the weight-sensing mat to measure more weig ht t han is act ua lly on
t he sea t.
If the PASSENGER AIRBAG OFF light still does not come on and
does not stay on cont in uou sly (when the ignition is sw itched on),
• t ake the child re st raint o ff the fr ont pa ssenge r seat and in stall i t
prope rly at one of t he rear seat pos itions. Have t he a irbag system
i n sp ec ted by y ou r au thorized A udi dea ler im medi ately.
• move the child to a rear seat posit io n and make sure that the child
is prop erly restra ined in a chi ld restr aint t hat is a ppropr iate f or its
size and age.
Th e
PASSENGER AIRBAG OFF light s ho uld NO T come on when the
ign ition is on and an adult is sitt ing in a proper seating pos it io n on the
front passenger seat . If t he
PASSENGER AIRBAG OFF light comes on
and stays on or flashes for abou t 5 seco nds w hile driving, under these
circumstances, make sure that:
• t he adult on t he fr on t p asse nger sea t is prope rly se ate d on the
center of the seat cushion with his or her back up against the backrest
and the bac krest is not recline d => page 172, "Proper occupant
seating posit ions",
• t he adult is n ot tak ing weig ht off t he se at by h olding on to t he
passenger assist handle above the fro nt passenger doo r or
s u pp orting their weight on the armrest,
• the safety belt is be ing properly worn and t hat there is not a lot of
s la ck in t he safe ty be lt webb ing ,
• accessory seat cove rs or cushions o r othe r th ings that may cause
an in cor rect re adin g or impress io n o n the weight -sen sing m at under
the upholstery of the seat have been removed from the front
pas senge r sea t,
• a safety be lt extender has not been left in the safety belt latch fo r
t he fr ont p asse n ge r se at.
In addition to the
PASSENGER AIRBAG OFF lig ht i n the center of the
instrument pa nel, the message
PASSENGER AIRBAG OFF or
PASSENGER AIRBAG ON w ill br ie fly ap pear in t he instr ument cluster
Controls and equip
ment Safety first Vehicle operation
display. This
is to inform the dr iver of the current front passenger
a ir bag s tatus. •
Important safety instructions on
monitoring the Advanced Airbag System
& WARNING
An airbag system that is not functioning properly cannot provide
supplemental protection in a frontal crash.
• If the airbag indicator light comes on, it means that there may
be something wrong with the Advanced Airbag System. It is possible that the airbag will inflate when it is not supposed to, or
will not inflate when it should .
• Have the airbag system inspected immediately by your autho
rized Audi dealer.
& WARNING
If the front airbag inflates, a child without a child restraint, in a
rearward-facing child safety seat or in a forward-facing child
restraint that has not been properly installed will be seriously
injured and can be killed .
• Even though your vehicle i s equipped with an Advanced Airbag
System, make certain that all children, especially 12 years and
younger , always ride on the back seat properly restrained for their
age and size .
• Always install forward or rear-facing child safety seats on the
rear seat -even with an Advanced Airbag System.
• If you must install a rearward-facing child safety seat on the
front passenger seat because of e xceptional circumstances and
the PASSENGER AIR BAG OFF light does not appear and stay on, immediately install the rear-facing child safety seat in a rear ..,
Vehicle care Do-it-yourself service Technical data
Page 209 of 362
are wearing your safety belt and wear ing it properly . This is why you
should always wear your safety belt, not just because the law requires
you to do so=>
page 181, "General notes".
The safety belt buckle for the driver and front seat passenger have
switches that tell the airbag control module if the safety belt is being
used or not. If the safety belt is being used, the knee airbag will
dep loy at a slightly higher rate of deceleration than if the belt is not
being used. Therefore, in a particular collision, it is poss ible that an
airbag will not deploy at a seating position where the safety belt is
being used but will inflate at the position whe re the safety be lt is not
being used.
Remember too, airbags w ill deploy only once and only in certa in kinds
of accidents -your safety belts are always there to offer protection in
t hose accidents in which airbags are not supposed to deploy or when
they have already deployed, for example when your vehicle strikes or
is struck by another after the first collision.
This is just one of the reasons why an airbag is not a substitute for the
safety belt. The airbag system wo rks most effective ly when used with
the safety belts. Therefore, always wear your safety belts correctly .
It is important to remember that while the supplemental airbag
system is desig ned to reduce the likelihood of serious injuries, other
injuries, for example, swe lling, bruis ing, and minor abrasions can
also be associated with airbags.
The knee airbag system basically consists of:
• Th e electronic control module
• T wo inflatable airbags (airbag and gas generator), one for the
driver and one for the front passenger
• The airbag indicator light in the instrument panel
The knee airbag system will not deploy:
• when the ignition is turned off
• in front-end collis ions when the decelerat ion measured by the
control unit is too low
• in s ide collisions
Safety first Vehicle OP-eration
Airbag system
• in rear-end collisions
• in rollovers
• in the event of a system ma lfunction (warning/indicator light illu
minated)=>
page 16 .
& WARNING
• Safety belts and the airbag system can only provide protection
when occupants are in the proper seating position =>
page 199.
• If the airbag indicator light comes when the vehicle is being
used, have the system inspected immediately by your authorized
Audi dealer. The airbag may not work properly when the vehicle
acceleration in a side collision is high enough to deploy the airbag.
See also =>
page 16. •
A pp lies to vehi cles: w ith knee a irbags
How knee airbags work
The risk of injury to the leg area is reduced by fully
deployed knee airbags.
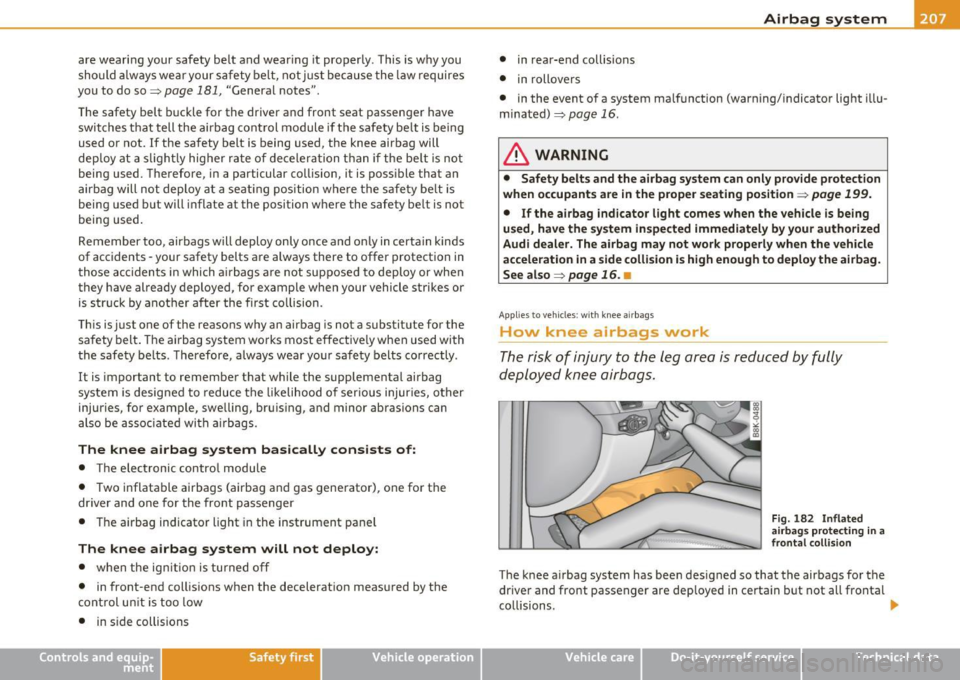
Fig . 182 Inflated
airbags protecting
in a
frontal collision
The knee air bag system has been designed so that the airbags for the
dr iver and front passenger are deployed in certa in but not all frontal
co llisions .
ti-
Vehicle care Do-it-yourselt service iTechnical data
Page 211 of 362
Side airbags
Description of side airbags
The airbag system can provide supplemental protection
to properly restrained occupants.
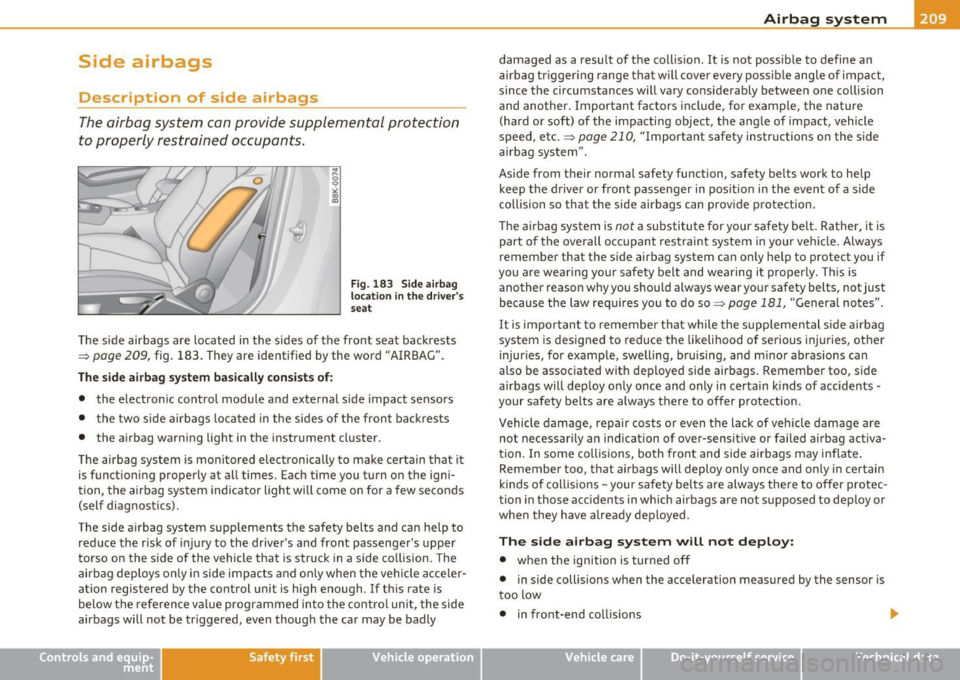
Fig. 183 Side airbag
location in the driver's
seat
The side airbags are located in the sides of the front seat backrests
=>
page 209, fig. 183. They are identified by the word "AIRBAG" .
The side airbag system basically consists of:
• the electronic control module and external side impact sensors
• the two side airbags located in the sides of the front backrests
• the airbag warning light in the instrument cluster.
The airbag system is monitored electronically to make certain that it
is functioning properly at all times. Each time you turn on the igni
tion, the airbag system indicator light will come on for a few seconds
(self diagnostics) .
The side airbag system supplements the safety belts and can help to reduce the risk of injury to the driver's and front passenger's upper
torso on the side of the vehicle that is struck in a side collision. The
airbag deploys only in side impacts and only when the vehicle acceler
ation registered by the control unit is high enough . If this rate is
below the reference value programmed into the control unit, the side
airbags will not be triggered, even though the car may be badly
Safety first Vehicle OP-eration
Airbag system
damaged as a result of the collision. It is not possible to define an
airbag triggering range that will cover every possible angle of impact,
since the circumstances will vary considerably between one collision
and another. Important factors include, for example, the nature
(hard or soft) of the impacting object, the angle of impact, vehicle
speed, etc.
=> page 210, "Important safety instructions on the side
airbag system" .
Aside from their normal safety function, safety belts work to help keep the driver or front passenger in position in the event of a side
collision so that the side airbags can provide protection.
The airbag system is
not a substitute for your safety belt. Rather, it is
part of the overall occupant restraint system in your vehicle. Always
remember that the side airbag system can only help to protect you if
you are wearing your safety belt and wearing it properly. This is
another reason why you should always wear your safety belts, not just
because the law requires you to do so=>
page 181, "General notes".
It is important to remember that while the supplemental side airbag
system is designed to reduce the likelihood of serious injuries, other
injuries, for example, swelling, bruising, and minor abrasions can
also be associated with deployed side airbags. Remember too, side
airbags will deploy only once and only in certain kinds of accidents -
your safety belts are always there to offer protection .
Vehicle damage, repair costs or even the lack of vehicle damage are
not necessarily an indication of over-sensitive or failed airbag activa
tion. In some collisions, both front and side airbags may inflate.
Remember too, that airbags will deploy only once and only in certain
kinds of collisions -your safety belts are always there to offer protec
tion in those accidents in which airbags are not supposed to deploy or
when they have already deployed.
The side airbag system will not deploy:
• when the ignition is turned off
• in side collisions when the acceleration measured by the sensor is
too low
• in front-end collisions
~
Vehicle care Do-it-yourselt service iTechnical data
Page 215 of 362
Airbag system Ill
----------------=--=---
& WARNING
• Safety belts and the airbag system will only prov ide protection
when oc cupants are in the proper seating position =>
page 73,
"General recommendations ".
• If the airbag indicator light comes on when the vehicle i s being
used , have the system inspected immediately by your authorized
Audi dealer. The side curtain airbag may not work properly even
when the vehicle a cceleration in a side collision is high enough to
activate the airbag. •
How side curtain airbags work
Side curtain ai rbags can work together with side airbags
to h elp reduce the risk of head and upper torso injuri es for
occupants who are properly restrained.
..
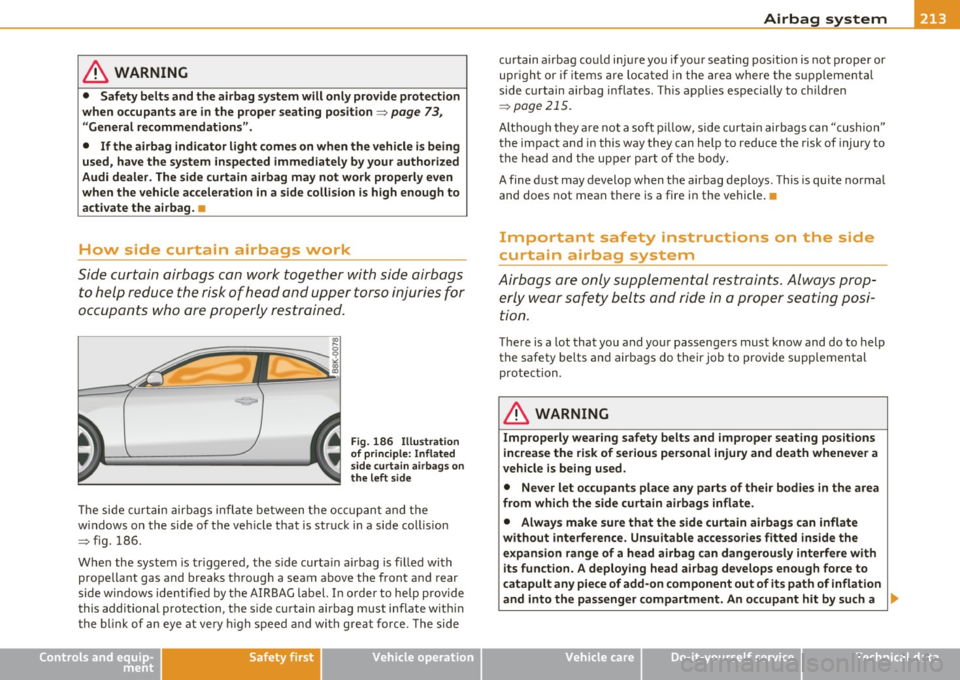
Fig . 1 8 6 Illu st ra tion
o f princi ple: Inflated
side curtain airb ag s on
the left s ide
Th e side curtai n airbags inflate between the occup an t and t he
windows on the side of t he veh icle tha t is struck in a side coll is ion
=> fig . 18 6.
When the system is tr iggered, the side curta in a irbag is filled with
prope llant gas and breaks t hrough a seam above the front an d rear
side w indows identifie d by t he A IRBA G labe l. In o rder to he lp p rov ide
this additional protection, t he s ide c urtain airbag must inflate within
t he blink of an eye at ve ry high speed and with gre at f orce. The side
Controls and equip
ment Safety first Vehicle operation
curtain a
irbag co uld in jure you if your seating posit io n is not proper or
upr ight or if items are lo cated in the area where the s uppleme ntal
side cu rtain airbag i nflates. T his app lies especially to c hildren
=> page 215.
Alt hough they a re not a sof t pill ow, side curta in airbags c an "cushion"
the impact and in this way they can help to reduce the risk of injury to
t he head and t he uppe r part o f th e bo dy.
A fine d ust may develop when the airbag deploys . Th is is quite norma l
and does not mean there is a fire in the vehicle .•
Important safety instructions on the side
curtain airbag system
A irbags ar e only supp lemental r estraints. Always prop
e rly wear s afe ty b elts and ride in a proper seating posi
tio n.
T he re is a lot that yo u and your passenge rs must k now and do to help
the safety belts and airba gs do their job to provide supplemental
protection .
& WARNING
Improperly wearing safety belts and improper seating pos itions
increa se the risk of serious personal injury and death whenever a
vehicle is being used.
• Never let oc cupants place any parts of their bodie s in the area
from which the side curtain airbags inflate.
• Always make sure that the side curtain airbags can inflate
without interference . Unsuitable accessories fitted inside the
expansion range of a head airbag can dangerously interfere with
its function. A deploying head airbag develops enough force to
catapult any piece of add-on component out of its path of inflation
and into the passenger compartment. An occupant hit by such a .,
Vehicle care Do-it-yourself service Technical data
Page 239 of 362
Intelligent technology
--------------------------------------------------' "---.L==--
The system operates across the entire speed range in combination
w ith the ABS sys tem. If the A nti-L o ck Brak e System (A BS) mal fun c
tions, the ESP will also shut down.
How the system works
The Anti-Lock Brake System (ABS), Elect ronic D ifferential Lock (EDL)
and the Anti-Slip Regul ation System (AS R) are in teg rated in the e lec
tronic stab ilizat ion program . In addition to the data prov ided by
th ese fun ctions, the ESP control unit re quires addi tional meas ure
ment data provided by hig h pe rformance senso rs . The ro tat ional
speed of the vehicle about its vertical axis, veh icle acceleration in the
fore-and-a ft and lateral d irect ions, the brake pressure , a nd the
steerin g ang le are all measured .
Th e d irec tion in whi ch the driver w ishes to tra ve l is d ete rm ined wi th
the a id of the steering a ngle and ve hicle speed and is con tinually
c omp ared wi th the a ctu al b ehavior o f the ve hicl e. If t he two do no t
match, for example, when the vehicle starts hydroplani ng on a wet
roa d, E SP w ill automatica lly bra ke the approp riate whee l to correct
the problem.
Th e ve hicle is t hen stab ilized by the fo rces acting on the whee l during
bra king .
If the ve hicl e is oversteering (the vehicle tu rns too s harp ly
and the rear whee ls slide toward the outside of a curve), the brakes
a re mainly a pplied on the whee l tha t is o n the o uts ide of t he curve. In
the case of a vehicle that is
understeering (the vehicle does not turn
shar ply enough and push es out o f a curve), the b rakes are ap plied as
needed on the whee l th at is on the inside of the curve or additionally
on the ot her wheels . An acoustic s ignal indicates w hen ESP bra ke
applica tion cuts in=> &.
T he system operates across the entire speed range in combination
w ith the A BS system =>
page 241. If the A nti-Lo ck Br ake Sys tem
(ABS) ma lfunctions, the ESP w ill be o ut of act ion as we ll.
Activating
When you turn on the engine, ESP wi ll automatica lly be activated and
w ill pe rfor m a self- tes t. As soo n as t he tes t is co mplete d, th e sys tem
is in normal operating mo de.
Controls and equip
ment Safety first Vehicle operation
Yo
u can activate a deactivated ESP or deactivated ESP/ ASR if required
b y pressi ng the =>
page 236, fi g. 1 9 8 => page 236, fig . 19 7 bu tton.
Wh en they are activated, the message
Stabilisation program on
appears briefly in t he di sp lay .
Deactivating
The ES P shoul d no rma lly be acti va te d a ll the tim e. I f necess ary, y ou
can deact ivate A nti-Slip Reg ulat io n (ASR) or th e Electro nic Sta biliza
t ion Progr am ( ES P) by p ress ing the button =>
page 23 6, fig. 198.
• Deactivating ASR: Tap th e button . In cer tain exceptional s itua
t ions (e.g. driving with tire chains), the Anti -Slip Reg ulation (ASR) can
be dea ct iva te d =>
page 238. The m ess age ASR off Caution! Limited
driving stability
a pp ears in the d isp lay as well.
• Deactivating ESP/ASR Press the but ton for mor e tha n 3 seconds .
With the ESP/ ASR deactivated, the indicator light comes on, see
=>
p age 15. The m ess age Warning! Restri cted stability ap pears in
the display as we ll.
& WARNING
The Electronic Stabilization Program is nevertheless subje ct to the
laws of physics . It is particularly important to pay attention to
this fact on wet and slippery roads. It is therefore important that
you always adapt your driving to the condition of the road and
traffic conditions . Do not allow the increased safety provided by
the Electronic Stabilization Program system to lull you into accepting additional safety risks .
u
Vehicle care Do-it-yourself service Technical data
Page 281 of 362
___________________________________________ C_ h _ e_c _k _ i_n -=g ~ a_n _ d_ f_i _ll _i _ n -=g =--- ......J•
0 Note
Dr iv ing with an insufficient oil level is likely to cause severe damage
to the engine .
[ i ] Tips
• The oil pressure warning display~ is not an indicator of the oil
level. Do not rely on it. Instead , check the oil level in your engine at
regular intervals, preferably each time you refuel, and always
before going on a long trip .
• If you have the impression your engine consumes excessive
amounts of oil, we recommend that you consult an authorized Audi
dealer to have the cause of your concern properly diagnosed. Keep in
m ind that the accurate measurement of o il consumption requires
great care and may take some time. An authorized Audi dealer has
instructions about how to measure oil consumption accurately .•
Checking the engine oil level
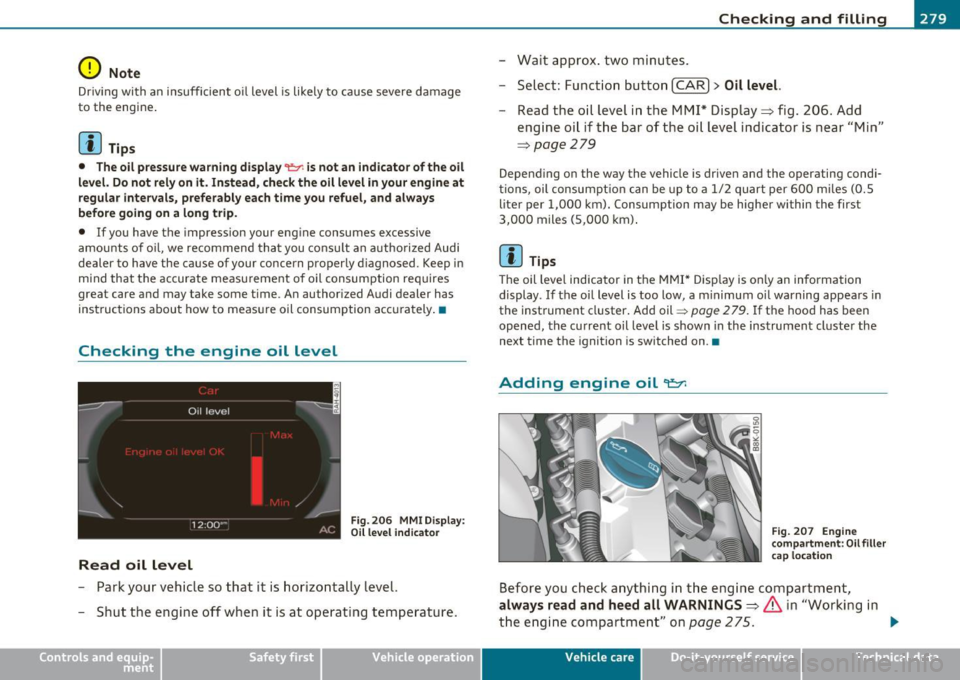
Fig. 206 MMI Display:
Oil leve l ind icator
Read oil level
-Park your vehicle so that it is horizontally level.
- Shut the engine off when it is at operating temperature.
Vehicle OP-eration
-Wait approx . two minutes.
- Select: Function button
[CAR]> Oil level.
- Read the oil level in the MMI* Display => fig. 206. Add
engine oil if the bar of the oil level indicator is near "Min"
=>
page 279
Depending on the way the vehicle is driven and the operating condi
tions, oil consumpt ion can be up to a 1/2 quart per 600 mi les (0.5
liter per 1,000 km). Consumption may be higher within the first
3,000 miles (5,000 km) .
[ i ] Tips
Th e oil level indicator in the MMI* Display is on ly an information
display.
If the oi l level is too low, a m inimum o il warning appears in
the instrument cluster. Add oil=>
page 2 79. If the hood has been
opened, the current oil level is shown in the instrument cluster the
next time the ignition is switched on .•
Adding engine oil
com partment: Oil filler
cap location
Before you check anything in the engine compartment,
always read and heed all WARNINGS=> & in "Working in
the engine compartment" on
page 275. .,,_
Vehicle care Do-it-yourselt service iTechnical data
Page 303 of 362
_________________________________________ T_ i_re _ s_a _n_ d_ w_ h_e _e _l_s _ ..... fflll
5. Determine the combined weight of
luggage and cargo being loaded on the
vehicle. That weight may not safely
exceed the available cargo and luggage
load capacity calculated in Step 4.
6. If your vehicle will be towing a trailer,
load from your trailer will be transferred
to your vehicle. Consult this manual to
determine how this reduces the available
cargo and luggage load capacity of your
vehicle.
Check the tire sidewall(~
page 303~
fig. 216) to determine the designated
load rating for a specific tire .•
Vehicle OP-eration
Tire service life
The service life of tires depends on a lot of different
things including proper installation and balancing,
correct tire pressure and driving style .
(-----~
_____ __,,:)
Tread Wear Indicator (TWI)
N
"' 0 9
"" ~
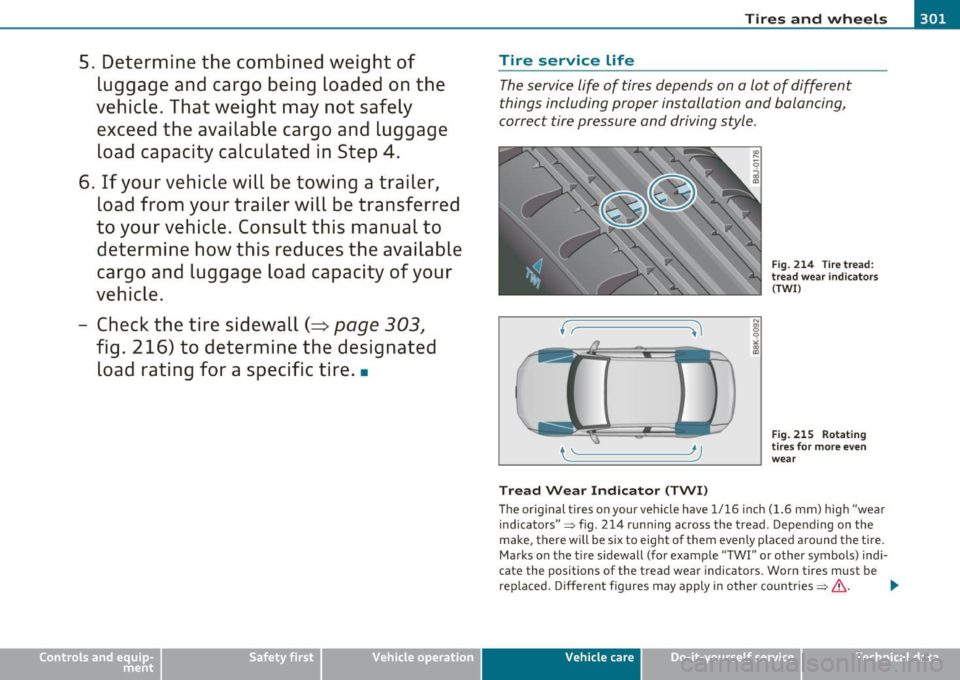
Fig. 214 Tire tread:
tread wear indicators
(TWI)
Fig. 215 Rotating
tires for more even
wear
Th e original tires on your vehicle have 1/16 inch (1.6 mm) high "wear
indicators "~ fig. 214 running across the tread. Depending on the
make, there will be six to eight of them even ly placed around the tire.
Marks on the tire sidewall (for example "TWI" or other symbols) indi
cate the positions of the tread wear indicators. Worn tires must be
rep laced. Different figures may apply in other countries ~
&- .,_
Vehicle care Do-it-yourselt service iTechnical data
Page 313 of 362
Tires and wheels -_____________________ ,,...
Applie s to vehicl es: wi th t ir e pr essure mon itor ing syste m
Tire pressure indicator appears
The tire pressure indicator in the instrument cluster
informs you if the tire pressure is too low or if there is a
system malfunction.
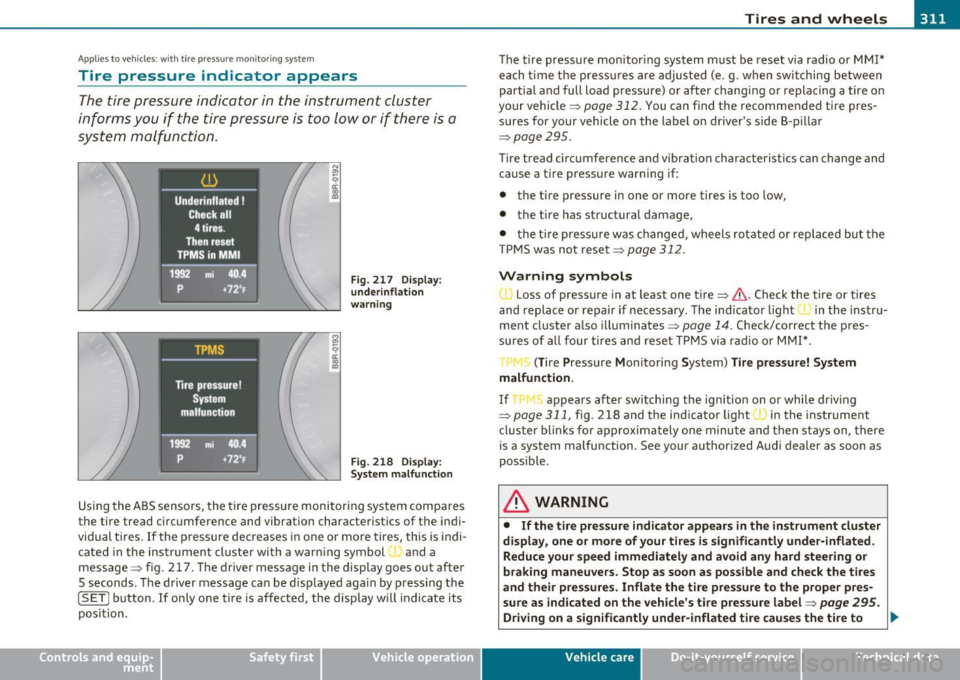
F ig . 217 Displ ay:
un derinfl ation
wa rn ing
Fi g. 218 Disp la y:
S yst em m alf unction
Us ing the A BS sensors, the tire pressure monitor ing system com pa res
the tire tread circumference and vibrat ion characterist ics of the ind i
vidual tires .
If the pressure decreases in one or more tires, this is indi-
cated in the instrument cluster with a warn ing symbol and a
message => fig . 217 . T he driver message in the display goes out after
5 seconds. T he driver message can be d isp layed again by p ressing the
[SETj button. If on ly one tire is affected, the display will indicate its
posi tion.
Vehicle OP-eration T
he tire pressure mon itor ing system must be reset via radio or MMI*
e ach t ime the press ures a re adjus ted (e.g . when switching between
partia l a nd full load pressure) or after chang ing or replacing a tire on
your vehicle =>
page 312. You ca n find the recommended tire pres
sures for your vehicle on the label on dr iver's side B-p illar
=> page 295.
Tir e tread ci rcumference and vibrat ion ch aracterist ics ca n change and
cause a tire pressure warn ing if:
• the tire pressure in one o r more tires is too low,
• the t ire has structura l damage,
• t he ti re pressure w as changed, wheels rotated or replaced bu t the
TP MS was not reset=>
page 312.
Warning symbols
• Loss of pressure in at least one tire => & . Check the tire or tires
and replace or repa ir if necessary . The ind icator light
I in the instru
ment cl uster a lso illuminates =>
page 14. Check/correct the pres
s u res of a ll four tires and reset TPMS via r adio or MM I*.
il (T ire Pressure Monitoring System) Tire pressure! System
malfunction.
If appears after sw itching the ignition on o r while dr iv ing
=> page 311 , fig. 218 and the ind icator light (1 in the instrument
cl uster blinks for a pprox imately one minu te and then s tays on, there
is a system malfunction. See your author ized Audi dealer as soon as
poss ible.
& WARNING
• If the tire pressure indi cator appears in the instrument cluster
display, one or more of your tires is significantly under -inflated.
Reduce your speed immediately and avoid any hard steering or
braking maneuvers . Stop as soon as possible and check the tires
and their pre ssure s. Inflate the tire pre ssure to the proper pre s
sur e as ind icated on the vehicle's tire pres sure label =>
page 295.
Driving on a significantly under-inflated tire causes the tire to _,,.
Vehicle care Do-it-yourselt service iTechnical data
Page 317 of 362
What do I do now? -________________ PfWII
Removing the spare tire
- Lift th e carg o floo r by the plas tic h andle ~ page 314,
fig . 2 20.
- H ook the hand le into t he luggage compa rtment weathe r
stri p.
- Tur n th e la rge screw~
page 314 , fig . 220 cou nter -clock-
w ise .
- Ta ke out the sp are t ire.
- U nho ok the c arg o flo or b efo re clos ing th e rear lid .
Securing the replaced tire
- Pla ce the w heel w it h t ire in t he spa re wheel we ll and
secu re t he wheel wit h the large sc rew.
- Unhook the c arg o floor before closing the re ar lid.
Using the spare tire (compact spare tire)
T he compact s pare tire is only inte nded for em er gen cie s until you can
reac h a repa ir sh op. R epl ace it as quickly as poss ible wit h a standar d
w he el a nd t ire.
Th ere are some rest rict io ns o n th e use of the compact s pare tire . The
compa ct spar e tir e has b een d esign ed spe cific ally f or your t ype of
vehicle. It must n ot be swa pped with a compact spare tire from
an other ty p e of vehi cle.
Snow chains
Fo r te chni cal re ason s, the use of snow ch ain s on th e compact s par e
t ire is not permitted .
I f y ou do h ave to dr ive wi th sno w chains an d a
front t ire fails, mount
t he spare wh eel w it h t ire instead of a rear tire. Ins tall the s now chai ns
on t he rear tire and use it to repla ce the defective fro nt tire .
Safety first
& WARNING
• Never use the spare tire if it is damaged or if it is worn down to
the tread wear indicators.
• If the spare tire is more than 6 years old, use it only in an emer
gency and with extreme caution and careful driving.
• The spare tire is intended only for temporary and short-term
use. It should be replaced as soon as possible with the normal
wheel and tire .
• After mounting the compact spare tire, the tire pressure must
be checked as soon as possible. The tire pressure of the compact
spare tire must be 4.2 bar; otherwise, you risk having an accident.
• Do not drive faster than 50 mph (80 km/h) . You risk having an
accident.
• Avoid full-throttle acceleration, heavy braking, and fast
cornering. You risk having an accident.
• Never drive using more than one spare wheel and tire. You risk
having an accident.
• Normal summer or winter tires must not be mounted on the
compact spare wheel rim.
• For technical reasons, the use of tire chains on the spare tire is
not permitted. If it is necessary to drive with tire chains, the spare
wheel must be mounted on the front axle in the event of a flat in
a rear tire. The newly available front wheel must then be installed
in place of the rear wheel with the flat tire . Installing the tire
chain before mounting the wheel and tire is recommended.
• Loose items in the passenger compartment can cause serious
personal injury during hard braking or in an accident.
- Never store the inflatable spare tire or jack and tool s in the
passenger compartment.
- Always store all jacking equipment, tools, and the inflatable spare tire in the luggage compartment.
- Tighten the knurled retaining screw for the inflatable spare
tire securely. •
Vehicle care Do-it-yourself service Technical data
Page 349 of 362
___________________________________________ A_ l::.. p _h _a_ b_ e_t _ic _a_ l_ in_ d _ e_x __ fflll
Audi drive select .. .. .. ...... .. .. . .. . 147
Adaptive dampers ................ 147
Description ............. .. ....... 147
Dynamic steer ing ... ....... ..... .. 147
Sett ing the driv ing mode . .. .. .. .. . 148
Audi Serv ice Repai r Manuals and Litera ture .
340
Auto Lock .. .. ... ..... ... ... ... .. .. .. 46
Auto Safety Hotline ... ... ... . .. ..... 179
Auto-Check Control .... .. ... ...... .. .. 31
Automatic belt retractor .......... .. . 185
Automatic car wash
See Washing ....... .. .... .. .... . 257
Automatic climate control
A/C mode .......... .... .. .... .. .
100
Automatic climate control plus ..... .. . 101
A/C mode .... .......... ...... .. . 107
See also Deluxe automa tic clima te cont rol
plus ..........................
101
Automatic climate control system . ...... 95
See also Deluxe automat ic climate contro l
95
Automatic driving light control ......... 58
Automatic Shift Lo ck (ASL) ......... .. .
153
Automatic transmission .............. 150
Automatic Shift Lock (ASL) ..... .... 153
Driving ...... ...... .. .. .. .. .... . 151
Dynamic shift p rogram . .. .. ... . .. . 154
Eme rgency release ......... .... .. . 156
Fail-safe mode . .. ................ 156
Kick -down ........ .. .... ... .. .. . 154
Manual shift program ..... .... .... 155
Selector lever ............ ... ..... 152
Controls and equip
ment Safety first
Shift buttons
... ...... .. .... ..... 156
Steering wheel with tiptronic ...... . 156
Automatic wipe/wash system .......... 65
Average speed ......... .. .. .......... 24
Avoid damaging the vehicle .... .... ... 247
B
Battery . .. .. .. .. .... ...... ......... 285
Bat tery location inside the luggage
compartment . ........ .... .....
286
Charging ........................ 288
Important warnings when working on the
battery ... .. .. ... ..... .... ... ..
286
Jump start ing . ........... ...... .. 328
Low ... .. .. .. .... .... ........... 243
Replacing the battery .. .. .. ....... 289
State of charge ..... .............
243
Winter operation ... ..... ......... 285
Work ing on the battery .... ... .. .. .
286
Battery voltage .. .... .... .. .. .... ... . 39
Befo re driving ..... .... .. .. .. .. .... .
171
Blended gasoline .. ......... ...... .. 269
Body cavity sealing ..... ....... ...... 262
Booster seats ... .. .... .. ........... 223
Brake assist ... .. ........... ........ 241
Brake booster ... .. ... ... .. ......... 240
Brake fluid
Changing the brake fluid ...........
285
Checking the brake fluid level ....... 284
Reservoir .. .. .. ...... .. .... ..... 284
What is the correct brake fluid level? . 284
What should I do if the brake fluid warning
light comes on? ... .. .. .. ........
284
Brake system . .... .. .. ... .... ... ... . 284
Anti-lock brake system .......... ... 17
Brake fluid .. ...... ............. . 284
Brake fluid specificat ions for refill and
replacement . .... ............. .
285
Brake light defective .... ... .. .. .. .. 39
Brake pads .. .. .... ..... .... .... .
246
Electromechanical parking brake . ... 116
General information ............ .. 239
How does moisture or road salt affect the
brakes? ... .... .. ............. . 239
Malfunction .............. ...... .. 33
Warning/indicator lights ... .. .. .. ..
18
Worn brake pads symbol ........... 38
Braking guard
See Audi braking guard .......... .. 135
Break-in period . .. .. .. .... .......... 246
Brake pads . ... ................ .. 246
Tir es ... ........................ 246
Bulbs . ................ ... .. .. .. ... 327
C
California Proposition 65 Warning .. ... 276
Battery specific .. .. .... ... .... ... 288
Capacities . ......... ... . .... .. .. .. . 339
Car care ... ................ ...... .. 256
Interior ............ .. .... .... .. .
263
Plastic and vinyl ................ .. 260
Weatherstrips ...... ...... .. .. .. . 261
Care of exterior ...... .. .. .. .. .. .. ... 256
Vehicle operation Vehicle care Do-it-yourself service Technical data