ECU AUDI A5 COUPE 2011 Owners Manual
[x] Cancel search | Manufacturer: AUDI, Model Year: 2011, Model line: A5 COUPE, Model: AUDI A5 COUPE 2011Pages: 362, PDF Size: 84.88 MB
Page 45 of 362
![AUDI A5 COUPE 2011 Owners Manual (]] Tips
• The operation of the remote control key can be temporarily
disrupted by interference from transmitters in the vicinity of the
vehicle wo rking in the same frequen AUDI A5 COUPE 2011 Owners Manual (]] Tips
• The operation of the remote control key can be temporarily
disrupted by interference from transmitters in the vicinity of the
vehicle wo rking in the same frequen](/img/6/57583/w960_57583-44.png)
(]] Tips
• The operation of the remote control key can be temporarily
disrupted by interference from transmitters in the vicinity of the
vehicle wo rking in the same frequency range (e.g. a cell phone, rad io
equipment) .
• If you open the dr ive r's doo r with the key left in the ignit ion lo ck,
a ch ime will sound . This is your reminder to remove the key and lock
the doo r.
• For security reasons, replacement keys are only available from
Audi dealers.
• For Declaration of Complia nce to United States FCC and Industry
Canada regulations=>
page 343 . •
Check Light in the master key
The check li ght in the master key provides inform ation
about different conditions.
!
lJl
Fig. 2 8 Che ck lig ht in
t h e maste r key
The check light comes on brief ly once when a button is p ressed, and
during an "inquiry" by the convenience key system.
Con tro ls a nd e quip
m en t Vehicle
OP-eration
Opening and closing
If the check light does not come o n, the batte ry is dead and has to be
rep laced. In addi tion, when the batte ry is dead the • sym bol appears
in the instrument cluster d isp lay as well as the message :
Please change ke y batte ry
Battery replacement => page 43. •
Master key battery replacement
..
Fig . 2 9 R em ote
m aste r ke y: Rem ovin g
th e m ech anic al ke y
Fig. 30 Remot e
m as ter k ey: Rem oving
t he batte ry hol der
We recommend having the battery changed by an authorized
Audi dealer. However, if you wish to rep lace the dead battery
yourse lf, proceed as follows :
- P ress the release button©=> fig. 29.
~
Vehicle care Do-it-yourselt service iTechnical data
Page 48 of 362
Opening and closing
Automatic locking
The a utomat ic lock ing feature loc ks all t he vehi cle doo rs and the rea r
lid wh en you d rive faster tha n 9 m ph (15 km/h) .
T he car is unlocked again once t he ignit ion key is removed. In add i
t ion , th e ve hicl e ca n be u nlocked if the ope ning func tion in t he power
locking system switch o r at one of the door levers is actuated. The
Au to Lo ck funct ion ca n b e tur ned o n and off in t he radio or
M MI*
=> page 47.
Add itionally , in t he even t of a cras h with a irbag deployme nt the doors
ar e au to m atically u nlocked to allow access to the vehicle.
Anti-theft alarm warning system
If the anti -theft a larm warn ing system de tects a break-i n into t he
vehicle, acous tic an d visual warning s ignals are triggered.
Th e a nti-theft wa rning system is acti va ted a uto mati ca lly wh en you
lock the vehicle . It is deactivated w hen unl ocking using t he
remote
key ,
with t he mechanical key , and when you swi tch o n the igni tion .
The alarm also turns off w hen the alarm cycle has expired .
Turn signals
When you unlock the vehicle, the t urn s ignals flash twice, when y ou
l ock it o nc e.
If they do not fl ash, one of the door s, the rea r lid or the
hood is not locked .
Unintentionally locking yourself out
In the following cases the re safeguards to p revent yo u lock ing your
re mote m aste r k ey in the ve hicl e:
• The veh icle does not lock with t he centra l lock ing sw itch
=>
pa ge 50 if the drive r's door is o pen.
• On vehicles with conven ience key *, if the most recently used
m aste r key i s in t he lug gage compartme nt, the re ar lid is aut om at i
cally unloc ked aga in af ter i t is closed =>
page 51 .
Do not loc k yo ur vehicle w it h the remote master key until all doo rs
and the rear lid are closed . In t his way yo u avoid locking yoursel f out
acc identally .
& WARNING
• When you leave the vehicle, always remove the ignition key
and take it with you. This will prevent pas sengers (children, for
example ) from accidentally being locked in the vehicle should
they accidentally press the power locking switch in the front
doors.
• Do not leave children inside the vehicle unsupervised. In an
emergency it would be impossible to open the doors from the
outside without the key.
[ i ] Tips
• In the event of a cras h w it h ai rbag deployme nt all locked doo rs
w ill be a uto mat ically u nlocked to giv e access to t he v ehi cle occu pants
from t he outside .
• If the power locki ng system should malfunction, you ca n lock the
driver's door using the mechanical key =>
page 51.
• If the power locking system should fail, yo u can still o pen t he fuel
tank flap in an
emergency ::::>page273 .
• You a re well advised not to keep valuables inside a n unattended
veh icle, v isible or no t. Even a prope rly lo ck ed ve hicle canno t pro vide
the secu rity of a safe .
• If the L ED in th e upp er edge of th e dr iver 's d oor p anel come s on
for abo ut 30 seco nds afte r th e ve hicle is locked , there is a ma lfu nc
tion in t he powe r locking or the a nti- t heft wa rnin g system . H ave the
ma lf u nctio n corrected by an a uth orized Aud i dea lership o r qualified
re pair facility. •
Page 52 of 362
Opening and closing
-Tur n the me chanical key i n th e lo ck of the d river's door to
the lock position @=> & in "General descr iption" on
pag e 45.
If the power locki ng system f ail s, there is eme rge ncy locki ng for the
passenger 's door=>
page 51.
& WARNING
Read and follow all WARNINGS=> & in "General descript ion" on
page 45.
[IJ Tips
• After the ignit ion is swi tched on, the power locking sys tem swi tch
and the unlocking button for the rear lid
c;:; i n the door are enabled .•
Locking and unlocking the vehicle from
inside
Fig . 39 Driver 's door :
power lo cking switch
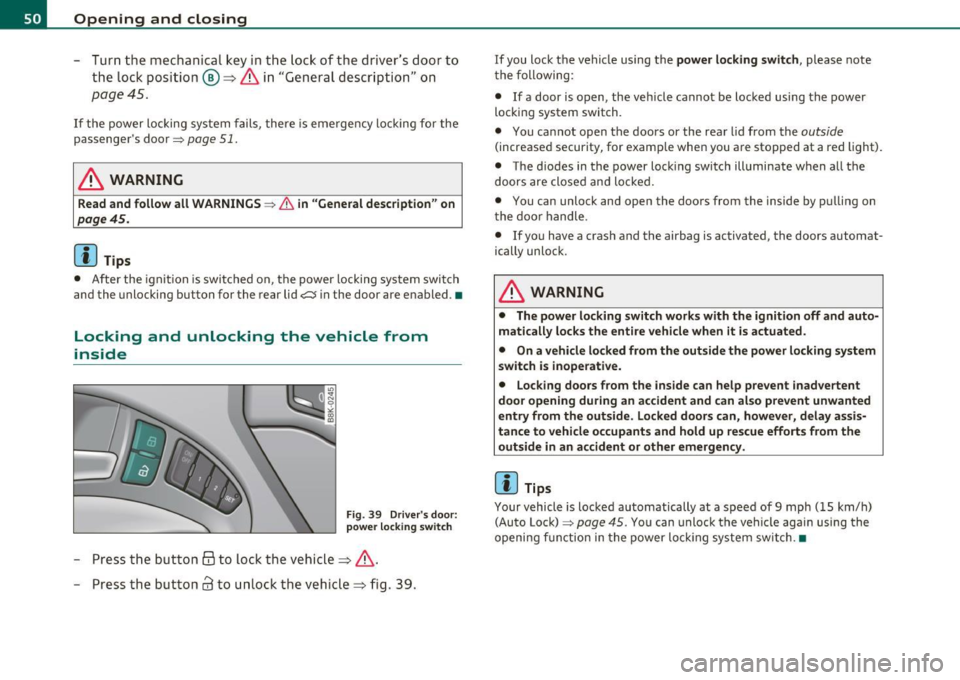
- Press the b utto n @ to lo ck the vehicl e=> & .
- Press the but ton
63 to u nloc k the veh icle => fig. 39.
If you lock the vehicle using the power locking switch , please note
t he following:
• If a door is open, the veh icle cannot be locked using the power
loc kin g system switch.
• You ca nnot open the doors or the rear lid from the
outside
(increased security, for examp le when you are sto pped at a red light).
• The diodes in the power loc king switch ill uminate when a ll the
doors are close d an d lock ed .
• You can unlock and open the doors from the inside by p ulling on
t he doo r handle .
• If yo u have a crash and the airbag is activated, the doors automat
ically unlo ck.
& WARNING
• The power locking switch works with the ignition off and auto
matically locks the entire vehicle when it is actuated .
• On a vehicle locked from the outside the power locking system
switch is inoperati ve.
• Locking doors from the inside can help prevent inadvertent
door opening during an accident and can al so prevent unwanted
entry from the outside. Locked doors can, however, delay assis
tance to vehicle occupants and hold up rescue efforts from the outside in an accident or other emergency .
[IJ Tips
Your vehicle is loc ked automatically at a speed of 9 mph ( 15 km/h)
(Auto Lock)=>
page 45. You can unlock t he vehicle again using the
openi ng f unction in the power loc king system sw itch. •
Page 57 of 362

Valet parking
Through the "valet parking" feature the luggage
compartment of your vehicle is secured from unautho
rized access during the valet parking service.
Fig. 46 Valet parking
button
With "valet parking " activated, the rear lid cannot be opened.
- Take the mechanical key out of the master key=>
page 44.
- Open the glove box=> page 93 and activate => fig. 46 the
"valet parking" feature by pressing the
[VALET) button.
The indicator light in the switch illuminates .
- Close the glove box and lock it with the mechanical key.
- Lock both rear seatbacks with the mechanical key =>
page 86.
- Lock the luggage compartment pass-through with the
mechanical key=>
page 87.
-Leave the master key with the service personnel for
parking and keep the mechanical key with you .
When the "valet parking" feature is activated:
• the unlocking button for the rear lid
<::::::5 in the driver's door is inac
tive
Con tro ls a nd e quip
m en t Vehicle
OP-eration
Opening and closing
• the button <::::::5 on the master key is inactive
• the opening handle in the rear lid is inactive .
The vehicle can be driven and locked and unlocked with the master key. Access to the luggage compartment is blocked.•
Panoramic tilting sunroof
Tilting and closing
,,,,, OJ?1 11111
Fig. 47 Section of
headliner: Switch for
panoramic tilting
sunroof
- To tilt the panoramic tilting sunroof, press the switch briefly.
- To close the panoramic tilting sunroof, pull the switch briefly.
- To set an intermediate position, press/pull the switch
until the roof reaches the desired position .
After the ignition is switched off, you can still operate the Panorama
for about 10 minutes . As soon as the driver's or passenger's door is
opened, the switch is inoperative.
Sun blind
The sun blind can be opened and closed manually in any position.
Vehicle care Do-it-yourselt service iTechnical data
Page 67 of 362

Applie s to vehicles : with su n s had e
Sun shade
Fig. 59 with MMI:
Button for rear window
sun shade
Fig. 60 without MMI :
Button for rear window
sun shade
- To extend/retract the rear window sun shade, press the
button
r.&l => fig. 60. In vehicles with MMI*, the button is
located above the climate control system=> fig. 59.
The rear window sun shade can be set in the MMI* so that it retracts
automatically when driving in reverse. Select [CAR]>
Window> Rear
window sun shade> On
to do this. The sun shade is extended again
as soon as the vehicle is traveling forward at a speed greater than
9 mph (15 km/h) if the ignition has not been switched off in the
meant ime. The current setting is automatically stored and assigned
to the remote key .
Contro ls a nd e quip
m en t Vehicle
OP-eration
Clear vision
(I) Tips
• Pressing the button~ several times consecutively can trigger the
overload protection. The sun shade can only be extended/retracted
again after a brief waiting period .
• The rear window sun shade only functions when the vehicle inte
rior is warmer than 14°F (-10°(). •
Wiper and washer system
Switching the windshield wipers on
Fig. 61 Windshield
wiper lever
Move the windshield wiper lever to the corresponding position :
@-Windshield wiper off
©-Interval mode. To extend/shorten the wiper intervals, move the
switch @to the left/right. In vehicles with a rain sensor*, the wind
shield wipers are activated automati cally starting at a speed of 2 mph
(4 km/h) . The higher the sensitivity of the rain sensor* is set (switch
© to the right), the earlier the windshield wipers react to moisture
on the w indshield.
@ -Slow wiping
®-Fast wiping .,_
Vehicle care Do-it-yourselt service iTechnical data
Page 78 of 362
Seats and storage
Applies to veh icles : w ith manua lly adj ustable seats
Easy entry function
The easy entry function makes it easier for the rear
passengers to enter and leave the vehicle .
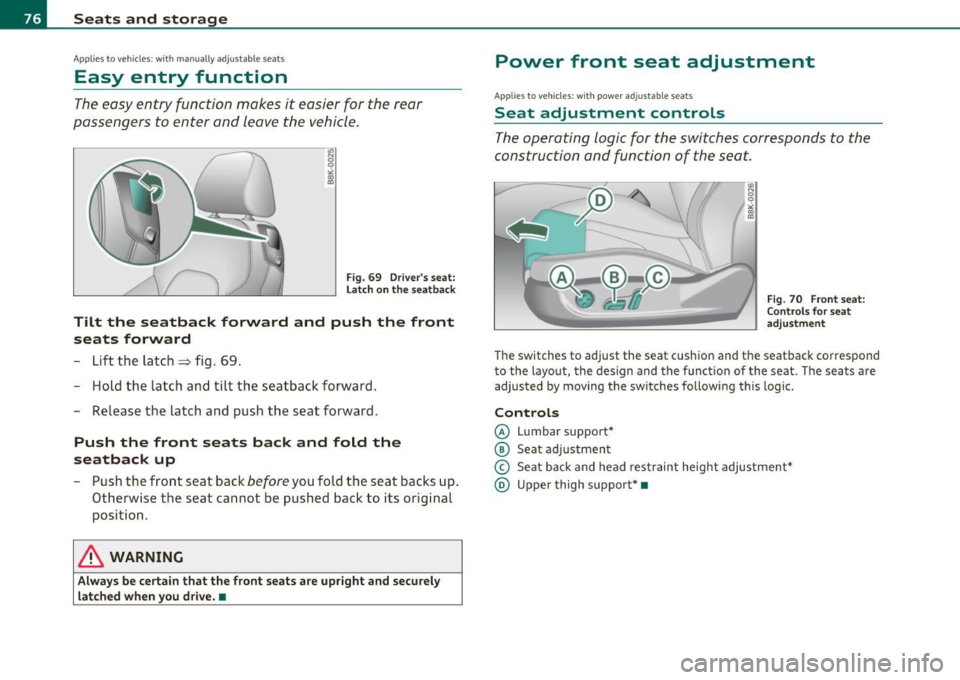
Fig. 69 Driver's seat:
La tch on the seatba ck
Tilt the seatback forward and push the front
seats forward
- Lift the latch=:> fig. 69.
- Hold the latch and tilt the seatback forward.
- Release the latch and push the seat forward.
Push the front seats back and fold the
seatback up
- Push the front seat back before you fold the seat backs up.
Otherwise the seat cannot be pushed back to its original position .
& WARNING
Always be certain that the front seats are upright and securely
latched when you drive.•
Power front seat adjustment
Ap plies to vehicl es: wit h po wer adjusta ble se at s
Seat adjustment controls
The operating logic for the switches corresponds to the
construction and function of the seat .
.,
~ 9
"' "' m
Fig. 70 Front seat:
Controls for seat
adj ustme nt
The switches to adjust the seat cushion and the seatback correspond
to the layout, the design and the funct ion of the seat. The seats are
adjusted by moving the switches following this logi c.
Controls
@ Lumbar support*
@ Seat adjustment
© Seat back and head restraint height adjustment*
@ Upper thigh support* •
Page 85 of 362
Luggage compartment
Loading Luggage compartment
Items of luggage must be stowed securely.
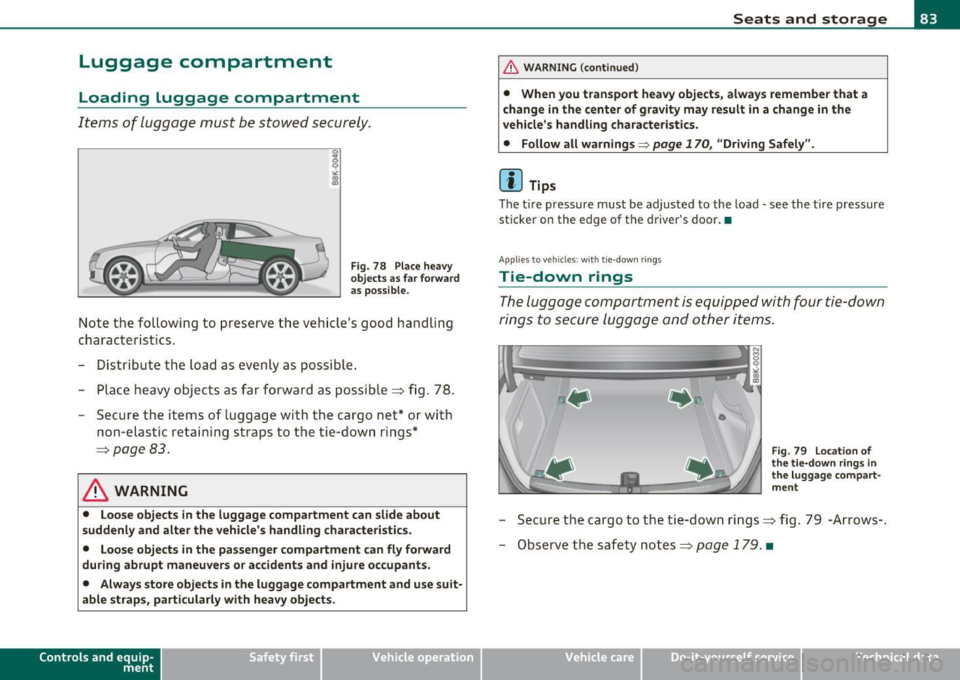
Fig. 78 Place heavy
objects as far forward
as possible.
Note the following to preserve the vehicle's good handling
characteristics.
- Distribute the load as evenly as possible.
- Place heavy objects as far forward as possible=> fig. 78.
- Secure the items of luggage with the cargo net* or with
non-elastic retaining straps to the tie-down rings*
=>
page 83.
& WARNING
• Loose objects in the luggage compartment can slide about
suddenly and alter the vehicle's handling characteristics.
• Loose objects in the passenger compartment can fly forward
during abrupt maneuvers or accidents and injure occupants.
• Always store objects in the luggage compartment and use suit
able straps, particularly with heavy objects.
Con tro ls a nd e quip
m en t Vehicle
OP-eration
Seats and storage
& WARNING (continued)
• When you transport heavy objects, always remember that a
change in the center of gravity may result in a change in the
vehicle's handling characteristics.
• Follow all warnings=>
page 170, "Driving Safely".
[I] Tips
The tire pressure must be adjusted to the load -see the tire pressure
sticker on the edge of the driver's door. •
Applies to vehicles: with tie -d own rings
Tie-down rings
The luggage compartment is equipped with four tie-down
rings to secure luggage and other items.
•
Fig. 79 Location of
the tie-down rings in
the luggage compart
ment
- Secure the cargo to the tie-down rings=> fig. 79 -Arrows-.
- Observe the safety notes=>
page 179. •
Vehicle care Do-it-yourselt service iTechnical data
Page 86 of 362
Seats and storage
Applie s to vehicles : w ith carg o net
Cargo net/Storage net
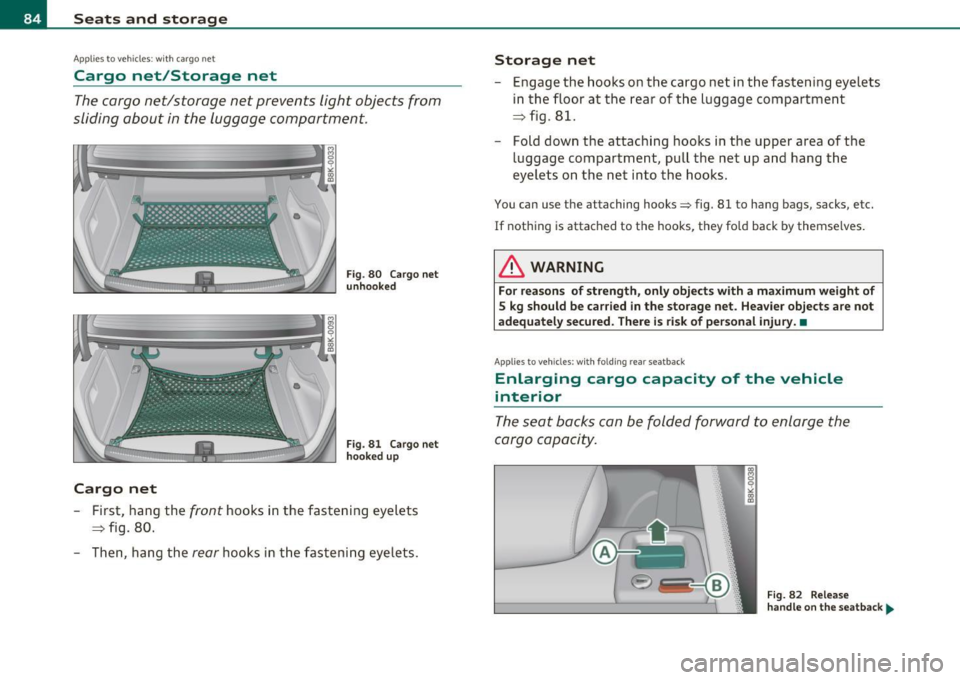
The cargo net/storage net prevents light objects from
sliding about in the luggage compartment.
Cargo net
Fig. 80 Cargo net
unhooked
Fig. 81 Cargo net
hooked up
Fir st, hang the front hooks in the fastening eyelets
=> fig. 80.
Then, hang the
rear hooks in the fastening eyelets.
Storage net
- Engage the hooks on the cargo net in the fastening eyelets
in the floor at the rear of the luggage compartment
=> fig. 81.
- Fold down the attaching hooks in the upper area of the
luggage compar tment, pull the net up and hang the
eye lets on the net into the hooks.
You can use the attaching hooks:::> fig. 81 to hang bags, sacks, etc.
If nothing is attached to the hooks, th ey fo ld back by themselves .
& WARNING
For reasons of strength, only objects with a maximum weight of
5 kg should be carried in the storage net. Heavier objects are not
adequately secured . There is risk of personal injury. •
Applies to vehicles: with fold ing rear seatback
Enlarging cargo capacity of the vehicle
interior
The seat backs can be folded forward to enlarge the
cargo capacity.
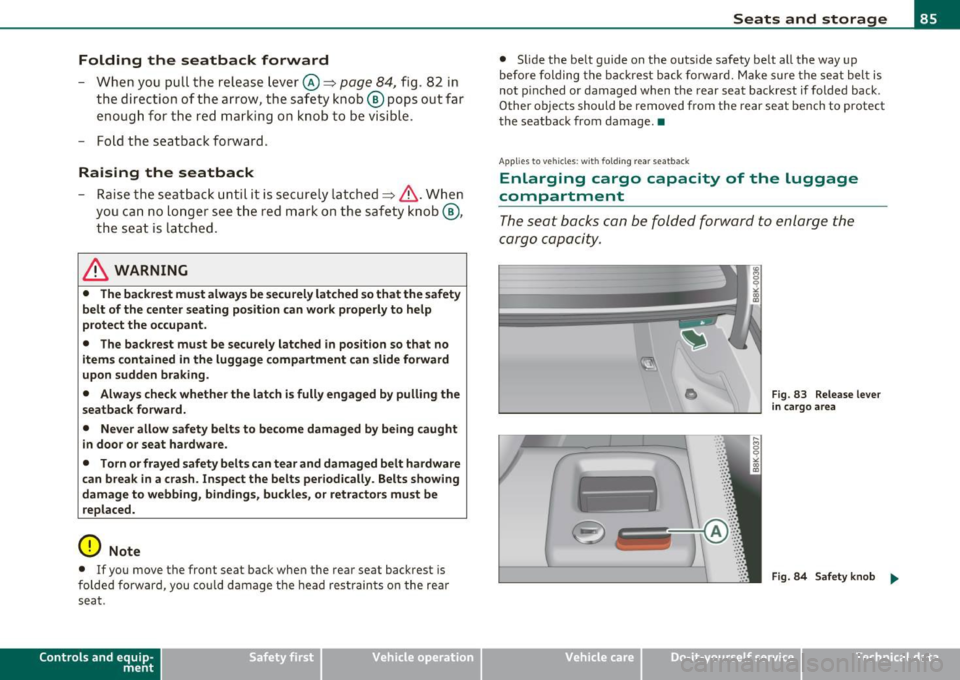
Fig. 82 Release
handle on the seatback ...
Page 87 of 362
Folding the seatback forward
-When you pull the release lever @=> page 84, fig. 82 in
the direction of the a rrow, the sa fe ty knob ® pops out far
eno ug h f or th e re d m ark ing on kn ob to be visi ble .
- Fold t he seatbac k forward.
Raising the seatback
- Raise th e se atb ac k un til it is s ecure ly lat ch ed => & . W hen
yo u ca n no lo nge r se e the red mark on the safe ty knob ®,
th e se at is lat ched.
& WARNING
• The backrest must always be securely latched so that the safety
belt of the center seating position can work properly to help
protect the occupant .
• The backrest must be securely latched
in pos ition so that no
items contained in the luggage compartment can slide forward
upon sudden braking.
• Always check whether the latch is fully engaged by pulling the
sea tback forward.
• Never allow safety belt s to become damaged by being caught
in door or seat hardware .
• Torn or frayed safety belts can tear and damaged belt hardware
can b reak in a crash. Inspect the belts periodically . Belts showing
damage to webbing , bindings , buckles, or retractor s mu st be
replaced.
0 Note
• If you move the front seat back when the rear seat backrest is
f olded forward, you co uld damage the hea d r estrain ts on the re ar
seat.
Con tro ls a nd e quip
m en t Vehicle
OP-eration
Seats and storage
• Slide the belt guide on the outs ide safety be lt all the way up
before folding the backrest b ack fo rwar d. M ake s ure the se at bel t is
not p inc hed or damaged when the rear seat backrest if folded back .
Other o bjects should be removed from the rear seat be nch to protect
the seatback from damage .•
Ap plies to vehicles: w it h fol ding rea r seatbac k
Enlarging cargo capacity of the Luggage
compartment
T he seat bac ks can be folded forward to enlarge the
c a rgo capacity.
-- ---
------=
Vehicle care
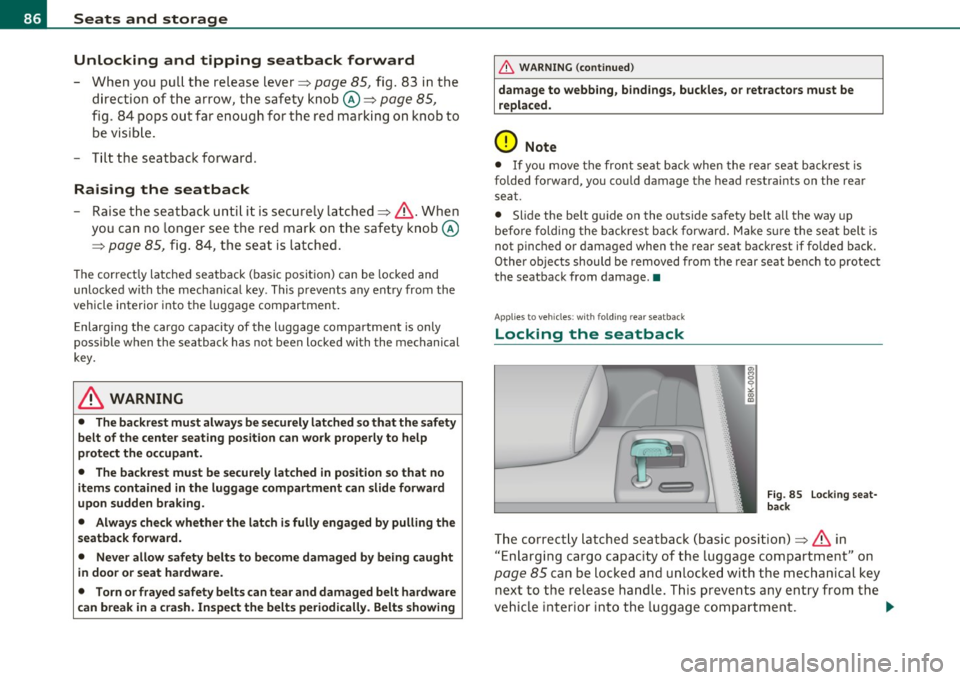
0 Fig . 83 Re lea se l eve r
in cargo a rea
F ig .
84 Safety knob ~
Do-it-yourselt service iTechnical data
Page 88 of 362
Seats and storage Unlocking and tipping seatback forward
- When you pull the release lever~ page 85, fig. 83 in the
direction of the arrow, the safety knob©~
page 85,
fig. 84 pops out far enough for the red marking on knob to
be visible.
- Tilt the seatback forward.
Raising the seatback
-Raise the seatback until it is securely latched~& . When
you can no longer see the red mark on the safety knob©
~ page 85, fig. 84, the seat is latched.
The correctly latched seatback (basic position) can be locked and
unlocked with the mechanical key . This prevents any entry from the
vehicle interior into the luggage compartment.
Enlarging the cargo capacity of the luggage compartment is only
possible when the seatback has not been locked with the mechanical
key.
& WARNING
• The backrest must always be securely latched so that the safety
belt of the center seating position can work properly to help
protect the occupant.
• The backrest must be securely latched in position so that no
items contained in the luggage compartment can slide forward
upon sudden braking.
• Always check whether the latch is fully engaged by pulling the
seatback forward.
• Never allow safety belts to become damaged by being caught
in door or seat hardware.
• Torn or frayed safety belts can tear and damaged belt hardware
can break in a crash. Inspect the belts periodically. Belts showing
& WARNING (continued)
damage to webbing, bindings, buckles, or retractors must be
replaced.
0 Note
• If you move the front seat back when the rear seat backrest is
folded forward, you cou ld damage the head restraints on the rear
seat.
• Slide the be lt guide on the outs ide safety be lt all the way up
before folding the backrest back forward. Make sure the seat belt is
not pinched or damaged when the rear seat backrest if folded back.
Other objects should be removed from the rear seat bench to protect
the seatback from damage. •
Applie s to v eh icl es: wi th fol ding rear se a tback
Locking the seatback
~. Fig. SS Locking seat
back
The correctly latched seatback (basic position) ~ & in
"Enlarging cargo capacity of the luggage compartment" on
page 85 can be locked and unlocked with the mechanical key
next to the release handle. This prevents any entry from the
vehicle interior into the luggage compartment.