battery AUDI A5 COUPE 2011 Owners Manual
[x] Cancel search | Manufacturer: AUDI, Model Year: 2011, Model line: A5 COUPE, Model: AUDI A5 COUPE 2011Pages: 362, PDF Size: 84.88 MB
Page 26 of 362
Driver information display
Resetting the service interval display
Your authorized Audi dea ler will reset the corresponding service
schedule after perform ing the appropriate service on your vehicle .
You a lso have the possibility to reset the oi l change schedule after
having performed an oil change according to Aud i specifications .
Select
I CAR I> Service interval display> Reset oil change interval.
0 Note
If you disconnect the battery te rm inals, no calculations c an be made
for the service interval display dur ing this time and no service
reminder will appear . Remember that observing the proper service
interva ls is v itally important to extending the life of your veh icle,
particularly the engine, and maintaining its value . Even if the mileage
dr iven is low , the max imum per iod of one yea r from one se rvice to the
next must not be exceeded .
[ i ] Tips
• Do not reset the display between oil changes, otherwise the
display will be incorrect .
• The information in the Service Reminder remains stored even
when the vehicle battery is disconnected .•
Trip computer
Introduction
The trip computer gives you information on current and
average fuel mileage, average speed, fuel range and
driving time .
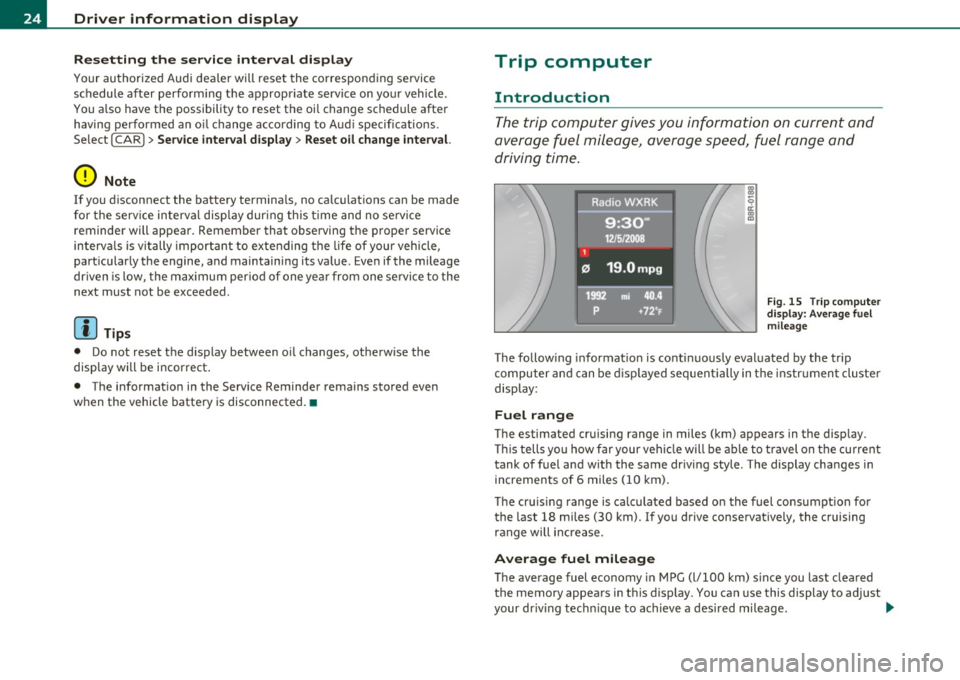
Fig. 15 Trip computer
di sp lay : Average fuel
mileage
The follow ing information is conti nuously evaluated by the trip
computer and can be displayed sequentially in the instrument cluster
display :
Fuel range
The estimated cruising range in miles (km) appears in the display.
Thi s tells you how far your vehicle will be able to travel on the current
tank of fuel and with the same driv ing style . The display changes in
increments of 6 miles (10 km).
The cruis ing range is ca lculated based on the fuel consumpt ion for
the last 18 miles (30 km). If you drive conservatively, the cruising
range will increase.
Average fuel mileage
The average fuel economy in MPG (l/100 km) s ince you last cleared
the memory appears in this d isp lay. You can use this d isplay to adjust
your dr iving tech nique to achieve a des ired mileage. .,,.
Page 27 of 362

Current fuel mileage
The instantaneous fuel consumption in miles per gallon (l/100 km) is
show n in this display . You can use this disp lay to adjust your driv ing
technique to achieve a desired mileage.
Fuel consumption is recalculated at intervals of 33 yards (30 meters).
Th is display switches to gallons/hour (liters/hour) when the vehicle is
not moving .
Average speed
The average speed in mph (km/h) since the last time the display was
reset appears in the display.
Elapsed time
The length of time that you have been driving since you last reset the
memory appears in this display.
Distance
The distance that has been covered since the last time the memory
was cleared appears in the display .
[I) Tips
• Fuel consumptions (average and current), range and speed are
displayed in metric units on Canadian models.
• All stored values will be lost if the vehicle battery is
disconnected .•
Controls and equip
ment Safety first
Driver information display
Memories
The trip computer is
equipped with two fully automatic
memories as well as an efficiency program*.
Fig . 16 Trip computer
display: memory level
1
You can switch between the trip computer 1 and 2 and the efficiency
program* by pressing the [
RESET] button @=> page 26, fig . 17 .
You can tell which memory level is currently active by the number or
the sign in the display => fig. 16. The data from the single-trip
memory (memory leve l 1) is being displayed if a
1 appears in the
display . If a
2 is shown, then the data from the total -trip memory is
being displayed (memory level 2). The fuel pump nozzle
ii indicates
the efficiency program*=>
page 27.
Single-trip memory (Trip computer 1)
The sing le-trip memory stores the trip information from the time the
ignition is turned on until it is turned off. If the trip is continued
within 2 hours from the time the ignition was turned off, the new
data will be included in the calculation of the current trip informa
tion.
If the trip is interrupted for more than 2 hours the memory is
reset automatically.
Total-tr ip memory (Trip computer 2)
Unlike the single-trip memory, the total-trip memory is not reset
automatically. This permits you to evaluate your driving data for the
entire pe riod between manual resets. _..
Vehicle care Technical data
Page 28 of 362

Driver information display
Efficiency program*
The efficiency program can he lp you to use less fuel=> page 27. •
Operation
The trip computer is controlled by two switches on the
windshield wiper lever .
B
Fig. 17 Windshield
wiper l eve r: controls
for the trip computer
-To display the trip computer memory levels, press the
[ RESET) button @=> fig. 17 repeatedly until the desired
memory level is shown in the display.
- To display trip information within a memory level, press
the top or bottom part of the function se lection switch @.
The trip computer will not operate unless the ignition is on. When you
turn on the ignition, the function that was in use when yo u last turned
the ignition off will be d isplayed.
In addition to information on the trip computer (trip computer 1 and
2 and the efficiency program*), the dig ital speedometer and informa
tion regarding the navigation system* can also be displayed. To
switch the d isp lay between the different informat ion, tap the
[RESET I button @ briefly.
Setting values to zero
To delete one current value from the trip computer, select the
desired function and press the
I RESET I button @ for at least one
second. The following values can be set to zero
individually :
• Average fuel mileage
• Average speed
• Elapsed time
• Distance
All curre ntly displayed values are deleted in the effic iency program*.
In addition,
all the values in the single-trip or the total-trip memory
can be deleted simultaneous ly =>
page 26 .
(I) Tips
All stored values will be lost if the vehi cle battery is disconnected. •
Basic Settings for the trip computer
The radio or MM!* operating unit is used for setting the
trip computer's basic settings.
-Select: Function button [CARI> Instrument cluster > On-
board computer 1
or On-board computer 2.
Th e values in the single -trip or the total-trip memory can all be reset
to zero at the same time under
Reset in the menu.
In addition, you can determine what information from the trip
computer should be shown in the instrument cluster display.
If one
of the p ieces of driver information is turned
Off , that driver informa
tion will not be shown in the display. The information w ill continue to
be calculated by the trip computer and can be turned back
On at any
t ime. ._
Page 35 of 362
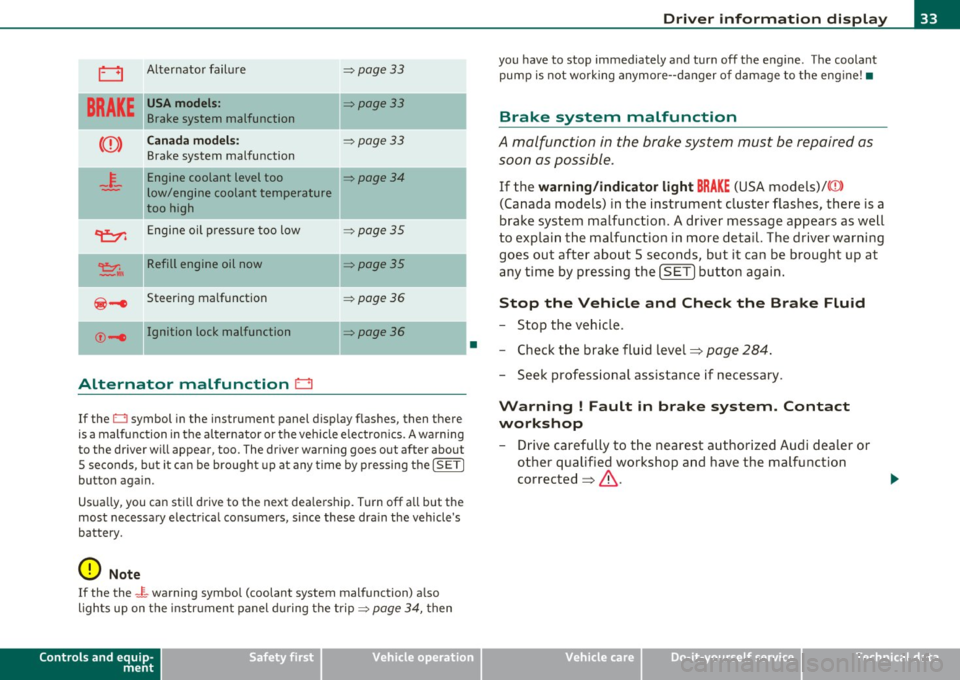
0 Alternator failure => page 33
BRAKE
USA models: =:>page 33
Brake system malfunction
Canada models: =:>page 33
Brake system malfunction
- -
4-
Engine coolant level too =:>page 34
low/engine coolant temperature
too high
~ Engine oil pressure too low =:>page 35
~ II Refill engine oil now =:>page 35
@-e Steering malfunction =:> page 36
©-1 Ignition lock malfunction ::::>poge36
-
Alternator malfunction 0
If the O symbol in the instrument panel display flashes, then there
is a malfunction in the alternator or the vehicle electron ics . A warning
to the driver will appear, too . The driver warning goes out after about
5 seconds, but it can be brought up at any time by pressing the
!SETI
button again.
Usua lly, you can sti ll drive to the next dea lership. Turn off all but the
most necessary e lectr ica l consumers, s ince these dra in the vehicle's
battery.
0 Note
If the the _ f_ warning symbol (coolant system malfunction) a lso
lights up on the instr ument panel during the trip =>
page 34, then
Controls and equip
ment Safety first
•
Driver information display
you
have to stop immediately and turn off the engine . The coolant
pump is not work ing anymore--danger of damage to the engine! •
Brake system malfunction
A malfunction in the brake system must be repaired as
soon as possible.
If the warning/indicator light BRAKE (USA models)/((D )
(Canada models) in the instrument cluster flashes, there is a
brake system malfunction . A driver message appears as well
to explain the malfunction in more detail. The driver warning
goes out after about 5 seconds, but it can be brought up at
any time by pressing the
[SET] button again.
Stop the Vehicle and Check the Brake Fluid
-Stop the vehicle .
- Check the brake fluid level=>
page 284.
-Seek professional assistance if necessary .
Warning ! Fault in brake system. Contact
workshop
- Drive carefully to the nearest authorized Audi dealer or
other qualified workshop and have the malfunction
corrected =>
&.
Vehicle care Technical data
Page 39 of 362
When a yellow warning symbol appears, one warning tone sounds. A
driver message appea rs as well to expla in the ma lf u nction in more
detail. The driver warning goes out after about 5 second s, but it can
be brought up at any time by pressing the
! SETI button again.
Check t he function displayed as soon as possible . T he yellow symbol
wi ll not go out again until the reason for the malfunct ion has been
corrected.
I f several priority 2 malfunctions are present , the symbols appear in
succession and remain for about 2 seconds .
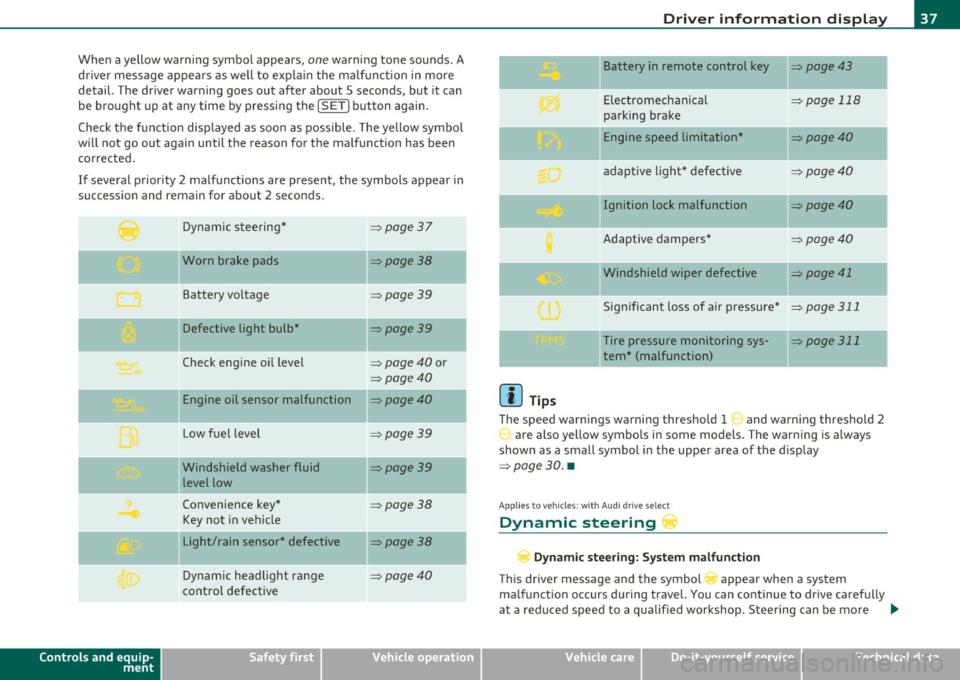
Dynamic steering*
=:> page37
Worn brake pads =>page 38
Battery voltage =>page39
IIDefective light bulb* =>page39
Check engine oil level => page 40 or
=> page40
Engine oil sensor malfunction =>page40
Low f uel level => page 39
I
-
Controls and equip
ment
jl Windshield washer fluid
level low
Convenience key*
Key not in vehicle
Light/rain sensor* defective
Dynamic headlight range
control defective
Safety first
=> page 39
=> page 38
=>page 38
=>page40
Dri ver information display
II Battery in remote control key =>page43
-
Electromechanical => page 118
parking brake
-Engine speed limitation* =>page40
adaptive light* defective =>page40
Ignition lock malfunction =>page40
Adaptive dampers* =>page40
"Windshield wiper defective => page 41
-
Significant loss of a ir pressure* => page 311
Tire pressure monitoring sys-=> page 311
tern * (malfunction)
W Tips
The speed warn ings warning threshold 1 and warn ing threshold 2
r are also yellow symbols in some models. The warning is a lways
shown as a small symbol in the upper area of the d isplay
=> page 30. •
App lies to ve hicle s: wit h Aud i d ri ve sele ct
Dynamic steering'"'
Dynamic ste ering: S ystem mal fu ncti on
This d river message and the symbol appear when a system
ma lfunction occurs dur ing travel. You can continue to drive ca refu lly
at a reduced speed to a qualified workshop. Steering can be more _,.
Vehicle care Technical data
Page 41 of 362

App lies to veh icles : w ith d efecti ve ligh t bulb w arn in g
Defective light bulb warning t
The defective light bulb warning monitors the function of
the li ght bulbs in the vehicl e.
Th e defect ive light bulb warn ing monitors t he f unct ion of the l igh t
bulbs. If a defective light bu lb is detected, or if a light bu lb has
burned out, a ye llow symbol appears as well as a no tifica tion t hat
shows which light bulb is defective .
Defective bulb
If this symbol I lights up, a turn signal (front or rear), a headlamp, a
bra ke light, t he back -up light, a fog lamp or a re a r fog lamp h as
fa iled.
& WARNING
• Light bulbs are unde r pressure and can explode when bulbs a re
replaced -risk of injury .
• With gas-discharge lamp s* (xenon headlights ), the high
voltage component mu st be handled appropriately. Doing other
wise poses a ri sk of death!
[ i ] Tips
Have an a uth orized A udi dea ler or other qualified workshop perform
t he rep lacement or the repa ir.•
Windshield washer fluid level too low -..>
Please refill washer flu id
If the symbol illuminates, add windshield washer fluid to the washer
system and a lso to the headlig ht washer system* =>
page 290. •
Controls and equip
ment Safety first
Driver information display
Fuel supply too low l
When the symbol
illuminates, this means there are about 2.1
gallons (8 liters) of fue l lef t in t he fuel t ank. T ime to refuel!
:::>page 270 .
If the symbol lig hts up, even when there is ample fue l in the tank, and
the text
TANK SYSTEM MALFUNCTION l CONTACT WORKSHOP
appears in the display , the re is a fault in the system. Contact a quali
fied wo rkshop to have t he fault rectified. •
Applies to v ehicles : w ith batte ry volt age warni ng
Battery voltage
If battery powe r drops into the range w here it can limit the ability of
t he engine to s tart, th is the symbol -appears in t he instr ument
cluster display with the fo llowing d river message
battery charge low:
Indicates charging by being driven .
While this dr iver not ification is displayed, you have to be prepared for
limited sta rting capability .
Driver message appears and goes out aga in
If this dr ive r mess age appe ars af ter the igni tion is t urned on o r w hile
dr iv ing and it goes out again after a wh ile , the battery has been
adequ ate ly rech arged.
Driver message appears and does not go out again
If this dr iver not ificat ion appears a fter the igni tion is turned o n or
wh ile driving and does no t go out again, the battery 's state of cha rge
is no t in t he opt im al range . St art ing capability is restricte d. H ave t he
batte ry checked at an authorized Aud i dealer or other q ualified work
s hop as soon as poss ible. •
Vehicle care Technical data
Page 45 of 362
![AUDI A5 COUPE 2011 Owners Manual (]] Tips
• The operation of the remote control key can be temporarily
disrupted by interference from transmitters in the vicinity of the
vehicle wo rking in the same frequen AUDI A5 COUPE 2011 Owners Manual (]] Tips
• The operation of the remote control key can be temporarily
disrupted by interference from transmitters in the vicinity of the
vehicle wo rking in the same frequen](/img/6/57583/w960_57583-44.png)
(]] Tips
• The operation of the remote control key can be temporarily
disrupted by interference from transmitters in the vicinity of the
vehicle wo rking in the same frequency range (e.g. a cell phone, rad io
equipment) .
• If you open the dr ive r's doo r with the key left in the ignit ion lo ck,
a ch ime will sound . This is your reminder to remove the key and lock
the doo r.
• For security reasons, replacement keys are only available from
Audi dealers.
• For Declaration of Complia nce to United States FCC and Industry
Canada regulations=>
page 343 . •
Check Light in the master key
The check li ght in the master key provides inform ation
about different conditions.
!
lJl
Fig. 2 8 Che ck lig ht in
t h e maste r key
The check light comes on brief ly once when a button is p ressed, and
during an "inquiry" by the convenience key system.
Con tro ls a nd e quip
m en t Vehicle
OP-eration
Opening and closing
If the check light does not come o n, the batte ry is dead and has to be
rep laced. In addi tion, when the batte ry is dead the • sym bol appears
in the instrument cluster d isp lay as well as the message :
Please change ke y batte ry
Battery replacement => page 43. •
Master key battery replacement
..
Fig . 2 9 R em ote
m aste r ke y: Rem ovin g
th e m ech anic al ke y
Fig. 30 Remot e
m as ter k ey: Rem oving
t he batte ry hol der
We recommend having the battery changed by an authorized
Audi dealer. However, if you wish to rep lace the dead battery
yourse lf, proceed as follows :
- P ress the release button©=> fig. 29.
~
Vehicle care Do-it-yourselt service iTechnical data
Page 46 of 362
Open ing and closing
- Pull the mechanical key ® out of the master key.
- Press the release button©=>
page 43, fig. 30 on the
battery holder and at the same time pull the battery
holder out of the master key in the di rec tion of the arrow.
- Install the new battery CR 2032 w ith the"+" sign facing
down.
- Push the battery holder carefully into the master key.
- Install the mechanical key.
<£> For the sake of the environment
Dispose of dead batteries properly so as not to pollute t he environ
me nt.
(I] Tips
T he replacement battery must be the same specification as the
orig inal. •
Removing the mechanical key
-Press the release button©=> fig. 31.
Fig. 31 Re mote
m aster key: Removi ng
t he mecha nica l key
- Pull the mechanical key ® out of the master key .
Using the mechanical key, you can
• Lock and unlock* the storage compartment on the passenger's
side
~ page 93.
• Lock and unlock the lockable rear seatback* ~ page 86.
• Lock and unlock the vehicle manually~ page 49 if this should not
be poss ible with the master key .•
Emergency unlocking of the ignition key
In the event of malfunctions in the electrical system, it
may happen that you cannot remove the ignition key .
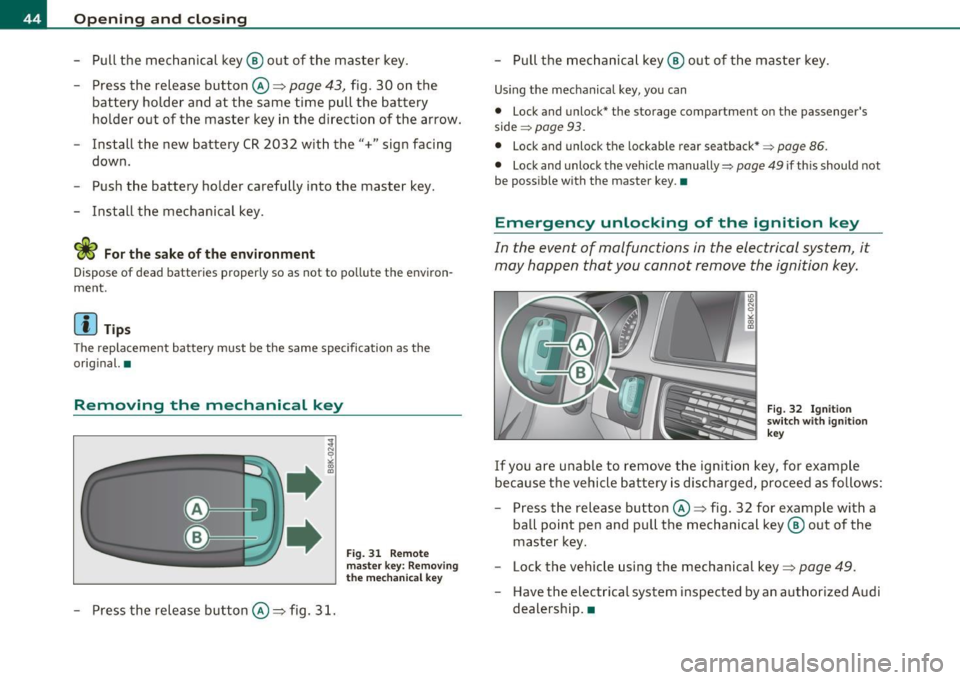
Fig. 3 2 I gnit ion
s wit ch with ignitio n
k ey
If you are unable to remove the ignitio n key , for examp le
because the vehicle batt ery is discharged, proceed as fo llows :
- Press the release button©=> fig. 32 for example with a
ba ll point pen and pull the mec hanica l key @ out of the
maste r key.
- Lock the vehicle using the mechanical key=>
page 49.
-Have the elect rical sys tem inspected by an authorized Audi
dealersh ip .•
Page 51 of 362
Locking vehicle
-Move the selector lever to the P position (automatic trans
mission*), otherwise the vehicle cannot be locked.
- Touch the sensor at the door handle
once ~ page 48,
fig. 37 to lock the vehicle~ & in "General description"
on
page 45 .
The vehicle can be locked and unlocked at any door. It depends on the
settings in the radio or MMI* whether the entire vehicle is unlocked
or one of the doors~
page 47. The master key must be within a
range of about 1.5 m from the appropriate door or the rear lid. It
makes no d ifference whether the master key is in your jacket pocket
or in your brief case.
If you grip the door handle while locking, th is can adversely affect the
locking function.
It is not possible to re-open the door for a brief period directly after
closing it. This allows you to ensure that the doors are properly
locked.
& WARNING
Read and follow all WARNINGS ~ & in "General description" on
page 45.
[ i ] Tips
If your vehicle has been standing for an extended period, please note
the following :
• The proximity sensors are deactivated after a few days to save
powe r. You then have to pull on the door handle once to unlock the
vehicle and a second time to open the vehicle .
• To prevent the battery from being discharged and to preserve your
vehicle's ability to start for as long as possible, the energy manage
ment system gradually switches off unnecessary convenience func-
Controls and equip
ment Safety first
Opening and closing
tions. It is possible that you w
ill not be able to unlock your vehicle
us ing these conven ience f unctions .
• For Declaration of Compliance to United States FCC and Industry
Canada regulations ~
page 343. •
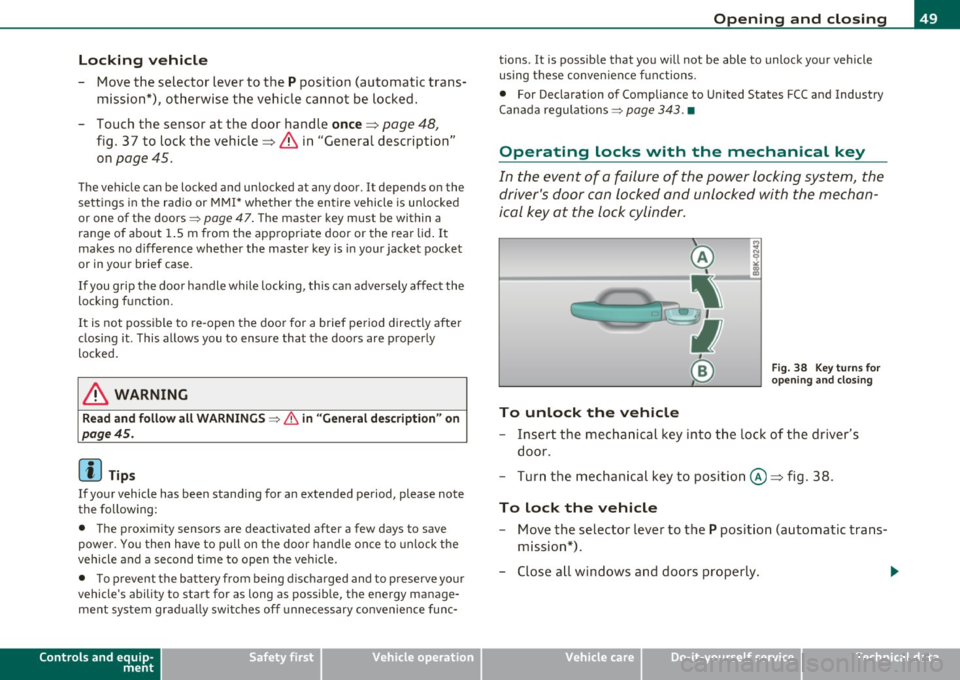
Operating locks with the mechanical key
In the event of a failure of the power locking system, the
driver's door con locked and unlocked with the mechan
ical key at the lock cylinder.
To unlock the vehicle
Fig. 38 Key turns for
opening and closing
- Insert the mechanical key in to the lock of the driver's
door.
- Turn the mechanical key to position @~ fig . 38.
To lock the vehicle
- Move the selector lever to the P position (automatic trans
mission*).
- Close all windows and doors properly.
~
Vehicle care Technical data
Page 56 of 362

Open ing and closing
Convenience opening/closing
The windows and the panoramic tilting sunroof can be
opened and closed with the mechanical key or the emer
gency key .
Convenience opening feature
~ N 0 ,; (X) a,
Fig . 45 Key turns for
ope nin g an d clos in g
- Use the emergency key or pull the mechan ical key out of
the master key~
page 44.
- Insert the key into the lock of the driver's door .
- Turn the key to position~ fig. 45
© until all the windows
have reached the desired position and the panoramic
tilting sunroof is t ilted .
Convenience closing featu re
- Use the emergency key or pull the mechanical key out of
the master key~
page 44.
-Turn the key in the lock of the driver's door to the lock
position @ until the windows and the panoramic tilting
sunroof are closed~&.
When the panoramic tilting sunroof is tilted/closed, the electric sun
shade* is also opened/closed.
& WARNING
• Neve r close the windows and th epanor amic til tin g sunroof
i nat tent ively and wi thout chec king -th ere is risk of i njur y.
• You m ust alway s wa tc h w hen the windows ar e being ra ise d s o
tha t no o ne can be trapp ed. If you r ele ase th e key, t he cl osing
ac tion is immediat ely can cel ed .
• Alwa ys read and hee d W ARNIN G~
& in "Gener al desc ripti on"
on
pa ge 45 . •
Correcting window regulator malfunction
After disconnecting the vehicle battery, the one-touch up
and down feature must be activated again.
- Pull and hold the power window switch until the window is
completely closed .
- Release the switch.
- Pull the switch again for one second . The automatic
closing/opening is now reactivated .•