fuel AUDI A5 COUPE 2011 Owners Manual
[x] Cancel search | Manufacturer: AUDI, Model Year: 2011, Model line: A5 COUPE, Model: AUDI A5 COUPE 2011Pages: 362, PDF Size: 84.88 MB
Page 5 of 362
Stowing Luggage ........... ... 177
Repor ting Safe ty Defects . . . . . . . 179
Safety be lts . . . . . . . . . . . . . . . . . . . 181
General no tes ........ ......... 181
Why safety belts? . . . . . . . . . . . . . 182
Safety belts . . . . . . . . . . . . . . . . . . 185
Safety belt pretensioners . . . . . . . 188
Airbag system ................ 190
Important th ings to know ...... 190
Front airbags ................. 194
Mon ito ring the Advanced A irbag
System ...................... 201
Knee ai rbags . . . . . . . . . . . . . . . . . . 206
Side airbags . . . . . . . . . . . . . . . . . . 209
Side curtain airbags ......... ... 212
Chil d Safe ty ................... 215
I mportant things to know ...... 215
Child safety seats ............. 221
Installing a child safety seat . . . . 225
LATCH Lowe r ancho rages and
tether for children . . . . . . . . . . . . . 229
Add it ional Informat ion
234
Vehicle operation ...... 236
Intelligent technology . . . . . . . . 236
Notice abo ut data recorded by
vehicle contro l modu les . . . . . . . . 236
E lect ronic s tab iliza tion Program
(ESP) . . . . . . . . . . . . . . . . . . . . . . . . 236
Braking ...................... 239
Servotronic ® -advanced power
steer ing sys tem . . . . . . . . . . . . . . . 242
Dr iving with your quattro ® . . . . . . 242
Energy management . . . . . . . . . . . 243
Controls and equip
ment Safety first
Driving
and environment ..... 246
The first 1,000 miles (1,500 km)
and afterwards . . . . . . . . . . . . . . . 246
Avoid damaging the vehicle 247
Dr iving through water on roads . 247
Ca talytic conve rter . . . . . . . . . . . . 247
Operate your veh icle economica lly
and m inimize po llution . . . . . . . . 24 8
Trailer towing . . . . . . . . . . . . . . . . 251
Dr iving wi th a trailer . . . . . . . . . . . 251
T railer tow ing tips . . . . . . . . . . . . . 253
Vehicle care .............. 2s6
Clea nin g and protect ion ...... 256
General information . . . . . . . . . . . 256
Care of exterior . . . . . . . . . . . . . . . 256
Care of interior . . . . . . . . . . . . . . . 263
Fuel supply and filling your fuel
tank .......................... 269
Gasol ine . . . . . . . . . . . . . . . . . . . . . 269
F u el tank .................... . 270
Checking and filling . . . . . . . . . . . 274
Eng ine hood . . . . . . . . . . . . . . . . . . 274
Engine compartment . . . . . . . . . . 276
Engine oil . . . . . . . . . . . . . . . . . . . . 277
Engine cooling system . . . . . . . . . 281
Brake fluid . . . . . . . . . . . . . . . . . . . 284
Bat tery . . . . . . . . . . . . . . . . . . . . . . 285
W indshield/headlight* washer
container . . . . . . . . . . . . . . . . . . . . 290
Tires and wheels .............. 291
Tires 291
T ir e pressure monitor ing system 310
Table of contents
Do-it-yourself service
What do I do now? .......... .
Vehic le tool k it ........ ...... .
Space -saving spare tire (compact
spare tire)* ....... ........ ... .
Cha nging a whee l ........... . .
Fuses and bulbs ......... .... .
Fu ses ... ......... .......... .
Bulbs ...................... .
Emergency situations ....... .
General . ........... ......... .
Starti ng by pushing or towi ng ..
Starting with jumper cables ... .
Use of jumper cables ......... .
Emergency towing w ith
commercial tow truck ........ .
Lif ting vehicle ............... .
Technical data
General information
Explana tion of technica l da ta .. .
Vehicle ident ification ......... .
Weights .................... .
Dimensions ................. .
Data ................ ... ...... .
211 hp, 2.0 Liter 4-cyl. engine .. .
Consumer Information ...... .
Warranty coverages .......... .
Operating your vehicle outside the
U.S.A . or Canada ............. .
Audi Service Repair Manuals and
Literature ................... .
Maintenance ............... . . 314
314
314
314
316
323
323
327
328
328
328
328
329
331
333
336
336
336
336
337
337
339
339
340
340
340
340
340
Vehicle operation
Vehicle care Do-it-yourself service Technical data
Page 13 of 362

Warning light in the instrument cluster display-1-
If the _L warning light in the i nstrument clus ter display flashes, this
can mean one of two things: either the coo lant
temperature is too
high, or the coolant
level is too low ~ page 34 .
If the needle is well in the uppe r area of the gauge, the coo lant
temperature is too high.
Stop the vehicle, switch the engine off, and
allow it to cool.
If th e war ning light comes o n ag ain af ter driv ing a
short distance, contact an author ized Aud i dea ler or othe r qualified
wor ksh o p.
& WARNING
• Alway s observe the warn ing in :::} page 267, "Engine compart·
ment ", before opening the hood and checking the engine coolant
level.
• Never open the engine hood if you see or hear steam, or if you
s ee engin e coolant dripping from the engine compartment. You
could burn yourself . Let the engine cool off first so that you cannot
hear or see any steam or engine coolant .
0 Note
• Mounting add ition al lights o r accesso ries in fron t of the a ir inlets
reduces the cooling effect of the radiator . At high outside tempera
tur es o r high engine load, the eng ine could ove rhe at.
• The front spo iler has been designed to properly d istribute the
c oo lin g air when the vehicle is moving. If the sp oi ler is d amaged, this
co uld reduce the cooling eff ect and the eng ine could then overheat .
Ask your au thor ized A udi dealer for assis tance .•
Con tro ls a nd e quip
m en t Vehicle
OP-eration
Instruments and warning /indicator lights
Tachometer (engine rev counter)
The tachomete r in dic ates t he engine RPM (revoluti ons
pe r mi nutes) .
If engine RPM drops below 1,500, you shou ld downsh ift to the next
lower ge ar. T he red area at the end of the s cale i ndi cates max imum
permissible engine RPM after the brea k-in per iod. Before reaching
t his area, move the sele ctor l eve r to pos ition
D (Dr ive) or ease your
foot off t he accelerator pedal.
0 Note
T he tac hometer needle@~ page 10, fig. 2 s hou ld only briefly be in
t he red zone: yo u co uld damage your eng ine! T he beg inning of the red
zone varies depe nd ing o n the eng ine.
~ For the sake of the environment
Upshifting early saves fuel and redu ces engine noise .•
[S ET] button
You c an per form d iffere nt fu nctions with t his but ton.
Fig . 3 SET butto n in
the instrume nt clu ste r
Th e !SE TI bu tto n performs the fo llow ing f unct io ns:
Vehicle care Do-it-yourselt service iTechnical data
Page 14 of 362
Instruments and warning/indicator lights
Switching on time , date, temperature display , and
odometer
Th e display appears for approx imately 30 seconds w hen you press the
ISETj b utton => page 11, fig. 3 w it h the ignition off .
Starting the Auto-Check sequence
The Auto -Check system => page 31 constant ly monitors certain indi
vidua l func tions a nd components of the ve hicle whe n the ign ition is
t u rne d on and w hen the vehicle is mov ing.
Wi th the ignit ion turned o n, you can star t the "A uto -Check sequence"
by pressing the
! SET ] button . You can perfo rm an Auto-Check
sequence when the veh icle is station ary an d the ig niti on i s turned o n
or w hen the veh icle is mov ing slower t han 3 mp h (5 km/h).
Calling up the dr iver information
A ye llow or red symbol appears in the instr ument cluster display,
u su ally wi th a drive r message. T he drive r mes sage disp lay disappea rs
after about 5 seconds. The driver message can be d isp layed aga in by
br ie fl y pr essing the
!S ET ] button.
Setting the speed warning
By press in g t he I SE T] bu tton br iefly, yo u ca n set thres ho ld 1 of the
speed warn ing wh ile yo u are driving =>
page 30. By maintaining pres
su re on t he
!SE TI but ton , you dele te the w arning thre shold. •
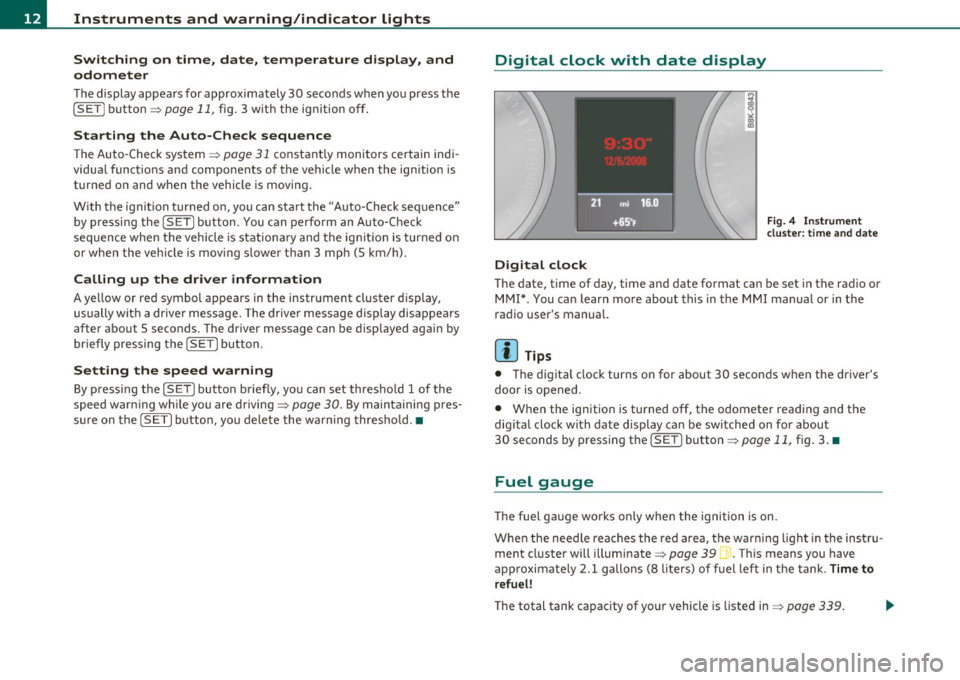
Digital clock with date display
Digital clock
Fig. 4 Instrume nt
cluster: t ime an d date
T he date, t ime of day, time and date format can be set in the rad io o r
MM I*. Y ou ca n learn more about this in t he MMI ma nual or in the
radio user's manual.
[ i ] Tips
• Th e digita l clock turns on for about 30 secon ds w hen the dr iver's
door is opened.
• When the ignition is turned off, the odometer rea ding and the
dig ital clock with date display can be sw itched on for about
30 seconds by press ing the
[SET I butto n=> page 11, fig . 3 . •
Fuel gauge
Th e fuel gauge wo rks on ly when the ignition is on.
W hen the nee dle rea che s the red a rea, t he war ning ligh t in t he ins tru
ment cl uster will illuminate =>
page 39 ,. Th is means you have
a p pr oxi mate ly 2.1 g allons (8 liter s) of f uel left in th e ta nk .
Time to
r efuel!
Th e total tank capac ity of yo ur vehicle is liste d in => page 339. .,,
Page 15 of 362
0 Note
Never run the tank completely d ry! An irregular supply of f uel can
cause engine misfiring and fuel could enter into the exhaust system.
T he ca talyt ic conver ter could then overhea t and be damaged. •
Odometer
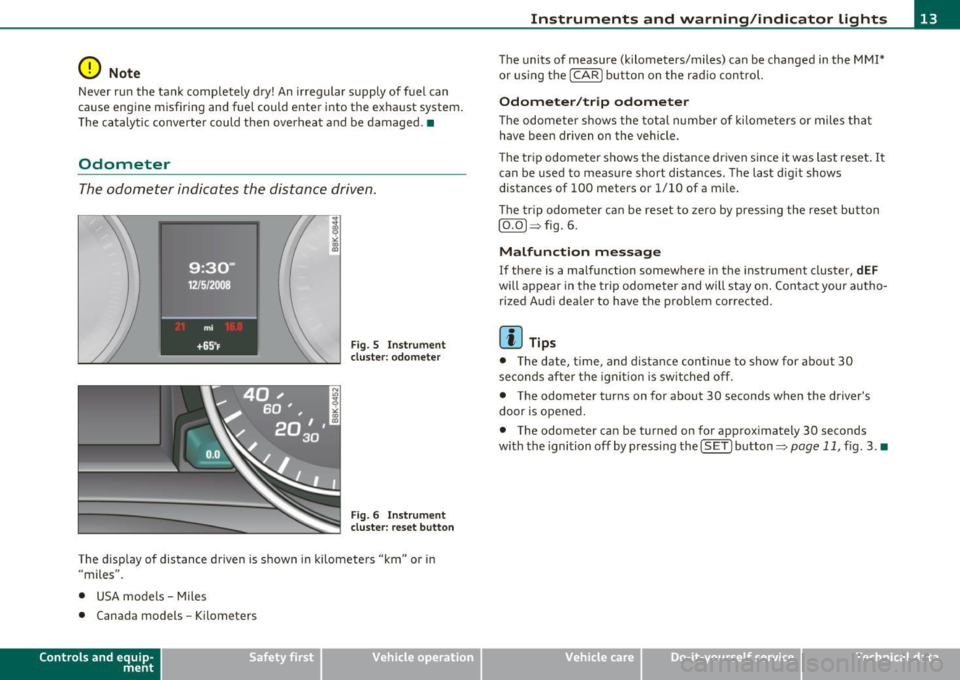
The odometer indicates the distance driven.
Fi g. 5 Ins tru m ent
cl uster : odome ter
Fig . 6 Instrume nt
cl uster : reset button
The disp lay of distance driven is s hown in kilometers "km" or i n
"miles" .
• USA models - Miles
• Canada models -Kilomete rs
Con tro ls a nd e quip
m en t Vehicle
OP-eration
Instruments and warning /indicator lights
The units of measure (k ilometers/miles) can be changed in the MMI *
or us ing the [
CAR] button on the ra dio con trol.
Odometer /trip odometer
T he odomete r shows the tot al number of ki lomete rs or mile s that
have been driven on the vehicle.
Th e tr ip odomete r shows the distance dr iven since it was last reset.
It
can be used to measure short d istances. The last d ig it shows
distances of 100 meters or 1/10 of a m ile.
Th e trip odome te r ca n be reset to zero by pressi ng the reset bu tton
[O.O) ~ fig. 6.
Malfunction message
If there is a ma lf u nction somewhere in the instrument cluster, dEF
will appear in th e trip odomet er and w ill stay on. Contact you r au tho
rized Aud i dea le r to have the p roblem corrected.
[ i ] Tips
• The date , time, and distance continue to show for about 30
seconds afte r the igni tion is sw itched off.
• The odometer turns on for about 30 seconds when the driver's
door is opened.
• The odometer can be turned on for approximately 30 seconds
w ith the ignition off by p ressing the
I SET] b utton::::> page 11, fig . 3. •
Vehicle care Do-it-yourselt service iTechnical data
Page 24 of 362
Driver information display
Appli es to veh icles : wi th manua l tra nsm iss io n and gea rshift indic ator
Gearshift Indicator
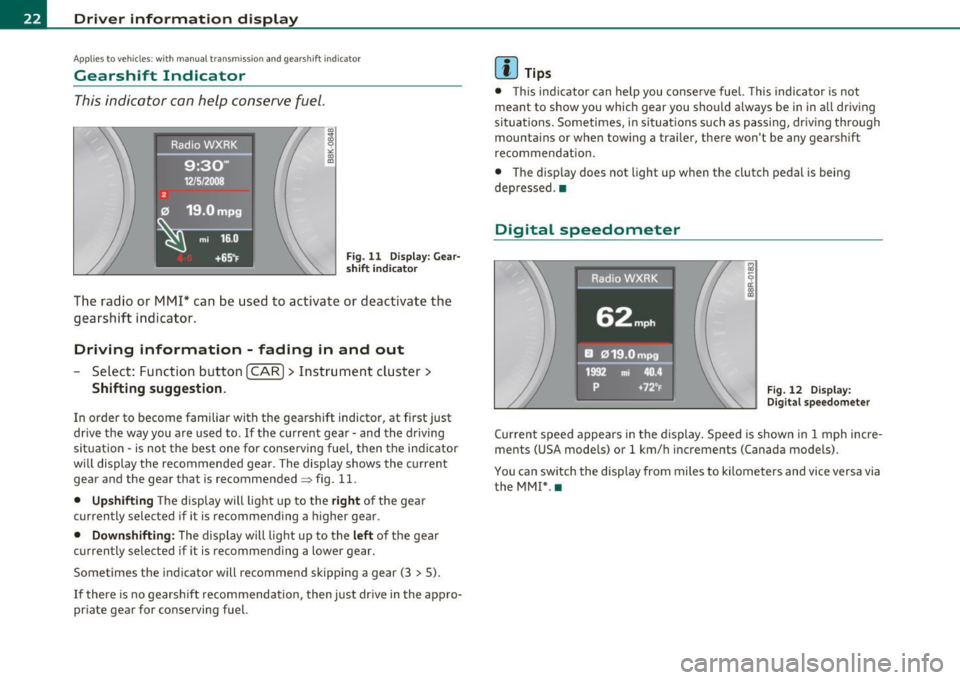
This indicator can help conserve fuel.
Fig. 11 Display: Gear
sh ift i ndica tor
The radio or MMI* can be used to activate or deactivate the
gearshift indicator .
Driving information - fading in and out
Select: Function button [CAR]> Instrument cluster>
Shifting suggestion.
In order to become familiar with the gearshift indictor, at first just
drive the way you are used to . If the current gear· and the driving
situation· is not the best one for conserving fuel, then the indicator
will display the recommended gear . The display shows the current
gear and the gear that is recommended~ fig . 11.
• Upshifting The display will light up to the right of the gear
currently selected if it is recommending a higher gear.
• Downshifting : The display will light up to the left of the gear
currently selected if it is recommending a lower gear.
Sometimes the indicator will recommend skipping a gear (3
> 5).
If there is no gearshift recommendation, then just drive in the appro
priate gear for conserving fuel.
[I] Tips
• T his ind icator can help you conserve fuel. This indicator is not
meant to show you which gear you should always be in in all driving
si tuations. Sometimes, in situations such as passing, driving through
mountains or when towing a trailer, there won't be any gearshift
recommendat ion.
• The display does not light up when the clutch pedal is being
depressed. •
Digital speedometer
Raaio,WXRK
62mph
EJ 019.Ompg
1992 mi 40.4
p +72°F Fig. 12 Display:
Digital speedometer
Current speed appears in the display. Speed is shown in 1 mph incre
ments (USA models) or 1 km/h increments (Canada models) .
You can switch the display from miles to kilometers and vice versa via the MM!* .•
Page 26 of 362
Driver information display
Resetting the service interval display
Your authorized Audi dea ler will reset the corresponding service
schedule after perform ing the appropriate service on your vehicle .
You a lso have the possibility to reset the oi l change schedule after
having performed an oil change according to Aud i specifications .
Select
I CAR I> Service interval display> Reset oil change interval.
0 Note
If you disconnect the battery te rm inals, no calculations c an be made
for the service interval display dur ing this time and no service
reminder will appear . Remember that observing the proper service
interva ls is v itally important to extending the life of your veh icle,
particularly the engine, and maintaining its value . Even if the mileage
dr iven is low , the max imum per iod of one yea r from one se rvice to the
next must not be exceeded .
[ i ] Tips
• Do not reset the display between oil changes, otherwise the
display will be incorrect .
• The information in the Service Reminder remains stored even
when the vehicle battery is disconnected .•
Trip computer
Introduction
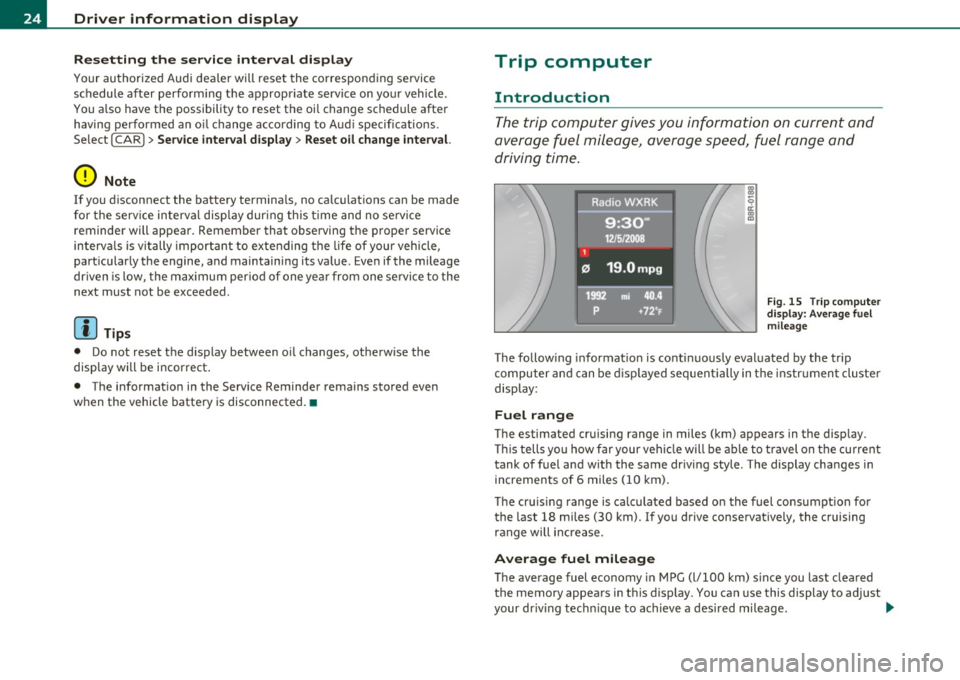
The trip computer gives you information on current and
average fuel mileage, average speed, fuel range and
driving time .
Fig. 15 Trip computer
di sp lay : Average fuel
mileage
The follow ing information is conti nuously evaluated by the trip
computer and can be displayed sequentially in the instrument cluster
display :
Fuel range
The estimated cruising range in miles (km) appears in the display.
Thi s tells you how far your vehicle will be able to travel on the current
tank of fuel and with the same driv ing style . The display changes in
increments of 6 miles (10 km).
The cruis ing range is ca lculated based on the fuel consumpt ion for
the last 18 miles (30 km). If you drive conservatively, the cruising
range will increase.
Average fuel mileage
The average fuel economy in MPG (l/100 km) s ince you last cleared
the memory appears in this d isp lay. You can use this d isplay to adjust
your dr iving tech nique to achieve a des ired mileage. .,,.
Page 27 of 362

Current fuel mileage
The instantaneous fuel consumption in miles per gallon (l/100 km) is
show n in this display . You can use this disp lay to adjust your driv ing
technique to achieve a desired mileage.
Fuel consumption is recalculated at intervals of 33 yards (30 meters).
Th is display switches to gallons/hour (liters/hour) when the vehicle is
not moving .
Average speed
The average speed in mph (km/h) since the last time the display was
reset appears in the display.
Elapsed time
The length of time that you have been driving since you last reset the
memory appears in this display.
Distance
The distance that has been covered since the last time the memory
was cleared appears in the display .
[I) Tips
• Fuel consumptions (average and current), range and speed are
displayed in metric units on Canadian models.
• All stored values will be lost if the vehicle battery is
disconnected .•
Controls and equip
ment Safety first
Driver information display
Memories
The trip computer is
equipped with two fully automatic
memories as well as an efficiency program*.
Fig . 16 Trip computer
display: memory level
1
You can switch between the trip computer 1 and 2 and the efficiency
program* by pressing the [
RESET] button @=> page 26, fig . 17 .
You can tell which memory level is currently active by the number or
the sign in the display => fig. 16. The data from the single-trip
memory (memory leve l 1) is being displayed if a
1 appears in the
display . If a
2 is shown, then the data from the total -trip memory is
being displayed (memory level 2). The fuel pump nozzle
ii indicates
the efficiency program*=>
page 27.
Single-trip memory (Trip computer 1)
The sing le-trip memory stores the trip information from the time the
ignition is turned on until it is turned off. If the trip is continued
within 2 hours from the time the ignition was turned off, the new
data will be included in the calculation of the current trip informa
tion.
If the trip is interrupted for more than 2 hours the memory is
reset automatically.
Total-tr ip memory (Trip computer 2)
Unlike the single-trip memory, the total-trip memory is not reset
automatically. This permits you to evaluate your driving data for the
entire pe riod between manual resets. _..
Vehicle care Technical data
Page 28 of 362

Driver information display
Efficiency program*
The efficiency program can he lp you to use less fuel=> page 27. •
Operation
The trip computer is controlled by two switches on the
windshield wiper lever .
B
Fig. 17 Windshield
wiper l eve r: controls
for the trip computer
-To display the trip computer memory levels, press the
[ RESET) button @=> fig. 17 repeatedly until the desired
memory level is shown in the display.
- To display trip information within a memory level, press
the top or bottom part of the function se lection switch @.
The trip computer will not operate unless the ignition is on. When you
turn on the ignition, the function that was in use when yo u last turned
the ignition off will be d isplayed.
In addition to information on the trip computer (trip computer 1 and
2 and the efficiency program*), the dig ital speedometer and informa
tion regarding the navigation system* can also be displayed. To
switch the d isp lay between the different informat ion, tap the
[RESET I button @ briefly.
Setting values to zero
To delete one current value from the trip computer, select the
desired function and press the
I RESET I button @ for at least one
second. The following values can be set to zero
individually :
• Average fuel mileage
• Average speed
• Elapsed time
• Distance
All curre ntly displayed values are deleted in the effic iency program*.
In addition,
all the values in the single-trip or the total-trip memory
can be deleted simultaneous ly =>
page 26 .
(I) Tips
All stored values will be lost if the vehi cle battery is disconnected. •
Basic Settings for the trip computer
The radio or MM!* operating unit is used for setting the
trip computer's basic settings.
-Select: Function button [CARI> Instrument cluster > On-
board computer 1
or On-board computer 2.
Th e values in the single -trip or the total-trip memory can all be reset
to zero at the same time under
Reset in the menu.
In addition, you can determine what information from the trip
computer should be shown in the instrument cluster display.
If one
of the p ieces of driver information is turned
Off , that driver informa
tion will not be shown in the display. The information w ill continue to
be calculated by the trip computer and can be turned back
On at any
t ime. ._
Page 29 of 362
![AUDI A5 COUPE 2011 Owners Manual (]] Tips
The d riving information in the efficiency program* is also reset to
zero with the single-trip memory .•
Efficiency program
App lies to v ehicl es: w ith tri p comp uter w AUDI A5 COUPE 2011 Owners Manual (]] Tips
The d riving information in the efficiency program* is also reset to
zero with the single-trip memory .•
Efficiency program
App lies to v ehicl es: w ith tri p comp uter w](/img/6/57583/w960_57583-28.png)
(]] Tips
The d riving information in the efficiency program* is also reset to
zero with the single-trip memory .•
Efficiency program
App lies to v ehicl es: w ith tri p comp uter with effic iency p rogram
Description
Fig . 18 Display: effi
ciency p rog ram
- Press the I RESET] button@~ page 26, fig . 17 repeat -
edly until the efficiency program appears in the display.
The efficiency program can help you to use less fuel. It evaluates
driving information in reference to fuel consumption and shows
other equipment influencing consumption as well as sh ift recom
mendations. Fuel economy messages~
page 28 provide tips for effi
cient driving .
The efficiency program uses distance and consumption data from trip computer 1. If the data are deleted in the effic iency program, those
values are also reset in trip computer 1. •
Contro ls a nd e quip
m en t Vehicle
OP-eration
Driver inf ormation display
App lies to ve hicles : with manual t ransmiss ion an d trip com pute r wi th eff icie ncy program
Enhanced shift indicator
Fig. 1 9 Display:
enhanced shift indi
cato r
-In the efficiency program, press the function selection
switch ~
page 26, fig. 17 ® repeatedly until the
enhanced shift indicator appears in the display.
The efficiency program also has an enhanced shift indicator . This
enhanced shift ind icator follows the same concept as the "standard"
shift indicator~
page 22. The selected and the recommended gears
are highlighted in colors like a traffic light.
The color of the circle indicates if the most suitable gear is engaged or if you should shift up or down.
Green circle without or with a
gear
Yellow circle~ fig. 19
Red circle
0 Not e
No gear or the most suitable
gear is engaged
Shift up or down one gear
Shift up two gears
This enhanced shift indicator can help you conserve fuel. It is not designed to recommend the correct gear in all driving situations.
Only the driver can decide which gear is correct in ce rtain dr iving situ -...
Vehicle care Do-it-yourselt service iTechnical data
Page 30 of 362
![AUDI A5 COUPE 2011 Owners Manual Driver information display
ations such as when passing another vehicle, driving on hills or
towing a trailer.
[ i ] Tips
• The enhanced shift indicator display is different in AUDI A5 COUPE 2011 Owners Manual Driver information display
ations such as when passing another vehicle, driving on hills or
towing a trailer.
[ i ] Tips
• The enhanced shift indicator display is different in](/img/6/57583/w960_57583-29.png)
Driver information display
ations such as when passing another vehicle, driving on hills or
towing a trailer.
[ i ] Tips
• The enhanced shift indicator display is different in vehicles with a
monochrome display .
• T he "standard " sh ift indicator* disappears when the enhanced
shift indicator is displayed. •
Applie s to vehicles: with tr ip co mput er w ith effic iency program
Other equipment
Fig. 20 Display: other
equipment
- In the efficiency program, press the function selection
switch~
page 26, fig . 17 ® repeatedly until the other
equipment appears in the display.
Other equipment that is currently affect ing fuel consumption is
listed in the efficiency program. The display shows up to three other
items of equipment @. The equipment using the most fuel is listed
first. If more than three items using fuel are switched on, the equip
ment that is currently using the most fue l is displayed .
A scale @also shows the current total consumption of all other
equipmen t.•
A ppli es to vehicles : wi th trip comp ute r wit h effic iency program
Fuel economy messages
Fig. 21 Display: fuel
economy message
Fuel economy messages are displayed when fuel consump
tion is increased by certain conditions . If you follow these
fuel economy messages, you can reduce your vehicle's
consumption of fuel. The messages appear automatically
and are only displayed in the efficiency program. The fuel
economy messages turn off automatically after a certain
period of time .
- To turn a fuel economy message off immediately after it
appears, press the [
RESET] button~ page 26, fig. 17@,
or
-Press the function selection switch~ page 26, fig. 17 ®·
(I) Tips
• Once you have turned a fuel economy message off, it will only
appear again after you turn the ign ition on again.
• The fuel economy messages are not displayed in every instance ,
but rather in interva ls over a period of time. •